

Page 1

Istruzioni per luso
PIANO
ITIT
IT
ITIT
Italiano, 1 Français, 21
GBGB
GB
GBGB
English, 11
ES
Espanol, 41
FR
PTNL
Portuges, 51Nederlands, 31
DE
Deutsch, 61
KBT 6313 IT
KBT 6313 IT CL
Sommario
IT
Installazione, 2-3
Posizionamento
Collegamento del piano di cottura
Smaltimento
Descrizione dellapparecchio, 5-6
Pannello di controllo
Descrizione delle zone di cottura
Avvio e Utilizzo, 7
Accensione del piano cottura
Spegnimento del piano di cottura
Il booster
Dispositivi di sicurezza, 8
Rilevamento dei recipienti
Uso di recipienti
Segnale acustico
Interruttore di sicurezza
Protezione termica
Precauzioni e consigli, 9
Consigli pratici per luso dellapparecchio
Sicurezza generale
Manutenzione e cura, 10
Escludere la corrente elettrica
Pulire lapparecchio
Smontare il piano
Page 2

IT
Installazione
! È importante conservare questo libretto per poterlo
consultare in ogni momento. In caso di vendita, di
cessione o di trasloco, assicurarsi che resti insieme
allapparecchio per informare il nuovo proprietario sul
funzionamento e sui relativi avvertimenti.
! Leggere attentamente le istruzioni: ci sono importanti
informazioni sullinstallazione, sulluso e sulla
sicurezza.
Posizionamento
! Gli imballaggi non sono giocattoli per bambini e
vanno eliminati secondo le norme per la raccolta
differenziata (vedi Precauzioni e consigli).
! Linstallazione va effettuata secondo queste istruzioni
e da personale professionalmente qualificato. Una
errata installazione può causare danni a persone,
animali o cose.
5 mm
min. 20 mm
CASSETTO
min. 40 mm
min. 20 mm
Incasso
Per garantire un buon funzionamento dellapparecchio
è necessario che il mobile abbia le caratteristiche
adatte:
il piano dappoggio deve essere di materiale
resistente al calore, a una temperatura di circa
100°C;
se si desidera installare il piano cottura sopra un
forno, questo deve essere provvisto di un sistema
di raffreddamento a ventilazione forzata;
evitare di installare il piano cottura sopra una
lavastoviglie: alloccorrenza frapporre un elemento di
separazione a tenuta stagna fra i due apparecchi;
a seconda del piano cottura che si desidera
installare (vedi figure), il vano del mobile deve avere
le seguenti dimensioni:
590
48
520
48
574
504
560 +/- 1
48
490 +/- 1
690
520
48
560 +/- 1
490 +/- 1
785
510
5 mm
FORNO
VENTILATO
min. 40 mm
Fissaggio
Linstallazione dellapparecchio deve essere effettuata
su un piano dappoggio perfettamente piano.
Le eventuali deformazioni provocate da un errato
fissaggio potrebbero alterare le caratteristiche e le
prestazioni del piano cottura.
MONTAGGIO DELLE MOLLE SUL LATO INFERIORE
LATO ANTERIORE DEL
PIANO DI COTTURA
PIANO DI
LAVORO
30
40
560 +/- 1
490 +/- 1
750 +/- 1
490+/- 1
Aerazione
Per consentire unadeguata aerazione e per evitare il
surriscaldamento delle superfici attorno allapparecchio,
il piano cottura deve essere posizionato:
a una distanza minima di 40 mm dalla parete
retrostante e di 600 mm da qualsiasi altra superficie
verticale;
in modo da mantenere una distanza minima di 20
mm fra il vano per lincasso e il mobile sottostante.
2
PIANO DI COTTURA ROVESCIATO
Page 3

Collegamento del piano di cottura
La sicurezza elettrica di questo apparecchio è
assicurata soltanto quando lo stesso è
correttamente collegato allimpianto di messa a
terra, come previsto dalle vigenti norme di
sicurezza elettrica. Controllare che questo
requisito di sicurezza fondamentale sia sempre
rispettato e, in caso di dubbio, richiedere un
controllo accurato dellimpianto da parte di
personale professionalmente qualificato.
Il costruttore non può essere considerato
responsabile per eventuali danni causati dalla
mancanza di messa a terra dellimpianto.
Prima di collegare lapparecchio accertarsi che i
dati tecnici riportati sulla targhetta siano
rispondenti alle caratteristiche dellimpianto
elettrico.
Verificare che la portata elettrica dellimpianto e
delle prese di corrente siano adeguate alla
potenza massima dellapparecchio indicata in
targa. In caso di dubbio, rivolgersi a personale
professionalmente qualificato.
Prima di qualsiasi intervento, disinserire
elettricamente lapparecchio.
Il collegamento del piano di cottura allimpianto deve
essere effettuato tramite una scatola di connessione:
nel caso di collegamento diretto dellapparecchio
alla rete, occorre prevedere un
omnipolareomnipolare
omnipolare, accessibile in caso di necessità, con
omnipolareomnipolare
distanza di apertura dei contatti uguale o superiore a
3 mm.
Valido solo per i modelli con cavo
alimentazione
Alcuni modelli sono forniti di cavo alimentazione
monofase, quindi deveno essere allacciati solo alla
rete monofase. Rispettare il colore dei fili, come da
schema allegato.
interruttoreinterruttore
interruttore
interruttoreinterruttore
Valido solo per i modelli senza cavo
alimentazione
Alcuni modelli non sono dotati di cavo di
alimentazione in quanto il cavo va dimensionato in
base al tipo di collegamento elettrico utilizzato (vedi
tabella di connessione seguente). Per allacciare il
cavo procedere come segue:
1. Aprire la morsettiera
facendo leva con un
cacciavite sulle
linguette laterali del
coperchio: tirare e
aprire il coperchio (vedi
figura).
2. Svitare la vite del
serracavo e toglierlo
facendo leva con un
cacciavite (vedi figura).
3. Togliere le viti dei
contatti L-N-
e poi
fissare i cavetti sotto le
teste delle viti
rispettando i colori Blu
(N) Marrone (L) GialloVerde (
).
per effettuare il collegamento elettrico desiderato
(vedi tabella), utilizzare i ponticelli alloggiati
dentro la scatola. Posizionare i fili del cavo
alimentazione in accordo con la tabella.
una volta effettuati i collegamenti stringere a
fondo tutte le viti dei morsetti.
fissare il cavo di alimentazione nellapposito
fermacavo e chiudere il coperchio.
IT
Collegamenti elettrici Tensione Frequenza Fusibili Sezioni
FR-BE-AT-DE-GR-ES-IL-
L
BLNBR
L
BLNBR
BR=BRUN,BL=BLEU
BR=BRUIN, BL=BLAUW
* Applicazione del fattore di simultaneità in conformità alla norma CEI 60335-2-6
IT-NZ-PT-GP-CH-MA-LUIE-FI-SE-IS-GB-NL-DK
230V - 1+N~ 50Hz
CY-MT-AU-NZ-KW
240V - 1+N~ 50Hz
FR-BE-NO
230V - 2 ~ 50Hz
BR=BRAUN, BL=BLAU
BR=BROWN, BL=BLUE
25A *
2,5 mm²
3
Page 4

IT
! In caso di installazione del piano di cottura sopra
un forno da incasso, lallaccio elettrico del piano e
quello del forno devono essere realizzati
separatamente, sia per ragioni di sicurezza elettrica,
sia par facilitare le eventuali operazioni di estrazione
del forno.
Collegamenti elettrici
12345
LN
12 34
L1 L2 N2N1
12345
L1 L2 N
12345
L1 L2 L3
12 34
L1 L2 N2N1
12345
LN
* Applicazione del fattore di simultaneità in conformità alla norma
5
5
CEI 60335-2-6
Ten si o ne
Frequenza
FR-AT-BE-DE-GP-ES-IE-IL-IS-IT-LURE-FI-GB-GR-PT--
SE-MA-NZ
230V-1+N~50 Hz
FR-BE-NO
230V-2~50/60 Hz
FR-BE-CH-DE- AT--
ES-IL-IT-NZ-PT-
MA- LU-SE-IS-NL
400V2-N~50 Hz
FR-BE-NO
230V3~50 Hz
NL
230V2+2-N~50 Hz
CY-AU-NZ- KW-MT
240V-1+N~50 Hz
Fusibili
Sezioni
25 A*
2,5 mm²
25 A*
2,5 mm²
16 A*
1,5 mm²
16 A*
1,5 mm²
16 A*
1,5 mm²
25 A*
2,5 mm²
Smaltimento
Smaltimento del materiale di imballaggio:
attenersi alle norme locali, così gli imballaggi
potranno essere riutilizzati.
La direttiva Europea 2002/96/CE sui rifiuti di
apparecchiature elettriche ed elettroniche (RAEE),
prevede che gli elettrodomestici non debbano
essere smaltiti nel normale flusso dei rifiuti solidi
urbani. Gli apparecchi dismessi devono essere
raccolti separatamente per ottimizzare il tasso di
recupero e riciclaggio dei materiali che li
compongono ed impedire potenziali danni per la
salute e lambiente. Il simbolo del cestino barrato
è riportato su tutti i prodotti per ricordare gli
obblighi di raccolta separata.
Per ulteriori informazioni, sulla corretta
dismissione degli elettrodomestici, i detentori
potranno rivolgersi al servizio pubblico preposto o
ai rivenditori.
Questa apparecchiatura è conforme
alle seguenti Direttive Comunitarie:
- 73/23/CEE del 19/02/73 (Bassa Tensione) e
successive modificazioni
- 89/336/CEE del 03/05/89 (Compatibilità
Elettromagnetica) e successive modificazioni
- 93/68/CEE del 22/07/93 e successive
modificazioni.
4
Page 5

Descrizione
dellapparecchio
Pannello di controllo
Spia di funzionamento
ZONE COTTURA PROGRAMMATA *
Indicatore della
DURATA PROGRAMMATA *
Indicatori di POTENZA
e di CALORE RESIDUO
Tasto SELEZIONE
ZONE COTTURA
15.
0
5.
0
IT
Tasto
REGOLAZIONE CONTAMINUTI *
Indicatori di POTENZA e di
CALORE RESIDUO
Indicatore di selezione di una
ZONE COTTURA
Tasti SELEZIONE
ZONE COTTURA
Indicatori di POTENZA
e di CALORE RESIDUO
Tasto DIMINUZIONE POTENZA
Tasto ACCESO SPENTO
Booster
Tasto BOOSTER *
Tasto AUMENTO POTENZA
Tasto BLOCCO COMANDI
Spia BLOCCO
Presente solo in alcuni modelli.
*
5
Page 6
IT
PIANI COTTURA
KBT 6313 I T
KBT 6313 I T CL
Zone di cottura Potenza (in W)
Posteriore destro
(Post Dx)
I 1200
Posteriore
IT 1800-B 3000-B 4000*
sinistro (Post Sx)
Destra Centrale
I 1800
Potenza totale 7000
I
zona di cottura induzione semplice
è
IT è zona di cottura induzione tripla
B 4000* è la zona di cottura può essere sovralimentata a 4000 W
Descrizione delle zone di cottura
Il sistema a induzione è il procedimento di cottura
più rapido che esista.
A differenza delle tecnologie tradizionali, la zona di
cottura con funzionamento a induzione non riscalda
il vetro. È il recipiente stesso, appoggiato sul piano,
che si trasforma in elemento riscaldante: il calore
viene generato direttamente allinterno della pentola,
la quale dovrà possedere necessariamente un fondo
in materiale ferromagnetico.
Ciascuna zona di cottura viene azionata:
tramite un tasto di selezione la cui serigrafia è una
riproduzione del disegno della zona di cottura,
e da un dispositivo di regolazione della potenza
composto da un doppio tasto (+,-).
Finché la temperatura delle zone di cottura rimane
superiore a 60 °C, anche dopo larresto, gli indicatori
di calore residuo restano accesi (lindicatore delle
potenze visualizza H) per prevenire il rischio di
ustioni.
La seguente tabella fornisce utili indicazione per un
utilizzo ottimale delle varie zone di cottura.
Potenza Tipo di cottura
1 Burro o cioccolato fuso
2
3
4 Preparazione di creme e salse
5
6 Cottura di pasta e riso
7
8
9 Fritture
Riscaldamento di liquidi
Cottura di carni lesse, blanquette,
entremets
Cottura a fuoco vivo di carni, pesce,
omelette
6
Page 7

Avvio e Utilizzo
Quando il piano di cottura viene collegato
elettricamente, un breve segnale acustico viene emesso
dopo alcuni secondi: soltanto a questo punto è possibile
accendere il piano di cottura.
Accensione del piano cottura
Laccensione del piano cottura avviene tenendo
premuto il tasto
Funzionamento delle zone di cottura
Ciascuna zona di cottura viene azionata tramite un tasto
di comando e un dispositivo di regolazione della
potenza composto da un doppio tasto (+,-).
per 3 secondi.
005.
Accensione di una zona di cottura
Per mettere in funzione una zona di cottura, premere il
relativo tasto di comando e impostare la potenza
++
desiderata (da 0 a 9) tramite i tasti
Per impostare direttamente la potenza massima (9),
premere brevemente il tasto
Spegnimento di una zona di cottura
Per spegnere una zona di cottura, selezionarla tramite il
relativo tasto di comando e:
premere contemporaneamente i tasti + e -: la
potenza torna immediatamente a 0 e la zona di
cottura si spegne;
oppure premere il tasto-: la potenza della zona di
cottura scende progressivamente, fino allo
spegnimento.
--
-.
--
+ e
++
--
-.
--
Spegnimento del piano di cottura
Premere il tasto ; lapparecchio si spegne.
Se i comandi dellapparecchio sono stati bloccati (vedere
paragrafo successivo), continueranno ad essere bloccati
anche dopo aver riacceso il piano di cottura. Per poter
utilizzare le zone di cottura occorre sbloccare i comandi.
Il booster
Per accelerare i tempi di riscaldamento delle zone di
cottura (vedere la tabella delle zone di cottura alla pagina
precedente), premere il tasto
Sul display della potenza appare
si interrompe automaticamente dopo 4 minuti. Nel periodo
di attivazione del booster, alcune zone di cottura (vedere la
tabella delle zone di cottura alla pagina precedente) sono
limitate a una potenza massima di 600W.
Booster
.
PP
P. La funzione Booster
PP
Blocco dei comandi
Quando il piano di cottura è in funzione, è possibile
bloccare i comandi per evitare il rischio di modifiche
fortuite alle regolazioni (bambini, operazioni di pulizia,
ecc.).
È sufficiente agire sul tasto
al tasto si accende e
Per modificare la potenza di riscaldamento o interrompere
la cottura, è necessario sbloccare i comandi: premere il
tasto
Per accedere nuovamente alla regolazione di una zona di
cottura, selezionarla tramite il tasto di comando
corrispondente.
Programmazione di una durata di cottura
E possibile programmare tutte le zone di cottura
contemporaneamente per una durata massima di 99
minuti.
Procedere nel modo seguente:
selezionare la zona di cottura tramite il tasto di comando
impostare la potenza desiderata tramite i tasti
premere il tasto di programmazione
impostare la durata di cottura desiderata tramite i tasti
confermare la programmazione premendo ancora una
Il conto alla rovescia della durata di cottura ha inizio
immediatamente. La fine della cottura programmata è
indicata da un segnale acustico (per la durata di 1 minuto)
e la zona di cottura si spegne.
Funzionamento della piastra induzione Tripla
Il funzionamento di questa piastra dipende
sostanzialmente dal diametro delle pentole che vengono
utilizzate per la cottura:
se il diametro della pentola rientra nella prima area
se il diametro della pentola rientra tra la prima e la
se il diametro della pentola supera la seconda zona e
La funzione Booster, quindi, può essere attivata solo negli
ultimi due casi indicati, con un assorbimento energetico
compreso tra 3kW e 4kW secondo il diametro della
pentola, quando cioè la dimensione della pentola superi il
diametro della prima zona. La funzione booster, infatti, non
è attiva nel caso in cui si utilizzi solo la zona di cottura
centrale più piccola (1800W).
; la spia si spegne e
corrispondente;
++
--
+ e
-;
++
--
volta il tasto
delineata, è possibile accendere la singola piastra
interna. In questo caso il booster non funziona e la
potenza erogata è di 1800W;
seconda area delineata, la potenza erogata massima si
estende a 2400W (fino a 3000W con il Booster attivo);
rientra tra la seconda e la terza, la piastra eroga una
potenza max fino a 3000W (fino a 4000W con il Booster
attivo).
.
; la spia che si trova accanto
i comandi si bloccanoi comandi si bloccano
i comandi si bloccano.
i comandi si bloccanoi comandi si bloccano
i comandi si sbloccanoi comandi si sbloccano
i comandi si sbloccano.
i comandi si sbloccanoi comandi si sbloccano
,
++
+ e
++
--
-,
--
IT
7
Page 8
Dispositivi di sicurezza
IT
Rilevamento dei recipienti
Ciascuna zona di cottura a induzione è provvista di
un dispositivo di rilevamento della pentola. La zona
di cottura emette calore unicamente in presenza di
una pentola di dimensioni adeguate alla zona di
cottura stessa.
La spia lampeggiante può indicare:
una pentola incompatibile (in materiale non
ferromagnetico),
una pentola di diametro insufficiente,
il sollevamento di una pentola.
Scegliere sempre una
adeguato a quello delle zone di cottura.adeguato a quello delle zone di cottura.
adeguato a quello delle zone di cottura.
adeguato a quello delle zone di cottura.adeguato a quello delle zone di cottura.
Avvertenza importante: zone di cottura ovali
Le zone di cottura ovali possono essere
sovralimentate soltanto se è attivato lintero ovale.
Non mettere due pentole piccole sulle zone di
cottura ovali.
pentola di diametropentola di diametro
pentola di diametro
pentola di diametropentola di diametro
Uso di recipienti
Dato che linduzione si attiva unicamente nel
momento in cui un recipiente metallico viene posto
sul piano di cottura per chiudere il campo
magnetico, il riscaldamento della pentola cessa
istantaneamente quando essa viene tolta dalla zona
di cottura.
Utilizzare un recipiente il cui
fabbricazione sia compatibile con il principiofabbricazione sia compatibile con il principio
fabbricazione sia compatibile con il principio
fabbricazione sia compatibile con il principiofabbricazione sia compatibile con il principio
dellinduzione (materiale ferromagnetico).dellinduzione (materiale ferromagnetico).
dellinduzione (materiale ferromagnetico).
dellinduzione (materiale ferromagnetico).dellinduzione (materiale ferromagnetico).
Si raccomanda luso di pentole in ghisa,Si raccomanda luso di pentole in ghisa,
Si raccomanda luso di pentole in ghisa,
Si raccomanda luso di pentole in ghisa,Si raccomanda luso di pentole in ghisa,
acciaio smaltato o inox speciale peracciaio smaltato o inox speciale per
acciaio smaltato o inox speciale per
acciaio smaltato o inox speciale peracciaio smaltato o inox speciale per
induzione.induzione.
induzione.
induzione.induzione.
Le pentole in rame, ceramica, terracotta, vetro,
maiolica, alluminio o inox non magnetico sono
incompatibili con il piano di cottura a induzione.
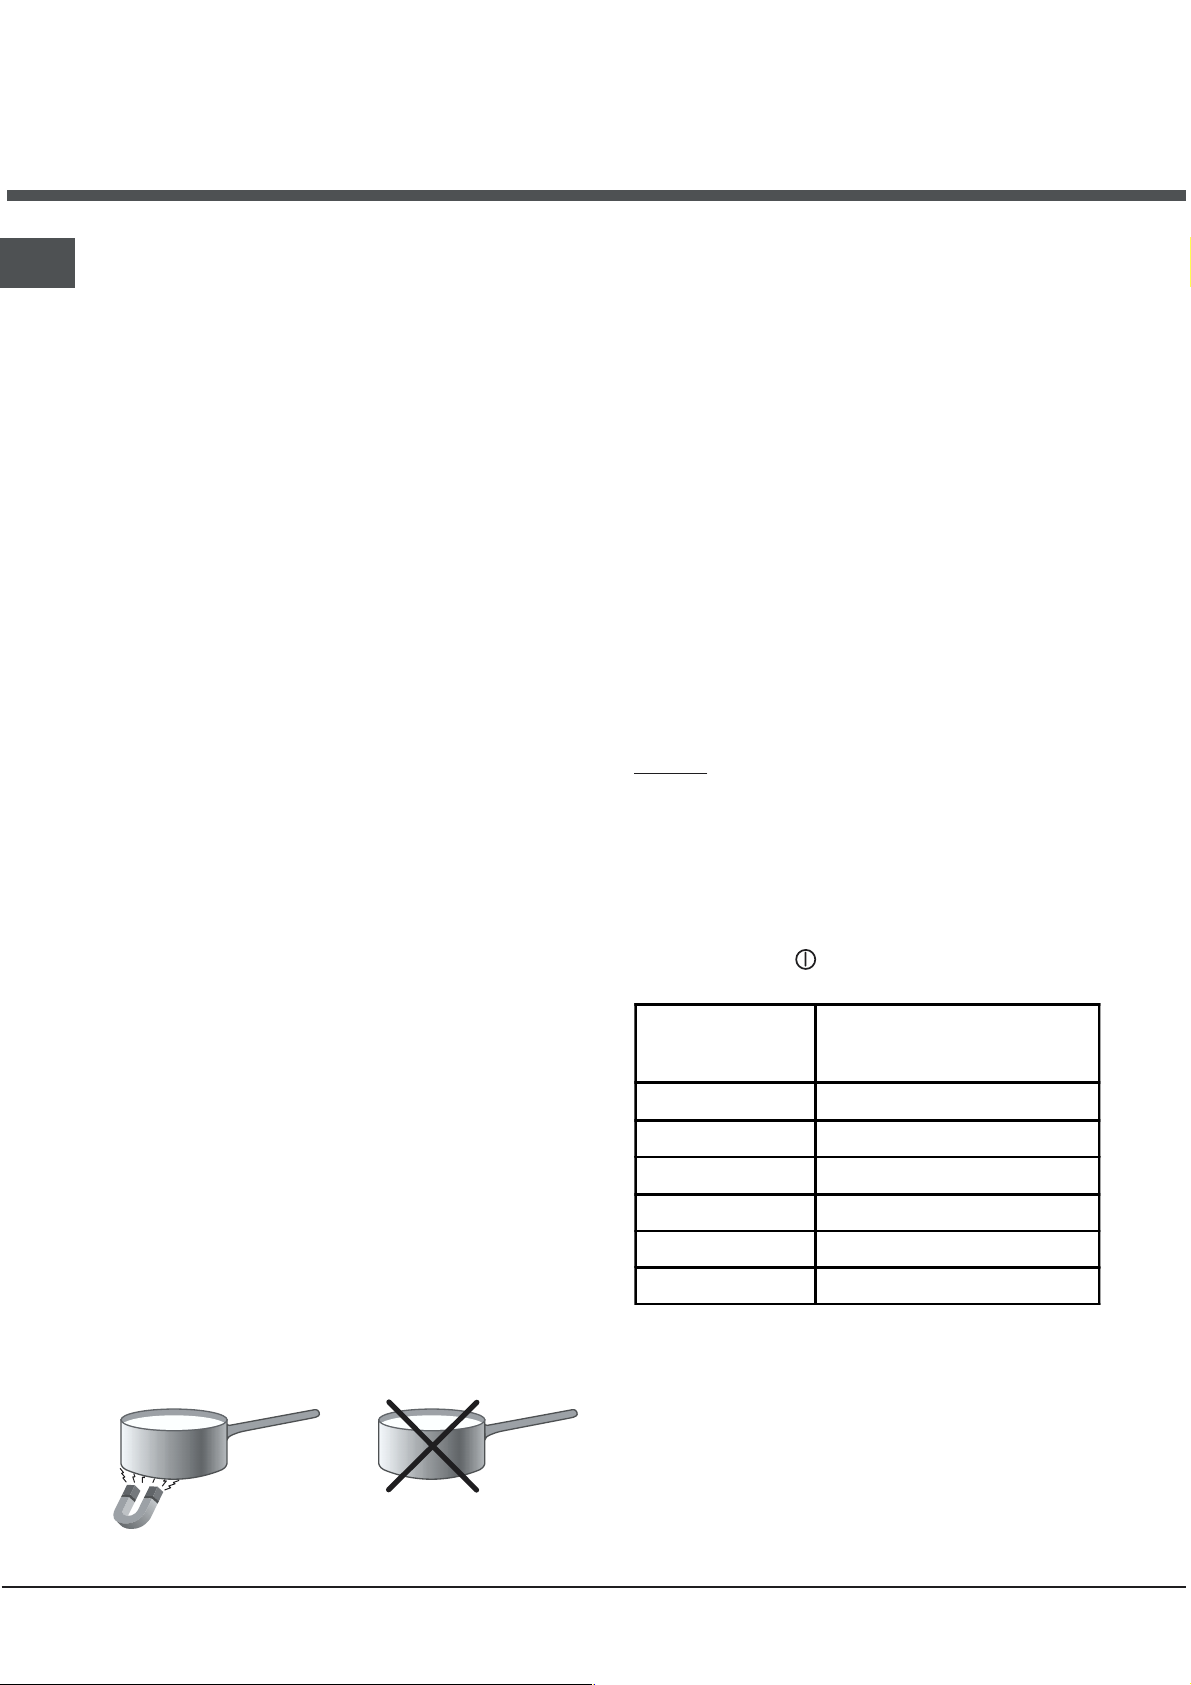
È sufficiente fare una prova con unaÈ sufficiente fare una prova con una
È sufficiente fare una prova con una
È sufficiente fare una prova con unaÈ sufficiente fare una prova con una
calamita. calamita.
calamita. Se questa viene attirata dal fondo della
calamita. calamita.
pentola e resta incollata, significa che la pentola è
in materiale ferromagnetico e quindi può essere
utilizzata sul piano a induzione.
Si consiglia luso di pentole
elevato spessoreelevato spessore
elevato spessore e di evitare assolutamente
elevato spessoreelevato spessore
recipienti dal fondo irregolare, che potrebbero
provocare la rigatura del vetro.
MATERIALE ADATTO MATERIALE NON ADATTO
Ghisa
Acciaio smaltato
Inox speciale
materiale dimateriale di
materiale di
materiale dimateriale di
con fondo piatto e dicon fondo piatto e di
con fondo piatto e di
con fondo piatto e dicon fondo piatto e di
Alluminio, Vetro, Terracotta,
Ceramica, Inox non magnetico
Rame,
Segnale acustico
Alcune anomalie, quali:
un oggetto (pentola, posata, ecc.) posto per oltre
10 secondi sullarea dei comandi,
un versamento sullarea dei comandi,
una pressione esercitata a lungo su un tasto, ecc.
possono provocare lemissione di un segnale
acustico e lo spegnimento del piano d cottura.
Rimuovere la causa del malfunzionamento per
interrompere il segnale acustico.
Per utilizzare il piano di cottura, riaccenderlo e
selezionare nuovamente la zona o le zone di cottura
desiderate. Impostare la potenza necessaria.
Interruttore di sicurezza
Lapparecchio è dotato di un interruttore di sicurezza
automatico che scatta dopo un certo intervallo di
tempo (vedere tabella) in funzione della potenza
scelta. Durante linterruzione di sicurezza, il display
della potenza indica 0.
esempio: la zona di cottura posteriore destra è
impostata su 5 e la zona di cottura anteriore sinistra
è impostata su 2. La zona posteriore destra si
spegne dopo 4 ore di funzionamento, mentre la zona
anteriore sinistra si spegne dopo 6 ore di
funzionamento.
Per sbloccare i comandi, spegnere il piano di cottura
premendo il tasto
Livello di
potenza
1-2 10 ore
35 ore
44 ore
5-6 3 ore
7-8 2 ore
91 ore
.
Tempo limite di
funzionamento
Protezione termica
In caso di surriscaldamento dei componenti
elettronici dellapparecchio, il piano di cottura si
spegne automaticamente e sul display delle
aa
potenze appare
Questo messaggio scompare non appena la
temperatura è scesa a un livello accettabile.
a
.
aa
8
Page 9

Precauzioni e consigli
! Lapparecchio è stato progettato e costruito
in conformità alle norme internazionali di sicurezza.
Queste avvertenze sono fornite per ragioni di sicurezza
e devono essere lette attentamente.
Consigli pratici per luso dellapparecchio
Per ottenere le migliori prestazioni dal piano di cottura:
adoperare pentole con fondo piatto per essere certi
che aderiscano perfettamente alla zona riscaldante;
adoperare sempre pentole di diametro sufficiente a
coprire completamente la zona riscaldante, in modo
da garantire lo sfruttamento di tutto il calore
disponibile;
accertarsi che il fondo delle pentole sia sempre
perfettamente asciutto e pulito, per garantire la
corretta aderenza e una lunga durata, sia alle zone
di cottura che alle pentole stesse;
evitare di utilizzare le stesse pentole utilizzate sui
bruciatori a gas: la concentrazione di calore sui
bruciatori a gas può deformare il fondo della
pentola, che perde aderenza;
non lasciare mai una zona di cottura accesa senza
pentola poiché il suo riscaldamento, raggiungendo
rapidamente il livello massimo, potrebbe
danneggiare gli elementi riscaldanti.
Sicurezza generale
Lapparecchio è stato concepito per un uso di tipo
non professionale allinterno dellabitazione.
Lapparecchio non va installato allaperto, nemmeno
se lo spazio è riparato, perché è molto pericoloso
lasciarlo esposto a pioggia e temporali.
Non toccare la macchina a piedi nudi o con le mani
o i piedi bagnati o umidi.
Lapparecchio deve essere usato per cuocere
alimenti, solo da persone adulte e secondo le
istruzioni riportate in questo libretto. Non utilizzare
il piano come superficie di appoggio, né come
tagliere.
Il piano in vetroceramica è resistente agli urti
meccanici, tuttavia può incrinarsi (o eventualmente
frantumarsi) se colpito con un oggetto appuntito,
quale un utensile. In questi casi, scollegare
immediatamente lapparecchio dalla rete di
alimentazione e rivolgersi allAssistenza.
Se la superficie del piano è incrinata, spegnere
l'apparecchio per evitare la possibilità di scosse
elettriche.
Evitare che il cavo di alimentazione di altri
elettrodomestici entri in contatto con parti calde
del piano cottura.
Non dimenticare che la temperatura delle zone di
cottura rimane piuttosto elevata per almeno trenta
minuti dopo lo spegnimento. Il calore residuo è
segnalato anche da un indicatore (vedi Avvio e
utilizzo).
Tenere a debita distanza dal piano cottura qualsiasi
oggetto che potrebbe fondere, ad esempio oggetti
in plastica, in alluminio o prodotti con un elevato
contenuto di zucchero. Fare particolare attenzione a
imballaggi e pellicole in plastica o alluminio:
se dimenticati sulle superfici ancora calde o tiepide
possono causare un grave danno al piano.
Assicurarsi che i manici delle pentole siano sempre
rivolti verso linterno del piano cottura per evitare
che vengano urtati accidentalmente.
Non staccare la spina dalla presa della corrente
tirando il cavo, bensì afferrando la spina.
Non fare pulizia o manutenzione senza aver prima
staccato la spina dalla rete elettrica.
Non posare oggetti metallici (coltelli, cucchiai,
coperchi, ecc.) sul piano perchè possono diventare
caldi.
Avvertenza per i portatori di pacemaker oAvvertenza per i portatori di pacemaker o
Avvertenza per i portatori di pacemaker o
Avvertenza per i portatori di pacemaker oAvvertenza per i portatori di pacemaker o
altri dispositivi medici impiantabili attivi:altri dispositivi medici impiantabili attivi:
altri dispositivi medici impiantabili attivi:
altri dispositivi medici impiantabili attivi:altri dispositivi medici impiantabili attivi:
Il piano cottura è conforme a tutte le normative
vigenti in materia di interferenze elettromagnetiche.
Questo prodotto è pertanto perfettamente
rispondente a tutti i requisiti di legge (direttive 89/
336/CEE). È stato progettato in modo da non creare
inferenze ad altre apparecchiature elettriche
utilizzate, a condizione che anche queste siano
conformi alle suddette normative.
Il piano cottura a induzione genera campi
elettromagnetici a breve portata.
Per evitare ogni rischio di interferenze tra il piano di
cottura e il pacemaker, quest'ultimo dovrà essere
realizzato in conformità alle normative vigenti.
A tale riguardo, possiamo garantire unicamente la
conformità del nostro prodotto. Per informazioni sulla
conformità o eventuali problemi di incompatibilità, si
prega di rivolgersi al proprio medico curante o alla
casa produttrice del pacemaker.
IT
9
Page 10

Manutenzione e cura
IT
Escludere la corrente elettrica
Prima di ogni operazione isolare lapparecchio dalla
rete di alimentazione elettrica.
Pulire lapparecchio
Evitare luso di detergenti abrasivi o corrosivi, quali
i prodotti in bombolette spray per barbecue e forni,
smacchiatori e prodotti antiruggine, i detersivi in
polvere e le spugne con superficie abrasiva: possono
graffiare irrimediabilmente la superficie.
Non utilizzare mai pulitori a vapore o ad alta
pressione per la pulizia dellapparecchio.
Per una manutenzione ordinaria, è sufficiente
lavare il piano con una spugna umida,
asciugando quindi con una carta assorbente per
cucina.
Se il piano è particolarmente sporco, strofinare
con un prodotto specifico per la pulizia delle
superfici in vetroceramica, sciacquare e
asciugare.
Per rimuovere gli accumuli di sporco più
consistenti servirsi di un apposito raschietto.
Intervenire non appena possibile, senza attendere
che lapparecchio si sia raffreddato, per evitare
lincrostazione dei residui. Eccellenti risultati si
possono ottenere usando una spugnetta in filo
dacciaio inossidabile - specifica per piani in
vetroceramica - imbevuta di acqua e sapone.
In caso sul piano cottura si fossero
accidentalmente fusi oggetti o materiali quali
plastica o zucchero, rimuoverli con il raschietto
immediatamente, finché la superficie è ancora
calda.
Una volta pulito, il piano può essere trattato
con un prodotto specifico per la manutenzione e
la protezione: la pellicola invisibile lasciata da
questo prodotto protegge la superficie in caso di
scolamenti durante la cottura. Si raccomanda
di eseguire queste operazioni con lapparecchio
tiepido o freddo.
Ricordarsi sempre di risciacquare con acqua
pulita e asciugare accuratamente il piano: i residui
di prodotti potrebbero infatti incrostarsi durante la
successiva cottura.
Telaio in acciaio inox *
Lacciaio inossidabile può macchiarsi per effetto
di unacqua molto calcarea lasciata per un periodo
di tempo prolungato a contatto dello stesso oppure a
causa di prodotti per la pulizia contenenti fosforo.
Si consiglia di sciacquare abbondantemente e
asciugare con cura dopo la pulizia del piano. In caso
di versamenti dacqua, intervenire rapidamente
asciugando con cura.
Alcuni piani cottura hanno una cornice in alluminio
somigliante allacciaio inox. Non utilizzare prodotti per
la pulizia e lo sgrassaggio non idonei per lalluminio.
Smontare il piano
Nel caso si renda necessario smontare il piano
cottura:
1. togliere le viti che fissano le molle di centraggio
sui lati;
2. allentare le viti dei ganci di fissaggio sugli angoli;
3. estrarre il piano cottura dal vano del mobile.
Raccomandiamo di evitare di accedere ai
meccanismi interni per tentare una riparazione. In
caso di guasto, contattare lAssistenza.
* Presente solo in alcuni modelli.
10
Page 11

Operating Instructions
HOB
GB
ITIT
IT
ITIT
Italiano, 1 Français, 21
GBGB
GB
GBGB
English, 11
ES
Espanol, 41
FR
PTNL
Portuges, 51Nederlands, 31
DE
Deutsch, 61
KBT 6313 IT
KBT 6313 IT CL
Contents
GB
Installation, 12-14
Positioning
Connecting the hob
Disposal
Description of the appliance, 15-16
Control panel
Cooking zone description
Start-up and use, 17
Turning on the hob
Turning off the hob
The booster
The safety devices, 18
Pan recognition
What cookware to use
Acoustic signal
Safety cut out
Overheating protection device
Precautions and tips, 19
Practical advice on using the appliance
General safety
Care and maintenance, 20
Switching the appliance off
Cleaning the appliance
Disassembling the hob
Page 12

Installation
GB
! Before operating your new appliance please read
this instruction booklet carefully. It contains
important information concerning the safe operation,
installation and maintenance of the appliance.
! Please keep these operating instructions for future
reference. Pass them on to possible new owners of
the appliance.
Positioning
! Keep all packaging materials out of the reach of
children. It may present a choking or suffocation
hazard (see Precautions and tips).
! The appliance must be installed by a qualified
professional in accordance with the instructions
provided. Incorrect installation may damage
property or cause harm to people or animals.
Built-in appliance
Use the appropriate cabinet to ensure that the
appliance functions properly.
The supporting surface must be heat-resistant up
to a temperature of approximately 100°C.
If the appliance is to be installed above an oven,
the oven must have a forced ventilation cooling
system.
Avoid installing the hob above a dishwasher: if
this cannot be avoided, place a waterproof
separation device between the two appliances.
Depending on the hob you want to install, the
cabinet must have the following dimensions (see
figure):
590
48
520
48
574
504
At a minimum of 40 mm from the back panel and
600 mm from any other vertical surfaces.
So that a minimum distance of 20 mm is
maintained between the installation cavity and the
cabinet underneath.
min. 20 mm
5 mm
COMPARTMENT
min. 40 mm
min. 20 mm
5 mm
FAN-ASSISTED
OVEN
min. 40 mm
Fixing
The appliance must be installed on a perfectly level
supporting surface.
Any deformities caused by improper fixing could
change the features and the operation of the hob.
REAR SPRING ASSEMBLY
560 +/- 1
48
490 +/- 1
690
520
560 +/- 1
48
490 +/- 1
785
560 +/- 1
490 +/- 1
750 +/- 1
Ventilation
To allow adequate ventilation and to avoid
overheating of the surrounding surfaces the hob
should be positioned as follows:
12
510
490+/- 1
FRONT OF HOB
HOB FROM BELOW
KITCHEN
WORKTOP
30
40
Page 13

Connecting the hob
The electrical safety of this appliance can only be
guaranteed if the latter is correctly and efficiently
earthed, in compliance with regulations on
electrical safety. Always ensure that this vital
safety measure has been taken. If you have any
doubts, call in a qualified technician to check the
electrical system thoroughly.
The manufacturer denies all responsibility for
damage resulting from a system which has not
been earthed correctly.
Before powering the appliance, check whether the
technical characteristics featured on the appliance
data plate correspond with those of the mains
electrical system.
Check that the current load of the mains supply
and of the power sockets is suitable for the
maximum power of the appliance, indicated on
the appliance data plate. If in doubt, contact a
qualified professional.
Disconnect the appliance from the electricity
supply before all operations.
Connect your hob to the electrical system by means
junction box:junction box:
of a
junction box: if the appliance is connected
junction box:junction box:
permanently to the mains, an
breakerbreaker
breaker, accessible if necessary, with a minimum
breakerbreaker
contact opening of 3 mm should be installed.
Valid only for models with a power supply
cable
Some models are supplied with a single-phase
power supply cable, and should consequently only
be connected to the single-phase mains. Observe
the wire colours, as indicated in the diagram
attached.
Electrical connections Voltage, Frequency Fuses, Sections
FR-BE-AT-DE-GR-ES-IL-
L
IT-NZ-PT-GP-CH-MA-LUIE-FI-SE-IS-GB-NL-DK
BLNBR
BLNBR
BR=BRUN,BL=BLEU
BR=BRUIN, BL=BLAUW
* Application of the simultaneity coefficient in accordance with
230V - 1+N~ 50Hz
CY-MT-AU-NZ-KW
240V - 1+N~ 50Hz
L
FR-BE-NO
230V - 2 ~ 50Hz
BR=BRAUN, BL=BLAU
BR=BROWN, BL=BLUE
cei 60335-2-6 norm
omnipolar circuitomnipolar circuit
omnipolar circuit
omnipolar circuitomnipolar circuit
25A *
2,5 mm²
Valid only for models without a power supply
cable
Some models are not fitted with a power supply
cable, as the cable should be sized according to the
type of electrical connection in use (see connection
table below). To connect the cable, proceed as
follows:
1. Open the terminal
board by inserting a
screwdriver into the
side tabs of the cover.
Use the screwdriver as
a lever by pushing it
down to open the cover
(see diagram).
2. Loosen the cable
clamp screw and
remove it, using a
screwdriver as a lever
(see figure).
3. Remove the wire
contact screws L-N, then fasten the wires
under the screw heads,
respecting the colour
code: Blue (N), Brown
(L) and Yellow-Green
Verde (
).
to make the desired electrical connection (see
table), use the jumpers housed inside the box.
Position the power supply cable wires according
to the indications in the table.
once the connections have been made, tighten all
the terminal screws fully.
Fasten the supply cable in place with the clamp
and close the cover of the terminal board.
GB
13
Page 14

GB
! If the hob is fitted above a built-in oven, the hob
and the oven must be connected to the mains
separately for safety reasons and to simplify
operations when it is necessary to pull the oven out
for some reason.
Electrical connections
12345
LN
12 34
L1 L2 N2N1
12345
L1 L2 N
12345
L1 L2 L3
12 34
L1 L2 N2N1
12345
LN
* Application of the simultaneity coefficient in accordance with
5
5
cei 60335-2-6 norm
Voltage,
Frequency
FR-AT-BE-DE-GP--
ES-IE-IL-IS-IT-LU-
RE-FI-GB-GR-PT--
SE-MA-NZ
230V-1+N~50 Hz
FR-BE-NO
230V-2~50/60 Hz
FR-BE-CH-DE-AT--
ES-IL-IT-NZ-PT -
MA- LU-SE-IS-NL
400V2-N~50 Hz
FR-BE-NO
230V3~50 Hz
NL
230V2+2-N~50 Hz
CY-AU-NZ-KW-MT
240V-1+N~50 Hz
Fuses,
Sections
25 A*
2,5 mm²
25 A*
2,5 mm²
16 A*
1,5 mm²
16 A*
1,5 mm²
16 A*
1,5 mm²
25 A*
2,5 mm²
Disposal
When disposing of packaging material: observe
local legislation so that the packaging may be
reused.
The European Directive 2002/96/EC relating to
Waste Electrical and Electronic Equipment
(WEEE) states that household appliances should
not be disposed of using the normal solid urban
waste cycle. Exhausted appliances should be
collected separately in order to optimise the cost
of re-using and recycling the materials inside the
machine, while preventing potential damage to
the atmosphere and to public health. The
crossed-out dustbin is marked on all products to
remind the owner of their obligations regarding
separated waste collection.
For further information relating to the correct
disposal of exhausted household appliances,
owners may contact the public service provided
or their local dealer.
This appliance conforms to the
following European Economic
Community directives:
- 73/23/EEC dated 19/02/73 (Low Voltage) and
subsequent amendments;
- 89/336/EEC dated 03/05/89 (Electromagnetic
Compatibility) and subsequent amendments;
- 93/68/EEC dated 22/07/93 and subsequent
amendments.
14
Page 15

Description
of the appliance
Control panel
Indicator light corresponding to the
PROGRAMMED COOKING ZONE *
PROGRAMMED COOKING
TIME indicator *
POWER (from 0 to 9) and
RESIDUAL HEAT indicators
COOKING ZONE
SELECTOR Keys
15.
0
5.
0
Booster
GB
TIMER CONTROL key for
COOKING TIME PROGRAMMING *
POWER (from 0 to 9) and
RESIDUAL HEAT indicators
ZONE SELECTION indicator
COOKING ZONE
SELECTOR Keys
POWER (from 0 to 9) and
RESIDUAL HEAT indicators
BOOSTER * Key
POWER DECREASE Key
ON/OFF Key
POWER INCREASE Key
Controls LOCK Key
LOCK indicator light
Only available on certain models.
*
15
Page 16
GB
KBT 6313 I T
HOBS
KBT 6313 I T CL
Cooking zones Power (in W)
Back Right (BR)
Central Right Zone
Back Left (BL)
I 1800 – B3000 – B4000*
I 1200
I 1800
Overall power 7000
I
IT
B 4000*
Cooking zone description
Induction is the fastest cooking method available.
Unlike traditional cooking zones, the induction zone
does not heat up the glass surface. The pan itself is
the heating element: the pan evenly transfers heat to
its contents as long as it is made of ferromagnetic
material.
single induction zone
è
Triple induction zone
è
the zone can be boosted to 4000 W
è
As long as the temperature of the cooking zones
remains above 60°C, even after use, the residual
heat indicators stay on(the power display indicates
H) to prevent the risk of burns.
The table below features information on how to use
the zones to their full potential.
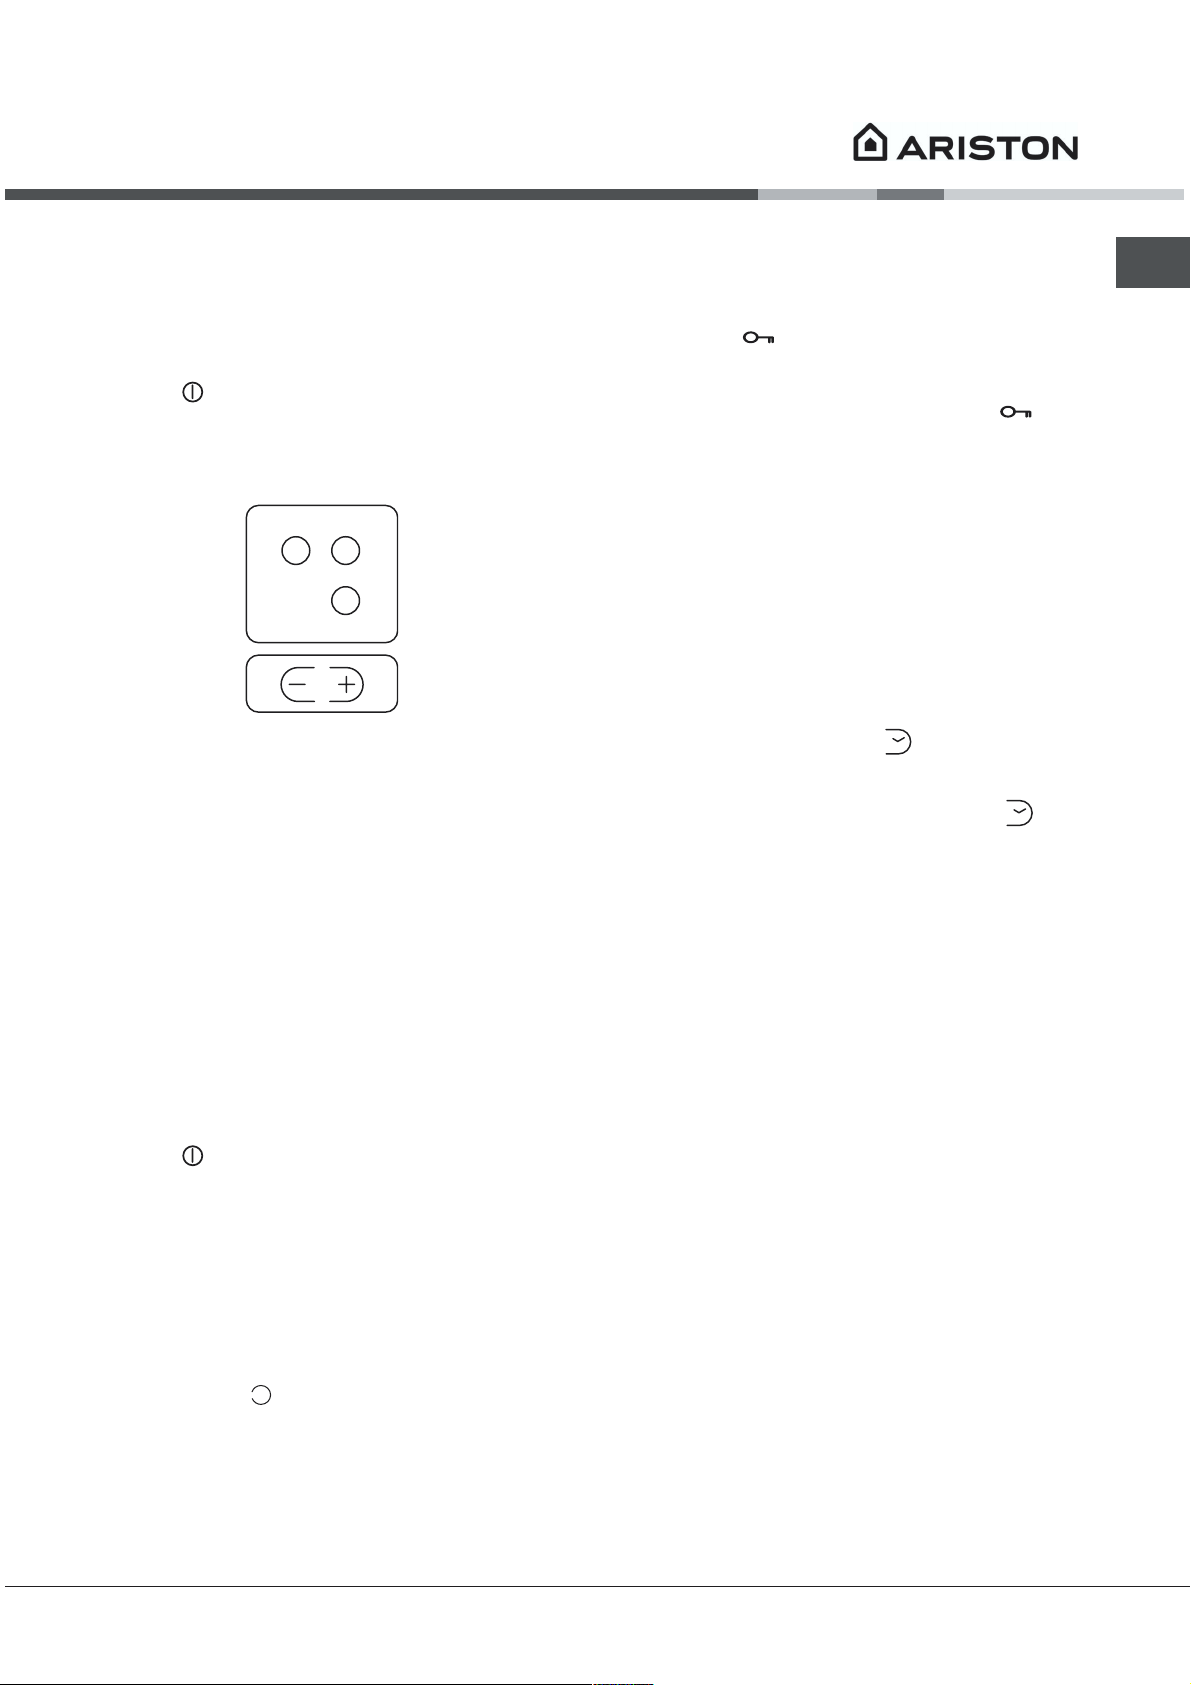
Each zone is controlled:
by a selector key whose silk screen printing
reproduces the cooking zone drawing,
and by a power adjustment set comprising two
parts (+,-).
Power Type of dish
1 Melted butter or chocolate
2
3
4 Preparation of creams and sauces
5 Cooking stews, blanquette, desserts
6 Cooking pasta and rice
7
8
9 Fried food
Reheating liquids
Sealing meat, fish, omelettes
16
Page 17
Start-up and use
When you connect the hob to the power supply, a
beep will sound after a few seconds: you can now
turn the hob on.
Turning on the hob
Press key for 3 seconds to turn the hob on.
Cooking zone control
Each cooking zone is operated by a control key and
by a power adjustment set (+ and -).
005.
Turning on a cooking zone
To turn a cooking zone on, press the corresponding
control key and set the desired heating power (from
0 to 9) using the
To set the maximum power directly (9), press key
--
- briefly.
--
++
+ and
++
--
- keys.
--
Controls lock
When the hob is in use, you can lock the controls to
avoid any accidental changes to the settings (by
children or when cleaning, for example).
Just press the
key lights up and
To change the power level setting or stop cooking,
the controls have to be unlocked: press the
the indicator light turns off and
unlockedunlocked
unlocked.
unlockedunlocked
To access the setting of a cooking zone again, select
the zone by pressing the corresponding control key.
Cooking time programming
You may programme all the cooking zones
simultaneously for a maximum cooking time of 99
minutes. Proceed as follows:
select the cooking zone by pressing the
corresponding control key,
set the desired heating power using the + and -
keys,
press the programming key
set the desired cooking time using the + and -
keys,
confirm the programming by pressing the
again.
key, the indicator light next to the
the controls are lockedthe controls are locked
the controls are locked.
the controls are lockedthe controls are locked
key,
the controls arethe controls are
the controls are
the controls arethe controls are
,
key
GB
Turning off a cooking zone
To turn off a cooking zone, press the corresponding
control key and:
press both
cooking zone power drops immediately to zero
and the zone is turned off.
or press the
progressively until the zone eventually turns off.
++
+ and
++
--
- key: the heating power drops
--
--
- simultaneously: the
--
Turning off the hob
Press the key; the appliance has been turned off.
If you have locked the hob controls (see paragraph
below), the same will still be locked when you turn
the hob back on. Unlock the controls in order to
operate the cooking zones.
The booster
To speed up the rise in temperature of the cooking
zones (see cooking zone table on the previous
page), press the
The power display will indicate
function comes to an automatic stop after 4 minutes.
When the booster function is on, certain cooking
zones (see the cooking zone table on the previous
page) are limited to a maximum power of 600W.
Booster
key.
PP
P. The booster
PP
The countdown begins immediately.
The end of programmed cooking is signalled by a beep
(one minute long) and the cooking zone is turned off.
Triple induction plate operation
The operation of this plate depends mainly on the
diameter of the pans which are used during cooking:
if the pans diameter falls within the first marked-
off area, it will be possible to switch on the
individual internal plate. In this case, the booster
does not work and the power output is 1800W;
if the diameter of the pan falls between the first
and second marked-off areas, the maximum
power output increases to 2400W (up to 3000W
with the Booster enabled);
if the diameter of the pan exceeds the second
area and falls between the second and third ones,
the power output of the plate may reach 3000W
(up to 4000W with the Booster enabled).
Therefore, the Booster function may be enabled only
in the last two cases indicated, with an energy
absorption of between 3kW and 4kW, depending on
the diameter of the pan; that is, when the size of the
pan exceeds the diameter of the first area. The
booster function is not enabled if you use only the
smallest central cooking zone (1800W).
17
Page 18

The safety devices
GB
Pan recognition
Each induction cooking zone is fitted with a pan
recognition device. The cooking zone only provides
heat in the presence of a pan which is suitable for
the cooking zone.
A blinking pan recognition indicator could signal:
that the pan is made of unsuitable material, which
is not ferromagnetic,
that the diameter of the pan is too small,
that the pan has been removed.
Always match the
of the cooking zones.of the cooking zones.
of the cooking zones.
of the cooking zones.of the cooking zones.
diameter of the pan with thatdiameter of the pan with that
diameter of the pan with that
diameter of the pan with thatdiameter of the pan with that
Warning: oval cooking zones
Oval cooking zones can only be boosted if the full
oval is enabled.
Do not place two small saucepans on oval cooking
zones.
What cookware to use
Given that induction only exists when the magnetic
field is sealed by a metallic recipient, the pan stops
being heated as soon as it is taken off the cooking
zone.
Use cookware made of material which is
compatible with induction (ferromagnetic
material).
Cast iron, enamelled steel or special induction
stainless steel saucepans are ideal.
Copper, ceramic, earthenware, glass, terracotta,
aluminium and non magnetic stainless steel
cookware is incompatible with induction cooking.
The easiest way to find out whether the pan is
suitable is with a magnet. If the magnet is
attracted by the pan bottom and stays stuck to the
same, the pan is made of ferromagnetic material
and can be used on your induction hob.
We recommend you use pans with a very flat and
thick bottom and avoid at all costs all cookware
with irregular rough bases which could scratch the
glass surface.
SUITABLE
*
Enamelled steel
Special stainless steel
Cast iron
Ceramic, non magnetic Stainless steel
UNSUITABLE
Aluminium, Glass, Earthenware,
Copper,
Acoustic signal
Anomalies such as:
an object (such as a saucepan or a lid, etc.)
placed for more than 10 seconds on the control
zone,
boiled-over liquids or food spilled on the control
zone,
prolonged pressure on a key,...could cause a
beep to sound and the hob to turn off.
To stop the beep from sounding, remove the cause
of the malfunction.
To use the hob, turn it back on and re-select the
cooking zone(s) you wish to use. Set the desired
heating power.
Safety cut out
Your appliance is fitted with a safety cut out which
intervenes after a certain amount of time (see table)
depending on the power setting. When the safety
cut out has intervened, the power display indicates
0.
for example: the back right cooking zone is set to 5
and the front left zone is set to 2. The back right
zone will turn off after 4 hours of operation and the
front left zone will turn off after 6 hours of operation.
To unlock the controls, turn the hob off by pressing
the
key.
Power level Maximum duration of operation
1-2 10 hours
3 5 hours
4 4 hours
5-6 3 hours
7-8 2 hours
9 1 hour
Overheating protection device
Should your appliances electronic components
overheat, the hob will turn off automatically and a
will come up on the power level display.
The letter will disappear as soon as the temperature
drops back down to an acceptable level.
18
Page 19

Precautions and tips
This appliance has been designed and
manufactured in compliance with international safety
standards. The following warnings are provided for
safety reasons and must be read carefully.
Practical advice on using the appliance
To obtain the best results from your hob:
Use flat-bottomed pans to ensure that they adhere
to the cooking zone perfectly.
Always use pans with a diameter that is large
enough to cover the hotplate fully, in order to use
all the available heat.
Make sure that the bottom of the cookware is
always dry and clean to guarantee correct
adherence and durability, not only for the cooking
zones but also for the cookware itself.
Avoid using the same cookware that is used on
gas burners: the heat concentration on gas
burners may have warped the base of the pan,
causing it not to adhere to the surface correctly.
Never leave a cooking zone on without cookware
placed on it because it heats up and rapidly
reaches the maximum level, which could damage
the heating elements.
General safety
The appliance was designed for domestic use
inside the home and is not intended for
commercial or industrial use.
The appliance must not be installed outdoors,
even in covered areas. It is extremely dangerous
to leave the appliance exposed to rain and
storms.
Do not touch the appliance with bare feet or with
wet or damp hands and feet.
The appliance must be used by adults only for the
preparation of food, in accordance with the
instructions provided in this booklet. Do not use
the hob as a worktop or chopping board.
The glass ceramic hob is resistant to mechanical
shocks, but it may crack (or even break) if hit with
a sharp object such as a tool. If this happens,
disconnect the appliance from the electricity
mains immediately and contact a Service Centre.
If the surface of the hob is cracked, switch off the
appliance to prevent electric shocks from
occurring.
Ensure that power supply cables of other
electrical appliances do not come into contact
with the hot parts of the hob.
Remember that the cooking zones remain
relatively hot for at least thirty minutes after they
have been switched off. An indicator light
provides a warning when residual heat is present (see
Start-up and use).
Keep any object which could melt away from the
hob, for example plastic and aluminium objects,
or products with a high sugar content. Be
especially careful when using plastic film and
aluminium foil or packaging:
if placed on surfaces that are still hot, they may
cause serious damage to the hob.
Always make sure that pan handles are turned
towards the centre of the hob in order to avoid
accidental burns.
When unplugging the appliance, always pull the
plug from the mains socket; do not pull on the
cable.
Never perform any cleaning or maintenance work
without having disconnected the appliance from
the electricity mains.
Do not place metal objects (knives, spoons, pan lids,
etc.) on the hob as they may become hot.
For the attention of wearers of pacemakers or
other active implants:
The hob complies with all current standards on
electromagnetic interference.
Your induction hob is therefore perfectly in
keeping with legal requirements (89/336/CEE
directives). It is designed not to create
interference on any other electrical apparatus
being used on condition that the apparatus in
question also complies with this legislation.
Your induction hob generates short-range
magnetic fields.
To avoid any interference between your induction
hob and a pacemaker, the latter must be
designed to comply with relevant regulations.
In this respect, we can only guarantee our own
product conformity. Please consult the pacemaker
manufacturer or your doctor concerning its
conformity or any possible incompatibility.
GB
19
Page 20

Care and maintenance
GB
Switching the appliance off
Disconnect your appliance from the electricity
supply before carrying out any work on it.
Cleaning the appliance
Do not use abrasive or corrosive detergents (for
example, products in spray cans for cleaning
barbecues and ovens), stain removers, anti-rust
products, powder detergents or sponges with
abrasive surfaces: these may scratch the surface
beyond repair.
Never use steam cleaners or pressure cleaners on
the appliance.
It is usually sufficient simply to wash the hob
using a damp sponge and dry it with absorbent
kitchen roll.
If the hob is particularly dirty, rub it with a special
glass ceramic cleaning product, then rinse well
and dry thoroughly.
Food residue and dirt can be removed using a
special scraper. Do this as soon as possible, do
not wait for the hob to cool down in order to avoid
incrustations. For excellent results, use a special
stainless steel wool pad for vitroceramic glass
cleaning soaked in soapy water.
Stainless steel frame *
Stainless steel can be marked by hard water which
has been left on the surface for a long time, or by
cleaning products containing phosphorus.
After cleaning, it is advisable to rinse the surface
well and dry it thoroughly. If water is spilt on the
surface, dry it quickly and thoroughly.
Some hobs have an aluminium frame which is
similar to stainless steel. Do not use any cleaning or
degreasing products which are not suitable for use
with aluminium.
Disassembling the hob
If it is necessary to disassemble the hob:
1. Loosen the screws fixing the alignment springs on
each side.
2. Loosen the screws holding the fixing hooks in
each corner.
3. Take the hob out of its installation cavity.
Do not attempt to repair the appliance yourself. If
the appliance breaks down, contact a Service
Centre.
If any plastic or sugary substances are
accidentally melted on the hob, remove them
immediately with the scraper, while the surface is
still hot.
Once it is clean, the hob may be treated with a
special protective maintenance product: the
invisible film left by this product protects the
surface from drips during cooking. This
maintenance should be carried out while the
appliance is warm (not hot) or cold.
Always remember to rinse the appliance well with
clean water and dry it thoroughly: residues can
become encrusted during subsequent cooking
processes.
Only available on certain models.
*
20
Page 21

Mode demploi
TABLE DE CUISSON
ITIT
IT
ITIT
Italiano, 1 Français, 21
GBGB
GB
GBGB
English, 11
ES
Espanol, 41
FR
PTNL
Portuges, 51Nederlands, 31
DE
Deutsch, 61
KBT 6313 IT
KBT 6313 IT CL
Sommaire
FR
Installation, 22-24
Positionnement
Raccordement de la table
Mise au rebut
Description de lappareil, 25-26
Tableau de bord
Description des foyers
Mise en marche et utilisation, 27
Mise sous tension
Arrêt de fonctionnement de la table
Le booster
Les sécurités, 28
Détection de récipients
Récipients à utiliser
Signal sonore
Coupure de sécurité
Sécurité thermique
Précautions et conseils, 29
Conseils dutilisation de lappareil
Sécurité générale
Nettoyage et entretien, 30
Mise hors tension
Nettoyage de lappareil
Démontage de la table
Page 22

FR
Installation
! Conserver ce mode demploi pour pouvoir le consulter
à tout moment. En cas de vente, de cession ou de
déménagement, veiller à ce quil suive lappareil pour
informer le nouveau propriétaire sur son fonctionnement
et lui fournir les conseils correspondants.
! Lire attentivement les instructions : elles
contiennent des conseils importants sur linstallation,
lutilisation et la sécurité de lappareil.
5 mm
min. 20 mm
TIROIR
Positionnement
! Les emballages ne sont pas des jouets pour
enfants, il faut les mettre au rebut en respectant la
réglementation sur le tri sélectif des déchets (voir
Précautions et conseils).
! Linstallation doit être effectuée par un
professionnel du secteur conformément aux
instructions du fabricant. Une mauvaise installation
peut causer des dommages à des personnes, des
animaux ou des biens.
Encastrement
Pour garantir le bon fonctionnement de lappareil, il
faut que le meuble possède des caractéristiques
bien précises:
le matériau du plan dappui doit pouvoir résister à
une température denviron 100°C;
en cas dinstallation de la table de cuisson au-
dessus dun four, il faut que ce dernier soit
équipé dun dispositif de refroidissement par
ventilation forcée;
éviter dinstaller la table de cuisson au-dessus
dun lave-vaisselle : si cest le cas, prévoir une
séparation étanche entre les deux appareils;
selon la table de cuisson à installer (voir figures), la
découpe du meuble doit avoir les dimensions
suivantes:
590
574
min. 40 mm
min. 20 mm
5 mm
CHALEUR
TOURNANTE
min. 40 mm
Fixation
Il est impératif dassurer lencastrement de lappareil
sur un plan dappui parfaitement plat.
Les déformations provoquées par une mauvaise
fixation risquent daltérer les caractéristiques de la
table de cuisson ainsi que ses performances.
MONTAGE DES RESSORTS DE FOND
48
520
48
504
48
560 +/- 1
490 +/- 1
690
520
48
560 +/- 1
490 +/- 1
785
510
560 +/- 1
490 +/- 1
750 +/- 1
490+/- 1
Aération
Pour permettre une bonne aération et pour éviter
toute surchauffe des surfaces autour de lappareil, la
table de cuisson doit être positionnée:
à au moins 40 mm de distance du mur arrière et à
au moins 600 mm de distance de toute autre
surface verticale;
de manière à ce quil reste au moins 20 mm de
distance entre la découpe dencastrement et le
meuble en dessous.
AVANT DE LA TABLE
TABLE A L'ENVERS
PLAN DE
TRAVAIL
30
40
22
Page 23

Raccordement de la table
La sécurité électrique de cet appareil nest
assurée que si ce dernier est correctement
raccordé à linstallation de mise à la terre,
conformément aux normes sur la sécurité
électrique. Il est indispensable de vérifier que
cette condition fondamentale de sécurité soit bien
remplie. En cas de doute, il faut sadresser à une
personne qualifiée pour un contrôle minutieux de
linstallation électrique.
Le fabricant ne peut en aucun cas être considéré
responsable des dommages pouvant survenir si
linstallation de mise à la terre fait défaut.
Avant de connecter lappareil, vérifiez si les
caractéristiques techniques figurant sur la
plaquette correspondent bien aux caractéristiques
de linstallation électrique.
Vérifiez si la charge électrique de linstallation et
des prises de courant est apte à supporter la
puissance maximale de lappareil figurant sur la
plaquette. En cas de doute, adressez-vous à une
personne qualifiée.
Avant toute intervention, déconnectezAvant toute intervention, déconnectez
Avant toute intervention, déconnectez
Avant toute intervention, déconnectezAvant toute intervention, déconnectez
lappareil.lappareil.
lappareil.
lappareil.lappareil.
Vous devez raccorder votre table à linstallation par
lintermédiaire d
lappareil est raccordé en fixe, il faut prévoir un
interrupteur omnipolaireinterrupteur omnipolaire
interrupteur omnipolaire, accessible en cas de
interrupteur omnipolaireinterrupteur omnipolaire
necessité, avec une distance douverture entre les
contacts supérieure ou égale à 3 mm.
Valable seulement pour les modèles avec câble
d'alimentation
Certains modèles sont équipés d'un câble
d'alimentation monophasé, ils ne peuvent par
conséquent être raccordés qu'à un réseau
monophasé. Respectez la couleur des fils selon
schéma ci-joint.
Branchements
électriques
BLNBR
BLNBR
BR=BRUN,BL=BLEU
BR=BRUIN, BL=BLAUW
* Application du coefficient de simultanéité suivant norme CEI60335-2-6
un boîtier de connexion:un boîtier de connexion:
un boîtier de connexion: si
un boîtier de connexion:un boîtier de connexion:
Ten s io n
Fréquence
FR-BE-AT-DE-GR-ES-IL-
L
L
IT-NZ-PT-GP-CH-MA-LUIE-FI-SE-IS-GB-NL-DK
230V - 1+N~ 50Hz
CY-MT-AU-NZ-KW
240V - 1+N~ 50Hz
FR-BE-NO
230V - 2 ~ 50Hz
BR=BRAUN, BL=BLAU
BR=BROWN, BL=BLUE
Fusibles
Sections
25A *
2,5 mm²
Valable seulement pour les modèles dépourvus
de câble d'alimentation
Certains modèles ne sont pas équipés de câble
d'alimentation car ce dernier doit être dimensionné
en fonction du type de raccordement électrique
utilisé (voir tableau de connexion suivant). Pour
raccorder le câble, procédez comme suit:
1. Pour ouvrir le bornier,
faites pression à laide
dun tournevis sur les
languettes latérales du
couvercle : tirez et
ouvrez le couvercle (voir
figure).
2. DEVISSER LA VIS DU
SERRE-CABLE ET LE
RETIRER EN FAISANT
LEVIER A L'AIDE D'UN
TOURNEVIS (VOIR
FIGURE).
3. Retirer les vis des
contacts L-N-
puis
fixer les fils sous les
têtes de vis en
respectant les couleurs
Bleu (N) Marron (L)
Jaune-Vert (
).
pour effectuer le raccordement électrique désiré
(voir tableau), utilisez les pontets placés dans le
boîtier. Positionnez les fils du câble électrique
selon le tableau.
après avoir effectué les raccordements, serrez à
fond toutes les vis des bornes.
fixez le câble d'alimentation dans le serre-câble
correspondant et fermez le couvercle.
FR
23
Page 24

FR
! Si lon installe la table de cuisson au dessus dun
four encastré, le branchement électrique de la table
et celui du four doivent être faits séparément pour
des raisons de sécurité et pour simplifier les
opérations servant à extraire le four si besoin est.
Branchements électriques
12345
LN
12 34
L1 L2 N2N1
12345
L1 L2 N
12345
L1 L2 L3
12 34
L1 L2 N2N1
12345
LN
5
5
Tens i on
Fré quence
FR-AT- BE-DE-GP-E-
S-IE-IL-IS-IT-LU-
RE-FI-GB-GR-PT-S-
E-MA-NZ
230V-1+N~50 Hz
FR-BE- NO
230V-2~50/60 Hz
FR-BE- CH-DE- AT-E-
S-IL-IT-NZ-PT-
MA- LU-SE-IS-NL
400V2-N~50 Hz
FR-BE- NO
230V3~50 Hz
NL
230V2+2-N~50 Hz
CY- AU-NZ -KW- MT
240V-1+N~50 Hz
Fusibles
Sections
25 A*
2,5 mm²
25 A*
2,5 mm²
16 A*
1,5 mm²
16 A*
1,5 mm²
16 A*
1,5 mm²
25 A*
2,5 mm²
Mise au rebut
Mise au rebut du matériel demballage : se
conformer aux réglementations locales, les
emballages pourront ainsi être recyclés.
La directive européenne 2002/96/CE relative aux
déchets déquipements électriques et
électroniques (DEEE), prévoit que les
électroménagers ne peuvent pas être traités
comme des déchets solides urbains courants.
Les appareils usagés doivent faire lobjet dune
collecte séparée pour optimiser le taux de
récupération et de recyclage des matériaux qui
les composent et empêcher tout danger pour la
santé et pour lenvironnement. Le symbole de la
poubelle barrée est appliqué sur tous les produits
pour rappeler quils font lobjet dune collecte
sélective.
Pour de plus amples renseignements sur la mise
au rebut des électroménagers, les possesseurs
peuvent sadresser au service public prévu à cet
effet ou aux commerçants.
* Application du coefficient de simultanéité suivant norme CEI60335-2-6
Cet appareil est conforme aux
Directives Communautaires
suivantes :
- 73/23/CEE du 19/02/73 (Basse Tension) et
modifications successives
- 89/336/CEE du 03/05/89 (Compatibilité
électromagnétique) et modifications successives
- 93/68/CEE du 22/07/93 et modifications successis.
24
Page 25

Description
de lappareil
Tableau de bord
Voyant de fonctionnement
correspondant au FOYER PROGRAMMÉ *
Indicateur de la DURÉE
de PROGRAMMATION *
Indicateurs de PUISSANCE (de 0 à 9)
et de CHALEUR RÉSIDUELLE
Touches de SÉLECTION
DES FOYERS
15.
0
5.
0
FR
Touche de RÉGLAGE
DU MINUTEUR *
Indicateurs de PUISSANCE (de 0 à 9)
et de CHALEUR RÉSIDUELLE
Indicateur de
SÉLECTION DUN FOYER
Touches de SÉLECTION
DES FOYERS
Indicateurs de PUISSANCE (de 0 à 9)
et de CHALEUR RÉSIDUELLE
Touche de DIMINUTION
de la PUISSANCE
Touche MARCHE/ARRÊT
Booster
Touche BOOSTER *
Touche d'AUGMENTATION
de la PUISSANCE
Touche de verrouillage des
COMMANDES
Voyant de VERROUILLAGE
Nexiste que sur certains modèles
*
25
Page 26

FR
KBT 6313 IT
TABLES
KBT 6313 I T CL
Foyers Puissance (en W)
Arrière droit
IT 1800-B3000-B4000*
(ARD)
Arrière gauche
I 1200
(ARG)
Droit central I 1800
Puissance totale 7000
è
I
foyer induction simple
IT
B 4000*
Description des foyers
L'induction est le procédé de cuisson le plus rapide.
Contrairement aux foyers traditionnels, le foyer
induction ne chauffe pas le verre. C'est le récipient
qui est l'élément chauffant: la chaleur est produite
directement dans la casserole à condition que le
fond de celle-ci soit en matériau ferro-magnétique.
Chaque foyer est commandé:
par une touche de sélection dont la sérigraphie
est une reproduction du dessin du foyer,
et par un ensemble de réglage de puissance en
deux parties (+,-).
Tant que la température des foyers est supérieure à
60°C, même après l'arrêt, les indicateurs de chaleur
résiduelle restent allumés (l'indicateur des
puissances affiche H) pour prévenir le risque de
brûlure.
foyer induction triple
è
le foyer peut être booster à 4000 W
è
Le tableau ci-dessous vous indique comment utiliser
les foyers de manière optimale.
Puissance Type de plats
1 Beurre ou chocolat fondu
2
3
4 Préparation des crèmes et sauces
5
6 Cuisson des pâtes et du riz
7
8
9 Fritures
Réchauffage des liquides
Cuisson des pots au feu, blanquettes,
entremets
Saisie des viandes, poissons, omelettes
26
Page 27

Mise en marche et
utilisation
Lors du branchement de la table, un bip sonore
retentit au bout de quelques secondes: vous pouvez
maintenant allumer votre table.
Mise sous tension
La mise sous tension de la table s'effectue en
appuyant 3 secondes sur la touche
Commande des foyers
Chaque foyer est commandé par une touche de
commande et par un ensemble de réglage de
puissance (+ et -).
.
005.
Démarrer un foyer
Pour mettre en fonction un foyer, appuyez sur la
touche de commande correspondante et réglez la
"+""+"
"+" et
"+""+"
"+""+"
"+"
"+""+"
puissance désirée (de 0 à 9) avec les touches
"-""-"
et
"-".
"-""-"
Pour accéder directement à la puissance maximum
(9), appuyez brièvement sur la touche
Arrêt d'un foyer
Pour arrêter un foyer, sélectionnez-le à l'aide de la
touche de commande correspondante et:
appuyez en même temps sur les touches
""
": la puissance du foyer revient immédiatement à
""
zéro et s'éteint.
ou appuyez sur la touche
foyer descend progressivement jusqu'à
extinction.
"-""-"
"-" : la puissance du
"-""-"
"-""-"
"-".
"-""-"
Arrêt de fonctionnement de la table
Appuyez sur la touche , l'appareil est alors hors
fonction.
Si vous avez verrouillé les commandes de l'appareil
(voir paragraphe suivant), elles seront toujours
bloquées quand vous rallumerez votre table.
Déverrouillez les commandes pour utiliser les foyers.
Le booster
Pour accélérer la montée en température des foyers
(voir tableau des foyers page précédente), appuyez
sur la touche
PP
alors "
P". La fonction booster s'arrête
PP
automatiquement après 4 minutes.
Pendant le fonctionnement du booster, certains
foyers (voir tableau des foyers page précédente)
sont limités à une puissance maximum de 600 W.
Booster
. L'affichage de puissance indique
Verrouillage des commandes
Quand la table est en fonctionnement, il est possible
de verrouiller les commandes, afin qu'il n'y ait pas
modification de réglage par inadvertance (enfant,
nettoyage,...).
Il suffit d'appuyer sur la touche
côté de la touche s'allume et
sont verrouilléessont verrouillées
sont verrouillées.
sont verrouilléessont verrouillées
Pour modifier l'allure de chauffe ou arrêter la
cuisson, il faut déverrouiller les commandes:
appuyez sur la touche
commandes sont déverrouilléescommandes sont déverrouillées
commandes sont déverrouillées.
commandes sont déverrouilléescommandes sont déverrouillées
Pour accéder de nouveau au réglage d'un foyer,
sélectionnez-le avec la touche de commande
correspondante.
Programmation d'une durée de cuisson
Vous pouvez programmer tous les foyers
simultanément pour une durée maximale de 99 minutes.
Procédez ainsi:
sélectionnez le foyer à l'aide de la touche de
commande correspondante,
réglez la puissance désirée avec les touches
"-""-"
et
"-",
"-""-"
appuyez sur la touche de programmation
réglez le temps de cuisson désiré avec les
"+""+"
touches
validez la programmation en rappuyant sur la
touche
Le décompte du temps commence aussitôt.
La fin de cuisson programmée est signalée par un
signal sonore (durant 1 minute) et le foyer s'éteint.
"-"-
"-
"-"-
Fonctionnement de la plaque à induction Triple
Le fonctionnement de cette plaque dépend du
diamètre des casseroles utilisées pour la cuisson :
si le diamètre de la casserole se situe en dedans
de la première zone délimitée, on peut nallumer
que la plaque interne. Dans ce cas le booster ne
fonctionne pas et la puissance débitée est de
1800W;
si le diamètre de la casserole se situe entre la
première et la deuxième zone délimitée, la
puissance maximale débitée est de 2400W
(jusquà 3000W si le Booster est activé);
si le diamètre de la casserole dépasse la
deuxième zone et est compris entre la deuxième
et la troisième, la plaque débite une puissance
maximale pouvant atteindre 3000W (jusquà
4000W si le Booster est activé).
La fonction Booster ne peut par conséquent être
activée que dans les deux derniers cas, avec une
absorption dénergie comprise entre 3kW et 4kW
selon le diamètre de la casserole, cest-à-dire quand
le diamètre de la casserole dépasse le diamètre de
la première zone. En effet, la fonction booster nest
pas activée en cas dutilisation de la zone de
cuisson centrale plus petite (1800W).
"+" et
"+""+"
.
"-""-"
"-",
"-""-"
, le voyant s'éteint,
, le voyant situé à
les commandesles commandes
les commandes
les commandesles commandes
lesles
les
lesles
"+""+"
"+"
"+""+"
,
FR
27
Page 28

Les sécurités
FR
Détection de récipients
Chaque foyer à induction est équipé dune détection
de casserole. Le foyer ne délivre de puissance
quen présence dune casserole adaptée au foyer.
La consigne clignotante peut signaler :
une casserole en matériau incompatible, non
ferro-magnétique,
une casserole de diamètre trop petit,
le retrait dune casserole.
Choisissez toujours une
diamètre des foyers.diamètre des foyers.
diamètre des foyers.
diamètre des foyers.diamètre des foyers.
Attention: foyers ovales
Les foyers ovales ne peuvent être boostés que si
l'ovale complet est actif.
Ne pas mettre deux petites casseroles sur les
foyers ovales.
casserole adaptée aucasserole adaptée au
casserole adaptée au
casserole adaptée aucasserole adaptée au
Récipients à utiliser
Dans la mesure où linduction nexiste que lorsque le
champ magnétique est fermé par un récipient
métallique, léchauffement de la casserole cesse
instantanément lorsquelle est ôtée du foyer.
Utilisez un récipient dont le
compatible avec linduction (matériau ferro-compatible avec linduction (matériau ferro-
compatible avec linduction (matériau ferro-
compatible avec linduction (matériau ferro-compatible avec linduction (matériau ferromagnétique).magnétique).
magnétique).
magnétique).magnétique).
Les casseroles en fonte, en acier émaillé ouLes casseroles en fonte, en acier émaillé ou
Les casseroles en fonte, en acier émaillé ou
Les casseroles en fonte, en acier émaillé ouLes casseroles en fonte, en acier émaillé ou
en acier inox spécial induction conviennent.en acier inox spécial induction conviennent.
en acier inox spécial induction conviennent.
en acier inox spécial induction conviennent.en acier inox spécial induction conviennent.
Les casseroles en cuivre, en céramique, en terre, en
verre, en faïence, en aluminium, en inox non
magnétique sont incompatibles avec linduction.
Vous pouvez faire un test avec un aimant. Vous pouvez faire un test avec un aimant.
Vous pouvez faire un test avec un aimant. Si
Vous pouvez faire un test avec un aimant. Vous pouvez faire un test avec un aimant.
laimant est attiré par le fond de la casserole et reste
«collé», la casserole est en matériau ferromagnétiqueet peut donc être utilisée sur la table
induction.
Nous vous recommandons des casseroles
épais et très plat épais et très plat
épais et très plat et déliminer tous les récipients
épais et très plat épais et très plat
à fond rugueux susceptibles de provoquer des
rayures sur le verre.
matériau estmatériau est
matériau est
matériau estmatériau est
à fondà fond
à fond
à fondà fond
Signal sonore
Des anomalies telle que :
un objet (casserole, couvert,...) placé plus de 10
secondes sur la zone de commande,
un débordement sur la zone de commande,
une pression longue sur une touche,...
peuvent provoquer l'émission d'un signal sonore et
l'extinction de la table.
Enlevez la cause du dysfonctionnement pour arrêter
le signal sonore.
Pour utiliser votre table, remettez-la sous tension et
resélectionnez le ou les foyers à utiliser. Réglez la
puissance désirée.
Coupure de sécurité
Votre appareil est doté d'une coupure de sécurité
automatique qui agit après un certain temps (voir
tableau) en fonction de la puissance choisie.
Pendant la coupure de sécurité, l'affichage de la
puissance indique "0".
exemple: le foyer arrière droit est réglé sur 5 et le
foyer avant gauche est réglé sur 2. Le foyer arrière
droit sera arrêté après 4 heures de fonctionnement
et le foyer avant gauche sera arrêté après 6 heures
de fonctionnement.
Pour déverrouiller les commandes, éteignez la table
en appuyant sur la touche
Niveau de
puissance
1-2 10 ore
35 ore
44 ore
5-6 3 ore
7-8 2 ore
.
Durée limite de
fonctionnement
*
28
A UTILISER
Fonte
Acier émaillé
Inox spécial
NE CONVIENT PAS
Cuivre
Aluminium, Verre, Terre,
Céramique, Inox non magnétique
91 ore
Sécurité thermique
En cas de surchauffe des composants électroniques
de votre appareil, la table s'éteint automatiquement
et l'affichage des puissances indique "a".
Cet affichage disparaît dès que la température est
redescendue à un niveau acceptable.
Page 29

Précautions et conseils
Cet appareil a été conçu et fabriqué conformément
aux normes internationales de sécurité. Ces conseils
sont fournis pour des raisons de sécurité et doivent
être lus attentivement.
Conseils dutilisation de lappareil
Pour obtenir de meilleures performances de la table de
cuisson :
utiliser des casseroles à fond plat pour quelles
adhèrent parfaitement à la zone de chauffe ;
utiliser toujours des casseroles dont le diamètre
couvre complètement la zone de chauffe de façon à
ce que toute la chaleur disponible puisse être
utilisée ;
veiller à ce que la base des casseroles soit toujours
sèche et propre, pour garantir un bon contact et une
longue durée de vie des foyers mais aussi des
casseroles ;
éviter dutiliser des casseroles qui sont aussi
utilisées sur les brûleurs à gaz : la concentration de
chaleur des brûleurs à gaz peut déformer le fond de
la casserole qui perd son adhérence;
ne jamais laisser un foyer allumé sans casserole
car, dans ce cas, le niveau maximum de chaleur est
atteint très rapidement et les éléments chauffants
risquent de sendommager.
Sécurité générale
Cet appareil a été conçu pour un usage familial, de
type non professionnel.
Cet appareil ne doit pas être installé en extérieur,
même dans un endroit abrité, il est en effet très
dangereux de le laisser exposé à la pluie et aux
orages.
Ne pas toucher à lappareil si lon est pieds nus ou
si lon a les mains ou les pieds mouillés ou
humides.
Cet appareil qui sert à cuire des aliments ne doit
être utilisé que par des adultes conformément aux
instructions du mode demploi. Ne pas utiliser la
table comme plan de dépose ou comme planche à
découper.
Le plan vitrocéramique résiste aux chocs
mécaniques, il peut toutefois se fendre (ou même
se briser) sous leffet dun choc provoqué par un
objet pointu, tel quun ustensile par exemple. Dans
ce cas, débrancher immédiatement lappareil du
réseau électrique et sadresser à un centre
dassistance technique.
Si la surface de la table est fêlée, éteindre l'appareil
pour éviter tout risque d'électrocution.
Eviter que le cordon dalimentation dautres petits
électroménagers touche à des parties chaudes de
la table de cuisson.
Ne pas oublier que la température des foyers reste
assez élevée pendant trente minutes au moins
après leur extinction. La chaleur résiduelle est aussi
signalée par un voyant (voir Mise en marche et
Utilisation).
Garder à bonne distance de la table de cuisson tout
objet qui pourrait fondre, des objets en plastique ou
en aluminium par exemple, ou des produits à haute
teneur en sucre. Faire très attention aux emballages,
au film plastique et au papier aluminium : au contact
des surfaces encore chaudes ou tièdes, ils risquent
dendommager gravement la table.
Sassurer que les manches des casseroles soient
toujours tournés vers lintérieur de la table de
cuisson pour éviter tout risque daccident.
Ne pas tirer sur le câble pour débrancher la fiche de
la prise de courant.
Neffectuer aucune opération de nettoyage ou
dentretien sans avoir auparavant débranché la fiche
de la prise de courant.
Ne pas poser d'objets métalliques (couteaux,
cuillères, couvercles, etc.) sur la table, ils risquent
de devenir brûlants.
Avis à toute personne portant un pacemakerAvis à toute personne portant un pacemaker
Avis à toute personne portant un pacemaker
Avis à toute personne portant un pacemakerAvis à toute personne portant un pacemaker
ou autre implant médical actif :ou autre implant médical actif :
ou autre implant médical actif :
ou autre implant médical actif :ou autre implant médical actif :
La table est conforme à toutes les réglementations
en matière d'interférences électromagnétiques.
Par conséquent, ce produit est parfaitement
conforme à toutes les dispositions légales
(directives 89/336/CEE). Il a été conçu de manière à
ne pas provoquer d'interférences à d'autres
appareils électriques utilisés, pourvu que ceux-ci
soient également conformes aux réglementations
susmentionnées.
La table induction génère des champs
électromagnétiques à courte portée.
Afin d'éviter tout risque d'interférence entre la table
de cuisson et le pacemaker, ce dernier devra être
fabriqué conformément à la réglementation en
vigueur.
A ce propos, nous ne pouvons assurer que la
conformité de notre produit. Pour tous
renseignements quant à la conformité ou à des
problèmes éventuels d'incompatibilité, nous vous
prions de bien vouloir vous adresser à votre
médecin traitant ou au fabricant du pacemaker.
FR
29
Page 30

Nettoyage et entretien
FR
Mise hors tension
Avant toute opération de nettoyage ou dentretien
couper lalimentation électrique de lappareil.
Nettoyage de lappareil
Ne jamais utiliser de détergents abrasifs ou
corrosifs, tels que des bombes aérosols pour
grilloirs et fours, des détacheurs et dérouilleurs, des
poudres à récurer ou des éponges à surface
abrasive : ils risquent de rayer irrémédiablement la
surface.
Ne jamais nettoyer lappareil avec des nettoyeurs
vapeur ou haute pression.
Pour un entretien courant, passer une éponge
humide sur la surface de la table et essuyer avec
du papier essuie-tout.
Si la table est sale, frotter avec un produit
dentretien adapté au verre vitrocéramique, rincer
et essuyer.
Une fois que la table est propre, elle peut être
traitée avec un produit dentretien et de protection
spécial : celui-ci forme un film invisible qui
protège la surface en cas de débordement
accidentel. Opérer de préférence quand lappareil
est tiède ou froid.
Prendre soin de toujours bien rincer à leau claire
et dessuyer la table : les résidus des produits
pourraient en effet sincruster lors dune prochaine
cuisson.
Cadre en acier inox *
Un contact prolongé avec une eau très calcaire ou
lutilisation de nettoyants contenant du phosphore
peuvent tacher lacier inox.
Nous conseillons de rincer abondamment et de bien
essuyer après entretien. Il est préférable déliminer
rapidement tout débordement deau sil y a lieu.
Certaines tables ont un cadre en aluminium
ressemblant à de lacier inox. Ne pas utiliser de
produits dentretien et de dégraissage ne convenant
pas pour laluminium.
Les salissures en relief senlèvent à laide dun
grattoir. Opérez dès que possible, ne pas
attendre que lappareil soit refroidi afin déviter
une incrustation des salissures. Lutilisation dune
éponge en fil dacier inoxydable - spécifique pour
verre vitrocéramique - imprégnée deau
savonneuse donne dexcellents résultats.
Tout objet, matière plastique ou sucre ayant
accidentellement fondu sur la table de cuisson
doit être aussitôt enlevé à laide du grattoir tant
que la surface est encore chaude.
Démontage de la table
Si le démontage de la table de cuisson savère
nécessaire :
1. enlever les vis qui fixent les ressorts de centrage
sur les côtés;
2. desserrer les vis des crochets de fixation dans
les coins;
3. dégager la table de cuisson du meuble.
Il est vivement déconseillé dessayer daccéder
aux mécanismes internes pour tenter une réparation.
En cas de panne, contacter le service dassistance
technique.
Nexiste que sur certains modèles
*
30
Page 31

Gebruiksaanwijzing
KOOKPLAAT
ITIT
IT
ITIT
Italiano, 1 Français, 21
GBGB
GB
GBGB
English, 11
ES
Espanol, 41
FR
PTNL
Portuges, 51Nederlands, 31
DE
Deutsch, 61
KBT 6313 IT
KBT 6313 IT CL
Inhoud
NL
Installatie, 32-34
Plaatsing
Aansluiting van de kookplaat
Afvalverwijdering
Beschrijving van het apparaat, 35-36
Bedieningspaneel
Beschrijving van de kookzones
Starten en gebruik, 37
Inschakelen kookplaat
Het uitschakelen van de kookplaat
De booster
Veiligheidssystemen, 38
Inschakelen kookplaat
Gebruik van de pannen
Geluidssignaal
Veiligheidsschakelaar
Thermische protectie
Voorzorgsmaatregelen en advies, 39
Praktische tips voor het gebruik van het apparaat
Algemene veiligheid
Onderhoud en verzorging, 40
De elektrische stroom afsluiten
Reinigen van het apparaat
De kookplaat verwijderen
Page 32

Installatie
T
NL
! Bewaar dit boekje zorgvuldig voor eventuele
raadpleging in de toekomst. Wanneer u het product
weggeeft, verkoopt, of wanneer u verhuist, dient u dit
boekje bij het apparaat te bewaren zodat alle nodige
informatie voorhanden blijft.
! Lees de gebruiksaanwijzing zorgvuldig door: er staat
belangrijke informatie in over installatie, gebruik en
veiligheid.
Plaatsing
! Het verpakkingsmateriaal is niet bestemd voor
kinderen en dient daarom te worden verwijderd
volgens de geldende normen voor gescheiden
afvalverzameling (zie Voorzorgsmaatregelen en
advies).
! De installatie moet worden uitgevoerd door een
bevoegde installateur en volgens de instructies van de
fabrikant. Een verkeerde installatie kan schade
berokkenen aan personen, dieren of dingen.
Inbouw
Voor een goede werking van het apparaat moet het
keukenmeubel de juiste kenmerken hebben:
het keukenblad moet uit hittebestendig materiaal
zijn vervaardigd en een temperatuur van circa 100°C
kunnen verdragen;
als de kookplaat boven een oven wordt
geïnstalleerd moet deze zijn voorzien van een
geforceerd geventileerd afkoelingssysteem;
installeer de kookplaat nooit boven een vaatwasser:
indien u dit toch doet, breng dan een waterdichte
afscheiding aan tussen de twee apparaten;
naar gelang van het type kookplaat dat u wenst te
installeren (zie afbeeldingen), moet het
keukenmeubel de volgende afmetingen hebben:
48
560 +/- 1
690
590
490 +/- 1
520
48
560 +/- 1
574
504
490 +/- 1
785
op zodanige wijze dat er een minimum afstand
overblijft van 20 mm tussen het inbouwmeubel en
het onderstaande meubel.
min. 20 mm
5 mm
LADE
min. 40 mm
min. 20 mm
5 mm
HETELUCHTOVEN
min. 40 mm
Bevestigen
Het apparaat moet op een absoluut horizontaal
oppervlak worden geïnstalleerd.
Eventuele door onjuiste installatie veroorzaakte
vervormingen kunnen de eigenschappen en de
prestaties van de kookplaat aantasten.
MONTEREN VAN DE KLEMMEN AAN DE ONDERKANT
VOORKANT VAN DE KOOKPLAA
KOOKPLAAT
30
40
48
520
560 +/- 1
490 +/- 1
48
750 +/- 1
Ventilatie
Om een juiste ventilatie te bereiken en een
oververhitting van de oppervlakken rondom het
apparaat te voorkomen, moet de kookplaat
geïnstalleerd worden op:
op een minimum afstand van 40 mm van de
achterwand of op 600 mm van elk ander verticaal
oppervlak;
32
510
490+/- 1
KOOKPLAAT OMGEKEERD
Page 33

Aansluiting van de kookplaat
De elektrische veiligheid van dit apparaat is
slechts dan verzekerd als het op de juiste wijze is
geaard zoals voorgeschreven door de geldende
normen voor elektrische veiligheid. Het is
belangrijk zich hiervan te verzekeren en, in geval
van twijfel, een controle te laten uitvoeren door
een bevoegde elektricien.
De fabrikant kan niet aansprakelijk worden
gesteld voor schade die veroorzaakt is door
nalatigheid betreffende het aarden van de
installatie.
Voordat u het apparaat gaat aansluiten moet u
zich ervan verzekeren dat de technische
gegevens op het typeplaatje corresponderen met
de kenmerken van uw elektrische net.
Controleer dat het electrische vermogen van het
net en van de stopcontacten voldoende is voor
het maximum vermogen van het apparaat zoals
aangegeven op het typeplaatje. In geval van
twijfel moet u zich wenden tot een bevoegde
installateur.
Voordat u enige ingreep gaat uitvoeren moet de
stroom van het apparaat worden afgesloten.
De aansluiting van de kookplaat aan het net moet
worden uitgevoerd door middel van een
contactdoos: bij rechtstreekse aansluiting van het
apparaat aan het net moet een bereikbare
veelpolige schakelaarveelpolige schakelaar
veelpolige schakelaar worden aangebracht, met
veelpolige schakelaarveelpolige schakelaar
een afstand tussen de contactpunten van minstens
3 mm;
Alleen geldig voor de modellen met
voedingskabel
Deze kookplaat is voorzien van een eenfase-kabel
en mag dus alleen worden aangesloten aan een
eenfase-net. Respecteer de kleuren van de draden
zoals aangegeven in bijgaand schema.
Branchements
électriques
FR-BE-AT-DE-GR-ES-IL-
L
IT-NZ-PT-GP-CH-MA-LUIE-FI-SE-IS-GB-NL-DK
BLNBR
BLNBR
BR=BRUN,BL=BLEU
BR=BRUIN, BL=BLAUW
* Application du coefficient de simultanéité suivant norme CEI60335-2-6
230V - 1+N~ 50Hz
CY-MT-AU-NZ-KW
240V - 1+N~ 50Hz
L
FR-BE-NO
230V - 2 ~ 50Hz
BR=BRAUN, BL=BLAU
BR=BROWN, BL=BLUE
Ten s io n
Fréquence
Fusibles
Sections
25A *
2,5 mm²
Alleen geldig voor de modellen zonder
voedingskabel
Sommige modellen zijn niet voorzien van een
voedingskabel aangezien de kabel moet worden
aangepast aan het soort elektrische aansluiting dat
u toepast (zie het hiervolgende schema voor de
aansluitingen). Voor het aanbrengen van de
voedingskabel moet u als volgt te werk gaan:
1. Licht de lipjes aan de
zijkant van het deksel
van het klemmenbord
op met een
schroevendraaier: trek
het deksel van het
klemmenbord open (zie
afb.).
2. Draai de schroef van
de kabelklem los en
verwijder hem met
behulp van een
schroevendraaier (zie
afbeelding).
3. Verwijder de
schroeven van de
contacten L-N-
en
bevestig de draden
onder de koppen van
de schroeven met
inachtneming van de
kleuren: Blauw (N) Bruin
(L) Geel-Groen (
).
voor het uitvoeren van de gewenste elektrische
aansluiting (zie tabel) gebruikt u de draadbruggen
die zich in de doos bevinden. Plaats de draden
van de voedingskabel zoals aangegeven in de
tabel.
als de aansluitingen zijn uitgevoerd schroeft u alle
schroefjes van het kroonsteentje stevig aan.
zet de kabel vast in de kabelklem en sluit de
deksel
NL
33
Page 34

NL
! In het geval dat de kookplaat boven een
inbouwoven wordt geïnstalleerd moet de elektrische
aansluiting van de kookplaat en die van de oven
apart worden uitgevoerd, zowel voor elektrische
veiligheidsredenen als voor het vergemakkelijken
van eventueel naar voren trekken van de oven.
Elektrische aansluitingen
12345
LN
12345
L1 L2
12345
L1 L2 N
12345
L1 L2 L3
12 34
L1 L2 N2N1
12345
LN
* Toepassing van de simultaneïteitsfactor conform aan de normen
5
CEI 60335-2-6
Spanning
Frequentie
FR-AT-BE-DE-GP--
ES-IE- IL-IS-IT-L U-
RE-FI-GB-G R-PT- -
SE-MA-NZ
230V-1+ N~50 Hz
FR-BE-NO
230V-2~ 50/60 Hz
FR-BE-CH-DE-AT--
ES-IL-IT-NZ-PT-
MA- L U-SE-IS-NL
400V2-N~ 50 Hz
FR-BE-NO
230V3~5 0 Hz
NL
230V2+2 -N~50 Hz
CY-AU-NZ-KW-MT
240V-1+ N~50 Hz
Zekeringen
Doorsnede
25 A*
2,5 mm²
25 A*
2,5 mm²
16 A*
1,5 mm²
16 A*
1,5 mm²
16 A*
1,5 mm²
25 A*
2,5 mm²
Afvalverwijdering
Het wegdoen van het verpakkingsmateriaal: houdt
u aan de plaatselijke normen zodat het materiaal
hergebruikt kan worden.
De Europese richtlijn 2002/96/EG, betreffende
afgedankte elektrische en elektronische
apparatuur (AEEA), voorziet dat huishoudelijke
apparatuur niet met het normale afval mag worden
meegegeven. De verwijderde apparaten moeten
apart worden opgehaald om het terugwinnen en
recyclen van de materialen waaruit ze bestaan te
optimaliseren en te voorkomen dat er eventuele
schade voortvloeit voor de gezondheid en het
milieu. Het symbool van de afvalemmer met een
kruis staat op alle producten om de consument
eraan te herinneren dat dit gescheiden afval is.
Om meer informatie te verkrijgen betreffende een
juiste verwijdering van huishoudapparaten kan de
consument zich richten tot de gemeentelijke
reinigingsdienst of de verkopers.
Deze apparatuur voldoet aan de
volgende EU voorschriften:
- 73/23/EEG van 19/02/73 (Laagspanning) en
daaropvolgende wijzigingen
- 89/336/EEG van 03/05/89 (Elektromagnetische
Compatibiliteit) en daaropvolgende wijzigingen
- 93/68/EEG van 22/07/93 en daaropvolgende
wijzigingen.
34
Page 35

Beschrijving
van het apparaat
Bedieningspaneel
Controlelampje "bedrijf" van de
GEPROGRAMMEERDE KOOKZONE *
Indicator van de
GEPROGRAMMEERDE TIJDSDUUR *
Indicators van de STROOMSTERKTE
(van 0 tot 9) en van de RESTWARMTE
Keuzetoets van de
KOOKZONES
15.
0
5.
0
NL
Toets voor het instellen
van de TIMER *
Indicators van de STROOMSTERKTE
(van 0 tot 9) en van de RESTWARMTE
Indicator van de KEUZE
van een KOOKZONE
Keuzetoets van de
KOOKZONES
Indicators van de STROOMSTERKTE
(van 0 tot 9) en van de RESTWARMTE
Toets voor het VERLAGEN
van de STROOMSTERKTE
AAN/UIT toets
Booster
Toets BOOSTER *
Toets voor het VERHOGEN
van de STROOMSTERKTE
Toets voor het BLOKKEREN
van de BEDIENING
Controlelampje van de
BLOKKERING
Slechts op enkele modellen aanwezig.
*
35
Page 36

NL
KOOKPLATEN KBT 6313 I T
KBT 6313 I T CL
Kookzones Vermogen (in W)
Rechts achter (RAx)
Links achter (LAx)
I T 1800-B3000-B4000*
I 1200
Plaat rechts midden I 1800
Totaal vermogen 7000
I è normale inductiekookzone
IT è Tripla inductie kookzone
B 4000* è de kookzone kan worden verhit tot aan
4000 W
Beschrijving van de kookzones
Het inductiesysteem is het snelste kooksysteem dat
er bestaat.
Verschillend van de traditionele technologie, wordt
met de inductiekookzone de glasplaat niet
verwarmd. De pan zelf, die op de kookplaat staat,
wordt een verwarmingselement: de warmte ontstaat
rechtstreeks binnenin de pan, die een bodem van
ferromagnetisch materiaal moet hebben.
Iedere kookzone wordt in werk gesteld:
door middel van een keuzetoets waarop de
afbeelding overeenkomt met de afbeelding op de
kookzone,
en door een stroomsterkteregelaar die uit een
dubbele toets bestaat (+,-):
Op de volgende tabel kunt u zien hoe u de
kookzones het beste kunt gebruiken.
Vermogen Bereiding
1 Boter of gesmolten chocola
2
3
4 Bereiden van vla en sausen
5 Gekookt vlees, blanquette, entremets
6 Pasta en rij st koken
7
8
9 Fritturen
Opwarmen van vloeist offen
Koken op hoog vuur: vl ees, vi s, omelet te
Zolang de temperatuur van de kookzones boven de
60 °C is, ook na het uitschakelen, blijven de
indicators van de restwarmte aan (de indicator van
de stroomsterkten vertoont H) ten einde het risico
van zich te branden te vermijden.
36
Page 37

Starten en gebruik
Als de kookplaat elektrisch wordt aangesloten hoort
u na enkele seconden een kort geluidssignaal:
Inschakelen kookplaat
U schakelt de kookplaat in door 3 seconden op
toets
Functionering kookzones
Iedere kookzone wordt in werking gesteld door
middel van een bedieningstoets en een
regelsysteem voor de stroomsterkte, bestaande uit
een dubbele toets (+,-).
te drukken.
005.
Het inschakelen van een kookzone
Voor het in werking stellen van een kookzone
drukt u op de betreffende toets en stelt u de
gewenste stroomsterkte in (van 0 tot 9) met de
toetsen "+" en "-".
Wilt u onmiddelijk de maximum stroomsterkte (9),
dan drukt u kort op de toets "-":
Het is mogelijk de verwarmingstijd van een
kookzone te versnellen door als volgt te werk te
gaan:
Het uitschakelen van een kookzone
Voor het uitschakelen van een kookzone kiest u de
zone door middel van de betreffende toets en:
druk tegelijkertijd op de knoppen
stroomsterkte gaat onmiddelijk terug op 0 en de
lichtkolom gaat uit.
of druk op de toets
kookzone gaat langzamerhand omlaag totdat hij
uit is.
"-""-"
"-" : de stroomsterkte van de
"-""-"
"+""+"
"+" en
"+""+"
"-""-"
"-": de
"-""-"
Het uitschakelen van de kookplaat
Druk op de toets ; het apparaat wordt elektrisch
uitgeschakeld. Als de bediening van het apparaat is
geblokkeerd (zie volgende paragraaf), blijft deze
geblokkeerd ook nadat de kookplaat opnieuw is
ingeschakeld. Voor gebruik van de kookzones moet
de bediening worden gedeblokkeerd.
De booster
Voor het versnellen van de verwarmingstijden van de
kookzones (zie de tabel van de kookzones op de
vorige bladzijde), drukt u op toets
Op de display van de stroomsterkte verschijnt "
De Boosterfunctie wordt automatisch onderbroken
na 4 minuten. In de periode van het activeren van de
booster zijn enkele kookzones (zie de tabel van de
kookzones op de vorige bladzijde) gelimiteerd tot
een maximum stroomsterkte van 600 W.
Booster
.
PP
P".
PP
Blokkering van het bedieningspaneel
Als de kookplaat in werking is kunt u het
bedieningspaneel blokkeren om ongewenste
veranderingen te vermijden (kinderen, schoonmaken
enz.).
U hoeft slechts op de toets
controlelampje dat zich naast de toets bevindt gaat
aan en
geblokkeerd.geblokkeerd.
geblokkeerd.
geblokkeerd.geblokkeerd.
Voor het veranderen van de stroomsterkte of het
onderbreken van het koken moeten de
bedieningstoetsen worden gedeblokkeerd:
controlelampje gaat uit en
worden gedeblokkeerd.worden gedeblokkeerd.
worden gedeblokkeerd.
worden gedeblokkeerd.worden gedeblokkeerd.
Voor toegang tot het regelen van een kookzone kiest
u deze door middel van de corresponderende
bedieningstoets.
Programmering bereidingstijd
Het is mogelijk tegelijkertijd alle kookzones te
programmeren voor een maximum van 99 minuten.
Ga als volgt te werk:
kies de kookzone door middel van de
stel de gewenste stroomsterkte in met de toetsen
druk op de programmeerknop
stel de gewenste bereidingstijd in met de toetsen
bevestig de programmering door nogmaals op de
Het aftellen van de bereidingstijd begint onmiddelijk.
Het einde van de geprogrammeerde bereidingstijd
wordt aangegeven met een geluidssignaal (voor 1
minuut) en de kookzone gaat uit.
Het functioneren van de Tripla inductieplaat
Het functioneren van deze plaat hangt hoofdzakelijk af
van de diameter van de pannen die u erop gebruikt:
als de diameter van de pan past op de eerste
als de diameter van de pan tussen de eerste en
als de diameter van de pan over de tweede zone
De functie van de Booster wordt dus alleen
geactiveerd in de laatste twee gevallen, met een
energie-opname van tussen de 3kW en 4kW, naar
gelang de diameter van de pan, dus als de afmeting
van de pan groter is dan de eerste zone. De functie
van de Booster is dus niet actief als alleen de centrale,
kleinste, kookzone wordt gebruikt (1800W).
de bedieningstoetsen wordende bedieningstoetsen worden
de bedieningstoetsen worden
de bedieningstoetsen wordende bedieningstoetsen worden
corrsponderende bedieningstoets;
"+" en "-";
"+" en "-";
toets
omlijnde zone, kunt u de enkele interne plaat
inschakelen. In dit geval functioneert de booster
niet en is de stroomsterkte 1800W;
de tweede omlijnde zone valt, dan is de
maximum stroomsterkte 2400W (tot aan 3000W
met de Booster actief);
heen valt en tussen de tweede en de derde in zit,
dan is de stroomsterkte max. 3000W (tot aan
4000W met de Booster actief).
te drukken.
te drukken; het
; het
de bedieningstoetsende bedieningstoetsen
de bedieningstoetsen
de bedieningstoetsende bedieningstoetsen
;
NL
37
Page 38

Veiligheidssystemen
NL
Het waarnemen van de pannen
Ledere inductie-zone is voorzien van een systeem
dat de pan waarneemt.. De zone straalt alleen
warmte uit als er een pan van de juiste afmetingen
op staat.
Het knipperend controlelampje kan betekenen:
een verkeerde pan (niet van ferromagnetisch
materiaal),
een pan van onvoldoende diameter,
het optillen van een pan.
Kies altijd een
op die van de kookzone.op die van de kookzone.
op die van de kookzone.
op die van de kookzone.op die van de kookzone.
Belangrijk: ovalen kookzones
De ovalen kookzones kunnen alleen extra stroom
krijgen als het hele ovaal geactiveerd is.
Plaats niet twee kleine pannen op de ovalen
kookzone.
pan met een diameter die pastpan met een diameter die past
pan met een diameter die past
pan met een diameter die pastpan met een diameter die past
Gebruik van de pannen
Aangezien de inductie alleen gaat functioneren op
het moment dat een metalen pan op de kookplaat
wordt geplaatst en het magnetische veld afsluit,
houdt het verwarmen van de pan op zodra deze van
de kookzone wordt verwijderd.
Gebruik een pan die gemaakt is van
geschikt is voor het grondbeginsel van degeschikt is voor het grondbeginsel van de
geschikt is voor het grondbeginsel van de
geschikt is voor het grondbeginsel van degeschikt is voor het grondbeginsel van de
inductie (ferromagnetisch materiaal).inductie (ferromagnetisch materiaal).
inductie (ferromagnetisch materiaal).
inductie (ferromagnetisch materiaal).inductie (ferromagnetisch materiaal).
Wij raden aan pannen te gebruiken vanWij raden aan pannen te gebruiken van
Wij raden aan pannen te gebruiken van
Wij raden aan pannen te gebruiken vanWij raden aan pannen te gebruiken van
gietijzer, geëmailleerd staal of speciaalgietijzer, geëmailleerd staal of speciaal
gietijzer, geëmailleerd staal of speciaal
gietijzer, geëmailleerd staal of speciaalgietijzer, geëmailleerd staal of speciaal
roestvrij staal voor inductie.roestvrij staal voor inductie.
roestvrij staal voor inductie.
roestvrij staal voor inductie.roestvrij staal voor inductie.
Koperen pannen, terracotta, glazen potten,
aardewerk, aluminium of roestvrij staal dat niet
magnetisch is, zijn ongeschikt voor een
inductieplaat.
U kunt zelf testen met een magneet. U kunt zelf testen met een magneet.
U kunt zelf testen met een magneet. Als deze
U kunt zelf testen met een magneet. U kunt zelf testen met een magneet.
door de bodem van de pan wordt aangetrokken en
blijft 'plakken', betekent het dat de pan van
ferromagnetisch materiaal is en dus kan worden
gebruikt op de inductieplaat.
Wij raden aan pannen te gebruiken
dikke bodemdikke bodem
dikke bodem en pannen te vermijden die een
dikke bodemdikke bodem
onregelmatige bodem hebben, die het glas zou
kunnen krassen.
materiaal datmateriaal dat
materiaal dat
materiaal datmateriaal dat
met een plattemet een platte
met een platte
met een plattemet een platte
Geluidssignaal
Enkele storingen, zoals:
een voorwerp (pan, lepel enz.) dat voor meer dan
10 seconden op het bedieningspaneel ligt,
iets dat is overgelopen op deze zone,
een lange druk op een toets enz.. kunnen een
geluidssignaal en het uitschakelen van de
kookplaat veroorzaken.
Verwijder de oorzaak van de storing en het
geluidssignaal houdt op.
Als u de kookplaat weer wilt gebruiken schakelt u
hem weer in en kiest u opnieuw de gewenste
kookzone/zones. Stel de stroomsterkte in die u
nodig heeft.
Veiligheidsschakelaar
Het apparaat is voorzien van een automatische
veiligheidsschakelaar die na een poosje optreedt
(zie tabel) naar gelang de gekozen stroomsterkte.
Gedurende deze veiligheidstussenkomst vertoont
de display van de stroomsterkte "0".
b.v.: de kookzone rechts-achter is op 5 ingesteld en
de kookzone links-voor is op 2 ingesteld. De zone
rechts-achter gaat na 4 uren uit, terwijl de zone linksvoor na 6 uren uitgaat.
Voor het deblokkeren van de bedieningstoetsen
schakelt u de kookplaat uit door op de toets
drukken.
Vermogens-niveau Maximale werkingsduur
1-2 10 uur
35 uur
44 uur
5-6 3 uur
7-8 2 uur
91 uur
te
GESCHIKTE MATERIALEN
*
38
Gietijzer
Ge‘mailleerd staal
Speciaal roestvrij staal
ONGESCHIKTE MATERIALEN
Aluminium, Glas, Terracotta,
Aardewerk, Niet magnetisch roestvrij staal
Koper,
Thermische protectie
In het geval van oververhitting van de elektronische
componenten van het apparaat gaat de kookplaat
automatisch uit en op de display van de
stroomsterkte verschijnt "a".
Deze boodschap verdwijnt zodra de temperatuur
voldoende is gezakt.
Page 39

Voorzorgsmaatregelen
en advies
Dit apparaat is ontworpen en vervaardigd volgens
de geldende internationale veiligheidsvoorschriften.
Deze aanwijzingen zijn geschreven voor uw
veiligheid en u dient ze derhalve goed door te
nemen.
Praktische tips voor het gebruik van
het apparaat
Teneinde optimale resultaten te bereiken van het
kookvlak:
gebruik pannen met een platte bodem die perfect
aansluiten op het verwarmgedeelte;
gebruik pannen die groot genoeg zijn om de
kookplaat geheel te bedekken teneinde alle
beschikbare hitte te benutten;
houd de bodem van de pannen altijd schoon en
droog zodat ze goed aansluiten op het kookvlak.
Dit verlengt de levensduur van zowel de pannen
als het kookgedeelte;
vermijd dezelfde pannen te gebruiken die u ook
op een gasfornuis gebruikt: de
warmteconcentratie van gasbranders kan de
bodem van pannen vervormen, waardoor ze niet
goed meer aansluiten;
laat nooit een kookgedeelte aan staan zonder een
pan erop. De verhitting, die snel het maximum
niveau bereikt, zou de verwarmingselementen
kunnen beschadigen.
Aangeraden stroomsterktes voor verschillende
bereidingen:
Algemene veiligheidsmaatregelen
Dit apparaat is vervaardigd voor niet-professioneel
gebruik binnenshuis.
Het apparaat dient niet buitenshuis te worden
geplaatst, ook niet in overdekte toestand. Het is erg
gevaarlijk als het in aanraking komt met regen of
onweer.
Raak het apparaat niet blootsvoets aan of met natte
handen of voeten.
Het apparaat dient om gerechten te koken. Het mag
uitsluitend door volwassenen worden gebruikt en
alleen volgens de instructies die beschreven staan
in deze handleiding. Gebruik het kookvlak niet om
voorwerpen op te plaatsen en ook niet als snijplank.
Het glaskeramische kookvlak is bestand tegen
mechanische stoten. Het kan echter worden
beschadigd (of barsten) als het wordt geraakt door
een puntig object, bijvoorbeeld door gereedschap.
Als dit gebeurt moet u onmiddellijk het apparaat
afsluiten van de elektrische stroom en contact
opnemen met de Technische Dienst.
Als het oppervlak van de kookplaat gebarsten is
moet u het apparaat uitschakelen om te voorkomen
dat u een elektrische schok krijgt.
Voorkom dat elektrische snoeren van andere kleine
keukenapparaten op warme delen van de kookplaat
terechtkomen.
Vergeet niet dat de temperatuur in het kookgedeelte
aanzienlijk hoog blijft tot minstens 30 minuten nadat
u het uitschakelt. De resterende warmte wordt
aangeduid door een aanwijzer (zie Starten en gebruik).
Houd voorwerpen die kunnen smelten op afstand
van de kookplaat, zoals bv. plastic, aluminium of
suikerhoudende etenswaren. Let vooral op plastic of
aluminium verpakkingen en folie:
als u ze op het nog warme of lauwe kookvlak
neerlegt, kunt u zware schade aanrichten.
Richt de handvaten van de pannen altijd naar de
binnenzijde van de kookplaat zodat u er niet per
ongeluk tegenaan stoot.
Trek de stekker nooit uit het stopcontact door aan
het snoer te trekken, maar altijd door de stekker
beet te pakken.
Maak de oven niet schoon of voer geen onderhoud
uit als de stekker nog in het stopcontact zit.
Plaats geen metalen voorwerpen (messen, lepels,
deksels enz.) op de kookplaat aangezien zij heet
kunnen worden.
Mededeling voor dragers van een pacemaker of
een ander actief ingeplant medisch apparaat:
De kookplaat voldoet aan alle geldende normen
betreffende elektromagnetische storing.
Dit product is aldus in volkomen overeenstemming
met de voorschriften van de wet (richtlijn 89/336/
EEG). Het ontwerp is zodanig gepland dat het geen
storingen veroorzaakt bij andere elektrische
apparaten die worden gebruikt, mits ook dezen
voldoen aan bovengenoemde normen.
De inductieplaat creëert elektromagnetische velden
op korte afstand.
Teneinde ieder risico van storing tussen de
kookplaat en de pacemaker te vermijden moet deze
laatste ook voldoen aan de geldende normen.
Wat dat betreft kunnen wij slechts de conformiteit
van ons eigen product garanderen. Voor informatie
omtrent conformiteit of eventuele problemen
verzoeken wij u zich tot uw behandelende arts te
wenden of tot de fabrikant van de pacemaker.
NL
39
Page 40

Onderhoud en verzorging
NL
De elektrische stroom afsluiten
Sluit altijd eerst de stroom af voordat u tot enige
handeling overgaat.
Reinigen van het apparaat
Vermijd het gebruik van schuurmiddelen of
bijtende middelen, zoals sprays voor barbecues en
ovens, vlekkenmiddelen, roestverwijderende
producten, schoonmaakmiddelen in poedervorm of
schuursponzen: deze kunnen het oppervlak
onherstelbaar krassen.
Gebruik nooit stoom- of hogedrukreinigers voor het
reinigen van het apparaat.
Voor normaal onderhoud moet u de kookplaat met
een vochtige spons reinigen en afdrogen met
keukenpapier.
Als de plaat erg vuil is moet hij worden
schoongemaakt met een speciaal middel voor
keramiekplaten. Daarna moet u hem afspoelen en
afdrogen.
Voor het verwijderen van hardnekkig vuil kunt u
een hiervoor bestemd schrapertje gebruiken. Doe
dit zo snel mogelijk zonder te wachten tot het
apparaat koud is geworden, om het hard worden
van de resten te vermijden Uitstekende resultaten
kunnen ook worden bereikt met een speciaal
roestvrij staalwolsponsje voor keramiekplaten in
een sopje gedoopt.
Vergeet niet de kookplaat altijd met schoon water
af te spoelen en goed af te drogen: restjes
schoonmaakmiddel kunnen de volgende keer dat
u kookt aankoeken.
Roestvrijstalen rand *
Roestvrij staal kan vlekken gaan vertonen als gevolg
van kalkhoudend water dat er lang op blijft liggen of
als gevolg van gebruik van schoonmaakmiddelen
die fosfor bevatten.
Spoel en droog de kookplaat altijd goed af nadat u
hem heeft schoongemaakt. Droog gemorst water
altijd meteen goed af.
Enkele kookplaten hebben een lijst van aluminium
die lijkt op roestvrij staal. Gebruik voor het reinigen
en ontvetten geen producten die niet geschikt zijn
voor aluminium.
De kookplaat verwijderen
Als u de kookplaat moet verwijderen:
1. verwijder de schroeven die de
centreringsklemmen aan de zijkant vasthouden;
2. maak de schroeven van de bevestigingshaken op
de hoeken los;
3. haal de kookplaat uit het meubel.
U mag nooit aan het interne systeem sleutelen om
een reparatie proberen uit te voeren. Als er een
storing is moet u contact opnemen met de Service
Dienst.
Als er op de kookplaat onverhoopt voorwerpen of
plastic materiaal of suiker zouden smelten, moet
u ze onmiddellijk met het schrapertje verwijderen
zolang het oppervlak nog warm is.
Als de plaat is schoongemaakt, kan hij worden
behandeld met een speciaal product voor
onderhoud en bescherming: het onzichtbare
laagje dat dit product achterlaat beschermt de
plaat in het geval er iets overkookt. Dit soort
handelingen moeten worden uitgevoerd als de
plaat lauw of koud is.
Slechts op enkele modellen aanwezig.
*
40
Page 41

Manual de
ES
instrucciones
ITIT
IT
ITIT
Italiano, 1 Français, 21
DE
Deutsch, 61
KBT 6313 IT
KBT 6313 IT CL
GBGB
GB
GBGB
English, 11
ES
Espanol, 41
FR
PTNL
Portuges, 51Nederlands, 31
ENCIMERA
Sumario
ES
Instalación, 42-44
Colocación
Conexión de la encimera
Eliminación
Descripción del aparato, 45-46
Panel de control
Descripción de las zonas de cocción
Puesta en funcionamiento y uso, 47
Encendido de la encimera
Apagado de la encimera
El acelerador (booster)
Dispositivos de seguridad, 48
Detección de los recipientes
Uso de recipientes
Señal sonora
Interruptor de seguridad
Protección térmica
Precauciones y consejos, 49
Consejos prácticos para el uso del aparato
Seguridad general
Mantenimiento y cuidados, 50
Interrumpir la corriente eléctrica
Limpiar el aparato
Desmontar la encimera
Page 42

ES
Instalación
! Es importante conservar este manual para poder
consultarlo en todo momento. En caso de venta, de
cesión o de mudanza, verifique que permanezca
junto al aparato para informar al nuevo propietario
sobre su funcionamiento y sobre las advertencias
correspondientes.
! Lea atentamente las instrucciones: contienen
importante información sobre la instalación, el uso y
la seguridad.
5 mm
min. 20 mm
CAJÓN
Colocación
! Los embalajes no son juguetes para niños y se
deben eliminar según las normas para la recolección
de residuos (ver Precauciones y consejos).
! La instalación se debe realizar siguiendo estas
instrucciones y por personal profesionalmente
calificado. Una instalación incorrecta puede producir
daños a personas, animales o cosas.
Empotramiento
Para garantizar un buen funcionamiento del aparato es
necesario que el mueble tenga las características
adecuadas:
el plano de apoyo debe ser de material resistente al
calor, a una temperatura de aproximadamente 100ºC;
si se desea instalar la encimera sobre un horno, el
mismo debe poseer un sistema de enfriamiento
con ventilación forzada.
evite instalar la encimera sobre un lavavajillas,
pero si fuera necesario, interponga un elemento
de separación estanco entre los dos aparatos;
según el tipo de encimera que se desea instalar
(ver las figuras), el espacio disponible en el
mueble debe tener las siguientes dimensiones:
48
560 +/- 1
590
490 +/- 1
520
48
560 +/- 1
574
504
490 +/- 1
min. 40 mm
min. 20 mm
5 mm
HORNO
VENTILADO
min. 40 mm
Fijación
La instalación del aparato se debe realizar sobre
una superficie de apoyo perfectamente plana.
Las deformaciones que se podrían provocar por una
mala fijación, pueden alterar las características y las
prestaciones de la encimera.
COLOCACIÓN DE LAS PINZAS EN LA PARTE INFERIOR
PARTE DELANTERA
DE LA ENCIMERA
SUPERFICIE
DE TRABAJO
30
40
690
48
520
48
785
510
560 +/- 1
490 +/- 1
750 +/- 1
490+/- 1
Aireación
Para permitir una aireación adecuada y para evitar el
sobrecalentamiento de las superficies que rodean al
aparato, la encimera debe estar colocada:
A una distancia mínima de 40 mm de la pared
posterior y a 600 mm de cualquier otra superficie
vertical;
De modo que se mantenga una distancia mínima
de 20 mm entre el hueco para el empotramiento y
el mueble que se encuentra debajo.
42
ENCIMERA VOLCADA
Page 43

Conexión de la encimera
La seguridad eléctrica de este aparato se
garantiza sólo cuando el mismo resulte
correctamente conectado a una eficiente
instalación de conexión a tierra conforme con lo
previsto por las normas vigentes sobre seguridad
eléctrica. Verifique que siempre se respete este
fundamental requisito de seguridad y, en caso de
dudas, solicite un cuidadoso control de la
instalación por parte de personal
profesionalmente especializado.
El fabricante no puede ser considerado
responsable por los eventuales daños causados
por la falta de conexión a tierra de la instalación.
Antes de conectar el aparato, verifique que los
datos técnicos contenidos en la placa concuerden
con las características de la instalación eléctrica.
Compruebe que la capacidad eléctrica de la
instalación y la de las tomas de corriente resulten
adecuadas a la potencia máxima del aparato
indicada en la placa de características. En caso
de dudas, llame a personal profesionalmente
calificado.
Antes de cualquier intervención, desconecteAntes de cualquier intervención, desconecte
Antes de cualquier intervención, desconecte
Antes de cualquier intervención, desconecteAntes de cualquier intervención, desconecte
eléctricamente el aparato.eléctricamente el aparato.
eléctricamente el aparato.
eléctricamente el aparato.eléctricamente el aparato.
La conexión de la encimera a la instalación se debe
efectuar mediante una caja de empalmes: en el
caso de conexión directa del aparato a la red, es
necesario utilizar un
fácilmente accesible, con una distancia de apertura
de los contactos igual o superior a 3 mm.
Válido sólo para los modelos con cable de
alimentación
Conexiones eléctricas Tensión Frecuencia
L
BLNBR
L
BLNBR
BR=BRUN,BL=BLEU
BR=BRUIN, BL=BLAUW
* Aplicación del factor de simultaneidad en conformidad con la norma
interruptor omnipolar interruptor omnipolar
interruptor omnipolar,
interruptor omnipolar interruptor omnipolar
FR-BE-AT-DE-GR-ES-ILIT-NZ-PT-GP-CH-MA-LUIE-FI-SE-IS-GB-NL-DK
230V - 1+N~ 50Hz
CY-MT-AU-NZ-KW
240V - 1+N~ 50Hz
FR-BE-NO
230V - 2 ~ 50Hz
BR=BRAUN, BL=BLAU
BR=BROWN, BL=BLUE
CEI 60335-2-6.
Fusibles
Secciones
25A *
2,5 mm²
Válido sólo para los modelos sin cable de
alimentación
Algunos modelos no poseen cable de alimentación
debido a que el cable se dimensiona de acuerdo
con el tipo de conexión eléctrica utilizada (ver la
siguiente tabla de conexión). Para conectar el cable,
proceda del siguiente modo:
1. Abra el panel de
bornes haciendo
palanca con un
destornillador sobre las
lengüetas laterales de
la tapa: tire y ábralo
(ver la figura).
2. Desenrosque el
tornillo de la mordaza
de terminal de cable y
extráigalo haciendo
palanca con un
destornillador (ver la
figura).
3. Quite los tornillos de
los contactos L-N-
y
luego fije los cables
debajo de las cabezas
de los tornillos
respetando los colores
Azul (N), Marrón (L) y
Amarillo-Verde (
).
para realizar la conexión eléctrica deseada (ver la
tabla), utilice los conectores puente que se
encuentran dentro de la caja. Coloque los cables
según lo indicado en la tabla.
una vez realizadas las conexiones, ajuste a fondo
todos los tornillos de los bornes.
fije el cable de alimentación en el correspondiente
sujetacable y cierre la tapa.
ES
Algunos modelos poseen un cable de alimentación
monofásico, por lo tanto, se deben conectar sólo a
la red monofásica. Respete el color de los cables,
como se indica en el esquema adjunto.
43
Page 44

ES
! Cuando la encimera se instala sobre un horno
empotrado, la conexión eléctrica de la encimera y la
del horno se deben realizar por separado, ya sea
por razones de seguridad eléctrica, como para
facilitar las eventuales operaciones de extracción
del horno.
Conexiones eléctricas
12345
LN
12345
L1 L2
12345
L1 L2 N
12345
L1 L2 L3
12 34
L1 L2 N2N1
12345
LN
* Aplicación del factor de simultaneidad en conformidad con la
5
norma CEI 60335-2-6.
Ten sió n
Frecuencia
FR-AT-BE-DE-GP--
ES-IE-IL-IS-IT-LU-
RE-F I-GB -GR-PT--
SE-MA-NZ
230V-1+N~50 Hz
FR-BE-NO
230V-2~50/60 Hz
FR-B E-CH-DE -AT- -
ES-IL-IT-NZ-PT-
MA- LU-SE-IS-NL
400V2-N~50 Hz
FR-BE-NO
230V3~50 Hz
NL
230V 2+2-N~ 50 H z
CY-AU-NZ-KW-MT
240V-1+N~50 Hz
Fusibles
Secciones
25 A*
2,5 mm²
25 A*
2,5 mm²
16 A*
1,5 mm²
16 A*
1,5 mm²
16 A*
1,5 mm²
25 A*
2,5 mm²
Eliminación
Eliminación del material de embalaje: respete las
normas locales, de esta manera los embalajes
podrán ser reutilizados.
La norma europea 2002/96/CE sobre la
eliminación de aparatos eléctricos y electrónicos
(RAEE), establece que los electrodomésticos no
se deben eliminar de la misma manera que los
desechos sólidos urbanos. Los aparatos en
desuso se deben recoger separadamente para
optimizar la tasa de recuperación y reciclaje de
los materiales que los componen e impedir
potenciales daños para la salud y el medio
ambiente. El símbolo de la papelera tachada se
encuentra en todos los productos para recordar la
obligación de recolección separada.
Para obtener mayor información sobre la correcta
eliminación de electrodomésticos, los poseedores
de los mismos podrán dirigirse al servicio público
responsable o a los revendedores.
Este aparato es conforme con las
siguientes Normas Comunitarias:
- 73/23/CEE del 19/02/73 (Baja Tensión) y sucesivas
modificaciones
- 89/336/CEE del 03/05/89 (Compatibilidad
Electromagnética) y sucesivas modificaciones
- 93/68/CEE del 22/07/93 y sucesivas
modificaciones.
44
Page 45

Descripción
del aparato
Panel de control
Luz indicadora de FUNCIONAMIENTO
de la zona de COCCIÓN PROGRAMADA *
Indicador de la
DURACIÓN PROGRAMADA *
Indicadores de POTENCIA (de 0 a 9)
y de CALOR RESIDUAL
Botones de selección de las
ZONAS DE COCCIÓN
15.
0
5.
ES
Botón de regulación del
CONTADOR DE MINUTOS *
Indicadores de POTENCIA (de 0 a 9)
y de CALOR RESIDUAL
Indicador de selección de una
ZONA DE COCCIÓN
Botones de selección de las
ZONAS DE COCCIÓN
Botón de
DISMINUCIÓN DE LA POTENCIA
Botón de
ENCENDIDO/APAGADO
0
Booster
Indicadores de POTENCIA (de 0 a 9)
y de CALOR RESIDUAL
Tecla del
ACELERADOR (BOOSTER) *
Botón de
AUMENTO DE LA POTENCIA
Botón de BLOQUEO
de los MANDOS
Luz indicadora de BLOQUEO
Presente sólo en algunos modelos.
*
45
Page 46

ES
KBT 6313 I T
ENCIMERAS
KBT 6313 I T CL
Zonas de cocción Potencia (en W)
Posterior derecho (PD)
Posterior izquierdo (PI)
IT 1800-B3000-B4000*
I 1200
Placa central derecha I 1800
Potencia total 7000
è
I
IT
B 4000*
zona de cocción por inducción simple
è
zona de cocción por inducción Tripla
è
la zona de cocción puede ser
sobrealimentada a 4000 W
Descripción de las zonas de cocción
El sistema por inducción es el procedimiento de
cocción más rápido que existe.
A diferencia de las tecnologías tradicionales, la zona
de cocción con funcionamiento por inducción no
calienta el vidrio. Es el mismo recipiente, apoyado
en la encimera, el que se transforma en elemento
calentador: el calor se genera directamente dentro
de la olla, la cual deberá poseer necesariamente un
fondo de material ferromagnético.
Cada zona de cocción se acciona:
utilizando un botón de selección cuya serigrafía
es una reproducción del dibujo de la zona de
cocción,
y con un dispositivo de regulación de la potencia
compuesto por un doble botón (+,-).
La siguiente tabla brinda útiles indicaciones para un
uso óptimo de las distintas zonas de cocción.
Potencia Tipo de cocción
1 Mantequilla o chocolate fundido
2
3
4 Preparación de cremas y salsas
5
6 Cocción de fideos y arroz
7
8
9 Frituras
Calentamiento de líquidos
Cocción de carnes hervidas, blanquette,
entremets
Cocción con fuego directo de carnes, pescados
y tortillas
Mientras que la temperatura de las zonas de
cocción permanezca por encima de 60 ºC, aún
después del apagado, los indicadores de calor
residual permanecerán encendidos (el indicador de
las potencias visualiza H) para prevenir
quemaduras.
46
Page 47

Puesta en
funcionamiento y uso
Cuando la encimera se conecta a la red de
alimentación eléctrica, se emite una breve señal
sonora después de algunos segundos: sólo a partir
de ese momento es posible encender la encimera.
Encendido de la encimera
El encendido de la encimera se produce
manteniendo presionado el botón
segundos.
Funcionamiento de las zonas de cocción
Cada zona de cocción se acciona utilizando un
botón de mando y un dispositivo de regulación de la
potencia compuesto por un doble botón (+,-).
durante 3
005.
Encendido de una zona de cocción
Para poner en funcionamiento una zona de
cocción, pulse el correspondiente botón de
mando y fije la potencia deseada (de 0 a 9)
++
utilizando los botones
Para seleccionar directamente la potencia máxima
(9), pulse brevemente el botón
Apagado de una zona de cocción
Para apagar una zona de cocción, selecciónela
mediante el correspondiente botón de mando y:
pulse simultáneamente los botones
potencia vuelve inmediatamente a 0 y la zona de
cocción se apaga;
o pulse el botón
cocción desciende progresivamente, hasta que
se apaga.
--
-: la potencia de la zona de
--
+ y
++
--
-.
--
--
-.
--
++
+ y
++
--
-: la
--
Apagado de la encimera
Pulse el botón ; el aparato se apagará.
Si los mandos del aparato fueron bloqueados
(consulte el párrafo sucesivo), continuarán estando
bloqueados incluso después de haber vuelto a
encender la encimera. Para poder utilizar las zonas
de cocción es necesario desbloquear los mandos.
El acelerador (booster)
Para disminuir los tiempos de calentamiento de las
zonas de cocción (consulte la tabla de las zonas de
cocción en la página precedente), pulse el botón .
En el display de la potencia aparece P. La función
Booster (acelerador) se interrumpe automáticamente
después de 4 minutos.
Durante el período de activación del acelerador,
algunas zonas de cocción (consulte la tabla de las
zonas de cocción a la página precedente) están
limitadas a una potencia máxima de 600 W.
Bloqueo de los mandos
Cuando la encimera está en funcionamiento, es
posible bloquear el panel de control para evitar el
peligro de modificaciones fortuitas de las
regulaciones (niños, operaciones de limpieza, etc.).
Es suficiente accionar el botón
que se encuentra al lado del botón se encenderá y
los mandos se bloquearánlos mandos se bloquearán
los mandos se bloquearán.
los mandos se bloquearánlos mandos se bloquearán
Para modificar la potencia de calentamiento o
interrumpir la cocción, es necesario desbloquear el
panel de control: pulse el botón
apagará y
desbloqueará.desbloqueará.
desbloqueará.
desbloqueará.desbloqueará.
Para poder realizar nuevamente la regulación de una
zona de cocción, selecciónela utilizando el botón de
mando correspondiente.
Programación de la duración de una cocción
Es posible programar simultáneamente todas las zonas
de cocción por un tiempo máximo de 99 minutos.
Proceda del siguiente modo:
seleccione la zona de cocción utilizando el botón
de mando correspondiente;
seleccione la potencia deseada utilizando los
botones
pulse el botón de programación
seleccione la duración de la cocción deseada
utilizando los botones
confirme la programación pulsando una vez más
el botón
La cuenta al revés de la duración de cocción comienza
inmediatamente. La finalización de la cocción
programada está indicada por una señal sonora
(durante 1 minuto) y la zona de cocción se apagará.
Funcionamiento de la placa de inducción Tripla
El funcionamiento de esta placa depende
fundamentalmente del diámetro de las ollas que se
utilizan en la cocción:
si el diámetro de la olla entra en la primera zona
delineada, es posible encender la placa interna.
En ese caso el acelerador (booster) no funciona y
la potencia suministrada es de 1800W;
si el diámetro de la olla está comprendido entre la
primera y la segunda zona delineada, la potencia
suministrada máxima es de 2400W (hasta 3000W
con el acelerador (Booster) activo);
si el diámetro de la olla supera la segunda zona y
está comprendido entre la segunda y la tercera,
la placa suministra una potencia máx. de 3000W
(hasta 4000W con el acelerador (Booster) activo).
Por lo tanto, la función Booster se puede activar sólo
en los dos últimos casos indicados, con una
absorción energética comprendida entre 3kW y 4kW
según el diámetro de la olla, siempre que el tamaño
de la misma supere el diámetro de la primera zona.
En efecto, la función booster no está disponible
cuando se utiliza sólo la zona de cocción central
más pequeña (1800W).
el panel de control seel panel de control se
el panel de control se
el panel de control seel panel de control se
++
--
+ y
-,
++
--
++
+ y
++
.
; la luz testigo
; la luz testigo se
,
--
-,
--
ES
47
Page 48

Dispositivos de
seguridad
ES
Detección de los recipientes
Cada zona de cocción por inducción está provista
de un dispositivo de detección de la olla. La zona
de cocción emite calor únicamente en presencia de
una olla de dimensiones adecuadas para esa zona
de cocción.
La luz testigo centelleante puede indicar:
una olla incompatible (de un material que no es
ferromagnético),
una olla de diámetro insuficiente,
que se ha levantado la olla.
Elija siempre una
de las zonas de cocción.de las zonas de cocción.
de las zonas de cocción.
de las zonas de cocción.de las zonas de cocción.
Advertencia importante: zonas de cocción ovaladas
Las zonas de cocción ovaladas se pueden
sobrealimentar sólo si está activado todo el
elemento oval.
No ponga dos ollas pequeñas sobre las zonas de
cocción ovaladas.
olla de diámetro adecuado alolla de diámetro adecuado al
olla de diámetro adecuado al
olla de diámetro adecuado alolla de diámetro adecuado al
Uso de recipientes
Debido a que la inducción se activa únicamente en
el momento en que un recipiente metálico se coloca
sobre la encimera para cerrar el campo magnético,
el calentamiento de la olla cesa instantáneamente
cuando la misma se quita de la zona de cocción.
Utilice un recipiente cuyo
sea compatible con el principio de inducciónsea compatible con el principio de inducción
sea compatible con el principio de inducción
sea compatible con el principio de inducciónsea compatible con el principio de inducción
(material ferromagnético).(material ferromagnético).
(material ferromagnético).
(material ferromagnético).(material ferromagnético).
Se recomienda el uso de ollas de hierroSe recomienda el uso de ollas de hierro
Se recomienda el uso de ollas de hierro
Se recomienda el uso de ollas de hierroSe recomienda el uso de ollas de hierro
fundido, acero esmaltado o inoxidablefundido, acero esmaltado o inoxidable
fundido, acero esmaltado o inoxidable
fundido, acero esmaltado o inoxidablefundido, acero esmaltado o inoxidable
especial para inducción.especial para inducción.
especial para inducción.
especial para inducción.especial para inducción.
Las ollas de cobre, cerámica, terracota, vidrio, loza,
aluminio o acero inox. no magnético son
incompatibles con la encimera por inducción.
Es suficiente realizar una prueba con unEs suficiente realizar una prueba con un
Es suficiente realizar una prueba con un
Es suficiente realizar una prueba con unEs suficiente realizar una prueba con un
imán. imán.
imán. Si el mismo es atraído por el fondo de la olla
imán. imán.
y permanece adherido, significa que la olla es de
material ferromagnético y, por lo tanto, se puede
utilizar en la encimera por inducción.
Se aconseja el uso de ollas
elevado espesorelevado espesor
elevado espesor y evitar siempre el uso de
elevado espesorelevado espesor
recipientes con fondo irregular que podrían rayar el
vidrio.
material de fabricaciónmaterial de fabricación
material de fabricación
material de fabricaciónmaterial de fabricación
con fondo plano y decon fondo plano y de
con fondo plano y de
con fondo plano y decon fondo plano y de
Señal sonora
Algunas anomalías, como:
un objeto (olla, cubierto, etc.) dejado sobre el área
de mandos durante más de 10 segundos
un derrame sobre el área de mandos,
una presión ejercida durante mucho tiempo sobre
un botón, etc. pueden provocar la emisión de una
señal sonora y el apagado de la encimera.
Para interrumpir la señal sonora, elimine la causa del
mal funcionamiento. Para utilizar la encimera, vuelva
a encenderla y seleccione nuevamente la zona o las
zonas de cocción deseadas. Seleccione la potencia
necesaria.
Interruptor de seguridad
El aparato está dotado de un interruptor de
seguridad automático que salta después de un
cierto intervalo de tiempo (consulte la tabla) en
función de la potencia elegida. Durante la
interrupción de seguridad, el display de la potencia
indica 0.
ejemplo: la zona de cocción posterior derecha está
configurada en 5 y la zona de cocción delantera
izquierda en 2. La zona posterior derecha se
apagará después de 4 horas de funcionamiento,
mientras la zona delantera izquierda se apagará
después de 6 horas de funcionamiento.
Para desbloquear los mandos, apague la encimera
pulsando el botón
Nivel de
potencia
1-2 10 horas
3 5 horas
4 4 horas
5-6 3 horas
7-8 2 horas
9 1 hora
.
Duración límite de
funcionamento
48
Protección térmica
En caso de sobrecalentamiento de los componentes
electrónicos del aparato, la encimera se apagará
automáticamente y en el display de las potencias
aparecerá a.
Este mensaje desaparecerá apenas la temperatura
haya descendido a un nivel aceptable.
Page 49

Precauciones y
consejos
El aparato ha sido proyectado y fabricado en
conformidad con las normas internacionales sobre
seguridad. Estas advertencias se suministran por
razones de seguridad y deben ser leídas atentamente.
Consejos prácticos para el uso del
aparato
Para obtener las mejores prestaciones de la encimera:
utilice ollas con fondo plano para asegurarse que se
adhieran perfectamente a la zona calentadora;
utilice siempre ollas de un diámetro suficiente para
cubrir completamente la zona de cocción, de ese
modo se garantiza el aprovechamiento de todo el
calor disponible;
verifique que el fondo de las ollas esté siempre
perfectamente seco y limpio para garantizar una
correcta adherencia y mayor duración, no sólo de
las zonas de cocción, sino también de las ollas.
evite utilizar las mismas ollas utilizadas en los
quemadores a gas: la concentración de calor en los
quemadores a gas puede deformar el fondo de la
olla que, en consecuencia, pierde adherencia;
no deje nunca una zona de cocción encendida sin
olla ya que su calentamiento, que alcanza
rápidamente el nivel máximo, podría dañar los
elementos calentadores.
Seguridad general
El aparato ha sido fabricado para un uso de tipo no
profesional en el interior de una vivienda.
El aparato no se debe instalar al aire libre, tampoco
si el espacio está protegido porque es muy
peligroso dejarlo expuesto a la lluvia y a las
tormentas.
No toque la máquina descalzo o con las manos y
pies mojados o húmedos.
El aparato debe ser utilizado para cocinar alimentos,
sólo por personas adultas y siguiendo las
instrucciones contenidas en este manual. No utilice
la encimera como superficie de apoyo ni como tajo
de cocina.
La encimera de vidriocerámica es resistente a los
choques mecánicos, no obstante, se puede rajar (o
eventualmente quebrantarse) si es golpeada con un
objeto con punta, como por ejemplo un utensilio. Si
esto sucediera, desconecte inmediatamente el
aparato de la red de alimentación eléctrica y llame
al Servicio de Asistencia Técnica.
Si la superficie de la encimera está agrietada,
apague el aparato para evitar sacudidas eléctricas.
Evite que el cable de alimentación eléctrica de otros
electrodomésticos entre en contacto con las partes
calientes de la encimera.
No olvide que la temperatura de las zonas de
cocción permanece bastante elevada durante treinta
minutos, como mínimo, después que se han
apagado. El calor residual también está señalado
por un indicador (ver Puesta en funcionamiento y
uso).
Mantenga cualquier objeto que se pueda fundir a
una debida distancia de la encimera, por ejemplo,
objetos de plástico, de aluminio o productos con un
elevado contenido de azúcar. Tenga particular
cuidado con los embalajes y películas de plástico o
aluminio:
si se dejan sobre las superficies todavía calientes o
tibias pueden causar un grave daño a la encimera.
Verifique que los mangos de las ollas estén siempre
dirigidos hacia dentro de la encimera para evitar
que sean chocados accidentalmente.
No desconecte el aparato de la toma de corriente
tirando del cable sino sujetando el enchufe.
No realice la limpieza o el mantenimiento sin haber
desconectado primero el aparato de la red eléctrica.
No coloque objetos metálicos (cuchillos, cucharas,
cubiertos, etc.) sobre la encimera porque pueden
calentarse.
Advertencia para las personas que poseenAdvertencia para las personas que poseen
Advertencia para las personas que poseen
Advertencia para las personas que poseenAdvertencia para las personas que poseen
marcapasos u otros dispositivos médicosmarcapasos u otros dispositivos médicos
marcapasos u otros dispositivos médicos
marcapasos u otros dispositivos médicosmarcapasos u otros dispositivos médicos
activos:activos:
activos:
activos:activos:
La encimera es conforme con todas las normas
vigentes en materia de interferencias
electromagnéticas.
Por lo tanto, este producto responde perfectamente
a todos los requisitos de ley (directivas 89/336/
CEE). Ha sido proyectado para no crear
interferencias con otros equipos eléctricos, con la
condición de que los mismos también sean
conformes con dichas normas.
La encimera de inducción genera campos
electromagnéticos de alcance limitado.
Para evitar todo riesgo de interferencias entre la
encimera y el marcapasos, éste último deberá ser
realizado en conformidad con las normas vigentes.
Al respecto, nosotros sólo podemos garantizar la
conformidad de nuestro producto. Para obtener
información sobre la conformidad o por problemas
de incompatibilidad, consulte con su médico o con
el fabricante del marcapasos.
ES
49
Page 50

Mantenimiento y cuidados
ES
Interrumpir la corriente eléctrica
Antes de realizar cualquier operación, desconecte el
aparato de la red de alimentación eléctrica.
Limpiar el aparato
Evite el uso de detergentes abrasivos o corrosivos,
como aerosoles para barbacoas y hornos,
quitamanchas y productos anticorrosivos, jabones
en polvo y esponjas con superficie abrasiva, ya que
pueden rayar irremediablemente la superficie.
No utilice nunca limpiadores a vapor o de alta
presión para la limpieza del aparato.
Para un mantenimiento ordinario, es suficiente lavar
la encimera con una esponja húmeda, secándola
luego con un papel absorbente para cocina.
Si la encimera está particularmente sucia,
refriéguela con un producto específico para la
limpieza de las superficies de vidriocerámica,
enjuáguela y séquela.
Para eliminar las acumulaciones de suciedad más
consistentes utilice una raedera especial. Intervenga
lo antes posible, sin esperar que el aparato se enfríe
para evitar la encostración de los residuos. Se
pueden obtener excelentes resultados usando una
esponja con hilos de acero inoxidable - especial para
encimeras de vidriocerámica, - embebida en agua y
jabón.
Si sobre la encimera se hubieran fundido
accidentalmente objetos o materiales como plástico
o azúcar, elimínelos inmediatamente con la rasqueta,
mientras la superficie está todavía caliente.
Recuerde siempre enjuagar la encimera con agua
limpia y secarla cuidadosamente: en efecto, los
residuos de productos podrían encostrarse
durante la siguiente cocción.
Armazón de acero inoxidable *
El acero inoxidable puede mancharse por la acción
de agua muy calcárea dejada por un período de
tiempo prolongado en contacto con el mismo o
debido a productos para la limpieza con contenido
de fósforo.
Se aconseja enjuagar abundantemente y secar con
cuidado después de la limpieza de la encimera. Si se
derramara agua, seque rápidamente y con cuidado.
Algunas encimeras poseen un marco de aluminio
que se asemeja al acero inoxidable. No utilice
productos para la limpieza y el desengrase no
adecuados para el aluminio.
Desmontar la encimera
Cuando sea necesario, se puede desmontar la
encimera:
1. quite los tornillos que fijan los muelles de
centrado en los costados;
2. afloje los tornillos de los ganchos de fijación en
las esquinas;
3. extraiga la encimera del mueble.
Se recomienda evitar acceder a los mecanismos
internos para intentar una reparación. En caso de
avería, llame al Servicio de Asistencia Técnica.
Una vez limpia, la encimera se puede tratar con un
producto específico para el mantenimiento y la
protección: la película invisible que deja este
producto protege la superficie en caso de
escurrimientos durante la cocción. Se recomienda
realizar estas operaciones con el aparato tibio o frío.
Presente sólo en algunos modelos.
*
50
Page 51

Instruções
para a utilização
GBGB
IT
Italiano, 1 Français, 21
KBT 6313 IT
KBT 6313 IT CL
GB
GBGB
English, 11
ES
Espanol, 41
FR
PTNL
Portuges, 51Nederlands, 31
PLANO
Índice
PT
Instalação, 52-54
Posicionamento
Ligação do plano de cozedura
Eliminação
Descrição do aparelho, 55-56
Painel de comandos
Descrição das zonas de cozedura
Início e utilização, 57
Acender o plano de cozedura
Apagar o plano de cozedura
O booster
Dispositivos de segurança, 58
Detecção de recipientes
Utilização de recipientes
Sinal acústico
Interruptor de segurança
Protecção térmica
Precauções e conselhos, 59
Conselhos práticos para utilizar esta aparelhagem
Segurança geral
Manutenção e cuidados, 60
Desligar a corrente eléctrica
Limpeza do aparelho
Desmontar o plano
Page 52

Instalação
PT
! É importante guardar este folheto para poder
consultá-lo a qualquer momento. No caso de venda,
cessão ou mudança, assegure-se que o mesmo
permanece com o aparelho para informar o novo
proprietário sobre o funcionamento e sobre as
respectivas advertências.
! Leia com atenção as instruções: há informações
importantes sobre a instalação, a utilização e a
segurança.
Posicionamento
! As embalagens não são brinquedos para as crianças
e devem ser eliminadas em conformidade com as
regras de colecta diferenciada (veja em Precauções e
Conselhos).
! A instalação deve ser realizada segundo estas
instruções e por pessoal profissional qualificado. Uma
instalação errada pode causar danos a pessoas,
animais ou objectos.
Encaixe
Para garantir um bom funcionamento do aparelho é
necessário que o móvel seja de características
adequadas:
o material do plano de apoio deve resistir a uma
temperatura de aproximadamente 100ºC;
se desejar instalar o plano de cozedura sobre um
forno, este deve ser equipado com de um sistema
de arrefecimento com ventilação forçada;
evite instalar o plano de cozedura sobre uma
máquina de lavar louça: se for faze-lo, instale um
elemento de separação entre os dois aparelhos com
retenção hermética;
conforme o plano de cozedura que desejar instalar
(veja figuras), o vão do móvel deverá ter as
seguintes dimensões:
574
504
490 +/- 1
48
560 +/- 1
590
490 +/- 1
520
48
560 +/- 1
de forma a manter uma distância mínima de 20 mm
entre o vão para o encaixe e o móvel abaixo dele.
min. 20 mm
5 mm
GAVETA
min. 40 mm
min. 20 mm
5 mm
FORNO VENTILADO
min. 40 mm
Fixação
A instalação do aparelho deve ser realizada sobre
uma superfície de apoio perfeitamente plana.
As deformações eventualmente provocadas por
uma fixação errada poderão alterar as
características e as performances do plano de
cozedura.
MONTAGEM DOS GRAMPOS DO LADO DE BAIXO
LADO DIANTEIRO DO
PLANO DE COZEDURA
PLANO DE
TRABALHO
30
40
690
48
520
48
785
510
560 +/- 1
490 +/- 1
750 +/- 1
490+/- 1
Ventilação
Para consentir uma adequada ventilação e para evitar
o superaquecimento das superfícies ao redor do
aparelho, o plano de cozedura deve ser posicionado:
a uma distância mínima de 40 mm da parede de
trás e de 600 mm de quaisquer outras superfícies
verticais;
52
PLANO DE COZEDURA VIRADO
Page 53

Ligação do plano de cozedura ao forno
A segurança eléctrica deste aparelho está
assegurada somente quando o mesmo estiver
ligado a uma instalação com ligação à terra
eficiente, em conformidade com as normas de
segurança eléctrica em vigor. Verifique se este
requisito fundamental de segurança é sempre
obedecido e, em caso de dúvida, mande efectuar
um controlo meticuloso da instalação por pessoal
profissionalmente qualificado.
O fabricador não se responsabiliza por danos
eventuais provocados pela falta de ligação à terra
da instalação.
Antes de ligar o aparelho, certifique-se que os
dados técnicos apresentados na placa de
identificação correspondam às características da
instalação eléctrica.
Verifique se a capacidade eléctrica da instalação
e das tomadas de corrente são apropriadas para
a potência máxima do aparelho que está indicada
na plaqueta. Em caso de dúvidas, contacte
pessoal profissionalmente qualificado.
Antes de quaisquer intervenções, desligue a
aparelhagem da electricidade.
A ligação do plano de cozedura na rede eléctrica
deve ser efectuada mediante uma caixa de
conexões: no caso de ligação directa do aparelho
na rede, será necessário providenciar um
interruptor omnipolar, acessível no caso de
necessidade, com distância de abertura dos
contactos igual ou superior a 3 mm.
Válido somente para os modelos com cabo de
alimentação
Alguns modelos são fornecidos de cabo de
alimentação monofásica, portanto devem ser
ligados somente à rede monofásica. Obedeça as
cores dos fios, da maneira indicada no esquema em
anexo.
Ligações eléctricas Tensão frequência Fusíveis Secções
FR-BE-AT-DE-GR-ES- IL-
L
IT-NZ-PT-GP-CH-MA-LUIE-FI-SE-IS-GB-NL-DK
BLNBR
BLNBR
BR=BRUN,BL=BL EU
BR=BRUIN, BL=BLAUW
* Aplicação do factor de simultaneidade em conformidade com a norma CEI
230V - 1+N~ 50Hz
CY-MT-AU-NZ-KW
240V - 1+N~ 50Hz
L
FR-BE-NO
230V - 2 ~ 50Hz
BR=BRAUN, BL=BLAU
BR=BROWN, BL=BLUE
25A *
2,5 mm²
60335-2-6
Válido somente para os modelos sem cabo de
alimentação
Alguns modelos não estão providos de cabo de
alimentação dado que o cabo deve ter as
dimensões na base do tipo de conexão eléctrica
utilizada (ver tabela de conexão seguinte).
Para conectar o cabo proceder como a seguir:
1. Para abrir a caixa de
terminais faça alavanca
com uma chave de
parafuso nas linguetas
aos lados da tampa:
puxe e abra a tampa (
veja a figura).
2. Desatarraxe o
parafuso da braçadeira
e tire-o utilizando uma
chave de fendas (veja a
figura).
3. Tire os parafusos
dos contactos L-Nem seguida, prenda os
fios embaixo das
cabeças dos parafusos
a obedecer as cores:
Azul (N) Castanho (L)
Amarelo-Verde (
).
para efectuar a conexão eléctrica desejada (ver
tabela), utilizar os reóforos alojados dentro da
caixa. Posicionar os fios do cabo de alimentação
de acordo com a tabela.
uma vez efectuadas as conexões apertar no
fundo todos os parafusos dos bornes.
fixe o cabo de alimentação na apropriada
braçadeira e feche a tampa
PT
e,
53
Page 54

PT
! No caso de instalação do plano de cozedura acima
de um forno de encaixar, a ligação eléctrica do
plano e a do forno devem ser realizadas
separadamente, por razões de segurança eléctrica e
para facilitar as eventuais operações de extracção
do forno.
Ligações eléctricas
12345
LN
12345
L1 L2
12345
L1 L2 N
12345
L1 L2 L3
12 34
L1 L2 N2N1
12345
LN
* Aplicação do factor de simultaneidade em conformidade com a
5
norma CEI 60335-2-6
Tensão
frequência
FR-AT-BE-DE-GP--
ES-IE-IL-IS-IT-LU-
RE-FI-GB-GR-PT--
SE-MA-NZ
230V-1+N~50 Hz
FR-BE-NO
230V-2~50/60 Hz
FR-BE-CH-DE-AT--
ES-IL-IT-NZ-PT -
MA- LU-SE-IS-NL
400V2-N~50 Hz
FR-BE-NO
230V3~50 Hz
NL
230V2+2-N~50 Hz
CY-AU-NZ-KW-MT
240V-1+N~50 Hz
Fusíveis
Secções
25 A*
2,5 mm²
25 A*
2,5 mm²
16 A*
1,5 mm²
16 A*
1,5 mm²
16 A*
1,5 mm²
25 A*
2,5 mm²
Eliminação
Eliminação do material de embalagem: obedeça
as regras locais, de maneira que as embalagens
possam ser reutilizadas.
A directiva Europeia 2002/96/CE relativa aos
resíduos de equipamentos eléctricos e
electrónicos (REEE) prevê que os
electrodomésticos não devem ser eliminados no
normal fluxo dos resíduos sólidos urbanos. Os
aparelhos não mais utilizados devem ser
recolhidos separadamente para optimizar a taxa
de recuperação e reciclagem dos materiais que
os compõem e impedir potenciais danos à saúde
e ao meio ambiente. O símbolo da lixeira
cancelada está indicado em todos os produtos
para lembrar o dever de colecta selectiva.
Para maiores informações sobre a correcta
eliminação dos electrodomésticos, os
proprietários poderão contactar o serviço de
colecta público ou os revendedores.
Este aparelho é em conformidade
com as seguintes Directivas da
Comunidade Europeia:
- 73/23/CEE de 19/02/73 (Baixa Tensão) e
posteriores modificações
- 89/336/CEE de 03/05/89 (Compatibilidade
Electromagnética) e posteriores modificações
- 93/68/CEE de 22/07/93 e posteriores modificações.
54
Page 55

Descrição
do aparelho
Painel de comandos
Indicador luminoso de FUNCIONAMENTO
da ZONA DE COZEDURA PROGRAMADA *
Indicador da
DURAÇÃO PROGRAMADA *
Indicadores de POTÊNCIA
(desde 0 até 9) e de CALOR RESÍDUO
Botões de SELECÇÃO DAS
ZONAS DE COZEDURA
15.
0
5.
0
PT
Botão de REGULAÇÃO do
CONTADOR DE MINUTOS *
Indicadores de POTÊNCIA
(desde 0 até 9) e de CALOR RESÍDUO
Indicador de SELECÇÃO de uma
ZONA DE COZEDURA
Botões de SELECÇÃO DAS
ZONAS DE COZEDURA
Indicadores de POTÊNCIA
(desde 0 até 9) e de CALOR RESÍDUO
Botão de
DIMINUIÇÃO DA POTÊNCIA
Botão
ACESO/APAGADO
Booster
Botão do BOOSTER *
Botão de
AUMENTO DA POTÊNCIA
Botão de BLOQUEIO
DOS COMANDOS
Indicador luminoso
de BLOQUEIO
* Há somente em alguns modelos.
55
Page 56

PT
KBT 6313 I T
PLANOS DE COZEDURA
KBT 6313 I T CL
Zonas de cozedura Potência (em W)
Traseiro direito (TrDir)
Traseiro esquerdo (TrEsq)
I T 1800-B3000-B4000*
I 1200
Placa central direita I 1800
Potência total 7000
I
è
zona de cozedura de indução simples
IT
è zona de cozedura de indução Tripla
B 4000*
è a zona de cozedura pode ser super
alimentada com 4000 W.
Descrição das zonas de cozedura
O sistema a indução é o processo de cozedura
mais rápido que existe.
Não como os processos tecnológicos tradicionais,
esta zona de cozedura com funcionamento a
indução não aquece o vidro. É o próprio recipiente,
colocado sobre o plano, que se transforma em
elemento aquecedor: o calor é gerado directamente
no interior da panela, que deve ter necessariamente
fundo em material ferromagnético.
Cada uma das zonas de cozedura é accionada:
A extensão das zonas de cozedura (concêntrica ou
oval) é activada mediante um botão específica.
Enquanto a temperatura das zonas de cozedura
permanecerem acima de 60 °C, mesmo depois de
apagadas, os indicadores de calor resíduo
permanecerão acesos (o indicador das potências
visualizará: H) para evitar o risco de queimaduras.
A seguinte tabela fornece indicações úteis para
utilizar da melhor maneira as várias zonas de
cozedura.
mediante um selector com indicado um desenho
da correspondente zona de cozedura,
e mediante um dispositivo de regulação da
potência constituído por um botão duplo (+,-).
56
Potência Tipo de cozedura
1 Manteiga ou chocolate derretido
2
3
4 Preparação de cremes e molhos
5
6 Cozedura de massas e arroz
7
8
9 Frituras
Esquentar líquidos
Cozedura de carnes cozidas, guisados,
entremets
Cozedura com fogo forte de carnes, peixe,
omeletes
Page 57

Início e utilização
Quando o plano de cozedura for ligado
electricamente, toca um breve sinal acústico depois
de alguns segundos: somente neste ponto será
possível o acesso ao plano de cozedura.
Acender o plano de cozedura
Para acender o plano de cozedura carregue 3
segundos no botão
Funcionamento das zonas de cozedura
Cada uma as zonas de cozedura é accionada
mediante um botão de comando e um dispositivo
de regulação da potência constituído por um botão
dupla (+,-).
Acender de uma zona de cozedura
Para colocar em funcionamento uma zona de
cozedura, carregue na respectivo botão de
comando e defina a potência que desejar (desde
0 até 9) mediante os botões "+" e "-".
Para definir directamente a potência máxima (9),
carregue brevemente no botão "-".
.
005.
Bloqueio dos comandos
Quando um plano de cozedura estiver a funcionar, é
possível bloquear os comandos para evitar riscos
de modificações acidentais das regulações
(crianças, operações de limpeza etc.).
É suficiente carregar no botão
luminoso situado ao lado do botão se acenderão e
os comandos se bloquearãoos comandos se bloquearão
os comandos se bloquearão.
os comandos se bloquearãoos comandos se bloquearão
Para modificar a potência de aquecimento ou
interromper a cozedura, será necessário
desbloquear os comandos: carregue no botão
indicador luminoso se apagará e
desbloquearão.desbloquearão.
desbloquearão.
desbloquearão.desbloquearão.
Para obter novamente acesso à regulação de uma
zona de cozedura, seleccione-a mediante a
respectivo botão de comando.
Programação da duração de cozedura
E possível programar simultaneamente todas as zonas
de cozedura até um prazo máximo de 99 minutos.
Proceda da seguinte maneira:
seleccione a zona de cozedura mediante a
respectivo botão de comando;
defina a potência que desejar mediante os botões
"+" e "-",
carregue no botão de programação
defina a duração da cozedura que desejar
mediante os botões "+" e "-";
para confirmar a programação carregue mais uma
vez no botão
.
; o indicador
os comandos seos comandos se
os comandos se
os comandos seos comandos se
,
; o
PT
Apagar uma zona de cozedura
Para desligar uma zona de cozedura, seleccione-a
mediante a respectivo botão de comando e:
carregue contemporaneamente nos botões "+" e "-
": a potência volta imediatamente para 0 e a zona
de cozedura desliga-se;
ou carregue na botão "-" : a potência da zona de
cozedura descerá progressivamente até desligarse.
Apagar o plano de cozedura
Carregue no botão ; o aparelho se desligará.
Se os comandos do aparelhagem estiverem
bloqueados (veja o seguinte parágrafo), continuarão
bloqueados mesmo depois de ter acendido
novamente o plano de cozedura. Para poder utilizar
as zonas de cozedura será necessário desbloquear
os comandos.
O booster
Para acelerar os tempos de aquecimento das zonas
de cozedura (veja a tabela das zonas de cozedura
na página anterior), carregue no botão
No display da potência aparecerá "
Booster interrompe-se automaticamente depois de 4
minutos. No período de activação do booster,
algumas das zonas de cozedura (veja a tabela das
zonas de cozedura na página anterior) têm uma
potência limitada a 600 W no máximo.
Booster
.
PP
P". A função
PP
A contagem regressiva da duração da cozedura
começará imediatamente. No final da cozedura
programada será indicado por um sinal sonoro (que
toca 1 minuto) e a zona de cozedura se apagará.
Funcionamento da chapa por indução Tripla
O funcionamento desta chapa depende
substancialmente do diâmetro das panelas que
serão utilizadas para a cozedura:
se o diâmetro da panela ficar por dentro da
primeira área delineada, será possível acender
apenas a chapa interna. Neste caso, o booster
não funciona e a potência fornecida é de 1800W;
se o diâmetro da panela ficar entre a primeira e a
segunda área delineada, a potência fornecida
máxima será de 2400W (até 3000W com o
Booster activo);
se o diâmetro da panela superar a segunda área
e ficar entre a segunda e a terceira, a chapa
fornecerá uma potência máx. de até 3000W (até
4000W se o Booster estiver activo).
A função Booster, portanto, pode ser activada
somente nos últimos dois casos citados, com uma
absorção energética incluída entre 3kW e 4kW
conforme o diâmetro da panela, ou seja, quando a
dimensão da panela superar o diâmetro da primeira
área. A função booster, de facto, não estará activa
no caso em que se utilize somente a área de
cozedura central menor (1800W).
57
Page 58

Dispositivos de
segurança
PT
Detecção de recipientes
Cada uma das zonas de cozedura a indução é
equipada com um dispositivo de detecção de
panela. A zona de cozedura emite calor unicamente
se houver uma panela de medidas adequadas na
respectiva zona de cozedura.
O indicador a piscar pode indicar:
uma panela incompatível (de material não
ferromagnético),
uma panela de diâmetro insuficiente,
que a panela foi tirada.
Escolha sempre uma
adequado ao das zonas de cozedura.adequado ao das zonas de cozedura.
adequado ao das zonas de cozedura.
adequado ao das zonas de cozedura.adequado ao das zonas de cozedura.
Advertência importante: zonas de cozedura
ovais
As zonas de cozedura ovais podem ser super
alimentadas somente se estiver aceso o oval inteiro.
Não coloque duas panelas pequenas numa mesma
zona de cozedura oval.
panela de diâmetropanela de diâmetro
panela de diâmetro
panela de diâmetropanela de diâmetro
Utilização de recipientes
Como a indução activa-se unicamente no momento
em que um recipiente de metal for colocado sobre o
plano de cozedura de maneira que feche o campo
magnético, o aquecimento da panela pára
imediatamente quando a mesma for tirada da zona
de cozedura.
Utilize um recipiente cujo
seja compatível com o principio da induçãoseja compatível com o principio da indução
seja compatível com o principio da indução
seja compatível com o principio da induçãoseja compatível com o principio da indução
(material ferromagnético).(material ferromagnético).
(material ferromagnético).
(material ferromagnético).(material ferromagnético).
É recomendado o uso de panelas em ferro gusa,
aço esmaltado ou inoxidável especial para indução.
As panelas de cobre cerâmica, terracota, vidro,
louça, alumínio ou inox não magnético são
incompatíveis com o plano de cozedura de indução.
É suficiente um ensaio com um ímanÉ suficiente um ensaio com um íman
É suficiente um ensaio com um íman. Se o
É suficiente um ensaio com um ímanÉ suficiente um ensaio com um íman
mesmo for atraído pelo fundo da panela e ficar
"preso", significa que a panela é de material
ferromagnético e portanto pode ser utilizada com o
plano a indução.
É aconselhável utilizar panelas
muito grossomuito grosso
muito grosso e evitar absolutamente recipientes
muito grossomuito grosso
de fundo irregular, que poderão provocar arranhões
no vidro.
material de fabricaçãomaterial de fabricação
material de fabricação
material de fabricaçãomaterial de fabricação
com fundo chato ecom fundo chato e
com fundo chato e
com fundo chato ecom fundo chato e
Sinal acústico
Algumas anomalias, nomeadamente:
um objecto (panela, talher etc.) foi deixado mais
de 10 segundos na área de comandos;
um derramamento na área dos comandos,
se carregar muito tempo num botão etc. poderá
provocar que toque um sinal sonoro e apagar o
plano d cozedura.
Resolva a causa do mau funcionamento para o sinal
sonoro deixar de tocar.
Para utilizar o plano de cozedura, acenda-o
novamente e seleccione de novo a zona ou as
zonas de cozedura que desejar. Defina a potência
necessária.
Interruptor de segurança
Esta aparelhagem é equipada com um interruptor de
segurança automático que desliga-se depois de um
certo tempo (veja a tabela) em função da potência
escolhida. Durante uma interrupção de segurança, o
display da potência indicará "0".
Por exemplo: a zona de cozedura traseira direita é
regulada em 5 e a zona de cozedura dianteira
esquerda é regulada em 2. A zona traseira direita se
desligará depois de 4 horas de funcionamento, por
outro lado, a zona dianteira esquerda se apagará
depois de 6 horas de funcionamento.
Para desbloquear os comandos, carregar no botão
para apagar o plano de cozedura.
Nival de
potência
1-2 10 horas
3 5 horas
4 4 horas
5-6 3 horas
7-8 2 horas
9 1 horas
Duração limite de
funcionamento
58
Protecção térmica
No caso de super aquecimento dos componentes
electrónicos do aparelho, o plano de cozedura
apaga-se automaticamente e no display das
potências aparece "a".
Esta mensagem desaparece mal a temperatura
desceu a um nível aceitável.
Page 59

Precauções e
conselhos
Este aparelho foi projectado e fabricado em
conformidade com as normas internacionais de
segurança. Estas advertências são fornecidas por
razões de segurança e devem ser lidas com atenção.
Conselhos práticos para utilizar esta
aparelhagem
Para obter as melhores performances da placa:
empregue panelas com fundo chato, para ter a
certeza que haverá uma perfeita aderência à zona
de aquecimento.
empregue sempre panelas com diâmetro
suficiente para cobrir inteiramente a zona de
aquecimento, de maneira que se aproveite
inteiramente o calor disponível.
certifique-se que o fundo das panelas esteja
sempre perfeitamente enxuto e limpo, para
assegurar uma aderência certa e uma longa
durabilidade não somente das zonas de
cozedura, mas também das próprias panelas.
evite utilizar as mesmas panelas que emprega
nos queimadores a gás: a concentração de calor
nos queimadores a gás poderá deformar o fundo
das panelas, que desta maneira perderá
aderência;
nunca deixe uma zona de cozedura acesa sem
uma panela, porque o seu aquecimento, ao
chegar rapidamente ao nível máximo, poderá
danificar os elementos de aquecimento.
Segurança geral
Este aparelho foi concebido para utilização de tipo
não profissional no âmbito de moradas.
Este aparelho não deve ser instalado ao ar livre,
mesmo num sítio protegido, porque é muito
perigoso deixá-lo exposto a chuva e temporais.
Não toque na máquina se estiver descalço, ou se as
suas mãos ou pés estiverem molhados ou húmidos.
Este aparelho deve ser empregado para cozer
alimentos, somente por pessoas adultas e segundo
as instruções apresentadas neste folheto. Não
utilize o plano como superfície de apoio ou como
tábua de cortar.
A placa de vitrocerâmica é resistente às batidas
mecânicas, entretanto pode rachar-se (ou
eventualmente partir-se) se for batida com um
objecto pontiagudo, com um utensílio. Nestes casos,
desligue imediatamente o aparelho da rede de
alimentação e contacte a assistência técnica.
Se a superfície do plano estiver rachada, desligue o
aparelho para evitar a possibilidade de choques
eléctricos.
Evite que o cabo de alimentação de outros
electrodomésticos encoste-se em partes quentes
do plano de cozedura.
Não se esqueça que a temperatura das zonas de
cozedura permanece muito alta pelo menos trinta
minutos depois de apagadas. O calor resíduo é
sinalizado também por um indicador (veja Início e
utilização).
Mantenha a devida distância da placa quaisquer
objectos que podem se derreter, por exemplo,
objectos de plástico, de alumínio ou produtos com
um alto conteúdo de açúcar. Preste muita atenção
com as embalagens e as películas de plástico ou
alumínio: se deixá-los sobre as superfícies
enquanto ainda estiverem quentes ou mornas,
podem causar um dano grave à placa.
Certifique-se que as pegas das panelas fiquem
sempre viradas para o lado interno do plano de
cozedura para evitar batidas acidentais.
Não puxe pelo cabo para desligar a ficha da
tomada eléctrica, pegue pela ficha.
Não realize limpeza nem manutenção sem antes ter
desligado a ficha da rede eléctrica.
Não apoie objectos metálicos (facas, colheres,
tampas, etc.) sobre o plano porque podem ficar
quentes.
Advertência para os portadores deAdvertência para os portadores de
Advertência para os portadores de
Advertência para os portadores deAdvertência para os portadores de
pacemaker ou outros dispositivos médicospacemaker ou outros dispositivos médicos
pacemaker ou outros dispositivos médicos
pacemaker ou outros dispositivos médicospacemaker ou outros dispositivos médicos
implantáveis activos:implantáveis activos:
implantáveis activos:
implantáveis activos:implantáveis activos:
O plano de cozedura é conforme a todas as
normativas em vigor em matéria de interferências
electromagnéticas.
Este produto responde portanto perfeitamente a
todos os requisitos de lei (directivas 89/336/CEE).
Foi projectado de modo que não crie interferências
a outras aparelhagens eléctricas utilizadas, desde
que as mesmas também sejam conformes às
directivas acima citadas.
O plano de cozedura por indução gera campos
electromagnéticos de curto alcance.
Para evitar qualquer risco de interferências entre o
plano de cozedura e o pacemaker, este último
deverá ser realizado em conformidade com as
normativas em vigor.
Em relação a isto, podemos garantir unicamente a
conformidade do nosso produto. Para informações
sobre a conformidade ou eventuais problemas de
incompatibilidade, contacte o seu médico ou o
fabricante do pacemaker.
PT
59
Page 60

Manutenção e
cuidados
PT
Desligar a corrente eléctrica
Antes de realizar qualquer operação, desligue o
aparelho da alimentação eléctrica.
Limpeza do aparelho
Evite o emprego de detergentes abrasivos ou
corrosivos, tais como sprays para churrasqueiras e
fornos, tira-manchas e produtos contra ferrugem,
detergentes em pó e esponjas com superfície abrasiva.
podem arranhar irremediavelmente a superfície.
Nunca utilize equipamento de limpeza a vapor ou
de alta pressão para limpar a aparelhagem.
Para a manutenção ordinária, é suficiente lavar o
plano com uma esponja húmida e, em seguida,
enxugar com papel absorvente de cozinha.
Se o plano estiver muito sujo, esfregue com um
produto específico para limpeza de superfícies
em vidro cerâmica *, enxagúe e enxugue.
Lembre-se sempre de enxaguar com água limpa e
enxugar o plano com cuidado: para não acontecer
de resíduos de produtos grudarem-se na
sucessiva cozedura.
Quadro em aço inoxidável *
O aço inoxidável pode manchar-se por causa da
alta quantidade de calcário na água em contacto
durante muito tempo com o metal, ou por causa de
produtos de limpeza muito agressivos que
contenham fósforo.
É aconselhável enxaguar com água abundante e
enxugar com cuidado, depois de ter limpado o
plano. Se for derramada água, enxugue-a
rapidamente com cuidado.
Alguns planos de cozedura tem uma moldura de
alumínio parecida com o aço inoxidável. Não utilize
produtos para a limpeza e o desengorduramento
não idóneos para o alumínio.
Desmontar o plano
Para tirar as acumulações de sujidade maiores,
use uma espátula apropriada. Intervenha assim
que possível, sem aguardar que o aparelho
arrefeça, para evitar que resíduos grudem.
Podem ser obtidos excelentes resultados se usar
uma esponja especial de fios de aço inoxidável
específica para planos em vidro cerâmica,
molhada de água e sabão.
No caso em que no plano de cozedura tenham-se
acidentalmentefundidos objectos ou materiais
como plástico ou açúcar, removê-los
imediatamente com a espátula, até que a
superfície esteja ainda quente.
Depois de limpo, o plano poderá ser tratado com
um produto específico para a manutenção e a
protecção: a película invisível deixada por este
produto protegerá a superfície se algo for
derramado durante a cozedura. É recomendável
realizar estas operações com o aparelho morno
ou frio.
Caso seja necessário desmontar o plano de
cozedura:
1. remova os parafusos que fixam as molas de
centragem nos lados;
2. solte os parafusos dos ganchos de fixação nos
ângulos;
3. extraia o plano de cozedura do vão do móvel.
Recomendamos que se evite tentar o acesso aos
mecanismos internos para tentar uma reparação. Em
caso de avaria, contactar a Assistência técnica.
Há somente em alguns modelos.
*
60
Page 61

Bedienungsanleitung
KOCHFELD
ITIT
IT
ITIT
Italiano, 1 Français, 21
GBGB
GB
GBGB
English, 11
ES
Espanol, 41
FR
PTNL
Portuges, 51Nederlands, 31
DE
Deutsch, 61
KBT 6313 IT
KBT 6313 IT CL
Inhaltsverzeichnis
DE
Installation, 62-64
Aufstellung
Anschluss des Kochfeldes an den Backofen
Entsorgung
Beschreibung des Gerätes, 65-66
Bedienfeld
Beschreibung der Kochzonen
Inbetriebsetzung und Gebrauch, 67
Einschalten des Kochfeldes
Ausschalten des Kochfeldes
Booster-Funktion
Sicherheitsvorrichtungen, 68
Topferkennung
Geeignetes Kochgeschirr
Tonsignal
Sicherheitsschalter
Wärmeschutz
Vorsichtsmaßregeln und Hinweise, 69
Praktische Ratschläge zum Einsatz des Gerätes
Allgemeine Sicherheit
Reinigung und Pflege, 70
Abschalten Ihres Gerätes vom Stromnetz
Reinigung Ihres Gerätes
Demontage des Kochfeldes
Page 62

Installation
DE
! Bewahren Sie diese Bedienungsanleitung bitte
sorgfältig auf, damit Sie sie jederzeit zu Rate ziehen
können. Sorgen Sie dafür, dass sie im Falle eines
Verkaufs, eines Umzugs oder einer Übergabe an einen
anderen Benutzer das Gerät stets begleitet, damit
auch der Nachbesitzer die Möglichkeit hat, darin
nachschlagen zu können.
! Lesen Sie bitte die nachfolgenden Hinweise
aufmerksam durch. Sie liefern wichtige Informationen
hinsichtlich der Installation, des Gebrauchs und der
Sicherheit.
Aufstellung
! Verpackungsmaterial ist kein Spielzeug für Kinder. Es
ist entsprechend den Vorschriften zur getrennten
Müllsammlung zu entsorgen (siehe
Vorsichtsmaßregeln und Hinweise).
! Die Installation ist gemäß den vorliegenden
Anweisungen und von Fachpersonal durchzuführen.
Jede unsachgemäße Installation kann Menschen und
Tiere gefährden oder Sachschaden verursachen.
Einbau
Um eine einwandfreie Betriebsweise des Gerätes zu
gewährleisten, muss das für den Einbau bestimmte
Möbelteil folgende Eigenschaften aufweisen:
Die Auflagefläche muss aus hitzebeständigem
Material beschaffen sein, um einer Temperatur von
ca. 100°C standzuhalten.
Soll das Kochfeld über einem Backofen installiert
werden, muss letzterer mit einem Kühlsystem mit
Zwangsbelüftung ausgestattet sein.
Von der Installation eines Kochfeldes über einem
Geschirrspüler wird abgeraten. Gegebenenfalls ist
zur Abdichtung ein Zwischenteil zwischen beiden
Geräten zu installieren.
Je nach dem zu installierenden Kochfeld (siehe
Abbildungen) sind Arbeitsflächenausschnitte
folgender Abmessungen vorzusehen:
48
560 +/- 1
590
490 +/- 1
520
48
560 +/- 1
574
504
490 +/- 1
um einen Abstand von mindestens 20 mm zwischen
dem für den Einbau bestimmten Ausschnitt und
dem entsprechenden Unterschrank zu
gewährleisten.
min. 20 mm
5 mm
WÄRMEFACH
min. 40 mm
min. 20 mm
5 mm
HEIßLUFT
min. 40 mm
Befestigung
Das Kochfeld muss auf einer perfekt ebenen Stützbzw. Auflagefläche installiert werden.
Durch unsachgemäße Befestigung hervorgerufene
Verformungen könnten die Eigenschaften und
Leistungen des Kochfeldes beeinträchtigen.
MONTAGE DER KLAMMERN AN DER UNTERSEITE
VORDERSEITE DES
KOCHFELDES
ARBEITSFLÄCHE
30
40
690
48
520
48
785
510
560 +/- 1
490 +/- 1
750 +/- 1
490+/- 1
Belüftung
Um eine geeignete Belüftung zu gewährleisten und ein
Überhitzen der angrenzenden Flächen zu vermeiden,
muss das Kochfeld wie folgt angebracht werden:
in einem Abstand von mindestens 40 mm von der
dahinter liegenden Wand und von 600 mm von einer
jeden anderen vertikalen Fläche;
62
UNTERSEITE DES KOCHFELDES
Page 63

Anschluss des Kochfeldes
Die elektrische Sicherheit dieses Gerätes ist nur
dann gewährleistet, wenn es sachgemäß und
gemäß den geltenden Sicherheitsvorschriften an
eine Erdungsanlage angeschlossen wird. Die
Gegebenheit dieser grundlegenden
Sicherheitsanforderung muss überprüft werden, im
Zweifelsfalle ist eine Kontrolle der Anlage durch
Fachpersonal anzufordern.
Der Hersteller kann für eventuelle, durch Fehlen einer
Erdungsanlage verursachte Schäden nicht
verantwortlich gemacht werden.
Vor Anschluss des Gerätes kontrollieren Sie bitte,
dass die auf dem Typenschild angegebenen Daten
mit den Eigenschaften des Versorgungsnetzes
übereinstimmen.
Vergewissern Sie sich davon, dass die elektrische
Leistung der Anlage und der Steckdosen der
maximalen, auf dem Typenschild angegebenen
Höchstleistung des Gerätes entspricht. Im
Zweifelsfalle ziehen Sie bitte einen Fachmann zu
Rate.
Bei jeder Wartungs- oderBei jeder Wartungs- oder
Bei jeder Wartungs- oder
Bei jeder Wartungs- oderBei jeder Wartungs- oder
Reinigungsmaßnahme ist das Gerät vomReinigungsmaßnahme ist das Gerät vom
Reinigungsmaßnahme ist das Gerät vom
Reinigungsmaßnahme ist das Gerät vomReinigungsmaßnahme ist das Gerät vom
Stromnetz zu trennen.Stromnetz zu trennen.
Stromnetz zu trennen.
Stromnetz zu trennen.Stromnetz zu trennen.
Der Anschluss des Kochfeldes an das Stromnetz
muss mittels eines
vorgenommen werdenvorgenommen werden
vorgenommen werden: soll das Gerät direkt an
vorgenommen werdenvorgenommen werden
das Stromnetz angeschlossen werden, ist zwischen
Stromnetz und Gerät ein leicht zugänglicher,
allpoliger Schalter mit einer Kontaktweite von
mindestens 3 mm zwischenzuschalten.
AnschlussgehäusesAnschlussgehäuses
Anschlussgehäuses
AnschlussgehäusesAnschlussgehäuses
Nur für Modelle ohne Versorgungskabel
Einige Modelle sind nicht mit einem
Versorgungskabel ausgestattet, da das Kabel je
nach der Art des Elektroanschlusses zu bemessen
ist (siehe nachfolgende Anschlusstabelle). Schließen
Sie das Kabel wie folgt an:
1. Öffnen Sie das
Klemmengehäuse, indem
Sie unter Zuhilfenahme
eines Schraubenziehers
die seitlichen Zungen des
Klemmengehäusedeckels
anheben. Ziehen Sie den
Deckel ab (siehe
Abbildung).
2. Schrauben Sie die
Schraube der
Kabelklemme aus und
drücken Sie sie durch
Einwirken auf den
Schraubenzieher heraus.
3. Schrauben Sie die
Schrauben der Kontakte
L-N-
aus und
befestigen Sie die Drähte
dann unter Beachtung der
entsprechenden Farben
unter den
Schraubenköpfen: Blau
(N), Braun (L), Gelb/Grün
(
).
DE
Nur für Modelle mit Versorgungskabel
Einige Modelle werden mit einem EinphasenVersorgungskabel bestückt geliefert. Diese Modelle
dürfen demnach nur an ein Einphasennetz
angeschlossen werden. Achten Sie bitte auf die
Farben der Anschlussdrähte gemäß beigefügtem
Schaltplan.
Elektrischer Anschluss
L
BLNBR
L
BLNBR
BR=BRUN,BL=BLEU
BR=BRUIN, BL=BLAUW
* Anwendung des Gleichzeitigkeitsfaktors nach CEI 60335-2-6
Spannung
Frequenz
FR-BE-AT-DE-GR-ES-ILIT-NZ-PT-GP-CH-MA-LUIE-FI-SE-IS-GB-NL-DK
230V - 1+N~ 50Hz
CY-MT-AU-NZ-KW
240V - 1+N~ 50Hz
FR-BE-NO
230V - 2 ~ 50Hz
BR=BRAUN, BL=BLAU
BR=BROWN, BL=BLUE
Schmelz-
sicherungen
Querschnitte
25A *
2,5 mm²
Zur Erstellung des gewünschten
Elektroanschlusses (siehe Tabelle) verwenden Sie
bitte die im Gehäuse befindlichen Brücken.
Verlegen Sie die Drähte des Versorgungskabels
so wie in der Tabelle angegeben.
Schließen Sie diese dann an und ziehen Sie
abschließend sämtliche Klemmenschrauben fest
an.
Befestigen Sie nun das Versorgungskabel in der
entsprechenden Kabelklemme und schließen Sie
den Deckel.
63
Page 64

DE
! Wird das Kochfeld über einem Einbaubackofen
installiert, müssen die Elektroanschlüsse (der des
Kochfeldes und der des Backofens) getrennt
vorgenommen werden, und dies nicht nur aus
Sicherheitsgründen, sondern auch um den
Backofen, falls nötig, leichter herausziehen zu
können.
Elektrischer Anschluss
12345
LN
12345
L1 L2
12345
L1 L2 N
12345
L1 L2 L3
12 34
L1 L2 N2N1
12345
LN
* Anwendung des Gleichzeitigkeitsfaktors nach CEI 60335-2-6
5
Spannung
Frequenz
FR-AT-BE-DE-GP--
ES-IE-IL-IS-IT-LU-
RE-FI-GB-GR-PT--
SE-MA-NZ
230V-1+N~50 Hz
FR-BE-NO
230V-2~50/60 Hz
FR-BE-CH-DE-AT--
ES-IL-IT-NZ-PT-
MA- LU-SE-IS-NL
400V2-N~50 Hz
FR-BE-NO
230V3~50 Hz
NL
230V2+2-N~50 Hz
CY-AU-NZ-KW-MT
240V-1+N~50 Hz
Schmelzsicherungen
Querschnitte
25 A*
2,5 mm²
25 A*
2,5 mm²
16 A*
1,5 mm²
16 A*
1,5 mm²
16 A*
1,5 mm²
25 A*
2,5 mm²
Entsorgung
Entsorgung des Verpackungsmaterials: Befolgen
Sie die lokalen Vorschriften; Verpackungsmaterial
kann wiederverwertet werden.
Die europäische Richtlinie 2002/96/EG über
Elektro- und Elektronik-Altgeräte (WEEE) sieht vor,
dass Haushaltsgeräte nicht mit dem normalen
Stadtmüll entsorgt werden dürfen. Die Altgeräte
müssen getrennt gesammelt werden, um die
Rückführung und das Recycling der Materialen zu
optimieren, aus denen die Geräte hergestellt sind,
und um mögliche Belastungen der Gesundheit
und der Umwelt zu verhindern. Das
Mülleimersymbol ist auf allen Produkten
dargestellt, um an die Verpflichtung zur
getrennten Abfallsammlung zu erinnern. Für
weitere Informationen zur korrekten Entsorgung
können sich die Besitzer von Haushaltsgeräten an
die übergeordnete öffentliche Einrichtung oder an
ihren Händler wenden.
Dieses Gerät entspricht den
folgenden EG-Richtlinien:
- 73/23/EWG vom 19.02.73 (Niederspannung) und
nachfolgenden Änderungen
- 89/336/EWG vom 03.05.89 (elektromagnetische
Verträglichkeit) und nachfolgenden Änderungen
- 93/68/EWG vom 22.07.93 und nachfolgenden
Änderungen.
64
Page 65

Beschreibung
des Gerätes
Bedienfeld
Betriebsanzeigeleuchte der
PROGRAMMIERTEN KOCHZONE *
Anzeige der
PROGRAMMIERTEN GARZEIT *
Leistungsanzeige (0 - 9)
und RESTWÄRMEANZEIGE
KOCHZONEN-
WÄHLSCHALTER
15.
0
5.
0
Booster
DE
Taste zur EINSTELLUNG
der MINUTENUHR *
Leistungsanzeige (0 - 9)
und RESTWÄRMEANZEIGE
ANZEIGE zur Wahl
einer KOCHZONE
KOCHZONENWÄHLSCHALTER
Leistungsanzeige (0 - 9)
und RESTWÄRMEANZEIGE
BOOSTER-Taste *
Taste zur VERRINGERUNG
der LEISTUNG
EIN/AUS Taste
Taste zur ERHÖHUNG
der LEISTUNG
Taste zur SPERRE der
SCHALTELEMENTE
ANZEIGELEUCHTE „SPERRE“
Nur bei einigen Modellen.
*
65
Page 66

DE
KBT 6313 I T
KOCHFELDER
KBT 6313 I T CL
Kochzonen Leistung (in W)
Hinten rechts (HRe)
Hinten links (HLi)
I T 1800-B3000-B4000*
I 1200
Platte Mitte rechts I 1800
Gesamtleistung 7000
è
I
IT
B 4000*
Einfache Induktionskochzone
è
Induktionskochzone Tripla
è
Die Leistung dieser Kochzone kann
bis auf 4000 W erhöht werden
Beschreibung der Kochzonen
Kochen mit Induktion ist die schnellste und
zeitsparendste Art des Kochens.
Im Gegensatz zum traditionellen Prinzip der
Strahlungswärme erzeugt die Induktionsbeheizung
die Wärme durch ein elektromagnetisches Feld
direkt im Geschirrboden, die Glaskeramikfläche
selbst bleibt kalt: Voraussetzung dafür ist lediglich
ein Kochtopf mit Boden aus magnetisiertem
Material.
Eine jede Kochzone wird über
eine Bedienungstaste, deren Aufdruck eine
Reproduktion des Designs der entsprechenden
Kochzone darstellt,
und über einen Leistungsregler, bestehend aus
einer Doppeltaste (+,-) aktiviert.
Die nachstehende Tabelle liefert nützliche Hinweise
zum optimalen Einsatz der verschiedenen
Kochzonen.
Leistung Garart
1
2
3
4
5
6
7
8
9
Schmelzen von Butter, Schokolade
Erhitzen von Flüssigkeiten
Zubereitung von Cremes und Soßen
Suppenfleisch, Kalbsragout,
Süßspeisen
Reis- oder Nudelgerichte
Garen bei starker Hitze: Steaks, Fisch,
Omeletts
Fritieren
Die Restwärmeanzeigen bleiben auch nach
Ausschalten der Kochzone noch so lange
eingeschaltet, bis die Temperatur der
entsprechenden Heizelemente unter 60 °C absinkt
(die Leistungsanzeige signalisiert H) um Sie auf die
Gefahr, sich verbrennen zu können, aufmerksam zu
machen
66
Page 67

Inbetriebsetzung und
Gebrauch
Wird das Kochfeld an das Stromnetz
angeschlossen, ertönt nach einigen Sekunden ein
kurzes, akustisches Signal: nur daraufhin kann das
Kochfeld eingeschaltet werden.
Einschalten des Kochfeldes
Das Kochfeld wird über die Taste (für 3
Sekunden gedrückt halten) eingeschaltet.
Betriebsweise der Kochzonen
Eine jede Kochzone wird über eine Bedienungstaste
und über einen aus einer Doppeltaste (+,-)
bestehenden Leistungsregler eingeschaltet.
005.
Einschalten einer Kochzone
Um eine Kochzone einzuschalten, berühren Sie
die entsprechende Bedienungstaste und stellen
daraufhin über die Tasten "+" und "-" die
gewünschte Leistungsstufe (0 - 9) ein.
Um direkt die maximale Leistung (9) einzustellen,
drücken Sie kurz auf "-".
Ausschalten einer Kochzone
Um eine Kochzone auszuschalten, wählen Sie diese
zuerst über die entsprechende Bedienungstaste:
--
-: die
--
++
+ und
++
drücken dann gleichzeitig die Tasten
: Die Leistung sinkt sofort auf 0, die Kochzone
wird ausgeschaltet;
oder aber Sie drücken die Taste
Kochzonenleistung sinkt allmählich bis zum
völligen Abschalten.
- -
-
- -
Ausschalten des Kochfeldes
Drücken Sie die Taste ; das Kochfeld wird
ausgeschaltet. Sollten die Schaltelemente gesperrt
worden sein (siehe nachfolgenden Abschnitt),
bleiben diese auch bei Wiedereinschalten des
Gerätes gesperrt. Um eine Kochzone in Betrieb
nehmen zu können, müssen die Schaltelemente
zuerst wieder freigegeben werden.
Booster-Funktion
Sind mit einer Booster-Funktion ausgestattet.
Zur Beschleunigung der Aufheizzeiten der Kochzonen
(siehe Kochzonen-Tabelle auf der vorigen Seite),
drücken Sie die Taste
erscheint
automatisch nach 4 Minuten wieder aus. Sobald die
Boosterfunktion zugeschaltet wird, wird die
Heizleistung einiger Kochzonen (siehe KochzonenTabelle auf der vorigen Seite) auf eine maximale
Leistung von 600 W herabgesetzt.
PP
P. Die Boosterfunktion schaltet sich
PP
Booster
. Auf der Leistungsanzeige
Sperre der Schaltelemente
Während der Betriebszeit des Kochfeldes kann das
Bedienpaneel gesperrt werden, um irrtümliche
Einstellungsänderungen zu verhindern (durch
Kinder, bei der Reinigung usw.).
Ein kurzer Druck auf die Taste
neben der Taste befindliche Kontrollleuchte leuchtet
auf und die Schaltelemente werden freigegeben.
Um die Heizleistung zu ändern, oder den Gargang
zu unterbrechen, müssen die Schaltelemente
freigegeben werden: Drücken Sie die Taste
Kontrollleuchte erlischt, die Schaltelemente werden
freigegeben.
Um erneut die Einstellung bzw. Regulierung einer
Kochzone zu ermöglichen, ist diese mittels der
entsprechenden Bedienungstaste zu wählen.
Programmierung einer Garzeit
Es können alle Kochzonen gleichzeitig für eine Garzeit
von maximal 99 Minuten vorprogrammiert werden.
Verfahren Sie hierzu wie folgt:
Wählen Sie die Kochzone über die entsprechende
Bedienungstaste,
stellen Sie über die Tasten "+" und "-" die
gewünschte Leistungsstufe ein,
drücken Sie die Programmiertaste
stellen Sie über die Tasten "+" und "-" die
gewünschte Garzeit ein,
bestätigen Sie die Einstellung durch nochmaligen
Druck auf die Taste
Die Restgarzeit wird unverzüglich berechnet.
Ist die programmierte Garzeit abgelaufen, ertönt (1
Minute lang) ein akustisches Signal und die
Kochzone wird automatisch ausgeschaltet.
Betriebsweise der Induktionskochzone Tripla
Die Betriebsweise dieser Kochzone hängt in erster Linie
vom Durchmesser der verwendeten Kochtöpfe ab:
Deckt der Topf nur den ersten gekennzeichneten
Bereich ab, kann die innere Zone allein
eingeschaltet werden. In diesem Fall ist der
Booster nicht aktiv und die abgegebene Leistung
beträgt 1800 W;
Ist der Topf größer als der erste und kleiner als
der zweite gekennzeichnete Bereich, beträgt die
abgegebene Höchstleistung 2400 W (bis zu 3000
W bei aktivem Booster);
Ist der Topf größer als der zweite und kleiner als
der dritte Bereich, gibt die Kochzone eine
maximale Leistung von bis zu 3000 W (bis zu
4000 W bei aktivem Booster) ab.
Die Booster-Funktion, bei der die Energieaufnahme je
nach Topfdurchmesser zwischen 3 kW und 4 kW liegt,
kann also nur bei den letzten beiden der angegebenen
Fälle aktiviert werden, wenn also der Topf größer als
der Durchmesser der ersten Zone ist. Die BoosterFunktion ist demnach nicht aktiv, wenn nur die kleine
Kochzone in der Mitte verwendet wird (1800W).
.
genügt, die
; die
,
DE
67
Page 68

Sicherheitsvorrichtungen
DE
Topferkennung
Jede Induktionskochzone ist mit einer
Topferkennungs-Vorrichtung ausgerüstet. Die
Kochzone bewirkt ein Erhitzen des Topfbodens nur
bei einer angemessenen, der Kochzone
entsprechenden Topfgröße.
Das Blinken der Anzeigeleuchte kann Folgendes
signalisieren:
ein nicht geeignetes Kochgeschirr (aus nicht
magnetisiertem Material),
ein zu geringer Topfdurchmesser,
das Anheben bzw. Abnehmen eines Topfes.
Wählen Sie nur immer den
die denselben Durchmesser der eingesetztendie denselben Durchmesser der eingesetzten
die denselben Durchmesser der eingesetzten
die denselben Durchmesser der eingesetztendie denselben Durchmesser der eingesetzten
Kochzone aufweist.Kochzone aufweist.
Kochzone aufweist.
Kochzone aufweist.Kochzone aufweist.
Wichtig: Ovale Kochzonen
Die ovalen Kochzonen können nur dann
leistungsverstärkt werden, wenn das gesamte Oval
aktiviert wird.
Stellen Sie niemals zwei kleine Töpfe nebeneinander
auf die ovale Kochzone.
Topf bzw. die Pfanne,Topf bzw. die Pfanne,
Topf bzw. die Pfanne,
Topf bzw. die Pfanne,Topf bzw. die Pfanne,
Geeignetes Kochgeschirr
Da die Induktionsbeheizung nur in dem Moment
aktiviert wird, in dem das metallene Kochgeschirr
auf die Kochzone gestellt wird, nur so wird das
Magnetfeld geschlossen, wird die Erzeugung der
Hitze bei Abnahme des Topfes von der Kochzone
auch sofort wieder unterbrochen.
Verwenden Sie demnach Kochgeschirr, dessen
Herstellungsmaterial (magnetisiertes Material)
sich für das Induktionssystem eignet.
Wir empfehlen den Einsatz von Töpfen oder
Pfannen aus Gusseisen, emailliertem Stahl oder
Spezialstahl für Induktionskochzonen.
Geschirr aus Kupfer, Porzellan, Ton, Glas, Majolika,
Aluminium oder nicht magnetischem Edelstahl ist für
Induktionskochplatten ungeeignet.
Im Zweifelsfall hilft ein Magnet bei der Prüfung
der Verwendbarkeit.
Topfes haften, ist dieser für das System geeignet.
Es sollten ausschließlich Töpfe bzw. Pfannen mit
flachen und besonders starken Böden verwendet
werden, Geschirr mit unebenen Böden könnte das
Glas verkratzen.
GEEIGNETES MATERIAL
*
Gusseisen
emaillierter Edelstahl
magnetisierter Edelstahl
Bleibt er am Boden des
UNGEEIGNETES MATERIAL
Kupfer,
Aluminium, Glas, Ton,
Porzellan, nicht magnetisierter Edelstahl
Tonsignal
Kleinere Betriebsanomalien, verursacht durch:
Gegenstände (Topf, Besteck usw.), die für länger
als 10 Sekunden auf dem Schaltfeld liegen,
Flüssigkeit, die über das Schaltfeld gegossen
wurde,
ein zu langer Druck auf das Schaltfeld usw.
können ein akustisches Signal auslösen und das
Ausschalten des Kochfeldes bewirken.
Um dieses auszuschalten, muss der Grund der
Störung beseitigt werden.
Um das Kochfeld wieder benutzen zu können, muss
es neu eingeschaltet, und die gewünschte Kochzone
erneut gewählt werden. Auch die erforderliche
Leistungsstufe ist erneut einzustellen.
Sicherheitsschalter
Das Gerät ist mit einer Sicherheitsautomatik
ausgestattet, die nach einem gewissen Zeitintervall
(siehe Tabelle) je nach der eingestellten
Leistungsstufe anspricht. Bei Auftreten eines
solchen Sicherheitsintervalls schaltet die DisplayLeistungsanzeige auf "0".
Beispiel: Die hintere, rechte Kochzone wurde auf
Stufe 5 eingestellt, und die vordere, linke Kochzone
auf 2. Die hintere, rechte Kochzone schaltet sich
nach einer Betriebszeit von 4 Stunden aus, die
vordere, linke Kochzone dagegen nach einer
Betriebszeit von 6 Stunden.
Um die Schaltelemente zu entsperren, muss das
Kochfeld mittels der Taste
ausgeschaltet werden.
Leistungsstufe Maximale Betriebsdauer
1-2 10 Stunden
35 Stunden
44 Stunden
5-6 3 Stunden
7-8 2 Stunden
91 Stunde
Wärmeschutz
Im Falle einer Überhitzung der elektronischen
Geräte-Komponenten schaltet sich das Kochfeld
automatisch aus, auf der Leistungsanzeige erscheint
die Meldung a.
Diese Meldung erlischt, sobald die Temperatur auf
einen akzeptablen Wert gesunken ist.
68
Page 69

Vorsichtsmaßregeln
und Hinweise
Das Gerät wurde entsprechend den strengsten
internationalen Sicherheitsvorschriften entworfen und
gebaut. Nachstehende Hinweise werden aus
Sicherheitsgründen geliefert und sollten aufmerksam
gelesen werden.
Praktische Ratschläge zum Einsatz des
Gerätes
So gibt Ihnen Ihr Kochfeld sein Bestes:
Benutzen Sie Kochgeschirr mit flachem Boden, um
zu gewährleisten, dass der Boden vollständig auf
der Heizfläche aufliegt.
Benutzen Sie Kochgeschirr, dessen Durchmesser
mit dem der Kochzone übereinstimmt, d.h. dessen
Boden die Kochzone ganz bedeckt, und somit die
gesamte Wärme genutzt wird.
Achten Sie darauf, dass der Boden des
Kochgeschirrs trocken und sauber ist; nur so ist ein
perfektes Aufliegen des Geschirrbodens, sowie eine
lange Lebensdauer von Kochzone und Geschirr
gewährleistet.
Vermeiden Sie den Einsatz von Kochgeschirr, das
auch auf Gasflammen verwendet wird: Die äußerst
hohe Hitzekonzentration der Gasbrenner könnte die
Topfböden leicht verformen und demnach die
korrekte Auflage beeinträchtigen.
Lassen Sie niemals eine Kochzone eingeschaltet,
wenn kein Topf darauf steht. Auf diese Weise würde
die Kochzone in kürzester Zeit auf
Höchsttemperatur gebracht, was Schäden an den
Heizelementen zur Folge haben könnte.
Allgemeine Sicherheit
Dieses Gerät ist für den nicht professionellen
Einsatz im privaten Haushalt bestimmt.
Das Gerät darf nicht im Freien aufgestellt werden,
auch nicht, wenn es sich um einen geschützten
Platz handelt. Es ist gefährlich, das Gerät Gewittern
und Unwettern auszusetzen.
Berühren Sie das Gerät nicht mit nassen oder
feuchten Händen oder Füßen und auch nicht, wenn
Sie barfuß sind.
Das Gerät darf nur von Erwachsenen und gemäß
den Hinweisen der vorliegenden
Bedienungsanleitung zur Zubereitung von
Lebensmitteln verwendet werden. Verwenden Sie
das Kochfeld nicht als Abstellfläche oder als
Schneidebrett.
Das Glaskeramikkochfeld ist stoßfest; dennoch
kann es durch Stöße bzw. Aufprall von spitzen
Gegenständen zerbrechen. Schalten Sie das
Kochfeld in einem solchen Fall vom Stromnetz und
wenden Sie sich an die Kundendienststelle.
Vermeiden Sie, dass das Netzkabel anderer
Elektrogeräte in Kontakt mit heißen Kochfeldteilen
gelangt.
Bitte berücksichtigen Sie, dass die Kochzonen noch
für ca. 30 Minuten nach dem Ausschalten sehr heiß
bleiben. Die Restwärme wird auf der
entsprechenden Anzeige eingeblendet (siehe
Inbetriebsetzung und Gebrauch).
Halten Sie sämtliche Gegenstände, die schmelzen
könnten, wie Plastikteile oder Kunststoffe sowie
Zucker oder stark zuckerhaltige Speisen von dem
Kochfeld fern. Achten Sie besonders auf
Verpackungsmaterial, Frischhaltefolie und Alufolie:
Wird derartiges Material auf den noch heißen oder
warmen Oberflächen belassen, können sie das
Kochfeld dauerhaft beschädigen.
Sollte die Kochfeldoberfläche gesprungen sein,
schalten Sie das Gerät aus, um so mögliche
Stromschläge zu vermeiden.
Stellen Sie Stieltöpfe und Pfannen immer mit nach
innen gerichteten Griffen auf die Kochstelle, um
jegliches Risiko durch unbeabsichtigtes Anstoßen
auszuschließen.
Ziehen Sie den Netzstecker nicht am Netzkabel aus
der Steckdose, sondern nur am Netzstecker selbst.
Ziehen Sie vor der Reinigung oder vor
Wartungsmaßnahmen stets den Netzstecker aus
der Steckdose.
Legen Sie bitte keine Metallgegenstände (Messer,
Löffel, Deckel usw.) auf das Kochfeld; sie könnten
sehr heiß werden.
Hinweis für Herzschrittmacherträger oder Träger
anderer medizinischen Implantate:
Das Kochfeld entspricht allen geltenden Richtlinien in
Sachen elektromagnetischer Verträglichkeit.
Dieses Erzeugnis erfüllt demnach sämtliche
gesetzlichen Anforderungen (Richtlinien 89/336/CEE).
Es wurde so konzipiert, dass keine Interferenzen mit
anderen in Einsatz befindlichen elektrischen Geräten
entstehen können, es sei denn, letztere entsprechen
nicht den obigen Richtlinien.
Das Induktions-Kochfeld erzeugt elektromagnetische
Felder im Nahbereich.
Um jegliche Gefahren durch Interferenzen zwischen
dem Kochfeld und dem Schrittmacher
auszuschließen, muss letzterer in Übereinstimmung
mit den bestehenden Richtlinien hergestellt sein.
In dieser Hinsicht können wir nur für die
Übereinstimmung unseres Erzeugnisses gerantieren.
Für Informationen hinsichtlich der Konformität oder
eventueller Unverträglichkeiten bitten wir Sie, sich an
den behandelnden Arzt oder an die Herstellfirma des
Herzschrittmachers wenden zu wollen.
DE
69
Page 70

Reinigung und
Pflege
DE
Abschalten Ihres Gerätes vom Stromnetz
Vor jeder Reinigung und Pflege ist das Gerät vom
Stromnetz zu trennen.
Reinigung Ihres Gerätes
Der Einsatz von Scheuermitteln oder scharfen oder
chemischen Reinigungsmitteln, wie Backofensprays,
Fleckenentferner, Rostentfernungsmittel, Reiniger in
Pulverform und Scheuerschwämme, die die Oberfläche
des Kochfeldes hoffnungslos beschädigen würden, ist
zu vermeiden.
Verwenden Sie zur Reinigung des Kochfeldes
keine Dampf- oder Hochdruckreinigungsgeräte.
Zur täglichen Pflege genügt es, das Kochfeld mit
einem feuchten Schwamm abzuwischen und mit
Küchenpapier abzutrocknen.
Bei besonders starker Verschmutzung sollte ein
spezielles Reinigungsmittel für Glaskeramik
verwendet werden; anschließend ist das Kochfeld mit
Wasser abzuspülen und sorgfältig abzutrocknen.
Achten Sie bitte darauf, das Kochfeld nach der
Reinigung stets mit klarem Wasser abzuspülen
und anschließend abzutrocknen. Rückstände der
Reinigungsmittel könnten sich nämlich bei der
nächsten Benutzung des Kochfeldes ihrerseits
festsetzen.
Edelstahlrahmen *
Auf den Edelstahlteilen könnten Flecken
zurückbleiben, sollte stark kalkhaltiges Wasser oder
phosphorhaltiges Spülmittel für längere Zeit darauf
vorhanden sein.
Es ist ratsam, das Kochfeld nach der Reinigung gut
nachzuspülen und abzutrocknen. Wird versehentlich
Wasser darauf verschüttet, muss es sofort sorgsam
getrocknet werden.
Einige Kochfelder sind mit einem Aluminiumrahmen
versehen, der Edelstahl sehr ähnlich ist. Verwenden
Sie bitte keine Produkte zur Reinigung und
Entfettung, die nicht für Aluminium geeignet sind.
Demontage des Kochfeldes
Starke Verschmutzungen lassen sich mit einem
Schaber (Klingenschaber) entfernen. Sie sollten so
schnell wie möglich - und nicht erst nach Abkühlen
des Kochfeldes - entfernt werden, um zu vermeiden,
dass sich die Verschmutzungen festsetzen. Gute
Ergebnisse lassen sich auch mit einem -für
Glaskeramik geeigneten Spezialschwamm aus
Edelstahlwolle - und einer einfachen Spüllauge
erzielen.
Auf dem Kochfeld versehentlich geschmolzene
Alufolie, Plastikteile oder Kunststoffe, sowie
Zuckerreste müssen umgehend mit einem
Schaber von der noch warmen Oberfläche entfernt
werden.
Nach der Reinigung kann das Kochfeld mit einem
Pflegeprodukt nachbehandelt werden: Der
unsichtbare Schutzfilm, den ein solches Produkt
hinterlässt, schützt die Oberfläche vor eventuell
überkochenden Speisen. Es empfiehlt sich, diese
Nachbehandlung bei lauwarmem oder
abgekühltem Gerät vorzunehmen.
Sollte sich die Abnahme des Kochfeldes als
erforderlich erweisen, verfahren Sie bitte wie folgt:
1. Schrauben Sie die Schrauben aus, die zur
Befestigung der seitlichen Zentrierungsfedern
dienen;
2. lockern Sie die Schrauben der EckBefestigungsbügel;
3. nehmen Sie das Kochfeld aus dem
Möbelausschnitt heraus.
Wir empfehlen dringlich, Innenmechanismen nicht
eigenhändig zu reparieren. Kontaktieren Sie bei
Störungen bitte den Kundendienst.
Nur bei einigen Modellen.
*
70
Page 71

DE
71
Page 72

DE
07/2007 - 195045734.04
XEROX BUSINESS SERVICES
72
 Loading...