

Page 1
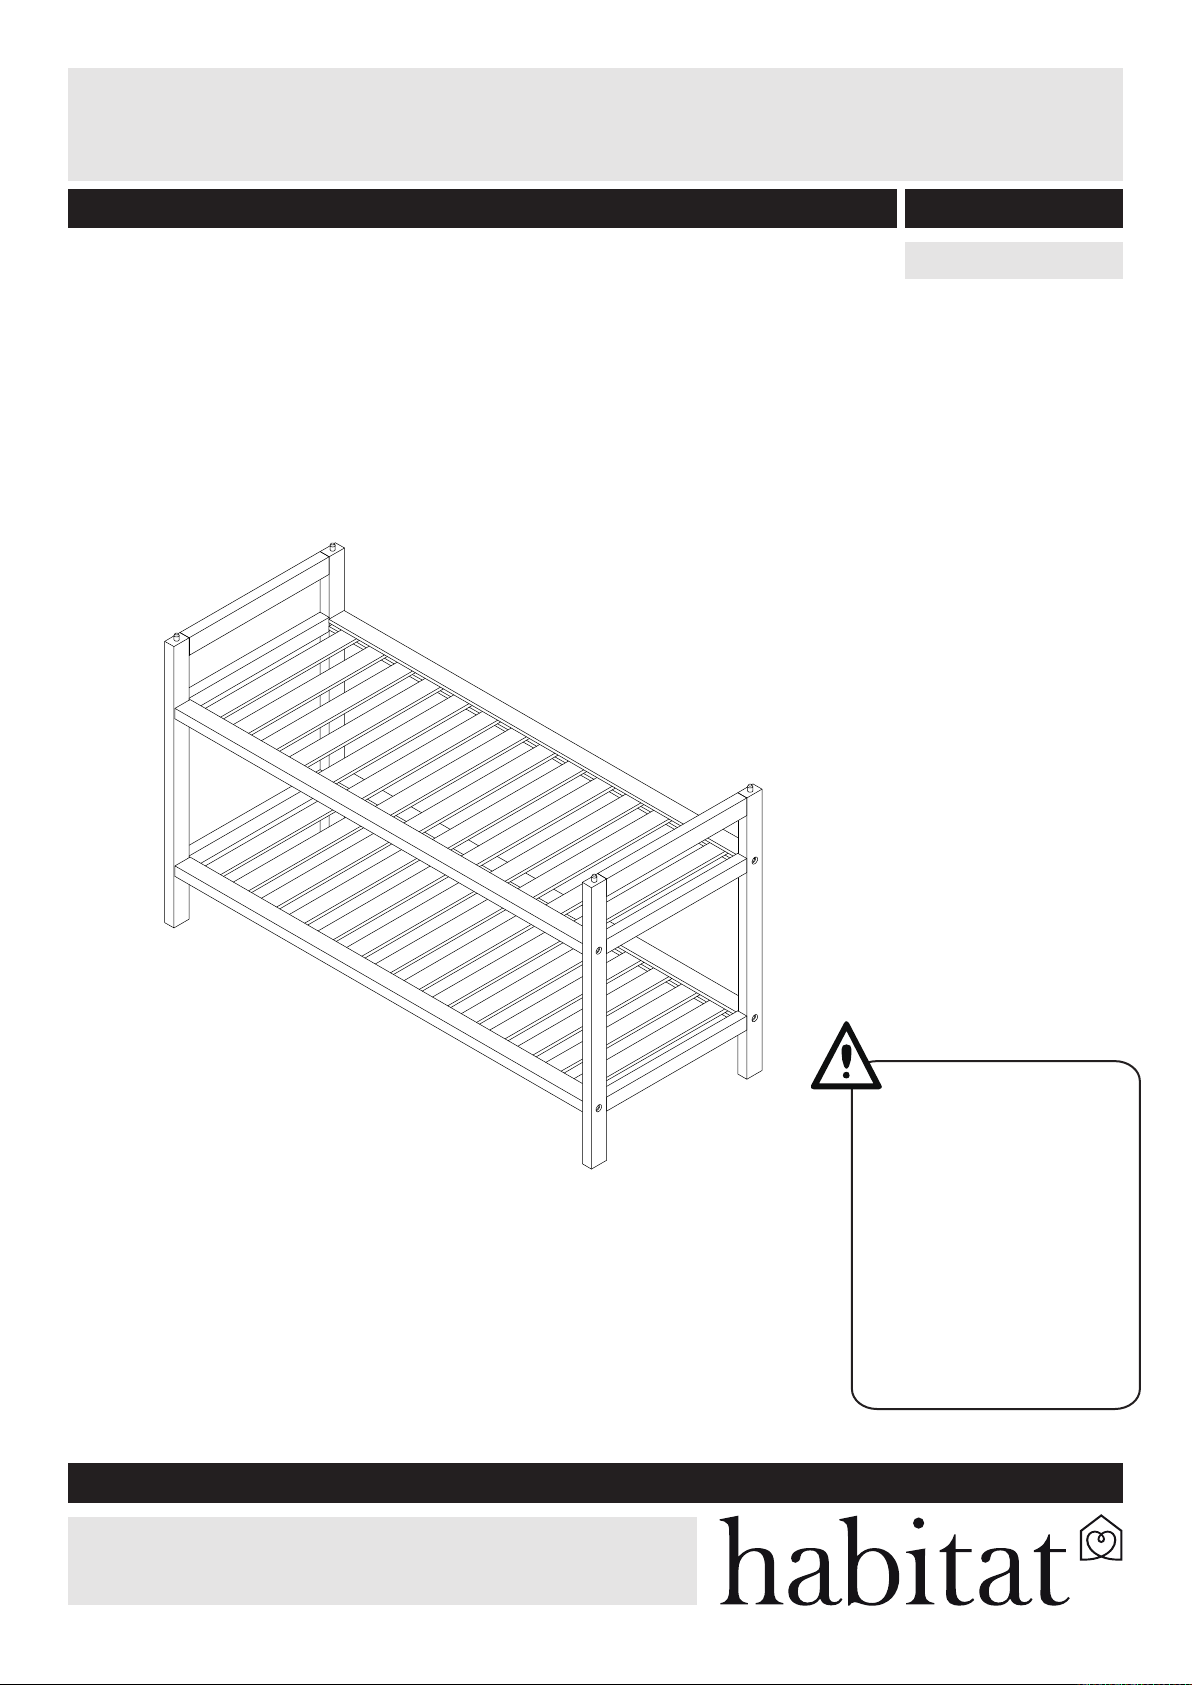
Kitt Shoe rack
Assembly Instructions - Please keep for future reference
KITT-SR-AW19-A
Dimensions
Width -70cm
Depth -28cm
Height -40.9cm
Important – Please r
If you need help or have damaged or missing parts, email:
customerservic
ead these instructions before assembly
or call:
0344 499 4686
Please Note
If you purchased two shoe
racks and want to stack
them, in order to help
prevent overturning these
products must to used with
wall devices provided to
fix the top one.
Page 2
Check you have all the components and
tools listed on the front cover and
pages 3.
Remove all fittings from the plastic bags
and separate them into their groups.
Assemble the item as close to its final
position (in the same room) as possible.
Dust regularly with a clean dry cloth.
Wipe up any spills immediately with a
damp cloth and then dry the surface
with a clean dry duster.
Repeat this procedure for periodic
cleaning.
Remove stubborn stains with a weak
washing up liquid solution and a damp
cloth and dry after with a clean cloth.
The use of furniture polish or spray is
not necessary or recommended.
Never use abrasive or corrosive
cleaning agents.
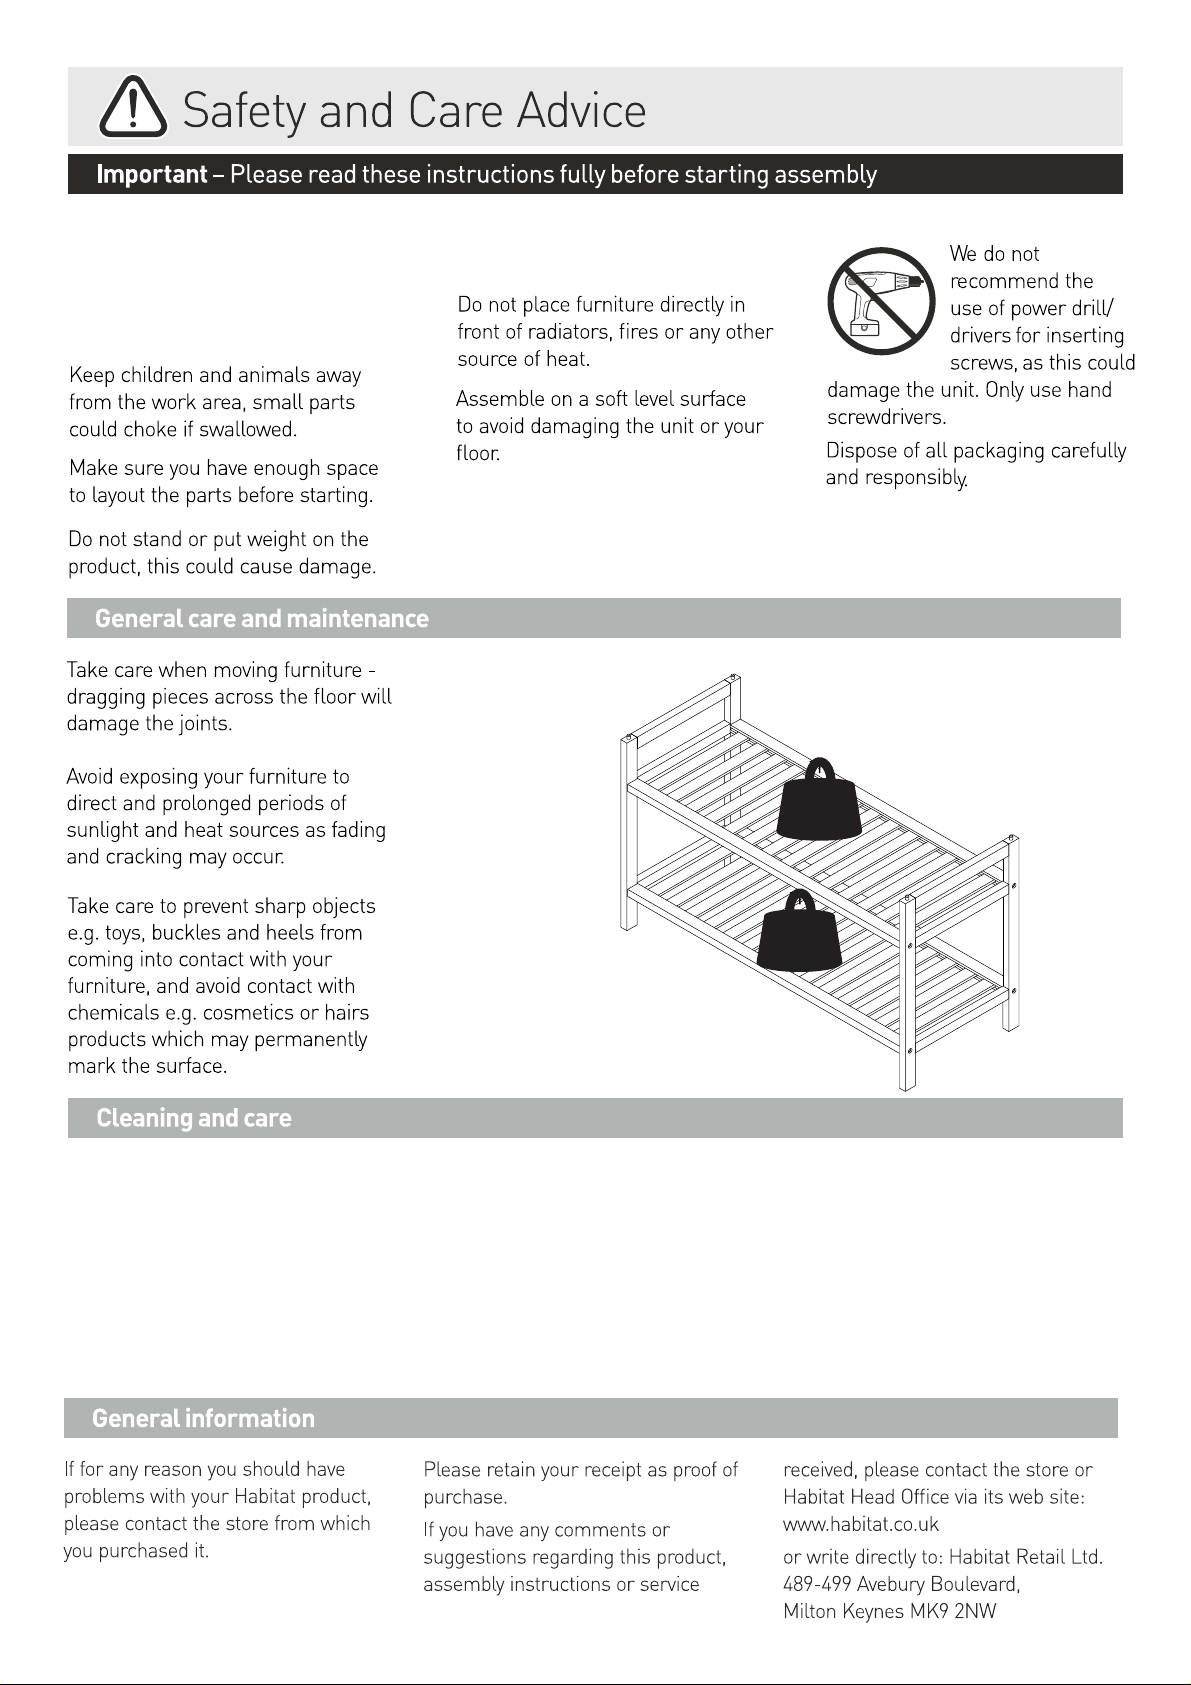
MAX
kg
5
MAX
kg
5
Always use place mats and coasters to
protect the surface from moisture and
heat.
2
Page 3
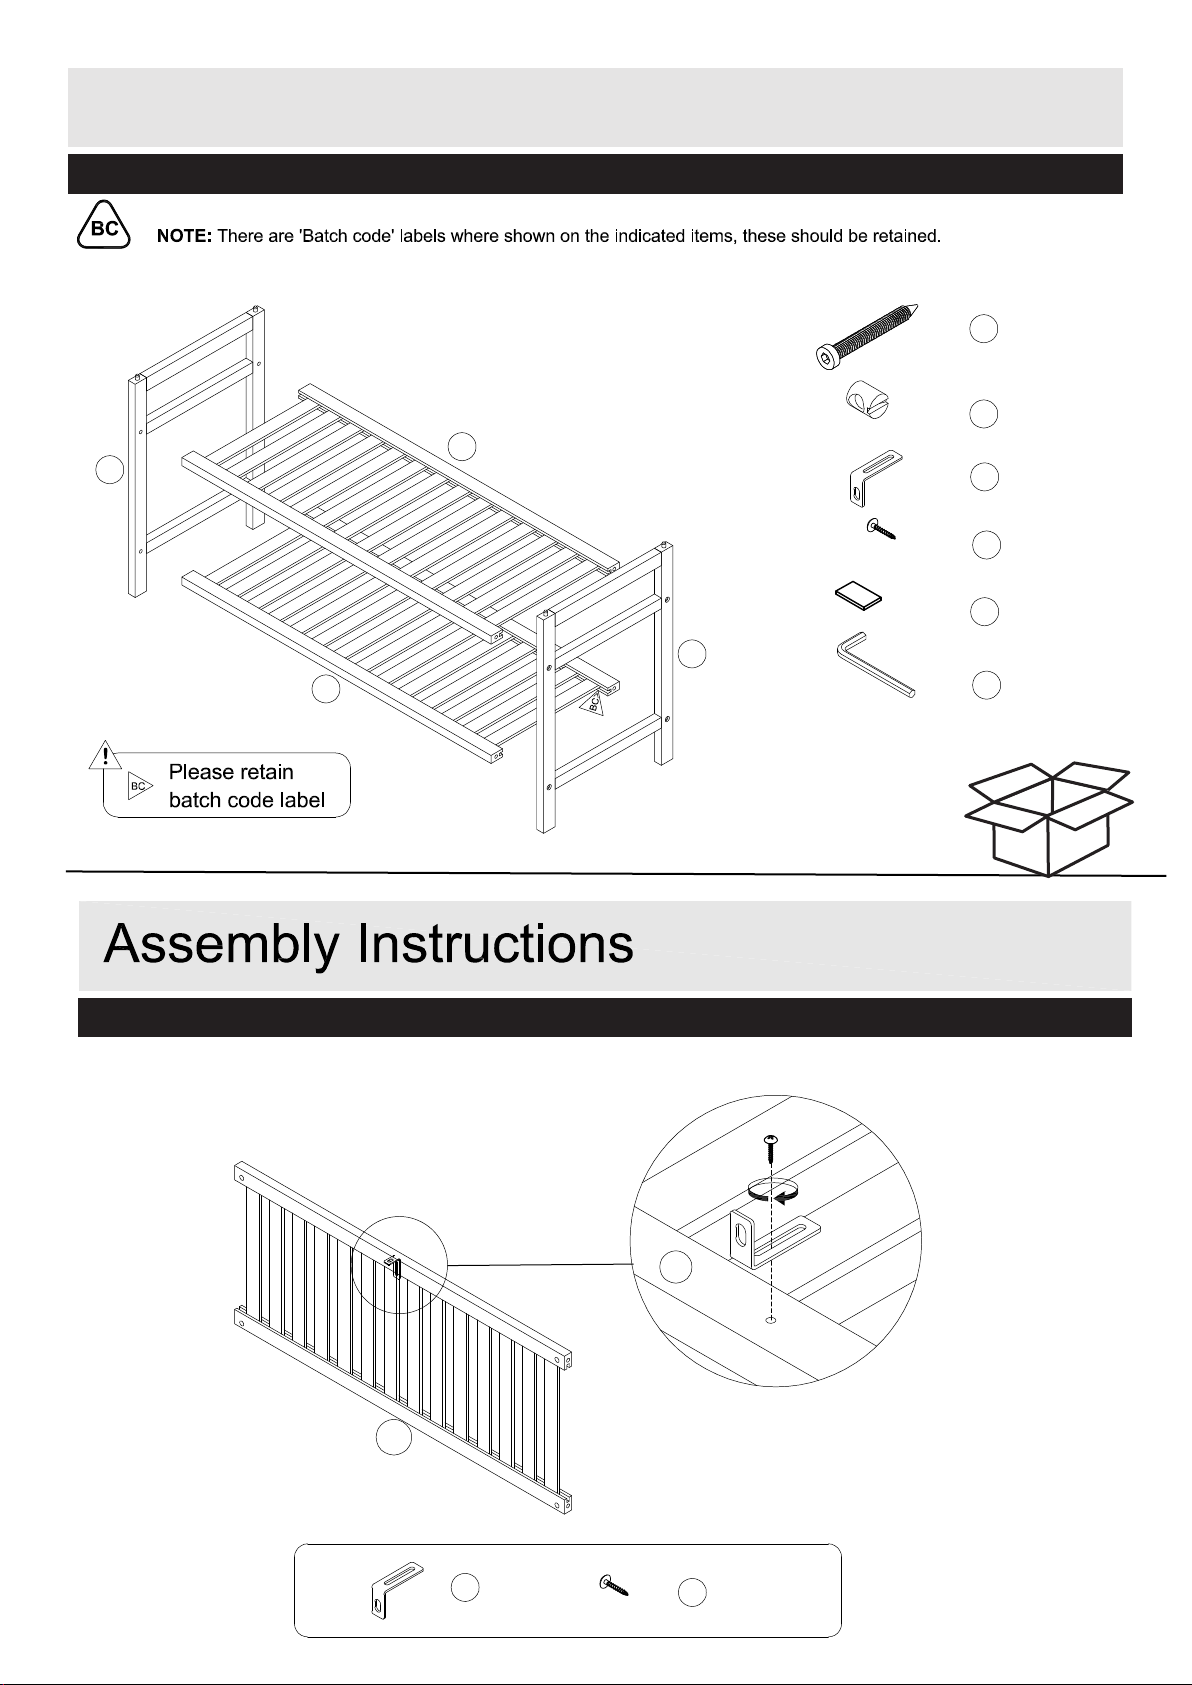
Components
Please check you have all the panels listed below
2
1
If you need help or have damaged or missing parts, email:
cust
[email protected] or call:
1
0344 499 4686
A
X8
X8
B
C
X1
D
X1
E
X6
Step1:
F
3
X1
1/1
2
2
C
X1
D
X1
3
Page 4
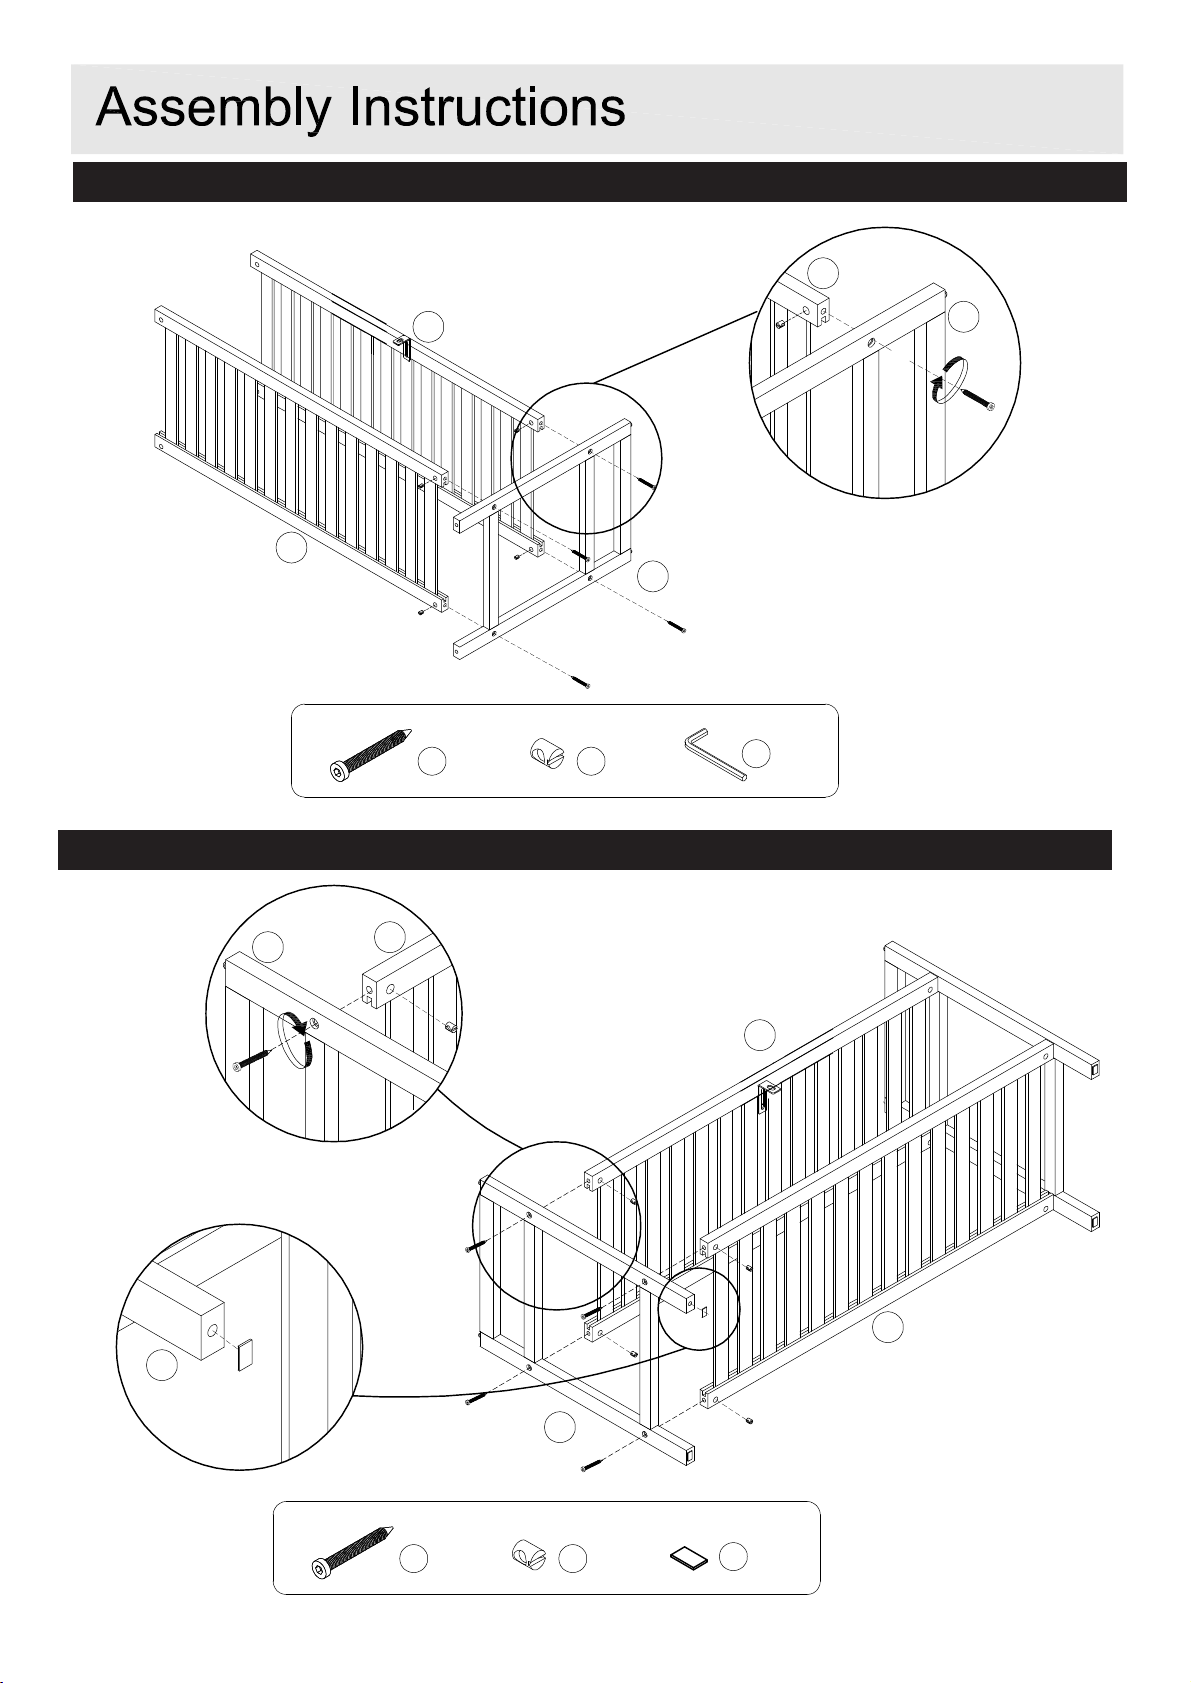
Step2:
2
Step3:
2
1
B
A
3
1
F
A
X4
B
X4
X1
1
2
B
2
A
3
1
E
1
E
A
X4
B
X4
X4
4
Page 5
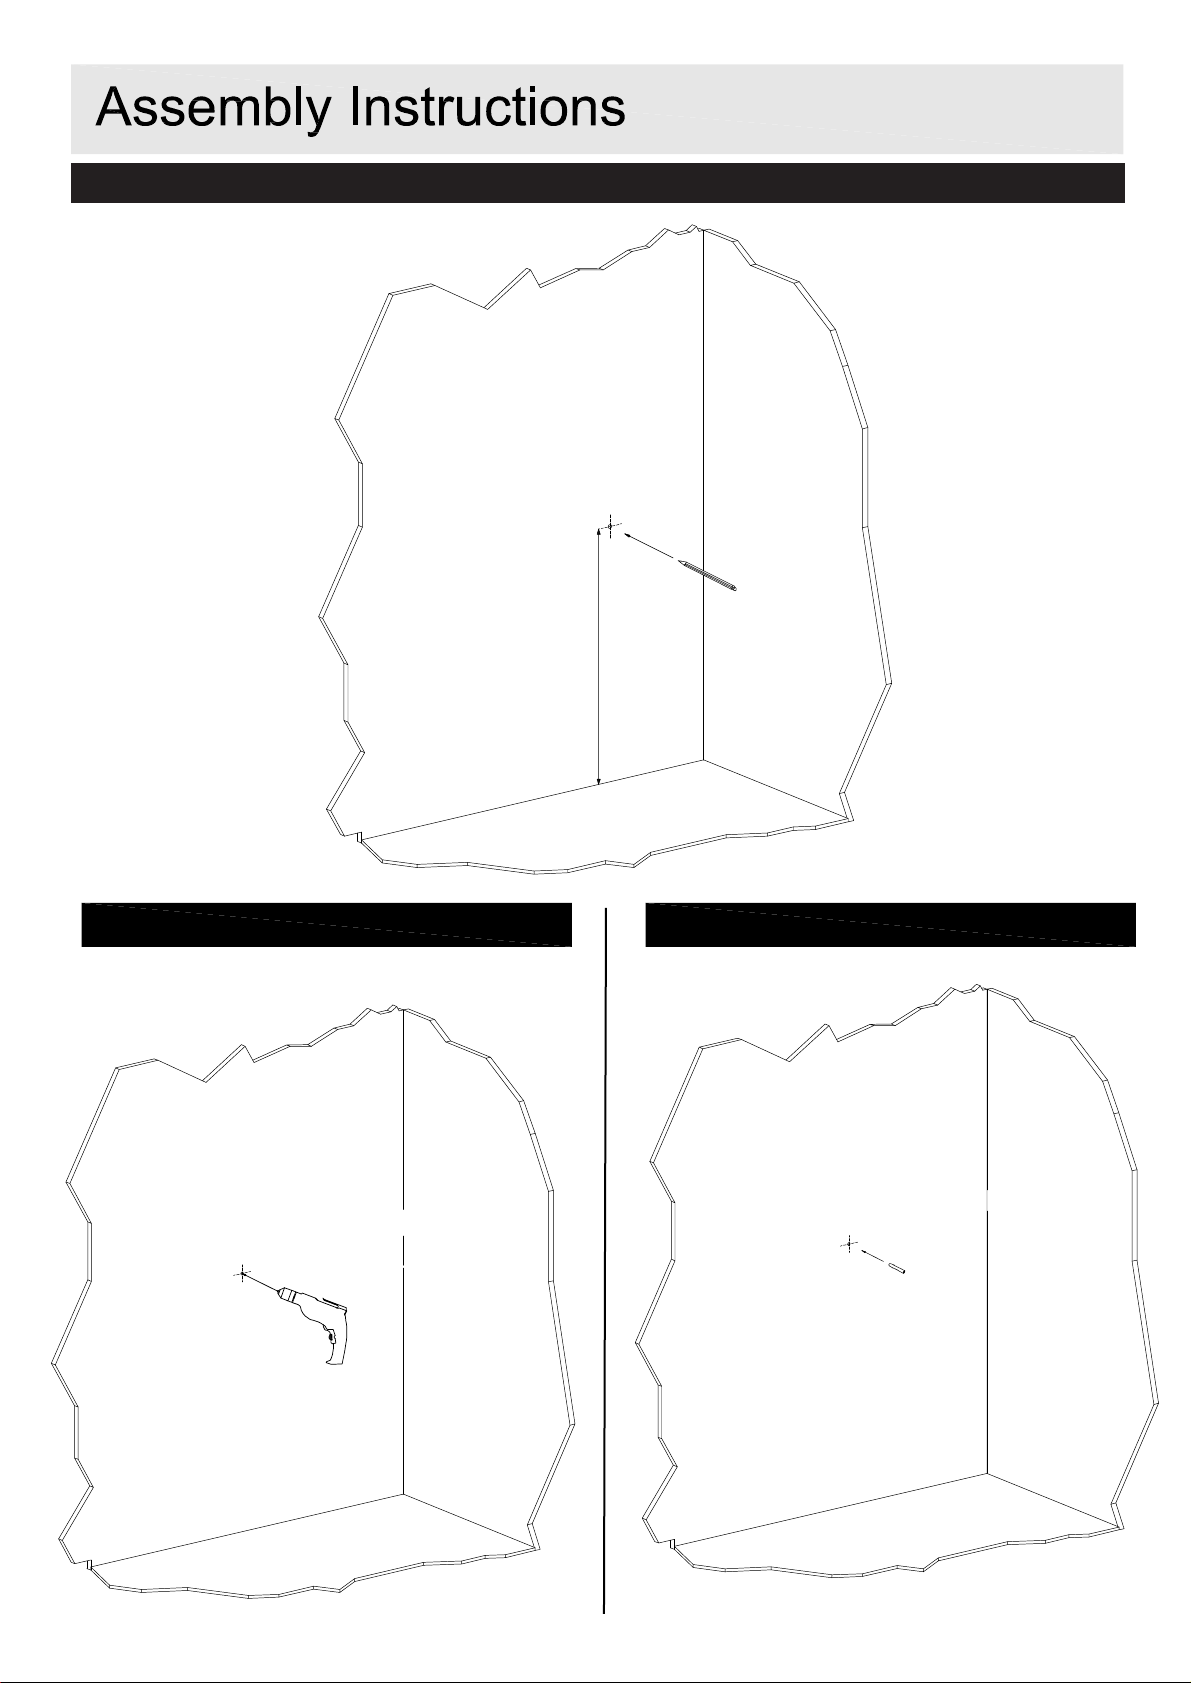
Step4:
IMPORTANT! If you purchased two shoe racks and want to stack them, please fix top one to your wall.
67.5
cm
Step54:
Step6:
5
Page 6
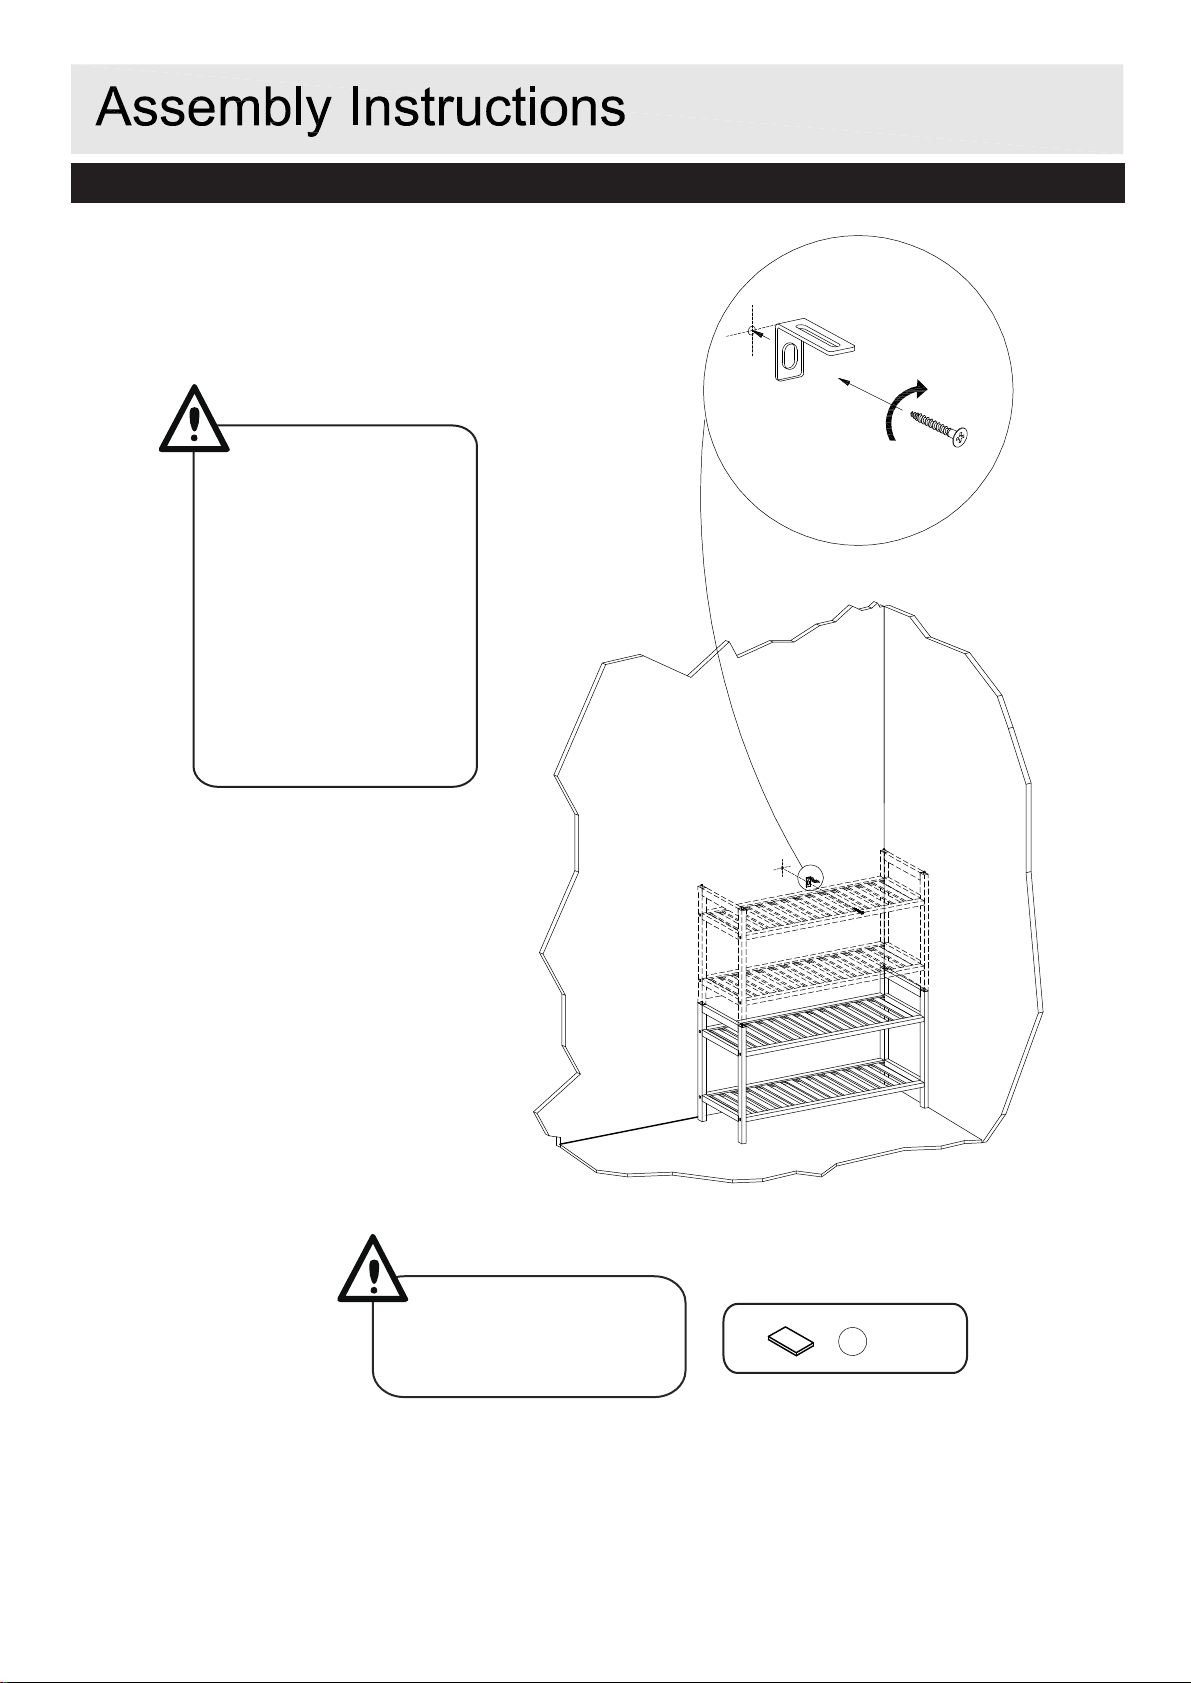
Step7:
Fixing the wall bracket to your wall
C
Please Note
You must source and
supply suitable fixings for
your wall type. If in doubt
consult a qualified trades
person.
Always ensure that the
wall to be drilled into is
free from hidden electrical
wires, water and gas pipes.
Please Note!
If necessary the shelving can be
adjusted for levelling up to uneven
floors by extra felt pads.
E
X2
6
Page 7
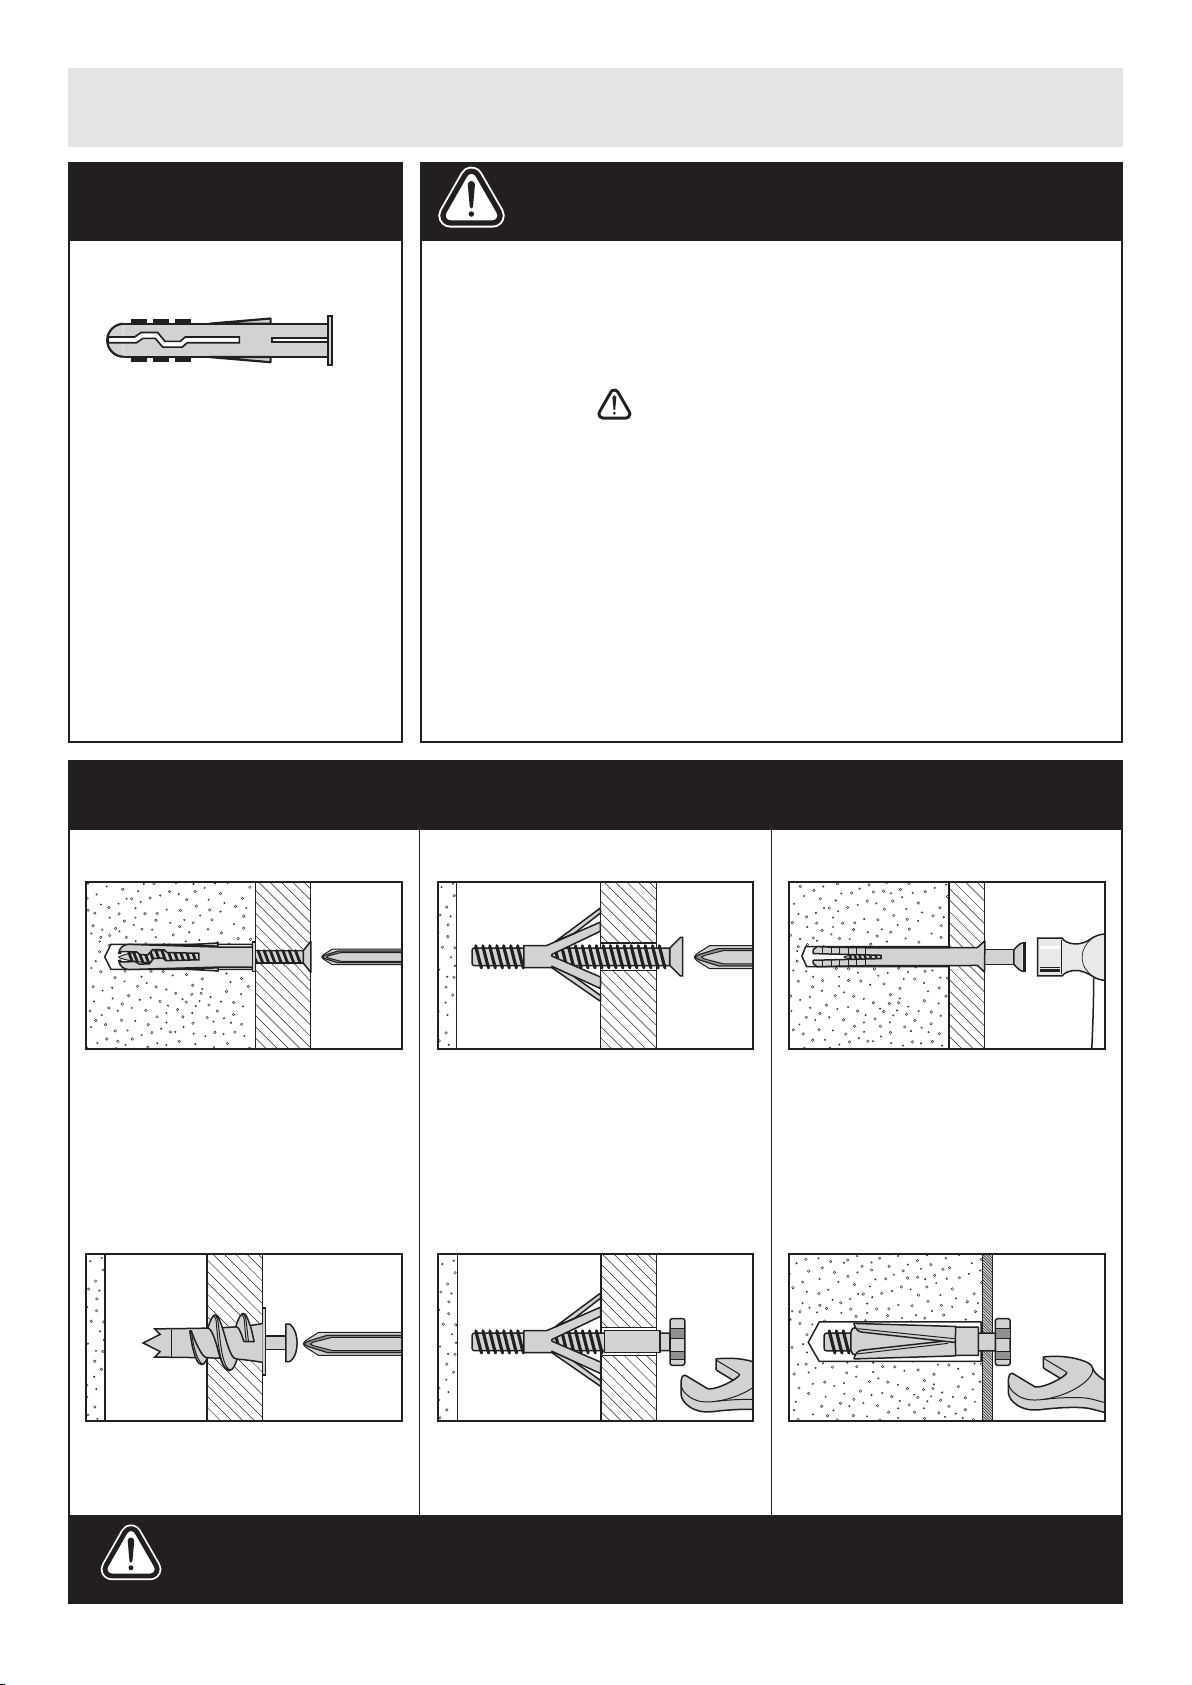
A Guide t
o - Wall Mounting & Fixings
Impor
W
tant note:
all Fixings:
- because of the variety of
different wall types, Habitat
cannot provide you with the
exact fixings you will need to
fix this product to the wall.
You must first identify the
type of wall you intend to fix
product onto and then contact
your local hardware store to
get the appropriate fixings.
tant:
Impor
check that ther
Mak
e sure that the screws and wall plugs being used are suitable
When drilling in
e are no hidden wires or pipes etc.
to walls always
for supporting your unit. Consult a qualified tradesperson if you are
unsure.
Hints:
1: Gener
2: Ensure you use the recommended drill bit to match the wall
3: Ensure you drill the hole horizontally, do not force the drill or
4: Take extra care when drilling high walls, ceilings and ceramic tiles.
5: Ensure wall plugs are well fitted and are a tight fit in the
al rule: Always use a larger screw and wall plug
ou are not sure.
if y
plug and hol
enlar
ge the hole.
e size.
Ensure wall plugs are inserted beyond the thickness of the ceramic
tiles to avoid the tiles splitting or cracking.
drill
ed hole.
ypes of walls
T
o.1 “General Purpose” wall plug
N
Gener
ally aerated blocks should not
be used to support heavy loads, use
a specialist fitting in this case. For light
loads, general purpose wall plugs can be
used.
No.2 “Plasterboard” wall plug
You can use one of the following types of wall plug if your walls are made
of brick, br
No.3 “Cavity Fixing” wall plug
For use with plasterboard partitions or
hollow wooden doors.
No.4 “Cavity Fixing-Heavy Duty” wall
eeze block, concrete, stone or wood.
plug
No.5 “Hammer Fixing” wall plug
For use with walls stuck with plasterboard.
The hammer fixing allows it to be fixed
to the wall rather than the plasterboard.
Always check the fixing is secure to the
retaining wall.
No.6 “Shield Anchor” wall plug Heavy
loads
For use when attaching light loads on to
plasterboard partitions.
Care &
Maintenance
For use when fitting or supporting heavy
loads such as shelving, wall cabinets and
coat racks.
ety: Always check the fitting and
Saf
location to ensure your safety in and
around the home.
For use with heavier loads such as TV &
HiFi speakers and satelite dishes etc.
Fitting: From time to time check
the fitting to ensure the wall plugs
or screws do not become loose.
7
 Loading...