

Page 1
SO$FMA!In$ceiling!Mount!
Installation Manual!
Compatible!with!all!SurroundVideo®!Omni!Series!Cameras
!
'
'!
Page 2
!! ! Installation!Manual!
Page | 2 support@arecontvision.com
!
!
+1.818.937.0700 877.CAMERA.8 www.arecontvision.com avsales@arecontvision.com
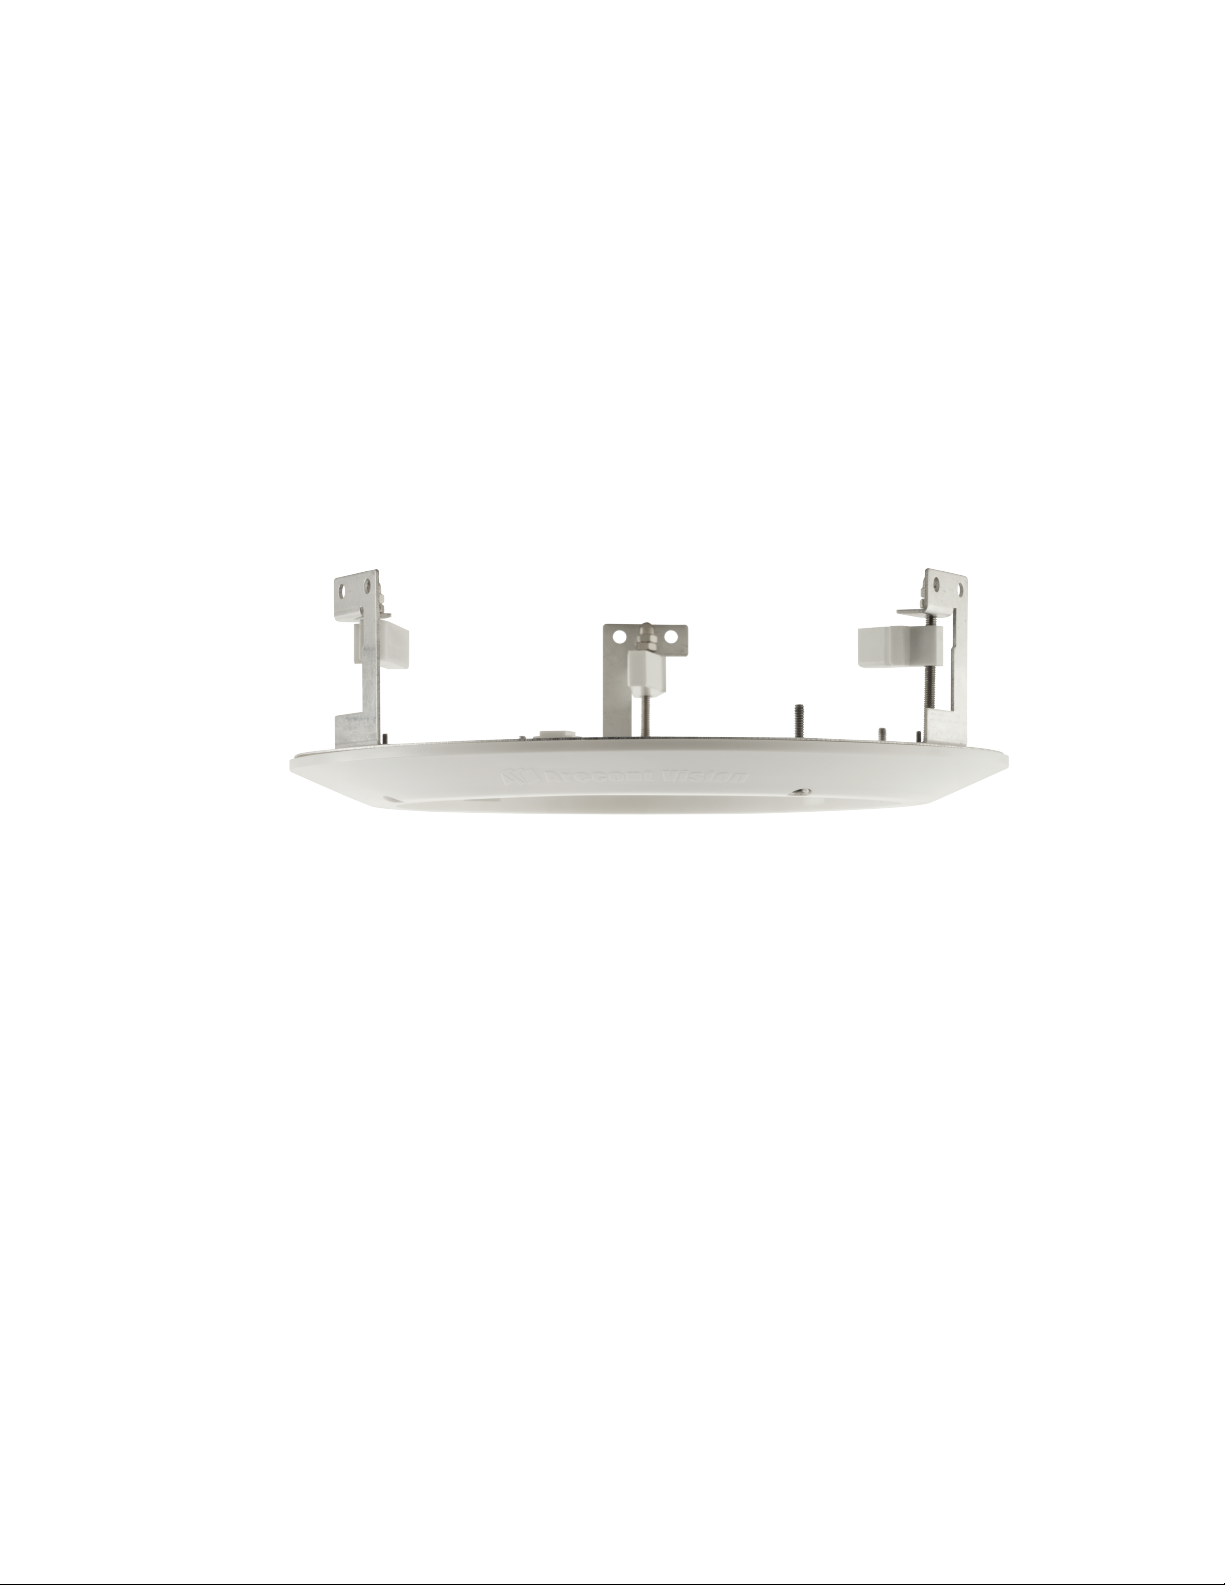
SurroundVideo®!Omni!In$ceiling!Mount
'
CAUTION!
1. Do not attempt to service a damaged unit yourself. Refer all servicing to qualified service
personnel.
2. Wiring methods shall be in accordance with the National Electrical Code/NFPA 70/ANSI, and
with all local codes and authorities having jurisdiction. Wiring should be UL Listed and/or
Recognized wire suitable for the application.
3. Always use hardware e.g. screws, anchors, bolts, locking nuts etc. which are compatible with
mounting surface and of sufficient length and construction to insure a secure mount.
Warranty Information
Global (3 Year) Limited Warranty
ARECONT VISION warrants to Purchaser (and only Purchaser) (the “Limited Warranty”), that: (a) each
Product shall be free from material defects in material and workmanship for a period of thirty-six (36)
months from the date of shipment (the “Warranty Period”); (b) during the Warranty Period, the
Products will materially conform with the specification in the applicable documentation; (c) all licensed
programs accompanying the Product (the “Licensed Programs”) will materially conform with applicable
specifications. Notwithstanding the preceding provisions, ARECONT VISION shall have no obligation or
responsibility with respect to any Product that (i) has been modified or altered without ARECONT
VISION’s written authorization; (ii) has not been used in accordance with applicable documentation; (iii)
has been subjected to unusual stress, neglect, misuse, abuse, improper storage, testing or connection;
or unauthorized repair; or (iv) is no longer covered under the Warranty Period. ARECONT VISION
MAKE NO WARRANTIES OR CONDITIONS, EXPRESS, IMPLIED, STATUTORY OR OTHERWISE,
OTHER THAN THE EXPRESS LIMITED WARRANTIES MADE BY ARECONT VISION ABOVE, AND
ARECONT VISION HEREBY SPECIFICALLY DISCLAIMS ALL OTHER EXPRESS, STATUTORY AND
IMPLIED WARRANTIES AND CONDITIONS, INCLUDING THE IMPLIED WARRANTIES OF
MERCHANTABILITY, FITNESS FOR A PARTICULAR PURPOSE, NON-INFRINGEMENT AND THE
IMPLIED CONDITION OF SATISFACTORY QUALITY. ALL LICENSED PROGRAMS ARE LICENSED
ON AN “AS IS” BASIS WITHOUT WARRANTY. ARECONT VISION DOES NOT WARRANT THAT (I)
THE OPERATION OF THE PRODUCTS OR PARTS WILL BE UNINTERRUPTED OR ERROR FREE;
(II) THE PRODUCTS OR PARTS AND DOCUMENTATION WILL MEET THE END USERS’
REQUIREMENTS; (III) THE PRODUCTS OR PARTS WILL OPERATE IN COMBINATIONS AND
CONFIGURATIONS SELECTED BY THE END USER; OTHER THAN COMBINATIONS AND
CONFIGURATIONS WITH PARTS OR OTHER PRODUCTS AUTHORIZED BY ARECONT VISION
OR (IV) THAT ALL LICENSED PROGRAM ERRORS WILL BE CORRECTED.
For RMA and Advance Replacement information visit http://www.arecontvision.com
Page 3

!! ! Installation!Manual!
Page | 3 support@arecontvision.com
!
!
+1.818.937.0700 877.CAMERA.8 www.arecontvision.com avsales@arecontvision.com
SurroundVideo®!Omni!In$ceiling!Mount
Installation
1. The SurroundVideo® Omni camera has been designed to provide installers with flexible
mounting options such as ceilings, walls, poles or corners. Determine a secure location to
mount the camera.
2. Use the supplied security L-key, to remove the four (4) screws securing the dome cover. The
bubble and four (4) securing screws will be used on the SO-FMA. The camera trim ring is no
longer required and can be discarded or saved for future use.
!
NOTE: When mounting the camera outdoors or in a wet environment, use of supplied rubber gasket is
recommended. Ensure the three holes on the top of the housing are aligned with the gasket and it is
properly seated flush with the camera housing.
Ensure you have the proper compatible mounting parts prior to starting your installation:
Reference #
Mount Type
In-ceiling Mount Components Required
1
In-ceiling mount
SO-FMA in-ceiling adapter
2
SurroundVideo® Omni camera
Page 4

!! ! Installation!Manual!
Page | 4 support@arecontvision.com
!
!
+1.818.937.0700 877.CAMERA.8 www.arecontvision.com avsales@arecontvision.com
SurroundVideo®!Omni!In$ceiling!Mount
NOTE: It is recommended to conduct periodic inspections of the installation. Rust on the metal
parts or screws may result in damage to the camera.
In-ceiling Mount
To properly flush mount the SurroundVideo® Omni to a drop ceiling or similar surface, a flush mount
adapter kit (SO-FMA) is required (sold separately).
1. Cut a hole in the ceiling using the template provided.
2. Insert the Flange Plate brackets from the SO-FMA into the ceiling hole. The lip of the plate
should be flush with the ceiling.
Figure 1: Insert the Flange Plate brackets via the SO-FMA into the ceiling hole
3. Screw the 3 screws into the ceiling. Continue to tighten the screws until the flush mount is
snuggly installed. The “Support Arm” will ride down the screw to compress the mounting
surface. NOTE: Do not over-torque the lever screws.
Page 5

!! ! Installation!Manual!
Page | 5 support@arecontvision.com
!
!
+1.818.937.0700 877.CAMERA.8 www.arecontvision.com avsales@arecontvision.com
SurroundVideo®!Omni!In$ceiling!Mount
!
Figure 3: Compress the mounting surface with lever screws
Reference #
Description
1
SO-FMA flange plate support arm
2
Lever screw
3
SurroundVideo Omni G2 camera
4
Rubber gasket
5
Dome cover
6
SO-FMA trim ring
4. Attach the trim ring to the flush mount adapter by rotating counter clockwise (Figure 4).
Figure 4: Attach trim ring to the flush mount adapter counter clockwise
Page 6

!! ! Installation!Manual!
Page | 6 support@arecontvision.com
!
!
+1.818.937.0700 877.CAMERA.8 www.arecontvision.com avsales@arecontvision.com
SurroundVideo®!Omni!In$ceiling!Mount
5. To configure the camera, reference the camera’s installation manual.
Support
1. Arecont Vision FAQ Page Located at ArecontVision.com
2. Check the following before you call:
• Restore camera to factory default with AV200 or the camera webpage.
• Upgrade to the latest firmware by visiting ArecontVision.com.
• Isolate the camera on a dedicated network and test with AV200.
• Swap the “troubled” camera with a known good camera to see if the problem follows the
camera or stays at the location.
3. Contact Arecont Vision Technical Support one of three ways:
1. Online Portal: Support.ArecontVision.com
2. Phone: 1.818.937.0700 (option #1)
3. Email: support@arecontvision.com
3. Use the Arecont Vision software AV IP Utility located on the CD or available for download at our
website (www.arecontvision.com) for camera discovery and setup (see Instruction Manual
located on the CD or available on our website).
'
'
'
'
'
!
!
!
 Loading...