

Page 1
SO-FMA
www.arecontvision.com
In-ceiling SO-FMA Mount Quick Guide
Compatible with SurroundVideo Omni Camera Series
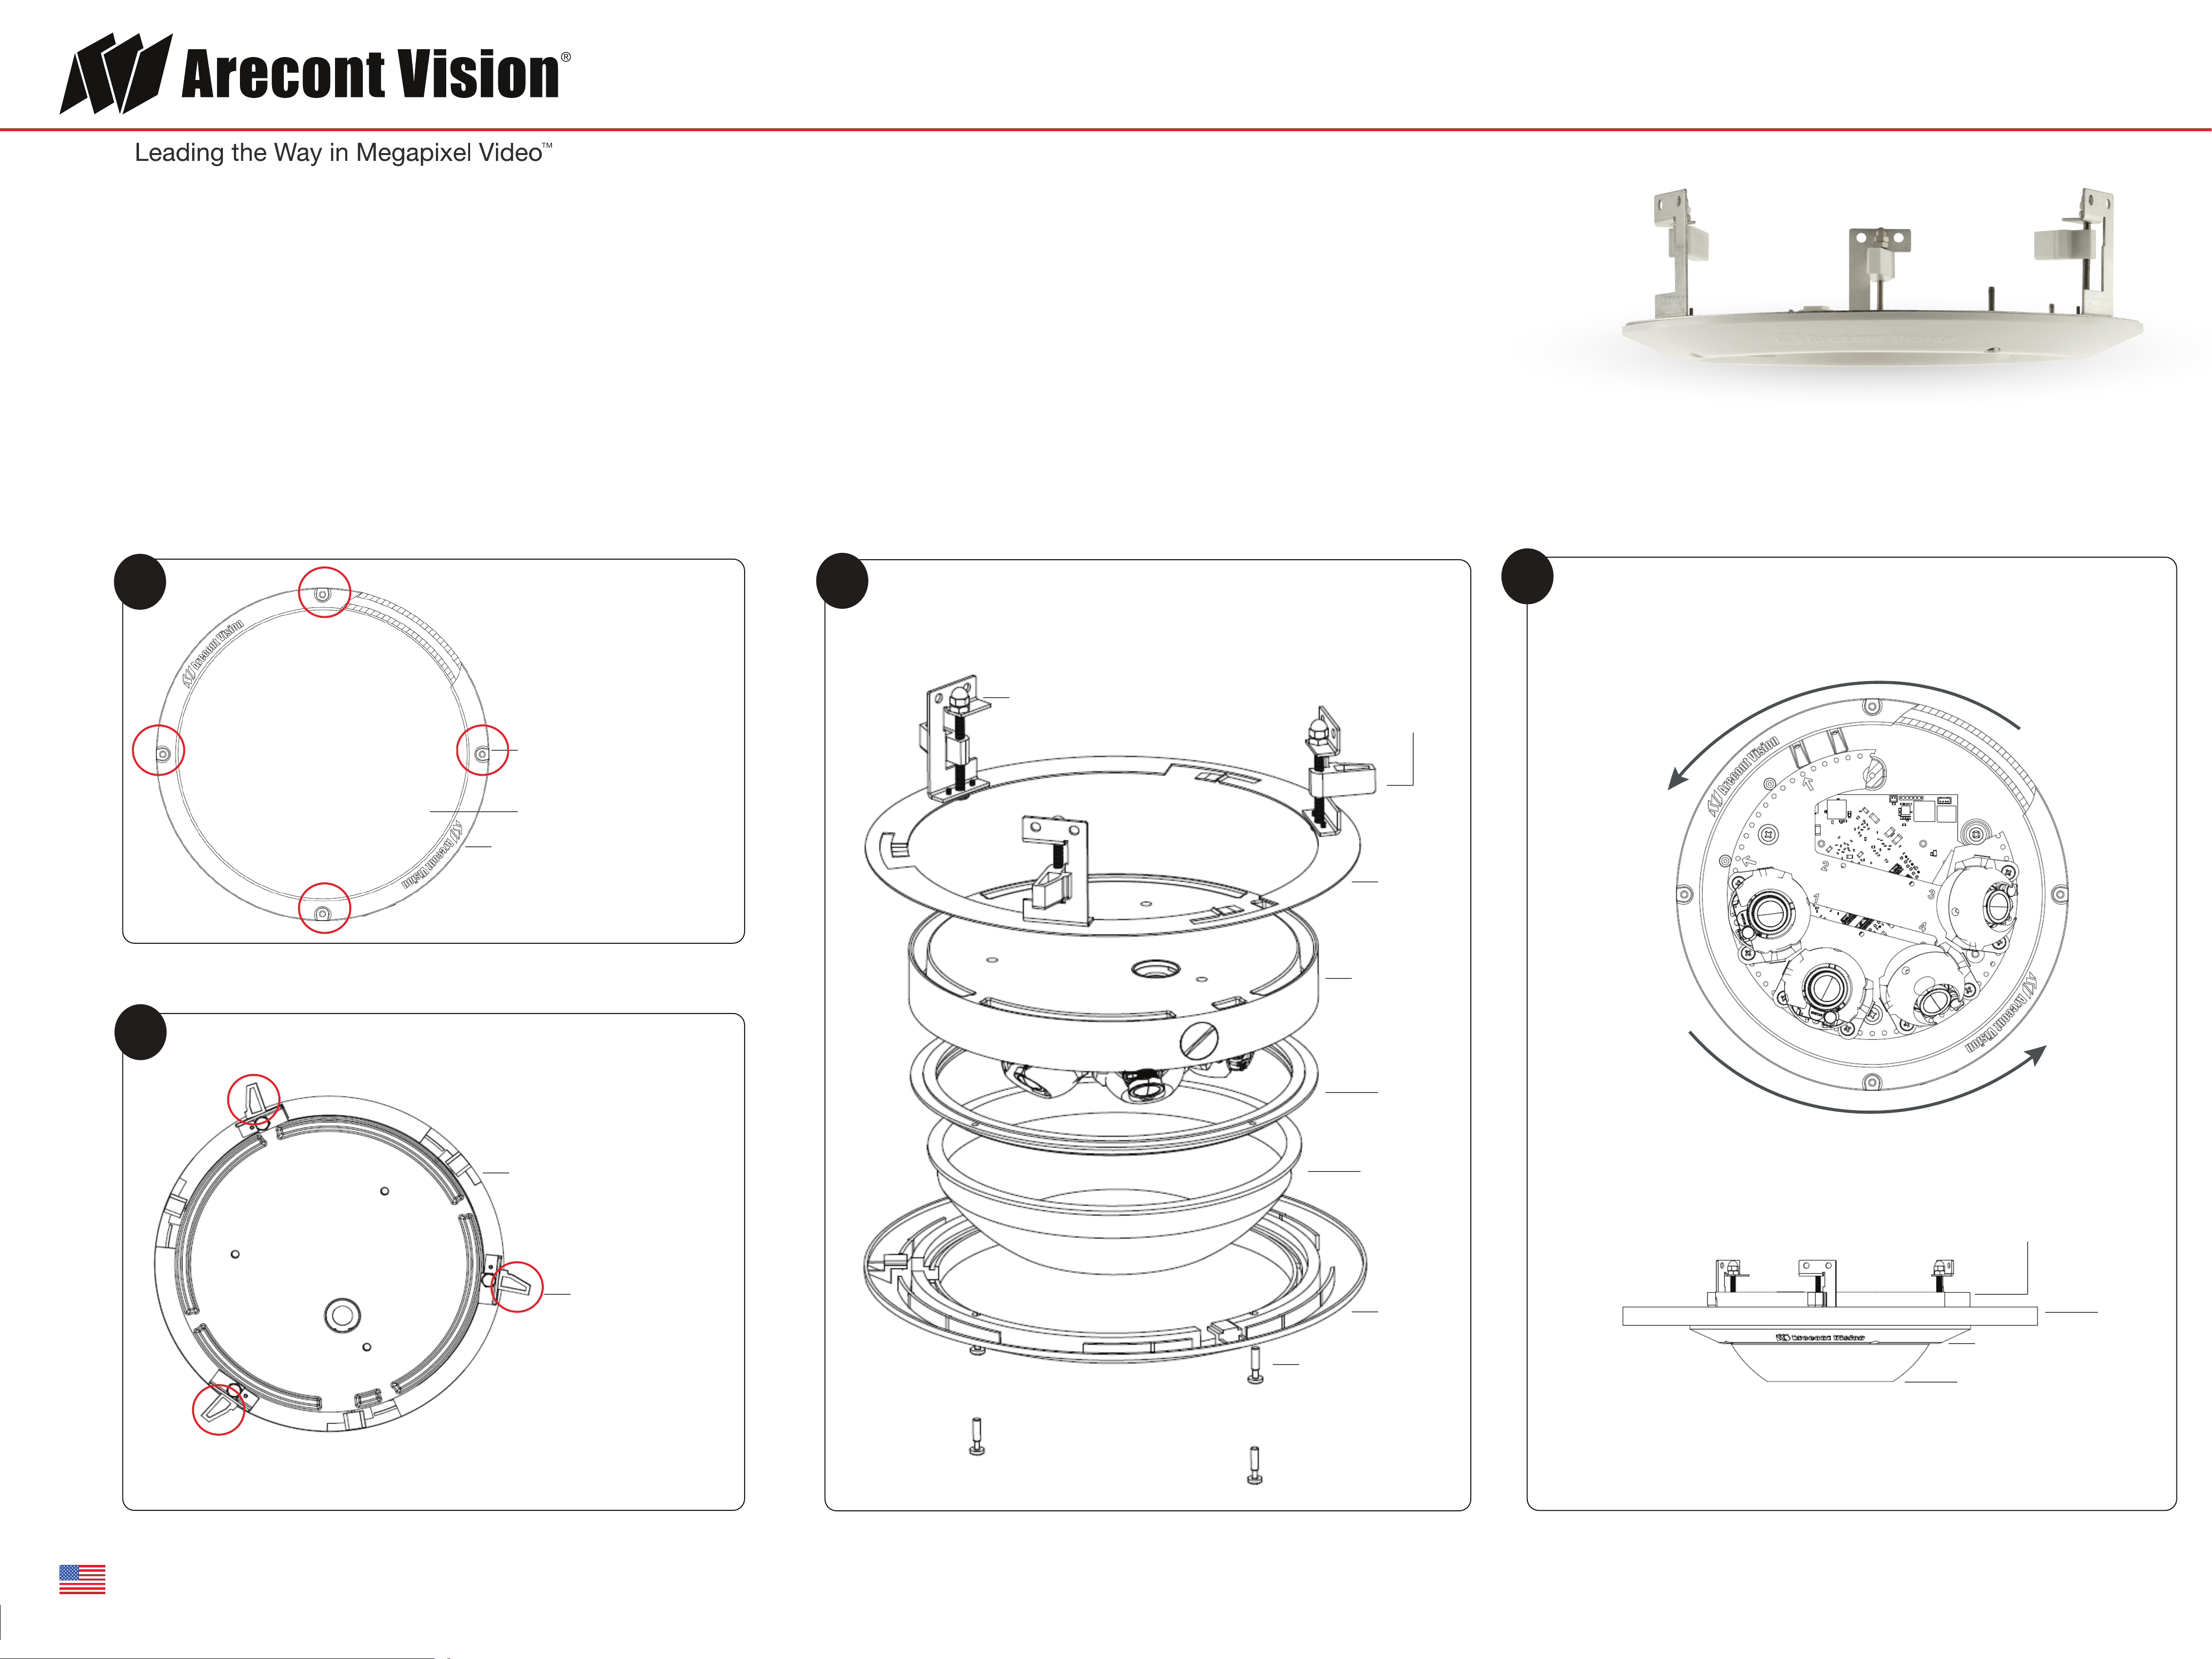
Attach Flange Plate and Camera
Continue to tighten the screws until the flush mount is snuggly installed. The
“Support Arm” will ride down the screw to compress the mounting surface.
NOTE: Do not over-torque the lever screws.
1
Remove Camera Dome Cover
With the supplied L-key, remove
the four (4) securing screws on
the Surround Video Omni Camera
dome cover. Set the bubble and
four (4) securing screws aside to
re-use with the SO-FMA. The trim
3
Attach Trim Ring
4
Position the bubble under the SO-FMA trim ring and align the hole patterns.
Attach the trim ring to the SO-FMA flush mount adapter by rotating counter
clockwise. With the supplied L-key, attach the four (4) securing screws.
ring can be discarded or saved.
Securing Screws*
Camera Dome Cover*
Trim Ring (discard or save)
*Re-use with SO-FMA Trim Ring
Lever Screw
Flange Plate
Bracket
SO-FMA
In-ceiling
Mount
SurroundVideo
2
Insert Flange Plate Brackets into Ceiling
Cut a hole in the ceiling using the
template provided. Insert the
Flange Plate brackets from the
SO-FMA into the ceiling hole and
begin to tighten.
SO-FMA In-ceiling Mount
Omni Camera
Rubber
Gasket
Dome Cover
SO-FMA
In-ceiling
Mount
Flange Plate Bracket
NOTE: The lip of the plate should be flush with the ceiling.
SO-FMA
Trim Ring
Securing Screws
Download the full manual at www.arecontvision.com
Ceiling
SO-FMA Trim Ring
Dome Cover
Made in the USA
Please visit www.arecontvision.com for more information. Copyright 2016 Arecont Vision. v001_EN_001
 Loading...