

Arecont Vision D4F-AV3115v1-3312, D4S-AV5115DNv1-3312, D4S-AV5115v1-3312 Installation Manual
Arecont Vision D4S/D4F Installation Manual
0 | Page
Arecont Vision D4S/D4F Installation Manual
D4S/D4F Indoor Dome Installation Manual
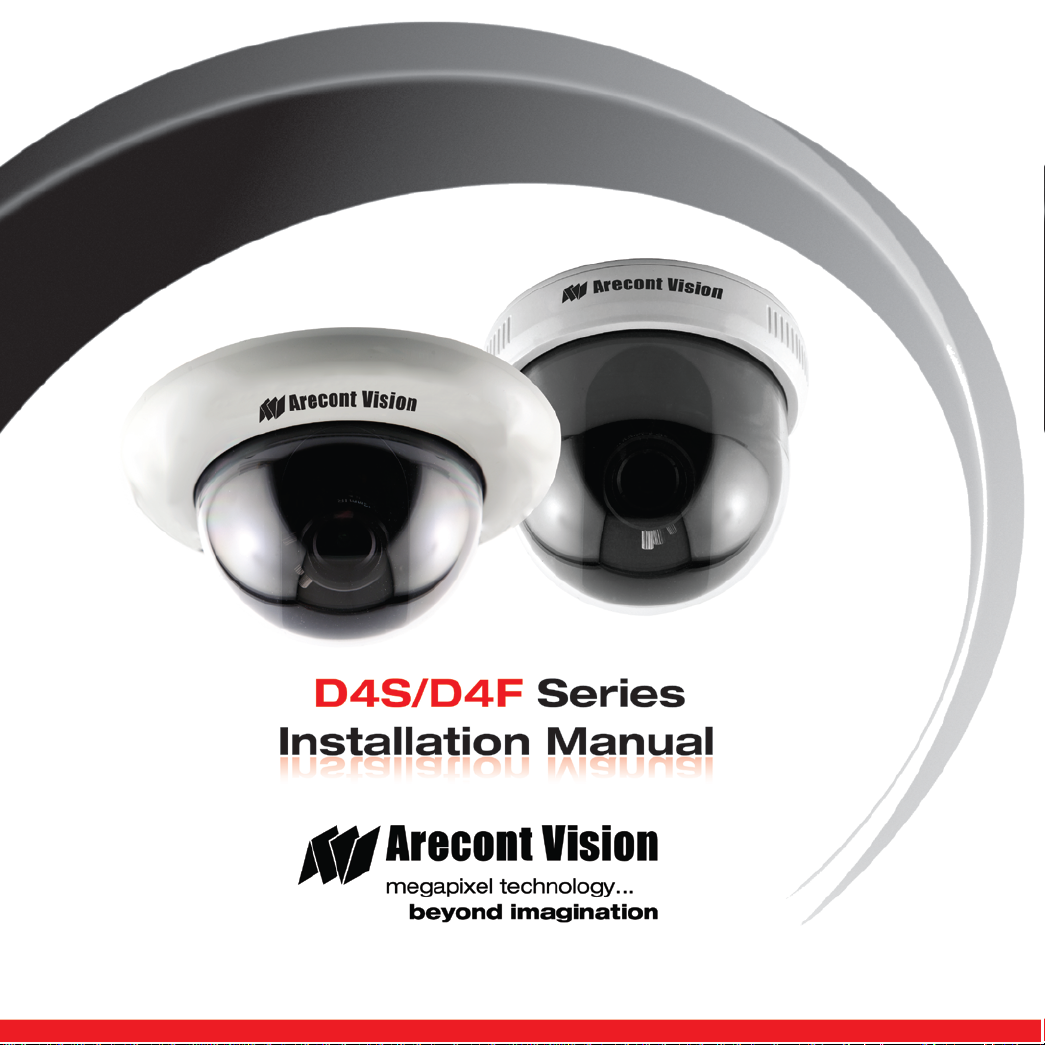
Inside the box:
A. Mounting template
B. Arecont Vision D4S (Image 1-1) or
D4F (Image 1-2)
C. Pack of three (3) wood screws and three
(3) dry wall anchors (D4S only)
Not included but needed:
• #0 Phillips head screwdriver
• #1 Phillips head screwdriver
A
Image 1-1 D4S Indoor Dome
B
A B
Mounting the Camera:
1. Remove camera and hardware from the
box.
2. Use the Mounting template, prepare the
mounting provisions for camera
installation.
3. Use #0 Philips head screwdriver to
loosen the set screw to release the dome
cover (Image 2-1 and 2-2). NOTE: Do
not remove screw from the dome cover.
C
Image 2-1 D4S
Image 1-2 D4F Indoor Dome
Image 2-2 D4F
1 | Page
Arecont Vision D4S/D4F Installation Manual
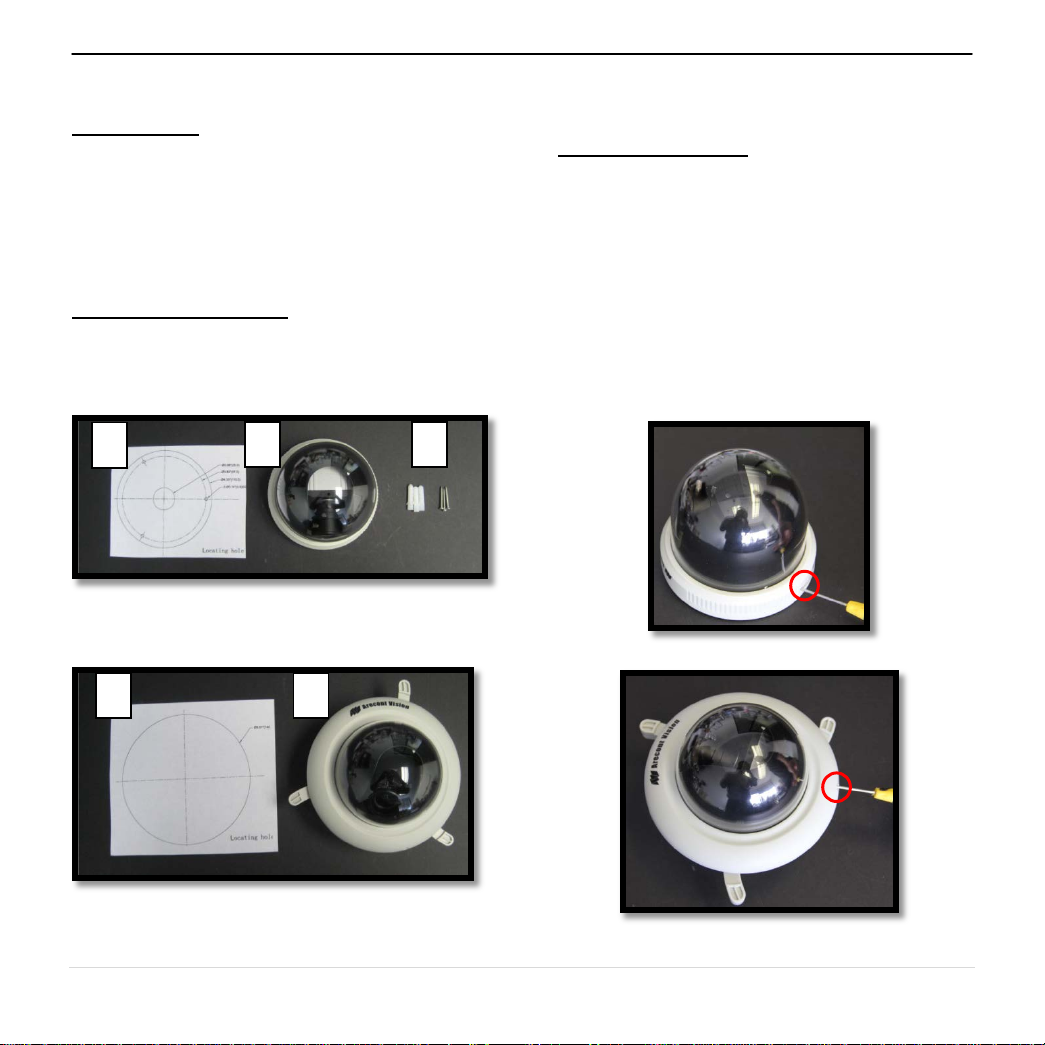
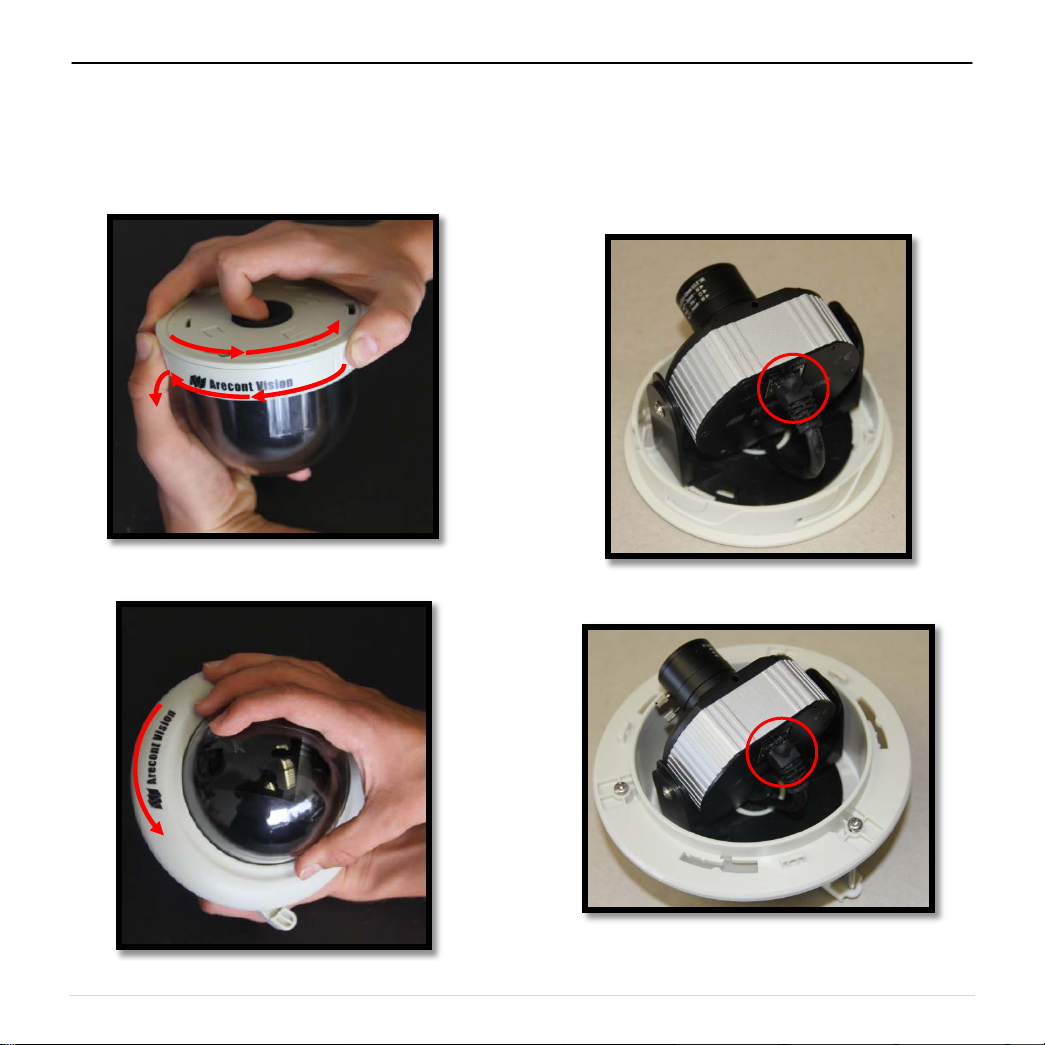
4. Remove D4S or D4F dome cover by rotating
counterclockwise as show in Image 3-1 and
3-2.
5. Run Ethernet cable through the hole on the
bottom of D4S or D4F and plug it into the
RJ45 port on AV’s H.264 compact
MegaVideo
®
camera. (Image 4-1 and 4-2)
Image 3-1 D4S
Image 3-2 D4F
Image 4-1 D4S
Image 4-2 D4F
2 | Page
 Loading...