

Page 1
1
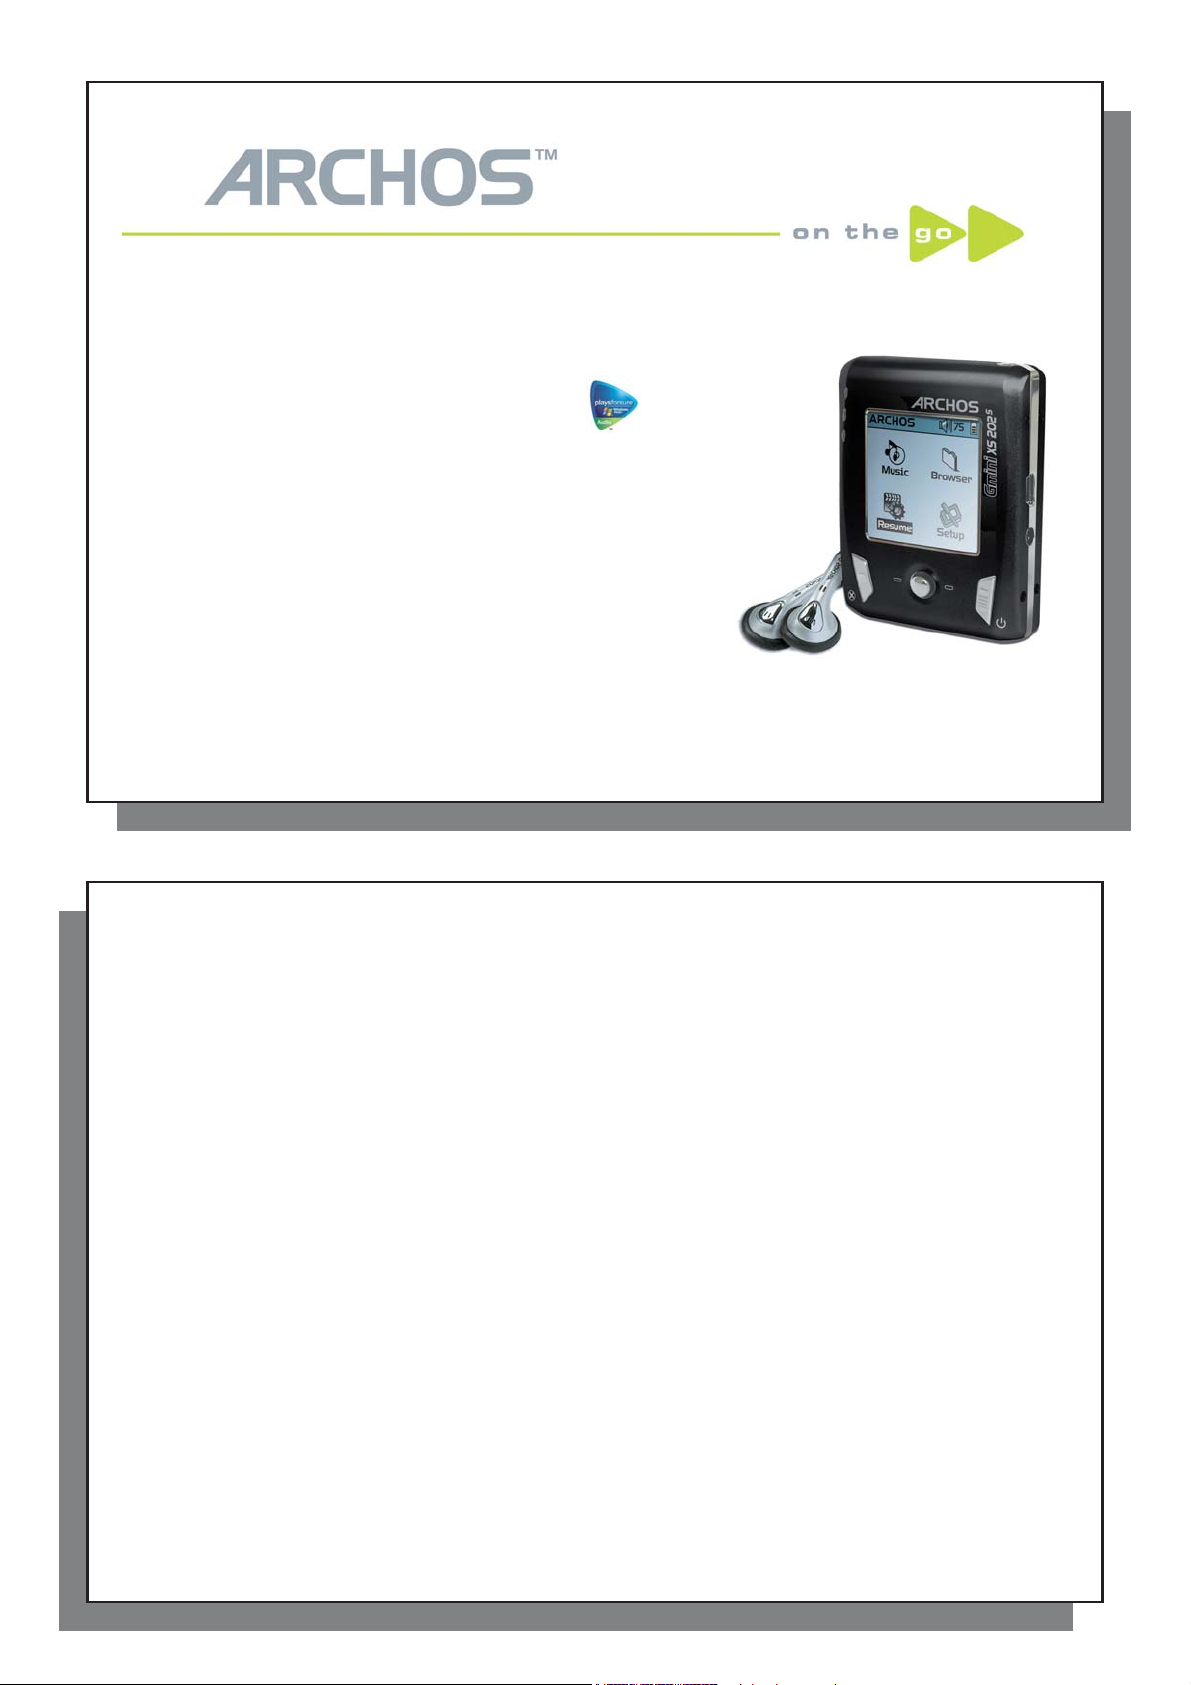
Gmini™ XS202
S
Gmini™ XS202
MP3 & WMA Digital Music Player & USB 2.0 Hard Drive
English user manual
V ersion 2.0 - Please see the Archos web site (WWW.ARCHOS.COM) for the most recent manual and software updates for your Gmini™.
2
An introductory note from ARCHOS
Dear Customer,
Archos thanks you for choosing our new ultra-small Gmini™ XS202
to fi nd the available accessories for this product (car adapter, carrying cases, power adapter etc.). Also, while at
our web site, check for free downloads of updated and improved software for your device.
The principal function of the Gmini™ is, of course, to play music. Because it has a real hard disk inside of it,
you can store thousands of songs. Using a standard audio cable, you can also play your music through a home
entertainment system. You can bring your entire CD collection with you anywhere and play it over anyone’s
sound system.
Putting music onto your Gmini™ is as easy as ‘drag and drop’ for your unprotected music fi les. And for protected
purchased music from PlaysForSure
Player 10. Plus, with its USB 2.0 high speed port, transfers are fi nished before you know it. The Gmini™ is also
ID3 compatible. This means that the ARCLibrary will sort your music so that you can listen to it by artist, album,
title, year, or genre. Click on Shuffl e, and listen to your music at random.
Finally, you can use the Gmini™ as a portable hard drive to store your important fi les. You can even use the
Archos double-browser to rename, create, copy, move, and delete fi les and folders.
This manual gives you all the information you need to know on using your Gmini™. Read through it carefully,
you just may fi nd out the Gmini™ includes some additional functionality that you didn’t expect. If you require
extra assistance, you can always call our help line or e-mail support to get a friendly Archos agent to give you a
hand.
Wishing you the best music listening experience,
The Archos T eam
S
S
. Check out our web site www.archos.com
®
web sites, it is as easy as clicking the Sync button in Windows Media
1
®
__________
As our engineers are always updating and improving the software, your device’s software may have a slightly
different appearance or modifi ed functionality than presented in this manual.
2
Page 2

3
C
ontents
C
ontents
1 Ports, Buttons, and Connections 5
2 First Time Usage 6
2.1 Charging the Battery 6
2.2 Turning the Gmini™ XS202
2.3 Changing the Interface language 7
2.4 Caring for the Gmini™ 7
2.5 Foreign Character Sets 7
3 Playing Music 8
3.1 Playing a Music File 8
3.2 Play Screen and Button Control 9
3.3 Playback Menu Items 11
3.4 ARCLibrary Specifi cs 11
3.5 ARCLibrary Updating 12
3.6 Setting a Bookmark 12
3.7 The Resume Function 12
3.8 Locking the Gmini™ Buttons 13
4 Putting Music onto your Gmini™ XS202
4.1 Synchronizing Music from Windows Media® Player (WMP) to the Gmini™ XS202
4.2 Comparison of Windows Media Player 10 to Windows Media Player 9 15
4.3 Transferring your CD collection to the Gmini™ XS202
4.4 Installing Windows Media® Player (WMP) 9 16
4.5 Installing Windows Media
5 Playlists 17
5.1 Creating a new Playlist 17
5.2 Loading a Playlist 18
5.3 Playing a Playlist 18
5.4 Playlist Menu Options 18
S
ON and OFF 7
S
S 15
®
Player (WMP) 10 16
S 14
14
4
6 Settings 20
6.1 Changing the Sound Settings 20
6.2 Changing the PlayMode Settings 22
6.3 Changing the time & date settings 23
6.4 Changing the Display Settings 24
6.5 Changing the Power Settings 25
6.6 Changing the System Settings 26
7 Using the Browser 27
7.1 Inside the MUSIC Folder 27
7.2 Navigating the Directory Structure 28
7.3 File and Folder Operations in Browser Mode 29
7.3.1 Contextual Menu on a File 29
7.3.2 Contextual Menu on a Folder 29
7.3.3 Contextual Menu while in the Double Browser 30
7.4 Using the Virtual Keyboard 30
8 Connecting the Gmini™ XS202
9 Connecting the Gmini™ to your Computer 33
9.1 USB Connection Type (‘Hard Drive’ or ‘Windows Device’) 33
9.2 Connecting the Gmini™ XS202
9.3 Disconnecting the Gmini™ from your Computer 34
35
10 Using iTunes™ with your Gmini™ XS202
11 Updating the Gmini™ XS202
11.1 Download the Update_GminiXS202.AOS fi le 38
11.2 Copy to Gmini™ root and Update 38
11.3 ‘Hard Drive’ or ‘Windows Device’? 39
11.4 Activate the Update 39
12 Troubleshooting 40
12.1 USB Connection issues 40
12.2 File issues, corrupted data, formatting, and partitioning. 42
12.2.1 Windows® ME Running Scan-Disk (Error Checking) - Hard Disk Mode only 42
12.2.2 Windows
13 Technical Specifi cations 44
14 Technical Support 45
15 Legal and Safety Notices 48
S
to a Stereo system 32
S 33
S
Firmware 38
®
XP & 2000 Running Check Disk Utility (ChkDsk) - Hard Disk Mode only 43
S
3
37
4
Page 3
5
1
Ports, Buttons, and Connections
Ports, Buttons, and Connections
1
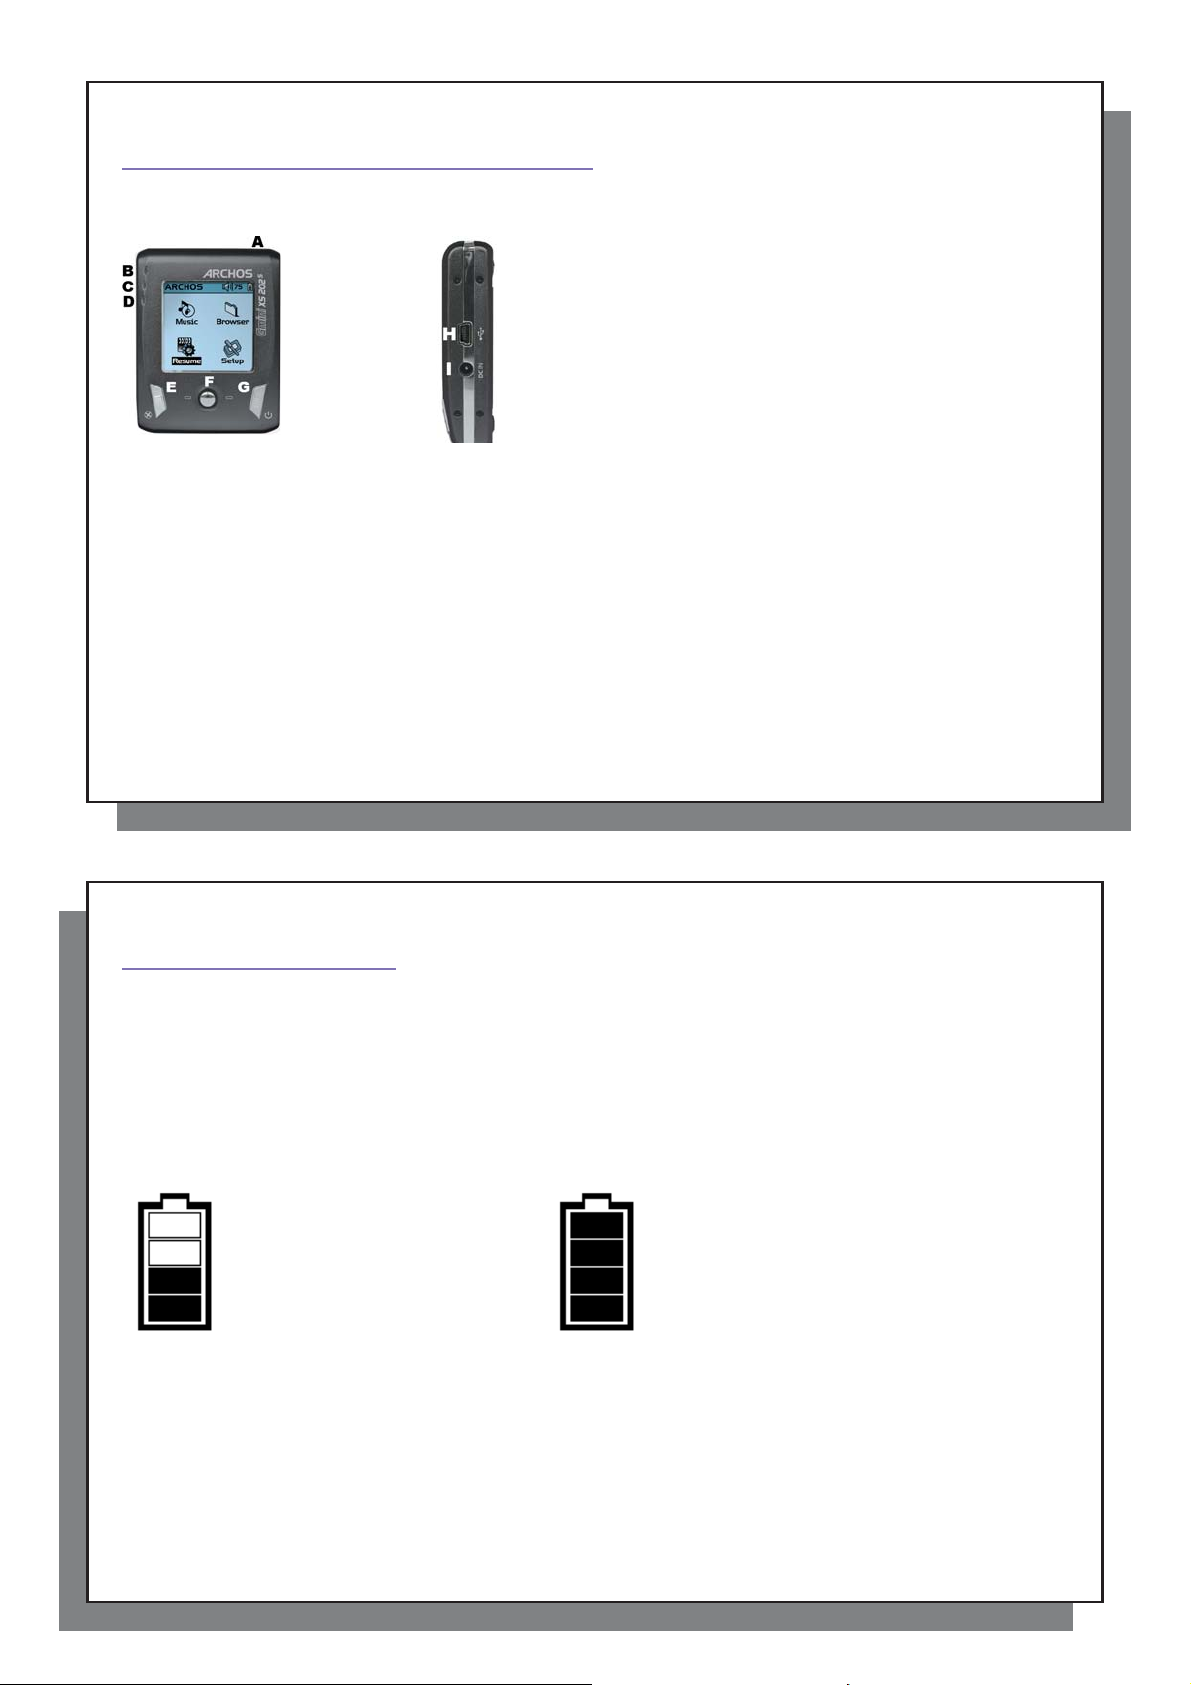
A Headphone jack
B Power On indicator
C Hard Disk activity indicator
D Battery charger indicator
E Stop/Escape/Off
F Navigation Joystick & Play/Enter button (Press down)
G On/Menu
H USB 2.0 port (USB 1.1 compatible) to connect to computer
I Power Connector (to connect an optional AC adapter/charger)
5
6
First Time Usage First Time Usage
2 2
2.1 Charging the Battery 2.1 Charging the Battery
Before using your Gmini XS202S for the fi rst time, completely charge the battery for three hours.
• The Gmini™ is charged through its USB connector. Connect the included USB cable to a running
computer and plug the other end into the Gmini™ while it is off. This will charge its internal battery. The CHG
indicator will also light up to show that its battery is charging.
• The battery is fully charged when the full battery icon appears.
Animated battery: Full battery:
The battery is currently being charged. The battery is fully charged.
• You can purchase an Archos charger/adapter to charge the battery from a wall outlet. The blue CHG indicator
lights up to indicate that the external adapter is connected. The battery will charge automatically when it is
plugged in.
• After the fi rst initial full charge, you may use the Gmini while the AC adapter is plugged in.
6
Page 4
7
2.2 Turning the Gmini™ XS202
S
ON and OFF
2.3 Changing the Interface language
2.4 Caring for the Gmini™
2.5 Foreign Character Sets
3
Playing Music
3.1 Playing a Music File
2.2 Turning the Gmini™ XS202
• Press and hold the ON/Menu button until the screen comes on.
• The Gmini will automatically shut off after a given amount of time if no buttons are pressed. To conserve battery
energy, the backlight will automatically shut of f. You can change these parameters in Setup > Power .
• Press and hold the Stop/off button until the Gmini shuts off.
2.3 Changing the Interface language
• English is selected as the default language for your Gmini user interface. You can choose another language by
going to Setup > Display .
2.4 Caring for the Gmini™
The Gmini is an electronic product that needs to be treated with care.
• Do not subject it to unnecessary shock or vibration.
• Do not subject it to heat. Keep it ventilated (especially when connected to a computer).
• Keep the Gmini away from water and excessively humid areas.
• Keep the Gmini away from high electromagnetic fi elds.
2.5 Foreign Character Sets
You have the possibility to display your fi le names, folder names, and MP3 ID3 tags in various character sets
(ex: Korean, Japanese, Simplifi ed Chinese, etc.). You can fi nd the language fi les CodePage_name.4fz in the font
folder under /Data on the Gmini XS202
If, for example, you would like to have the Japanese language display, you would copy the fi le Cp932.4fz into
the folder /system on the Gmini XS202
and ID3 tags written using the Microsoft
Only one.4fz fi le can be used at a time, thus you should only put one.4fz fi le into the /system folder. When an.4fz
language fi le is used, the interface language will be set to English.
S
ON and OFF
S
hard disk or on the Archos website under the heading Software.
S
. Shut down and restart the Gmini XS202
®
codepage for the language will now be displayed in that character set.
S
. File names, folder names,
8
Playing Music
3
3.1 Playing a Music File
To select a music fi le, push the navigation joystick to move upwards or downwards and press it down to enter a
highlighted subfolder or tag category. Click ENTER to play the highlighted song. Use LEFT to leave a folder and
go back to the previous level.
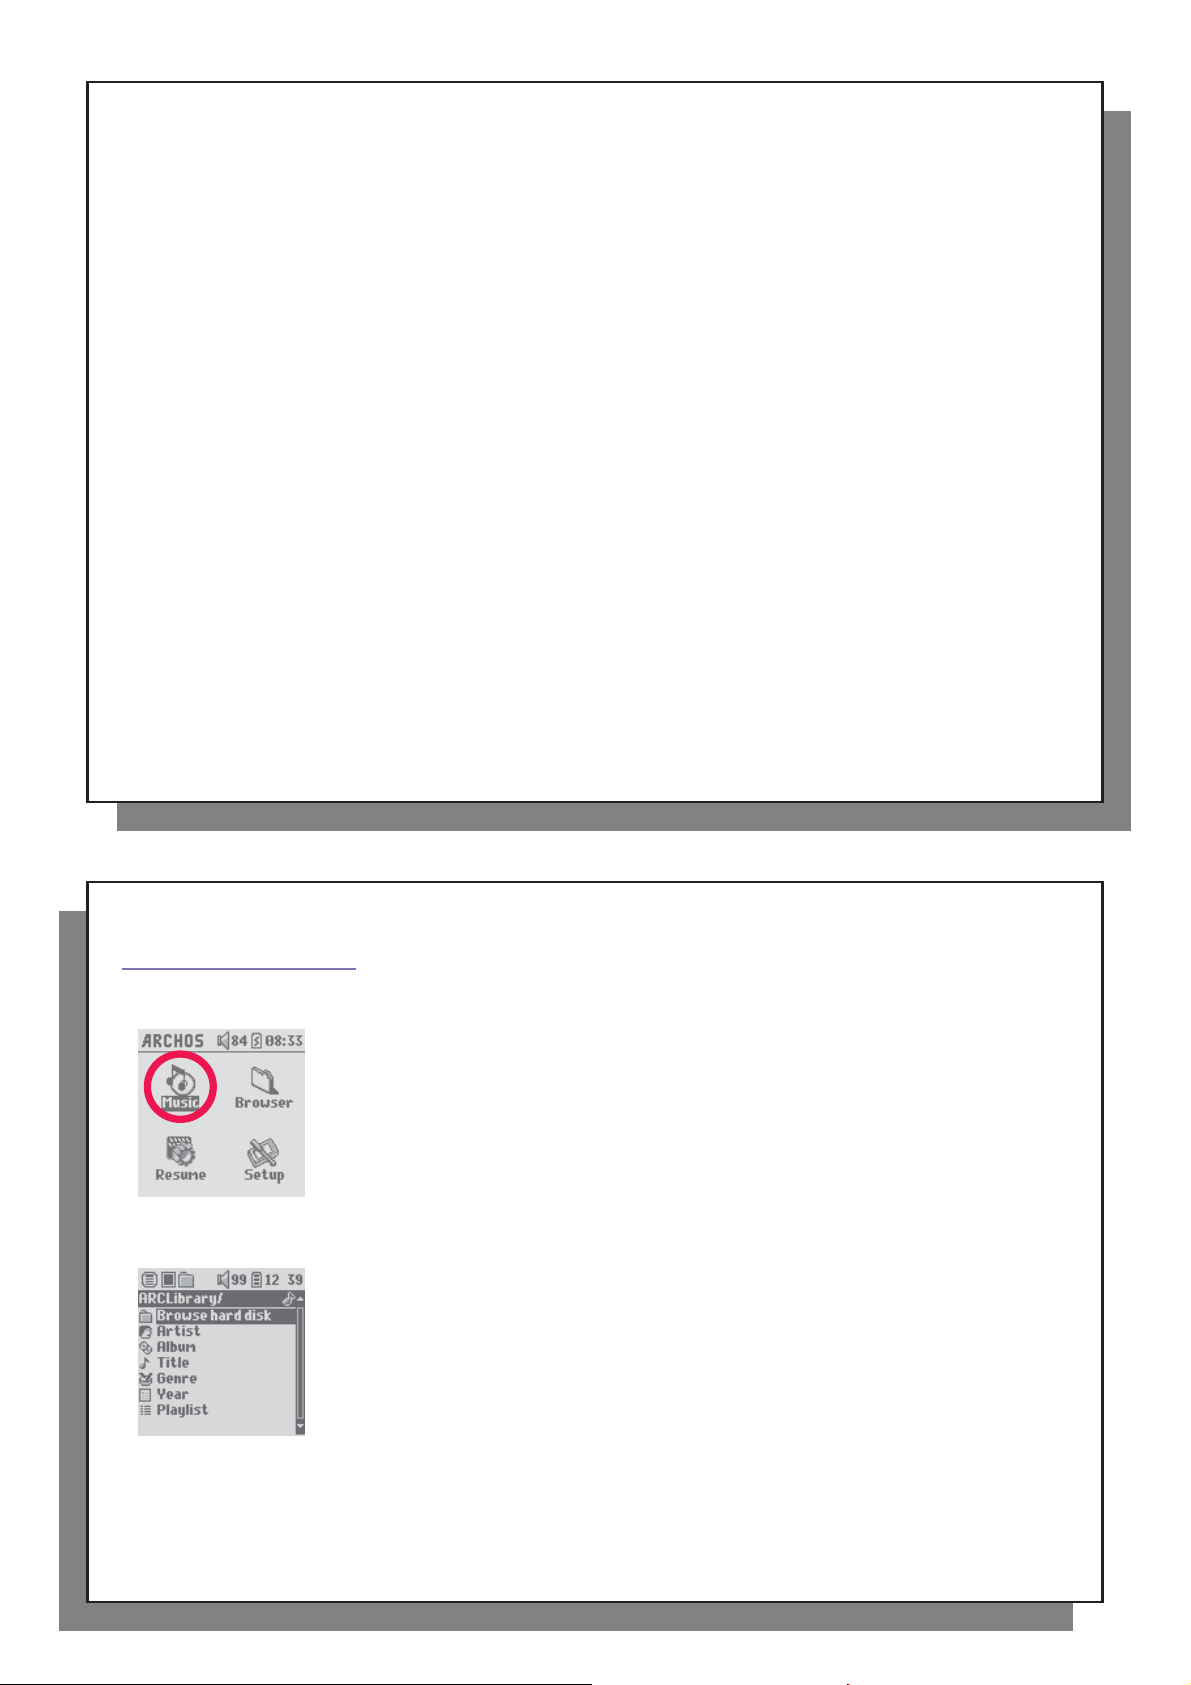
Once the Gmini has been turned on, the following screen is displayed. You can select
the major functions from this main menu.
• Music : Browse through the folder Music or use the ARCLibrary music selection
• Browser : Browse through and manage all of the other fi les on your Gmini.
• Resume : Resume playing from the last place you stopped.
• Setup : Set the parameters of your Gmini to your personal taste.
By clicking on the Music icon in the main menu screen, you will enter into a ‘music only’
mode. File types other than WMA, WAV, and MP3 that may be in those folders will be
fi ltered from view.
There are two ways to access your music, by selecting Browse hard disk or by searching
the songs’ tag information, Artist, Album, title, etc . In the case of Browse hard drive,
you will be sent directly to the Music folder of your Gmini. Here you can look at all your
music fi les and the folders on your Gmini’s hard drive as if you were browsing fi les in a
computer. The other way is to browse your music by tag information, artist, album, song
name, year, or genre. The Unknown category indicates that the fi le has no tag data.
7
system.
8
Page 5
9
3.2 Play Screen and Button Control
Play Status Play Order
D
D
B
C
E
F
A
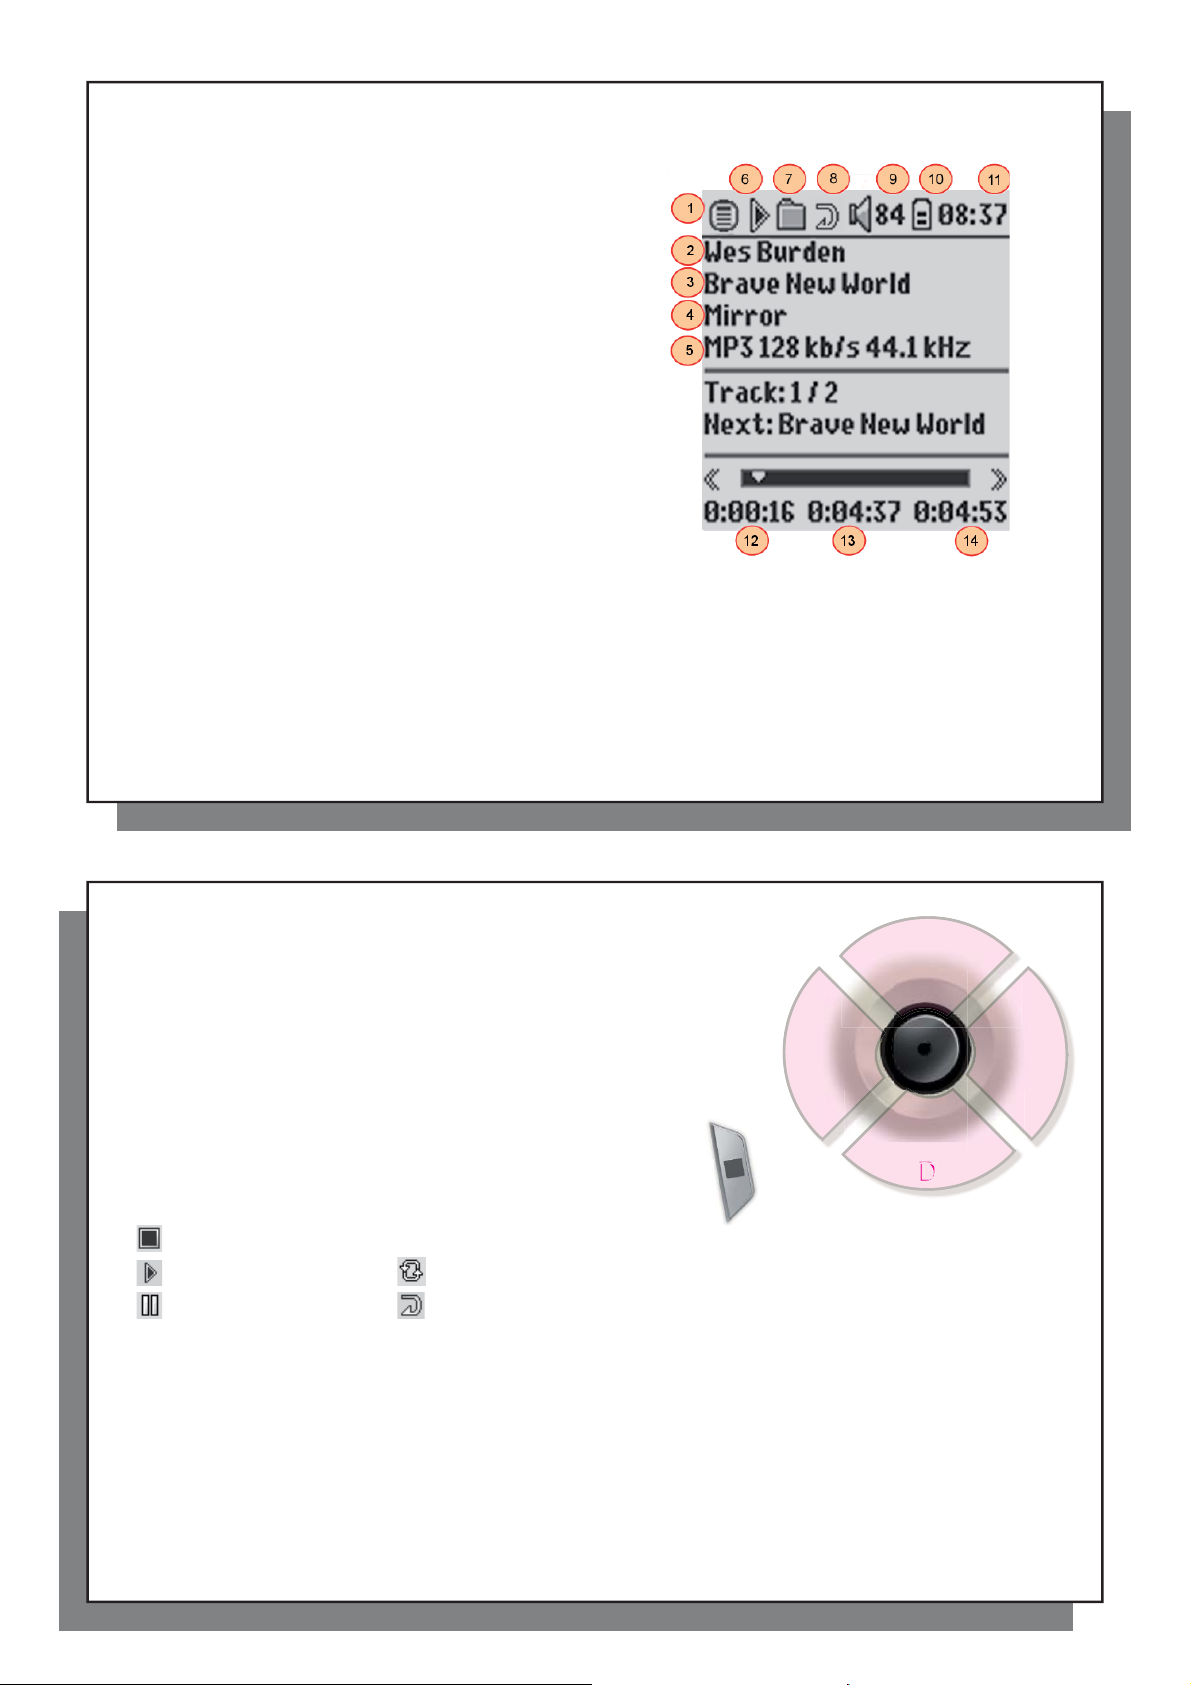
3.2 Play Screen and Button Control
(1) Menu available
(2) Artist* or parent folder
(3) Album* or current folder
(4) Song title* or fi le name
(5) File format and recording information
(6) Status: playing
(7) Play Mode: Folder
(8) Play Order: Repeat
(9) Volume (0-99)
(10) Battery level
(11) Real time clock
(12) Song elapsed time
(13) Song time remaining
(14) Song length
*If the fi le contains these tag data
10
A Play/pause/resume song
B Increase the volume
C Click once: Play the next song in the folder or playlist.
Hold: Fast forward through the song.
D Decrease the Volume
E Click once: Play the previous song in the folder or playlist
(during fi rst 10 seconds of song) otherwise go to the beginning
of the song.
Hold: Fast reverse through the song.
F Stop Song
Play Status Play Order
Stopped (no icon) Play once
Playing a track Shuffl e (Random) track selection
Current track is paused Repeat playing
The top status bar indicates the status and play settings that you have given. See the Settings chapter for a
description of the Playmode options.
F
E
B
A
D
9
C
10
Page 6

11
3.3 Playback Menu Items
3.4 ARCLibrary Specifi cs
3.5 ARCLibrary Updating
3.6 Setting a Bookmark
3.7 The Resume Function
3.3 Playback Menu Items
When the menu icon appears, you have certain options. During song
playback, press the MENU button for the following options.
3.4 ARCLibrary Specifi cs
• Setup: Enters the Setup screen (same as selecting the Setup icon in
the main menu) which allows you access to parameters such as bass
and treble.
• Info: Show fi le information such as the fi le name, number of kilobytes of hard
drive space used, date created, fi le format, etc.
• ARCLibrary: Allows you to browse through your ARCLibrary while listening to the
current song.
• Edit Playlist: Enters the playlist editor (see below how to use Playlists).
• Set Bookmark: Set a bookmark at the current position within the audio fi le. See
the Bookmark section below.
The ARCLibrary is a system for choosing your music by its characteristics. It can be
turned On or Off in the settings from Setup > Playmode . As shown in this screen
capture here, you can select your music by Artist, Album, Song Title, Genre, or
Year. MP3 and WMA music fi les have internal data tags to hold information about
the song. For MP3 fi les, these are known as ID3 tags. Not all MP3 fi les have all
this information fi lled in. If you purchase a song from a music download service,
the song will have this information. If you have an MP3 or WMA fi le without this tag
information, then you can add or change it by going to the properties of the fi le in
Windows® Explorer. Once you update the ARCLibrary, you will have access to all
newly copied music via the ARCLibrary. The ARCLibrary indexes all the music and
playlists that it fi nds in the folders Music and Playlists by using the tag information
in each song. Thus, you should never delete the folders Music or Playlists . If a
song does not have tags, it will be put into the category <unknown> .
12
3.5 ARCLibrary Updating
If you paste unprotected audio fi les from your computer to the Gmini, they go directly to the Gmini hard disk
without the ARCLibrary knowing about the new song. This is why the ARCLibrary is updated when you disconnect
your Gmini from the computer. Alternatively, you can set up the ARCLibrary to update only when you choose, by
setting it to “On”, not “automatic”. You can fi nd the information on how to do this in the section Playmode in the
Settings chapter. You will then have to go to the Setup > Playmode screen, highlight [Update ARCLibrary] and
press ENTER. A message screen will appear indicating that it is updating the ARCLibrary contents.
3.6 Setting a Bookmark
If you are listening to a song, or perhaps a long recording, and would like to place a bookmark in it in order
to pick up from this point at another time, you can use the Bookmark function. While listening to the audio
recording, simply click on the MENU button, then choose Set Bookmark . This will set a bookmark in the
audio fi le at the current position. You can only set one bookmark per fi le. When you look at the fi le in your
browser, it will have a small mark on its icon indicating that this fi le has a bookmark set within it. You can have
a maximum of 16 fi les bookmarked. Setting more bookmarks will erase existing bookmarks, starting with the
oldest. The next time you play the audio fi le, you will be presented with three options:
Resume: Start playing from the bookmarked position.
Ignore: Keep the bookmark but start playing from the very beginning.
Clear: Clear the bookmark from this fi le and start playing from the very beginning .
11
3.7 The Resume Function
When you turn on your Gmini you will sometimes notice that the icon which is highlighted on the main
screen is not the Browser but rather the Resume icon. This icon is highlighted when the Gmini XS202
12
can resume the last played audio fi le.
S
Page 7
13
3.8 Locking the Gmini™ Buttons
4
Putting Music onto your Gmini™ XS202
S
4.1 Synchronizing Music from Windows Media
®
Player (WMP) to the Gmini™ XS202
S
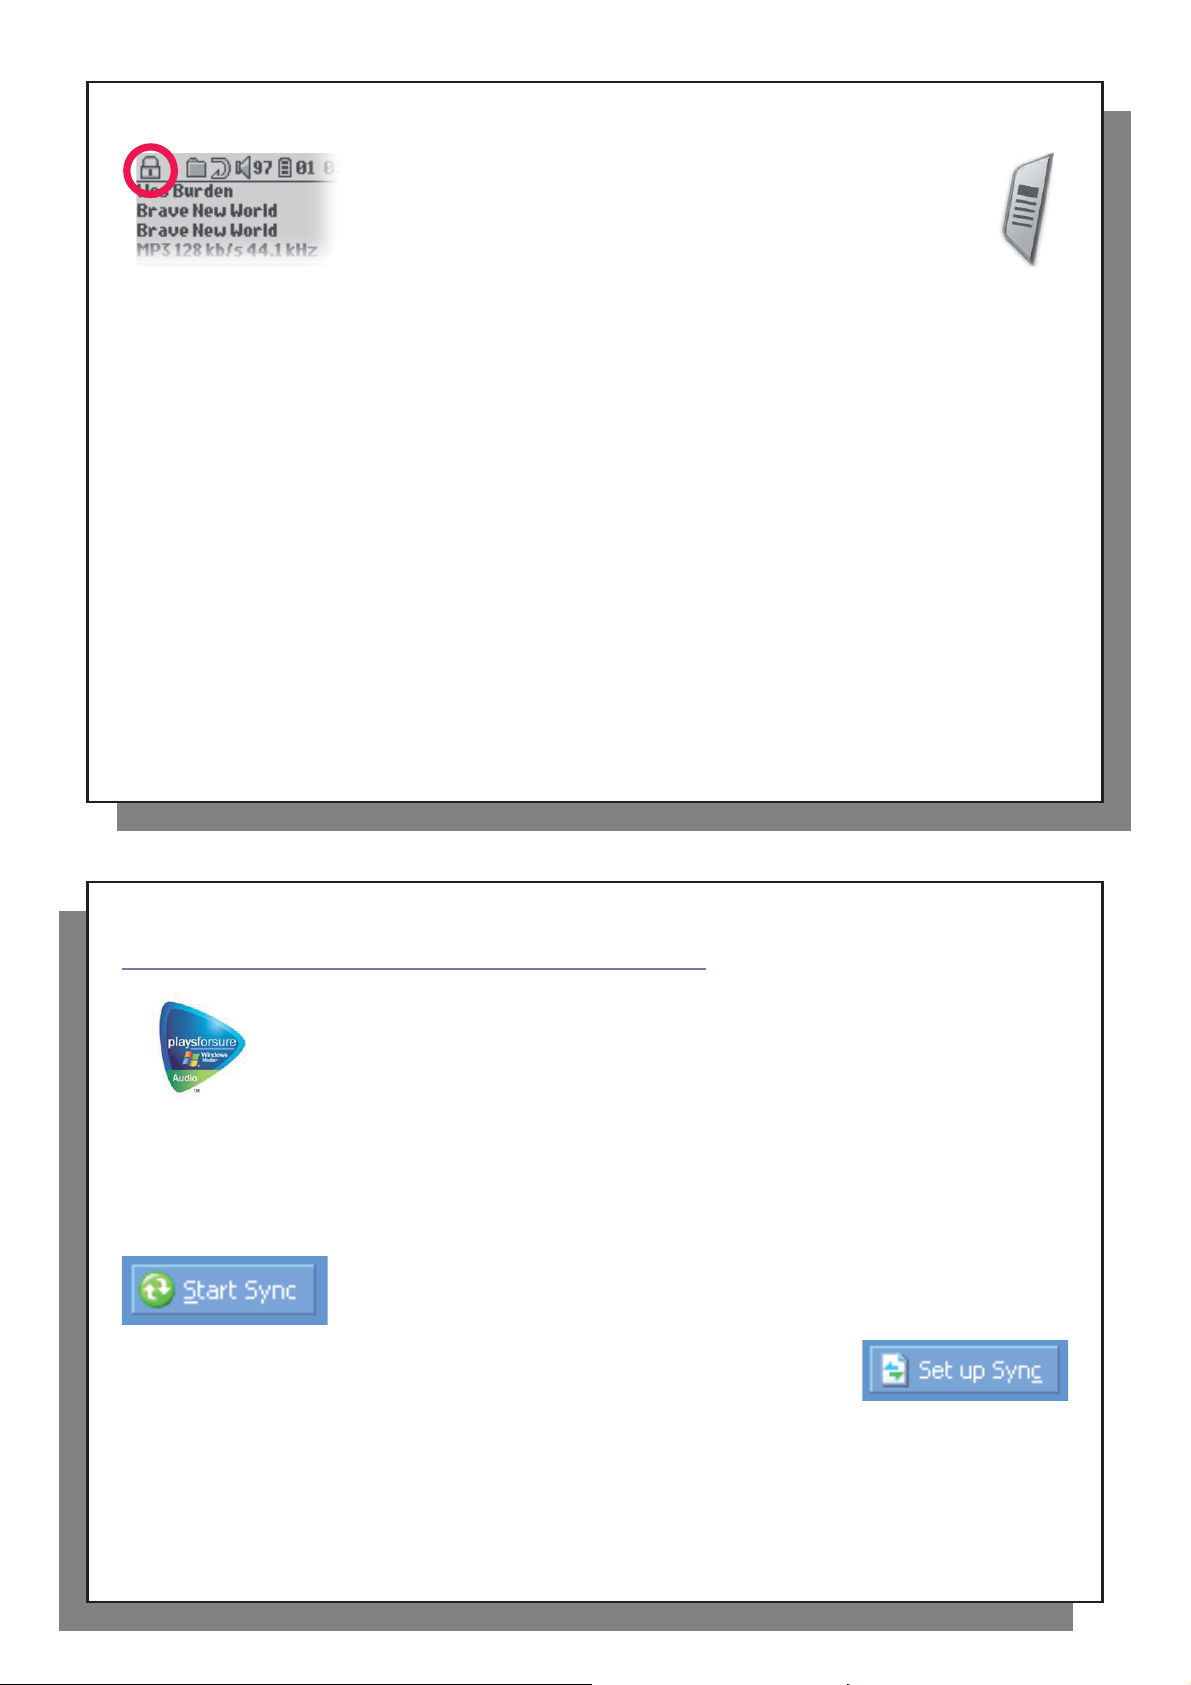
3.8 Locking the Gmini™ Buttons
You can prevent the Gmini from executing unintended functions by locking
the buttons. To lock the buttons, hold down on the MENU button until the
“lock” icon appears in the top-left corner of the screen. Now the buttons are
disabled, but you can still use the navigation joystick to change the volume.
To unlock the buttons hold down again on the Menu button until the “lock”
icon disappears.
14
Putting Music onto your Gmini™ XS202
4
contents of your Windows Media® Player media library to your Archos™ device. See the comparison chart below
for an explanation of the different features available when running Windows Media® Player 9 and 10 or check
out the Web site www.playsforsure.com.
* Subscription services require you to be running Windows Media® Player10.
4.1 Synchronizing Music from Windows Media
you can click the button Set up Sync in the Sync tab and then check the box labeled
Synchronize Device Automatically. This is the auto-sync advantage of WMP10. If
this box is checked, then each time you connect your Gmini™ to your PC, Windows
Media® Player will automatically start up and check to see if there is any new music
in your media library, and if so, will then copy them to your Gmini™. On the other hand, with Windows Media®
Player 9, you have to tell it what you want to sync, WMP9 cannot synchronize automatically when you connect
your Gmini™ to your computer.
Note for WMP10 users: Files added to your Gmini™ from another computer cannot be added to the Windows
Media® Player Library when you connect your Gmini™ to the computer. Songs which have been added, will
however, be listed in the device’s ARCLibrary
Your Archos™ product is a certifi ed PlaysForSure™ digital device which means that wherever
you fi nd music for sale or for subscription on the Internet with this symbol, you can be certain that
they will ‘Play for sure’ on your Gmini XS202
S
The Gmini XS202
9 and 10. The Windows Media® Player software is used to download digital media content from
the Internet to your computer and organize it. You will also use it to synchronize (copy) the
The Synchronize button in Windows Media® Player (WMP) is a one way ‘sync’ button.
That is, it will add music fi les to your Gmini™ so that you have the same digital media
on your Gmini™ as you have in your Windows Media® Player media library. Of course,
you can choose to sync only certain songs or sync your entire library. On WMP10,
is designed to work seamlessly with Windows Media® Player (WMP) versions
S
S
.
®
Player (WMP) to the Gmini™ XS202
.
13
S
14
Page 8
15
4.2 Comparison of Windows Media Player 10 to Windows Media Player 9
4.3 Transferring your CD collection to the Gmini™ XS202
S
4.4 Installing Windows Media
®
Player (WMP) 9
4.5 Installing Windows Media
®
Player (WMP) 10
4.2 Comparison of Windows Media Player 10 to Windows Media Player 9
Windows® Media Player 10 is only available for Windows® XP (service Pack 1) and newer operating systems. It
is worth your while to upgrade to Windows® XP (home or professional) and to Windows® Media Player 10. The
list below shows the advantages.
Functionality WMP9 WMP10
Auto-synchronize the WMP library
to ARCHOS
Can synchronize subscription music
(‘to go’ services) to your Gmini
Carefree USB disconnection
(no special green arrow unmount procedure)
PlaysForSure
* Must use WMP9 manual sync function to copy purchased music to the Gmini™.
™
Gmini™ on connecting to PC
™
™
audio content
4.3 Transferring your CD collection to the Gmini™ XS202
The process of transferring music from a CD into fi les for your Gmini XS202
as ‘ripping’. It is actually a transcoding process, taking the CDA (CD Audio) format and
converting it to WMA or MP3 format which the Gmini can read. There are many music
ripping programs on the market, but ARCHOS recommends that you use Windows
®
Media
Player to rip your music. In fact, when you place a music CD in your computer,
Windows® will ask you if you would like to rip it. Depending on the power of your
computer, to rip a 60 minute CD, it will take anywhere from 10 minutes to 60 minutes.
Once this is done, the album will become part of your music library. Connect your
Gmini to your computer with the supplied USB cable. Now, you go to the Sync tab
and tell Windows Media
transfer that album to your Gmini.
Note: Some music CDs have a special copy protection system that will not allow
Windows Media® Player to make music fi les from them.
®
Player to synchronize that album to your Gmini. It will then
no* yes
no yes
no yes
S
S
is known
15
16
4.4 Installing Windows Media
If you have Windows
software is to visit the Microsoft
the Gmini XS202
4.5 Installing Windows Media
You must be running Windows
Please visit Microsoft’s PlaysForSure website ( www.playsForSure.com ) and download the very latest version
of Windows Media® Player 10.
®
ME or 2000, you should use Windows Media
S
itself.
®
Player (WMP) 9
®
®
Website and download the very latest version, or install the version found on
®
Player (WMP) 10
®
XP (Service Pack 1 or higher) in order to install Windows Media
Player 9. The easiest way to install this
®
Player 10.
16
Page 9

17
5
Playlists
5.1 Creating a new Playlist
5.2 Loading a Playlist
5.3 Playing a Playlist
5.4 Playlist Menu Options
Playlists
5
A Playlist is a list of songs that the Gmini will automatically play one after the other. The Gmini can handle one
Playlist at a time. Y ou can create new Playlists, add or delete songs from a Playlist, or save a Playlist as a fi le (fi le
type.m3u) to be used another time. There is no limit to the number of Playlists you can save on the Gmini hard
drive. A Playlist can have a maximum of 1000 songs in it.
5.1 Creating a new Playlist
To create a Playlist, push the joystick to the RIGHT while you are in the Music browser. A
second panel will open on the right side to display the Playlist contents (shown empty in
the picture). You can now add songs to the current Playlist.
Note: If tracks are displayed in the right panel, this means a Playlist is already open. To
create a new Playlist, close the current list fi rst (see the Playlist Menu options) and click
RIGHT again.
In the left panel, search for the songs you would like to add to your Playlist. Once the
song is highlighted, click on the ENTER button to add it to the Playlist. The song will be
added to the Playlist and a small mark is placed next to the music note icon to indicate
that it is now in the Playlist. You can also add all the music fi les of a complete folder in
menu. Be careful which panel you are in since the left panel menu has different options than the right panel menu.
Continue searching and adding songs in this manner until you are satisfi ed. You can jump back and forth anytime
between the two panels by pushing the navigation joystick to the left and right.
We recommend that you save your Playlists to the Gmini hard drive (see Playlists Menu Options below) to use
over and over again. After saving a new Playlist, use the menu of the left panel to update the ARCLibrary in order
for it to appear in your Playlists folder. The menu also offers you the option INSERT: The track will be added
before the track which is highlighted in the Playlist.
one operation by highlighting the desired folder and choosing ADD or INSERT on the
18
5.2 Loading a Playlist
5.3 Playing a Playlist
After loading a Playlist, press the navigation joystick to the right to go into the
Playlist edition panel. Then use the navigation joystick to select a song. Click
on ENTER, and your Playlist will start playing from that song according to the
current PlayMode settings.
5.4 Playlist Menu Options
17
You can load a previously saved Playlist or add the fi les it contains to the current Playlist.
Use the music browser to select the Playlist of your choice (Playlists are indicated by
a special list icon) and then press OK. If there were already some items in the Gmini
Playlist, then the songs of the loaded Playlist will be added to the end of it. You can then
check or modify the Playlist as usual in the Playlist panel.
While in the Playlist screen (right side) you have the following options.
• Save: Saves the current Playlist onto the Gmini so that it can be reloaded later. It
will be saved into the directory Playlists .
• Close: Closing the list enables you to create a new Playlist by pushing the
navigation joystick to the right whilst in the Music folder or any of its sub-folders.
• Rename: Changes the name of the current Playlist using the Virtual Keyboard.
• Shuffl e: Randomly changes the order of the items in the loaded Playlist.
• Clear: Removes ALL tracks from the loaded Playlist.
18
Page 10

19
6
Settings
6.1 Changing the Sound Settings
• Move: Allows you to change the order of songs in the Playlist by moving them up
or down using the navigation joystick.
• Delete: Removes the highlighted track from the playlist.
Note: T o delete a Playlist, navigate to Browser > Playlists . Highlight the Playlist, press the
menu button, highlight Delete and press ENTER.
(Moving a music track)
Important: Once you save a Playlist it is important that you do not move the actual fi les as the
Playlist searches in the original fi le location. If you need to move your fi les to a different folder,
you’ll have to recreate your Playlists.
20
Settings
6
6.1 Changing the Sound Settings
If you would like to customize the sound quality, go to [ Setup > Sound ].
19
There are a number of parameters you can set on the Gmini to make it operate
according to your particular needs. Start by clicking on Setup .
Within the menus, you will fi nd different parameters. In order to modify a parameter,
push the navigation joystick to the left or right. Note that once you have reached the
last option, clicking further will not normally take you back to the fi rst item in the list.
20
Page 11

21
Parameter Description
6.2 Changing the PlayMode Settings
Parameter Description
Parameter Description
Volume Range: 0 to 99 Controls the current volume.
Balance Range: -5 to +5 (left to right)
Sound effect Rock, Techno, Jazz, Classic, Live or Custom
Change this parameter to select an equalizer setting to the style of music you are listening to.
Select Custom to set your own equalizer levels.
[Set Equalizer] T o customize the equalizer. See below.
[Reset] Sets all your sound parameters with default or fl at values.
Customizing the equalizer
To set the equalizer, highlight the [ Set equalizer ] line and then click on ENTER. You will now be able to adjust
the Gmini’s fi ve band equalizer. Use the LEFT/RIGHT buttons to select a specifi c frequency range (Bass,
Medium-Base, Medium, Medium-Treble, Treble) and then use the UP/DOWN buttons to increase or decrease
the response for the given frequency range. Modifying these settings changes the sound in real time. Thus it is
best to change these values while listening to a song.
1. 2. 3. Change values 4. Exit screen.
22
6.2 Changing the PlayMode Settings
If you would like the Gmini to play through an entire folder of songs, play songs at random (shuffl e), or any of the
other playing options, you can set these parameters in the Playmode settings. Go to Setup > Playmode .
Parameter Description
Current Folder Play all tracks in the current directory
All Play all tracks on the Gmini
Single Play a single track then stop
Queue User can queue the next track to be played †
Scan Gmini plays fi rst 15 seconds of each track ††
21
Repeat and shuffl e This parameter allows you to choose the order of play of your songs
Repeat: the music sequence is played in a loop
Shuffl e: the music sequence is played randomly
22
(no icon) Normal: the music sequence is played once
Page 12

23
6.3 Changing the time & date settings
6.4 Changing the Display Settings
Parameter Description
ARCLibrary Off, On. Automatic (default)
The ARCLibrary feature enables you to see your music organised by Artist, Album, Title, Genre and Year. Select
ARCLibrary Update Scans through all music and playlists in the folders Music and Playlists and indexes these into the ARCLibrary. Y ou
†Queue Mode: While the current song is playing, simply click on the menu button and select Browser or ARCLibrary
(depending on the current folder), fi nd the next song you want to play, then click ENTER. This is your queued song. The
lower arrow of the Queue icon will turn black. You can only queue one song at a time. See the Playlist section to prepare
multiple songs to play. Once the current track has fi nished playing, your queued track will be played. If you do not queue
another track at this time, the Gmini will play the next song in the original directory.
††Scan Mode: Each track in the directory is played for 15 seconds. This allows a quick sample of each song. If you
want to play the whole song, click on the Play button during those fi rst 15 seconds. The Gmini will then revert to single
directory mode and play the rest of the songs in the directory without scanning.
6.3 Changing the time & date settings
In order to set the time and date or to change the time format, go to Setup > Clock .
The Time format can be set to a 12 hour clock (0:00 to 12:59) or 24 hour clock (0:00 to 23:59).
Off to disable the feature or On to enable it. On Automatic, the library will update itself when disconnected from the
computer.
need to do this only when you have copied new music to your Gmini.
24
The Time is expressed in Hours , Minutes and Seconds , although seconds are not displayed. The date is
expressed as Day , Month and Year .
Having modifi ed all necessary parameters, be sure to set them. To do this, highlight the [Set] line and then click
ENTER. Wait a moment for the Gmini to save the new values before clicking the STOP/ESCAPE button.
6.4 Changing the Display Settings
In order to change the operating language of the Gmini or the contrast of the display, go to Setup > Display .
Parameter Description
Language Use this option to set the operating language of the Gmini. Options are English , Français , Deutsch , Español and
Рчсский .
Contrast These values represent the black/white contrast of the screen.
23
24
Page 13

25
6.5 Changing the Power Settings
Parameter Description
6.6 Changing the System Settings
Parameter Description
6.5 Changing the Power Settings
To help you get the most battery life out of your Gmini before having to recharge it, you can adjust the power
settings. Go to Setup > Power.
Parameter Description
Power Off Range: 1 to 9 minutes or Never.
Number of minutes of user inactivity before the Gmini automatically shuts off. The Gmini will not shut off during the
Backlight Backlight shut down time: 10 to 90 seconds, Never.
The time of user inactivity (no buttons pressed) before the Gmini turns off the backlight. Never indicates that the
Hard drive 10-90 seconds. The number of seconds from the time of the last fi le access before the Gmini tells the internal hard
playback of music fi les. Never (on DC Power) indicates that the Gmini will not do an automatic shut down.
backlight will always stay on. Keeping the backlight on will reduce the battery time.
disk to stop spinning. The longer this time, the more often the hard disk is turning and the quicker the response time
when accessing fi les. However, as it is set longer, it will quickly consume your battery. Caution: This setting should
only be changed by experienced users. The default setting is 10s.
26
6.6 Changing the System Settings
To change the system parameters or get information about the system, go to Setup > System .
Parameter Description
Show all fi les If “Off” is selected, fi les are fi ltered so that only music fi les are shown. The “On” setting lets you see other fi le types
USB Port Windows Device, Hard drive.
When set to Windows Device, your Gmini
When set to Hard Drive, your Gmini
OS Version Displays the current version of the Operating System (OS).
Prod key Display the product key of your Gmini XS202
Hard Disk Displays the amount of free and used space on the Gmini’s hard disk. Reported number of megabytes is binary
[Update Firmware] Used to update the Gmini to a new version of the Operating System. See the chapter
26
as well as music fi les.
to a Windows XP (SP1 or higher) operating system with Windows Media® Player 10 installed. It will be seen as
the Gmini™ XS202S ‘Device’ in Windows® Explorer. WARNING: This will not work for earlier Windows® operating
systems or Macintosh® computers.
computer. Use this mode for all non-Windows® XP operating systems
based counting (1kb=1024 bytes). Thus each reported MB represents approximately 1.05 megabytes (decimal).
Formatting also takes up space.
Updating the Gmini Firmware.
™
will use the MTP (Media Transport Protocol) whenever it is connected
™
will act as an external hard drive (mass storage device) when connected to a
S
. Every Gmini has a unique product key number.
.
25
Page 14

27
7
Using the Browser
7.1 Inside the MUSIC Folder
7.2 Navigating the Directory Structure
Button Controls
Button Action
Using the Browser
7
The browser is used to navigate the fi le system on the Gmini. The fi le system is the same
type of fi le system that is found on Windows
fi les from your computer to your Gmini is as easy as ‘drag and drop’. The fi le system is a
hierarchical system which includes folders and subfolders. Because you will be putting
hundreds of fi les onto your Gmini, it is STRONGLY ADVISED that keep a neat and
orderly fi le structure. We suggest that you keep the predefi ned folders: Data (to carry
miscellaneous data fi les with you), Music (all of your music fi les), and Playlists (to hold
all your music Playlists).
7.1 Inside the MUSIC Folder
The top level of your Archos Gmini includes the folder Music . Most people who create neat fi le structures for their
Archos players make the following hierarchy within the Music folder.
Level 1 – Artist (Dire Straits, Madonna, Stravinsky, etc.)
Level 2 – Album (Brothers in Arms, American life, etc.)
Level 3 – Song (Money for Nothing, etc.)
The folder Music is a special folder in that the Music icon on the main screen leads to this folder directly. It should
not be deleted or renamed.
®
based computers. This way, transferring
28
7.2 Navigating the Directory Structure
Button Controls
Button Action
Joystick Up Highlights the previous fi le or folder in the current directory
Joystick Down Highlights the next fi le or folder in the current directory
Joystick Right Open double-browser or gives the focus to the right panel.
Joystick Left Goes to parent directory if single panel view. Gives the focus to the left panel when in double-browser mode.
ENTER Folder highlighted: enters this folder .
File highlighted: Plays the fi le if it is a music fi le.
Off/Escape Exit Browser mode.
Menu Displays the contextual menu.
Just below the top status bar, you can see the directory you
are currently viewing. To navigate the directory structure you
will use the navigation joystick to move through the fi les in
a directory. Press ENTER to enter a highlighted folder. To
go back up one level in the directory structure,
you can either use the contextual MENU button
(select Parent) or move the joystick to the left.
The contextual MENU button allows you to create
new folders, delete folders, rename a fi le or folder,
or display information about a fi le.
27
28
Page 15

29
7.3 File and Folder Operations in Browser Mode
7.4 Using the Virtual Keyboard
7.3 File and Folder Operations in Browser Mode
While browsing the directory structure, you will have the option to manipulate fi les and folders. When you use
the Browser mode, you will be browsing through the Gmini’s hard drive as if browsing via a computer. In Browser
mode, you can create folders, delete fi les or folders, rename fi les or folders, and copy or move fi les from one
place to another.
7.3.1 Contextual Menu on a File
Info: Show fi le information such as song length, number of kilobytes used of hard drive
space, date fi le was created, etc.
Rename: Allows you to change the name of the highlighted fi le. You cannot change the
fi le extension type for fi le types that are playable by the Gmini. You will be sent to the
virtual keyboard (see the next section) to enter the new fi le name.
Delete: Delete the fi le permanently from the Gmini. (Before it is deleted, the Gmini
will ask for confi rmation: “Delete fi le? - Yes/No”). Press ENTER to confi rm or STOP/
ESCAPE to cancel.
Create Folder: Create a new folder in the current level of the directory. You will be sent
to the Virtual Keyboard to enter the new folder name. There is a limit of 1000 fi les per
folder.
7.3.2 Contextual Menu on a Folder
Info: Show fi le information such as number of kilobytes of hard drive space used, date
created, number of fi les and folders the folder contains etc.
Rename: Allows you to change the name of the highlighted folder. You will be sent to
the virtual keyboard (see the next section) to enter the new folder name.
Delete: Delete the fi le permanently from the Gmini. (Before it is deleted, the Gmini will
ask for confi rmation: “Delete folder X? - Yes/No.” Press ENTER to confi rm or STOP/
ESCAPE to cancel.
Create Folder: Create a new folder in the current level of the directory. You will be sent
to the Virtual Keyboard to enter the new folder name. There is a limit of 1000 fi les per
folder.
30
7.3.3 Contextual Menu while in the Double Browser
Source Destination
7.4 Using the Virtual Keyboard
If you want to create folders and rename fi les or folders, it is recommended to do so from your computer when
it is connected to the Gmini. The computer keyboard is easier to use. At times, however, you are not near your
computer and you would like to enter the text directly with the Gmini. For this, you will use the Virtual Keyboard.
Y ou will be taken to this screen when you rename a fi le or folder or create a new folder. You will use the navigation
joystick to move around the keyboard. Click on ENTER to enter the character that is highlighted. Once your text
is entered, select Enter on the bottom right.
By using the unique Archos double browser system, you can copy or move fi les
from one location in the fi le structure to another (caution: there is a limit of 1000
fi les per folder). While in the Browser mode, you simply move the joystick to the
right and a second browser panel will open. You can jump between the two panels
using the LEFT/RIGHT buttons. When the title of the folder is highlighted, this is
the active folder. The fi le highlighted within this active folder will be copied, that is
to say, it is the source for the copy. The other panel will be the destination folder.
Once you have decided on the destination folder, move to the source browser panel,
highlight the fi le to copy, and then click on the MENU button. You can now choose
Copy to copy the highlighted fi le, Copy All to copy all the fi les in that folder to the
destination folder, or Move to move it to the destination folder. Other options such as
Info, Delete, Rename and Create Folder are addressed above .
29
30
Page 16

31
8
Connecting the Gmini™ XS202
S
to a Stereo system
1 Contextual Menu
2 Text being typed
3 Cursor
4 Upper/Lower case*
5 Delete character*
6 Clear entire line*
7 Enter*
* These items can also be found in the contextual menu
Tip: use the STOP/ESCAPE button to cancel any changes you made
and exit the virtual keyboard.
32
Connecting the Gmini™ XS202
8
Connecting your Gmini XS202
Y ou will need a standard (mini headphone to RCA) audio cable for this which is not supplied with the Gmini (this
is available for purchase on the ARCHOS website www.archos.com). The diagram below illustrates the setup.
Plug the audio cable into the headphone jack and into the auxiliary jacks on your stereo. Note that this is only a
schematic representation of a stereo. If in doubt, the manual of your stereo will enable you to identify the auxiliary
inputs.
S
to a Stereo system
S
to a stereo system allows you to listen to your Gmini’s music without a headset.
31
32
Page 17

33
9
Connecting the Gmini™ to your Computer
9.1 USB Connection Type (‘Hard Drive’ or ‘Windows Device’)
9.2 Connecting the Gmini ™ XS202
S
9.3 Disconnecting the Gmini™ from your Computer
Connecting the Gmini™ to your Computer
9
9.1 USB Connection Type (‘Hard Drive’ or ‘Windows Device’)
Your device comes confi gured as a Windows® Device and will be immediately recognized by your computer if you
are running Windows® XP (with Service Pack 1 minimum) and Windows Media® Player 10. If you have another
version of Windows®, not sure what version of Windows® XP you have, or if you are using a Macintosh®, then
you will need to change the USB (Universal Serial Bus) Port setting on the Gmini™. You will do this by going to
System and USB Port and change it to ‘Hard Disk’.
9.2 Connecting the Gmini ™ XS202
Connection order: See the sections below for your particular computer’s operating system.
1) Turn on the Gmini™.
2) With your computer running, plug the USB cable into your computer.
3) Plug in the other end of the USB cable to the Gmini™ USB Device port (if your computer asks to install a new
driver for the new hardware, then you must unplug it and change the USB Port to Hard Drive.)
Windows® XP
Please verify* that you have Windows® XP and it is updated it to at least, Service Pack 1. You must also
have Windows Media® Player 10 (WMP10) installed on your computer. This way, you can take advantage of
connecting it as a ‘Windows Device’. Connect it to your PC as enumerated above and you can then see the
Gmini™ in Windows® Explorer and WMP10. Without Windows® XP Service Pack 1 (a free update) or Windows
Media® 10, you cannot use it as a Windows® recognized ‘Device’ and will have to follow the instructions for
Windows® ME & 2000 below.
* Right-click on ‘My Computer’ select ‘Properties’, and then look in the tab labeled ‘General’. It should say “Service Pack 1” or
higher.
S
34
Windows™ ME and 2000
Attention: Before connecting the Gmini™ to your computer with the USB cable, go to
Setup>System>USB Port and change it to ‘Hard Disk’.
When connected to your computer, the Gmini™ will be recognized as an external
Hard Drive and display automatically within a few seconds of being connected. You
will see a new drive letter, such as E: in My Computer . Y ou can now use the hard drive
called Gmini like any other external hard drive. Simply access it using Windows™
Explorer to drag and drop fi les to and from the Gmini™’s hard drive. If the Gmini™
is not automatically recognized and displayed as an external hard drive, please refer
to the troubleshooting section at the back of this manual.
Macintosh™ OS X
If you have OS X, you must update to version 10.3.9 or newer. You must also change the
Gmini™’s USB Port setting to ‘Hard Disk’. From the main menu, go to Setup>System>USB
Port and change it to ‘Hard Disk’.
You will now simply plug the Gmini™ into your Macintosh® as enumerated above, and
within a few seconds, the Gmini™ will be recognized as a mass storage device (Hard Disk)
and mount on the desktop. You can now use the hard drive called Gmini XS202 like any
other external hard drive.
9.3 Disconnecting the Gmini™ from your Computer
Windows Device Mode
If the Gmini™ is connected to your computer as a Windows Device, verify that no data is being transferred
between your Gmini™ and your computer (the HDD light on your Gmini™ is not fl ickering). You can now safely
unplug the USB cable from your Gmini™ and/or computer.
Hard Drive Mode
If the Gmini™ is connected to your computer as a hard drive, DO NOT SIMPLY PULL OUT THE USB CABLE
AT ANY TIME! WARNING: You must properly remove (unmount) your Gmini™ from the computer before
disconnecting the USB cable to avoid loss of data or freezing the computer and/or the Gmini™.
33
34
Page 18

35
Hard Drive Mode & Windows™
T o safely disconnect the Gmini™ hard drive, click on the system tray remove icon (green arrow as shown below)
and follow the instructions. Wait until you get a message saying that you can safely unplug the device before
disconnecting the USB cable.
Attention: The operating system will not allow you to safely disconnect the Gmini™ if you have an open fi le from it
in a running application. Y ou will have to close all open Gmini™ fi les in any running application. Sometimes, even
when fi les are closed in an application, you will have to shut down the application. Using the green disconnect
arrow in the system tray will then allow you to safely disconnect the Gmini™.
1. The safe remove icon is in the system tray near the system clock.
®
Windows
2. Click on the icon to Eject (unmount) the Gmini from
your computer and then select the ‘Safely remove’
message.
3. There will be a message indicating that it is now safe
to disconnect the Gmini. You can now go ahead and
unplug the USB cable from the Gmini.
XP Windows® 2000 & Windows® ME
35
36
Hard Drive Mode & Macintosh™
First, close all programs that are using fi les from your Gmini. Drag the Gmini hard drive
icon towards the trash can, and the trash can will become a big arrow as shown in the
screen image. Drop the hard drive icon onto the arrow. The hard disk icon will disappear
from the desktop. Y ou can now safely unplug the USB cable from your Gmini and/or your
computer.
36
Page 19

37
1 10
Using iTunes™ with your Gmini™ XS202
S
1 11
Updating the Gmini™ XS202
S
Firmware
11.1 Download the Update_GminiXS202.AOS fi le
11.2 Copy to Gmini™ root and Update
Using iTunes™ with your Gmini™ XS202
S
0
The easiest way to transfer music fi les between a Macintosh
use the Macintosh Finder™ to drag and drop the fi les to and from your Macintosh
®
However, for Macintosh
developed a special i-Tunes® plug-in. You will fi nd it in the folder /Data/i-Tunes Plug-in on the Gmini
fi nd a JPEG image illustrating where you need to copy the plug-in to. Once this is done, iTunes™ will recognize
the Gmini XS202
To make your user experience easy as possible, please keep in mind the following.
1) Music purchased at Apple’s on-line music store are copy protected with a proprietary encryption system.
ARCHOS™ device will not be able to play this purchased music or fi les in AAC format which you might have
created. It will happily play MP3 format fi les without problem.
2) When you create your Playlists with iTunes® (you can only create Playlists from songs that have been copied
to your Gmini XS202
save them to the Gmini Playlists directory. It would be best to use the Gmini itself to make Playlists and then
save these Playlists in your Playlists folder.
3) When you drag and drop MP3 fi les from your iTunes® library to your Gmini, the i-Tunes® program will look at
the ID3 tag information of the MP3 fi le, and create a folder on the root of your Gmini using the name of the
Artist as the folder name. Then it will take the Album name ID3 tag, and create a subfolder with that album as
its name. Finally, it will take the MP3 song itself and place it into that album subfolder. Thus, although it is a
clean structure of artists and albums, i-Tunes® does not follow the Gmini convention of placing the music into
the Music folder fi rst.
XS202S hard disk or from the Archos website. In this folder you will fi nd a .sit compressed fi le. You will
S
as a ‘Device’. Currently there is no plug-in for the PC version of iTunes™.
S
), your Macintosh® will save these Playlists to the root directory of your Gmini. It will not
users who do want to use the Gmini XS202
®
computer and your Gmini XS202
S
with iTunes®, Archos has
®
.
S
is to
The
38
Updating the Gmini™ XS202
1
Archos periodically updates the fi rmware or Operating System (OS) and makes it available for free download
on the ARCHOS website (www.archos.com). Updates to the Operating System include new features, feature
improvements, and bug fi xes. Y ou should check to make sure that you are running the most recent version of the
OS. To see the current version of the software your device is running, go to Setup > System and look at the line
OS Version . You will fi nd the most recent version of the OS and its version number at the Archos website (www.
archos.com) under the category Software .
11.1 Download the Update_GminiXS202.AOS fi le
When you click on the link to download the new OS fi le (the fi le name is Update_
GminiXS202.AOS), your browser may warn you that the contents of the download
may harm your computer. This is because the Windows
a .AOS fi le is. Be assured that Archos has made every effort to ensure that the fi le
does not contain viruses. Click on the option Save to download this fi le to a convenient
place, such as My Documents , in order to later copy this fi le to your Gmini XS202
your Gmini is connected to your PC, you can even save it directly to the Gmini.
You will also fi nd next to the fi rmware download, a text fi le which details the list of
changes from the previous version of the OS.
S
Firmware
®
system does not know what
S
37
. If
11.2 Copy to Gmini™ root and Update
If there is already an older version of the Update_GminiXS202.AOS fi le on your Gmini, Windows
38
When updating your Operating System, you must keep the AC charger/
adapter plugged into the Gmini™ so that it will not shut down due to low
batteries while you are performing the update. Connect your Gmini to your
computer (See the chapter on connecting to the computer for help), and
then copy the Update_GminiXS202.AOS fi le to the root directory of the
Gmini. The root directory is the top most level of the directory hierarchy.
Just drag this.AOS fi le onto the Gmini XS202
manager and it will place it in the top most directory (outside any folder).
S
Hard disk in your fi le
®
will ask if you
Page 20

39
11.3 ‘Hard Drive’ or ‘Windows Device’?
11.4 Activate the Update
1 12
Troubleshooting
12.1 USB Connection issues
want to overwrite the current fi le. Click on Yes.
Once this fi le is copied, safely disconnect Gmini XS202
in the connection chapter if you are unsure of how to do this.
11.3 ‘Hard Drive’ or ‘Windows Device’?
If your Gmini™ is seen as a hard drive, then you simply need to drag the Update_GminiXS202.AOS
fi le onto this icon, and Windows® will place the fi le into the top most directory (root) of the Gmini™. It
should not be placed inside any folder within your Gmini™. Once this fi le is copied, safely disconnect
(refer to the chapter on Connecting/Disconnecting) the Gmini™ from the computer.
If your Gmini™ is seen as a Windows® Device, then you will have to open the Gmini™ XS202
Device in Windows® Explorer and drop the Update_ GminiXS202.AOS into the Data folder (not
the Media folder). If there is already an older version of the Update_GminiXS202.AOS fi le on your
Gmini™, Windows® will ask if you want to overwrite the current fi le. Click on Yes. Disconnect the
Gmini™ from your computer.
11.4 Activate the Update
On your Gmini, go to Setup > System and select the [ Update Firmware ] line. Click ENTER. You will prompted
to power the Gmini by either the USB cable connected to a turned-on computer, or the optional adapter/charger.
The Gmini will now locate the update fi le and install it. A message will appear asking you to unplug the USB cable
(if that is how you powered it) and then click on any button to restart the device. You can go to Setup > System
to verify the new OS has been installed by looking at the version number there.
S
from the computer. Refer to the disconnection procedure
S
Warning!
Never unplug the USB cable or DC-in adapter while the update is in progress. This can cause
permanent damage to the unit.
40
Troubleshooting
2
12.1 USB Connection issues
Problem: I cannot get my Gmini to be recognized by the computer or it asks for a driver.
Solutions:
• If you are running an operating system other than Windows® XP (Service Pack 1 minimum) with Windows
Media® Player 10 or higher, the USB Port setting should be set to ‘Hard Drive’. Go to Setup > System > USB
Port and set it to ‘ Hard Disk ’. Only Windows® XP (Service Pack 1 or higher) with Windows Media® Player 10
or higher will allow for the USB Port ‘ Windows Device ’ setting.
• Shut off and reboot the computer and the Gmini and then try connecting again in the preferred order enumerated
in the Chapter Connecting your Gmini XS202
• If using a USB hub, try connecting without using the hub (some hubs are not powered and may not work with
the Gmini).
• If using a USB port in the front of your computer, try a USB port in the back. Front USB ports are often from
non-powered hubs.
• Do not connect to a USB port repeated through a keyboard.
• If using a laptop computer and a docking station, try connecting without the docking station.
• Macintosh® users must update to OS 10.3.9 or higher.
• (Hard Drive mode) If the Files Allocation Table (FAT) gets corrupted, the Gmini may not show up in Windows
XP for over one minute, and then it comes up as local drive . Use DOS Utility ChkDsk as shown below.
• (Hard Drive Mode) Windows® XP may recognize the AV 700 hard drive but yet not assign a drive letter to
it. Right click on My Computer and select Manage . Then select Storage , then Disk Management . Within this
window you may see the hard drive and be able to assign a drive letter by right-clicking on the hard drive, and
selecting the option Change drive letter and paths .
S
to your computer .
39
40
Page 21

41
12.2 File issues, corrupted data, formatting, and partitioning.
Problem: (Hard Disk Mode) What do I do if I try to disconnect via the green arrow but keep getting “The device
‘Generic Volume’ cannot be stopped now. Try stopping the device again later.”
Solution:
program that might be accessing data on the Gmini, including Windows
all programs, wait 20 seconds, then try the green arrow again. If this does not work, you should shut down the
computer and disconnect the USB cable once the computer is off.
Use the green arrow a second time. Sometimes Windows
®
does not update its status. Shut off any
®
Explorer. If this does not work, shut down
Problem: I have Windows
Solution: The original version of XP does not have native support for USB 2.0. Y ou must update your Windows
XP to a minimum of SP1 (Service Pack 1) in order for it to transfer fi les at the full USB 2.0 port capacity.
Problem: The Gmini shuts off by itself.
Solution: This is normal. If you are not playing music or using it, it will automatically shut off based on the
automatic power-off parameters in the Power submenu. Go to the menu [ Setup > Power ] where you can adjust
the Power off parameter.
Problem: The Gmini locks-up. None of the buttons react.
Solution: Did you set the Gmini to ‘lock’ mode? This is the mode that blocks the buttons from functioning so that
you can put the Gmini in your pocket or backpack without worrying about buttons getting accidentally pressed.
Hold down for three seconds on the Menu button to unlock all the buttons. The other possibility is an electrostatic
phenomena. That is, static electricity has temporarily knocked out the Gmini. Hold down on the STOP button for
15 seconds and the Gmini will shut off. Restart it normally now.
Problem: When I go to the Music icon in the main menu, I cannot see the music fi les or albums that I just put into the
Gmini.
Solution: The Gmini’s ARCLibrary must be refreshed. Go to Setup > Playmode > Update ARCLibrary . Your
newly transferred fi les will be indexed into the ARCLibrary. Files that are not in the folder Music will not be
included in the ARCLibrary.
®
XP and a USB 2.0 port, yet my fi le transfer rates are very slow.
41
42
®
12.2 File issues, corrupted data, formatting, and partitioning.
Problem: I want to clean up my Gmini’s hard drive, but Windows
cleaning tools.
Answer: This is because Windows
to Windows Device in Setup > System ). Do not change back to hard drive and run a defragmenter program.
This will give unexpected results.
Problem: On the Gmini, I fi nd new fi le names and folder names that I never created or they have strange
gibberish names.
Answer: (Hard Drive Mode) Most likely, the Gmini’s File Allocation Table (FAT) has been corrupted. This could
have been due to a shut down while the Gmini was connected to your computer. To fi x a corrupted FAT problem,
you should use the Error Checking utility or the Check Disk utility explained at the end of this section. Attention:
Windows
These are normal and will not harm the Gmini.
Problem: Can I defragment the Gmini’s hard drive?
Answer: (Windows Device Mode) The Gmini maintains an optimized fi le system and does not need to be
defragmented. Defragmenting will cause unexpected problems
Problem: I want to reformat the hard drive of the Gmini.
Solution: You can do this, but it will erase ALL of the data on your Gmini. First, as explained above, you should
run ScanDisk or the DOS chkdsk (Check Disk) program to try to fi x your problem. These will solve your problems
99% of the time. Note that Windows
format. This will make the Gmini unusable. Make sure you tell it to format the hard drive in FAT32 format .
12.2.1 Windows
• Quit all running applications.
• Properly connect the Gmini to your computer as explained in chapter 9.
®
and Macintosh® often write extra fi les to the hard drive such as fi nder.def or System volume info .
®
ME Running Scan-Disk (Error Checking) - Hard Disk Mode only
®
sees your Gmini as a Windows Device and not a hard drive (USB Port is set
®
XP and 2000 will, by default, format your Gmini hard drive in the NTFS fi le
®
will not let me use the standard hard drive
42
Page 22

43
1 13
Technical Specifi cations
ARCHOS Gmini XS202
S
series
• Right click on the Gmini hard drive in Windows
• Select the Tools option and run the Error checking program.
• Make sure you check the box to automatically fi x errors .
• Be patient, this may take a while. Windows
fi les available. This is OK, click on Yes .
12.2.2 Windows
If you still have problems with the fi le system on your Gmini you can try to fi x it using the DOS utility, check disk
(chkdsk). Simply running the Windows
following:
• Quit all running applications.
• Properly connect the Gmini to your computer as explained in chapter 9.
• Wait patiently (up to 5 minutes) for Windows
• Using the Command Prompt utility program, open a DOS window.
Start > Programs > Accessories > Command Prompt .
• At the prompt, type chkdsk e: /f . Use e: or the drive letter representing your Gmini.
• Be patient, this may take a while.
• When it is fi nished, exit the DOS Window and properly disconnect the Gmini from your computer.
®
XP & 2000 Running Check Disk Utility (ChkDsk) - Hard Disk Mode only
®
program Error Checking may not completely fi x disk errors. Do the
®
Explorer and select Properties.
®
may ask you to restart the computer to make certain Windows
®
XP to show the GMINI or local drive as mounted.
®
44
3
ARCHOS Gmini XS202
Storage Capacity See front of package.
Computer Interface High Speed USB 2.0 (compatible USB 1.1)
Audio Playback MP3 (Stereo, decoding 32-320 kb/s CBR & VBR), WMA, WAV (PCM), WMA protected fi les.
Screen 128 x 128 pixels. 4 level greyscale
Playback Autonom y Up to 17 hours*
Scalability Free Operating System updates downloadable from ARCHOS web site
Audio Connection Standard 3.5mm mini stereo headphone jack.
Power Internal rechargeable Lithium-Ion battery. Charged via USB cable through the computer.
System Requirements Windows®, ME, 2000 or XP. Mac: OS 10.3.9
And a computer with USB 2.0 interface (compatible USB 1.1 at a lower speed).
For protected WMA PlaysForSure
Technical Specifi cations
S
series
PlaysForSure
Optional charger/adaptor available.
USB 2.0 interface (compatible USB 1.1 at a lower speed).
TM
Audio.
TM
fi les: ME, 2000 or XP with Windows Media® Player 9 or 10 and a computer with
43
*Depending on usage (stop/start/settings/fi le type/etc.)
All brands and product names are registered trademarks and the property of their respective owners. Specifi cations are subject to change without notice.
Errors or omissions excepted. Images and illustrations may not always match contents. Copyright® 2005. ARCHOS. All rights reserved.
44
Page 23

45
1 14
Technical Support
Technical Support
4
In case you should encounter any technical diffi culties using your product, we suggest you go through these
steps in order to resolve any issues as effi ciently as possible:
1) Please read carefully through the appropriate sections of this manual. Some subject areas may be treated in
two different chapters depending on how the device is being used.
2) Look at the Troubleshooting section at the back of this manual. In this section, we have included answers to
some commonly asked questions.
3) Look at our Support section on the website (www .archos.com). Here, you will fi nd Frequently Asked Questions
(FAQ) for our different products, and there is a chance that somebody else has already asked your question.
4) If these steps did not help you resolve your technical diffi culty, you can always contact us either via email or by
calling the helpline. Telephone support will be provided in the language of the countries listed below. For other
countries, please use e-mail technical support.
• For warranty and services purposes, keep your sales receipt for proof of purchase.
• If technical support (Telephone or E-mail) determines that your product needs to be returned, please contact
the place of purchase to have your product repaired or replaced (depending on problem type).
DO NOT USE phone or e-mail support for marketing and sales questions. These numbers are to aid
those who have technical diffi culties / malfunctions.
46
Canada 949-609-1400 Nederland 020-50 40 510
Danmark 35 25 65 67 Norge 22 57 77 71
Deutschland 069-6698-4714 Schweitz/Suisse 442 004 111
España 09-1745-6224 Suomi 09 2311 3434
France 01 70 20 00 30 Svenska 08 579 290 80
Ireland 01-601-5700 UK 0207-949-0115
Telephone Support
45
Italia 02-4827-1143 USA 877-300-879 (toll free)
Email Support
tech-support.us@archos.com
English (United States and Canada customers)
tech-support.eu@archos.com
English or French (Europe and the rest of the planet)
tech-support.de@archos.com
German (Germany)
46
Page 24

47
1 15
Legal and Safety Notices
WWW.ARCHOS.COM
Worldwide Offi ces
United States & Canada Europe & Asia
ARCHOS
3, Goodyear - Unit A
Irvine, CA 92618 USA
Phone: 1 949-609-1483
Fax: 1 949-609-1414
United Kingdom Germany
ARCHOS
PO Box 1420
Southampton
SO15 1WF
United Kingdom
™
Technology
™
(UK) Limited
ARCHOS
12, rue Ampère
91430 Igny
France
Phone: +33 (0) 169 33 169 0
Fax: +33 (0) 169 33 169 9
ARCHOS
Business Park Vierwinden
Konrad-Zuse-Str. 22
41516 Grevenbroich
Germany
™
S.A.
™
Deutschland GmbH
Phone: +44 (0) 1264 366022
Fax: +44 (0) 1264 366626
Tel: + 49 (0) 21 82 – 570 41-0
Fax: + 49 (0) 2182 - 57041-70
48
Legal and Safety Notices
5
Warranty and Limited Liability
This product is sold with a limited warranty and specifi c remedies are available to the original purchaser in
the event the product fails to conform to the limited warranty. Manufacturer’s liability may be further limited in
accordance with its sales contract.
In general, the manufacturer shall not be responsible for product damages caused by natural disasters, fi re, static
discharge, misuse, abuse, neglect, improper handling or installation, unauthorized repair, alteration or accident.
In no event shall the manufacturer be liable for loss of data stored on disk media.
MANUFACTURER SHALL NOT BE LIABLE FOR ANY SPECIAL, INCIDENTAL OR CONSEQUENTIAL
DAMAGES. EVEN IF INFORMED OF THE POSSIBILITY THEREOF IN ADVANCE.
ARCHOS licensor(s) makes no warranties, express or implied, including, without limitation, the implied warranties
of merchantability and fi tness for a particular purpose, regarding the licensed materials. ARCHOS’s licensor(s)
does not warrant, guarantee or make any representations regarding the use or the results of the use of the
licensed materials in terms of its correctness, accuracy, reliability, correctness or otherwise. The entire risk as to
the results and performance of the licensed materials is assumed by you. The exclusion of implied warranties is
not permitted by some jurisdictions. The above exclusion may not apply to you.
In no event will ARCHOS’s licensor(s), and their directors, offi cers, employees or agents (collectively ARCHOS’
licensor) be liable to you for any consequential, incidental or indirect damages (including damages for loss of
business profi ts, business interruption, loss of business information, and the like) arising out of the use of inability
to use the licensed materials even if ARCHOS’ licensor has been advised of the possibility of such damages.
Because some jurisdiction do not allow the exclusion or limitation of liability for consequential or incidental
damages, the above limitations may not apply to you.
Please see your sales contract for a complete statement of warranty rights, remedies and limitation of liability.
47
48
Page 25

49
Furthermore, warranty does not apply to:
1.
Damages or problems resulting from misuse, abuse, accident, alteration or incorrect electrical current or voltage.
2. Any product tampered-with or damaged warranty seal or serial number label.
3. Any product without a warranty or serial number label.
4. Batteries and any consumable items delivered with or in the equipment.
The end user is required to use this product only in conformity with its original purpose and is strictly forbidden
to make any technical modifi cations that could potentially impinge on the rights of third parties. Any modifi cation
to the hardware, software, or physical enclosure of the product must be approved in writing by ARCHOS. Non
approved modifi ed products are subject to the withdrawal of any or all guarantee clauses.
Warnings and Safety Instructions
CAUTION
To prevent risks of electric shock, this unit must only be opened by qualifi ed service personnel.
Power off and disconnect the power supply cable before opening the unit.
WARNING
To prevent fi re or shock hazard, do not expose the unit to rain or moisture.
Use of this product is for personal use only. Copying CDs or loading music, video, or picture fi les
for sale or other business purposes is or may be a violation of copyright law. Copyrighted materials,
works of art, and/or presentations may require authorization to be fully or partially recorded. Please
be aware of all such applicable laws concerning the recording and use of such for your country
and jurisdiction.
SAFETY
For driving safety, only a passenger should operate the device when the car is in motion and not
the driver. Laws governing the usage of electronic devices by the driver may be applicable in your
jurisdiction and/or country.
49
50
FCC Compliance Statement
FCC Compliance
This equipment has been tested and found to comply with limits for a Class B digital device, pursuant to Part
15 of the FCC Rules. These limits are designed to provide reasonable protection against harmful interference
in a residential installation. This equipment generates, uses and can radiate radio frequency energy and, if not
installed and used in accordance with instructions, may cause harmful interference to radio communications.
However, there is no guarantee that interference will not occur in a particular installation. If this equipment does
cause harmful interference to radio or television reception, which can be determined by turning the equipment off
and on, the user is encouraged to try to correct the interference by one or more of the following measures:
• Reorient or relocate the receiving antenna.
• Increase the separation between the equipment and receiver.
• Connect the equipment into an outlet on a circuit different from that to which the receiver is connected.
• Consult the dealer or an experienced radio/TV technician for help.
CAUTION: Modifi cations not authorized by the manufacturer may void users authority to operate
this device.
FCC Part 15 - Operation is subject to the following two conditions:
1 This device may not cause harmful interference;
2 This device must accept any interference received including interference that may cause
undesired operation.
Electrostatic Discharge
Normal functioning of the product may be disturbed by ESD. If so, simply reset the product to resume normal
operation by following the instruction manual. During fi le transmission, please handle with care and operate in a
static-free environment.
50
Page 26

51
Avoiding Hearing Damage
This product respects the current regulations for limiting the output volume of consumer audio devices to a safe
level. By listening to your device with headphones or earbuds at high volumes, you run the risk of permanent
damage to your ears. Even if you get used to listening at high volumes and it seems normal to you, you still
risk the possibility of damaging your hearing. Reduce the volume of your device to a reasonable level to avoid
permanent hearing damage. If you hear ringing in your ears, reduce the volume or shut off your device. This
device has been tested with the Archos supplied earphones. Other manufactures earphones may produces
volume levels higher or lower than the Archos delivered earphones.
Copyright Notice
Copyright ARCHOS © 2005 All rights reserved.
This document may not, in whole or part, be copied, photocopied, reproduced, translated or reduced to any
electronic medium or machine-readable form without prior consent, in writing, from ARCHOS. All brands and
products names are registered trademarks and the property of their respective owners. Specifi cations are subject
to change without notifi cation. Errors and omissions accepted. Images and illustrations may not always match
contents. Copyright
Disclaimer of warranty: to the extent allowed by applicable law, representations and warranties of non-infringement
of copyrights or other intellectual property rights resulting from the use of the product under conditions other than
as here above specifi ed, are hereby excluded.
Environmental Considerations
Protection of the environment is an important concern to ARCHOS
actions, ARCHOS
entire cycle of its products; from fabrication to consumer usage, to fi nal disposal.
Batteries : If your product contains a detachable battery pack, you should only dispose of it in a designated
collection point for used batteries.
The Product : The crossed-out garbage can symbol on your product signifi es that it falls into the category of
electric/electronic equipment. Products of this type contain substances that are potentially dangerous to the
environment and to human health. Therefore, you should not dispose of the ARCHOS electronic device in a
regular trash. As such, the current European directives ask that this device be collected:
®
ARCHOS. All rights reserved.
™
™
has consciously included a set of methods that favor a respect for the environment into the
. In order to put this concern into tangible
51
52
- At places of distribution in the case of a purchase of a similar electronic product.
- At locally created disposal areas (waste disposal centers, sorted trash system, etc.)
By doing this, you are actively participating in the reuse and recycling of disposed electronic and
electric equipment that could have potential effects on the environment and human health.
52
 Loading...