

Arcam Diva DV-88 Plus Owners manual
DV8 8 P L U SH A N D B O O K
Arcam DV88PLUS DVD player
Lecteur de DVD Arcam DV88PLUS
DVD-Spieler Arcam DV88PLUS
Engl i sh
Fran ç ais
Deut s ch

DV88PLUS
2
Engl i sh
DV88PLUS
3
Safety guidelines
CAUTION: To reduce the risk of electric shock, do not
remove cover (or back). No user serviceable parts inside.
Refer servicing to qualied service personnel.
WARNING: To reduce the risk of re or electric shock, do not
expose this apparatus to rain or moisture.
The lightning ash with an arrowhead symbol within an equilateral
triangle, is intended to alert the user to the presence of uninsulated
‘dangerous voltage’ within the product’s enclosure that may be of
sufcient magnitude to constitute a risk of electric shock to persons.
The exclamation point within an equilateral triangle is intended to alert
the user to the presence of important operating and maintenance
(servicing) instructions in the literature accompanying the product.
CAUTION: In Canada and the USA, to prevent electric shock,
match the wide blade of the plug to the wide slot in the
socket and insert the plug fully into the socket.
Important safety instructions
This product is designed and manufactured to meet strict
quality and safety standards. However, you should be aware of
the following installation and operation precautions:
1. Take heed of warnings and instructions
You should read all the safety and operating instructions
before operating this appliance. Retain this handbook for future
reference and adhere to all warnings in the handbook or on the
appliance.
2. Water and moisture
The presence of electricity near water can be dangerous.
Do not use the appliance near water – for example next to a
bathtub, washbowl, kitchen sink, in a wet basement or near a
swimming pool, etc.
3. Object or liquid entry
Take care that objects do not fall and liquids are not spilled into
the enclosure through any openings. Liquid lled objects such
as vases should not be placed on the equipment.
4. Ventilation
Do not place the equipment on a bed, sofa, rug or similar
soft surface, or in an enclosed bookcase or cabinet, since
ventilation may be impeded. We recommend a minimum
distance of 50mm (2 inches) around the sides and top of the
appliance to provide adequate ventilation.
5. Heat
Locate the appliance away from naked ames or heat
producing equipment such as radiators, stoves or other
appliances (including other ampliers) that produce heat.
6. Climate
The appliance has been designed for use in moderate climates.
7. Racks and stands
Only use a rack or stand that is recommended for use with
audio equipment. If the equipment is on a portable rack it
should be moved with great care, to avoid overturning the
combination.
8. Cleaning
Unplug the unit from the mains supply before cleaning.
The case should normally only require a wipe with a soft, damp,
lint-free cloth. Do not use paint thinners or other chemical
solvents for cleaning.
We do not advise the use of furniture cleaning sprays or
polishes as they can cause indelible white marks if the unit is
subsequently wiped with a damp cloth.
9. Power sources
Only connect the appliance to a power supply of the type
described in the operating instructions or as marked on the
appliance.
10. Power-cord protection
Power supply cords should be routed so that they are not likely
to be walked on or pinched by items placed upon or against
them, paying particular attention to cords and plugs, and the
point where they exit from the appliance.
11. Grounding
Ensure that the grounding means of the appliance is not
defeated.
12. Power lines
Locate any outdoor antenna/aerial away from power lines.
13. Non-use periods
If the unit has a standby function, a small amount of current will
continue to ow into the equipment in this mode. Unplug the
power cord of the appliance from the outlet if left unused for a
long period of time.
14. Abnormal smell
If an abnormal smell or smoke is detected from the appliance,
turn the power off immediately and unplug the unit from the wall
outlet. Contact your dealer immediately.
15. Servicing
You should not attempt to service the appliance beyond that
described in this handbook. All other servicing should be
referred to qualied service personnel.
16. Damage requiring service
The appliance should be serviced by qualied service personnel
when:
A. the power-supply cord or the plug has been damaged, or
B. objects have fallen, or liquid has spilled into the appliance,
or
C. the appliance has been exposed to rain, or
D. the appliance does not appear to operate normally or
exhibits a marked change in performance, or
E. the appliance has been dropped or the enclosure
damaged.
Safety compliance
This product has been designed to meet the IEC 60065
international electrical safety standard.
RISQUE DE CHOC ELECTRIQUE
NE PAS OUVRIR
ATTENTION
CAUTION
RISK OF ELECTRIC
SHOCK DO NOT OPEN

Engl i sh
DV88PLUS
3
Using this handbook
This product incorporates copyright protection technology that is
protected by method claims of certain U.S. patents and other intellectual
property rights owned by Macrovision Corporation and other rights
owners. Use of this copyright protection technology must be authorized
by Macrovision Corporation, and is intended for home and other
limited viewing uses only unless otherwise authorized by Macrovision
Corporation. Reverse engineering or disassembly is prohibited.
Consumers should note that not all high denition television sets are fully
compatible with this product and may cause artifacts to be displayed
in the picture. In case of 525 progressive scan picture problems, it is
recommended that the user switch the connection to the ‘Standard
Denition’ output. If there are questions regarding TV set compatibility
with this model 525p DVD player, please contact Arcam Customer
Support Department.
Manufactured under licence from Dolby Laboratories.
“Dolby”, “Pro Logic”, and the double-D symbol are trademarks of Dolby
Laboratories.
Condential unpublished works, Copyright © 1992–1997 Dolby
Laboratories. All rights reserved.
Manufactured under licence from Digital Theater Systems, Inc.
US Patent Number 5,451,942 and other world-wide patents issued and
pending. ‘DTS’ and ‘DTS Digital Surround’, are trademarks of Digital
Theater Systems, Inc.
Copyright © 1996 Digital Theater Systems, Inc. All rights reserved.
This handbook has been designed to give you all the information
you need to install, connect, set up and use the Arcam DiVA
DV88PLUS. The remote control handset supplied with the
equipment is also described.
It may be that the DV88PLUS has been installed and set up as
part of your Hi-Fi installation by a qualied Arcam dealer. In
this case, you may wish to skip the sections of this handbook
dealing with installation and setting up the unit. Use the
Contents list to guide you to the relevant sections.
Safety
Safety guidelines are set out on the preceding page of this
handbook.
Many of these items are common sense precautions, but for
your own safety, and to ensure that you do not damage the unit,
we strongly recommend that you read them. This is a class 1
product and requires an earth connection.
Disc types supported
The ARCAM DV88PLUS DVD player plays a range of disc types.
These include:
DVD-video (single region, set at factory)
CDDA (‘normal’ audio-CDs) including HDCD decoding,
CD-R, and CD-RW
Video CD, including variants such as CVCD, SVCD and
DVCD
MP3 and WMA audio les, when on a CD-ROM or
CD-R/CD-RW (some restrictions apply)
Picture CDs (JPEG image les).
Contents
Safety guidelines .............................................................2
Important safety instructions ......................................2
Safety compliance.....................................................2
Using this handbook.........................................................3
Safety.......................................................................3
Disc types supported.................................................3
Installation...............................................................4
Positioning the unit ....................................................4
Connecting outputs: Video.........................................4
Component video ......................................................4
RGB output ...............................................................4
S-Video .....................................................................4
Composite video .......................................................4
Progressive video......................................................5
Connecting Digital audio.............................................5
Connecting Analogue audio ........................................5
Remote Control input .................................................5
Connecting to a power supply ....................................5
Conguring your DVD player ....................................6
Introduction...............................................................6
Switching the power on..............................................6
Obtaining a TV picture................................................6
Using the Set-up menus .............................................6
Operational setup......................................................6
Video setup...............................................................7
Audio setup...............................................................8
Access setting ..........................................................8
Completing the set-up................................................8
Basic use of your DVD player ...................................9
Introduction...............................................................9
Front panel controls...................................................9
Playing a disc............................................................9
Using the remote control........................................10
Advanced controls .................................................11
Advanced DVD and VCD features ....................................12
Jumping to a particular point ....................................12
Special playback modes ..........................................12
Peforming an A-B repeat ..........................................12
To program a special sequence................................13
Advanced MP3/WMA/JPEG and audio CD features...........14
Screen layout ..........................................................14
Player mode............................................................14
Browsing the disc (Browse mode).............................14
Programmed playback (Audio CDs)...........................15
Programmed playback (CD-ROM)..............................15
Shufe and Repeat ..................................................15
ReferenceTroubleshooting......................................16
Problems with remote controls .................................16
Problems with video output ......................................16
Problems with audio output ......................................17
Problems with disc playability...................................17
Technical specications..................................................18
Guarantee .....................................................................19
On line registration.........................................................19

DV88PLUS
4
Engl i sh
DV88PLUS
5
COAXOPTICAL
POWER INLET
SUPPLY
VOLTAGE
SCART A/V OUT COMPOSITE
Pb
B
Pr
R
COMPONENT
Y
G
S VIDEO
PCM/BITSTREAM
L
R
1 2
VID EO OU T
DIG ITAL O UT
AUD IO OUT
230V
REMOTE
IN
Installation
NOTE: The DVD player can only support component video
or RGB video at any one time. This is specied in the setup
menu. If you use either of these outputs with an incorrect
menu setting, the picture will be coloured in a strange way.
Similar effects result from cross connection of the three
signals.
If you use component video outputs, you must ensure that
the SCART socket is not used. Similarly, if the SCART socket
is used, disconnect the component video leads.
NOTE: Component video DVD players and TVs are not
generally available in Europe.
Positioning the unit
Place the DV88PLUS on a level, rm surface and ensure that
there is adequate ventilation for the unit.
Connecting outputs: Video
To view the pictures from the DVD player you need to connect
one of its video outputs to a TV, monitor or projector.
The DV88PLUS has ve video outputs:
Component video
RGB
S-video
Composite video
Progressive scan component 525P (480P) and
625P (576P) video.
You only need to use one type of video from the list. Choose a
type that your TV supports.
NOTE: If your TV supports none of these types of video
then it’s time to purchase a new TV!
Note that you may connect equipment such as AV receivers
in the signal path between the DVD player and the TV, so long
as that equipment supports the correct type of video signal.
For instructions on how to connect AV equipment, consult the
manual for that equipment.
Component video
Use three phono cables to connect the Component Y, Pb, Pr
outputs of the DVD player to the Y, Pb, Pr inputs of the TV.
Ensure that the cables are suitable for video use and that they
are approximately the same length. Some component video
interfaces are labelled in different ways: see the table below if
your TV’s component inputs are not labelled ‘Y, Pb, Pr’.
RGB output
RGB output is available on both the SCART and Component/
RGB sockets and offers picture quality equal to component
video.
Use appropriate cables to connect either the SCART connector
or RGB phonos to the TV. Note that if you are using RGB output
via phono connectors, you will also need to use COMPOSITE as
a sync signal.
If you are using a SCART connection to your TV, it is best to
mute your TV’s speakers because SCART also carries stereo
audio signals; this prevents audio coming through the TV.
AV control: The SCART output has a control signal that switches
your TV to its SCART input when the DV88PLUS is turned on. It
will also signal to wide screen TVs the correct aspect ratio
(16:9 or 4:3), provided these features are supported by the TV.
S-Video
The S-Video output (also known as S-VHS or Y/C) is commonly
supported by TVs worldwide. Connect the S VIDEO output of the
DVD player to the S-Video input of the TV using an appropriate
cable.
Composite video
If your TV only offers a composite input (sometimes labelled
CVBS or just ‘video’), connect this to the COMPOSITE video
output of the DVD player using a phono cable suitable for video
use.
DV88PLUS alternative alternative alternative
Y
Y Y Y
Pb
Cb (B–Y) U
Pr
Cr (R–Y) V

Engl i sh
DV88PLUS
5
Connecting to a power supply
Mains lead
The appliance is normally supplied with a moulded mains plug
already tted to the lead. If for any reason the plug needs to
be removed, it must be disposed of immediately and securely,
as it is a potential shock hazard when inserted into the mains
socket. Should you require a new mains lead, contact your
Arcam dealer.
Wrong plug?
Check that the plug supplied with the unit ts your supply and
that your mains supply voltage agrees with the voltage setting
(115V or 230V) indicated on the rear panel of the unit.
If your mains supply voltage or mains plug is different, consult
your Arcam dealer or Arcam Customer Support on
+44 (0)1223 203200.
Plugging in
Push the plug (IEC line socket) of the power cable supplied with
the unit into the socket (POWER INLET) in the back of the unit.
Make sure it is pushed in rmly.
Put the plug on the other end of the cable into your power
supply socket and switch the socket on.
Progressive video
If your television is capable of accepting a progressively
scanned video signal, you may wish to use the progressive
video output from the DV88PLUS.
To connect the progressive output of the DV88PLUS to your TV,
follow the instructions above for connecting component video. If
you are unsure whether your TV can accept progressive video,
please refer to its instruction manual or consult your dealer.
Connecting Digital audio
If you have an external surround sound decoder, receiver or
D-A converter that you wish to use with the DVD player, then
you will need to connect it using either a coaxial or optical lead.
These digital outputs provide PCM, Dolby Digital, DTS or MPEG
multi-channel audio, depending on the source material. It is also
possible to set the digital output always to output 2-channel
PCM (stereo mix-down) via the setup menu.
If possible, use the coaxial connection as this may offer slightly
better performance. Connect the coax output of the DVD player
to the digital audio coax input of the decoder/D-A converter
or receiver using a phono cable designed for digital audio
interconnection.
Alternatively, connect the optical output of the DVD player to the
optical input of the decoder/D-A converter or receiver using a
TOSLINK optical lead.
Connecting Analogue audio
If you wish to use the high quality D-A converters of the DVD
player, then you will need to use the analogue audio outputs of
the DVD player.
Two pairs of outputs are provided (these are identical), labelled
L (left) and R (right). Connect one of these pairs to the input
of your amplier using a suitable pair of interconnect cables.
If required, the second set of audio outputs can be used to
connect to a second amplier setup for ‘multi-room’ use, or
routed to a tape recorder for making recordings.
Remote Control input
The REMOTE IN input can be used to pass RC5 codes to the
DV88PLUS if it is installed in a position (or system) where infrared
cannot be used.
DV88PLUS
6
Engl i sh
DV88PLUS
7
Conguring your DVD player
Introduction
Congratulations – if you have followed the installation
instructions then the required connections to other equipment
will have been made. It is now essential to go through an
initial set up procedure to ensure the DVD player is congured
correctly for use.
Switching the power on
Press in the POWER button on the front panel. The power LED
above the switch lights green.
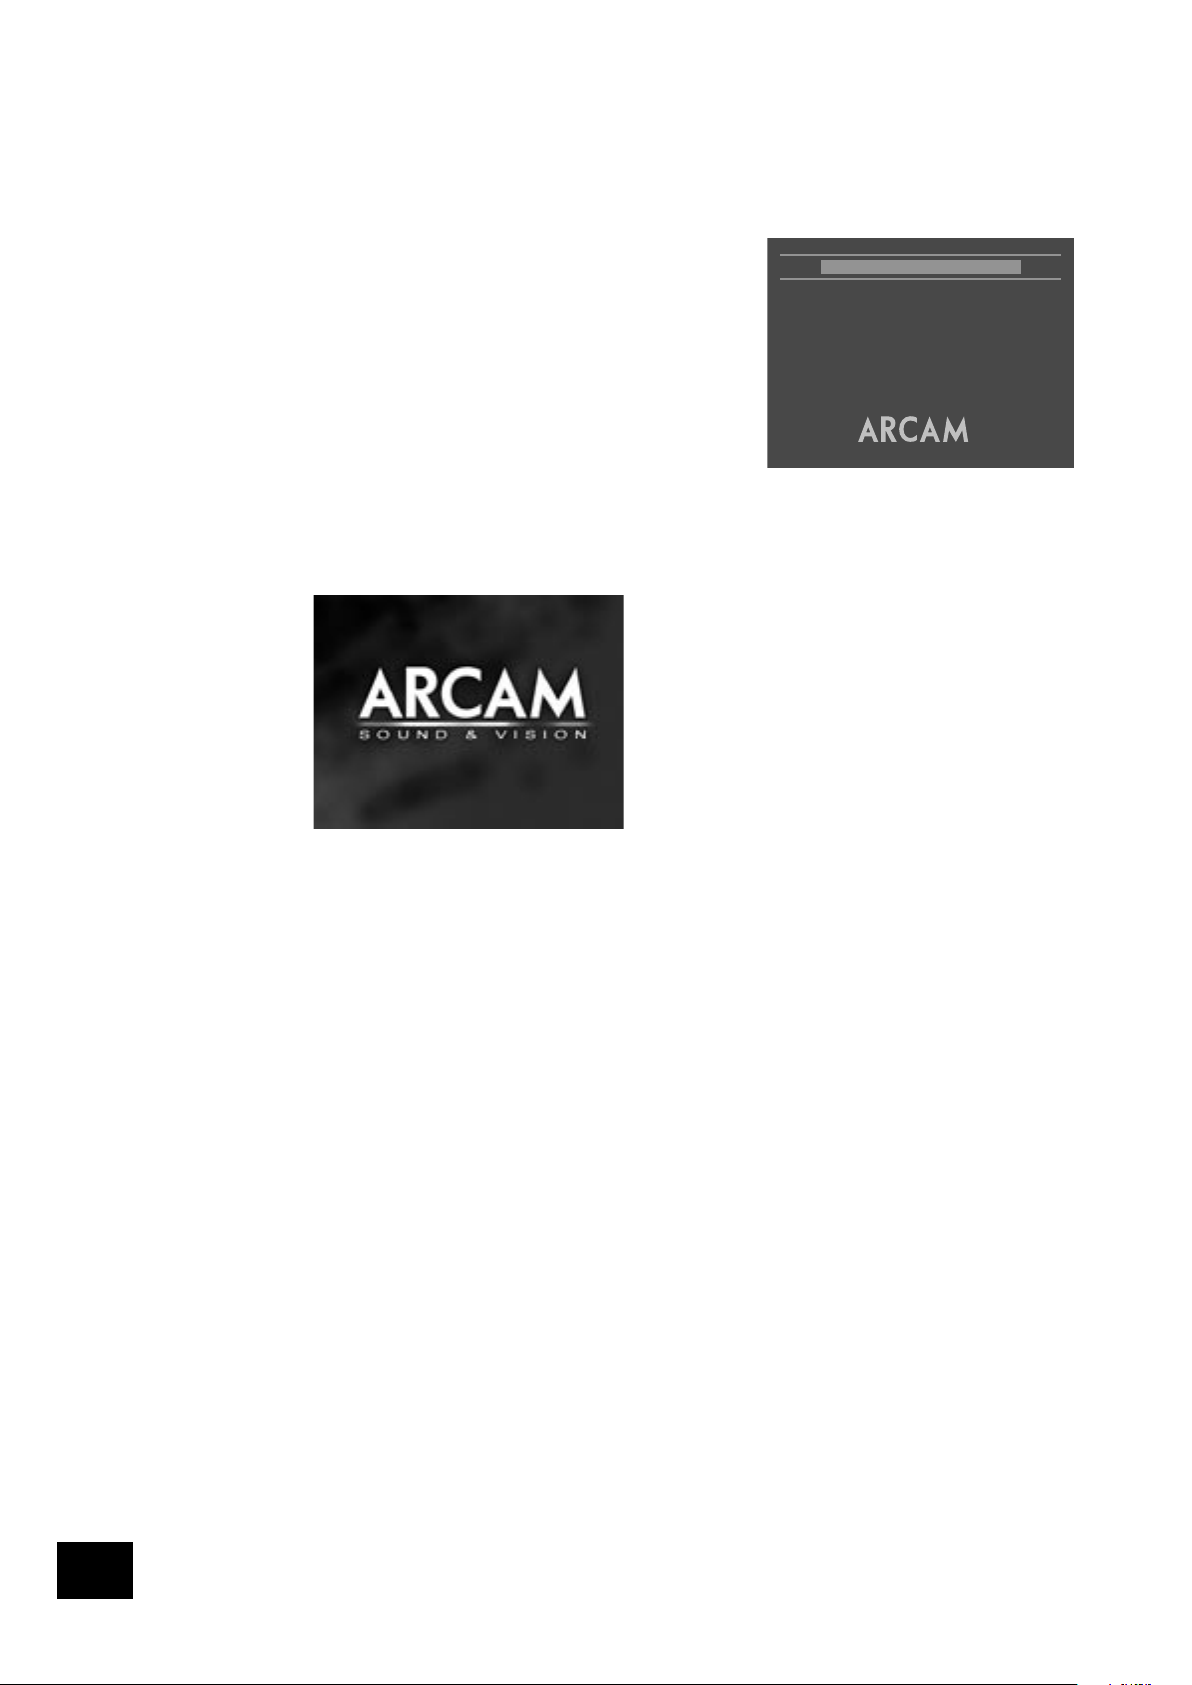
Obtaining a TV picture
Ensure the TV is switched on and that you have selected the
correct TV input. You should see the following image. This is
the image that the DVD player gives whenever there is no disc
playing.
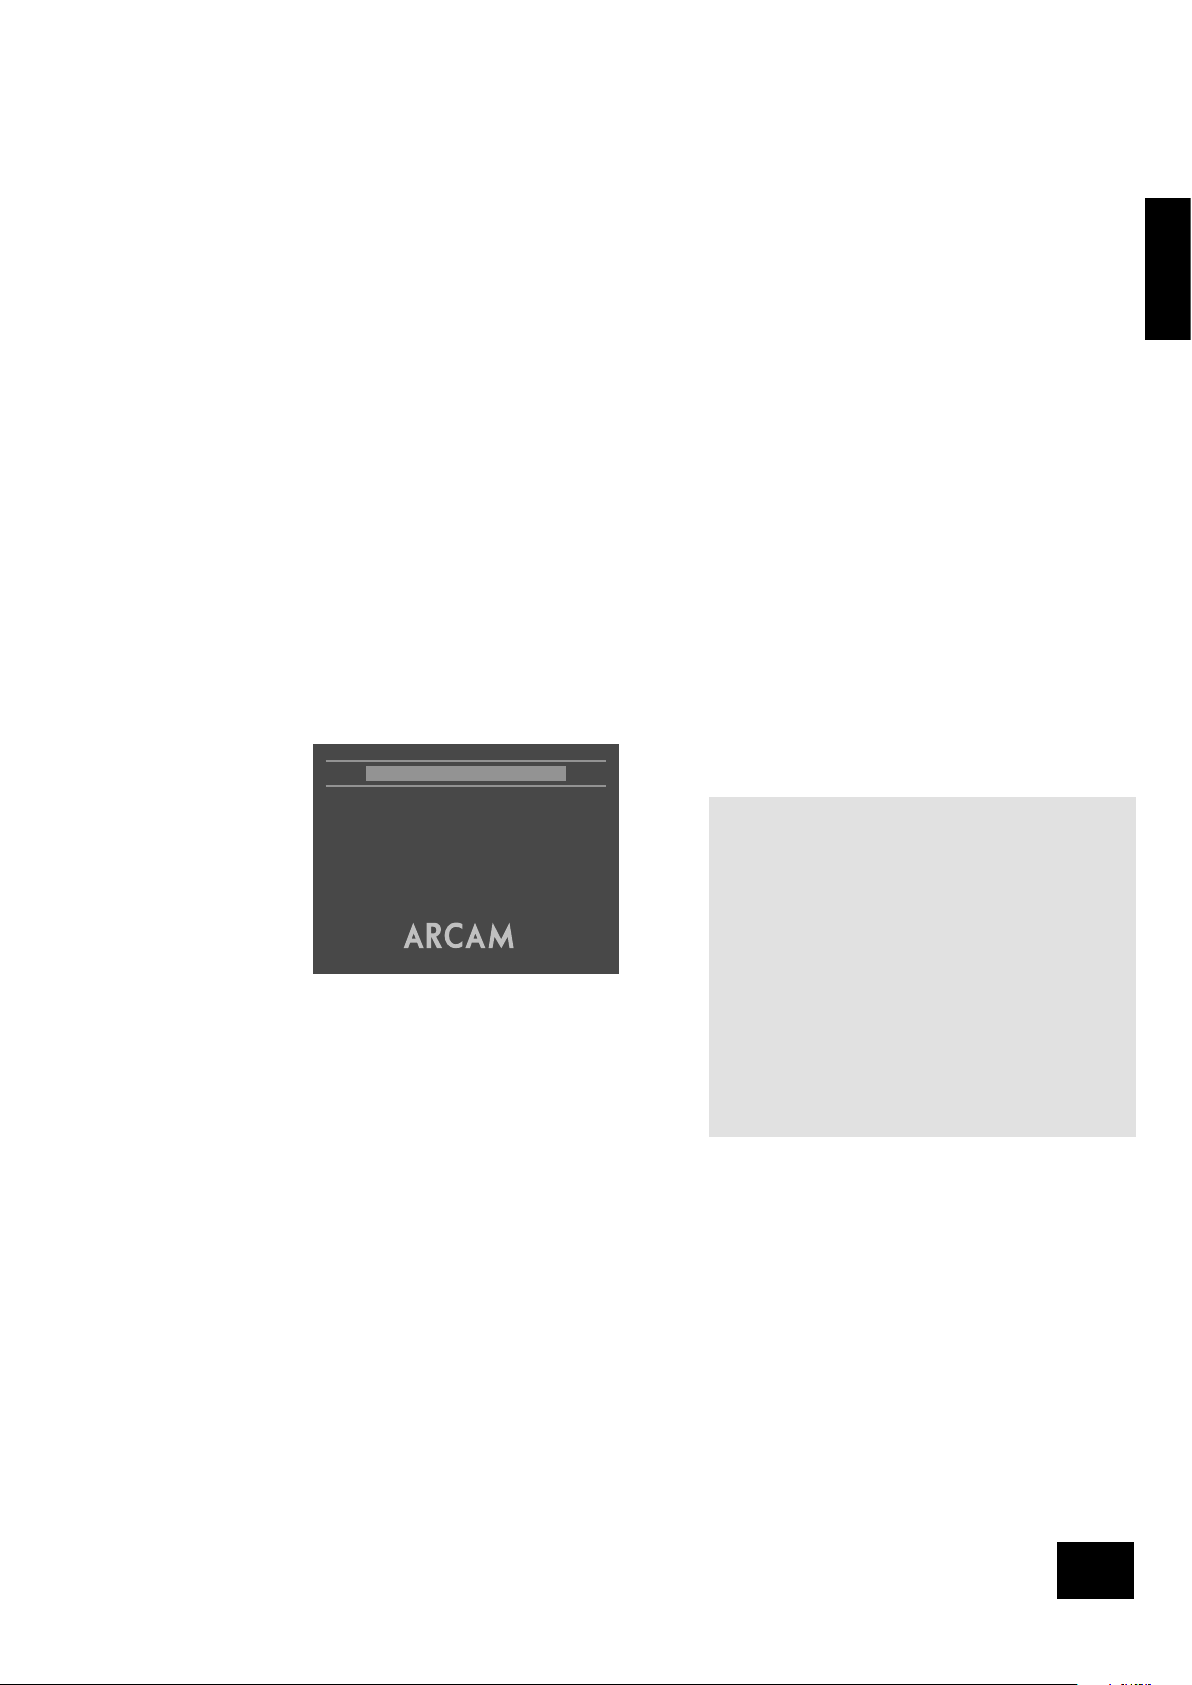
To protect your screen from damage caused by persistent
static images, a ‘screen saver’ facility activates after a few
minutes of inactivity.
Using the Set-up menus
If you have not already done so, now would be a good time to
t the two AAA batteries in the remote handset, taking care to
get them the correct way round. Select ‘DVD’ using the CD/DVD
button on the remote control.
Ensure that no disc is playing and press SETUP on the remote
control: a menu appears on the TV screen.
The Set-up menu comprises four pages of options. The top line
of each page shows the page title, indicating the nature of the
settings controlled by the page. To make a change, rst use
the UP/DOWN controls to highlight the item. Once the item to
be changed has been highlighted, press RIGHT to open the list
of options for the menu item. The current option for the menu
item is shown highlighted; the UP/DOWN controls can be used
to select the new option, then pressing LEFT conrms the
selection and closes the option list.
To change page, highlight the page bar at the top of the screen
and use the LEFT/RIGHT controls to move through the pages.
In the ‘Setup’ menu, the UP/DOWN controls ‘wrap around’, so
that with the highlight bar at the bottom of the screen, pressing
DOWN takes the bar to the top of the screen.
Operational setup
Operation 1/4
OSD Language English
DVD Menu
English
Subtitle English
Audio English
Remote type CR-314
OSD Status On
Priority Not applicable
OSD Language
This setting controls the language of the messages displayed
on the On-Screen Display (OSD). The default language is
English, with three other languages supported.
Note that this setting does not change the language of any
information displayed on the front panel, which is always in
English.
DVD menu
Some DVD discs support a number of different languages
for the DVD disc menu (the menu present on the DVD itself).
This setting allows the preferred language to be specied. For
example, if this item is set to ‘French’ then disc menus will be
displayed in French, where supported by the disc.
Note that not all discs will have your preferred language
available.
Subtitle
This setting controls the subtitles displayed on the TV.
Off No Subtitles
Auto Subtitles for the primary language on the
disc
Closed Caption ‘Closed Caption’ information from the disc (if
present) is sent to the TV
English English subtitles
French French subtitles, etc. (six languages are
supported)
Note that some discs may force the subtitles to be displayed
regardless of how the Subtitle item is set.
Closed Caption information is displayed only if the ‘Closed
Caption’ option is selected, closed caption information is
present on the disc, and your TV supports closed caption
decoding.
The default setting for Subtitle is ‘Off’. Alternatively, choose the
setting for the language you prefer. Note that not all discs will
have your preferred language available as a subtitle.
Audio
This controls the default audio track, when there is more than
one audio track present.
English English language, if available
French French language, if available, etc. (six languages
are supported)
The default setting is ‘English’. Choose the setting you would
like as default. Note that the Audio preference setting is not
respected by all discs, which may impose their own default
choice.
Engl i sh
DV88PLUS
7
Remote type
This informs the player which type of remote control you
are using, so that the player can take into account the slight
differences between the remote types. For ARCAM remote
controls, the remote type is always written on the front of the
remote control, normally at the bottom of the unit.
CR-314 This selects the grey ARCAM CR-314 remote
control
CR-80 This selects the black ARCAM CR-80 learning
remote control
CR-9000 This selects the black ARCAM CR-9000 learning
remote control
Other A non-ARCAM learning remote control is being used
It is important to choose ‘Other’ if the learning remote in use
does not support RC-5 ‘toggle bits’.
OSD (On Screen Display)
This setting controls the ‘pop up’ messages that appear on
screen.
On Pop-up messages are enabled
Off No pop-up messages, only menus when required.
Certain messages, such as ‘No Disc’ are always shown
regardless of how this is set.
Priority
This item is not applicable for the DV88PLUS, and should not be
changed.
Video setup
Video 2/4
TV Shape 4:3 Letterbox
TV System Auto
Progressive Off
HQ Video RGB Scart
NTSC Black 7.5 IRE(Standard)
TV shape
This needs to be set correctly for the type of TV you have and
the type of display you prefer.
4:3 Letterbox Use this setting if you have a conventional 4:3
TV, and you prefer to view wide screen movies
in letterbox format (with black bars at the top
and bottom)
4:3 Panscan Use this setting if you have a conventional 4:3
TV, and you prefer to view wide screen movies
in Pan & Scan format (cropping the sides of
the image)
16:9 Use this setting if you have a wide screen
(16:9) TV. Material in 16:9 format is displayed
so as to ll the screen.
If you have a 4:3 TV and you have set a preference for Panscan,
it does not mean you will always see movies in this format,
since the Panscan display must be supported on that disc.
TV System
This is set at the factory to be appropriate for the type of TV
used in your country. Should you need to change this setting,
the options are explained below.
Auto The video output is taken from that recorded on
the disc. When no disc is playing, the logo screen
is displayed using the standard of the last disc
played.
NTSC NTSC is always used as the video standard. Note
that PAL discs are converted to NTSC, but this
causes some reduction in the quality of the video
output (and may cause the video to become
‘jerky’). This is the best setting to use if your TV
can accept only NTSC video (this is generally the
case in North America); better results are obtained
by using ‘Auto’, but your TV must be able to
support PAL.
PAL PAL is always used as the video standard. Note
that NTSC discs are converted to PAL, but this
causes some reduction in the quality of the video
output (and may cause the video to become
‘jerky’). Better results will be obtained by using
‘Auto’, but your TV must be able to support NTSC.
Progressive
Off The video output will always be interlaced (standard
denition video). Use this setting if your display
device does not support progressive scan.
Auto (525) The component video output will switch to
progressive scan mode whenever the output
standard is NTSC (525). This would be whenever
an NTSC disc is played, or whenever ‘TV System’
is set to NTSC. The video output will revert to
interlaced (standard denition) for PAL (625)
modes. Use this setting only if your display device
supports progressive scan.
On (625/525) The component video output will output
progressive scan video for both PAL and NTSC
discs. Use this setting only if your TV supports
progressive scan in both PAL and NTSC formats.
HQ Video (High Quality Video)
This setting controls the type of video given out on the
Component and SCART video outputs. It is set at the factory to
be appropriate for the type of TV used in your country, so it is
best not to change it. If it gets set incorrectly then the picture
shown on the TV will have strange colouring.
Component
The video output on both the Component video (3
phonos) and SCART is Y, Pb, Pr component video.
RGB SCART
The video output on both the Component video (3
phonos) and SCART is RGB. Note that if you are
using RGB output via phono connectors, you will
also need to use COMPOSITE as a sync signal.
NOTE: When progressive scan is active, the component
video output will be in progressive mode, and the other video
outputs (composite and S-Video) are muted.
Since progressive scan must be component, not RGB, the
‘HQ video setting’ will be forced to component if progressive
scan is enabled.
Not all displays support progressive scan. If you accidentally
enable progressive scan and your display does not support
it, you will be unable to view the picture from the DVD player,
including the on screen display required to change the video
settings. To revert to interlaced mode without using the on
screen menus, press and hold the STOP button on the front
panel at any time. The video mode will revert to interlaced
mode after the button has been held in for ve seconds.
DV88PLUS
8
Engl i sh
DV88PLUS
9
Access setting
Access 4/4
Password – – – –
Rating View all films
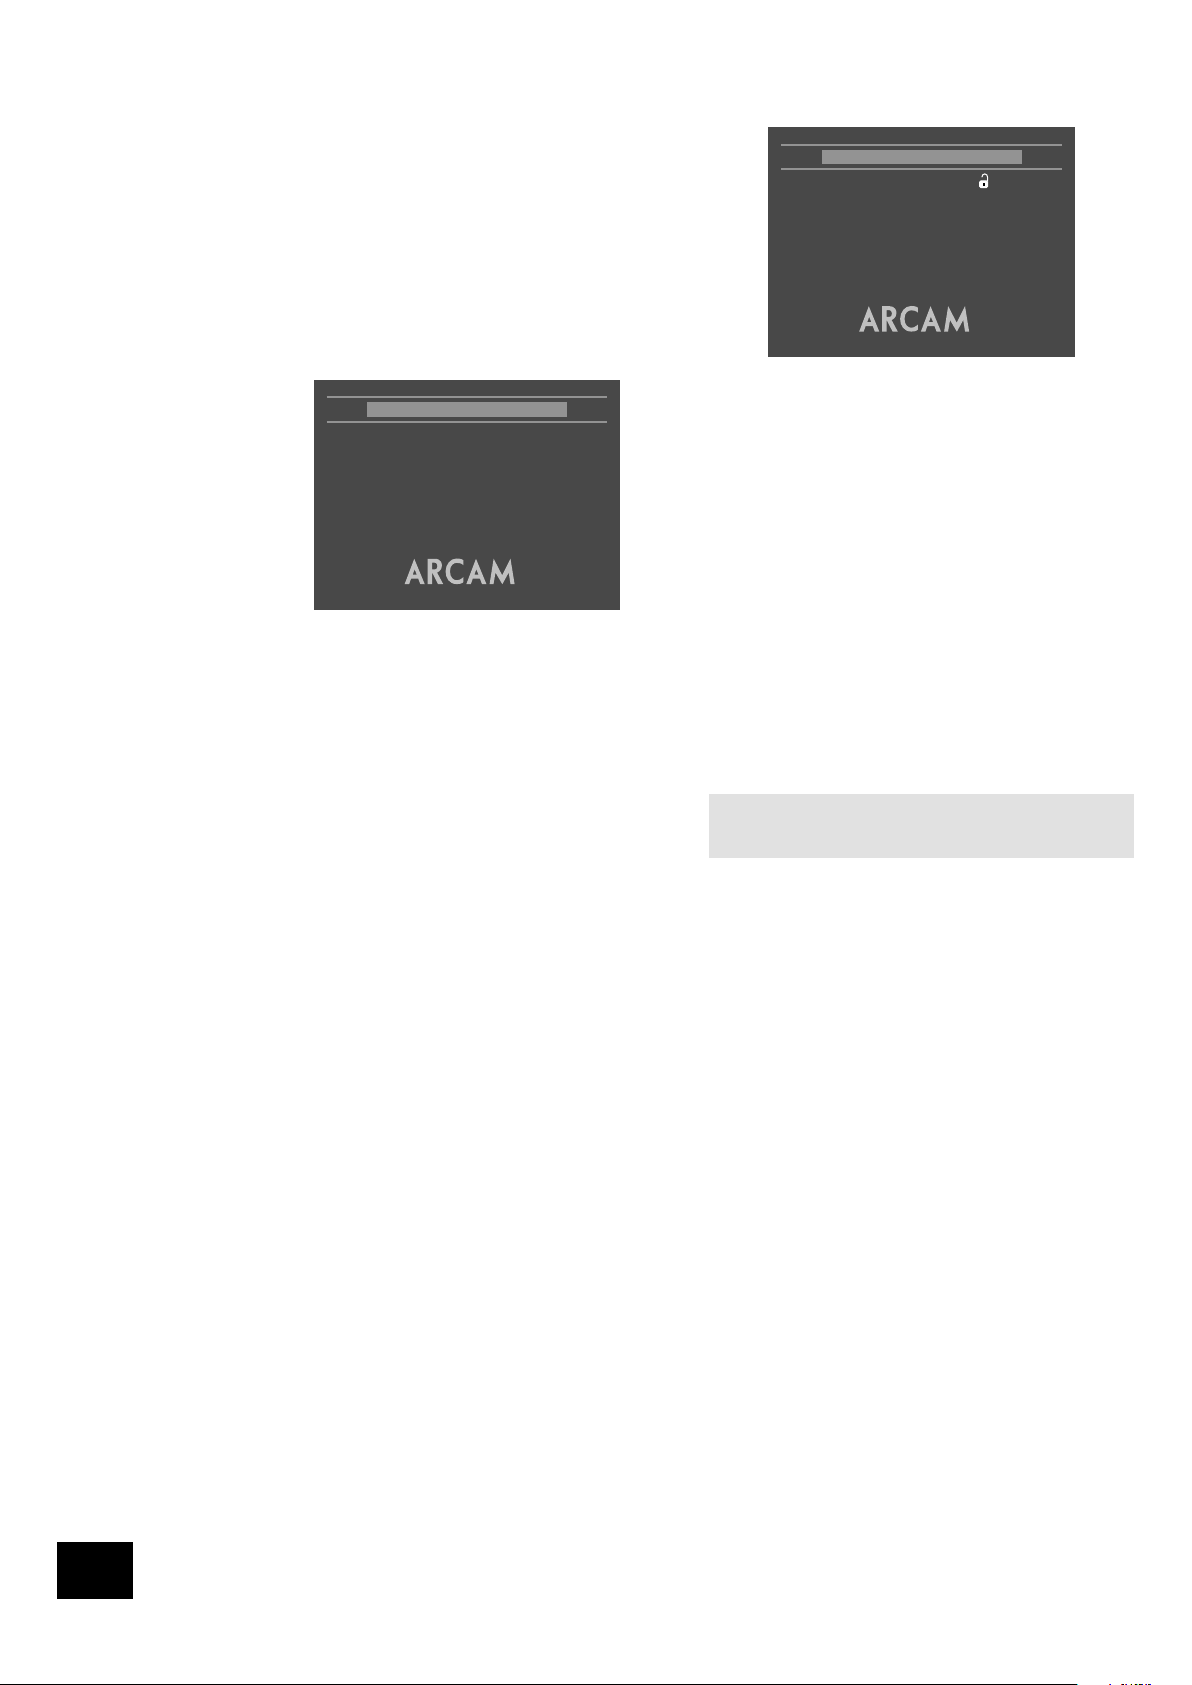
Password
The password setting works in conjunction with the rating
setting (the next menu item) to provide a means of limiting
content playback by children (parental control).
You will see there are four dashes and a padlock symbol.
Normally the padlock symbol will be open and this means the
parental control is unlocked. Under this condition the rating
setting may be freely changed.
To lock the parental control, choose a suitable four digit
number. Don’t forget your password as you will need to know
it to unlock the player. Highlight ‘Password’ and enter your four
digit number using the numerical keys on the handset.
When all four digits have been entered, press OK on the
handset. The player is now locked and you will not be able to
change the rating setting.
To unlock the parental control, highlight ‘Password’ and enter
your four digit number, followed by OK.
NOTE: You can change the password any time you lock the
player.
Rating
The rating setting is used in conjunction with the password to
restrict the content of DVD titles that may be played. To change
this setting the parental control must be unlocked.
The term ‘Parental level’ refers to a standard dened for
DVDs. DVD movies may have a parental level between 1 and
8. Note that this only applies to DVD video discs that have the
parental level correctly implemented. Some DVD video titles do
not respond to parental control settings, and Video CDs have no
mechanism for parental control.
View All Titles of all parental levels will be played
No Adult Only material of parental level 4 or less may be
played. This corresponds to the MPAA (Motion
Picture Association of America) rating of PG-13
Kids Only Only material of parental level 1 may be played.
This corresponds to MPAA rating G.
Once the rating level has been set, DVD titles with parental level
higher than the setting will not play. Sometimes DVD video titles
may be produced that have the parental level set for specic
scenes, so a disc will play but skip or substitute certain scenes.
Completing the set-up
Complete the setup procedure by pressing SETUP on the
remote control. This saves all the data and closes the setup
menu. You can press SETUP at any time while in a menu to quit
from it.
To return to the setup menu at any time, ensure that there is no
disc playing and press the SETUP button.
NTSC black (Pedestal)
This setting controls the ‘pedestal’ signal or black level when
the NTSC video standard is used. Note that it does not affect
PAL video in any way.
0 IRE This removes the pedestal from NTSC video. This
setting should be used in Japan, and also if you are
using RGB video, whatever the country.
7.5 IRE This is the standard pedestal level that should be
used in all countries that use NTSC video, with the
exception of Japan.
Audio setup
Audio 3/4
Audio Bitstream/2 Ch.
Down-sample Max 48K
Pro Logic Not applicable
Audio Delay Not applicable
This section allows you to congure the type of analogue and
digital audio outputs. In particular, the digital output type needs
to be set correctly if you are using an external audio decoder,
receiver or D-A converter.
Audio
Two different types of digital output are supported:
‘Bitstream/ 2Ch’ and ‘PCM/ 2Ch’.
The ‘Bitstream’ setting supports the following audio standards:
2 channel PCM (on CDs or DVDs)
Dolby Digital
MPEG multi channel
DTS multi channel.
Use the Bitstream setting if you have an external decoder that
supports Dolby Digital.
Stereo PCM: When the ‘PCM/2Ch’ digital output is selected,
all audio material played is down-mixed to stereo and output
as stereo PCM. Use this setting if you have an external D-A
converter that supports only 2-channel PCM.
Note that the analogue output is muted when a DTS soundtrack
is played, since DTS is not decoded.
Pro Logic
This item is not applicable for the DV88PLUS, and should not be
changed.
Audio delay
This item is not applicable for the DV88PLUS, and should not be
changed.
Down-sample
This needs to be set correctly if you are using an external audio
decoder, receiver or D-A converter.
Max 96K Choose this option if your external audio decoder
is able to process digital audio with a sample rate
of up to 96kHz, or if you are not using the digital
audio outputs. This is the maximum sample rate
present on DVD-video discs.
Max 48K Choose this option if your external audio decoder
is unable to process digital audio with a sample
rate of up to 96kHz.
Note that this setting is relevant only to the output from DVDvideo discs
Engl i sh
DV88PLUS
9
Basic use of your DVD player
POWER
TRACK
PAUSESTOPPLAYLOAD
Introduction
‘Basic operation’ explains how to play a DVD, CD or other type
of disc, including the use of the CR-314 remote control.
More sophisticated features – such as special playback modes
and programming jumps and playback sequences – are
described in the ‘Advanced features’ section.
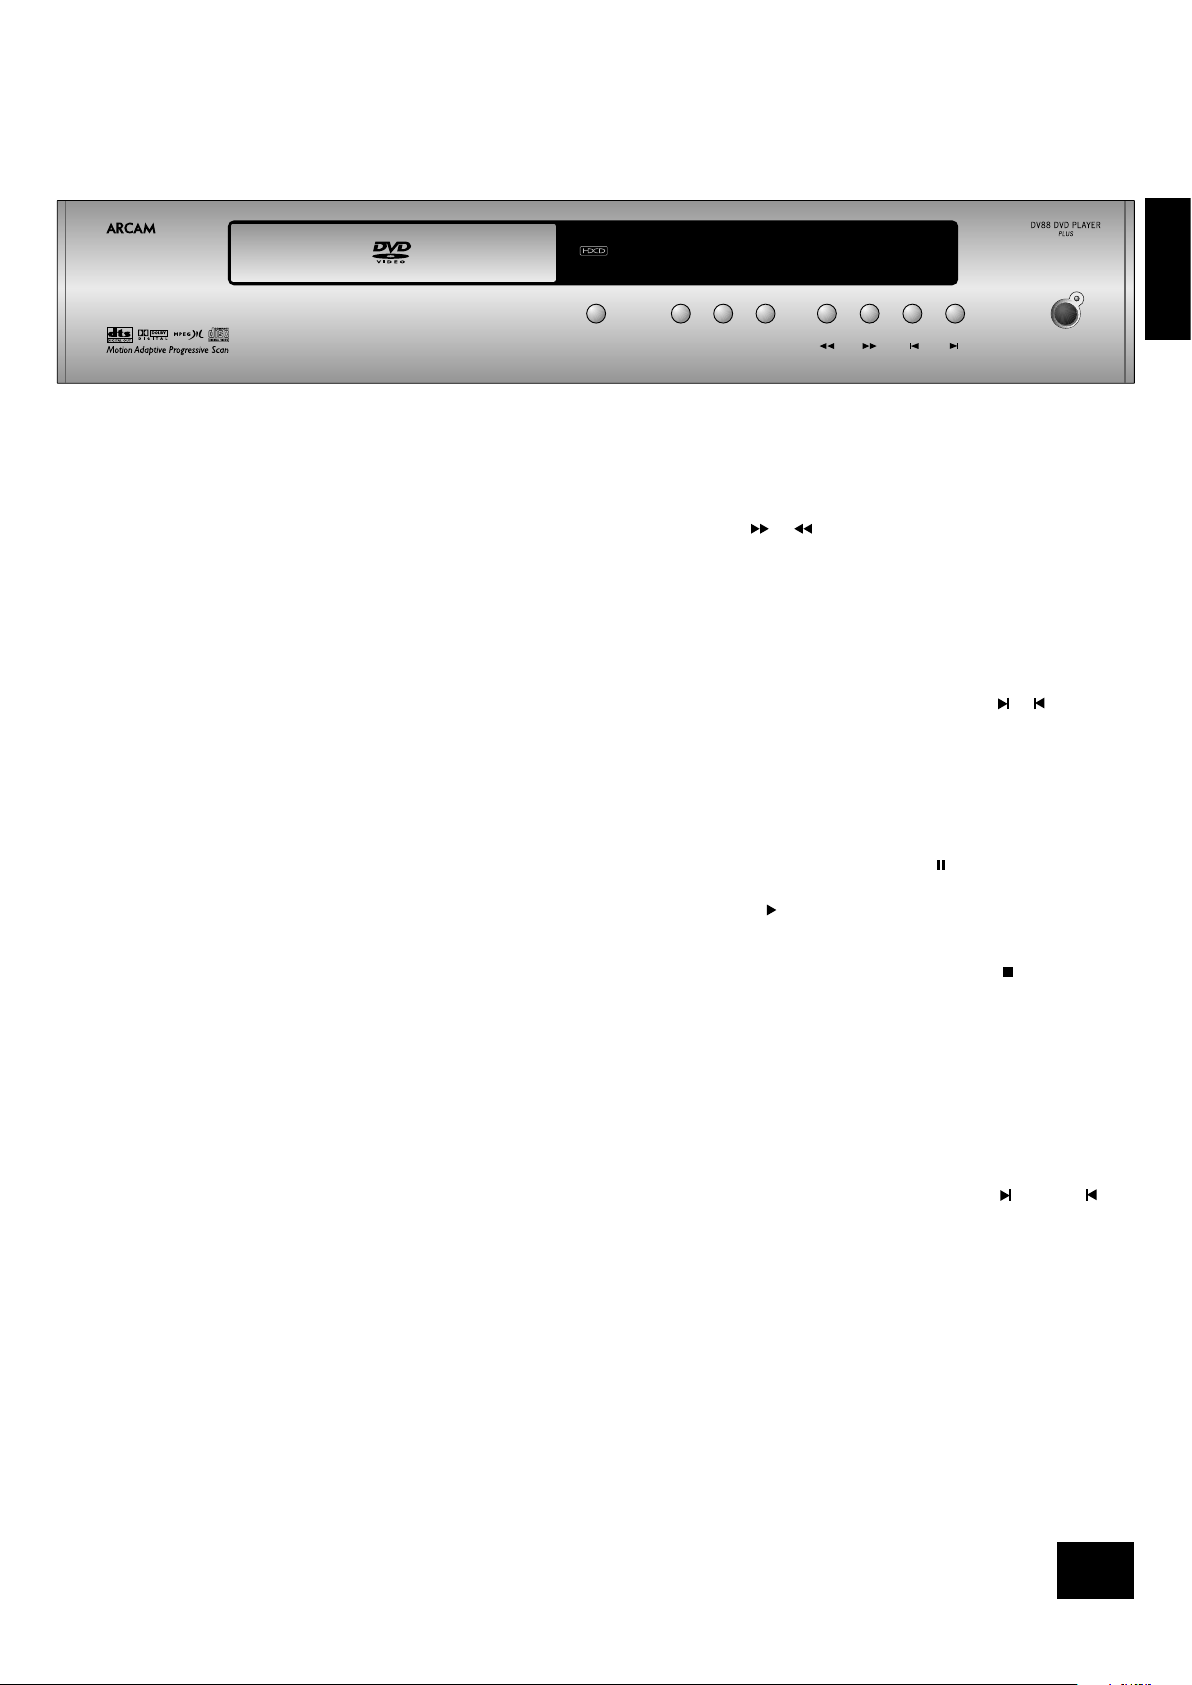
Front panel controls
Switching on
Switch the unit on by pressing the POWER button. The status
LED glows green when the unit is powered up and red when in
standby mode (standby is operated from the remote control).
Note that the remote control sensor is located on the right hand
side of the display window. Do not obstruct this or the remote
will not work.
HDCD indicator
This LED is located on the left of the display and lights green to
indicate when HDCD (High Denition Compatible Digital) material
is playing from suitably recorded audio CDs.
Playing a disc
Loading a disc
Press LOAD on the front panel (or OPEN on the handset) and
place the disc on the tray, with the playback side facing down.
Some discs are double sided, in which case the side labelled
‘side A’ should face up, to access side A.
Press LOAD on the front panel to close the tray. The disc loads
after a pause of a few seconds.
Playing a disc
Most DVDs begin playing automatically, but some titles begin by
displaying a menu. Select the menu item ‘Play movie’ (or similar)
using the cursor pad, then press OK to start playback.
For discs that do not play automatically (including CDs and
VCDs), press PLAY.
Note that when playing DVDs, the drive mechanism operates at
much higher speeds compared with CDs and so may produce
more noise when loading and playing initial chapters. This is
normal.
Fast play
Press or on the front panel or remote control to play fast
forward or backwards. For DVDs, VCDs and CDs the following
speeds for fast playback are available: x2, x4, x8, x20, x60 and
x100. Press the button repeatedly to cycle through the different
speeds. To resume normal playback speed, press PLAY.
Fast playback is not available for MP3 discs.
Skipping chapters/tracks
To skip chapters (or tracks on a CD), press or .
When skipping back, the rst button press takes you to the
beginning of the current chapter. Pressing the button again
takes you to the start of the previous chapter.
Note that it is common for Video CDs to have only one track.
Pausing playback
Press PAUSE on the front panel or on the remote control to
pause playback. To resume playback, press PLAY on the front
panel or on the handset.
Stopping playback
Press the STOP button on the front panel or on the remote
control to stop playback.
When playing a DVD, pressing STOP once performs a ‘resume
stop’. If you now press PLAY, playback resumes from the point
it was stopped.
If you press STOP twice, this is a ‘complete stop’, and playback
resumes from the beginning of the disc.
Front panel menu navigation
Should you need to navigate a disc or title menu from the front
panel, use PAUSE for ‘up’, STOP for ‘down’ , for ‘right’, for
‘left’ and PLAY for ‘OK’.
DV88PLUS
10
Engl i sh
DV88PLUS
11
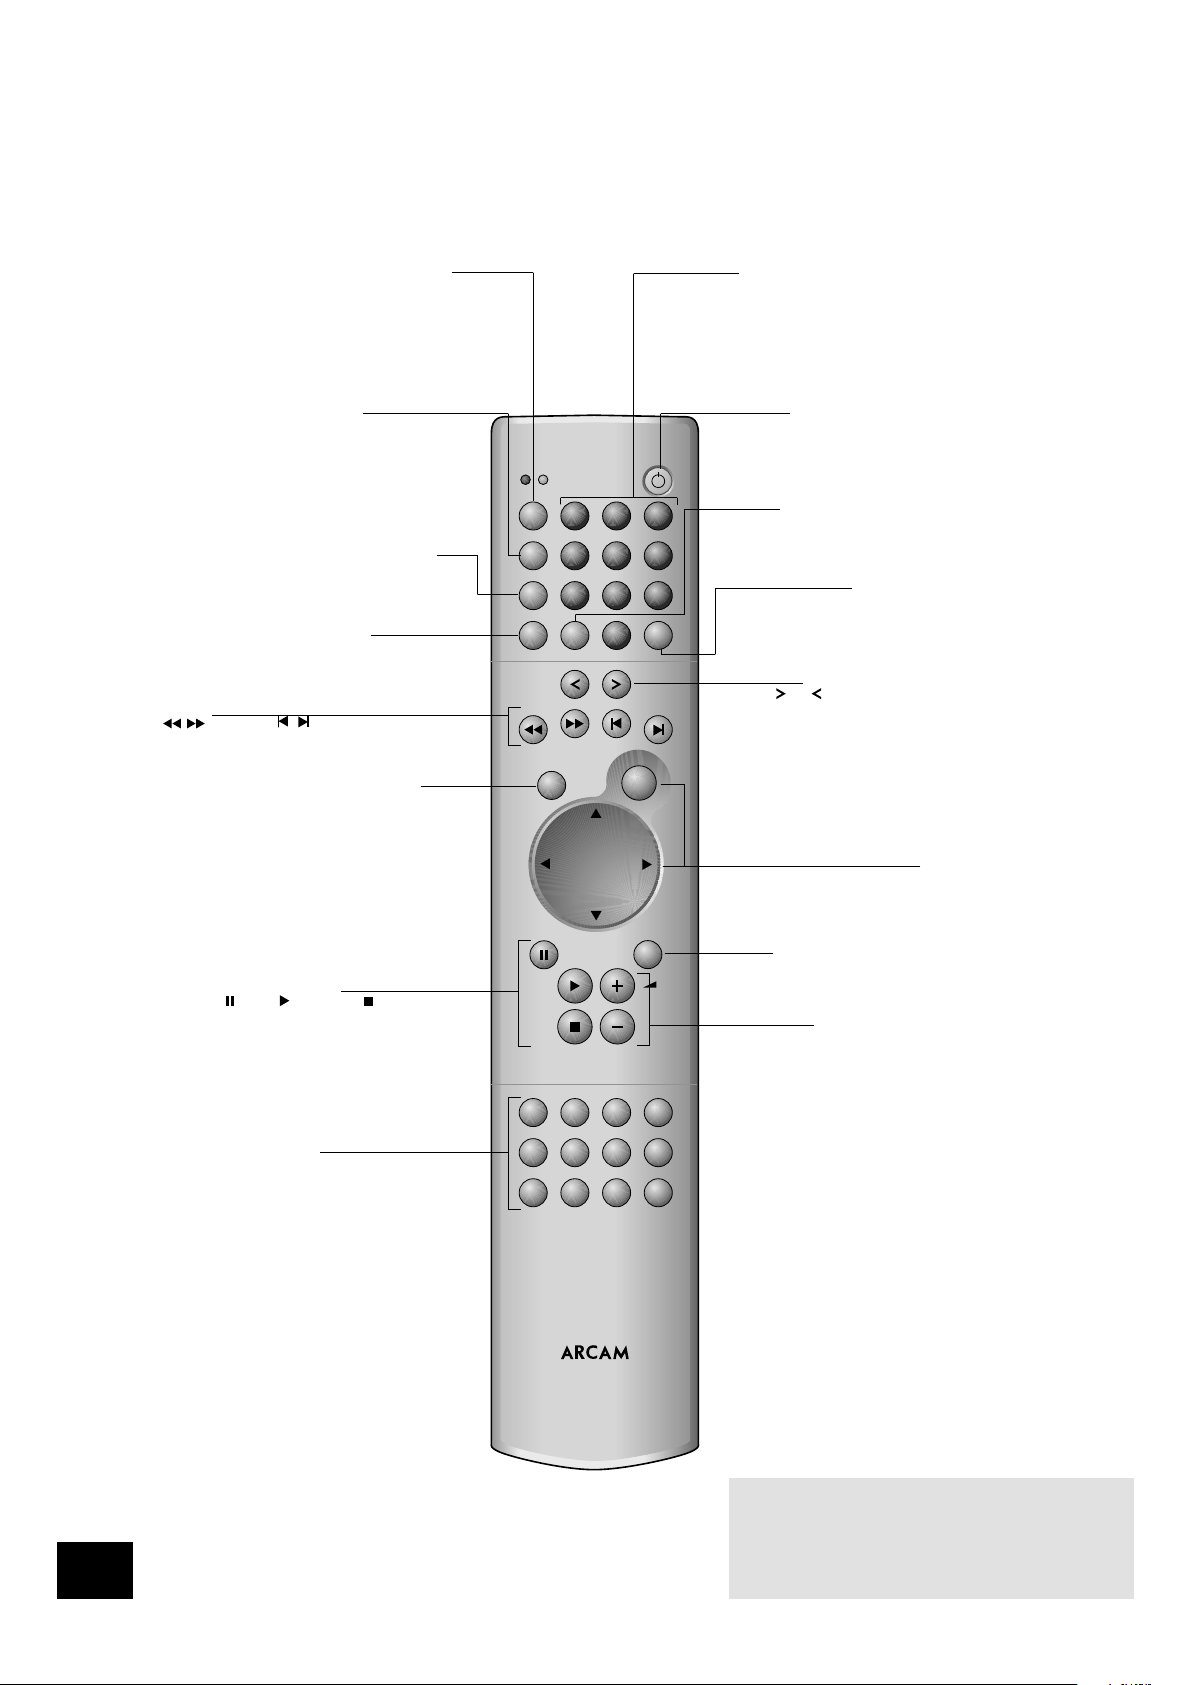
Using the remote control
OK
ANGLE
CD DVD
SETUP STATUS SRCH
ZOOM AUDIO MEM RTN
P
MODE
SUBT TITLE MENU
RPT CLEAR
0
PROG
A-B
7
8
9
DISP
4
5 6
CD
DVD
1
2
3
MUTE
OPEN
CD/DVD REMOTE
CR-314
CD/DVD
Ensure that DVD mode is selected using the CD/DVD
toggle button. The ‘DVD’ LED above the CD/DVD button
is lit briey when DVD mode is selected.
DISP (display)
Dims or turns the DV88PLUS’s display on or off. Turning the display
off generally gives a slight improvement in sound quality.
Pressing DISP once turns the display off; twice dims the display.
To restore the display to full brightness, press DISP a third time.
A–B
This button enables you to repeat a selected
section from the disc (see page 12).
RPT (repeat)
Press RPT to cycle through the repeat play options.
CLEAR
Use CLEAR within the ‘Program’ and ‘Bookmark’ menus to clear
a numeric eld (see pages 12–13).
0–9 keypad
This allows direct access to individual tracks on audio CDs. To
select a track, press the corresponding keypad button followed
by OK. For tracks greater than 9, enter the digits in sequence.
For example, to play track 15, press 1, then 5, then OK.
PROG (program)
You can program a selection of up to 20 chapters/tracks
from a disc to play in any order. Press PROG to access the
’Programme’ menu (see pages 13 and 15).
MUTE
Stops sound to the speaker outputs of certain Arcam ampliers.
Volume +/–
Adjusts the volume on Arcam remote-controllable ampliers.
Note that the volume (+/–) controls and MUTE button have
no effect on the audio output level of the DVD players.
NOTE: Remember to install the two AAA batteries supplied
before trying to use your remote control.
Do not place anything in front of the display area on the
DVD player (where the IR receiver is located), or the
remote control may not work.
OPEN
Opens and closes the disc tray.
Slow play
Press or on the remote control to play slow forward or
backwards. There are four speeds of slow playback: 1/5,
1/4, 1/3 and 1/2. Press the button repeatedly to cycle
through the different speeds. To resume normal playback
speed, press PLAY.
Note that slow play does not apply to audio CDs.
Cursor pad and OK button
Use the cursor pad to navigate the On Screen Display (OSD) and
menu pages. Conrm your selection with the OK button.
Playback control
Pause ( ), Play ( ) and Stop ( ) (see page 9).
Fast play and Skip chapter/tracks
Play fast ( ) and Skip ( ) chapters/tracks in both
directions (see page 9).
Advanced controls
These buttons are described on the facing page.
Standby
Press Standby to toggle the standby state of the DVD player.
Note that Arcam CD players are not controlled by this button.
Engl i sh
DV88PLUS
11
P MODE
Press P MODE to toggle random playback
ANGLE SETUP STATUS SRCH
ZOOM AUDIO MEM RTN
P
MODE
SUBT TITLE MENU
SRCH (search)
It is possible to access any point on the disc
directly using the ‘Search’ menu.
Press SRCH to access the ‘Search’ menu.
RTN (return)
Press RTN to move back through the DVD ‘Disc’
and ‘Title’ menus. Note that this feature is only
of use with discs using multi-level menus.
MENU
Press MENU to access the DVD ‘Disc’ menu.
This navigation menu is specic to a disc
and varies for each title, but typically offers
facilities to select chapters, languages,
and view extra material such as trailers or
documentaries.
Once the menu has been accessed, use the
cursor pad to move around the menu and
press OK to activate a menu ‘button’.
STATUS
Press STATUS once to show the elapsed and
remaining time of the disc. Press STATUS a
second time to give play status information
about the current disc. Press STATUS a third
time to close the status display.
The status information displayed varies
depending on the type of disc – DVD, CD or
VCD.
MEM (memorise)
It is possible to ‘bookmark’ up to three points
on a DVD title, so you can quickly jump to those
parts of the title again. Press MEM to access
the ‘Bookmark’ menu.
TITLE
Press TITLE to access the DVD’s
‘Title’ menu. Note that this feature only
applies to multi-title discs.
SETUP
‘Setup’ allows you to congure the DV88PLUS for
use in your system. Ensure that no disc is playing
and press SETUP to access the ‘Setup’ menu.
AUDIO
Some DVDs offer the facility to select different
audio tracks. Press AUDIO to cycle through the
available tracks.
The TV displays the number, language and type
of audio track, e.g. ‘1 Eng DD 6CH’.
SUBT (subtitle)
Press SUBT on the remote control to cycle
through the available subtitle languages,
including ‘OFF’. Some discs force subtitles
on, over-riding player set up.
ANGLE
Some DVDs offer the facility to select different
camera angles. If this feature is available the
‘camera’ symbol lights in the display.
Press ANGLE to cycle through the available angles.
ZOOM
Press ZOOM to enlarge a particular area of
the picture. Each press of the ZOOM button
increases the zoom, normally until a maximum
of 4x enlargement is reached (although the
amount of zoom possible varies depending on
the type of disc: in some cases no zooming is
possible). Pressing ZOOM when the maximum
enlargement has been reached returns the image
to normal size.
While using the zoom function, the cursor pad
can be used to move around within the image.
The zoom function can also be used when
playback is paused.
Note that a zoom level of x1.25 is particularly
useful if the output from the DVD player is in a
screen format different from that of your TV. A
zoom of x1.25 when a ‘widescreeen’ image is
displayed on a 4:3 TV causes the bars at the top
and bottom of the screen to disappear (although
the sides of the image are lost); a zoom of x1.25
when a 4:3 image is displayed on a widescreen
TV causes the bars at the side of the image to
disappear (although the top and bottom of the
image are lost).
Advanced controls

DV88PLUS
12
Engl i sh
DV88PLUS
13
Advanced DVD and VCD features
This section explains the more sophisticated DVD and VCD
features, such as special playback modes. The operations
described here are not exactly the same for DVDs and VCDs,
but are similar enough to make it appropriate to group them
together.
Note that many VCDs have a single track, so some operations
involving tracks will not be relevant.
Jumping to a particular point
Press the SRCH button on the remote control to open the
‘Search’ menu:
Sea rch
Ti me :
Ti tl e/Ch apter :
01 2 7
-; - - : - -
00: 56 :10 0 0:56 :1 2
If the disc is playing, then the elapsed and total times on the
disc are shown in the top right of the page.
A jump can be performed using different speciers: jump to a
particular time or to a specied chapter/track on the disc.
Time
Highlight the ‘Time’ eld and enter the time in hours, minutes
and seconds, then press OK. The Search menu is removed from
the screen and playback starts from the time specied. Invalid
time entries are ignored.
Title/Chapter
(Applies to DVDs only) To jump to a title or chapter, highlight the
title/chapter position and enter the number of the title/chapter
to jump to, before pressing OK. It is possible to jump to a
chapter within a different title to the current one by entering
a value into both elds. Note that specifying a title without a
chapter will jump to the rst chapter in the title.
Track
(VCDs only) To jump to a specied track on a VCD, enter the
track number in the ‘Track’ eld, then press OK. Note that many
VCDs have only one track.
Closing the Search menu
When displayed, this menu screen can be closed again
by pressing the SRCH button (which also has the effect of
cancelling the search).
Special playback modes
Playback modes are available that allow repeat, shufe and
programmed playback.
Repeat
Press the RPT button on the remote control to cycle through
the repeat options. For DVDs, a chapter or title repeat may
be selected (i.e. play continuously the current chapter or the
current title). For VCDs, a track or disc repeat is available.
When a chapter/track repeat is selected, the loop symbol on
the front panel display is illuminated and the current chapter/
track is repeated. If a title/disc repeat is selected, the loop
symbol and ‘ALL’ are illuminated and the current title/disc is
repeated.
To cancel repeat, press the RPT button until ‘Repeat: Off’ is
displayed.
Shufe
Press the P MODE button on the remote control to to switch
shufe play on.
The ‘RAND’ (random play) indicator shows on the display, and
the chapters/tracks are played in random order.
To cancel random play, press the P MODE button for a second
time.
Peforming an A-B repeat
The DV88PLUS can repeat a specic section of a DVD or VCD;
this is called an A-B repeat.
To perform an A-B repeat, wait until the disc is at the point
where you want the repeat to start, then press A-B. The TV
display shows a repeat symbol, followed by ‘A–’, and the front
panel shows ‘A–’.
Press A-B again at the point you want the repeat to end. The
repeat symbol, followed by ‘A-B’ is shown on the TV monitor,
and the front panel shows ‘A-B’. The selected section is
repeated in a loop.
To cancel the A-B repeat, press A-B again. An ‘Off’ message is
displayed on the TV monitor.
Engl i sh
DV88PLUS
13
To program a special sequence
Press PROG on the remote control to open the ‘Programme’
menu. Note that playback must be stopped rst.
DVD
The bottom of the screen shows the number of titles present
on the disc, together with the number of chapters in the title
selected currently (or the rst title if no title has yet been
specied). Below this is an information line, giving relevant
information for the cursor position.
2 Title(s) on this disc.
27 Chapter(s) in this title.
Enter title number.
Play Clear All
1: – –
2: – –
3: – –
4: – –
5: – –
6: – –
7: – –
8: – –
9: – –
10: – –
11: – –
12: – –
13: – –
14: – –
15: – –
16: – –
17: – –
18: – –
19: – –
20: – –
You can enter a sequence of up to 20 title/chapter
combinations for programmed playback. If you enter data that
is invalid for the current disc, the eld is erased automatically.
A number of aids have been built in to the programme menu to
make it easier to use. These are best illustrated by an example.
Let’s assume that you want to play chapters 5, 7, 9, 4, 8, 3,
and 1 (in that order) of title 1, then all of title 2.
2 Title(s) on this disc.
27 Chapter(s) in this title.
Enter title number
.
Play Clear All
1: 1 5
2: 1 7
3: 1 9
4: 1 4
5: 1 8
6: 1 3
7: 1 1
8: 2 All
9: – –
10: – –
11: – –
12: – –
13: – –
14: – –
15: – –
16: – –
17: – –
18: – –
19: – –
20: – –
First, highlight the title position for the rst programmed item
(as shown in the screen above). Then press the number 1
on the remote control: ‘1’ is shown in the position. Using the
remote control, press to highlight the chapter position. The
message at the bottom of the screen changes accordingly,
prompting you for the required information. Press 5 on the
remote handset.
Since we have a number of chapters all from the same title, it
would be a lot of work to have to enter the title number each
time. Press on the remote handset. Notice that the player
assumes that the title number remains the same for this entry
as for the previous one. Enter the remaining chapter numbers,
pressing after each one. (Note that pressing at the bottom
of a column places the cursor at the top of the next column.)
Next, we want to specify all of title 2. For this, highlight the
title position of the next entry (entry 8) and enter the number
2, indicating title 2. Highlight the chapter position and, without
entering any number, press . The player lls in the text ‘All’ to
indicate that all the chapters in title 2 will be played.
VCD
The bottom of the screen shows the number of tracks present
on the disc. Below this is an information line, giving relevant
information for the cursor position.
You can enter a sequence of up to 20 tracks for programmed
playback. If you enter data that is invalid for the current disc,
the eld is erased automatically.
To program the player, highlight the rst entry (using the cursor
pad on the remote control), then press the number of the track
you want to play rst. To enter a second track, move down,
then type the number of the second track to play, etc. To enter
a track number greater than 9, press the two digits sequentially
(e.g., for track 10, rst press 1, then press 0).
General
To play the programme you have entered, highlight the ‘PLAY’
button on the screen and press OK. The ‘PROG’ indicator shows
in the display and the programmed sequence begins.
If you make a mistake while programming, you can clear a
single eld by highlighting it and pressing CLEAR. To clear all the
elds at once, highlight the ‘CLEAR ALL’ button on the screen
and press OK.
To stop the programmed sequence and return to normal
playback, select the PLAY button in the programme menu with
no programme specied. This clears the programme mode and
cause normal playback order to be resumed.
Note that skipping forward or back through tracks while
in programmed play mode skips through the programmed
sequence.
DV88PLUS
14
Engl i sh
DV88PLUS
15
Advanced MP3/WMA/JPEG and audio CD features
The DV88PLUS DVD player has the ability to handle MP3, WMA
and JPEG les, when these are burned on to a CD-R or CD-RW
disc. Picture/Photo CDs are also playable. These le types may
be mixed together, if desired.
This section explains the more sophisticated CD-based features,
for audio CDs and for CD-ROM discs containing MP3, WMA and
JPEG les. The operation for audio-CDs and other CD-ROMs is
very similar, except that CD-ROMs can have directories and subdirectories, while audio-CDs do not have a directory structure.
In this section of the document, we use the term ‘CD-ROM’ to
refer to a CD-R or CD-RW disc containing MP3, WMA or JPEG
les, and including Picture/Photo CDs.
All of these advanced features use on-screen menus, so a TV
monitor is required.
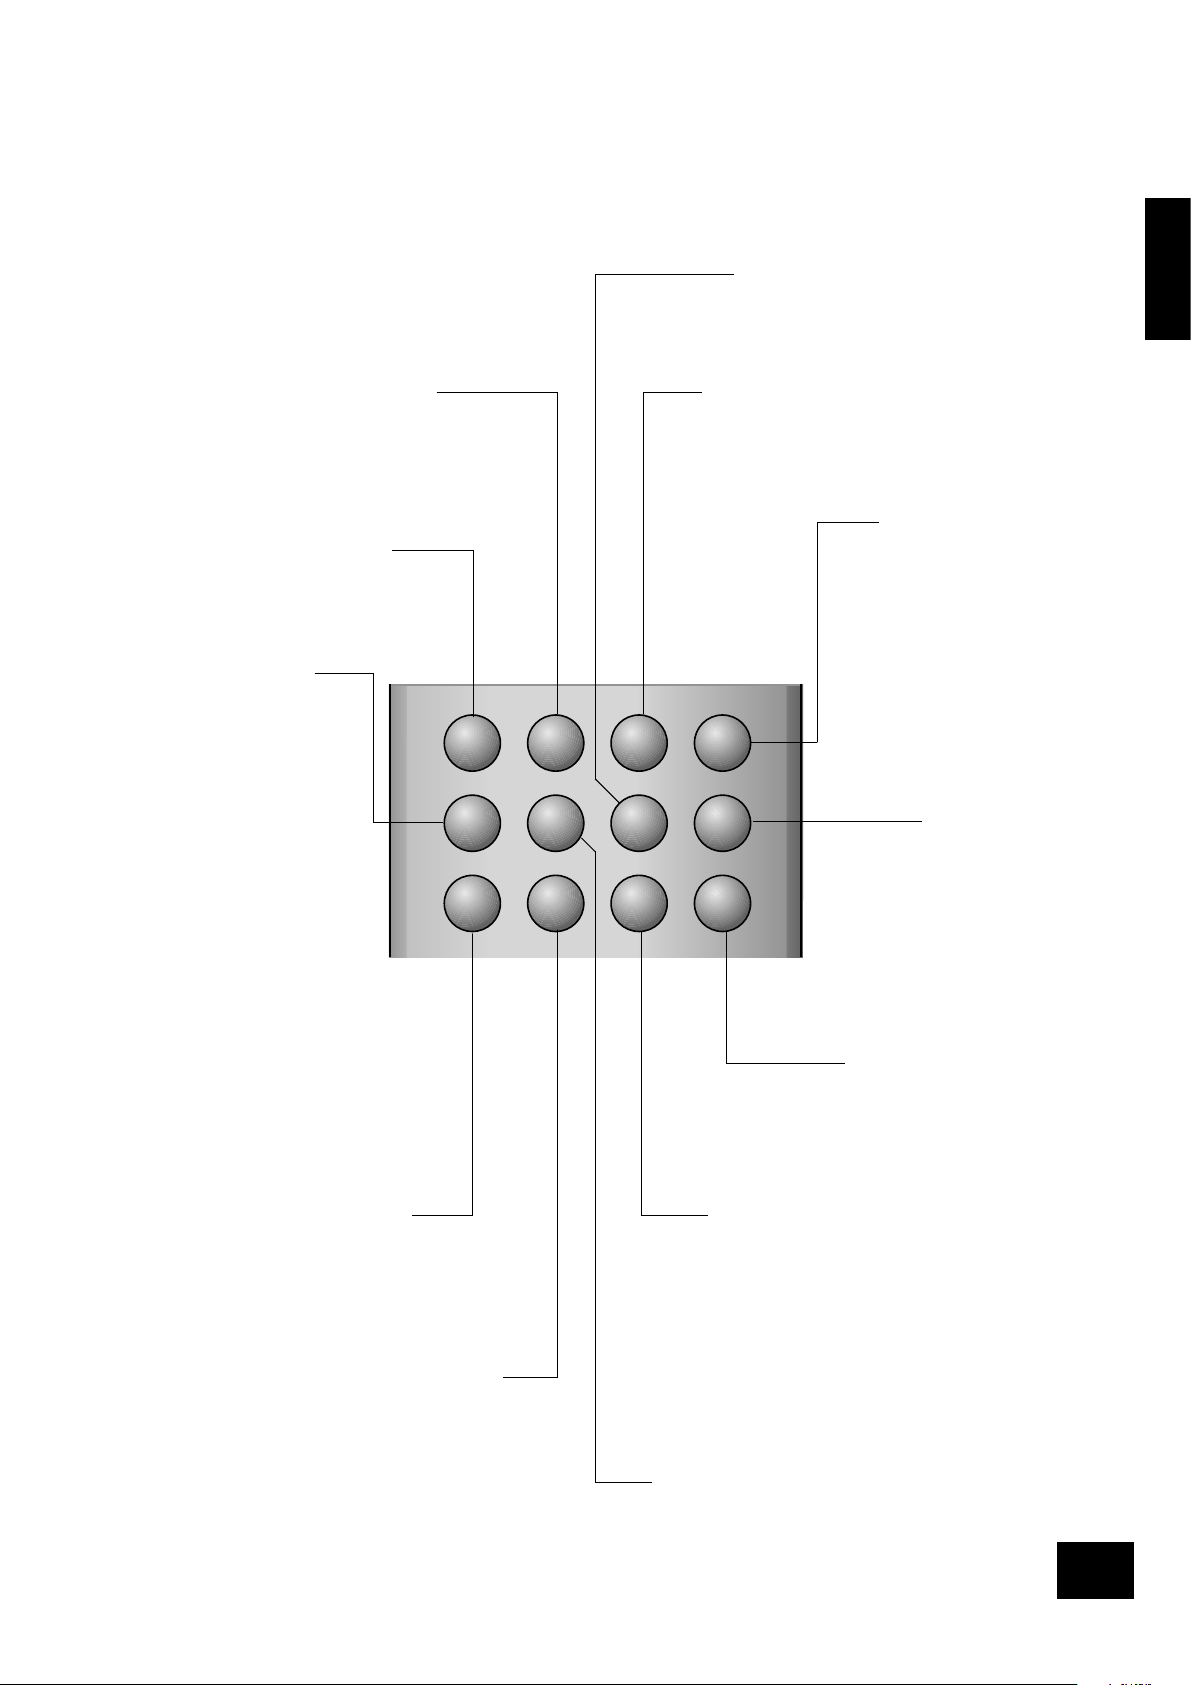
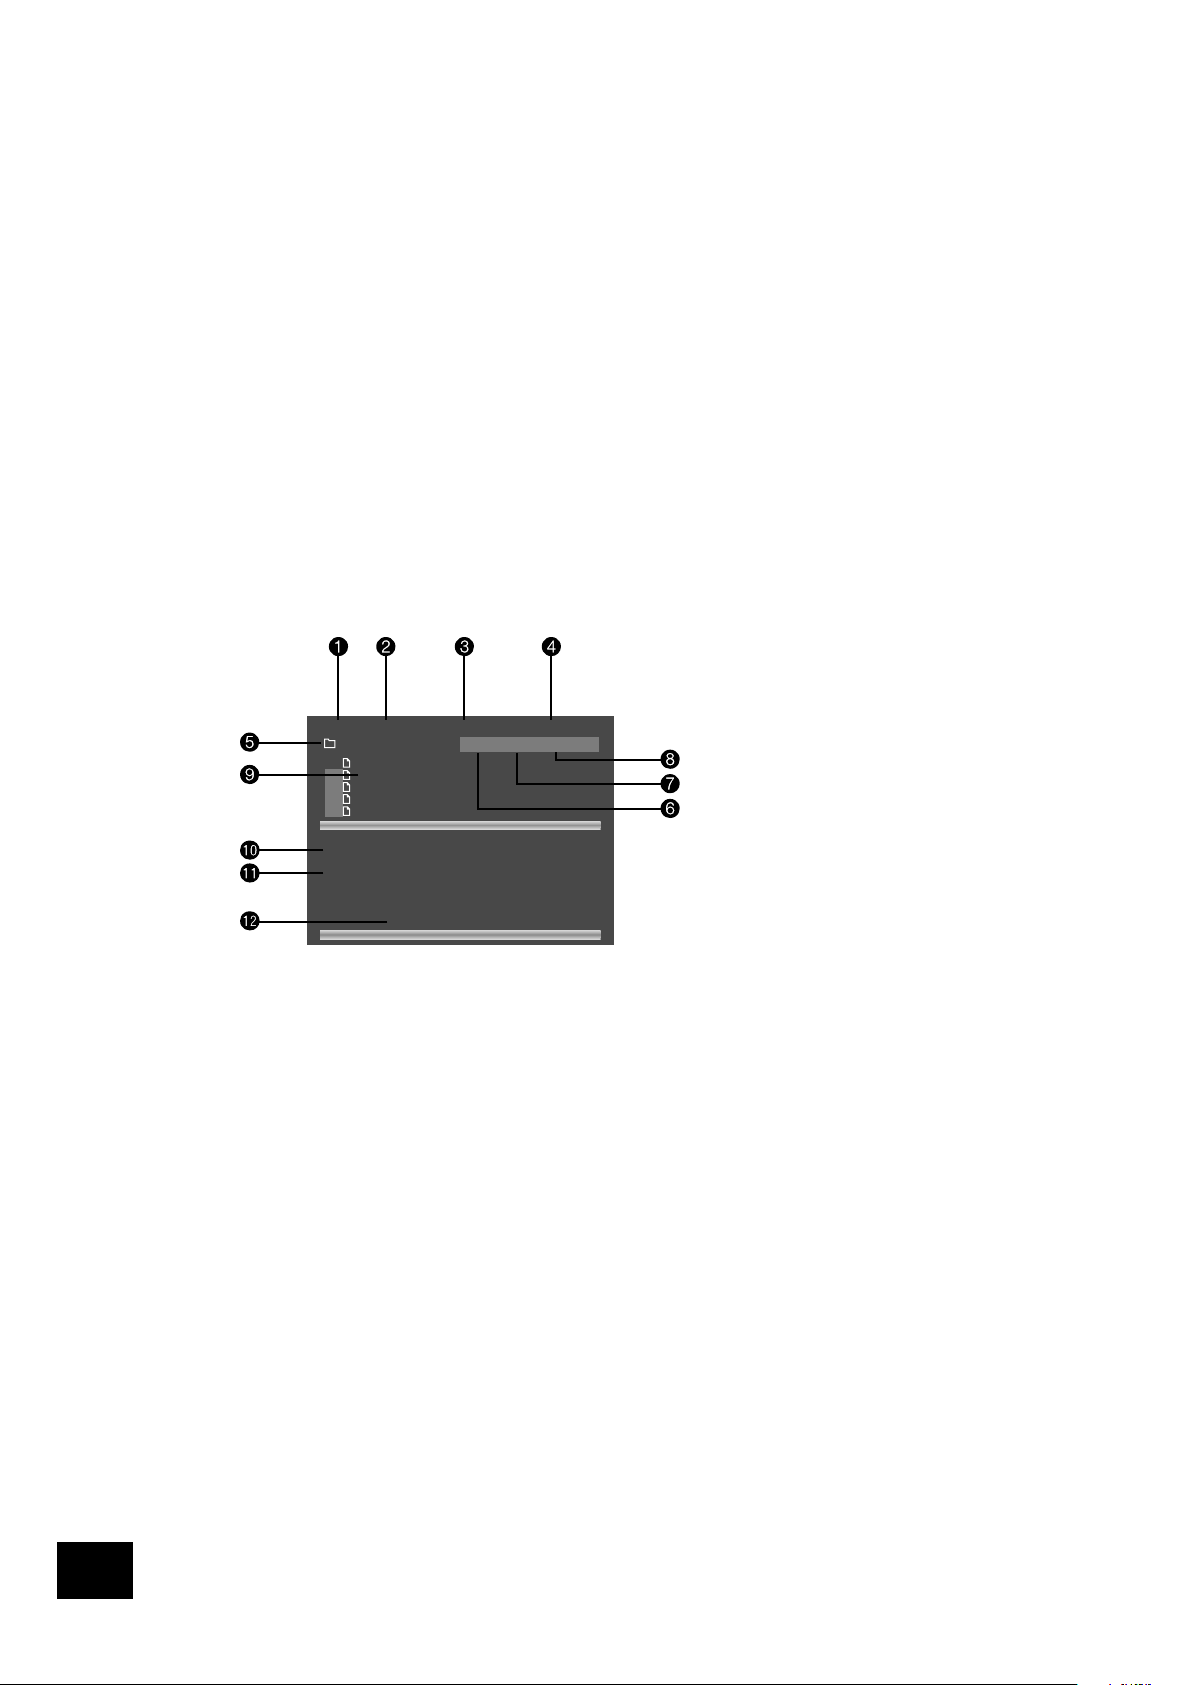
Screen layout
When an audio-CD or CD-ROM is detected by the DVD player,
the disc navigator screen is displayed.
The screen shown above is the disc navigator screen, in this
example showing a CD-R containing MP3 les. The following
items can be identied:
1
The user command indicator.
2
The mode of the player. This is described in more detail
below.
3
The current track number and the total number of tracks
in this directory (for CD-ROMs), or on the whole disc (for
audio-CDs).
4
The playback time of the current track, and the total
playback time.
5
For CD-ROMs, this area shows the current directory.
6
‘Up’ – for CD-ROMs, selecting this button changes
directory to one level above the current one. This button
is not shown for audio-CDs, or if the current directory is at
the top level.
7
‘PAF’ – Play All Files on the disc. Starting from the rst
valid le/track, all valid les/tracks on the disc are played,
in the order found.
8
‘PD’ – Play Directory. (CD-ROMs only). Starting from the
rst valid le in the current directory, all the (valid) les in
the current directory are played.
9
The names of the tracks in this directory. For audio-CDs,
the text ‘Track 1’, etc., is shown here. For CD-ROMs, the
text shown here is based on the le name of the track.
bk
When playing CD-ROMs, the full name of the le being
played is displayed here (subject to screen space).
bl
When playing CD-ROMs, tag information from MP3 and
WMA les is displayed here, if present on the disc.
bm
Helpful messages to the user are displayed here. When
the disc is loaded, the PAF button (7) is highlighted. This
means that loading the disc and pressing PLAY or OK is
enough to set the disc playing.
Player mode
When playing audio-CDs or CD-ROMs, the player can be in one
of three modes:
Browse mode: the user is free to navigate around the disc
directory structure (while playback is stopped). Valid les/tracks
in each directory (audio-CD tracks or les that can be played) are
displayed on the screen. Pressing PLAY while the cursor is on a
valid le/track will start playback from that point, continuing to the
end of the disc. Alternatively, the ‘PD’ or ‘PAF’ buttons can be used
to start playback.
Programme mode: Press PROG on the remote control to enter
‘Programme’ mode to choose the order in which the les/tracks
are played. Playback must be stopped rst. ‘Programme’ mode
operates differently for audio-CDs and MP3 discs, and is explained
on page 15.
Playlist mode: The player is in this mode when a programmed
sequence of les/tracks is being played. No navigation of the
disc may be performed in this mode; the player starts at the
beginning of the programmed playlist and plays through to the
end.
Browsing the disc (Browse mode)
By default, the disc navigator is in ‘Browse’ mode. In this mode,
the user can navigate around the disc (using the cursor pad
for direction and ‘OK’ to select an option). When a le/track
is highlighted, the tag information for that le (if available)
is displayed in the lower portion of the screen. Use the ‘Up’
button to move to a higher-level directory; to enter a lower-level
directory, press OK when the directory name is highlighted.
At any time, press PLAY or OK to begin playback from the
le/track highlighted currently. Navigation around the current
directory is possible during playback, but playback stops
automatically if you attempt to navigate out of the current
directory. Please note the following:
Fast forward and fast rewind do not work with MP3 or
WMA playback.
Skipping forward past the end of a directory with
CD-ROMs causes playback to continue from the next
directory containing valid les. Skip-back can be
performed only as far as the beginning of the current
directory.
Directory trees may be up to 10 directories deep.
Long le names, of up to 64 characters (Joliet standard),
are supported.
Only sample rates of 44.1kHz and 48kHz are supported
for MP3 and WMA les.
For MP3 playback, the following constant bit rates are
supported: 32, 64, 80, 96, 112, 128, 160, 192, 256
and 320 kilobits per second. Variable bit rate (VBR)
between 96kb/s and 320kb/s is also supported.
For WMA playback, the following constant bit rates are
supported: 48, 64, 80, 96, 128, 160 and 192kb/s.
CD-ROM discs may contain les other than MP3, WMA or
JPEGs, but these are not displayed on the screen.
Mp3 Info:
2People.mp3
Artist: Jean-Jaques Smoothie
Album:
Song: 2 People
Comment: 320kbps/44100H
Genre: Disco Year: --- Browse. press ‘OK’ to play.
STOP Browse Disc Track 86:28:15 00:03:27
Up PAF PD/MP3–44100–320kbp
1
2
3
4
5
2People
Chillin
FeelingGood
TheWord
YourLove

Engl i sh
DV88PLUS
15
Because of differences in the many MP3 and WMA encoders
available, we recommend that you conduct a test recording
before transferring large numbers of MP3 les to CD-R or
CD-RW for subsequent playback on the DV88PLUS.
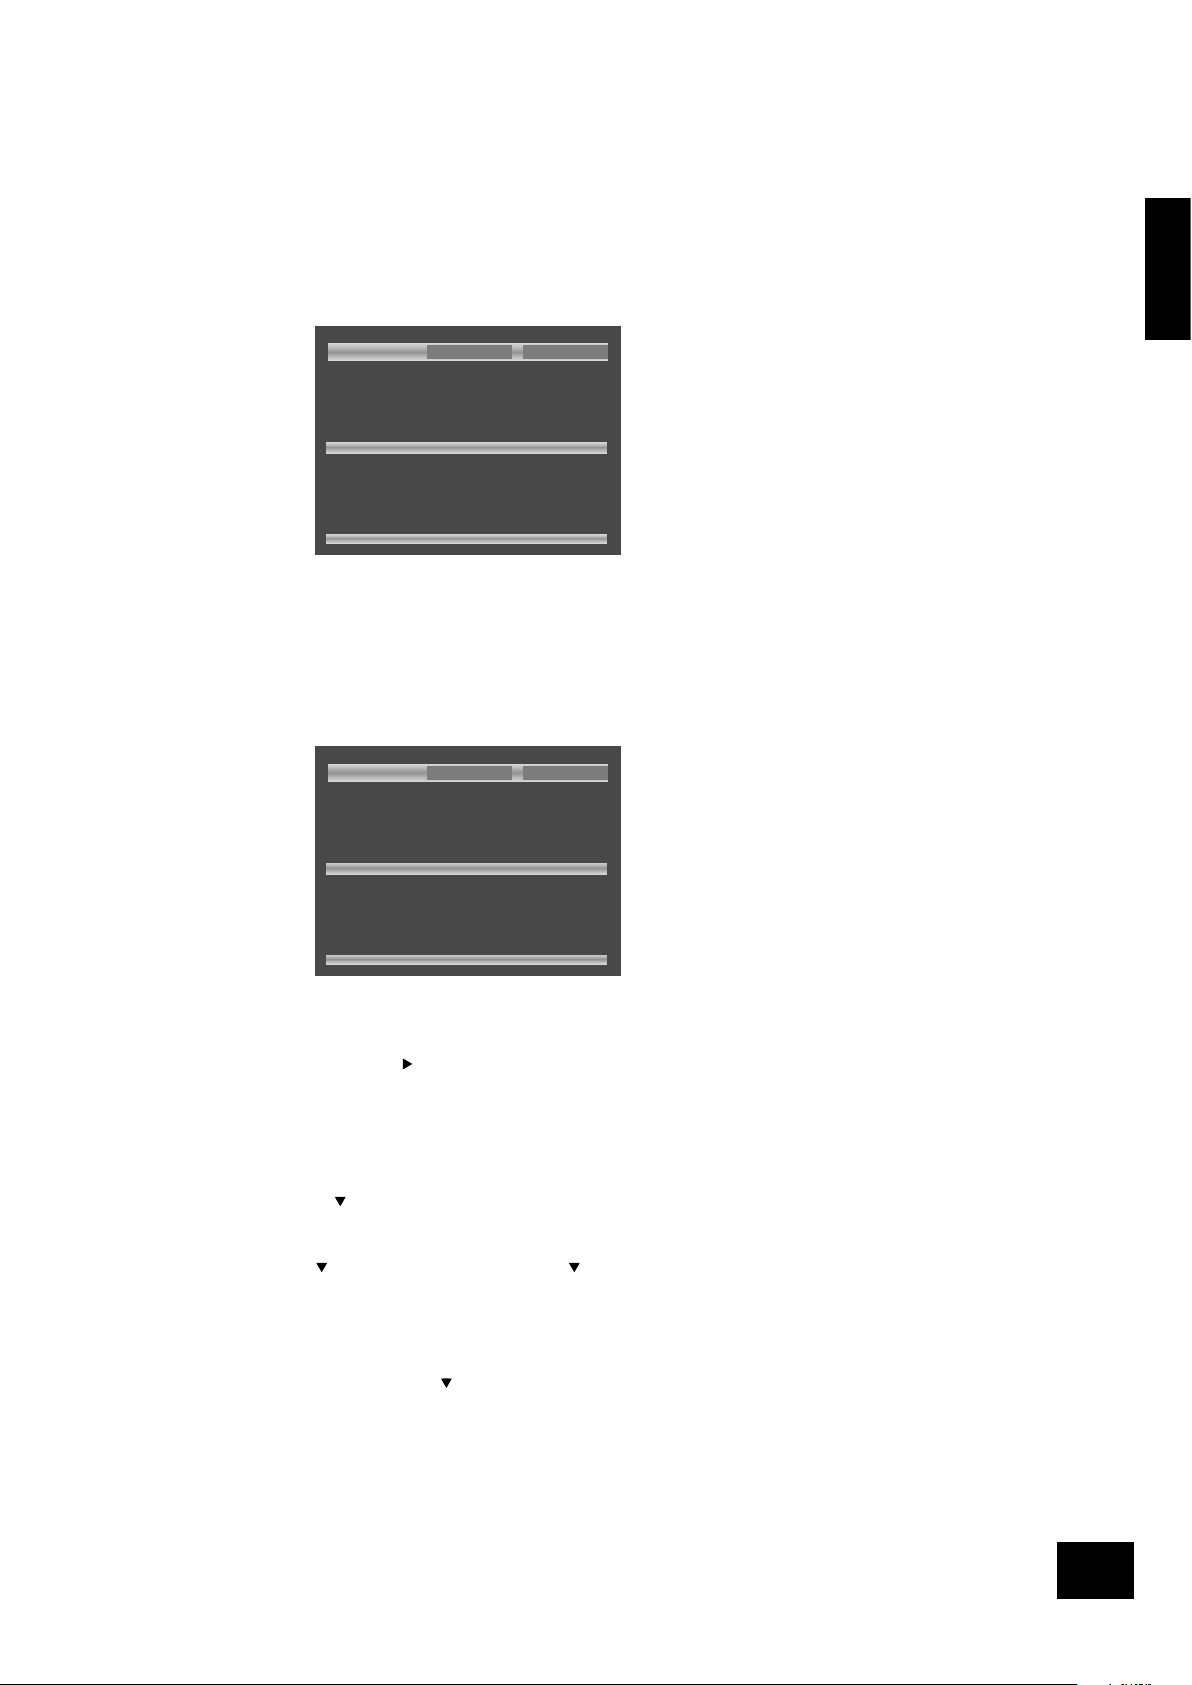
Programmed playback (Audio CDs)
Press PROG on the remote control to open the ‘Programme’
menu. Playback must be stopped rst.
13 Track(s) on this disc.
Enter title number.
Play Clear All
1: 1
2: 2
3: 3
4: 4
5: 5
6: 6
7: 7
8: 8
9: 9
10: 10
11: 11
12: 12
13: 13
14: – –
15: – –
16: – –
17: – –
18: – –
19: – –
20: – –
The bottom of the screen shows the number of tracks present
on the disc. Below this is an information line, giving relevant
information for the cursor position.
You can enter a sequence of up to 20 tracks for programmed
playback. If you enter data that is invalid for the current disc,
the eld will be erased automatically.
To program the player, highlight the rst entry (using the cursor
pad on the remote control), then press the number of the track
you want to play rst. To enter a second track, move down,
then type the number of the second track to play, etc. To enter
a track number greater than 9, press the two digits sequentially
(e.g., for track 10, rst press 1, then press 0).
To play the programme you have entered, highlight the PLAY
button on the screen and press OK. The ‘PROG’ indicator shows
on the front panel display and the programmed sequence
begins.
If you make a mistake while programming, you can clear a
single eld by highlighting it and pressing CLEAR. To clear all the
elds at once, highlight the ‘CLEAR ALL’ button on the screen
and press OK.
To stop the programmed sequence and return to normal
playback, select the ‘PLAY’ button in the programme menu with
no programme specied. This clears programme mode and
causes normal playback order to be resumed.
Note that in programmed playback mode, skipping track
forward or back skips forward or back through the programmed
sequence.
The player returns to ‘Browse’ mode if no programme has been
entered when PROG is pressed for a second time.
Programmed playback (CD-ROM)
Pressing the PROG button on the remote control stops playback
(if active) and changes the player mode to ‘Programme’ mode
(as indicated at point (2)).
Navigating the directory tree is the same as described earlier
for ‘Browse’ mode. Files from any location on the disc may
be added to the playlist by moving the cursor to the le, then
pressing OK on the remote control. Files that are present in the
playlist are shown with a light blue highlight.
To remove a le from the playlist, move the cursor to the le
and press OK. The blue highlight disappears from the le,
indicating that the le is no longer in the playlist. To remove all
les from the playlist, press CLEAR on the remote control.
When you have entered the programme to your satisfaction,
press the PROG button again. This changes the display to
show the programmed list (‘Playlist’ mode) and playback starts
automatically.
Playback can be stopped and started using the STOP and PLAY
keys, as normal. To stop the programmed sequence and return
to normal playback, press the PROG button for a third time; this
stops playback and changes the player to ‘Browse’ mode.
Shufe and Repeat
Note that this section is valid for audio-CDs only.
Repeat
Press the RPT button on the remote control to cycle throught
the repeat options. ‘Track’ or ‘Disc’ (i.e. all) repeat are available.
When a track repeat is selected, the loop symbol on the front
panel display is illuminated and the current track is repeated.
If a disc repeat is selected, the loop symbol and ‘ALL’ are
illuminated and the entire disc is repeated.
To cancel repeat, press the RPT button until the Repeat symbols
on the front panel display are no longer illuminated.
Shufe
Press the P MODE button on the remote control to activate
shufe play.
The ‘RAND’ (random play) indicator shows on the display, and
the tracks are played in random order.
To cancel random play, press the P MODE button for a second
time.
Note that Repeat and Shufe cannot be set at the same time.
NOTE: If a programmed sequence is shufed using the
P MODE button on the remote control, pressing P MODE again
will not ‘unshufe’ the programme.

DV88PLUS
16
Engl i sh
DV88PLUS
17
Reference
Troubleshooting
Problems with remote controls
Problem Possible cause Solution
Remote control not working DVD not selected Select DVD using the remote’s CD/DVD toggle switch
Batteries not installed, incorrectly
installed, or flat
Check battery compartment and reinstall batteries if necessary
Obstruction between IR lens and
remote control
Remove any obstruction
Player does not respond consistently
to the remote control
The player is not configured to use the
correct remote type
Change the ‘Remote Type’ item on the ‘Operation’ page of the Set-up menu to
the correct type
Player does not respond to a
learning remote control
The remote control has not been
programmed correctly
Reprogram the remote control. If programming from the supplied (ARCAM)
remote control, ensure that the ARCAM remote control is configured to DVD
and not to CD (see above)
What are the discrete on/off codes
for use with my learning remote?
The system code for the DVD player is 25 (hex. 0x19). The on/off codes are:
On = 123 (hex. 0x7b)
Off = 124 (hex. 0x7c)
A complete list of codes can be found on our website at www.arcam.co.uk
Problems with video output
Problem Possible cause Solution
No picture! Incorrect input selected on the TV Select the appropriate video input on the TV (consult your TV handbook)
Bad video connection from DV88PLUS
to TV
Check connections at both ends and, if necessary, try an alternative cable
The player has been put into standby
(the power LED is red)
Press the green button on the remote control to bring the player out of
standby
Progressive scan output from the DVD
player is being used, but the television
(or another device in the signal path)
cannot handle progressive scan input
Press and hold the STOP button on the front panel (not the remote control)
for at least ve seconds. The video will change from progressive scan to
interlaced output.
‘Black bars’ are shown at the top
and bottom of the screen
This can occur when a ‘Wide screen’ film is viewed on a 4:3 format television.
Even with a 16:9 format television, ‘black bars’ may still be visible. This is because the DVD being viewed, although
‘Wide screen’, is not in 16:9 format. Many films are in 1:2.35 format, which will not completely fill a 16:9 screen.
Picture is coloured strangely ‘HQ video’ is set incorrectly in ‘Setup’
menu
Enter the ‘Setup’ menu and check the ‘HQ video’ setting (see page 7)
Component or RGB video leads are
crossed
Check wiring between the DV88PLUS and the TV monitor
‘TV system’ is set incorrectly in ‘Setup’
menu
Enter the ‘Setup’ menu and check the ‘TV system’ setting (see page 7)
Picture is ‘jerky’ or shimmers This occurs when NTSC discs (such
as those from the USA) are played in
a machine where the output is set to
PAL (such as those sold in Europe), or
vice-versa
If your television can handle both NTSC- and PAL-format video, then enter
the ‘Setup’ menu and change the ‘TV system’ setting (on the ‘Video’ page) to
‘Auto’.
The picture freezes for a moment
approximately half way through a
film
This is caused by the player changing
layers on a two-layer disc
There is no fault.
Further information about disc layer changes can often be found on the rear
cover of the disc packaging.
The picture freezes for a moment at
random points in a film
The disc is dirty or damaged A damaged or dirty disc may cause audio and/or video drop-outs to occur (and
may be accompanied by increased drive noise). Clean or replace the disc.

Engl i sh
DV88PLUS
17
Problems with audio output
Problem Possible cause Solution
No sound! Incorrect input selected on audio
device (decoder, receiver, amplifier,
etc.)
Select the appropriate input on the audio device (consult that product’s
handbook)
Bad audio connection (analogue or
digital) from DV88PLUS to audio device
Check connections at both ends and, if necessary, try an alternative cable
No sound from the centre/rear
speakers
A two-channel source, such as a CD, is
being played
There is no fault
The ‘Audio’ is set incorrectly in the
‘Setup’ menu
Enter the ‘Setup’ menu and change the ‘Audio’ setting to ‘Bitstream/2ch.’
(see page 8)
Bad connection between the DV88PLUS
and the amplifier/receiver or the
amplifier/receiver and the speakers
Check connections at both end and, if necessary, try alternative cables
Problems with disc playability
Problem Possible cause Solution
Player loads disc but does not play,
or play-back halts unexpectedly
(perhaps with the message ‘Invalid
Region’ being displayed)
Not all discs play automatically when
loaded
Press PLAY
There is a fault in the manufacturing of
the disc
Some discs are manufactured incorrectly, and are known to cause problems
on ARCAM (and other) DVD players. Naturally, we aim to support all discs; from
time-to-time we issue software upgrades for the player that fixes new problems
of which we are aware. Please contact ARCAM customer support for further
details.
The disc is from the wrong region DVD discs are designed to be played only in the region that they are sold in
(for example, discs from the USA are ‘Region 1’ and discs from Europe are
‘Region 2’). Your player is factory-configured to play discs from the region it is
to be sold in, and may not play discs from other regions.
Disc does not play and ‘Bad Disc’ is
displayed
The disc is damaged or dirty, or does
not contain any files that the DV88PLUS
can handle
Remove disc from tray and check surfaces for damage or dirt. In the case of a
CD-ROM, check that the disc contains valid MP3/WMA or JPEG files.
Some MP3/WMA files cannot be
played
There are some restrictions on the
type of MP3/WMA files that the
DV88PLUS player can play
See page 14 of this Handbook
The player takes a long time to
identify a CD
Since this is a DVD player (primarily), it checks for discs in the following order: DVDs, SVCDs, VCDs, CDs. Therefore it
takes longer to identify a CD than any other disc type.
The front-panel display is not
illuminated
The front-panel display has been
switched off
The front panel supports three different levels of illumination. Press the ‘DISP’
button on the remote control to select your preferred level
Before contacting customer services
If any problem persists or cannot be cured using the advice
given, either contact your Arcam dealer or Arcam customer
support.
Before contacting Arcam customer services with a question
however, it is useful to have various version and region
numbers available. This information is displayed in the top left
corner of the screen when the player is rst switched on (or
brought out of standby).
This information is shown for approximately two seconds, and
has the following format:
software version/ drive version/ Arcam region/ DVD region

DV88PLUS
18
Engl i sh
DV88PLUS
19
Technical specications
General
Power Requirements 115V or 230V AC, set by voltage selector switch on rear panel
Power consumption < 45 VA
Dimensions 430mm x 80mm x 280mm
Weight net: 4.9kg; packed: 6.5kg
Video outputs
Composite video 1 x gold plated phono. 1V pk-pk in 75Ω
S-Video 1 x 4-pin mini-DIN. Y 1V pk-pk in 75Ω, C 0.3V pk-pk in 75Ω
Component video Interlaced or Progressive (525P)
3 gold plated phono sockets. Y 1V pk-pk in 75Ω, Pb 0.7V pk-pk in 75Ω,
Pr 0.7V pk-pk in 75Ω
SCART socket with RGB video All 0.7V in 75Ω, composite video 1V in 75Ω, and stereo audio
Auto switching of TV with aspect ratio control
Audio outputs
Analogue audio outputs Two pairs of stereo outputs on gold plated phono sockets
Output level 2.2V rms at 0dB signal, 4V rms with HDCD discs
Frequency response 20Hz to 20kHz (+0.1db, –0.5dB)
THD+N <0.005% for 1kHz 0dB signal, measured 22Hz–22kHz, unweighted
Signal-to-noise ratio 105dB, measured 20Hz–20kHz, unweighted
Digital audio output (IEC958) PCM/Dolby digital/MPEG/DTS on gold plated phono (coax) and TOSLINK (optical)
Accessories supplied
CR-314 remote control
2 x AAA batteries
mains lead
E&EO
Continual improvement policy
Arcam has a policy of continual improvement for its products.
This means that designs and specications are subject to
change without notice.
NOTE: All specication values are typical unless otherwise
stated.
 Loading...