


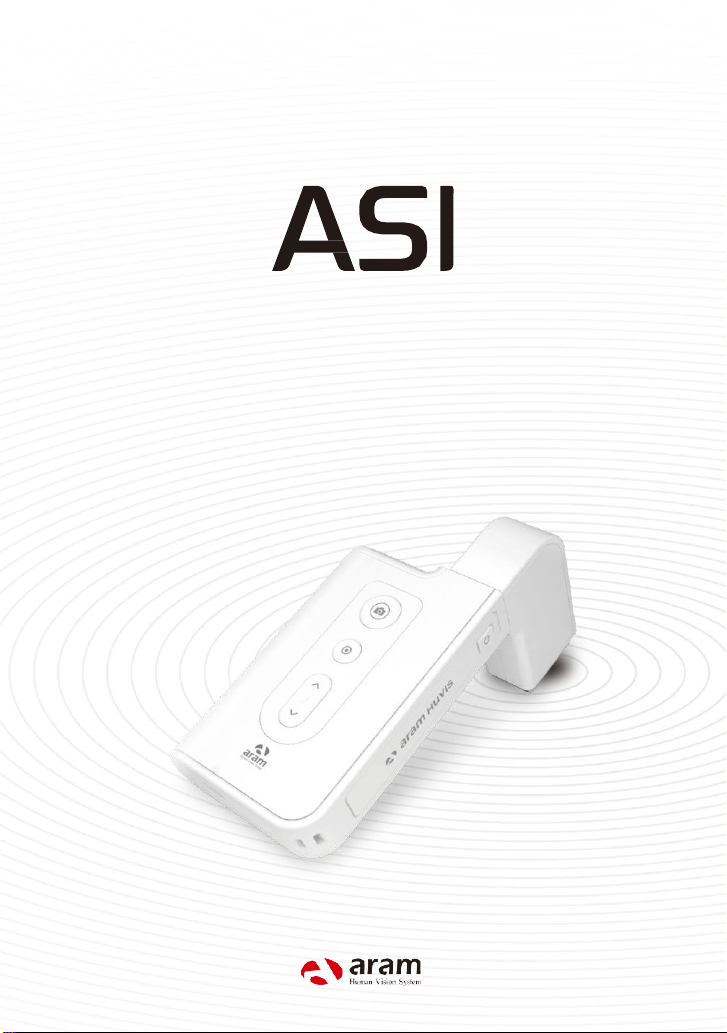
ASI
User Manual
Contents
A. Components 2
B. H/WParts
ⅰ. Both Sides
ⅱ.Settings
C.SystemSettings
ⅰ. Download &Install
ⅱ. How to connect with the program
ⅲ.Wi-Fi Combo
3
4
6
7
8
D. Program Settings
ⅰ. Device Certification 12
E. Application
ⅰ. Start Analysis
ⅱ. Full Analysis
CRM
Moisture
Sebum
Pore
Melanin
Acne
Wrinkle
Sensitivity 22
Summary 23
ⅲ.ViewMode
F. Warrantty
G. FCC
※Notes on use
·The images of this manual can be diVerent with the actual things.
·The information contained in this manual and future improvements are subject to change without notice.
·The latest version of the manual will be updated atthe below link.
http://www.aramhuvis.com/downloads
11
25
27
14
15
16
17
18
19
20
21
24
1 Contents

Components
Mainbody with skin lens (ASI100)
Cradle
USBcable
A. Components 2
Sebum paper 1 box
Battery
Cleaning cloth
Charger
Manual
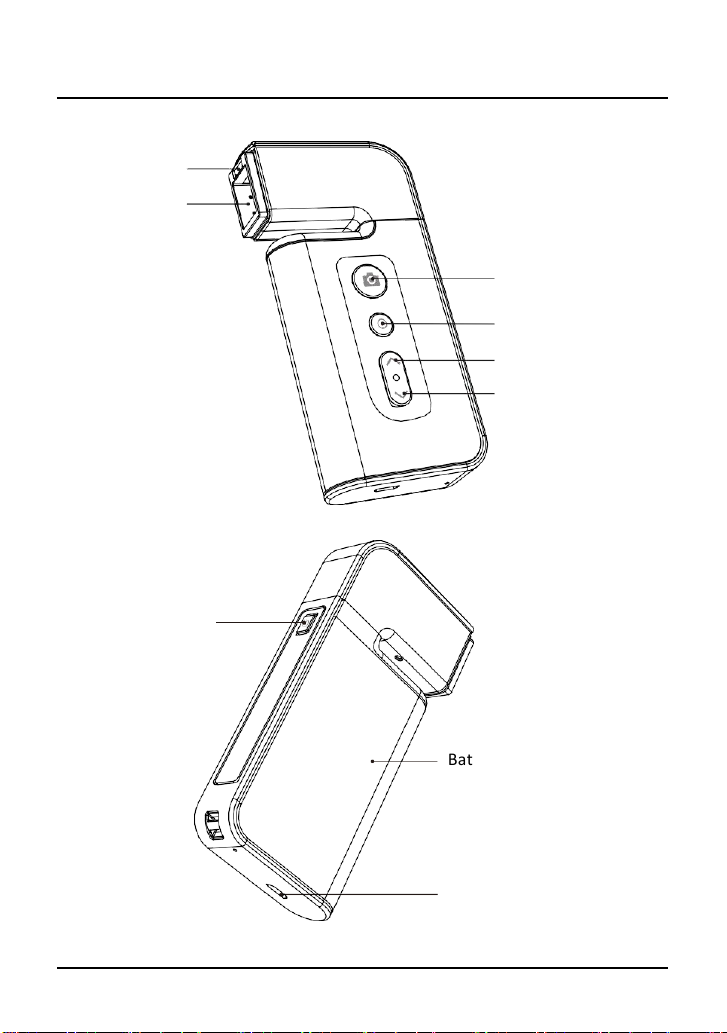
H/WParts
Both Sides
Moisture sensor
LED light & lens
Power on& oV
Capture
Start, Analysis, Result
Mode up
Mode down
Battery cover
USB & chargerconnector
3 B.H/W Parts -Both Sides

H/WParts
Settings
Insert the battery
Open the battery cover by pushing it leh to right with thumbs.
1
Insert the battery and gently press the battery into place.
2
3
Close thecover.
1
To turn onthe power
1
Press and hold “power”button.
2
"Indicate LED" starts twinkling in blue light.
2
When it stops,the device is ready to use.
1
To turn oVthe power
1 Press and hold "power" button.
2
"Indicate LED" will be turned oV.
B. H/W Parts -Settings 4
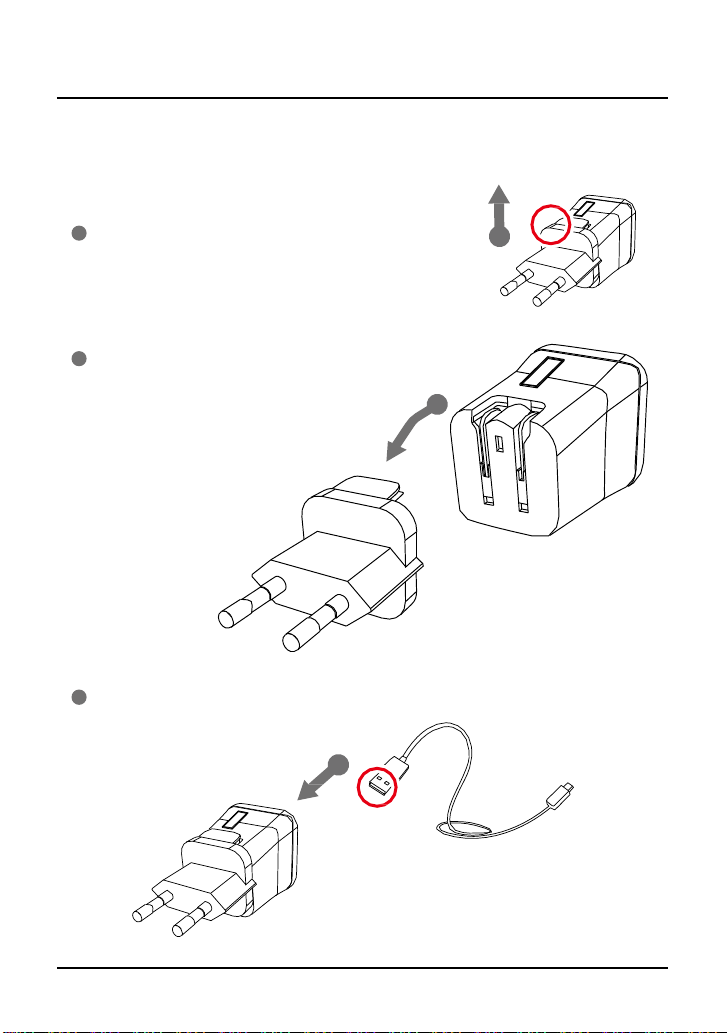
H/WParts
Settings
Charger can be used for Amercian type &European type.
The default isEuropean type .
1
Push the plug up.
2
Then 220V European type is disassembled
and youcan see the 110V-220V
American type inside of the charger.
2
1
3
Choose the one you want to use and connect USB cable in adaptor.
3
5 B. H/W Parts - Settings

SystemSettings
Download &Install
PCUser
1
Go to link on the browser as below.
http://ww
2
Install the program.
Tablet device or Smartphone user
1
iOS : Go to “App Store” and download application.
2
Android : Go to “Goolgle Play Store” and download it.
*Charge ASI device. It is possible to operate ASI device while charging, but it is
recommended to charge the device at least an hour if the battery was totally depleted.
*The micro USB port does not support data transfer.
w.aramhuvis.com/downloads
C. System Settings - Download & Install 6
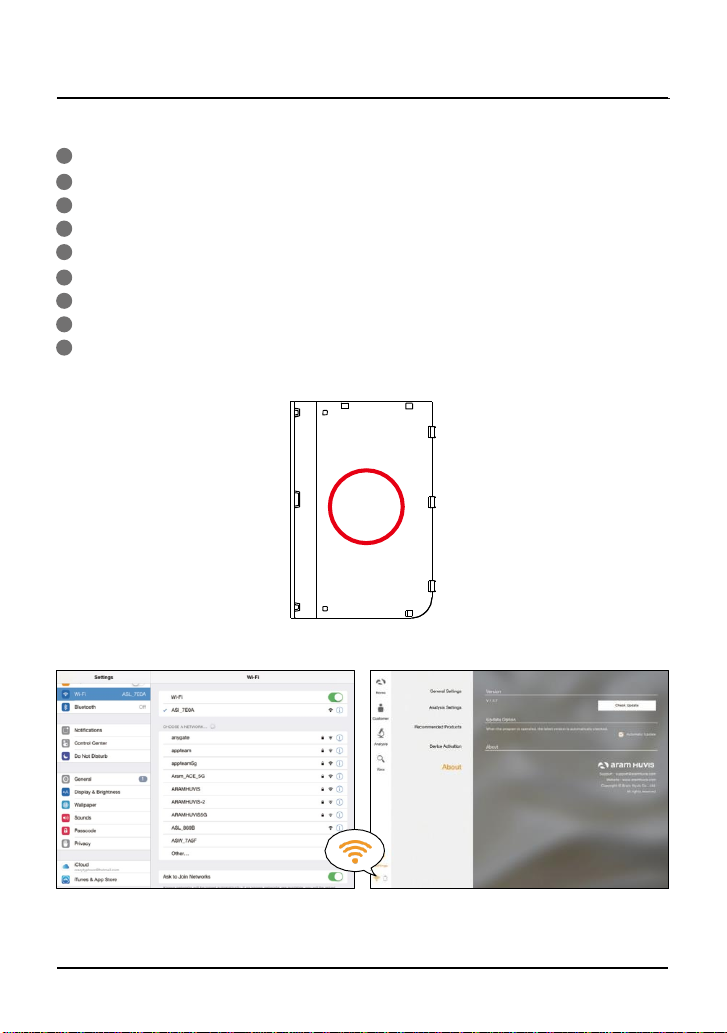
1 First of all, checkthe Wi-Fi nameand password which is described at back sideof battery cover.
2
Wi-Fi name & password must be same and the format is“ASI_XXXX”.
3 Turn on thedevice.
4 While turningon the device, prepare PC,Tablet, Smartphone to run the S/W.
5 Once“ASI”device is turned on, please go to network settingto setup the Wi-Fi connection.
6 Among Wi-Fi lists, find “ASI_XXXX” and select it.
7 When above code is connected, run the program“Solutionist”.
8 To check working properly, pleasecheck the program and see the leh below side.
9 If it is correctly set up, you cansee the orange light of Wi-Fi singal.
SSID: ASI_ XXXX
PW: XXXXXXXX
SystemSettings
How toconnect with the program
7 C. System Settings - How to connect with the program

Wi-FiCombo
- It means user could use device and internet at the same time.
- With this function, user can send an email aher analysis immediately.
How touse?
1 The device has AP(ASI_XXXX)to be connected with the program “Solutionist” by Wi-Fi.
2 First of all, connect the device to AP to use it with “Solutionist”.
3 Run “Solutionist”.
PC /Phone/Tablet
Wireless LAN
Internet
Analyzer
SystemSettings
Wi-FiCombo
C. System Settings - Wi-Fi Combo 8
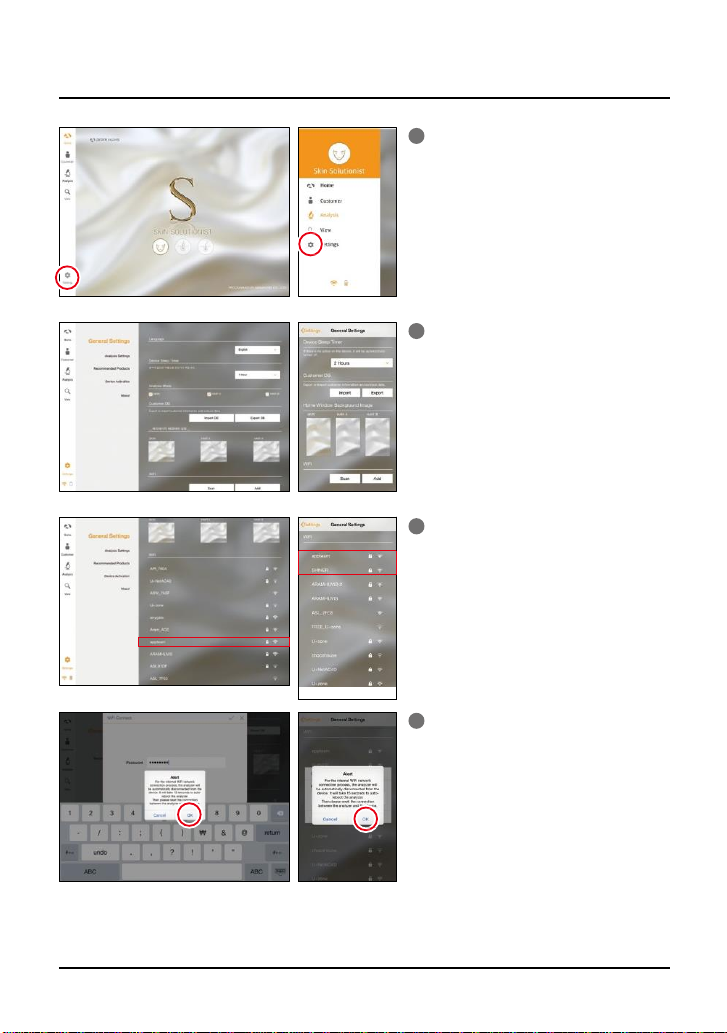
1 Touch Settings.
2 In “General Settings”, go to “Wi-Fi” and
touch “Scan”button.
3 The available Wi-FI lists appear. Amon
g them, please choose the best sign
al Wi-Fito connect it.
4 During connect it, you can see the mess
age saying that ASI device will be auto
matically disconnected andreboot. Ple
ase touch “OK” button.
SystemSettings
Wi-FiCombo
9 C. System Settings - Wi-Fi Combo
 Loading...