

Page 1
ASSEMBLY AND OPERATION MANUAL
™
™
™
WARRANTY
AquaCraft will warrant this kit for 90 days after the purchase from defects in materials or
workmanship. AquaCraft will either repair or replace, at no charge, the incorrectly made part.
Make sure you save the receipt or invoice you were given when you bought your model! It
is your proof of purchase and we must see it before we can honor the warranty.
To return your SuperVee 27 Nitro for repairs covered under warranty you should send your
boat to:
Hobby Services
3002 N. Apollo Drive, Suite 1
Champaign, Illinois 61822
Attn: Service Department
Phone: (217) 398-0007, 9:00 am – 5:00 pm Central Time M-F
E-mail: hobbyservices@hobbico.com
Entire Contents © Copyright 2007 AQUZ1003 for AQUB22** V1.0
Page 2

TABLE OF CONTENTS
SPECIFICATIONS & DESCRIPTION CHANGES ....................2
REPAIR SERVICE.........................................................................2
SAFETY PRECAUTIONS ............................................................2
USEFUL TOOLBOX ITEMS .......................................................3
OTHER USEFUL TOOLBOX ITEMS .........................................3
BOAT TERMINOLOGY ..............................................................3
PREPARING YOUR BOAT FOR OPERATION ........................3
INSTALL THE RECEIVER ANTENNA ........................................4
INSTALL THE RECEIVER BATTERIES........................................4
CHECK THE RADIO SYSTEM ...................................................5
RUNNING THE ENGINE ..........................................................5
BREAKING IN THE ENGINE .....................................................5
RUNNING THE SUPERVEE 27 NITRO....................................6
TUNING THE SUPERVEE 27 NITRO ....................................... 6
MAINTENANCE .........................................................................7
RUNNING TIPS ..........................................................................9
RACING ......................................................................................9
NATIONAL MODEL BOATING ORGANIZATIONS ..............10
ENGINE TROUBLESHOOTING FLOWCHART .................... 11
ORDERING REPLACEMENT PARTS ......................................11
AQUACRAFT .18 MARINE ENGINE
EXPLODED VIEW ...........................................Back Cover Page
Thank you for purchasing the AquaCraft SuperVee 27™
Nitro. This manual contains the instructions you need to
safely prepare, operate, and maintain your R/C boat. Read
over this manual thoroughly before operating the SuperVee
27 Nitro boat.
If for any reason you feel this model is not for you, return
it to your local dealer immediately. PLEASE NOTE: Your
hobby dealer cannot accept a return on any model boat
after assembly has begun.
1. Under all circumstances return the ENTIRE system; boat
and radio.
2. Make sure the transmitter is turned off, all batteries are
removed and fuel is drained from the tank.
3. Send written instructions which include: a list of all items
returned, a THOROUGH explanation of the problem, the
service needed and your phone number during the day.
If you expect the repair to be covered under warranty,
be sure to include a proof-of-purchase date (your store
receipt or purchase invoice).
4. Be sure to send your full return address.
SAFETY PRECAUTIONS
• Adult supervision is strongly recommended! Children
should be warned about the dangers of playing in close
proximity to water.
• Use care to avoid touching the propeller anytime the
engine is running. Pay equally close attention to items
such as loose clothing, shirt sleeves, ties, scarves, long
hair or loose objects such as screwdrivers or pencils that
may fall out of shirt or jacket pockets onto the spinning
prop. If your fi ngers, hands, etc., come in contact with the
spinning propeller, you may be severely injured.
• Because of the speed and mass of this boat, it is capable
of infl icting property damage and severe personal injury
if a collision occurs. Never run this boat in the presence
of swimmers or where the possibility of collision with
people or property exists.
• Never threaten any wildlife or disturb fi shermen with your
model boat! This is the quickest way to get model boating
banned from your favorite local pond.
SPECIFICATION & DESCRIPTION CHANGES
All pictures, descriptions, and specifi cations found in this
instruction manual are subject to change without notice.
AquaCraft maintains no responsibility for inadvertent
errors in this manual.
REPAIR SERVICE
Repair service is available anytime.
After the 90-day warranty, you can still have your SuperVee
27 Nitro repaired for a small charge by the experts at
AquaCraft’s authorized repair facility, Hobby Services, at
the address listed on the front page of this manual.
To speed up the repair process, please follow the
proceeding instructions.
• Radio Control boats are controlled by radio signals,
which are subject to possible interference from other R/C
transmitters, paging systems or other electrical noise. Before
turning your radio on, make sure no one else in the area is
operating a radio on the same frequency (channel).
• Model engine fuel is poisonous. Do not allow it to come
into contact with the eyes or mouth. Always store fuel in a
clearly marked container and out of the reach of children.
• Model engine fuel is highly fl ammable. Keep it away
from open fl ame, excessive heat, sources of sparks, or
anything else that might ignite it. Do not smoke or allow
anyone else to smoke in close proximity to open fuel.
Make sure that fuel lines are in good condition so that
fuel will not leak onto a hot engine causing a fi re.
• Never operate your engine in an enclosed space. Model
engines, like automobile engines, exhaust deadly carbon
monoxide. Run your engine only in an open area.
2
Page 3
• Model engines generate considerable heat. Do not touch
any part of your engine until it has cooled. Touching the
muffl er, cylinder head, or exhaust header may result in
a serious burn.
• Use safety glasses when starting or running engines. The
propeller may throw loose material such as sand or
gravel into your face.
• NEVER attempt to swim after a stalled or capsized boat.
Wait patiently for the wind currents to return the boat
to shore or use a tennis ball attached to the end of a
fi shing rod to retrieve a stalled or capsized boat.
• NEVER operate your boat while standing in the water.
• ALWAYS wear a personal fl otation device when boarding
and operating any retrieval craft.
If the buyer is not prepared to accept the liability associated
with the use of this product, the buyer is advised to return
this kit immediately in new and unused condition to the
place of purchase.
USEFUL TOOLBOX ITEMS
As with any hobby, it is a good idea to assemble a useful
collection of tools and accessories to bring along anytime
you head out to the pond. Here are some items you will want
to keep handy.
❏ Cooler with plenty of cold water and soda
❏ Folding table
❏ Lawn chairs
❏ First-aid kit
❏ Canopy for shelter
BOAT TERMINOLOGY
BOW: The front of the boat.
STERN: The back of the boat.
PORT: This is the left side of the boat when aboard and
facing the front (bow).
STARBOARD: This is the right side of the boat when aboard
and facing the front (bow).
HULL: The body of the boat.
DECK: The top of the boat.
HATCH: Typically a removable top to access the inside of
the hull.
PREPARING YOUR BOAT FOR OPERATION
❏ Metric and standard hex drivers
❏ 10mm Open end wrench
❏ 12mm Open end wrench
❏ Hobby knife (HCAR0109)
❏ Long nose pliers
❏ Glow plug wrench (DTXR1170)
❏ Engine tuning screwdriver (DTXR1170)
❏ Spare glow plugs (DTXG3001)
❏ Fuel tubing (GPMQ4131)
❏ After Run
™
engine oil (HCAP3000)
❏ Extra “AA” batteries
❏ AquaCraft GrimRacer
lubricant (AQUB9500)
OTHER USEFUL TOOLBOX ITEMS
™
Speed Grease cable
❏ Paper towels
❏ Spray-on glass cleaner
❏ Sunglasses
❏ Sun block
❏ Waders or rubber boots
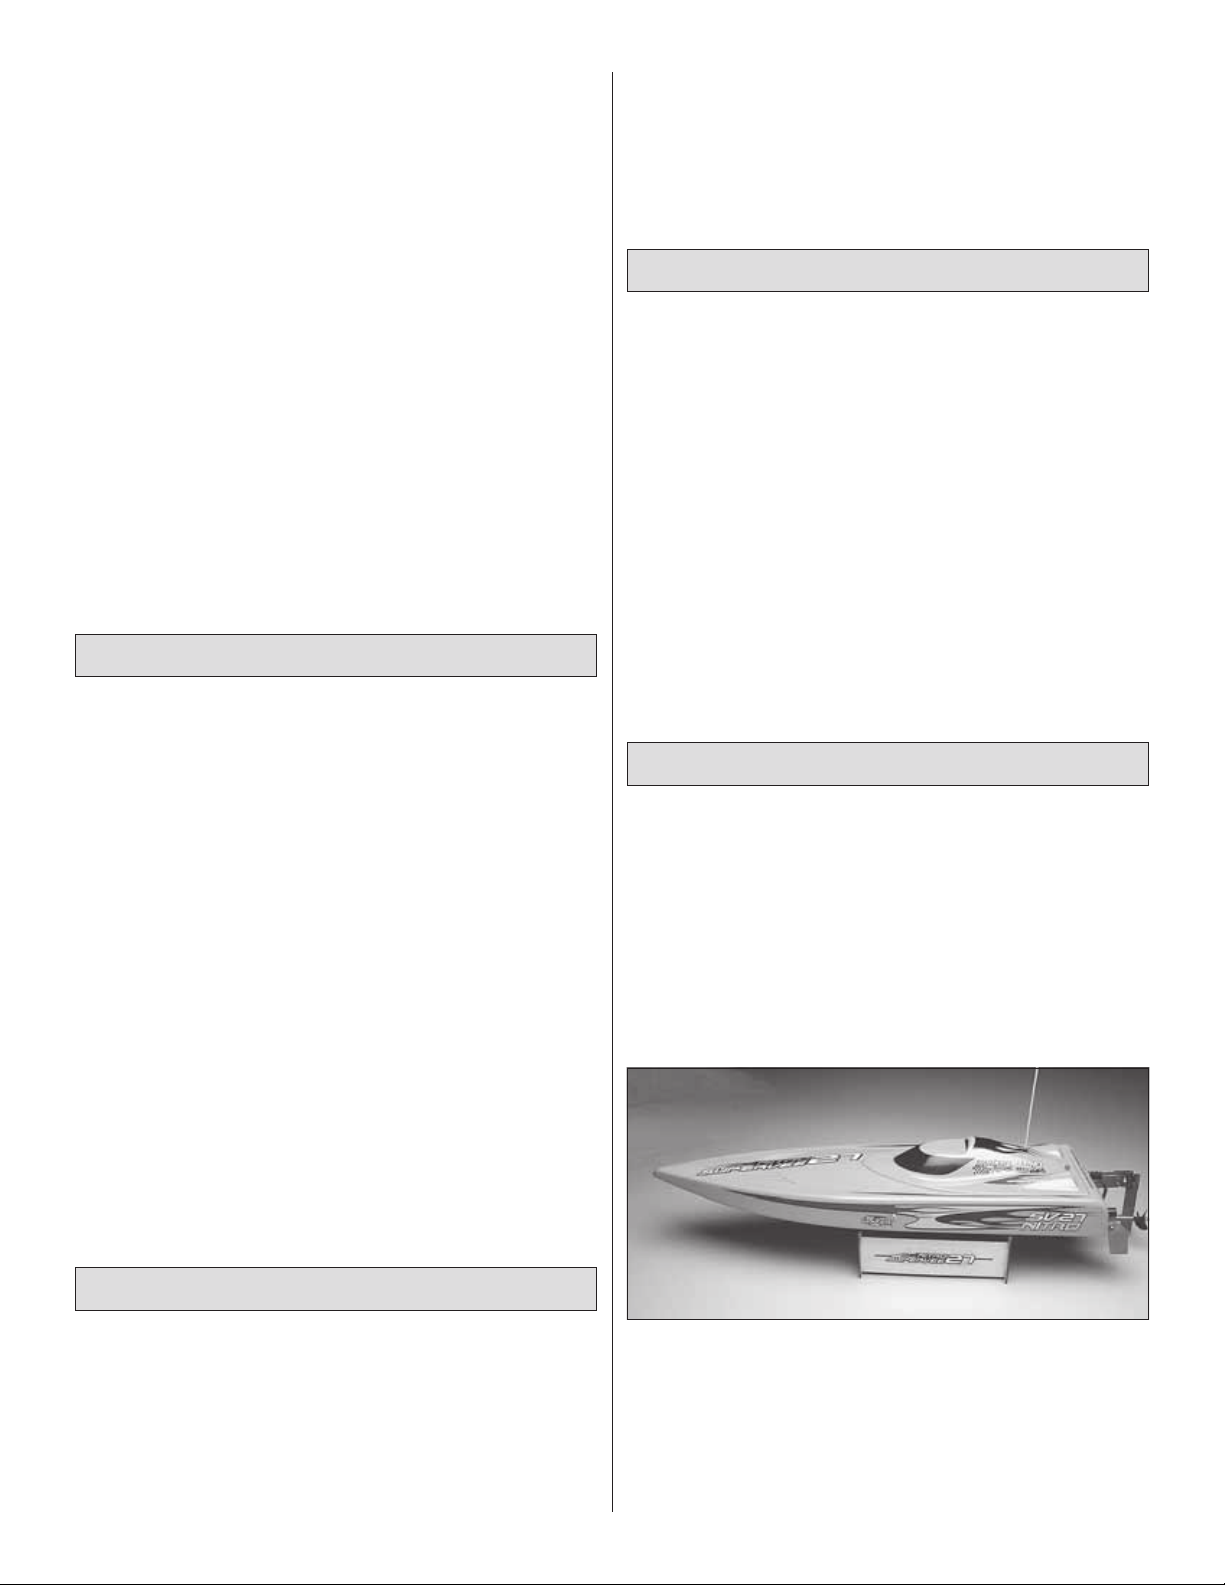
Carefully remove your SuperVee 27 Nitro boat and stand
from the box. You may wish to keep the box in order to
transport and store your SuperVee 27 Nitro.
Decals have been provided for your SuperVee 27 Nitro.
Simply cut them out, peel, and stick! See the photos on the
box for a decal placement example.
THE BOAT STAND
Your boat comes with a laser cut and engraved stand. It’s
pre-built with soft protective cradle strips to help keep your
boat scuff free.
3
Page 4
TRANSMITTER ASSEMBLY
Note: The transmitter is not water resistant and should
never come in contact with water.
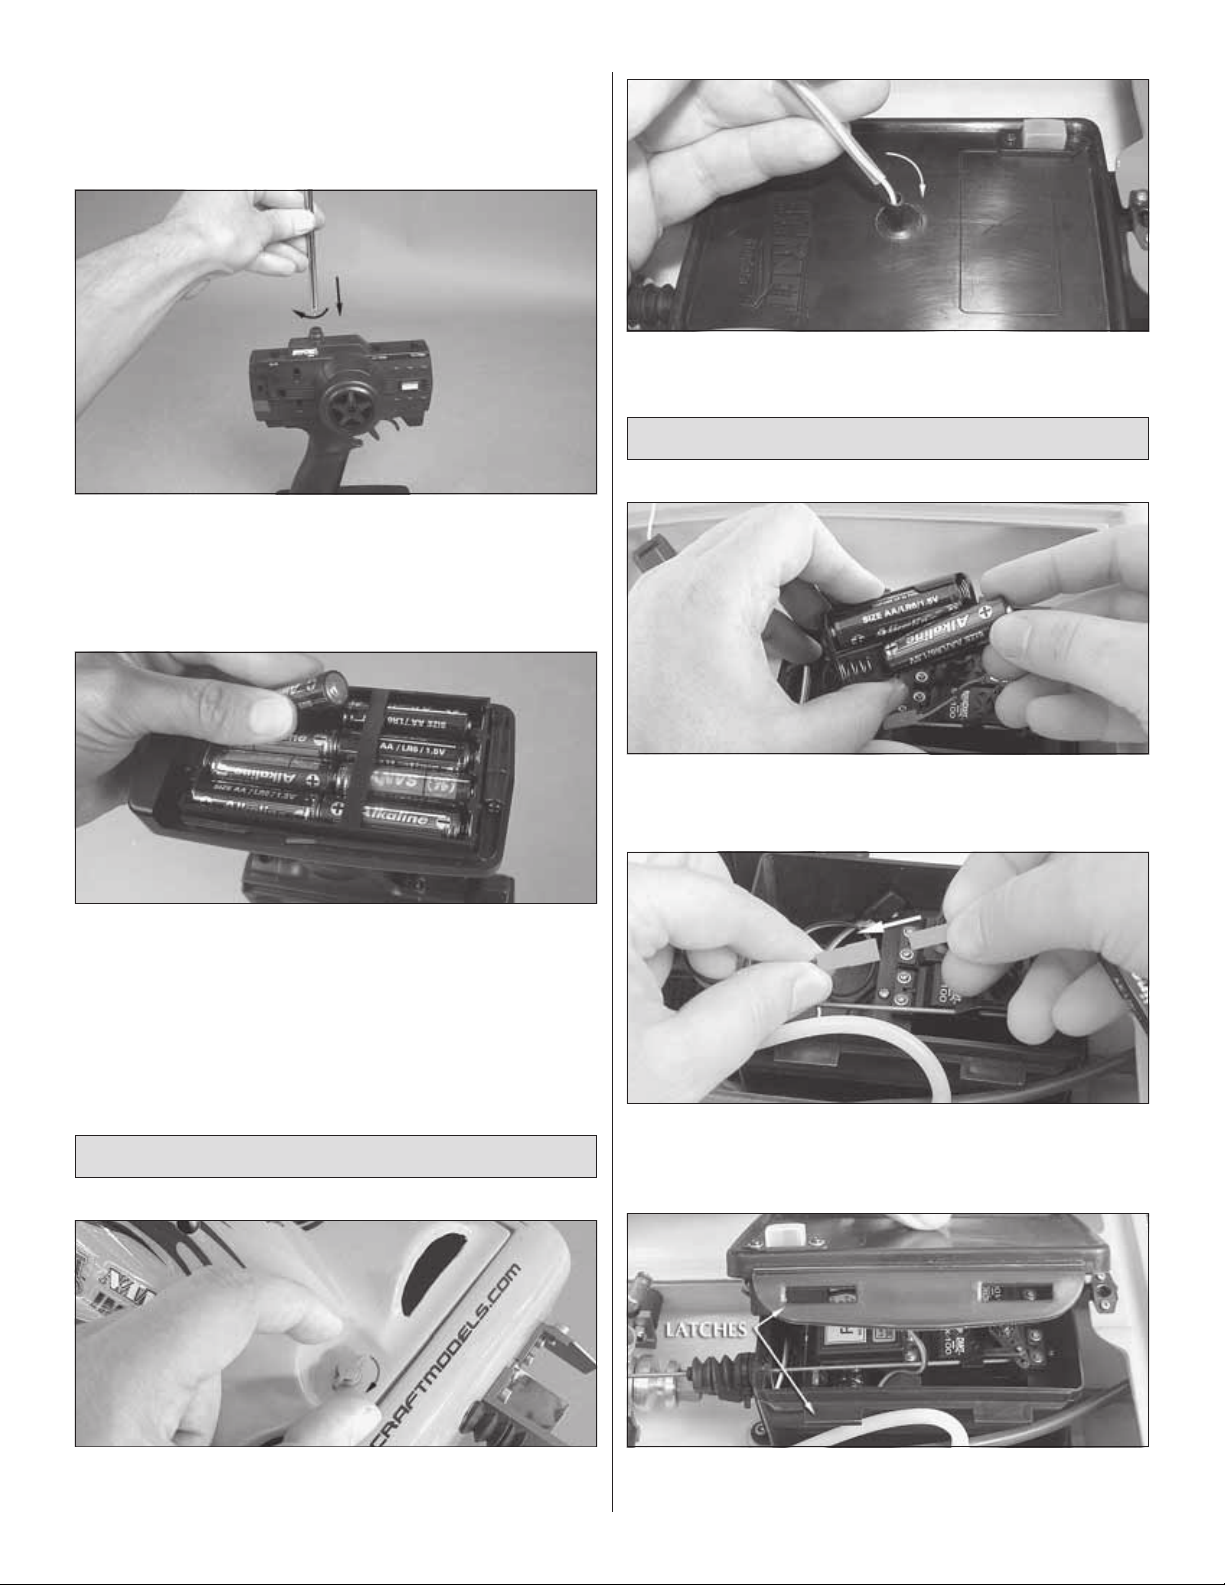
❏ 1. Remove the transmitter antenna from the plastic bag
located on the back of the cardboard transmitter protector.
Screw the antenna into the hole located at the top of the
transmitter. Give a light tug on the antenna to make sure it
is threaded in properly.
❏ 2. Install the receiver antenna tube by pushing lightly
into the plastic antenna base as shown.
INSTALL THE RECEIVER BATTERIES
❏ 2. Slide the battery door open on the bottom of the
transmitter and install eight (8) fresh “AA” batteries. Follow
the diagram located in the bottom of the battery tray for
proper battery orientation.
❏ 3. Turn the transmitter “ON”. The battery light should
glow bright red. If the light does not turn on re-check the
installation of the batteries.
INSTALL THE RECEIVER ANTENNA
❏ 1. Open the radio box lid and install four fresh “AA”
batteries in the battery holder. Be sure to follow the
polarity confi guration molded into the battery holder.
❏ 2. Plug the battery box connector into the ON/OFF
switch connector. Do not force them together; they are
designed to fi t together only one way.
❏ 1. Locate and turn the rear hatch lock 1/4 turn to unlock
and remove the hatch.
❏ 3. Replace the radio box lid and secure it with the latches
located on both sides of the radio box.
4
Page 5

❏ 5. Secure the glow starter onto the engine’s glow plug.
❏ 4. Replace the hatch and secure it by pushing straight
down on top of the rear hatch lock.
CHECK THE RADIO SYSTEM
• Standing behind the boat with both the receiver and
transmitter powered up, rotate the wheel to the left. The
back of the rudder should move towards the left. Move
the wheel to the right. The back of the rudder should
move towards the right. If this is not the case, simply
move the transmitter steering servo reverse switch to the
other position.
• Squeeze the trigger on the transmitter; this should open
the throat of the carburetor. Conversely, pushing the
trigger should close the throat completely.
RUNNING THE ENGINE
Before running the engine, read the manual completely.
There are Several Simple Steps to Starting the Engine:
❏ 6. Check that the throttle is 1/8” open from the fully
closed position. To adjust the idle speed, turn the idle
stop screw in (clockwise) to increase the idle speed or out
(counterclockwise) to slow the idle speed. Adjust the idle
stop screw 1/8th of a turn at a time until the desired speed
is reached. Pull the handle of the recoil starter in quick,
short pulls. Repeat if necessary, until the engine fi res. DO
NOT PULL THE RECOIL HANDLE MORE THAN 381mm
[15"]; DOING SO MAY DAMAGE THE PULL-START.
❏ 7. With the engine started, remove the glow starter after
10-15 seconds.
❏ 8. Put the hatch back in place and rotate the hatch lock
at the rear of the boat to secure it in place. BE CAREFUL
NOT TO TOUCH THE SPINNING PROP!
If the engine fails to start, refer to the ENGINE
TROUBLESHOOTING FLOWCHART on page 11.
BREAKING IN THE ENGINE
IMPORTANT: The propeller will begin spinning as soon as the
engine starts! Be certain that the propeller is unobstructed;
failure to do so will damage the prop.
❏ 1. Install a glow plug if one is not in your engine. The
glow plug threads into the top of the cylinder head.
❏ 2. Fill the tank almost to the top. Leave a little air at the
top of the tank.
❏ 3. Open the high-speed needle valve 2-1/2 turns out
(counterclockwise) from fully closed. The high-speed
needle is sticking up on the right side of the carburetor
(looking at it from behind the boat). If you have previously
run the boat, keep the same needle valve setting that you
used on your last run.
❏ 4. Prime the engine by placing a fi nger over the carburetor
opening and pulling the starter handle 2-3 times or until
you see fuel entering the carburetor. The quantity of fuel
drawn into the engine by priming is an important factor in
starting the engine successfully.
To insure long life and good performance from your
AquaCraft .18 engine, you MUST break-in the engine. The
break-in period is critical for long life of the internal parts
of the engine. This should be done over the fi rst 5 tanks
of fuel.
SOME THINGS TO REMEMBER DURING BREAK-IN
❏ 1. Before running your SuperVee 27 Nitro it is a good
idea to check the water cooling system to be sure all the
lines are properly connected and in working condition.
❏ 2. Use the same fuel that you will use for normal running.
Use nitro fuels that are specially formulated for model
boat engines. Typically this would be 30-65% nitromethane
boat fuel.
❏ 3. Resist the urge to accelerate and decelerate the
boat quickly.
❏ 4. Break-in puts stress on the glow plug and you can burn
it out. Make sure you have an extra plug or two on hand.
55
Page 6

HOW TO STOP YOUR ENGINE
DRIVING TIPS
Just as squeezing the throttle trigger on your transmitter
increases power, pushing the trigger the opposite way
decreases power. Pushing the throttle trigger should close
off the throat of the carburetor completely, cutting off air
intake and stopping the engine.
THE FIRST TANK
Your fi rst tanks of fuel should be used to run the boat at
a very rich high-speed needle valve setting. This allows
the fuel to carry as much oil as possible into the engine to
lubricate the internal parts during break-in.
TANKS 1 TO 3
❏ 1. Open the needle valve 2-1/2 turns out from fully
closed (counterclockwise). This is factory set already, but
check it to make sure. When closing the high-speed
needle, close the needle until you feel some resistance.
DO NOT overtighten or you will damage the carburetor.
❏ 2. Start the engine.
❏ 3. Once the engine is started, adjust the high-speed
needle valve around 1/8th of a turn at a time, fi nding the
setting where the engine just barely runs. This may take a
few times. The engine will perform sluggishly and stall from
time to time – this is normal during the break-in process.
The motor and propeller spin counterclockwise on your
SuperVee 27 Nitro. Torque from the engine and propeller
naturally cause the boat to turn better to the right than to
the left.
Your SuperVee 27 Nitro is very fast and very agile. It’s a
good idea to let off the throttle as you enter the corner.
Likewise if the boat starts to get out of shape you will want
to let off the throttle to get the boat settled back down. You
can make adjustments to the boat’s hardware for better
handling and even more performance, but just remember,
one small adjustment at a time. For more tuning info see
“TUNING YOUR SUPERVEE 27 NITRO” at the AquaCraft
web site, www.aquacraftmodels.com or by reading below.
❏ 4. Place the boat in water and run the engine at a medium
speed, periodically accelerating and decelerating.
❏ 5. Continue running the engine until the tank is almost
out of fuel. Do not allow the engine to run out of fuel. This
leans out the engine and can cause overheating.
TANKS 4 & 5
Turn in the needle valve (clockwise) around 1/8th of a turn
from the previous setting. You should notice that the engine
performs better during each run. After the 5th tank, you
should be near to the peak performance of the engine.
RUNNING THE SUPERVEE 27 NITRO
Gently place the boat in water that is at least 8” deep and free
of obstacles (weeds, rocks, sticks, ducks, muskrats, etc.).
Throttle up to full speed. Note: Your SuperVee 27 Nitro may
cavitate for the fi rst 10 to 15 feet. This is normal! If the boat
has a tendency to turn right or left, adjust the steering trim
knob on your transmitter until the boat runs in a straight
line when the steering wheel is at neutral.
When you are ready to bring your boat back to shore,
drive it parallel to the shoreline. After you have stopped
the motor, turn the boat towards the shore.
TUNING YOUR SUPERVEE 27 NITRO
PROPELLER CHOICES
The propeller plays a huge part in how your SuperVee 27
Nitro performs. The FRP (Fiber-Reinforced Plastic) prop
that comes with the boat is a good all around prop but if
you want even more performance, try your hand at a metal
prop. To start with, here are a few good choices.
AquaCraft/GrimRacer 4053 (AQUA9715)
AquaCraft/GrimRacer 4052/3 (AQUA9716)
Octura X437/3, X438
You can make hardware adjustments to your SuperVee
27 Nitro to suit your driving style or achieve maximum
handling and speed for your water conditions.
Strut Settings: You can use the information below as a
guideline to help you understand what happens when you
adjust the angle of the strut. Remember that the prop and
water conditions play a huge part in the performance of
the boat.
6
Page 7

trim plates (negative). If it looks like the boat is running wet,
you can bend the trim plates up a small amount (positive).
MAINTENANCE
RADIO BOX MAINTENANCE
Positive Angle: Positive strut angle causes the bow (front) to
run high, making the boat faster but less stable and likely to
blow off course or crash in rough water. This also places the
least amount of stress on the motor and speed control.
Neutral or No Angle: Good for most setups, but ultimately
the prop, weight of the boat and water conditions will
determine if you are going to run your boat with Neutral
strut angle.
Negative Angle: Negative strut angle can cause the boat to
run tight. Remember, make small adjustments at a time as
negative strut angle places the most amount of stress on
the drive components. Too much negative angle and your
boat might “stuff” dive under water if it comes off a wave.
Remember, small adjustments are best.
When fi nished running, remove the hatch, open the
radio box by unsnapping the side latches and unplug the
receiver battery. Let the cover sit on the side of the boat
and wipe away water that might have collected in the radio
box compartment. It is best to leave the radio box cover
and hatch cover off the boat overnight to allow any water
that might enter to evaporate.
ENGINE MAINTENANCE
• Drain any remaining fuel from the tank.
• Remove the glow plug.
• Place a few drops of Hobbico® After Run Oil (HCAP3000)
into the carburetor and in the cylinder head. Place a rag
over the cylinder head and gently pull the recoil starter a
few times to spread the oil throughout the engine.
HULL MAINTENANCE
• Remove the hatch cover.
• Open the radio box.
Rudder Angle: Tilting the bottom of the rudder to a positive
angle (away from the transom) will cause the transom to
run higher out of the water in the corners. Tucking it under
will cause the transom to run deeper. Keep in mind as you
make your adjustments that a small change can make a
big difference.
Trim Plates: The trim plates are used to help control the ride
of the hull. If the boat is hopping, you can bend down the
• Soak up any excess water with a paper towel.
• Wipe down the entire boat with spray-on glass cleaner and
a soft cotton towel.
DRIVESHAFT MAINTENANCE
❏ 1. Remove the hatch cover.
❏ 2. Use the 12mm wrench to hold the fl ywheel nut in
place while loosening the collet assembly with the 10mm
wrench as shown.
7
Page 8

keeping it clean and not over-leaning the engine.
• Make sure that you use a fuel from a reputable
manufacturer that is labeled as model boat engine fuel.
• Avoid using old fuels in the engine. After running for the
day, run all of the fuel out of the engine. Use after run oil
(HCAP3000) and work it into the engine by pulling the
pull-starter 2-3 times.
• Do not use silicone sealer on the engine joints. Silicone
sealer contains acetic acid, which is corrosive if it gets
inside your engine.
❏ 3. Gently pull the driveshaft out and wipe off any old grease.
❏ 4. Apply AquaCraft GrimRacer Speed Grease cable
lubricant (AQUB9500) or heavy-duty marine grade cable
grease to the driveshaft and reinsert it into the stuffi ng
box. Slowly rotate the driveshaft while gently pushing it
back into place. Be sure to leave about a 3mm [1/8"] gap
minimum between the drive dog and the stuffi ng box as
shown.
• Store your engine someplace where it will not be
subjected to extreme temperature changes.
If you are having problems with your engine, consult the
“ENGINE TROUBLESHOOTING FLOWCHART” on page 11
of this manual. The following are some potential problems.
GLOW PLUG
The glow plug is an item that will wear out and need
replacement from time to time. It is a good idea to remove the
glow plug before your fi rst run, attach it to the glow starter
and see how well it glows. You should see a bright orange
glow from the fi lament. If a coil or two will not glow or the
plug will not glow at all, replace the plug. If the engine quits
when you remove the glow starter, the plug might need to
be changed, although this may be because you are running
too rich and need to screw in your high-speed needle some.
Look at the glow plug when you are running the engine. If
you see any bubbles coming from around the plug, replace
the glow plug (copper) gasket, or both the plug and the
gasket. The only real way to test a glow plug is to replace it.
Make sure you have a spare plug or two on hand every time
that you run the SuperVee 27 Nitro.
❏ 5. Use the 12mm wrench to hold the fl ywheel steady
while tightening the collet assembly with the 10mm
wrench as shown. Make sure there is still a 3mm [1/8"] gap
between the drive dog and the stuffi ng box.
WAYS TO ENSURE LONG ENGINE LIFE.
• Keep your engine clean. Dirt will act as insulation on an
engine. It will not be able to shed heat as easily.
• Do not over-lean your engine.
• Do not run your engine at high speeds with the boat out
of the water.
• Do not overheat the engine. This goes along with
FUEL
Fuel can go bad. The main ingredient in model fuel is
methanol, which is basically a form of alcohol. Alcohols
absorb water out of the air, so keep your fuel jug cap on at
all times. Store your fuel out of the sunlight and in a cool
place. Bad fuel is one of the most diffi cult problems to
diagnose in engines. If you have tried everything you can
think of to remedy an engine that is not running correctly,
try using some fresh fuel.
FUEL LINE
Fuel line is susceptible to pinhole leaks. You will not be able
to see a hole in the fuel line, but if you see bubbles in the
line going to the carburetor, replace the fuel line. Another
symptom of a leak in the fuel line is a surging engine. A
properly tuned engine will surge when the air bubbles
enter the carburetor. It is basically leaning out the mixture.
8
Page 9

OVERHEATING
One of the worst things you can do to your engine is overheat
it. The oils that lubricate the engine are carried in the fuel.
If your engine is set too lean, there will not be enough oil
in the engine to lubricate the internal parts. This will cause
premature wear in the engine and cause damage.
RUNNING TIPS
PLEASE READ these valuable tips as well as the “SAFETY
PRECAUTIONS” at the beginning of this manual BEFORE
running the SuperVee 27 Nitro to ensure a successful and
safe run.
If your SuperVee 27 should happen to stall or capsize,
water currents and wind will slowly carry it to shore. The
bad news is that the boat could be carried to the opposite
shore. Keep variables like wind direction, currents, and
the size of the lake in mind when surveying areas to run
your boat.
RACING
Although it is very enjoyable to go out and run the
SuperVee 27 Nitro by yourself, the real fun and excitement
of R/C boating is experienced when you get involved in
racing. Racing against other boats is much different than
running your boat alone. The following suggestions will
provide helpful strategies when racing a model boat.
A good set-up for running alone may not be the best for
racing conditions. Race water conditions create challenges
different from running alone. Five or six boats racing against
one another will create rough water conditions on the race
course and to successfully compete in racing situations, it
may be necessary to “tighten” the ride characteristics.
Wakes caused by other boats can upset the balance and ride
characteristics of even a well trimmed model boat. When
running down the straight-aways, don’t follow in another
boat’s wake. Wakes generated by other boats while entering
and negotiating a corner are especially dangerous.
A helpful tip is to use a fi shing reel with at least a 12lb. line
with a tennis ball tied to the end to retrieve stalled boats. It
is not advisable to run R/C boats on any free-fl owing body
of water such as creeks or rivers.
If for whatever reason your boat takes on a large amount
of water, swamps or sinks causing the radio equipment to
get wet, you must do the following immediately:
• Remove the radio equipment from the boat. Allow ALL
the components to air dry completely. Reinstall the
components and check for proper operation before
running the boat again.
If the engine quits from ingesting water it may be diffi cult
to restart. To make the engine easier to restart, do the
following as soon as the boat has been recovered:
• Remove the glow plug from the engine and set it aside
to dry.
• Drain the fuel tank of any remaining fuel to eliminate
the possibility of water contaminated fuel.
• Place a rag over the open glow plug hole and pull on
the recoil handle as many times as needed to fl ush the
water and remaining fuel out of the engine. Note: The
recoil will get easier to pull as fl uid exits the engine.
Racing other boats through a corner presents possibly
the greatest challenge. The fi rst corner after the start of a
race can be especially challenging. The boat entering the
corner fi rst has the task of holding its position (often called
“holding your lane”) through the corner and following
boats must then attempt to hold their lanes. Changing
lanes and crossing a wake to gain position in a turn can
have disastrous results. Executing a good start in the inside
lane is one key to successful racing.
Avoid beating yourself. In any type of racing, there are some
situations you can control and other situations that you
cannot control. The ability to set the needle-valve on the
engine so it runs the entire race without stopping, checking
the linkages, fasteners, fuel tubing, amount of fuel, glow
plug, and radio system are conditions/situations that can be
dealt with prior to the start of a race. During the race, making
a good start and driving defensively are controllable actions.
By focusing on tasks and actions that can be controlled,
successful racing outcomes can be achieved.
• Test the glow plug for proper operation by attaching the
glow starter. You should see a bright orange glow from
the fi lament. Reinstall or replace the glow plug as need.
With these steps completed, re-start the engine as outlined
in the “RUNNING THE ENGINE” section.
9
Page 10

NATIONAL MODEL BOATING
ORGANIZATIONS
There are three national model boating organizations in
the United States and Canada:
APBA or American Power Boat Association
(RC Boat Category)
www.apba-rcboating.com
IMPBA or International Model Power Boat Association
www.impba.net
NAMBA or North American Model Boat Association
www.namba.com
Each of the three organizations has its own rule book
governing model boat racing, sanctioned events, and
recognized records. Organized model boat racing is
offered at both regional and national levels. Location of
clubs, race dates and locations, membership applications,
and other information can be obtained through their
respective web sites.
• For “drag racing” place the buoys similar to the
above sketch.
• For “oval racing” place the buoys similar to the above
sketch. Note: The patterns shown are not based on
any sort of offi cial standards; therefore, you may set
up racecourses any way you choose. Smaller courses
provide more action and excitement.
Another good source for information regarding all aspects
of model boat operation is:
http://www.rcuniverse.com
Of course, racing does not have to be an organized and
sanctioned competition to be fun. Small informal races
can be very exciting.
Here are some suggestions for setting up a simple
racecourse for boats:
The length of the races can be determined by a set
number of laps around the buoys (for example, the fi rst
boat to complete fi ve (5) laps is the winner); or by time (for
example, whoever is leading at the end of two (2) minutes
is the winner).
GOOD LUCK AND GREAT BOATING!
• Make 2 to 4 simple and inexpensive “marker buoys” with
empty milk jugs, string, and heavy objects for anchors,
similar to the above sketch.
10
Page 11

ENGINE TROUBLESHOOTING FLOWCHART
ORDERING REPLACEMENT PARTS
To order replacement parts for the AquaCraft SuperVee 27 Nitro, use the order numbers in the Replacement Parts List
that follows. Replacement parts are available only as listed and can be purchased from hobby shops or mail order/
Internet order fi rms. Hardware items (screws, nuts, bolts) are also available from these outlets. If you need assistance
locating a dealer to purchase parts, visit www.hobbico.com and click on “Where to buy.” If this kit is missing parts,
contact Hobbico Product Support.
REPLACEMENT PARTS LIST
Order # Description
AQUB9213 Header Cooling Coil
AQUB6503 ISO .18 Engine Mount
AQUB8604 Radio Box w/ Tray
AQUB7891 FRP 3-Blade 37mm Prop (2)
AQUB7890 Rudder Blade
AQUB9522 FE Mono Port Turn Fin
AQUZ1003 Instruction Manual
AQUB9521 Rubber Switch Boot and Plate
AQUB9520 Transom Water Pick Up Assembly
AQUB6902 Fuel Tank
AQUB6903 Green Fuel Tubing 3'
AQUB6904 Blue Water Tubing 3'
AQUB6316 Decal Sheet – White
AQUB6317 Decal Sheet – Blue
AQUB6318 Decal Sheet – Red
AQUB6319 Decal Sheet – Yellow
AQUB6320 Decal Sheet – Green
AQUB6321 Decal Sheet – Orange
AQUB6322 GrimRacer Decal Sheet
AQUB6701 Engine Flywheel
AQUB7892 Engine Cable Coupler
AQUB9009 Linkage and Connector Set
AQUB7889 Rudder Bracket
Order # Description
AQUB6201 White Fiberglass Cowl
AQUB9044 Trim Plates w/ Backplates
AQUB7885 Drive Dog w/ Prop Nut
AQUB7882 FE Mono Turn Fin
AQUB7100 Boat Stand, Unassembled
AQUB7883 Drive Cable w/Prop Shaft
AQUB7884 Prop Shaft Strut Bushing
AQUB7881 FE Mono Strut Assembly
AQUB8713 Rudder Control Arm
AQUG1147 .18 Marine Engine
AQUG6000 .18 Exhaust Header w/Coupler
AQUG6001 .18 Tuned Pipe
AQUG6002 Silicone Exhaust Extension
11
Page 12

AQUACRAFT .18 INBOARD MARINE ENGINE EXPLODED VIEW
ENGINE PARTS LIST
AQUG1147 AquaCraft .18 Marine Engine
Stock # Description Includes
AQUG4101 Front Bearing 12 x 1pc
AQUG4151 Rear Bearing 10 x 1pc
AQUG4201 Carb Complete 35 x 1pc
AQUG4223 Carb Gasket (O-ring) 7 x 1pc
AQUG4226 Throttle Arm Nut 24 x 1pc
AQUG4241 Carb Retainer Screws 36 x 2pcs
AQUG4261 Carb Barrel (Rotor) 27 x 1pc
AQUG4351 Connecting Rod 6 x 1pc
AQUG4411 Backplate w/Gasket 8, 16 x 1pc
AQUG4501 Crankcase 11 x 1pc
AQUG4551 Crankshaft 9 x 1pc
AQUG4601 Piston/Sleeve Set 3, 4 x 1pc
AQUG4651 Water Cooling Head 1, 13 x 1pc
AQUG4652 Head Button 13 x 1pc
AQUG4739 Carb Dust Cover 26 x 1pc
AQUG4751 Fuel Inlet 31 x 1pc
AQUG4771 Backplate Gasket 8 x 1pc
AQUG4772 Head Gasket 2 x 1pc
AQUG5041 Idle Needle w/O-ring 22, 23 x 1pc
AQUG5042 Idle Needle O-ring 23 x 1pc
AQUG5241 Piston Pin 5 x 1pc
Stock # Description Includes
AQUG5511 Recoil Start Assembly 18 x 1pc
AQUG5512 One-Way Bearing 37 x 1pc
AQUG5226 Needle Socket 32 x 1pc
AQUG5527 Needle Valve w/O-ring 33 x 1pc
AQUG5528 Needle Valve Assembly 31, 32, 33, 34 x 1pc
AQUG5529 Needle Valve O-ring 33 x 1pc
AQUG5621 Backplate Screws 17 x 4pcs
AQUG5622 Head Screws 20 x 4pcs
AQUG5721 Start Shaft 15 x 1pc
AQUG5831 Throttle Arm 25 x 1pc
AQUG5871 Throttle Stop Screw Assembly 29, 30 x 1pc
AQUG6000 Exhaust Header w/Coupler 42, 43, 44 x 1pc,
40, 41, 45 x 2pcs
AQUG6001 .18 Tuned Pipe 46, 47, 48 x 1pc
AQUG6002 Tuned Pipe Silicone Extension 49 x 1pc
AQUG9213 Header Cooling Coil 50 x 1pc
 Loading...