

Page 1
Warranty
• AquaCraft™will warrant this kit for 90 days after the purchase from defects in materials or workmanship. AquaCraft will
either repair or replace, at no charge, the incorrectly made part.
• Make sure you save the receipt or invoice you were given when you bought your model! It is your proof of purchase
and we must see it before we can honor the warranty.
• To return your Reef Racer 2™for repairs covered under warranty, you should send your boat to:
Hobby Services
3002 N. Apollo Drive, Suite 1
Champaign, Illinois 61822
Attn: Service Department
Phone: (217) 398-0007 9:00 am - 5:00 pm Central Time M-F
E-mail: hobbyservices@hobbico.com
HCAZ3025 for HCAB14**Entire Contents © Copyright 2004
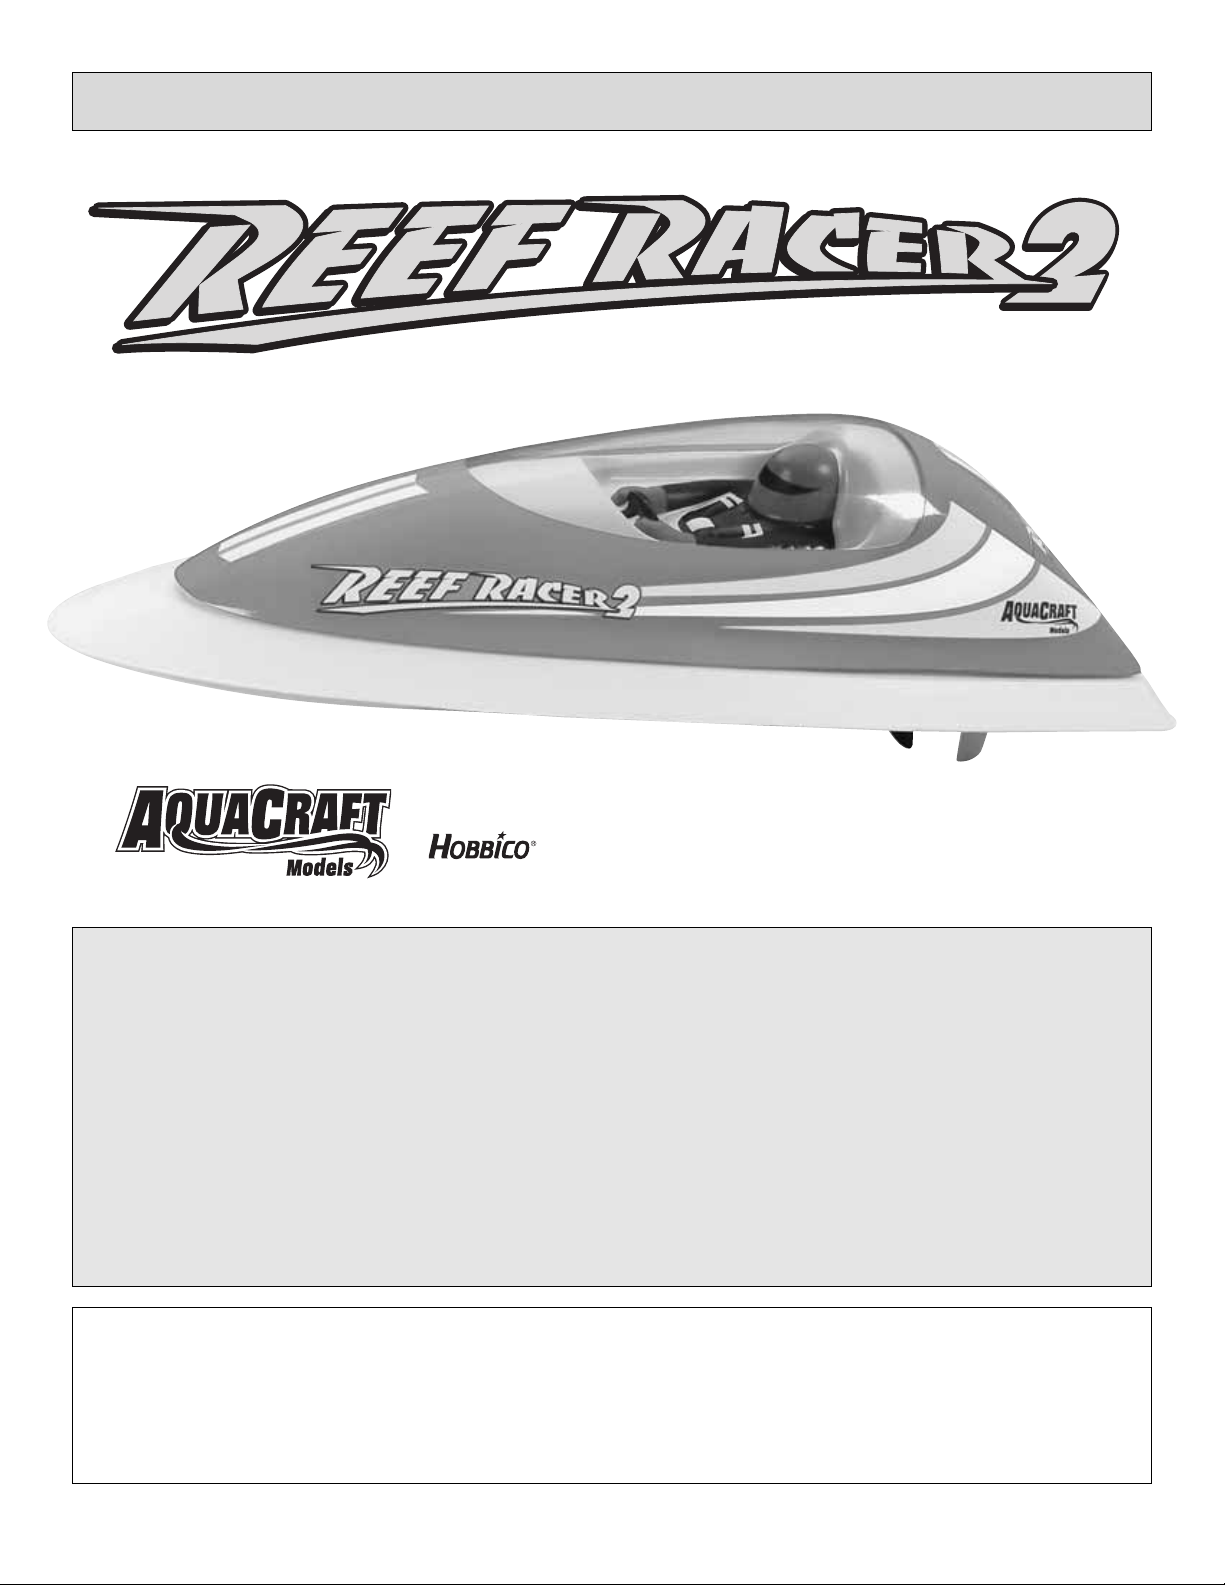
ASSEMBLY AND OPERATION MANUAL
™
™
Before Building:
Thank you for purchasing the Reef Racer 2! This manual contains the instructions you need to safely operate and maintain
your boat. We want the operation of this boat to be a success so BEFORE preparing the Reef Racer 2 for action please read
this manual thoroughly. If for any reason you think that this model is not for you, return it to your local dealer immediately.
PLEASE NOTE: Your hobby dealer cannot accept a return on any model after final assembly sequence has begun.
by
Page 2

• Adult supervision is strongly recommended! Children
should be warned about the dangers of playing in close
proximity to water.
• Do not attempt to charge battery packs in the immediate
vicinity of swimming pools, lakes, rivers, oceans, inland
seas, etc. Above all, NEVER ATTEMPT TO OPERATE A
CHARGER IF YOU, THE CHARGER, OR THE BATTERY
PACK ARE WET.
• Always remove the battery pack from the boat before
recharging.
• This boat is controlled by radio signals, which are
susceptible to possible interference from other R/C
transmitters, paging systems, or other electrical noise.
Before turning your radio transmitter and boat “ON”,
make sure no one else in the area is operating a radio on
the same frequency (channel).
• Do not touch the propeller anytime the electronics are
turned “ON”. Pay close attention to items such as loose
clothing, shirtsleeves, ties, scarves, long hair or any loose
objects that may come in contact with the spinning
propeller. If your fingers, hands, etc. come in contact
with the spinning propeller, you may be severely injured.
• The speed and mass of this boat can inflict property
damage and severe personal injury if a collision occurs.
Never run this boat in the presence of swimmers or where
the possibility of collision with people or property exists.
• Electric motors can generate considerable heat. Do not
touch any part of your motor until it has cooled.
Touching the motor immediately after running the boat
may result in a serious burn.
If the buyer is not prepared to accept the liability associated
with the use of this product, the buyer is advised to return
this kit immediately in new and unused condition to the
place of purchase.
Repair service is available anytime.
After the 90-day warranty, you can still have your Reef Racer
2 repaired for a small charge by the experts at AquaCraft’s
authorized repair facility, Hobby Services, at the address
listed on the front page of this manual.
To speed up the repair process, please follow these instructions:
1. Under all circumstances return the ENTIRE system; battery
pack, charger, boat and radio.
2. Make sure the electronics are turned off and all batteries
are removed.
3. Send written instructions which include a list of all items
returned, a THOROUGH explanation of the problem, the
service needed and your phone number during the day. If
you expect the repair to be covered under warranty, be sure
to include a proof-of-purchase date (your store receipt or
purchase invoice).
4. Also be sure to send your full return address.
All pictures, descriptions, and specifications found in this
instruction manual are subject to change without notice.
AquaCraft maintains no responsibility for inadvertent errors in
this manual.
It is a good idea to assemble a useful collection of tools to
bring along anytime you head out to the pond. Here are
some items you may wish to keep handy.
❏ #2 Phillips Screwdriver (HCAR1024)
❏ 1.5mm Hex Driver (HCAR1150)
❏ 4mm Socket or Wrench
❏ Paper Towels
❏ Spray-on Glass Cleaner
❏ Hook & Loop Material (GPMQ4480)
❏ Hobby Knife (HCAR0109)
❏ Electrical Tape
TRANSMITTER ASSEMBLY
Important Note: The transmitter is not water-resistant and
should never come in contact with water.
❏ 1. Remove the transmitter antenna from the transmitter
box and screw it into the top of the transmitter. To ensure that
the antenna is attached, lightly pull on the base of the
antenna. If it slides out, it is not installed properly.
FINAL ASSEMBLY SEQUENCE
USEFUL TOOLBOX ITEMS
SPECIFICATION & DESCRIPTION CHANGES
REPAIR SERVICE
SAFETY PRECAUTIONS
2
Page 3
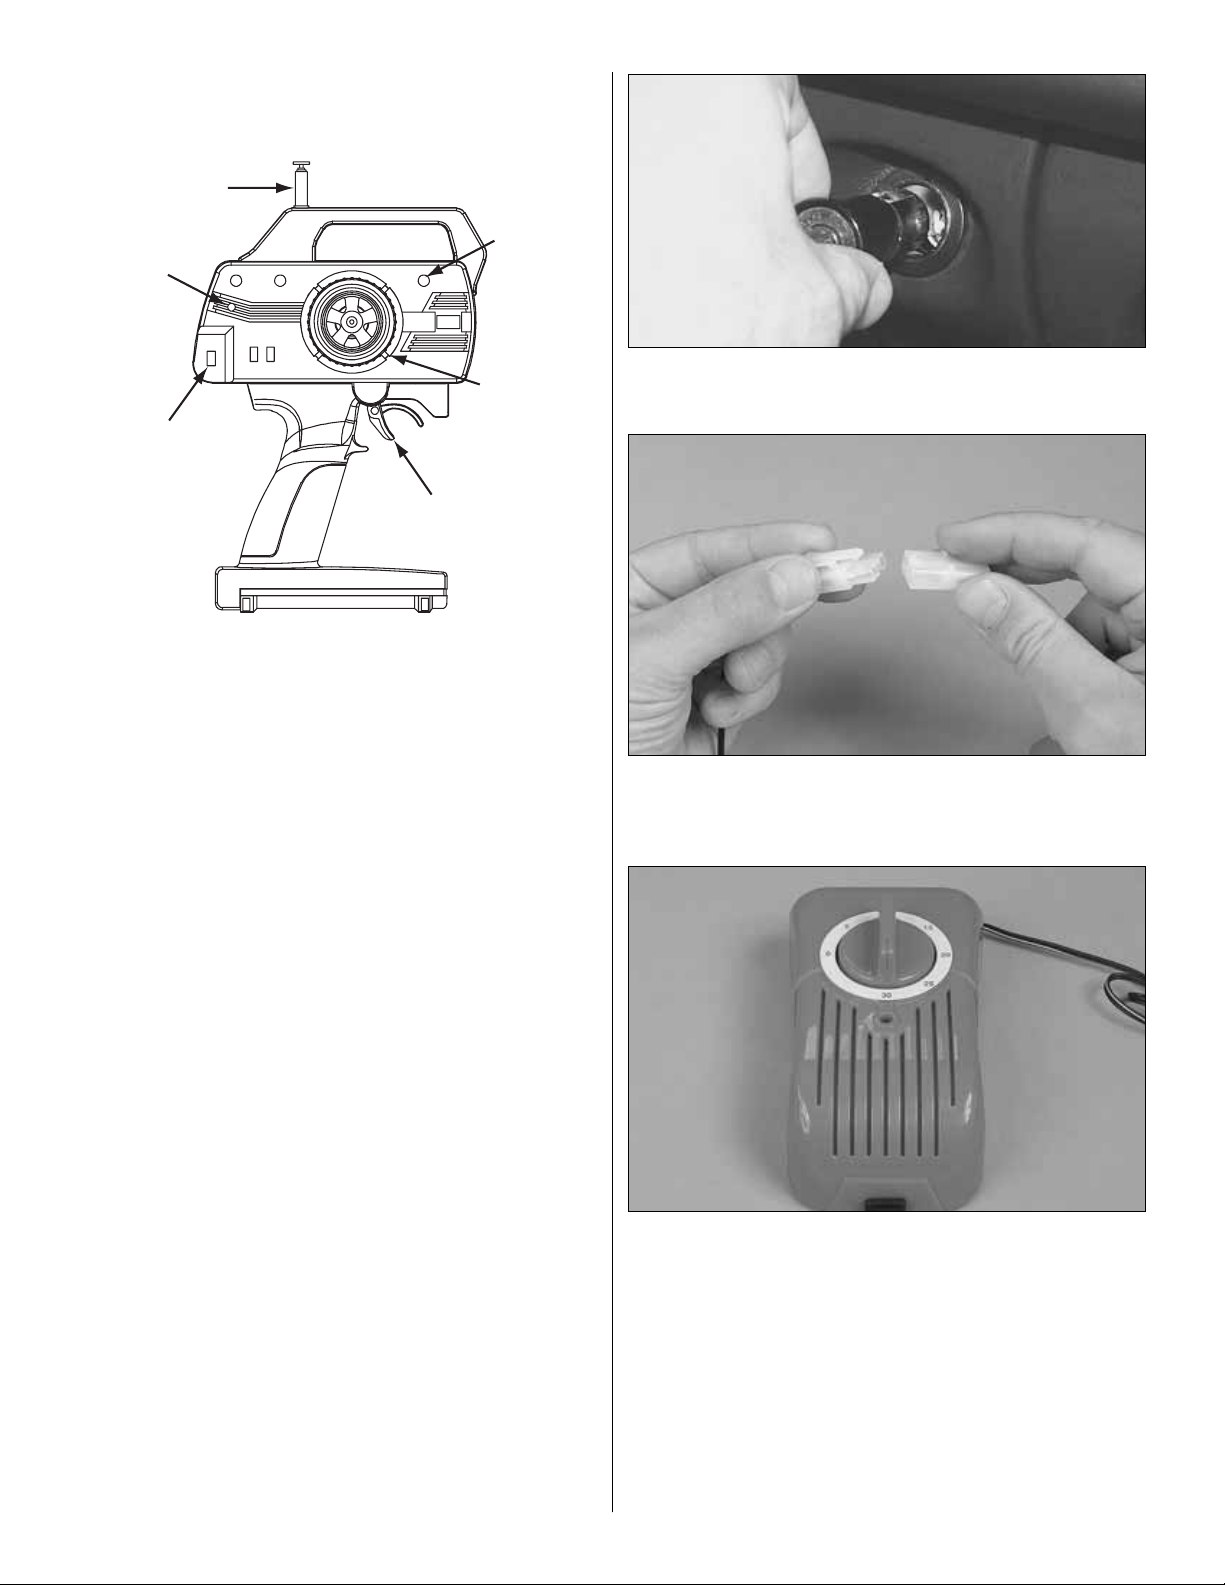
❏ 2. Slide off the battery door on the bottom of the
transmitter. Install 8 fresh “AA” batteries into the bottom of the
transmitter in the configuration molded into the battery holder.
Re-install the battery door onto the bottom of the transmitter.
❏ 3. Turn the transmitter “ON” using the switch on the front.
The red LED light next to the on/off switch should light up. If
the LED begins flashing erratically, turn the transmitter off and
check to make sure that the batteries are installed properly.
If you see a steadily flashing LED, the batteries are low and
need to be replaced.
BATTERY PACK CHARGING & INSTALLATION SEQUENCE
• IMPORTANT! The included charger unit is designed for
use in an automobile’s 12-volt power outlet.
• Do not attempt to charge a battery pack while the
automobile is running.
• The charger is equipped with a 70” charging lead. It is
highly recommended that the charger be placed outside
of the vehicle while in use.
• NEVER LEAVE A CHARGER AND BATTERY PACK
UNATTENDED WHILE CHARGING.
• Use only the battery pack and charger intended for use
with the Reef Racer 2. In the event that you use a
different battery charger, charge this pack at a maximum
charge rate of 1.2 amps.
• Charge the battery pack only after it has been
fully discharged.
❏ 1. Plug the battery charger into an automobile’s 12-volt
power outlet as shown.
❏ 2. Join the battery and charger connectors as shown. Do
not force them together; they are designed to fit together only
one way.
❏ 3. Set the charger’s timer to 30 minutes. The red LED on
the charger will illuminate to indicate that charging is in
progress. It is a good idea to check the battery pack every five
(5) minutes. If at any time the battery pack becomes very hot
during the charging process, immediately unplug the charger
from the outlet and allow the battery to cool completely
before attempting to use.
❏ 4. After charging is completed, unplug the charger unit
from the outlet. Disconnect the battery and charger
connectors by pushing the small tab down while gently
pulling the connectors apart.
Antenna
Power
Light
On/Off
Throttle
Steering
Trim
Steering
Wheel
3
Page 4

❏ 5. The canopy is held to the deck of the Reef Racer 2 with
hook & loop material. Open the battery compartment of the Reef
Racer 2 by gently lifting the canopy as shown.
❏ 6. Each hatch lid is held in place by tabs. Twist the forward
lid until the tabs line up with the slots and gently lift the lid
from the deck as shown.
❏ 7. Plug the battery pack into the boat’s battery connector.
Do not force them together; they are designed to fit together
only one way. Place the battery pack in the battery tray with
the provided hook & loop material as shown.
❏ 8. Replace the forward hatch lid with the tabs lined up
with the slots and give it a twist to lock it in place.
CHECK OPERATION:
❏ 1. Turn the power “ON” to the transmitter and then the boat
(in that order). Place the canopy on top of the Reef Racer 2 hull
and make sure that the hook & loop material attach securely.
❏ 2. Standing behind the boat with both the Reef Racer 2 and
transmitter “ON”, rotate the wheel to the left. The back of the
rudder should move towards the left. Move the wheel to the
right. The back of the rudder should move towards the right.
❏ 3. Squeeze the trigger on the transmitter, the propeller
should turn in a counter-clockwise motion.
❏ 4. Turn the power “OFF” to your boat and then
your transmitter.
• NEVER attempt to swim after a stalled or capsized boat!
Wait patiently for the wind currents to return the boat to
shore or use a tennis ball attached to the end of a fishing
rod to retrieveit.
• It is dangerous to operate any R/C vehicle at any time that
there is insufficient light.
PLEASE READ BEFORE RUNNING
THE REEF RACER 2
4
Page 5

• R/C models produce vibrations which will cause screws,
nuts, bolts, etc, on your model to become loose over
time. It is important to make sure that all hardware is
secure before operating your model.
• The edges of the propeller are very sharp and can cut your
fingers if you are not careful. Never attempt to stop the
prop with your hand. In the event that weeds become
entangled in the propeller, turn the Reef Racer 2’s power
“OFF” before attempting to remove them.
• CAUTION: Your Reef Racer 2 may take on small amounts
of water, especially when running in rough water due to
high winds or when making tight turns. Keep a roll of
paper towels handy and dry out the hull interior after
every run.
• Total run time of the Reef Racer 2 is approximately 6-10
minutes (assuming you begin with a fully charged battery
pack). When you notice a decrease in power or sluggish
steering response, it means the battery pack is nearly
drained and it’s time to head for shore. As soon as the
boat reaches shore, turn off the power to the boat’s
receiver and transmitter (in that order).
• CAUTION: The motor and battery may be hot! Allow
them to cool for a few minutes before attempting to
remove the battery pack.
• After you are done running for the day, store your Reef
Racer 2 with both hatch lids removed to allow the
interior to dry out completely. If you fail to do this, it may
result in corrosion of the electronic components.
• IMPORTANT: If your boat takes on a large amount of
water causing the radio equipment to get wet, you must
do the following immediately: Remove the battery pack
and radio equipment from the boat. Allow the
components to air-dry completely before reassembling.
Reinstall the components and check for proper operation
before running the boat in water.
LAUNCH PROCEDURE:
❏ 1. Turn the power “ON” to the transmitter and then the
boat (in that order).
❏ 2. Gently place the boat in water that is at least 8" [200mm]
deep and free of obstacles (weeds, rocks, sticks, ducks,
muskrats, etc.).
❏ 3. Slowly advance the throttle to full speed and note if the
boat has a tendency to turn right or left. Adjust the steering
trim knob on your transmitter until the boat runs in a straight
line when the steering wheel is at neutral.
❏ 4. When finished running, be sure to turn the power “OFF”
to your boat and then the transmitter (in that order).
THE WAITING GAME
If your Reef Racer 2 should happen to stall, water currents will
slowly carry it to shore. The bad news is that the boat could
be carried to the opposite shore. When surveying areas to run
your Reef Racer 2, keep variables in mind such as wind
direction, size of the lake, strength of river currents, etc.
HELPFUL TIP:
Use a fishing rod with at least 12 lb. line and a tennis ball tied
to the end to retrieve a stalled boat.
GOOD LUCK AND GREAT BOATING!
It is important to periodically (every 10-15 battery packs)
remove the drive and rudder shafts and re-lubricate them with
a thin coat of petroleum jelly or light grease. This procedure
will require a 1.5mm hex driver. Make sure that power to the
boat is “OFF” during this procedure.
❏ 1. Twist the rear hatch lid until the tabs line up with the
slots and gently lift the lid from the deck and locate the rudder
horn as shown. Use a 1.5mm Allen wrench to loosen the
rudder horn set screw and pull the rudder away from the hull.
MAINTENANCE
5
Page 6

❏ 2. Loosen the 1.5mm set screw located at the rear of the
drive coupler assembly, and pull the shaft out as shown.
❏ 3. After applying lubricant to the shaft, re-insert the shaft
into the drive tube and rotate it while slowly pushing it back
into place.
❏ 4. Re-tighten the 1.5mm set screw on the coupler assembly,
making sure that the set screw rests on the flat spot of the
drive shaft.
❏ 5. Apply a small amount of lubricant to the rudder shaft and
re-install the rudder and the rudder arm. Re-tighten the
1.5mm rudder arm set screw.
To order replacement parts for the AquaCraft Reef Racer 2,
use the order numbers in the Replacement Parts List that
follows. Replacement parts are available only as listed and
can be purchased from hobby shops or mail order/ Internet
order firms. Hardware items (screws, nuts, bolts) are also
available from these outlets. If you need assistance locating a
dealer to purchase parts, visit www.hobbico.com and click on
“Where to buy”. If this kit is missing parts, contact Hobbico
Product Support at:
Phone: 217-398-8970
Fax: 217-398-7721
E-mail: productsupport@hobbico.com
REPLACEMENT PARTS LIST
Order # Item
HCAB6312 ..............Decal Sheet
HCAB6400 ..............Deck Lids (2)
HCAB6458 ..............White Canopy
HCAB6459 ..............Blue Canopy
HCAB6460 ..............Red Canopy
HCAB6461 ..............Yellow Canopy
HCAB6462 ..............Purple Canopy
HCAB6463 ..............Orange Canopy
HCAB7755 ..............Propeller Set
HCAB7756 ..............Driveshaft
HCAB8707 ..............Rudder w/Control Arm
HCAG1061 ..............180 Motor w/ Connectors
HCAM3500 .............7.2V 1100mAh Battery Pack
HCAM3501 .............Rx/ESC Channel A1
HCAM3502 .............Rx/ESC Channel A2
HCAM3503 .............Rx/ESC Channel A3
HCAM3504 .............Rx/ESC Channel A4
HCAM3505 .............Rx/ESC Channel A5
HCAM3506 .............Rx/ESC Channel A6
HCAP9919 ..............12V Field Charger
HCAZ3025 ..............Instruction Manual
Although it is very enjoyable to go out and run the Reef Racer 2
by yourself, we think the real fun and excitement is experienced
when you get involved in RACING!
Racing does not have to be an organized and sanctioned
competition to be fun. In fact, small informal races can be
very exciting without the stress that comes with formal events.
Here are some suggestions for setting up a simple racecourse
for boats:
• Make 2 to 4 simple and inexpensive “marker buoys” with
empty milk jugs, string and heavy objects for anchors, similar
to the above sketch.
RACING
ORDERING REPLACEMENT PARTS
6
GALLON-SIZE
PLASTIC MILK JUG
NYLON STRING
(ENOUGH TO REACH BOTTOM)
BOLT, ROCK OR HEAVY
OBJECT FOR ANCHOR
Page 7

• For “drag racing” place the buoys similar to the above sketch.
•For “oval racing” place the buoys similar to the above
sketch. NOTE: The above patterns are not based on any sort
of official standards; therefore, you may set up racecourses
any way you desire, using your imagination to make the races
more interesting. Usually the smaller courses will provide
more action and excitement.
The length of the races can be determined by a set number of
laps around the buoys (for example, the first boat to complete
5 laps is the winner); or by time (for example, whoever is
leading at the end of two minutes is the winner).
7
AquaCraft™Paradise™RTR
Length: 26 in (660mm)
Its high-quality fiberglass hull
sets it apart from other entrylevel boats - quick and easy
final assembly enables you
to set sail in no time! The
hull is already trimmed
and painted, the nylon
sails are preprinted,
ballast is installed and
the rigging is in place,
ready for connection.
A 2-stick radio by
Futaba®provides
precise sail and
rudder control; a
unique display
stand ensures that
the Paradise will
draw admiring
looks whether
on dry land or on
the water! Requires 12 “AA” batteries.
CHECK OUT THESE OTHER SENSATIONAL
AQUACRAFT BOATS!
AquaCraft™Pro Fisherman™RTR
From a distance, it would be easy to mistake the Pro Fisherman for the real thing. It sits on a display stand that looks like a
custom tow-behind, even to having the same sparkle metallic finish as the boat. Look on deck, and you’ll find swiveling seats
and a trolling motor in the bow. Check out the stern, and you’ll find a big EP outboard that hides a water-cooled 550 motor
and bearing-supported drive train. Includes a 2-channel radio made by Futaba®, reversible ESC, push-pull steering linkage and
a choice of six colorful finishes! Requires a 6-7 cell battery, charger and 8 “AA” cells. Length: 26.2" (665mm). HCAB11**
HCAB01**
Page 8

CHECK OUT THESE OTHER SENSATIONAL AQUACRAFT BOATS!
Check us out on the web at www.aquacraftmodels.com and watch for more exciting AquaCraft releases coming soon!
AquaCraft™Hammer™EP RTR
“Strike hard, strike fast” - that’s the Nitro Hammer’s slogan,
but it’s good for this 24" (610mm) electric, too. Batteries are
the only thing you need to buy or install; everything else is
already covered: assembly, finishing, a display stand and
more. Gear for the AquaCraft 2-channel radio is installed, as
is a water-cooled 550 motor and ESC w/reverse. Great for all
skill levels and available in six exciting colors. Requires a
6- or 7-cell battery, charger and 8 “AA” cells. HCAB10**
AquaCraft™Nitro Hammer™GP RTR
Factory-built and finished in one of six custom colors, the Nitro
Hammer includes virtually everything needed for high-speed
fun: an AquaCraft 2-channel radio by Futaba®, a fuelproof
fiberglass hull, engine stand, power-boosting tuned pipe and a
FREE video that shows you how to break-in and maintain the
included, recoil-started AquaCraft .15 Marine engine. Just 24"
(610mm) long, the Nitro Hammer requires 20% glow fuel, a
glow starter and 12 “AA” batteries. HCAB26**
AquaCraft™Bristol Bay RTR
From the real cloth sails to the simulated wood
deck, the 33.5" (850mm) Bristol Bay offers the
look of a working fishing vessel. Authentic scale
details are painted and applied; the fiberglass
hull is painted and the cabin features working
mast and cabin lights. It takes only minutes to
install the mast and connect the rigging and
only a few more to install batteries. Everything
else is already ship-shape, including a 550
motor, direct drive system, reversible ESC and
gear for the included 2-channel pistol radio by
Futaba®. Requires a 6-cell battery, charger & 10
“AA” batteries. HCAB60**
 Loading...