

Page 1
Apple Technician Guide
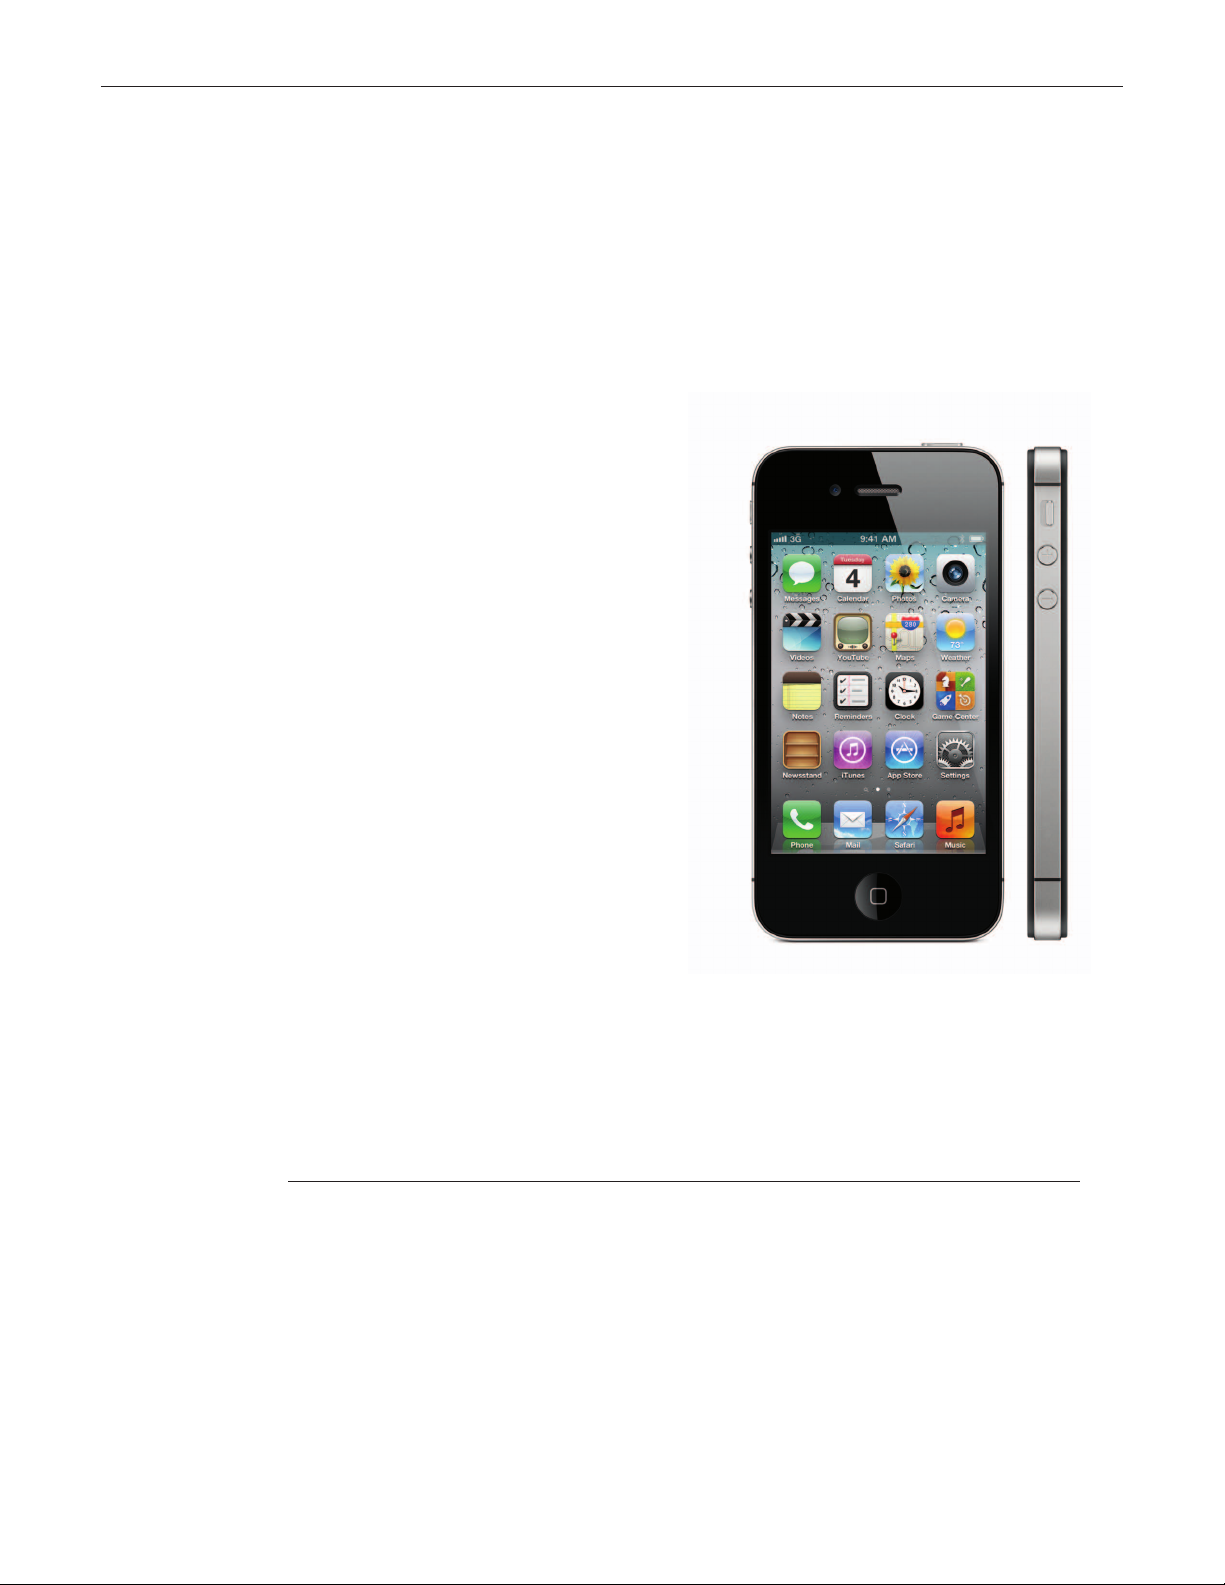
iPhone 4
iPhone 4 and iPhone 4S
ADN 070-2840-C
Updated: 2012-02-21
Page 2

Apple Inc.
© 2011-2012 Apple Inc. All rights reserved.
Under the copyright laws, this document may not be copied, in whole or in part, without the
written consent of Apple.
Every eort has been made to ensure that the information in this document is accurate. Apple
is not responsible for printing or clerical errors.
Apple
1 Innite Loop
Cupertino, CA 95014-2084
USA
+ 1 408 996 1010
www.apple.com
Apple, the Apple logo, iPhone, iOS, iTunes, iCloud, Mac, Macintosh, and Mac OS X are trademarks
of Apple Inc., registered in the U.S. and other countries.
Page 3

iPhone 4
Contents
About This Guide
Updates 9
Updated 21 February 2012 9
Updated 16 November 2011 9
Introduced 14 October 2011 10
Note About Images In This Guide 10
Feedback 11
Basics
Overview 13
Scope of this Document 13
iPhone Model Feature Dierences 13
iPhone 4/4S at a Glance 13
System Requirements 14
Identifying iPhones 15
Model Dierences 15
Serial Number and IMEI/MEID Location 16
Conguration Codes 18
Apple ID 19
Additional Resources 20
Troubleshooting
Cleaning Procedures 22
General Troubleshooting 25
Backup User Data 25
Common Troubleshooting Procedures 26
Charge Battery 27
Restart 28
Reset 28
Force Quit an App 29
Erase All Content and Settings 30
Restore 31
Recovery Mode Restore 31
DFU Restore 33
Page 4

Symptom Charts 34
Power Issues 34
No Power 34
Battery Will Not Charge 36
Battery Life Too Short 38
Other Power Issue 39
Display Issues 40
No Video / Poor Image 40
Display Anomalies 41
Multi-Touch Issues 42
Display Rotation Issues 43
Cracked Glass 44
Other Display Issue 45
Mechanical Issues 46
Button Issues 46
Camera Issues 48
Temperature Alert 50
Burnt Smell/Odor 51
Band Split/Oset 52
Other Mechanical Issue 52
Software Issues 53
Unexpected Freeze/Restart/Power O, “Connect to iTunes” 53
Alert Messages on Device or in iTunes 55
App Issues 56
Cannot Play Media 57
Other Software Issue 58
Connectivity Issues 59
iTunes Sync Issues 59
Wi-Fi Issues 61
Bluetooth Issues 63
Cellular Call/Text Issues 64
Cellular Data Issues 66
SIM Card Issues 68
Other Connectivity Issue 69
Sound Issues 70
No Ringer Sound 70
No Vibrate 71
Speaker/Receiver Issues 72
Microphone Issues 74
Headphone Issues 76
Headphone Microphone Issues 78
Other Sound Issue 80
Accessories Issues 81
“Accessory not made to work” 81
TV/Video Out Issues 82
Other Accessories Issue 83
Page 5

Take Apart
General Information 85
Before You Begin 85
Electrostatic Discharge Precautions 85
Required Tools 85
Safety 86
Battery Handling 86
Broken Glass Handling 87
Take Apart – iPhone 4 (GSM model)
Internal View 89
Service Parts 90
Back Cover Identication 91
SIM Tray 93
Back Cover 94
Removal 95
Reassembly 96
Internal Checks 98
Internal Liquid Contact Indicators 98
Missing Internal Parts 98
Serial Number Barcode 99
Main Camera 100
Removal 101
Reassembly 103
Vibe Motor 106
Removal 107
Reassembly 108
Battery 109
Removal 110
Reassembly 112
Page 6

Take Apart – iPhone 4 (CDMA model)
Internal View 120
Service Parts 121
Back Cover Identication 122
Back Cover 123
Removal 124
Reassembly 125
Internal Checks 127
Internal Liquid Contact Indicator 127
Missing Internal Parts 127
Serial Number Barcode 128
Main Camera 129
Removal 130
Reassembly 132
Battery 135
Removal 136
Reassembly 138
Take Apart – iPhone 4S
Internal View 146
Service Parts 147
SIM Tray 149
Back Cover 150
Removal 151
Reassembly 152
Internal Checks 154
Internal Liquid Contact Indicator 154
Missing Internal Parts 154
Serial Number Barcode 155
Volume Button Shim 156
Main Camera 159
Removal 160
Reassembly 162
Battery 165
Removal 166
Reassembly 168
Page 7

Verication Testing
Completing a Repair 176
Test Functionality 176
Verify Cellular Account 176
Clean Device 176
Handle Defective Parts 176
Carrier Screening 177
Required Tools 177
Computer Setup for Restoration Process 178
Cosmetic Protection 179
Functional Testing for Carriers 179
Functional Testing 182
Test Multi-Touch and Accelerometer 182
Test Buttons and Switches 183
Test Ambient Light Sensor 183
Test Proximity Sensor 183
Test Wi-Fi 184
Test Bluetooth 184
Test GPS 185
Test Compass 185
Test Audio Playback 186
Test Audio Recording 186
Test Video Playback 187
Test Video Out 187
Test Main Camera 187
Test Front Camera 188
Page 8

Apple Technician Guide
About This Guide
iPhone 4
© 2011 Apple Inc. All rights reserved.
Page 9

Updates
Updated 21 February 2012
Cover Page: Changed document number to version 070-2840-C.
Troubleshooting:
• Removed Visual Mechanical Inspection section. This information is now available in
the separate iPhone Visual Mechanical Inspection Guide. As of this update, the current
version of the iPhone VMI document is 070-2515-E.
• Cleaning: Added warning not to use long metal tools (such as screwdrivers or dental picks)
while cleaning inside the headphone jack, as this could lead to battery puncture.
• Mechanical > Button Issues: Deep Dive step 2: added image and text “With display o,
press center of Home button and verify that display turns on. Repeat same test for the top,
bottom, left and right edges of Home button (3, 6, 9, 12 in image at left). The display should
turn on when pressing any of these 5 locations.”
Take Apart:
• General Information > Required Tools: Replaced old xture with new iPhone 4 Battery
Fixture (923-0075).
• Battery chapters: Updated procedures to use new iPhone 4 Battery Fixture.
Updated 16 November 2011
Cover Page: Changed document number to version 070-2840-B.
Basics:.
• Identifying iPhones > Serial Number and IMEI/MEID Location: Added text to table in
item #4: “Use Motorola DS6707 Scanner (Apple part #922-9230) to scan the barcode of
iPhone 4 (GSM model).”
Troubleshooting > Symptom Charts:
• Power > Battery Life Too Short: Reversed Yes/No actions for Deep Dive step 1.
• Display > Multi-Touch Issues: Reversed Yes/No actions for Deep Dive step 1.
• Mechanical > Button Issues: Deep Dive step 4, no result: added text “For iPhone 4S volume
button issues, try installing Volume Button Shim”.
Take Apart:
• General Information > Required Tools: Added “Motorola DS6707 Scanner (922-9230) for
iPhone 4 (GSM model) serial barcode”.
• SIM Tray chapters: Added image and text “Note: The original SIM tray shows the device’s
IMEI/MEID and serial number.”
• Internal Checks chapters:
2012-02-21
iPhone 4 — Updates 9
Page 10

• Changed “Internal Liquid Contact Indicators” text to “If the LCI is activated (red), it
indicates contact with liquid, which can cause damage that is not covered under
warranty and is not eligible for modular repair, but is eligible for Out-of-Warranty
(OOW) paid whole unit replacement.”
• Added new section to show location of internal serial number barcode.
• iPhone 4 (GSM model) Service Parts: Corrected Torx Security Screw Kit part# to 922-9634.
• iPhone 4S Service Parts:
• Added camera pan to list of camera kit contents.
• Added volume button shim 923-0072.
• iPhone 4S Main Camera: Changed First Steps note and removal step 7 to align with service
part kit contents. A new camera includes a new pan.
• iPhone 4S Volume Button Shim: Added new shim procedure for volume button issues.
Verication Testing:
• Carrier Screening > Computer Setup for Restoration Process: Updated Media Bundle le
name to “063-6545-C.zip”.
• Functional Testing > Test Audio Playback: Corrected missing words in “Note: If distortion
or a missing channel is found during testing, inspect for contaminants in audio jack
preventing proper electrical connection.”
Introduced 14 October 2011
Combined and updated the following documents into a single new document. Rewrote
troubleshooting symptom charts. Updated text and screenshots for iOS 5 and OS X Lion.
Added information and take-apart procedures for the new iPhone 4S.
• 070-2515-D iPhone Visual Mechanical Inspection (VMI)
• 070-2761-B Apple Technician Guide for iPhone
• 070-2616-B iPhone Disassembly Guide
• 070-2618-F Modular Repair Guide for iPhone 4 (GSM model)
• 070-2730-C Modular Repair Guide for iPhone 4 (CDMA model)
• 070-2636-D Functional Screening Guide for iPhone 4 (GSM model)
• 070-2732-C Functional Screening Guide for iPhone 4 (CDMA model)
Note About Images In This Guide
Screenshots and other graphics are for illustration purposes only and may not show current or
observed dialog boxes, wordings, values, versions, models, capacities, and may be for a dierent
model than you are testing. However the steps and sequences are the same unless noted.
2012-02-21
iPhone 4 — Updates 10
Page 11

Feedback
We want your feedback to help improve this and future Technician Guides!
Please email any comments to: [email protected]
2012-02-21
iPhone 4 — Feedback 11
Page 12

Apple Technician Guide
Basics
iPhone 4
© 2011 Apple Inc. All rights reserved.
Page 13
Overview
Scope of this Document
This Apple Technician Guide provides troubleshooting steps, take apart procedures and other
information about iPhone 4 and iPhone 4S. It is designed to be used in conjunction with the
iPhone Visual Mechanical Inspection guidelines (070-2515).
The iPhone (original), iPhone 3G and iPhone 3GS are covered in a separate document.
iPhone Model Feature Dierences
iPhone 4 introduced a faster A4 chip, high-resolution 960x640 Retina display, 5MP camera with
LED ash, VGA front camera, and FaceTime. Separate models are available for GSM and CDMA
networks.
iPhone 4S introduced a faster dual-core A5 chip, 8MP camera with 1080p HD video recording,
and Siri voice assistant. iPhone 4S is a world phone for both GSM and CDMA networks.
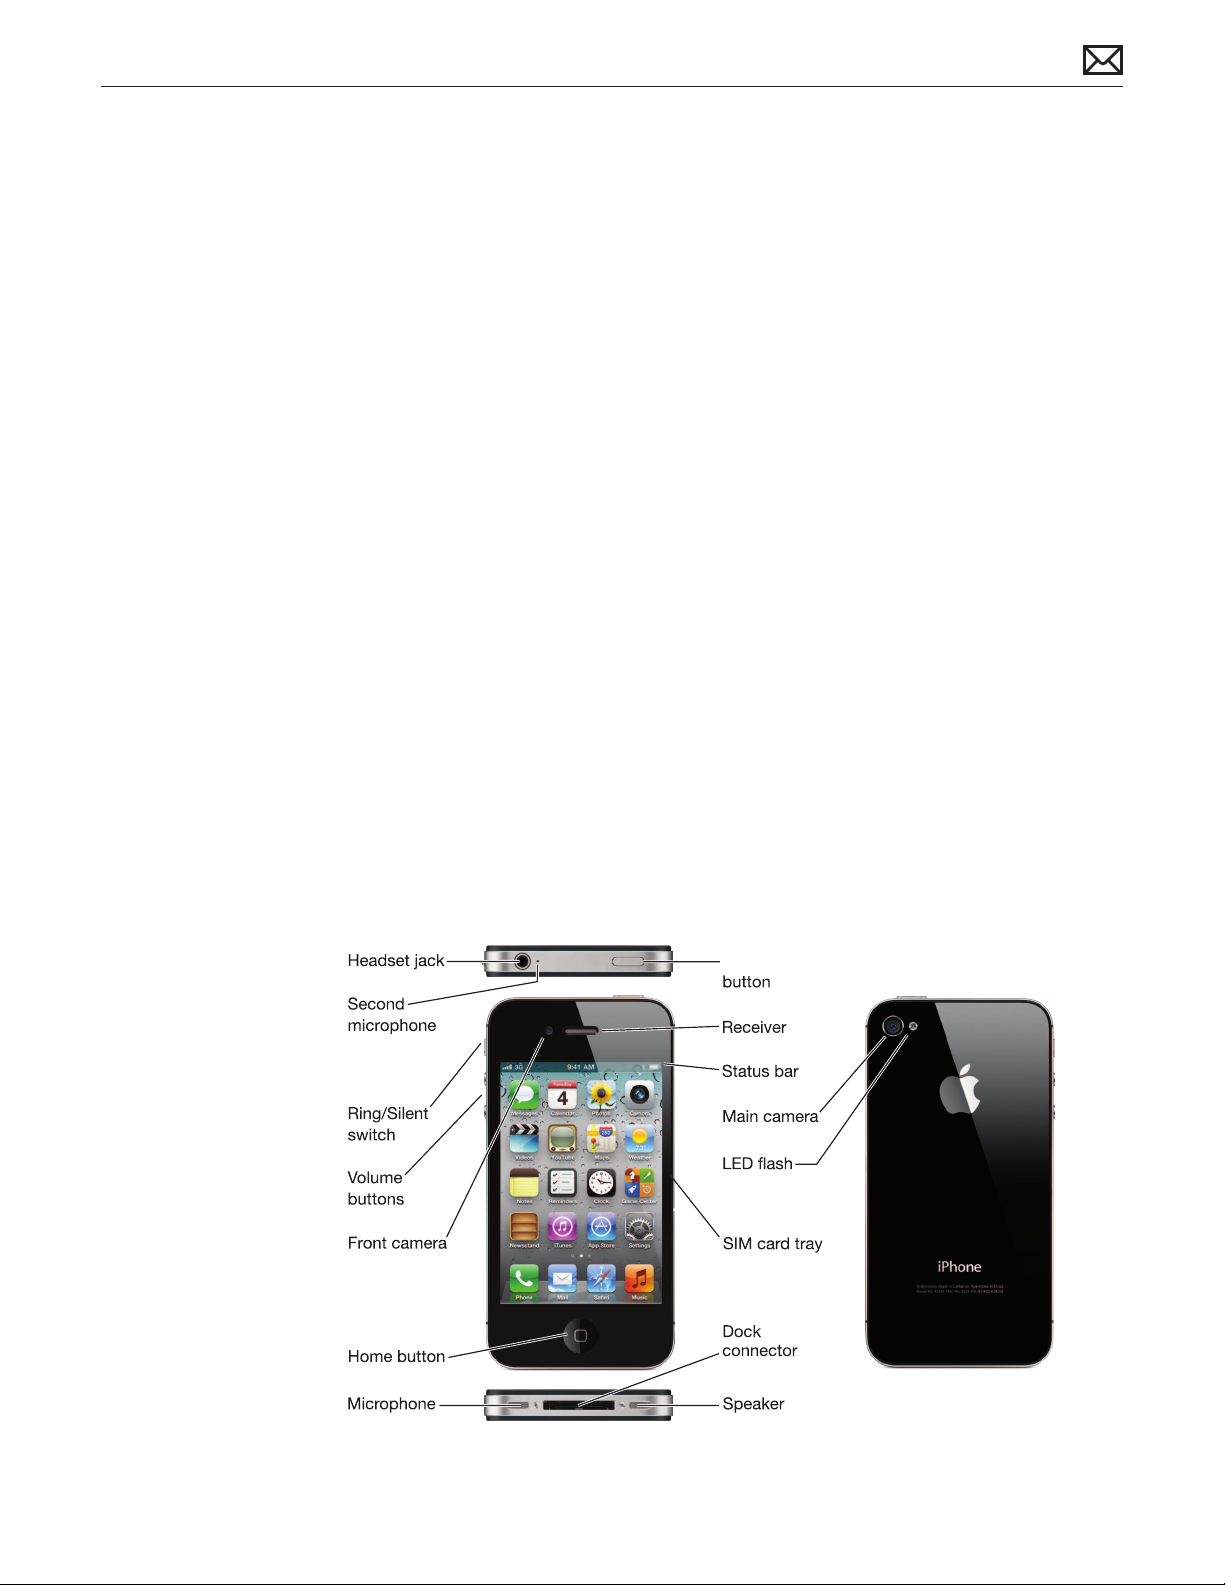
iPhone 4/4S at a Glance
On/Off
not in iPhone 4
(CDMA model)
2012-02-21
iPhone Basics — Overview 13
Page 14

System Requirements
Mac
• Mac computer with USB 2.0 port
• Mac OS X v10.5.8 or later
• The latest version of iTunes (free download from www.itunes.com/download)
• iTunes Store account
• Internet access
Windows
• PC with USB 2.0 port
• Windows 7; Windows Vista; or Windows XP Home or Professional with Service Pack 3 or later
• The latest version of iTunes (free download from www.itunes.com/download)
• iTunes Store account
• Internet access
2012-02-21
iPhone Basics — Overview 14
Page 15
Identifying iPhones
Model Dierences
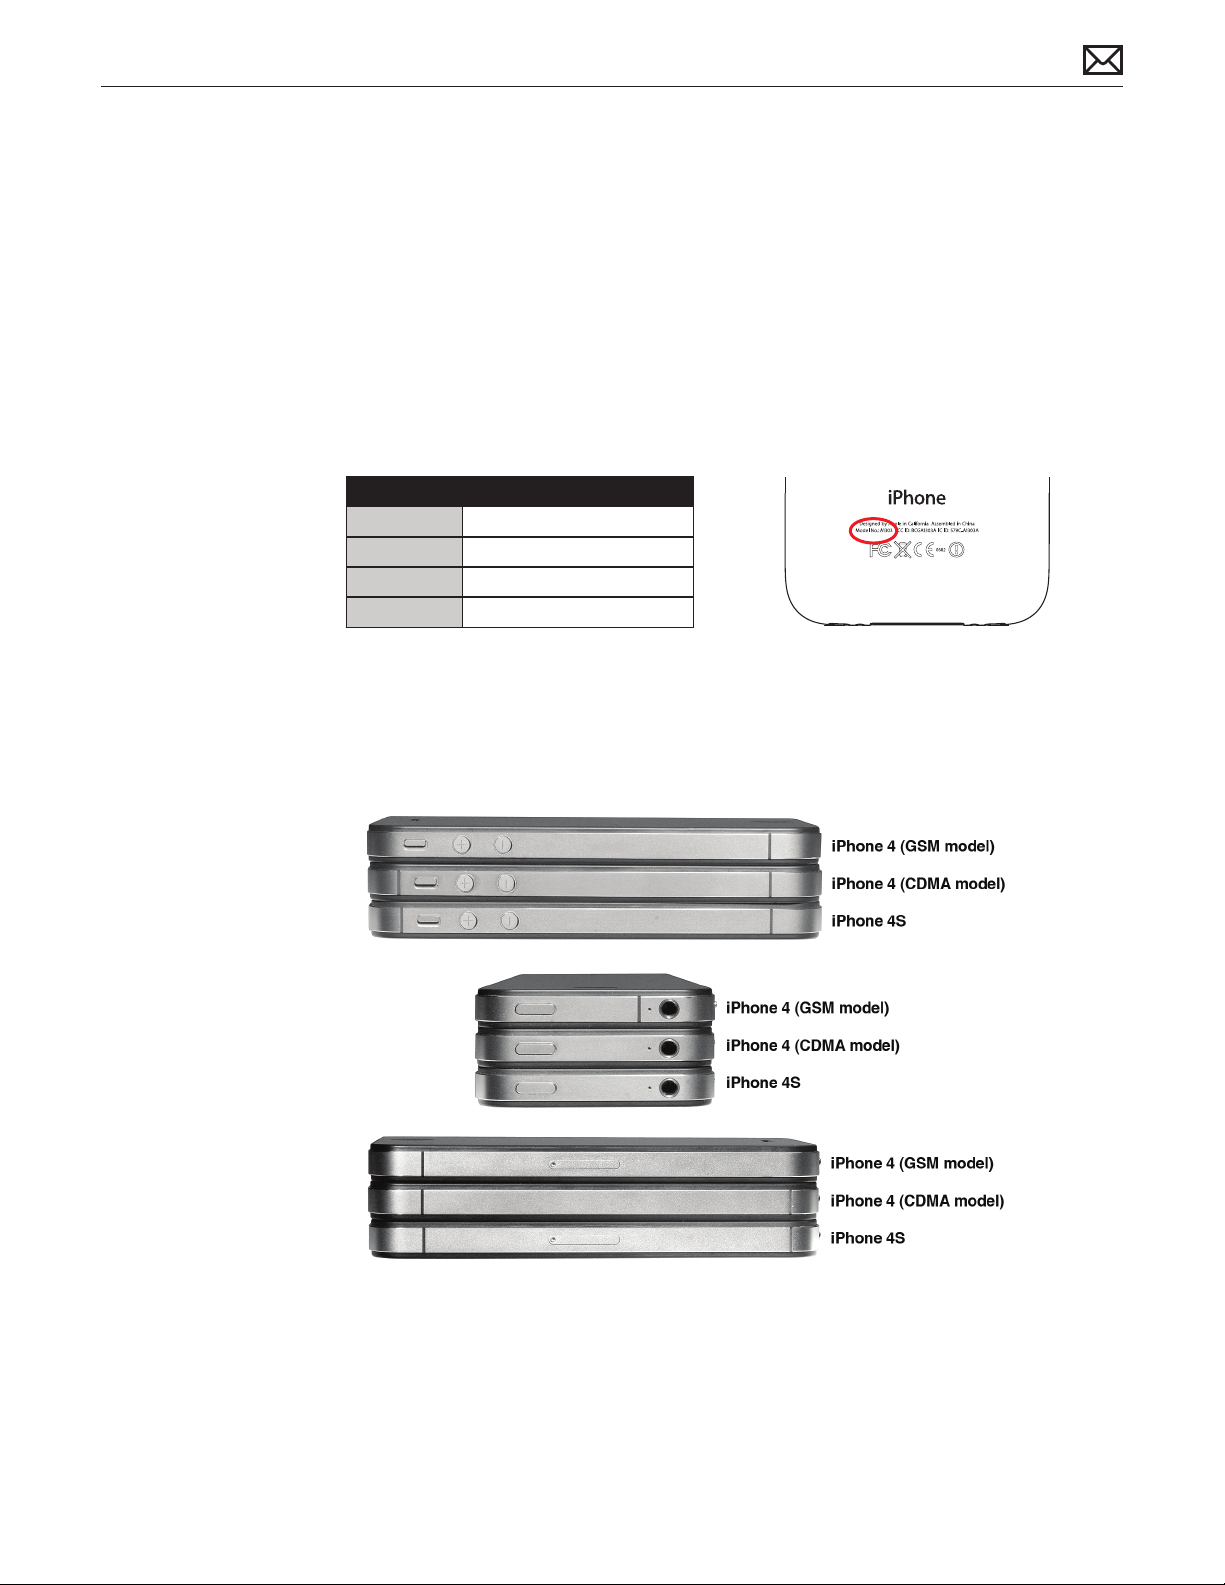
iPhone models can be identied by model number, which is printed on the back cover:
Model # iPhone Model
A1332 iPhone 4 (GSM model)
A1349 iPhone 4 (CDMA model)
A1387 iPhone 4S
A1431 iPhone 4S (China only)
IPhone 4/4S models can also be visually dierentiated by:
• The presence or lack of a SIM card tray. IPhone 4 (GSM model) and iPhone 4S have a SIM
card tray on the right edge, whereas iPhone 4 (CDMA model) does not.
• The dierent positioning of joints on the metal band (see all images below).
2012-02-21
iPhone Basics — Identifying iPhones 15
Page 16
Serial Number and IMEI/MEID Location
iPhones that use GSM technology have an IMEI, or International Mobile Equipment Identity.
iPhones that use CDMA technology have an MEID, or Mobile Equipment Identier. Both IMEI
and MEID have the same function: to uniquely identify a mobile device on a cellular network.
There are several ways to get iPhone’s serial number and IMEI/MEID. See Apple Support article
HT1267: iPhone: Locating the serial number, IMEI, ICCID or MEID
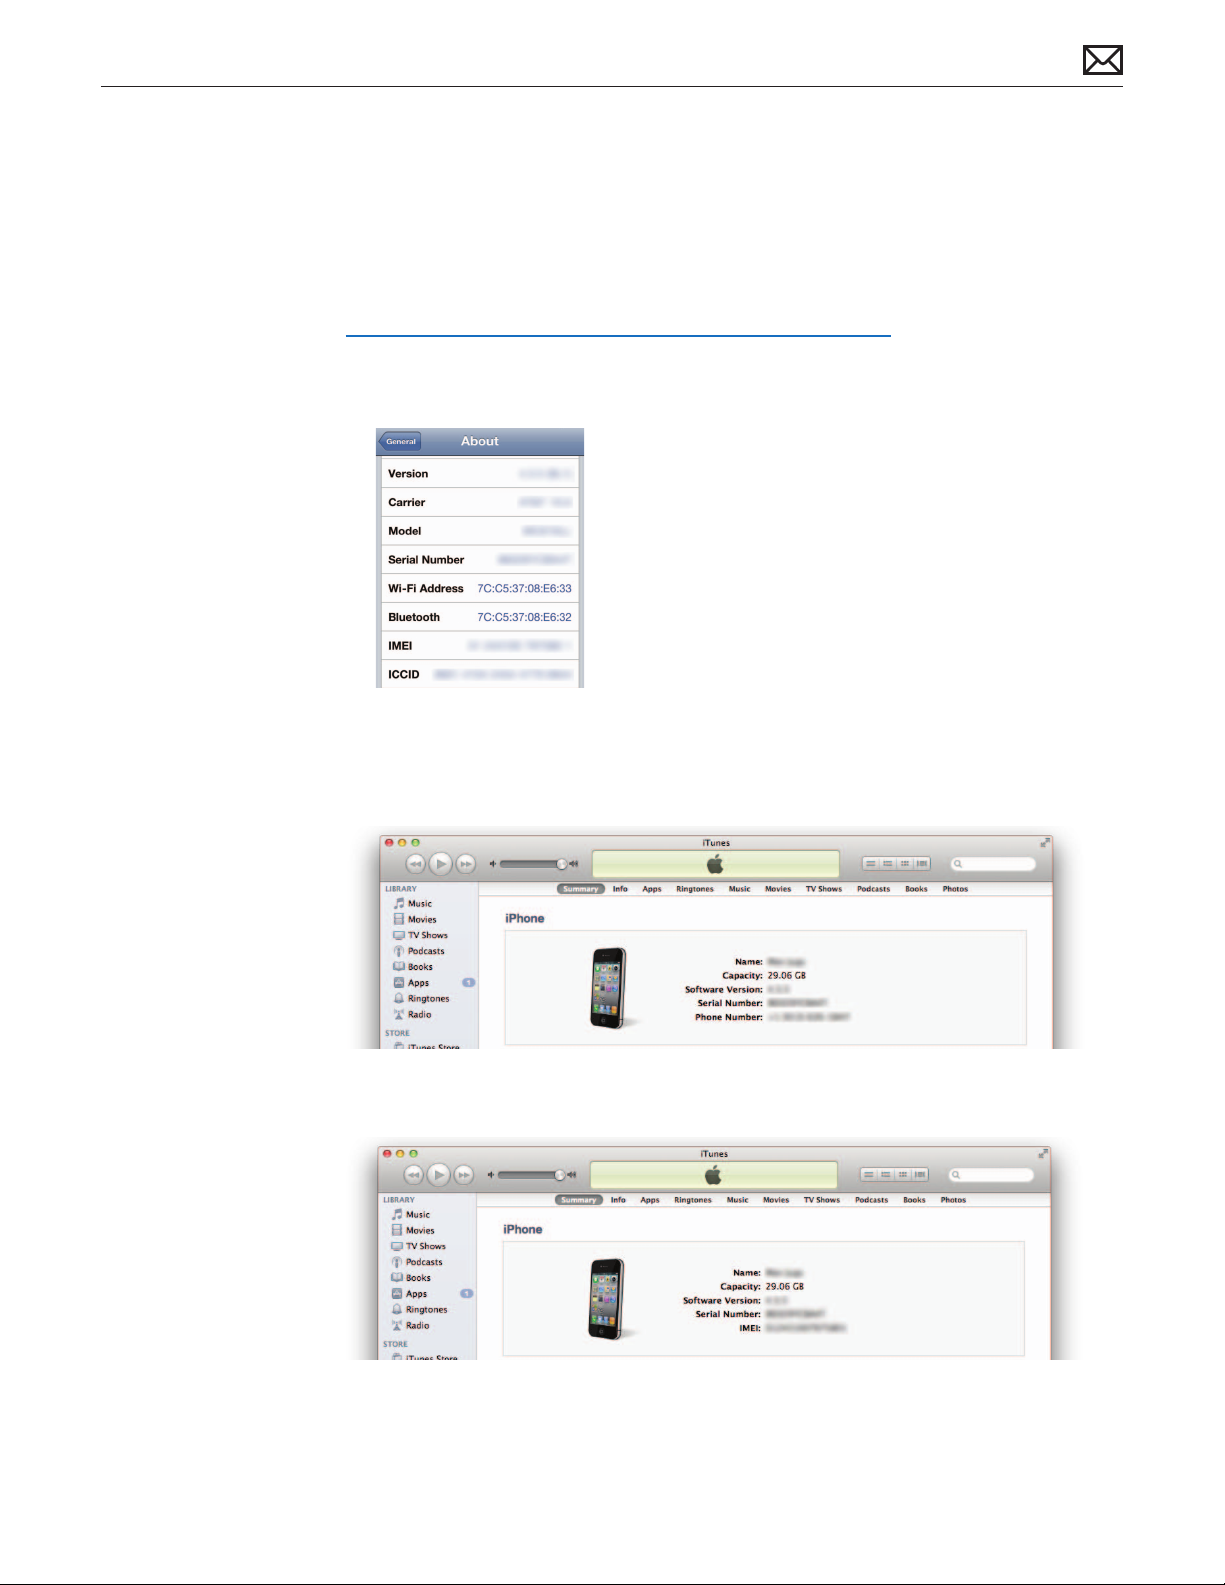
1. If iPhone is operational, the serial number, IMEI/MEID and ICCID can be found in
Settings > General > About
2. With iPhone connected to a computer, in iTunes, click the Summary tab. iPhone’s serial
number and phone number will display on screen.
Note: You can choose Edit > Copy to put the serial number on the Clipboard.
If you click the “Phone Number” text, iTunes will display iPhone’s IMEI/MEID:
2012-02-21
If you then click the “IMEI (or MEID)” text, iTunes will display iPhone’s ICCID.
iPhone Basics — Identifying iPhones 16
Page 17
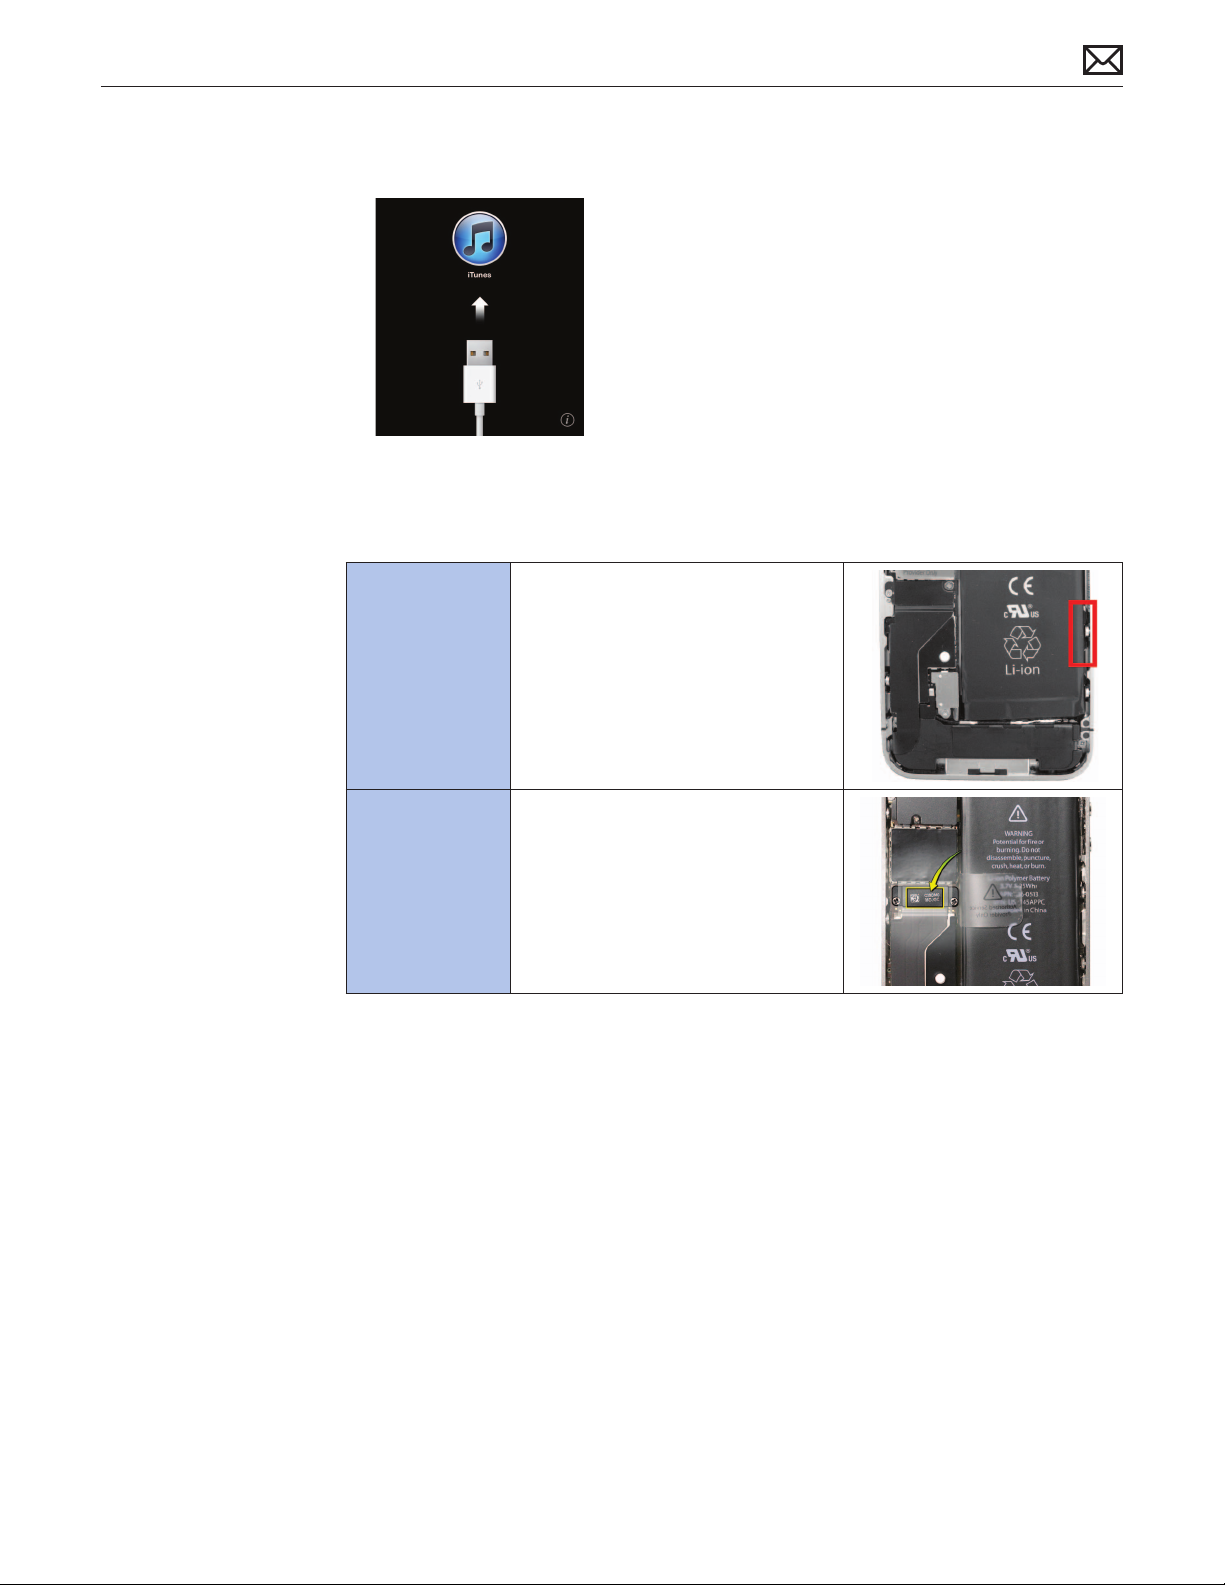
3. If iPhone is displaying the “Connect to iTunes” screen, tap the ‘i” in a circle at the lower right
of the screen to view the IMEI/MEID and ICCID.
4. If iPhone 4 is not operational, the serial number can be found by removing the back cover.
See the Take Apart section of this document for step-by-step instructions. Use the serial
number to look up the IMEI/MEID and ICCID.
iPhone 4
(GSM model)
iPhone 4S and
iPhone 4
(CDMA model)
With the back cover removed, the
serial number is printed in barcode
format on the band, on the right side
of the battery well.
Use Motorola DS6707 Scanner (Apple
part #922-9230) to scan the barcode of
iPhone 4 (GSM model).
With the back cover removed, the
serial number is printed in both
human-readable and 2D barcode
formats on a label beneath the battery
pull tab.
2012-02-21
iPhone Basics — Identifying iPhones 17
Page 18

Conguration Codes
All iPhone models have a unique conguration code (the last 3-4 characters of the serial
number), specic for each model type, color and capacity. The conguration code (listed in the
table below) is the best way to precisely determine which model is being serviced.
Note: An iPhone that has been modied to alter functionality or capability without the
written permission of Apple is not eligible for warranty service. This may be indicated by a
signicantly dierent capacity shown in Settings > General > About, compared to the capacity
listed on the back of the unit, or by mismatched serial numbers. (The modication may have
been performed by an unauthorized service center, of whom the user is unaware.)
iPhone Conguration Codes:
(last 3-4 characters of the serial number)
iPhone 4
Model A1332
GSM CDMA GSM MM (CDMA)
8GB Black DP0N DP0V
8GB White DPMW DPNG
iPhone 4
Model A1349
iPhone 4S
Models A1387 and A1431*
16GB Black A4S DDP7
16GB White DZZ DDP8
32GB Black A4T DDP9
32GB White E00 DDPC
64GB Black
64GB White
*Model A1431 is only available in China.
DT9V
DT9Y
DTC0
DTD0
DTD1
DTD2
DTD5
DTD6
DTD7
DTDC
DTDD
DTDF
DTDK
DTDL
DTDM
DTDR
DTDT
DTDV
DTC1
DTF9
DTD3
DTFC
DTD8
DTFD
DTDG
DTFF
DTDN
DTFG
DTDW
DTFH
2012-02-21
iPhone Basics — Identifying iPhones 18
Page 19

Apple ID
Many iOS 5 features require an Apple ID, including:
• Home Sharing
• iCloud
• iMessage
• iTunes and App Stores
While troubleshooting, you may isolate a user’s issue to his or her Apple ID. You should help
users resolve issues with their existing Apple IDs, instead of creating new ones. Creating a new
Apple ID for a user who already has one can confuse the user, cause the creation of multiple
iTunes and App Store accounts, and reduce the amount of Apple IDs available for others.
Refer users who don’t know if they have Apple IDs to appleid.apple.com, where they can do
the following:
• Find out if he or she has an Apple ID
• Reset his or her Apple ID password
• Manage the information associated with his or her Apple ID
A user who has any of the following, already has an Apple ID and you should not help create a
new one:
• Free Find My iPhone account
• FaceTime account
• Game Center account
• Mac App Store account
• Apple Online Store account
• iTunes Store account
• Apple Jobseeker account
• iChat account
• Active or expired MobileMe account
2012-02-21
iPhone Basics — Apple ID 19
Page 20

Additional Resources
iPhone Product Page
iPhone features and technology.
www.apple.com/iphone/
iPhone Support Page
Information, guides, assistants, and troubleshooting tips.
www.apple.com/support/iphone/
iPhone Technical Specications
The latest system requirements, supported languages, media formats, and technical details.
www.apple.com/iphone/specs.html
support.apple.com/specs/#iphone
iPhone User Guide
Easy to access, in-depth usage instructions for features and settings.
support.apple.com/manuals/#iphone
How to Sync iPhone and other iTunes topics
www.apple.com/itunes/how-to/
About iPhone Batteries
www.apple.com/batteries/iphone.html
2012-02-21
iPhone Basics — Additional Resources 20
Page 21

Apple Technician Guide
Troubleshooting
iPhone 4
© 2011 Apple Inc. All rights reserved.
Page 22
Cleaning Procedures
Required Tools
• Lighted otoscope (or lighted magnifying glass)
• ESD-safe brush (922-9918)
• ESD-safe tweezers
• Micro-ber cloth
CAUTION: Never use compressed air to clean any part of an iPhone, as this can damage
delicate components.
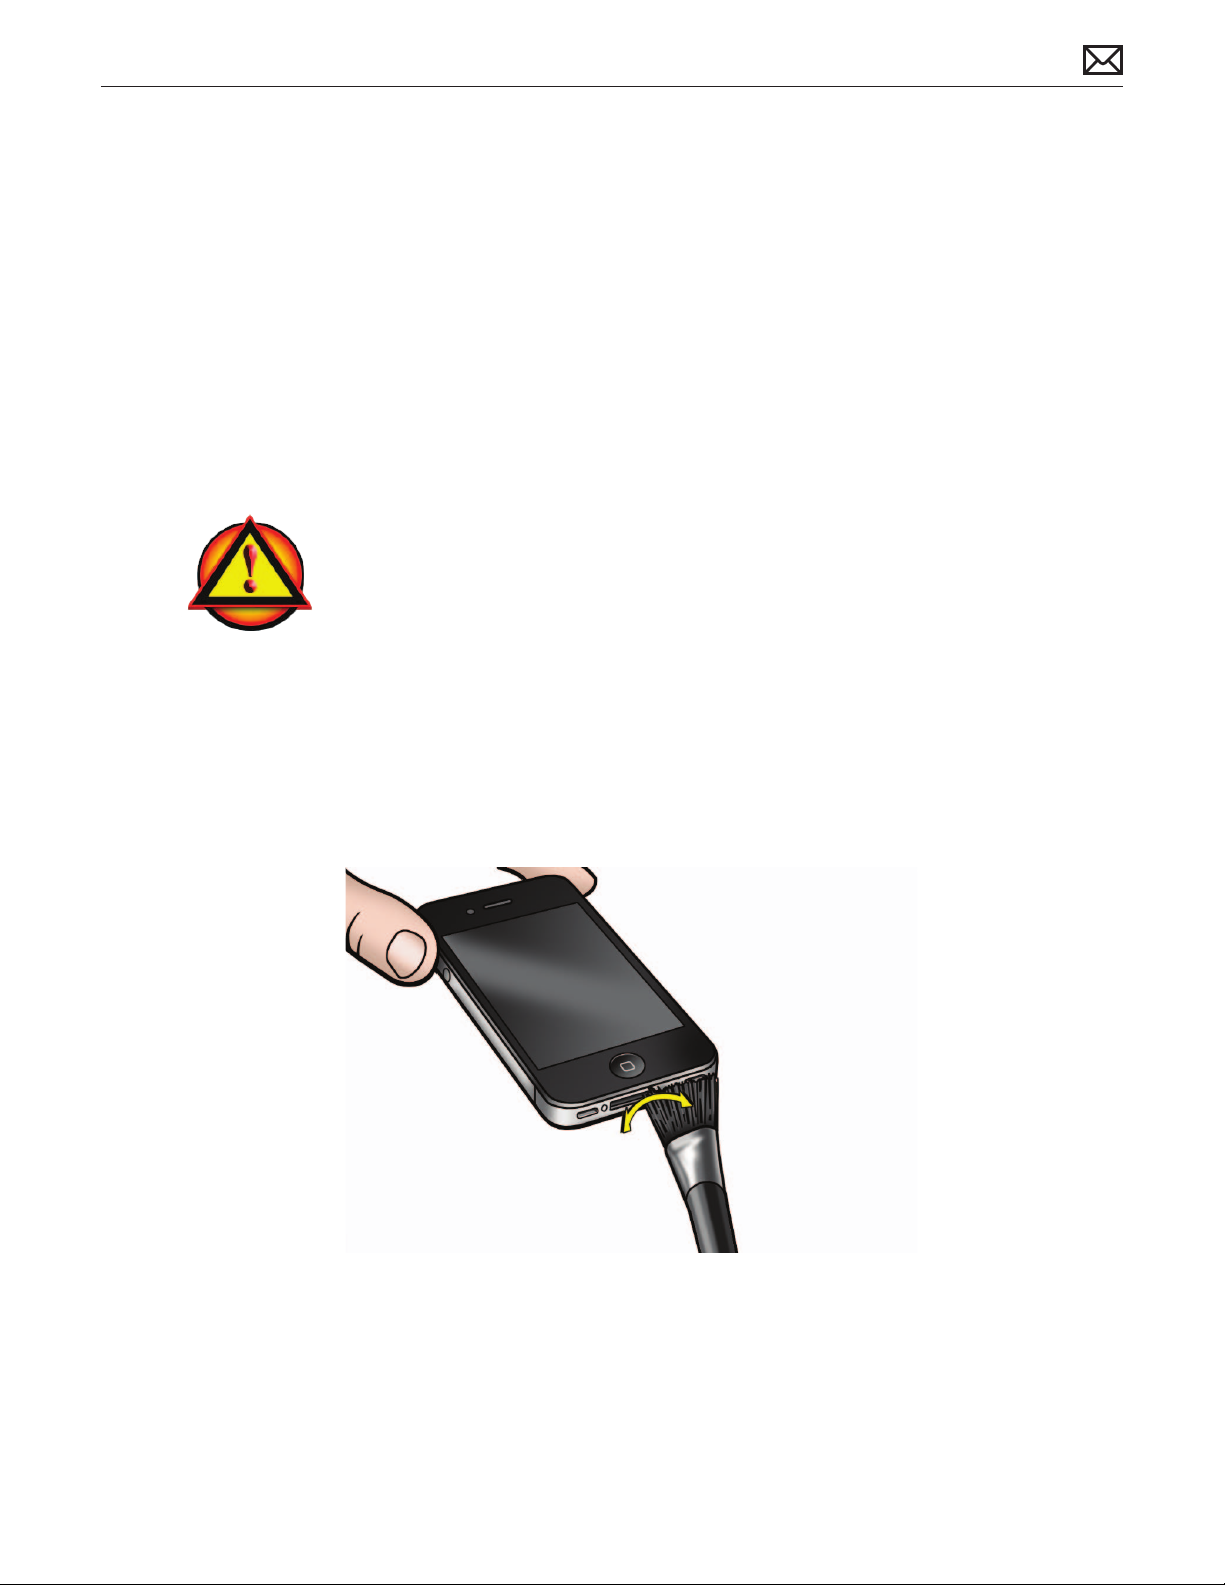
Dock Connector
1. Power o iPhone (red slider).
2. Use a lighted otoscope or magnifying glass to inspect for debris that may be causing issues.
3. Use an anti-static brush to delicately brush out lint or debris. Be careful not to damage the
contacts along the top of the connector pin rail. Avoid brushing debris into the speaker or
microphone located on either side of the dock connector.
4. If needed, use anti-static tweezers to pull out any large pieces of lint or debris.
2012-02-21
iPhone 4 Troubleshooting — Cleaning Procedures 22
Page 23
Headphone Jack
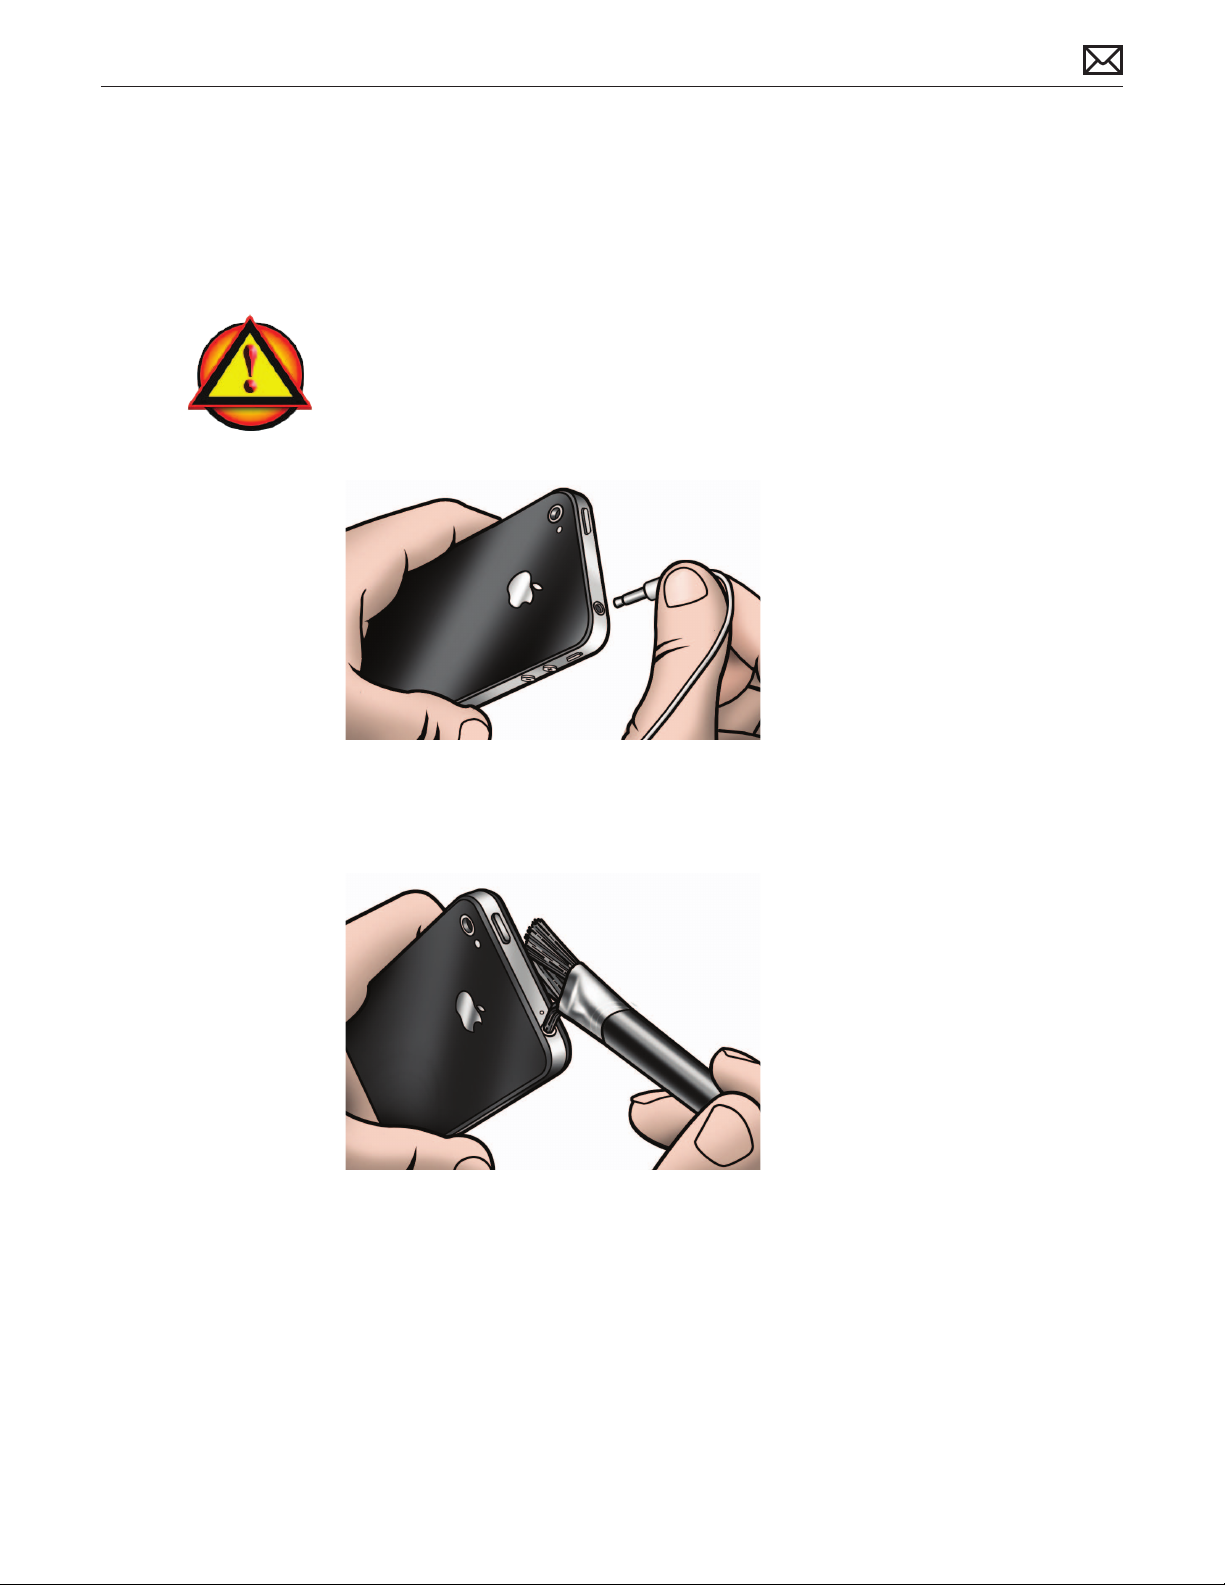
Foreign material in the headphone jack can cause audio or functional issues, such as:
• iPhone is stuck in headphone mode and no audio is heard from receiver or speaker.
• Headphone audio is distorted (static or crackles) or is not functioning.
• Headphone audio is only heard in one channel.
• Headphone microphone has distorted sound or is not functioning.
WARNING: Do not use long metal tools (such as screwdrivers or dental picks) while
cleaning inside the headphone jack, as this could lead to battery puncture.
1. Insert headphone plug into jack and verify that it can be inserted fully.
2. Use a lighted otoscope or magnifying glass to inspect for debris that may be causing issues.
3. Use an anti-static brush to brush out lint or debris. Use just enough bristles to t inside the
headphone jack, and twist the bristles to loosen and lift out debris.
2012-02-21
iPhone 4 Troubleshooting — Cleaning Procedures 23
Page 24
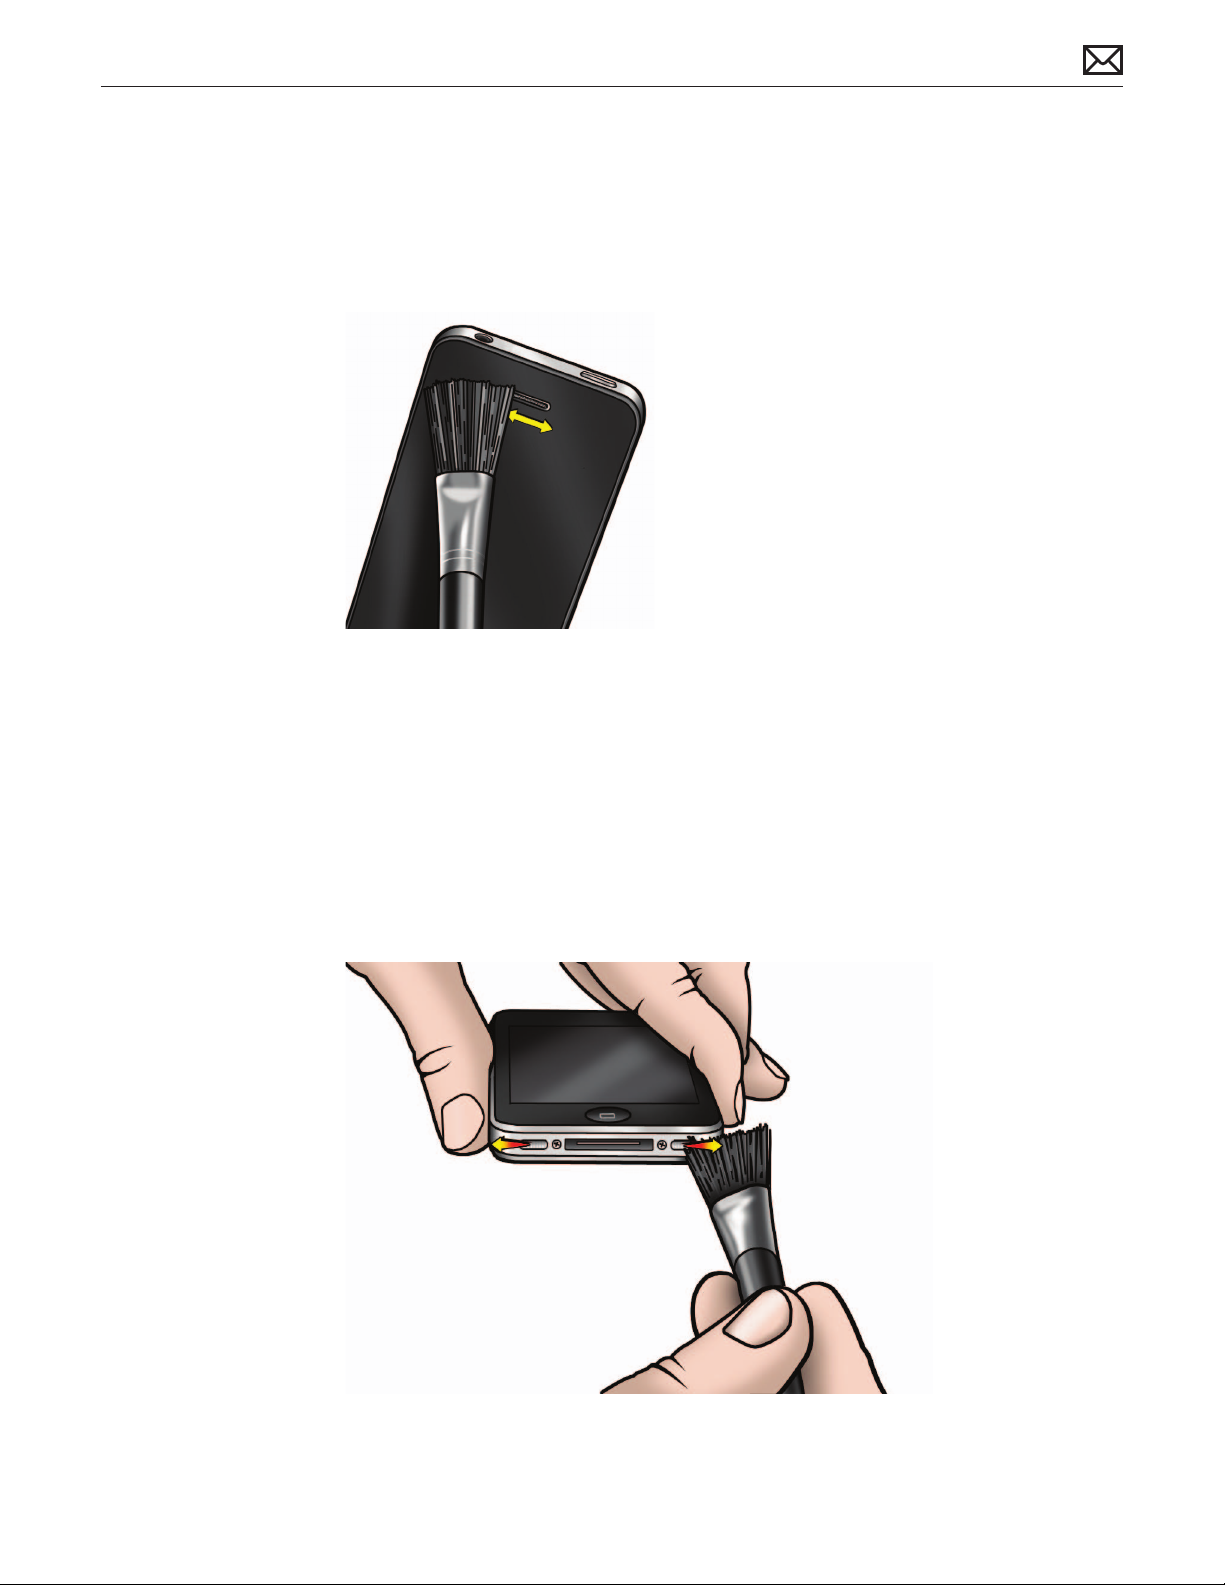
Receiver
1. Inspect the receiver for loose debris.
2. Use an anti-static brush to gently brush the cover mesh of the receiver to remove debris.
Avoid using large sweeping motions across the glass, as this could lead to scratches.
3. Use a micro-ber cloth to clean away the loosened debris.
Speaker and Microphone
Foreign material can cause audio performance issues, such as:
• Low or distorted speaker volume while playing music or during a hands-free call.
• Mued, low volume or distorted microphone.
1. Use an anti-static brush to gently brush the cover mesh of the microphone and/or speaker.
Do not cross over the dock connector to avoid brushing debris into the dock connector.
2. Use a micro-ber cloth to clean away the loosened debris.
2012-02-21
iPhone 4 Troubleshooting — Cleaning Procedures 24
Page 25
General Troubleshooting
Backup User Data
Before troubleshooting a user’s device, verify that the data is backed up to iCloud (requires
iOS 5) or to iTunes on the user’s computer.
Learn more about iCloud at www.apple.com/icloud.
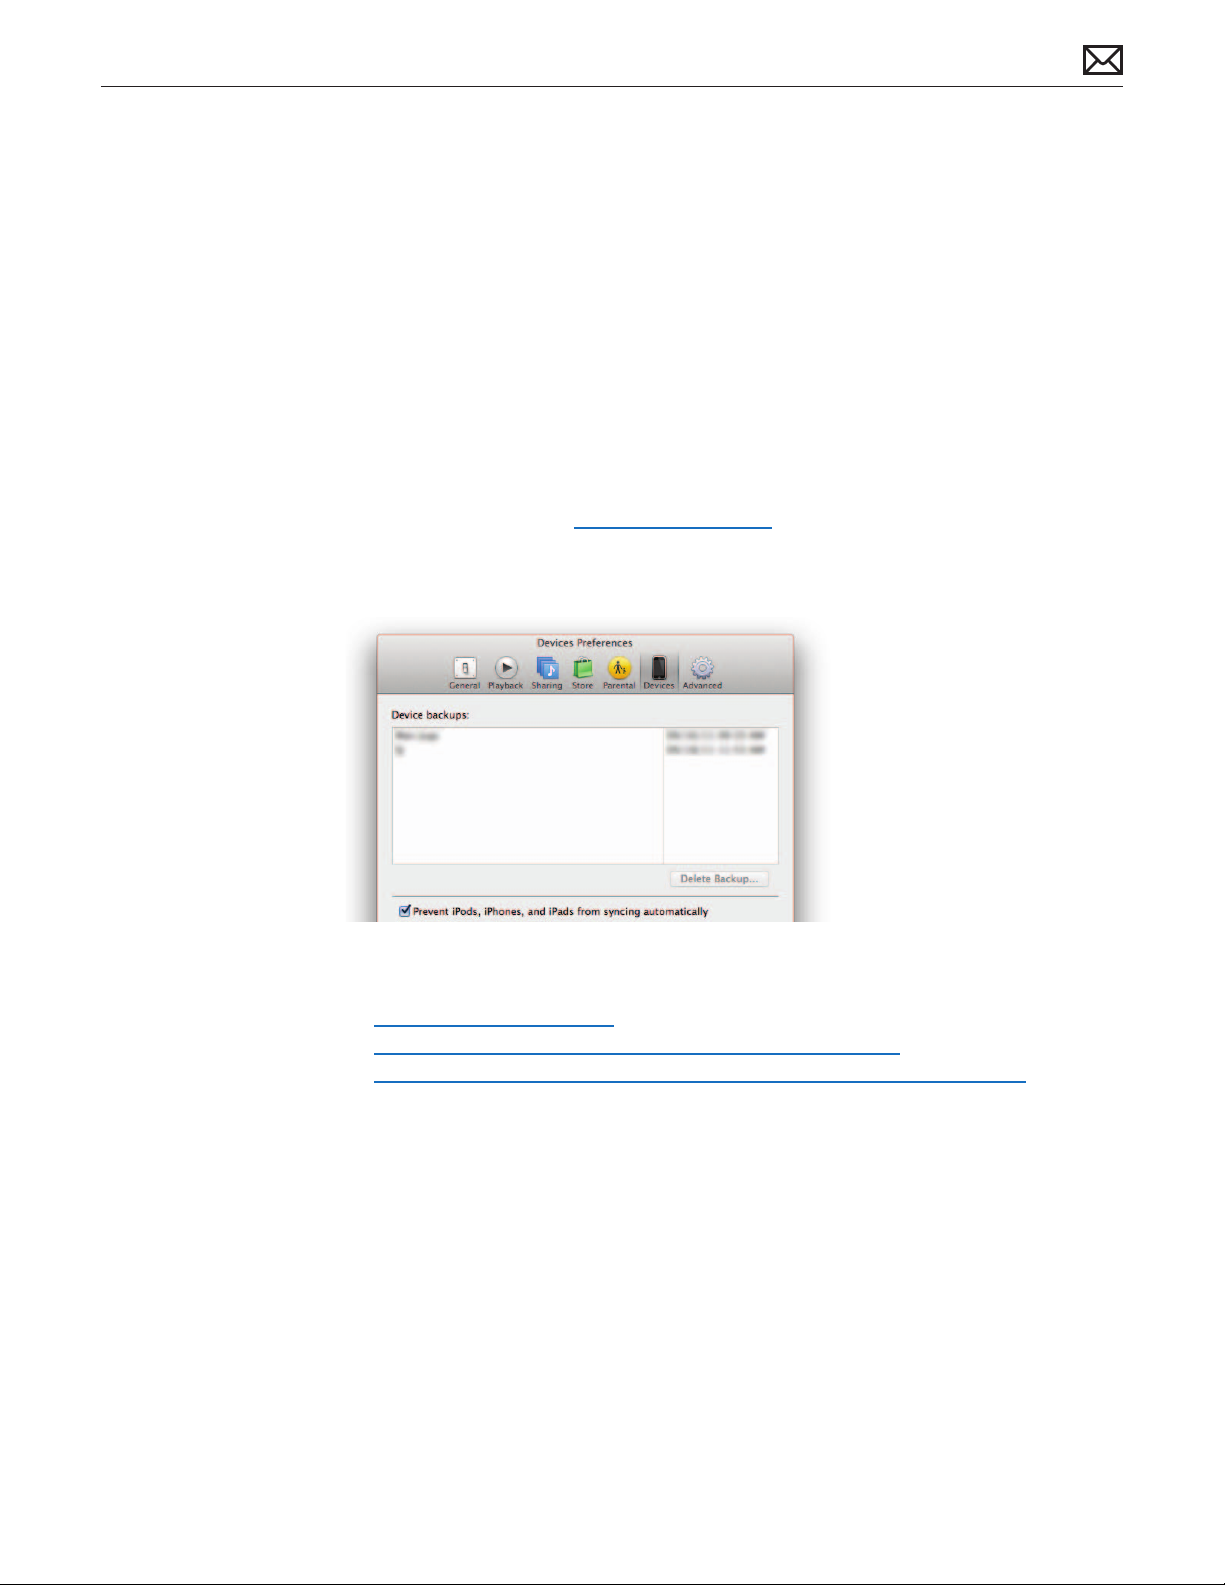
Important: To avoid syncing a user’s device to a test computer, go to iTunes > Preferences >
Devices and select “Prevent iPods, iPhones, and iPads from syncing automatically”.
2012-02-21
Apple Support articles:
• HT1766: iOS: About backups
• HT4137: How to back up your data and set up as a new device
• TS2529: iTunes: “Backup could not be saved on the computer” alert message
iPhone 4 Troubleshooting — General Troubleshooting 25
Page 26
Common Troubleshooting Procedures
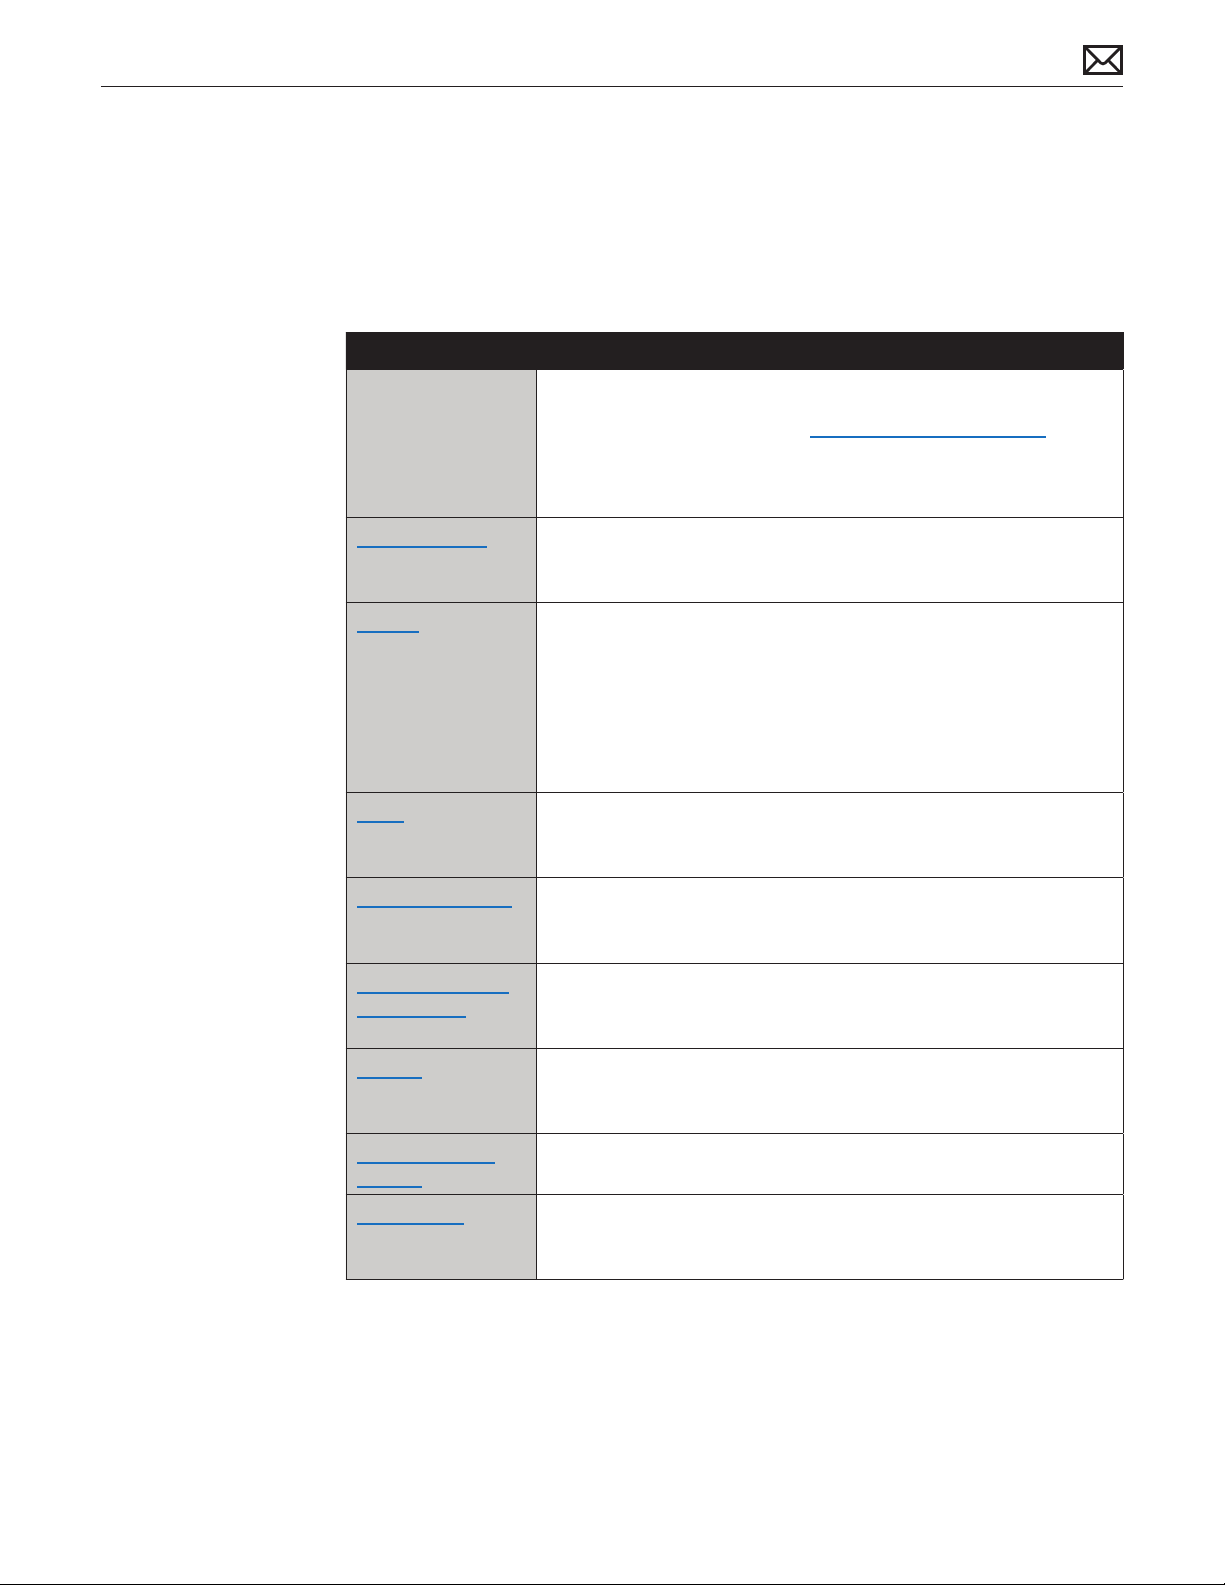
When troubleshooting, attempt the quick xes in the order listed. This table is a summary of
these common procedures; see detailed information on the following pages.
IMPORTANT: These steps may not be eective for all issues. Apply only the steps necessary
to isolate and resolve the issue.
Quick Fix Action
Update to Latest
Software
Go to Settings > General > Software Update, if available; or
Use the latest version of iTunes (www.itunes.com/download) to
check for the latest iOS. Connect the device to the computer, go
to iTunes > (Device) > Summary and click the “Check for Update”
button.
Charge Battery Connect to a known-good power outlet using a known-good Apple
USB Power Adapter and Dock Connector to USB Cable to charge the
battery. Do not charge via a computer port.
Restart A restart forces the device to close all open les and powers o all
hardware components.
1. Press and hold the On/o button on top of the device until a red
slider appears.
2. Slide your nger across the slider to turn o the device.
3. To turn the device on, press and hold the On/o button until the
Apple logo appears.
Reset Perform a reset ONLY if unable to do a restart.
Press and hold both the On/o button and the Home button for at
least ten seconds, until the Apple logo appears.
Force Quit an App Double-click the Home button to display recently used apps. Press
and hold the app until a red minus appears. Tap the red minus to
quit the app.
2012-02-21
Erase All Content
and Settings
1
Erases all user content and settings. From the Home screen choose
Settings > General > Reset > Erase All Content and Settings.
If possible, try this before a Restore since it is much faster.
Restore
1
Erases all software and data, and then installs a fresh copy of iOS.
Connect the device to the computer, go to iTunes > (Device) >
Summary and click the “Restore” button.
Recovery Mode
Restore
DFU Restore
1
1
Recovery mode loads only the rmware drivers necessary for iTunes
to recognize the device. See instructions on the following pages.
Device Firmware Update (DFU) allows you to perform a restore when
all other attempts to restore the device fail. See instructions on the
following pages.
1
WARNING: This will delete all user data and settings on the device. A backup should be
done prior, if saving content is important to the user.
iPhone 4 Troubleshooting — General Troubleshooting 26
Page 27

Charge Battery
The device must have a sucient battery charge to proceed with troubleshooting. A low
battery condition can be the cause of many issues.
If the device has any of the following symptoms, it should be connected to an Apple USB Power
Adapter to charge for up to 10 minutes:
• will not power on
• black screen
• shows the “battery trap” image (left)
• low battery charge
Note: An Apple USB Power Adapter delivers more power than a computer’s USB port, so the
power adapter is the recommended initial charging method for a low battery. Once the device
has started up to the iOS or it has been charging for 10 minutes, it can be disconnected from
the power adapter and connected to a computer.
If troubleshooting or testing will be done without the device connected to power, make sure
the device has a sucient battery charge before continuing.
Important:
• Before connecting any cable to the dock connector or the headphone jack, check the port
condition for debris, contamination, corrosion, liquid, or damage, and clean or remedy this
issue before connecting cables.
• If when charging the device, it becomes too hot, disconnect and replace the device.
Also refer to the following Apple Support articles:
• HT1476: iPhone and iPod touch: Charging the battery
• HT1805: iPhone: About standby and usage time
• About iPhone Batteries: www.apple.com/batteries/iphone.html
• iPhone Battery Performance Test Information: www.apple.com/iphone/battery.html
2012-02-21
iPhone 4 Troubleshooting — General Troubleshooting 27
Page 28

Restart
A restart safely closes active apps and processes, preserving any data in the process, forces the
device to close all open les, and powers o all hardware components.
A restart can quickly resolve a wide range of issues, including:
• App(s) unexpectedly quit.
• Battery life is shorter than expected.
• Hardware not performing as expected.
• Interface or apps are slow to respond.
• iTunes does not recognize or sync with the device.
Procedure:
1. Turn o the device: Press and hold the On/o button for a few seconds until the red “slide to
power o” slider appears, and then slide the slider.
2. Turn on the device: Press and hold the On/o button until the Apple logo appears.
Reset
If the device is unresponsive and restart does not work, try to reset it.
IMPORTANT: Perform a reset ONLY if unable to do a restart.
Key Points:
• Reset only when you cannot restart the device normally.
• A reset removes all power for a fraction of a second to power o the device.
• A reset does not close open les or save data before the device powers o.
• A reset can potentially cause le or operating system damage, requiring a restore.
Procedure:
1. Press and hold both the On/o button and the Home button together for at least 10
seconds, until the Apple logo appears.
2012-02-21
iPhone 4 Troubleshooting — General Troubleshooting 28
Page 29
Force Quit an App
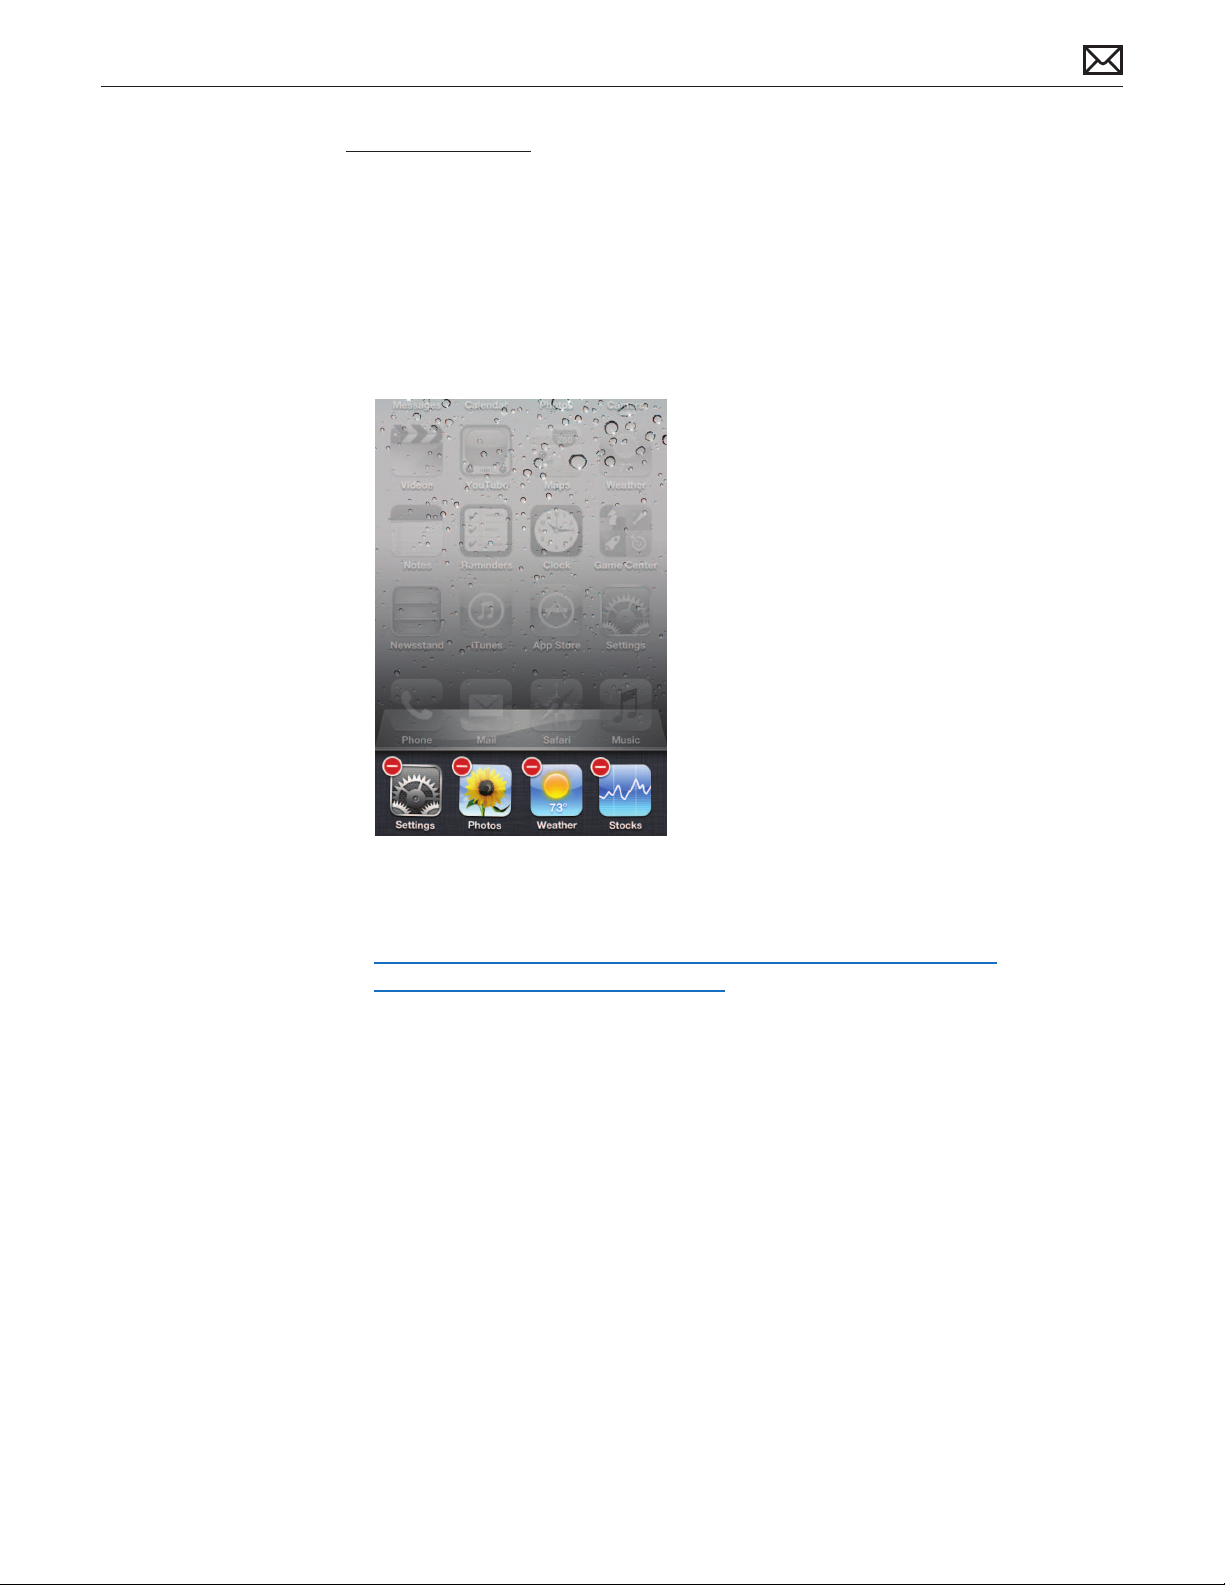
This procedure forces an app to quit that is not responding to input or doesn’t perform as
expected. This is a good rst troubleshooting step.
Procedure:
1. From the Home screen, double-click the Home button to display recently used apps.
2. Tap and hold the app until a red minus appears. Tap the red minus to quit the app.
Tap on the Home screen, above, to return.
3.
Also refer to the following Apple Support articles:
• TS1702: iOS: Troubleshooting applications purchased from the App Store
• HT4211: iOS: Understanding multitasking
2012-02-21
iPhone 4 Troubleshooting — General Troubleshooting 29
Page 30
Erase All Content and Settings
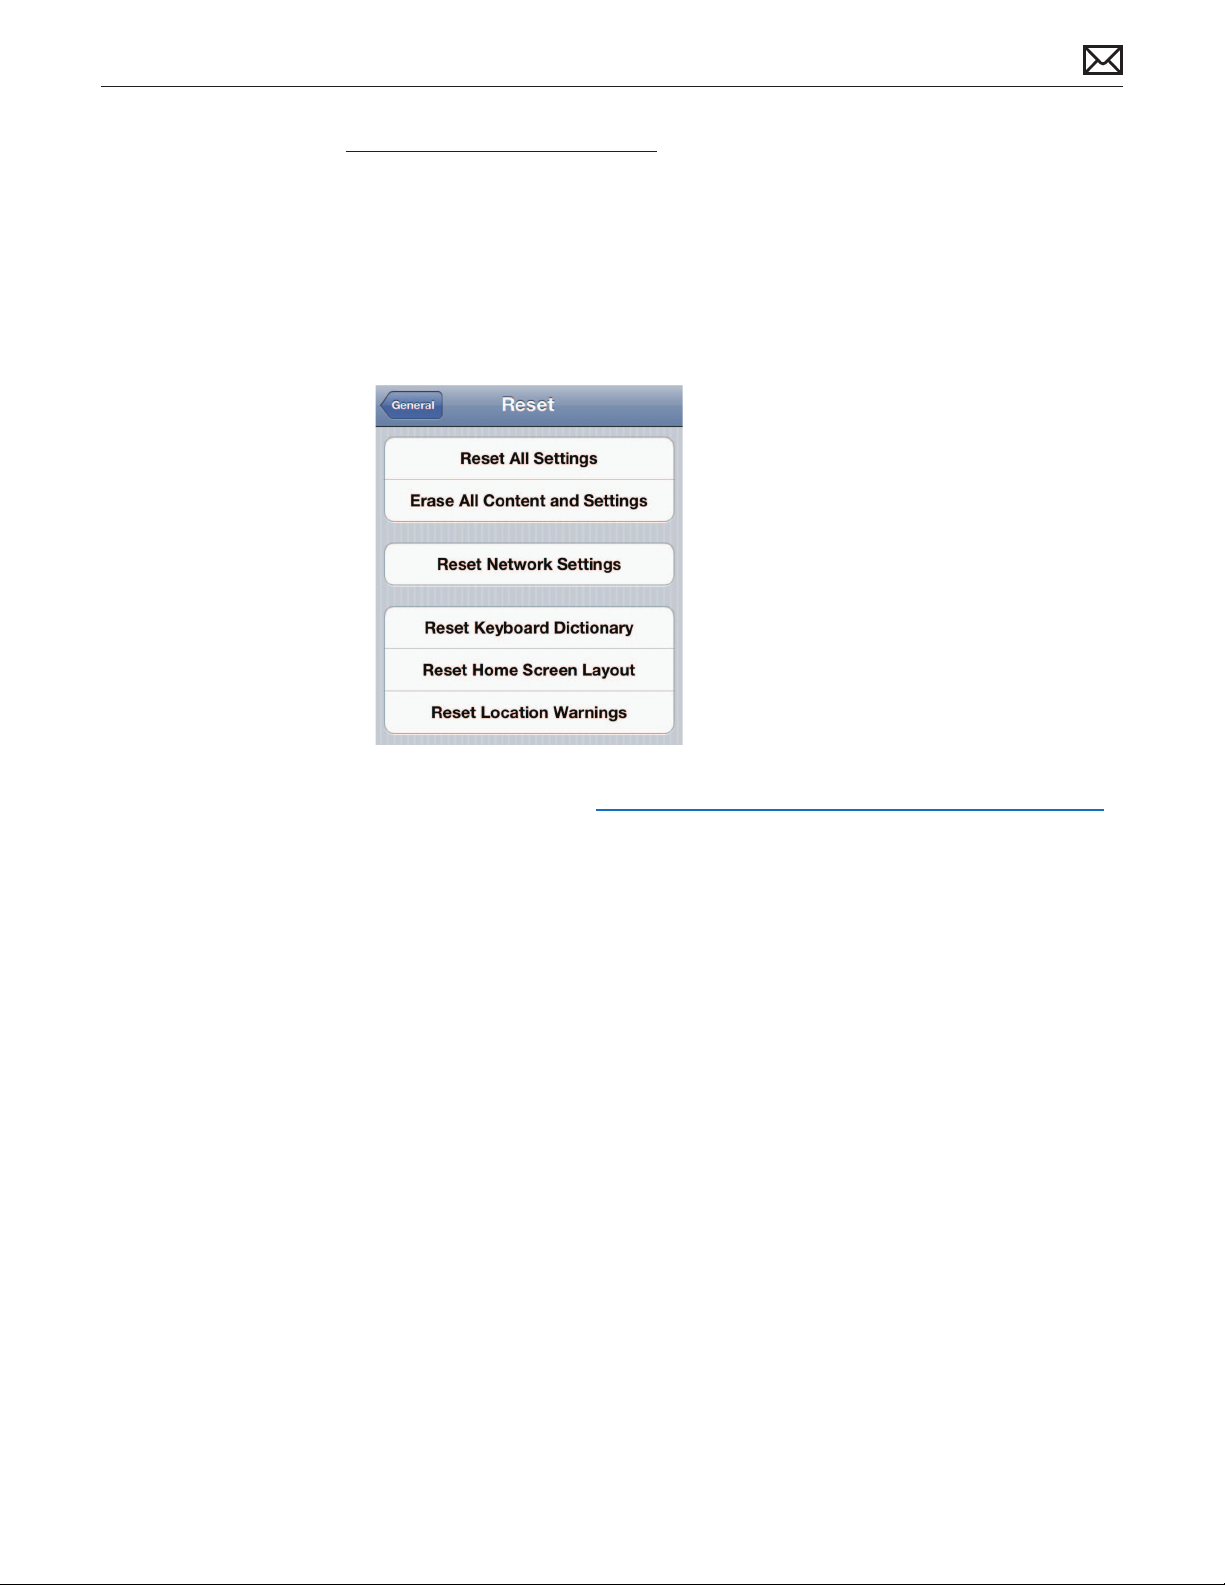
Erase is a quick way to get back to factory settings. It will delete all user content and settings,
but it does not reinstall iOS like a restore will do.
WARNING: This will delete all user data and settings on the device.
Procedure:
1. From the Home screen choose Settings > General > Reset > Erase All Content and Settings.
Also see Apple Support article HT2110: iOS: Understanding ‘Erase All Content and Settings’.
If Erase All Content and Settings does not resolve an issue, proceed to do a Restore (see next
page).
2012-02-21
iPhone 4 Troubleshooting — General Troubleshooting 30
Page 31

Restore
A restore completely erases the device and reinstalls a fresh copy of iOS.
WARNING: This will delete all user data and settings on the device.
Key Points
• A restore erases all user content, settings, and iOS les, and then reinstalls only iOS.
• A restore is time-consuming, especially if you have to download the restore package.
• If iTunes displays an alert with an error code, see Apple Support articles TS3694: iTunes:
Specic update-and-restore error messages and advanced troubleshooting and
TS1275: iOS: Resolving update and restore alert messages before continuing.
• When the restore is complete, test the device before restoring a backup or syncing content.
• Note: Do not set up as a new device, as this can erase previous backups. Copy or rename
the backup folder before proceeding; location of this folder is listed in Apple Support article
HT1414: iTunes: Backing up, updating, and restoring iOS software.
Procedure:
1. Connect device to a computer running the latest version of iTunes.
2. In the left column under Devices, click on the device name, then go to the Summary panel
and click the Restore button.
Recovery Mode Restore
If iTunes cannot detect the device, or a specic restore error appears, check cable connections.
If the issue persists, consider forcing the device into recovery mode.
WARNING: This will delete all user data and settings on the device.
If you cannot restore a device, even when using recovery mode, service or replacement may be
the appropriate option.
Key Points
• Recovery mode loads only the rmware drivers necessary for iTunes to recognize the device.
• To force recovery mode, power o the device, and then connect it to a USB port on the
computer while holding down the Home button.
• If the device does not power o, try a Reset to power it o.
• If iTunes displays an alert with an error code, see Apple Support articles TS3694: iTunes:
Specic update-and-restore error messages and advanced troubleshooting and
TS1275: iOS: Resolving update and restore alert messages.
Note: In certain situations, an device will automatically go into recovery mode after an update
or restore issue. If the device is already in recovery mode, attempt to restore using iTunes.
2012-02-21
iPhone 4 Troubleshooting — General Troubleshooting 31
Page 32
Procedure:
Use the following steps to place a device into recovery mode. If the device is already in
recovery mode, start at step 6.
1. Disconnect the Dock Connector to USB Cable from the device, but leave the other end of
the cable connected to the computer’s USB port.
2. Turn o the device: Press and hold the On/o button for a few seconds until the red slider
appears, then slide the slider. Wait for the device to turn o.
• If you cannot turn o the device using the slider, perform a Reset: press and hold the
On/o button and Home button at the same time. When the device turns o, release
the buttons. Press and hold the Home button while reconnecting the USB cable to the
device. Continue holding the Home button.
3. While pressing and holding the Home button, reconnect the USB cable to the device. When
you reconnect the USB cable, the device should power on.
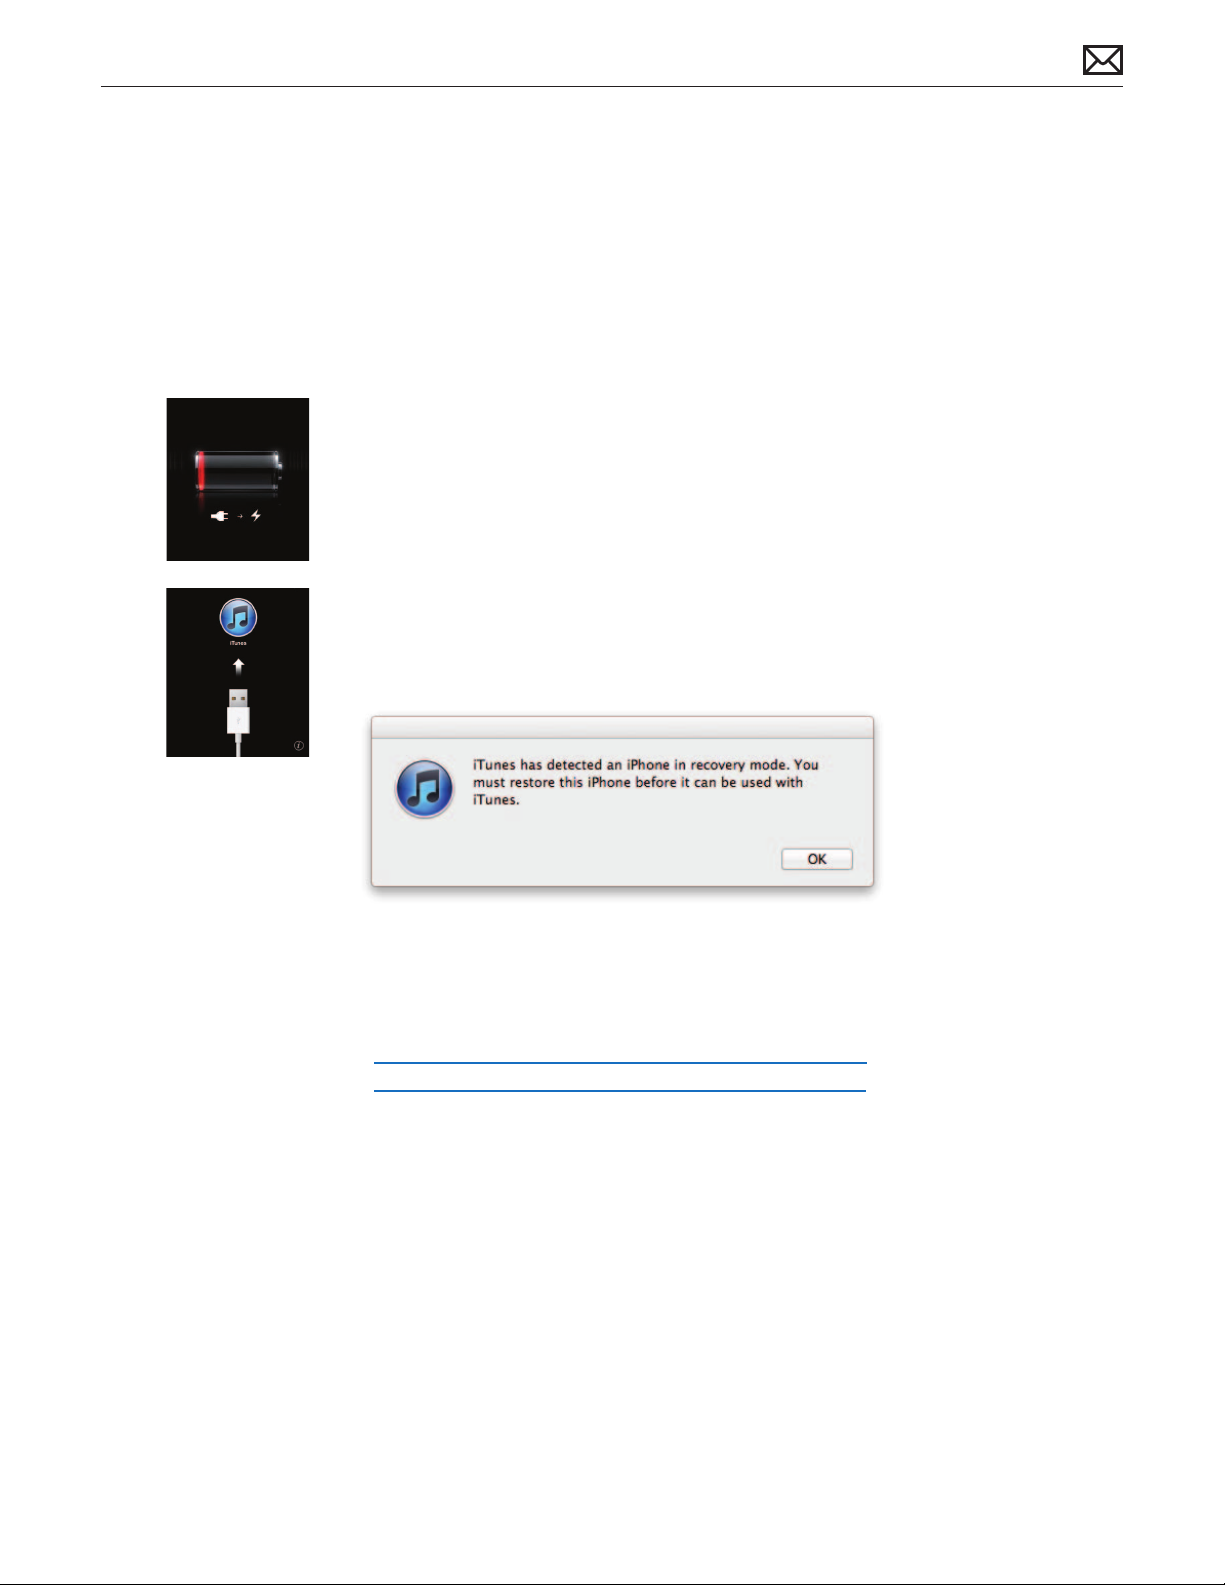
Note: If you see the “battery trap” image at left, let the device charge for at least 10 minutes
to ensure the battery has some charge, and then repeat step 2.
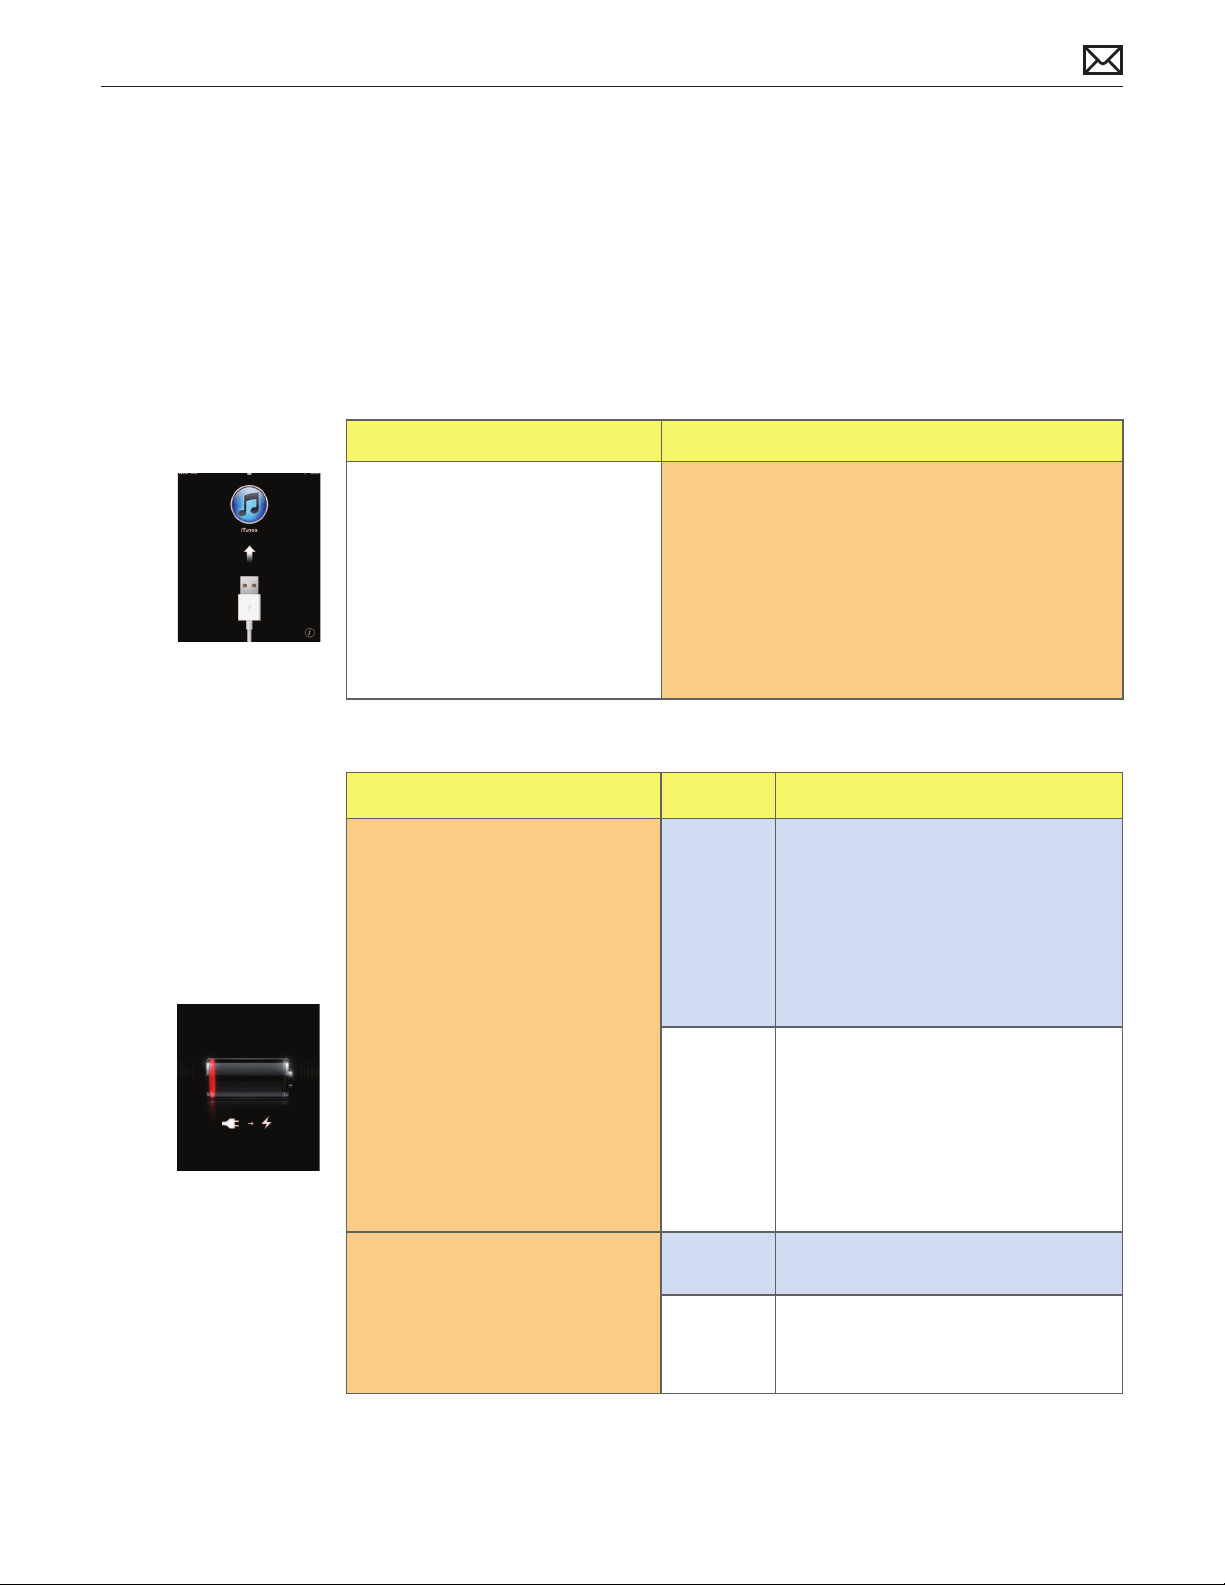
4. Continue holding the Home button until you see the “Connect to iTunes” screen at left.
When this screen appears you can release the Home button:
5. If necessary, open iTunes. You should see an alert that iTunes has detected a device in
recovery mode.
2012-02-21
6. Use iTunes to restore the device.
If you don’t see the “Connect to iTunes” screen, try these steps again. If you see the “Connect to
iTunes” screen but the device does not appear in iTunes, refer to Apple Support articles:
• TS1591: iOS: Device not recognized in iTunes for Mac OS X
• TS1538: iOS: Device not recognized in iTunes for Windows
If you decide not to do a restore, you may be able to escape by resetting the device.
iPhone 4 Troubleshooting — General Troubleshooting 32
Page 33

DFU Restore
Device Firmware Update (DFU) Restore allows you to perform a restore when all other attempts
to restore the device fail. DFU Restore is only necessary if:
• the device won’t turn on
• the device won’t go into recovery mode
• the device won’t charge
WARNING: This will delete all user data and settings on the device.
Procedure:
Timing is critical--use a watch to time the steps below!
1. Charge the device for at least 5 minutes, then connect to iTunes. If the device is not
detected, open iTunes and move to step 2.
2. Press Home + On/o buttons together and hold down for 8 seconds and then release the
On/o button.
3. Continue to press the Home button until you see the “Recovery Mode” message in iTunes,
which may take up to 30 seconds.
Note: In DFU Mode the device’s screen is blank.
If you did not get the “Recovery Mode” message in iTunes or the device’s screen is not blank/
black, repeat all steps paying careful attention to your timing.
If you decide not to do a restore, you may be able to escape by resetting the device.
2012-02-21
iPhone 4 Troubleshooting — General Troubleshooting 33
Page 34

Symptom Charts
Power Issues
No Power
Known-Good Parts & Materials Required: USB Power Adapter, Dock Connector to USB Cable,
iOS diagnostics, computer running the latest version of iTunes with a known-good USB port
Quick Check
Symptoms Quick Check
• Will not power on
• Black screen
• Shuts o after removing power
1. Try to restart the device.
2. Try to reset the device.
Deep Dive
Check Result Action
1. Check on/o button.
Check that the on/o button is
not stuck (up or down.)
Is the button functional?
2. Charge battery.
Plug the device into a knowngood power adapter and cable
to charge the battery for up to
2 minutes.
Is any image displayed on
screen within 2 minutes?
3. Reset the device.
Yes Go to step 2.
No Determine if the issue is caused by
accidental damage. Refer to the Visual
Mechanical Inspection guidelines.
Yes Go to step 4.
No Go to step 3.
Yes Go to step 4.
2012-02-21
Attempt to reset the device
while connected to knowngood power.
After attempted reset, is any
image displayed on screen?
No Determine if the issue is caused by
accidental damage. Refer to the Visual
Mechanical Inspection guidelines.
iPhone 4 Symptom Charts — Power Issues 34
Page 35
4. Verify device status.
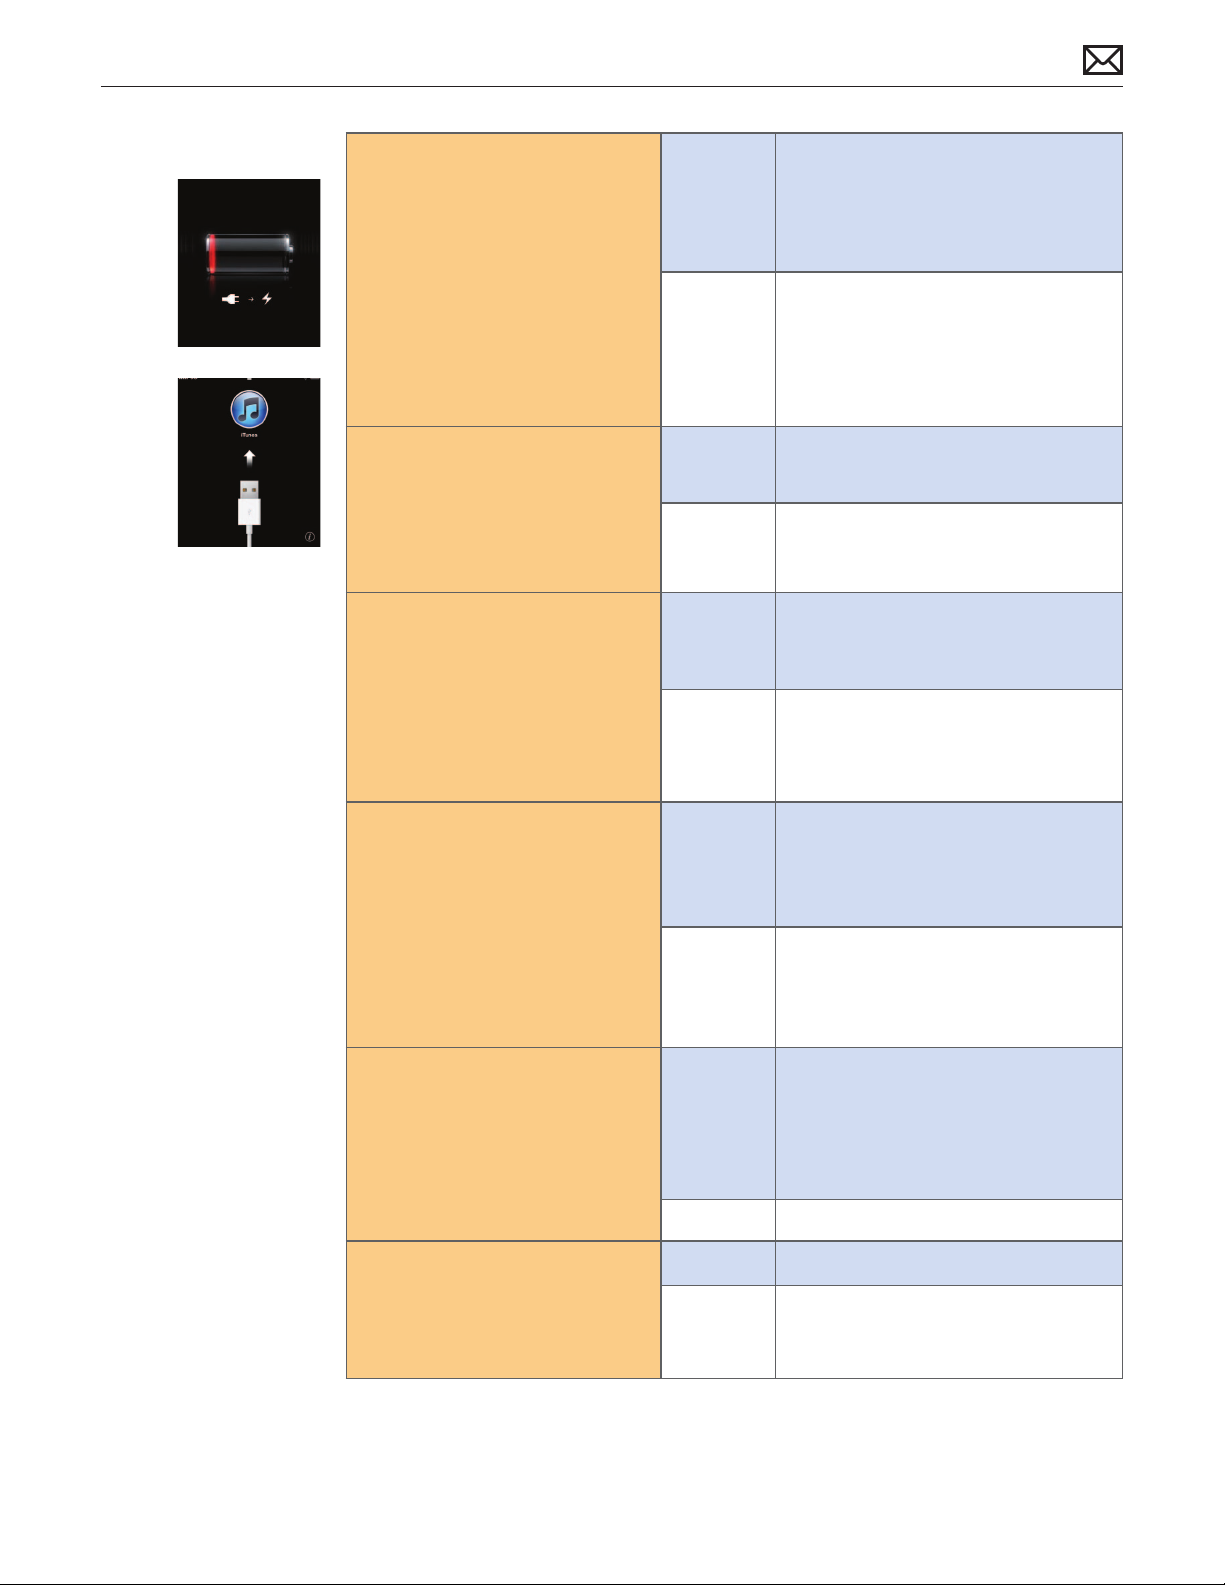
Identify if device woke up to
the “battery trap” image (at left)
or to an iOS screen, such as:
- “slide to unlock”
- Apple Logo (startup)
- “connect to iTunes” (at left)
Did the device wake to the
battery trap image or an iOS
screen?
Battery
Go to step 5.
Trap
iOS Screen Go to step 6.
5. Continue charging.
Charge the device for up to an
additional 10 minutes.
After 10 minutes, did the
device wake to an iOS screen?
6. Identify iOS screen.
Identify if the device woke to
“slide to unlock” rather than
the Apple logo or “connect to
iTunes.”
Did the device wake to “slide
to unlock?”
7. Restore with iTunes.
Restore the device using
the latest version of iTunes.
If restore fails, attempt DFU
restore.
Warning: This will delete all
user data on the device.
Was restore successful?
Yes Go to step 6.
No Determine if the issue is caused by
accidental damage. Refer to the Visual
Mechanical Inspection guidelines.
Yes Go to step 8.
No Go to step 7.
Yes Go to step 8.
No Determine if the issue is caused by
accidental damage. Refer to the Visual
Mechanical Inspection guidelines.
2012-02-21
8. Test battery.
Allow device to charge for 2
more minutes, then unplug the
device.
Did the device immediately
power o?
9. Run diagnostics.
Use diagnostics to verify the
battery status.
Is the battery status “normal?”
Yes Determine if the issue is caused by
accidental damage. Refer to the Visual
Mechanical Inspection guidelines.
Replace the device’s battery, if possible,
rather than replacing the whole unit.
No Go to step 9.
Yes Issue resolved.
No Determine if the issue is caused by
accidental damage. Refer to the Visual
Mechanical Inspection guidelines.
iPhone 4 Symptom Charts — Power Issues 35
Page 36

Battery Will Not Charge
Known-Good Parts & Materials Required: USB Power Adapter, Dock Connector to USB Cable,
iOS diagnostics, computer running the latest version of iTunes with a known-good USB port
Quick Check
Symptoms Quick Check
• Battery will not charge from
USB Power Adapter
• Battery charge icon does not
show fully charged
1. Probe whether the user charges their device
using the USB Power Adapter or another power
source. Other USB adapters may not provide
enough power to charge the device.
2. Important: Battery and charge indicators can
uctuate briey when you connect the device to
power or wake it from sleep. If this occurs, wait
a few seconds and then check again. Battery
percentage can remain at 99% with a full charge.
This is expected behavior and does not indicate a
battery or hardware issue.
3. Restart the device.
4. If you can’t restart the device, reset the device.
Deep Dive
Check Result Action
1. Attempt to charge the battery.
Plug the device into a knowngood power adapter and cable
to charge the battery. Allow up
to 2 minutes for the device to
respond.
Did the device wake to the
“battery trap” image (at left) or
to the “slide to unlock” screen?
Battery
Trap
Slide to
Unlock
Go to step 2.
Go to step 3.
2012-02-21
2. Continue charging.
Charge the device for up to an
additional 10 minutes.
After 10 minutes, did the
device wake to the “slide to
unlock” screen?
Yes Go to step 3.
No Determine if the issue is caused by
accidental damage. Refer to the Visual
Mechanical Inspection guidelines.
iPhone 4 Symptom Charts — Power Issues 36
Page 37

3. Verify charge status.
Check battery icon in the upper
right-hand corner of the screen.
Is the device currently
charging?
Yes Go to step 6.
No Go to step 4.
4. Restore with iTunes.
Restore the device using
the latest version of iTunes.
If restore fails, attempt DFU
restore.
Warning: This will delete all
user data on the device.
Was restore successful?
5. Verify charge status.
Check battery icon in the upper
right-hand corner of the screen.
Is the device currently
charging?
6. Test battery.
Allow device to charge for 2
more minutes, then unplug the
device.
Did the device immediately
power o?
Yes Go to step 5.
No Determine if the issue is caused by
accidental damage. Refer to the Visual
Mechanical Inspection guidelines.
Yes Go to step 6.
No Determine if the issue is caused by
accidental damage. Refer to the Visual
Mechanical Inspection guidelines.
Replace the device’s battery, if possible,
rather than replacing the whole unit.
Yes Determine if the issue is caused by
accidental damage. Refer to the Visual
Mechanical Inspection guidelines.
Replace the device’s battery, if possible,
rather than replacing the whole unit.
No Go to step 7.
2012-02-21
7. Run diagnostics.
Use diagnostics to verify the
battery status.
Is the battery status “normal?”
Yes Issue resolved.
No Determine if the issue is caused by
accidental damage. Refer to the Visual
Mechanical Inspection guidelines.
Replace the device’s battery, if possible,
rather than replacing the whole unit.
iPhone 4 Symptom Charts — Power Issues 37
Page 38

Battery Life Too Short
Known-Good Parts & Materials Required: USB Power Adapter, Dock Connector to USB Cable,
iOS diagnostics
Quick Check
Symptoms Quick Check
• Battery runs out of power very
quickly
• Battery does not hold a charge
• Short play time
1. On the device, go to Settings > General >
Software Update to verify device has the most
up-to-date software. If unavailable, verify by
plugging the device into iTunes.
2. Suggest www.apple.com/batteries/iphone.
html as a resource for the user to learn about
optimizing battery settings.
Deep Dive
Check Result Action
1. Diagnose battery condition.
Use diagnostics to verify the
battery condition.
Is the battery condition
“normal’?
2. Diagnose usage/standby time.
Use diagnostics to determine
usage and standby time. If
these times are the same, it
points to a corrupt system
process running in the
background that is draining
power.
Yes Go to step 2.
No Determine if the issue is caused by
accidental damage. Refer to the Visual
Mechanical Inspection guidelines.
Replace the device’s battery, if possible,
rather than replacing the whole unit.
Yes Restore the device using the latest
version of iTunes. If restore fails,
attempt DFU restore.
Warning: This will delete all user data
on the device.
No Go to step 3.
2012-02-21
Are usage times and standby
time the same duration?
3. Diagnose unsupported apps.
Use diagnostics to determine
any apps that are unsupported
on the device.
Are there unsupported apps
listed?
Yes Restore the device using the latest
version of iTunes. If restore fails,
attempt DFU restore.
Warning: This will delete all user data
on the device.
No Go to step 4.
iPhone 4 Symptom Charts — Power Issues 38
Page 39

4. Diagnose unresponsive apps.
Use diagnostics to determine
any apps that are unresponsive
running in the background that
may be draining the battery.
Are there unresponsive apps
listed?
Yes Instruct user how to quit background
processes on the device.
No No trouble found. Suggest www.
apple.com/batteries/iphone.html as
a resource for the user to learn about
optimizing battery settings.
Other Power Issue
Deep Dive
Check Result Action
1. Verify whether any of the
troubleshooting ows apply to
the issue reported by the user.
Yes Jump to appropriate troubleshooting
ow.
No
Document reported failure and send
feedback to [email protected]
stating that a suitable troubleshooting
ow wasn’t found.
Escalate through your usual channels
for further troubleshooting support.
2012-02-21
iPhone 4 Symptom Charts — Power Issues 39
Page 40

Display Issues
No Video / Poor Image
Known-Good Parts & Materials Required: Dock Connector to USB Cable, computer running
the latest version of iTunes with a known-good USB port
Quick Check
Symptoms Quick Check
• No video
• Distorted video
• No backlight
• Rainbow eect
• Poor image
• Bad contrast
• Horizontal / vertical lines
• White screen
• Light bleed
1. Try rotating the device to conrm if the issue is
caused by media, software, or the display.
2. Charge the battery: Plug the device into a knowngood power adapter and cable to charge the
battery for 10 minutes.
3. Restart the device.
4. Reset the device.
Deep Dive
Check Result Action
1. Restore with iTunes.
Restore the device using
the latest version of iTunes.
If restore fails, attempt DFU
restore.
Warning: This will delete all
user data on the device.
Yes Issue resolved.
No Determine if the issue is caused by
accidental damage. Refer to the Visual
Mechanical Inspection guidelines.
2012-02-21
Did this resolve the issue?
iPhone 4 Symptom Charts — Display Issues 40
Page 41

Display Anomalies
Known-Good Parts & Materials Required: none
Quick Check
Symptoms Quick Check
• Pixel anomalies
• Particles or debris under the
glass
1. Clean the display with a clean micro-ber
cloth. Important: Do NOT use liquids, sprays, or
abrasives to clean the device.
Deep Dive
Check Result Action
1. Inspect display.
Noticeable particles, debris, or
screen anomalies such as dead
pixels are (upon user claim
only) covered under warranty.
See Apple Support article
HT4044: About LCD display
pixel anomalies for Apple
products released in 2010 and
later.
Probe to determine if the
issue is caused by accidental
damage. Refer to the Visual
Mechanical Inspection
guidelines.
Yes OOW replacement.
No Whole unit replacement.
2012-02-21
Is the issue caused by
accidental damage?
iPhone 4 Symptom Charts — Display Issues 41
Page 42

Multi-Touch Issues
Known-Good Parts & Materials Required: none
Quick Check
Symptoms Quick Check
• Multi-Touch is slow to respond
• Isolated areas not responding
• Slider to turn on/o not
responding
• Erratic response to touch
• Display turns on briey and a
battery icon ashes
1. Clean the display with a clean micro-ber
cloth. Important: Do NOT use liquids, sprays, or
abrasives to clean the device.
2. Rule out environmental causes by checking for
use of protective lms, cases, gloves, or a stylus.
Verify that user touches screen with nger pads
and not ngernails.
3. On the device, go to Settings > General >
Software Update to verify device has the most
up-to-date software. If unavailable, verify by
plugging the device into iTunes.
4. Quit any background apps.
5. Restart the device.
6. Reset the device.
Deep Dive
Check Result Action
1. Test Multi-Touch.
Launch the Calculator app and
perform the following tests:
- With the device in a vertical
orientation, test all the
calculator buttons.
- Turn the device to a horizontal
orientation and test all the
calculator buttons.
Yes Issue resolved.
Remind user that protective lms,
cases, styluses, gloves or ngernails can
prevent Multi-Touch from responding
properly.
No Determine if the issue is caused by
accidental damage. Refer to the Visual
Mechanical Inspection guidelines.
2012-02-21
Did the display respond as
expected?
iPhone 4 Symptom Charts — Display Issues 42
Page 43
Display Rotation Issues
Known-Good Parts & Materials Required: Dock Connector to USB Cable, computer running
the latest version of iTunes with a known-good USB port
Quick Check
Symptoms Quick Check
• Display does not rotate when
device changes orientation
1. Verify that screen rotation lock is o. Double-click
the Home button to display recently used apps.
Flick from left to right along the bottom of the
screen. If the Screen Rotation Lock button shows
a padlock, tap that button to turn o rotation
lock.
2. Hold the device in a vertical plane (upright), not
horizontal (at).
3. Not all iOS apps are designed to rotate. Some
may use only portrait or landscape mode, or
switch depending on the content. To test screen
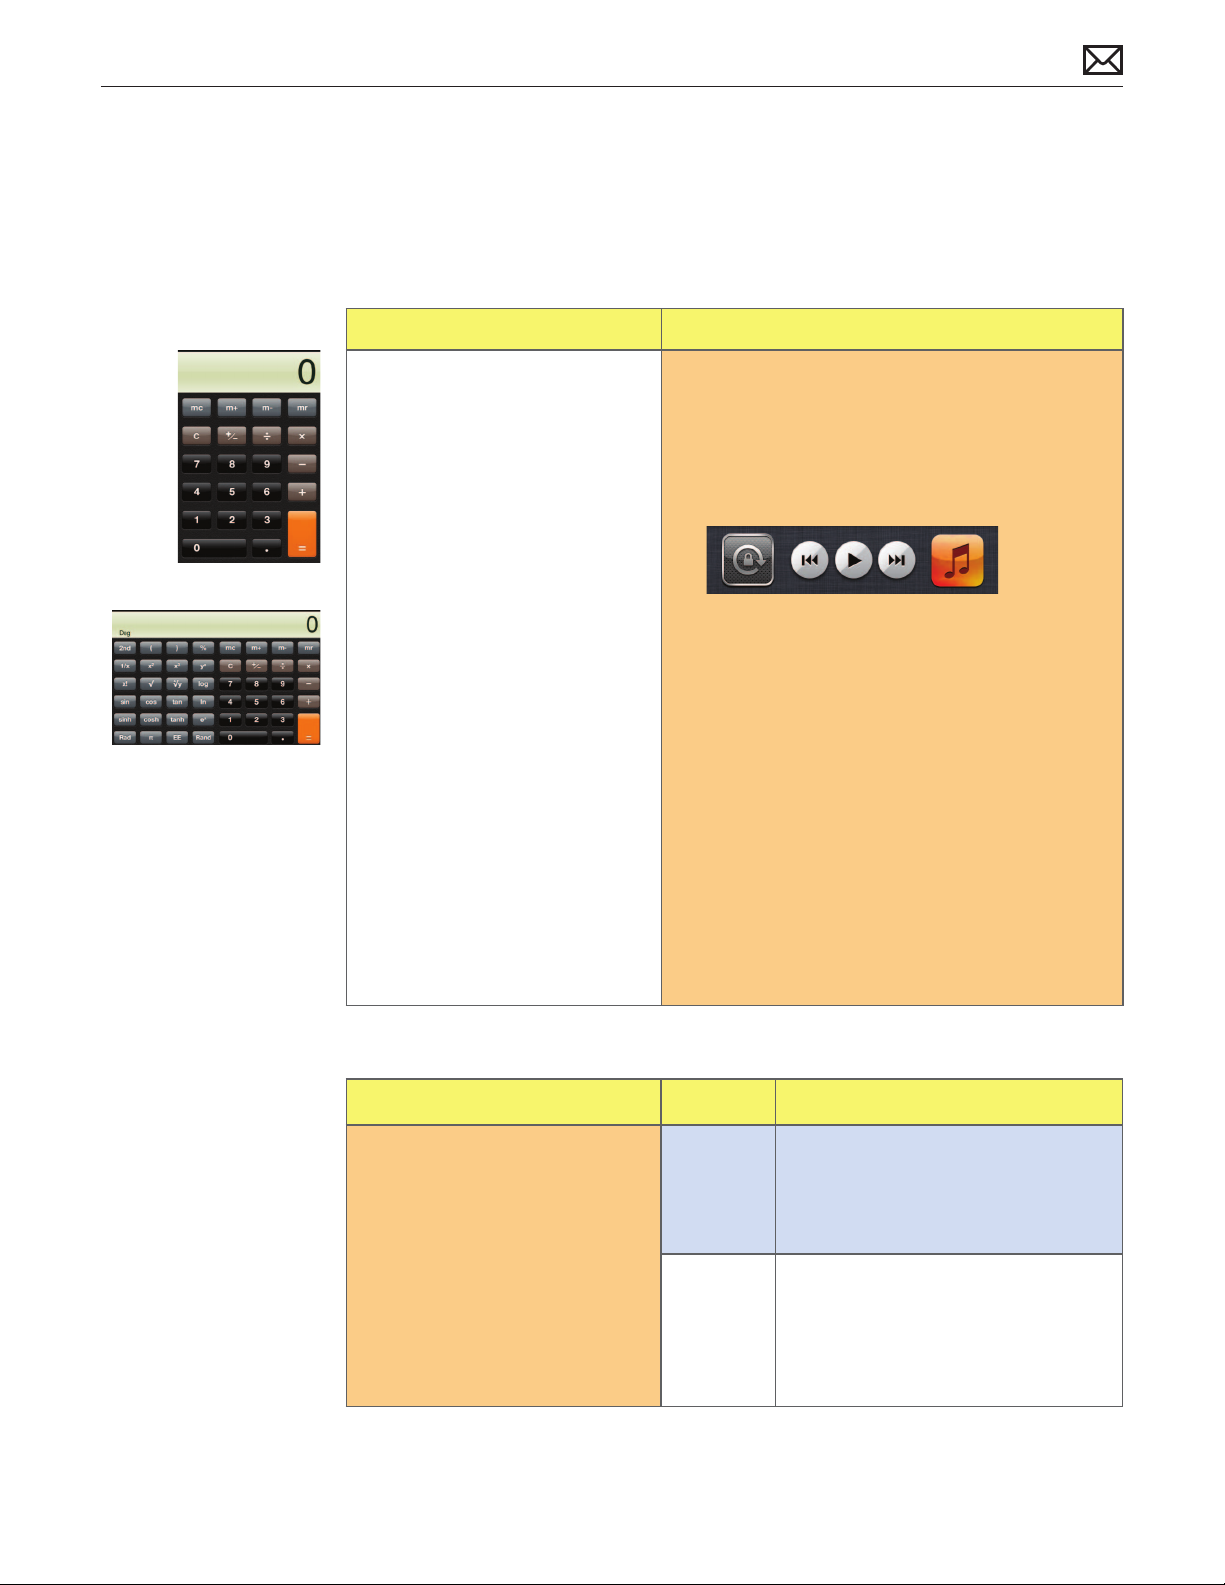
rotation, open the Calculator app. If the screen
does not rotate as expected while using the
calculator app (see images at left), continue
troubleshooting.
4. Restart the device.
5. On the device, go to Settings > General >
Software Update to verify device has the most
up-to-date software. If unavailable, verify by
plugging the device into iTunes.
2012-02-21
Deep Dive
Check Result Action
1. Restore with iTunes.
Restore the device using the
latest version of iTunes.
Warning: This will delete all
user data on the device.
Open the Calculator app and
rotate device.
Does the display rotate
properly?
Yes Issue resolved.
No Determine if the issue is caused by
accidental damage. Refer to the Visual
Mechanical Inspection guidelines.
iPhone 4 Symptom Charts — Display Issues 43
Page 44

Cracked Glass
Known-Good Parts & Materials Required: none
Quick Check
Symptoms Quick Check
• Cracked LCD
• Cracked cover glass
• Cracked back cover
1. Go to Deep Dive.
Deep Dive
Check Result Action
1. Determine any safety risk.
Determine whether there is
a safety issue, such as glass
fragments. Do not perform
procedures that can be a safety
risk to you or the user.
Can you proceed safely?
2. Inspect display.
Probe to determine if the
issue is caused by accidental
damage.
Is the issue caused by
accidental damage?
Yes Go to step 2.
No Out-of-warranty physical abuse.
Replace back cover, if appropriate,
rather than replacing the whole unit.
Escalate per safety procedures if user
claims injury.
Yes Out of warranty. Replace back cover, if
appropriate, rather than replacing the
whole unit.
No Determine if the issue is caused by
accidental damage. Refer to the Visual
Mechanical Inspection guidelines.
Replace back cover, if appropriate,
rather than replacing the whole unit.
2012-02-21
iPhone 4 Symptom Charts — Display Issues 44
Page 45

Other Display Issue
Deep Dive
Check Result Action
1. Verify whether any of the
troubleshooting ows apply to
the issue reported by the user.
Yes Jump to appropriate troubleshooting
ow.
No
Document reported failure and send
feedback to [email protected]
stating that a suitable troubleshooting
ow wasn’t found.
Escalate through your usual channels
for further troubleshooting support.
2012-02-21
iPhone 4 Symptom Charts — Display Issues 45
Page 46

Mechanical Issues
Button Issues
Known-Good Parts & Materials Required: Dock Connector to USB Cable, computer running
the latest version of iTunes with a known-good USB port
Quick Check
Symptoms Quick Check
• on/o button not working
• ring/silent switch not working
• Volume up/down buttons not
working
• Home button not working
1. Restart the device.
2. On the device, go to Settings > General >
Software Update to verify device has the most
up-to-date software. If unavailable, verify by
plugging the device into iTunes.
Deep Dive
Check Result Action
1. Check physical response.
Verify that the button/switch
isn’t recessed or sticky and that
there is no debris blocking its
use.
Does the button physically
respond as it should?
Yes Go to step 2.
No Determine if the issue is caused by
accidental damage. Refer to the Visual
Mechanical Inspection guidelines.
2012-02-21
iPhone 4 Symptom Charts — Mechanical Issues 46
Page 47
2. Check software response.
For volume up/down buttons,
test volume up and down.
For on/o button, test pressing
and holding down the
button for “slide to power o”
functionality.
For ring/silent switch, ip the
switch and verify Ringer bell
icon changes on screen.
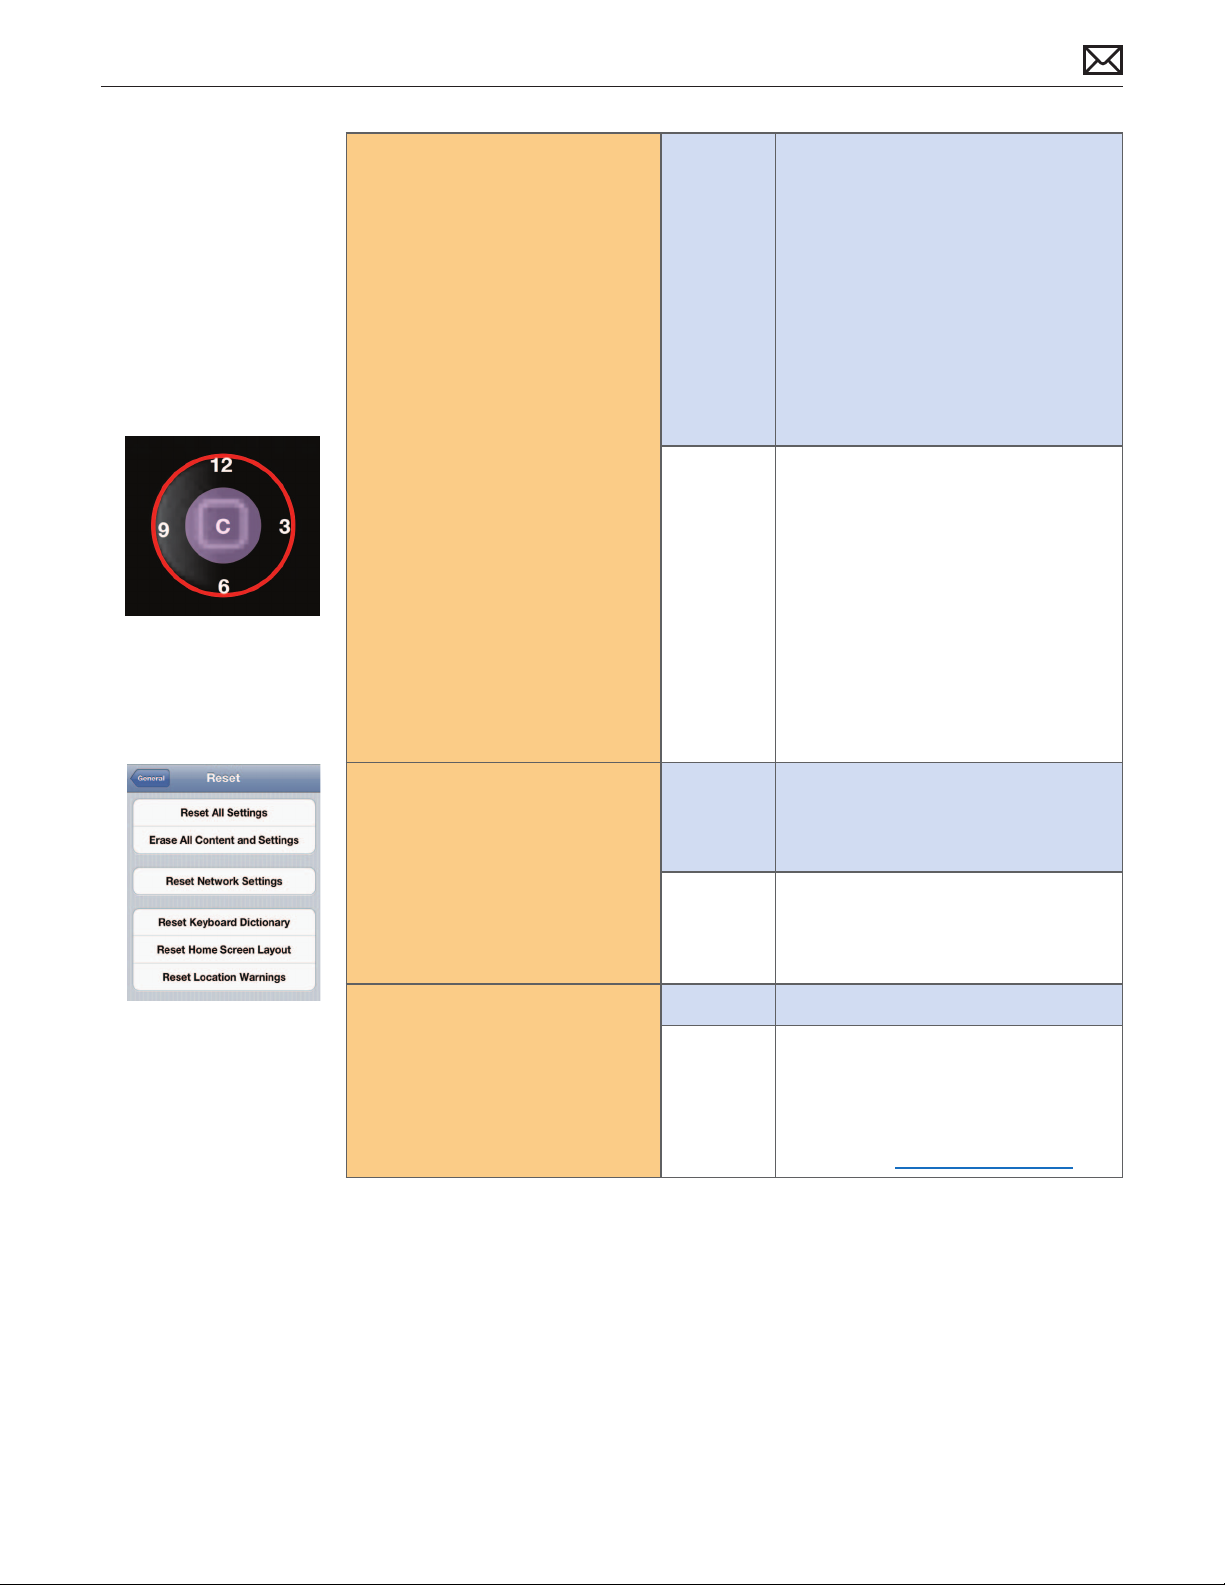
For Home button, test single
and double clicks, and test hold
for “Voice control.” With display
o, press center of Home
button and verify that display
turns on. Repeat same test for
the top, bottom, left and right
edges of Home button (3, 6, 9,
12 in image at left). The display
should turn on when pressing
any of these 5 locations.
Are the buttons responding as
expected?
Yes Issue resolved.
No Go to step 3.
3. Erase all content and settings.
Go to Settings > General >
Reset > Erase All Content and
Settings.
Warning: This will delete all
user data on the device.
Is the button issue resolved?
4. Restore with iTunes.
Restore the device using
the latest version of iTunes.
If restore fails, attempt DFU
restore.
Is the button issue resolved?
Yes Issue resolved.
No Go to step 4.
Yes Issue resolved.
No
Determine if the issue is caused by
accidental damage. Refer to the Visual
Mechanical Inspection guidelines.
For iPhone 4S volume button issues,
try installing Volume Button Shim.
2012-02-21
iPhone 4 Symptom Charts — Mechanical Issues 47
Page 48

Camera Issues
Known-Good Parts & Materials Required: Dock Connector to USB Cable, computer running
the latest version of iTunes with a known-good USB port
Quick Check
Symptoms Quick Check
• Camera app is missing
• Camera not functioning
• Cannot take photos
• Cannot take video
• Camera LED ash not working
• Cannot switch between main
and front cameras
• Camera quality is fuzzy
• Camera takes photos or video
with incorrect color balance
Deep Dive
1. Make sure case or protective lm is not
obstructing the camera or ash.
2. On the device, go to Settings > General >
Software Update to verify device has the most
up-to-date software. If unavailable, verify by
plugging the device into iTunes.
3. If the Camera app is missing, verify that Camera
has not been restricted in Settings > General >
Restrictions. The user would need to enter their
password to disable the restriction.
4. Sound eects: When taking a photo or starting
a video recording, the device makes a shutter
sound. The sound isn’t played if the ring/silent
switch is set to silent. Note: In some regions, the
sound eects for Camera are played even if the
ring/silent switch is set to silent.
5. Set LED ash mode: In the Camera app, tap
the ash button in the upper left corner of the
screen, then tap O, Auto, or On.
2012-02-21
Check Result Action
1. Identify camera issue.
Test to determine if the camera
functions at all or if the issue is
related to image quality.
Which issue?
2. Restore the device.
Restore the device using
the latest version of iTunes.
If restore fails, attempt DFU
restore.
Warning: This will delete all
user data on the device.
Is the camera issue resolved?
No
Function
Image
Quality
Yes Issue resolved.
No Determine if the issue is caused by
Go to step 2.
Go to step 3.
accidental damage. Refer to the Visual
Mechanical Inspection guidelines.
Replace main camera, if possible, rather
than replacing the whole unit.
iPhone 4 Symptom Charts — Mechanical Issues 48
Page 49

3. Clean glass over camera lens.
If main camera is aected,
remove back cover and clean
both sides of back cover with a
microber cloth.
If front-facing camera is
aected, clean front glass with
a microber cloth.
Perform the main camera test.
Is the camera image quality
issue resolved?
Yes Issue resolved.
No Go to step 4.
4. Inspect back cover.
Remove back cover and inspect
lens cover for scratches that
could be aecting image
quality.
Is back cover’s lens cover
scratched, enough to cause
image quality loss?
5. Clean camera lens.
Remove back cover and
clean the camera lens with a
microber cloth. Perform the
main camera test.
Is the camera image quality
issue resolved?
Yes Determine if the issue is caused by
accidental damage. Refer to the Visual
Mechanical Inspection guidelines.
Replace back cover, if possible, rather
than replacing the whole unit.
No Go to step 5.
Yes Issue resolved.
No Determine if the issue is caused by
accidental damage. Refer to the Visual
Mechanical Inspection guidelines.
Replace main camera, if possible, rather
than replacing the whole unit.
2012-02-21
iPhone 4 Symptom Charts — Mechanical Issues 49
Page 50
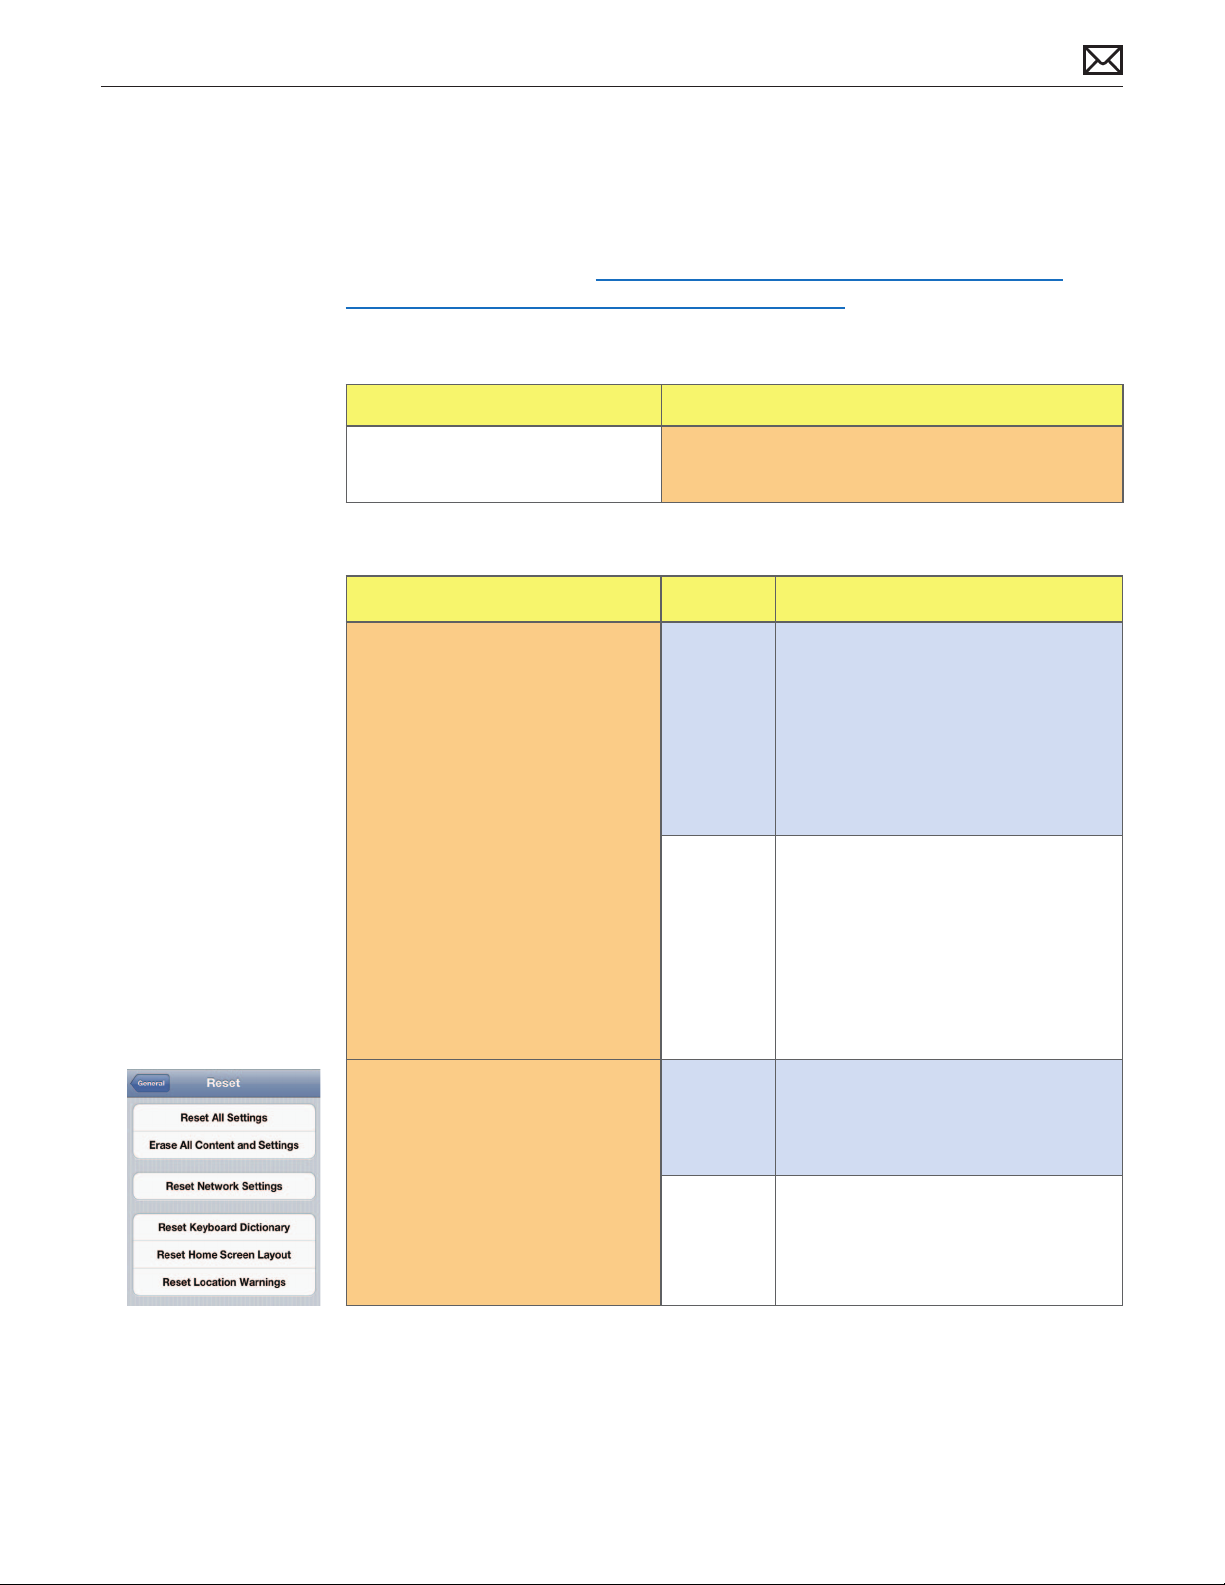
Temperature Alert
Known-Good Parts & Materials Required: Dock Connector to USB Cable, computer running
the latest version of iTunes with a known-good USB port
Also see Apple Support article HT2101: iPhone, iPad, and iPod touch (4th generation):
Keeping device within acceptable operating temperatures.
Quick Check
Symptoms Quick Check
• Temperature alert message
appears
1. Go to Deep Dive.
Deep Dive
Check Result Action
1. Allow device to cool down.
Allow the device to cool
down. The device will follow
these automated steps before
returning to full function:
a. Battery charging is disabled.
b. Display brightness dims.
c. Cellular transmission power is
reduced.
d Apps close, phone calls end,
a temperature alert message
appears.
e. Device powers o.
After the device has had a
chance to cool, has it returned
to normal operation?
Yes Issue resolved.
No Go to step 2.
2012-02-21
2. Erase all content and settings.
Go to Settings > General >
Reset > Erase All Content and
Settings.
Warning: This will delete all
user data on the device.
Is the temperature issue
resolved?
Yes Issue resolved.
No Go to step 3.
iPhone 4 Symptom Charts — Mechanical Issues 50
Page 51

3. Restore with iTunes.
Restore the device using
the latest version of iTunes.
If restore fails, attempt DFU
restore.
Is the temperature issue
resolved?
Yes Issue resolved.
No Determine if the issue is caused by
accidental damage. Refer to the Visual
Mechanical Inspection guidelines.
Burnt Smell/Odor
Known-Good Parts & Materials Required: none
Quick Check
Symptoms Quick Check
• Unusual burnt smell or odor 1. Disconnect all accessories or 30-pin connections
from the device.
Deep Dive
Check Result Action
1. Check for safety issue.
Determine whether there is
a safety issue, such as fumes,
excessive heat, or shock. Do not
perform procedures that can
be a safety risk to you or the
user.
Can you proceed safely?
2. Identify odor source.
Determine the source of the
odor.
Is the odor coming from the
device or an accessory?
Yes Go to step 2.
No Determine if the issue is caused by
accidental damage. Refer to the Visual
Mechanical Inspection guidelines.
Escalate per safety procedures if user
claims injury.
Device Determine if the issue is caused by
accidental damage. Refer to the Visual
Mechanical Inspection guidelines.
Accessory Advise user to discontinue use of the
accessory. Replace Apple accessory. If
user has a third-party accessory, refer
to manufacturer for support.
2012-02-21
iPhone 4 Symptom Charts — Mechanical Issues 51
Page 52

Band Split/Oset
Deep Dive
Check Result Action
1. Check for safety issue.
Determine whether there is
a safety issue, such as glass
fragments or sharp metal
edges. Do not perform
procedures that can be a safety
risk to you or the user.
Can you proceed safely?
Yes Covered if under warranty. Check for
out-of-warranty repair options.
No Covered if under warranty. Check for
out-of-warranty repair options.
Escalate per safety procedures if user
claims injury.
Other Mechanical Issue
Deep Dive
Check Result Action
1. Verify whether any of the
troubleshooting ows apply to
the issue reported by the user.
Yes Jump to appropriate troubleshooting
ow.
No
Document reported failure and send
feedback to [email protected]
stating that a suitable troubleshooting
ow wasn’t found.
2012-02-21
Escalate through your usual channels
for further troubleshooting support.
iPhone 4 Symptom Charts — Mechanical Issues 52
Page 53
Software Issues
Unexpected Freeze/Restart/Power O, “Connect to iTunes”
Known-Good Parts & Materials Required: USB Power Adapter, Dock Connector to USB Cable,
computer running the latest version of iTunes with a known-good USB port
Quick Check
Symptoms Quick Check
• Freezes
• Frozen on-screen image
• Frozen Apple logo
• Frozen low-battery image
• “Connect to iTunes” image (at
left)
• Unexpectedly restarts
• Unexpectedly powers o
1. Force quit frozen app.
2. Try to restart the device.
3. Try to reset the device.
Deep Dive
Check Result Action
1. Verify device status.
Plug the device into a knowngood power adapter and cable
to charge the battery. Allow up
to 2 minutes for the device to
respond.
Identify if device woke up to
the “battery trap” image (at left)
or to an iOS screen, such as:
• “slide to unlock”
• Apple Logo (startup)
• “connect to iTunes”
Battery
Trap
iOS Screen Go to step 3.
Go to step 2.
2012-02-21
Did the device wake to
“battery trap” or to an iOS
screen?
2. Continue charging.
Charge the device for up to an
additional 10 minutes.
After 10 minutes, did the
device wake to an iOS screen?
Yes Go to step 3.
No Determine if the issue is caused by
accidental damage. Refer to the Visual
Mechanical Inspection guidelines.
iPhone 4 Symptom Charts — Software Issues 53
Page 54

3. Identify iOS screen.
Identify if the device woke to
“slide to unlock” rather than
the Apple logo or “connect to
iTunes.”
Did the device wake to “slide
to unlock?”
Yes Go to step 4.
No Go to step 5.
4. Verify functionality.
Determine if the device is still
exhibiting the behaviors the
user claimed were the initial
issue.
Is the issue resolved?
5. Restore with iTunes.
Restore the device using
the latest version of iTunes.
If restore fails, attempt DFU
restore.
Warning: This will delete all
user data on the device.
Is the issue resolved?
6. Verify functionality.
Determine if the device is still
exhibiting the behaviors the
user claimed were the initial
issue.
Is the issue resolved?
Yes Issue resolved.
No Go to step 5.
Yes Go to step 6.
No Determine if the issue is caused by
accidental damage. Refer to the Visual
Mechanical Inspection guidelines.
Yes Issue resolved.
No Determine if the issue is caused by
accidental damage. Refer to the Visual
Mechanical Inspection guidelines.
2012-02-21
iPhone 4 Symptom Charts — Software Issues 54
Page 55
Alert Messages on Device or in iTunes
Known-Good Parts & Materials Required: Dock Connector to USB Cable, computer running
the latest version of iTunes with a known-good USB port
Quick Check
Symptoms Quick Check
• “Use iTunes to Recover”
window
• Alert/error messages on the
device
• Alert/error message in iTunes
1. Read the alert to determine the issue. Many
alerts provide additional information or links to
resolve the issue. Refer to Apple Support article
TS1275: iOS: Resolving update and restore alert
messages.
2. Restart the device.
3. On the device, go to Settings > General >
Software Update to verify device has the most
up-to-date software. If unavailable, verify by
plugging the device into iTunes.
Deep Dive
Check Result Action
1. Inspect dock connector.
Verify that the dock connector
is clean and free of debris or
damage. Clean or x if possible.
Is the dock connection clean
and free of damage?
Yes Go to step 2.
No Determine if the issue is caused by
accidental damage. Refer to the Visual
Mechanical Inspection guidelines.
2012-02-21
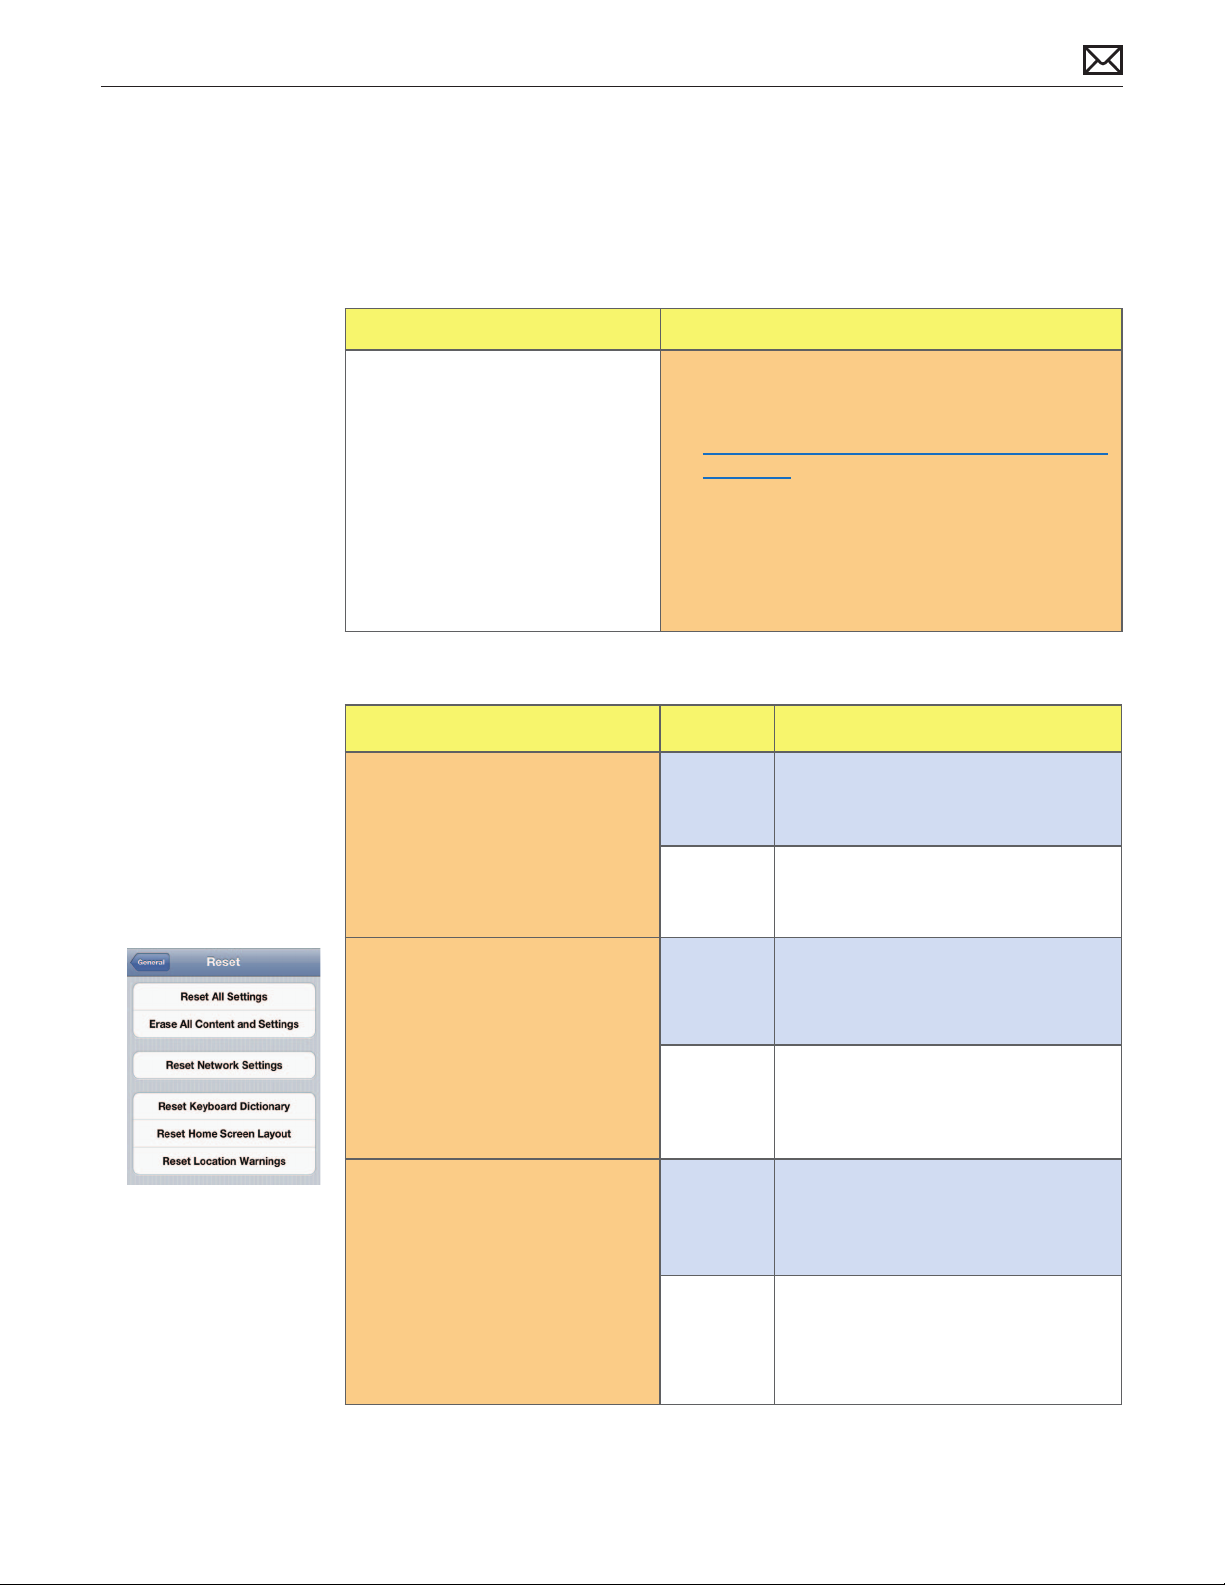
2. Erase all content and settings.
Go to Settings > General >
Reset > Erase All Content and
Settings.
Warning: This will delete all
user data on the device.
Is the issue resolved?
3. Restore with iTunes.
Restore the device using
the latest version of iTunes.
If restore fails, attempt DFU
restore.
Warning: This will delete all
user data on the device.
Is the issue resolved?
Yes Issue resolved.
No Go to step 3.
Yes Issue resolved.
No Determine if the issue is caused by
accidental damage. Refer to the Visual
Mechanical Inspection guidelines.
iPhone 4 Symptom Charts — Software Issues 55
Page 56
App Issues
Known-Good Parts & Materials Required: Dock Connector to USB Cable, iOS diagnostics,
computer running the latest version of iTunes with a known-good USB port
Quick Check
Symptoms Quick Check
• App not functioning correctly
• App unexpectedly quits
(returns to Home screen)
1. Restart the device.
2. Verify that the app is compatible with the device.
3. Launch App Store on device and tap “Updates” in
bottom right corner. If any updates are available,
tap “Update All” in upper right corner.
4. On the device, go to Settings > General >
Software Update to verify device has the most
up-to-date software. If unavailable, verify by
plugging the device into iTunes.
5. Remove and reinstall aected app.
Note: If multiple apps are having similar issues,
go to Deep Dive.
Deep Dive
Check Result Action
1. Diagnose unsupported apps.
Use diagnostics to determine
any apps that are unsupported
on the device.
Are there unsupported apps
listed?
Yes Restore the device using the latest
version of iTunes. If restore fails,
attempt DFU restore.
Warning: This will delete all user data
on the device.
No Go to step 2.
2012-02-21
2. Diagnose unresponsive apps.
Use diagnostics to determine
any apps that are unresponsive.
Are there unresponsive apps
listed?
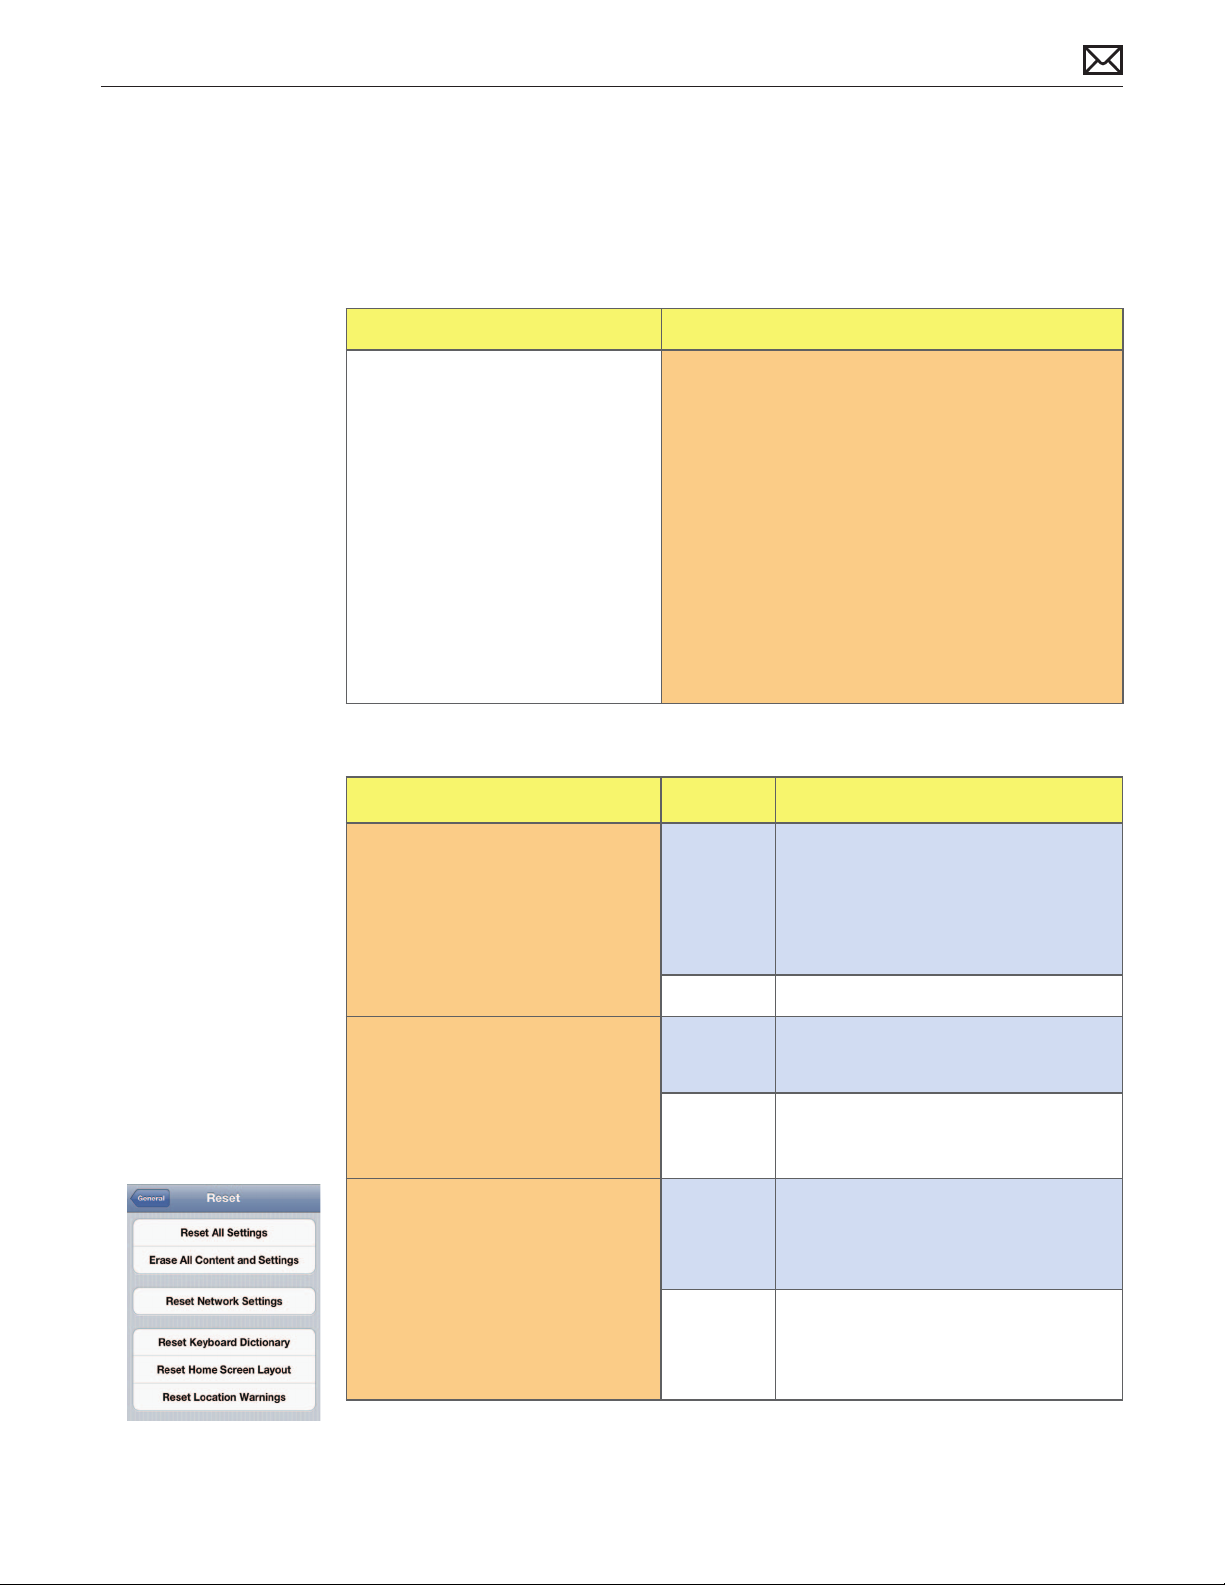
3. Erase all content and settings.
Go to Settings > General >
Reset > Erase All Content and
Settings.
Warning: This will delete all
user data on the device.
Is the app issue resolved?
Yes Instruct user how to quit processes on
the device.
No Go to step 3.
Yes Issue resolved.
No Go to step 4.
iPhone 4 Symptom Charts — Software Issues 56
Page 57

4. Restore with iTunes.
Yes Issue resolved.
Restore the device using
the latest version of iTunes.
If restore fails, attempt DFU
restore.
Is the app issue resolved?
No If failing app is NOT part of iOS, refer
user to the app developer for support.
Refer to Apple Support article HT1933:
How to report an issue with your
iTunes Store purchase.
If failing app is part of iOS, determine
if the issue is caused by accidental
damage. Refer to the Visual
Mechanical Inspection guidelines.
Cannot Play Media
Known-Good Parts & Materials Required: Dock Connector to USB Cable, computer running
the latest version of iTunes with a known-good USB port
Quick Check
Symptoms Quick Check
• Song, video, or other media will
not play
1. Restart the device.
2. On the device, go to Settings > General >
Software Update to verify device has the most
up-to-date software. If unavailable, verify by
plugging the device into iTunes.
3. If user’s computer is available, test that media
plays on the computer. If media does not play on
the computer, this is an issue with corrupt media.
Deep Dive
Check Result Action
1. Test with known-good media.
If problem media was
purchased, attempt to play
known-good media (free app,
free song of the week, song
preview in iTunes Store) on
device.
If problem media was not
purchased, restart the device
and resync content.
Is the issue resolved?
Yes Issue resolved.
No Go to step 2.
2012-02-21
iPhone 4 Symptom Charts — Software Issues 57
Page 58

2. Erase all content and settings.
Go to Settings > General >
Reset > Erase All Content and
Settings.
Warning: This will delete all
user data on the device.
Attempt to play known-good
media on device.
Does known-good media play
successfully?
Yes Issue resolved.
No Go to step 3.
3. Restore with iTunes.
Restore the device using
the latest version of iTunes.
If restore fails, attempt DFU
restore.
Attempt to play known-good
media on device.
Does known-good media play
successfully?
Yes Issue resolved.
No Determine if the issue is caused by
accidental damage. Refer to the Visual
Mechanical Inspection guidelines.
Other Software Issue
Deep Dive
Check Result Action
1. Verify whether any of the
troubleshooting ows apply to
the issue reported by the user.
Yes Jump to appropriate troubleshooting
ow.
No
Document reported failure and send
feedback to [email protected]
stating that a suitable troubleshooting
ow wasn’t found.
2012-02-21
Escalate through your usual channels
for further troubleshooting support.
iPhone 4 Symptom Charts — Software Issues 58
Page 59

Connectivity Issues
iTunes Sync Issues
Known-Good Parts & Materials Required: USB Power Adapter, Dock Connector to USB Cable,
computer running the latest version of iTunes with a known-good USB port
Quick Check
Symptoms Quick Check
• Device not recognized in
iTunes
• Device will not sync
Deep Dive
1. Verify that cable is securely attached to both
device and computer.
2. Try connecting device to a dierent USB 2.0 port
on computer (not on keyboard or an external
hub.)
3. Disconnect other USB devices from the computer.
4. Verify the device accepts power with a known-
good cable and power adapter. If not, jump to
Battery Will Not Charge.
5. Restart the device.
6. Restart the computer and reconnect the device.
7. For Windows, refer to Apple Support articles
TS1495: iOS: Device not recognized in iTunes
for Windows and TS1567: How to restart the
Apple Mobile Device Service (AMDS) on
Windows.
8. Check for third-party software conicts.
2012-02-21
Check Result Action
1. Inspect dock connector.
Verify that the dock connector
is clean and free of debris or
damage. Clean or x if possible.
Is the dock connector clean
and free of of debris or
damage?
Yes Go to step 2.
No Determine if the issue is caused by
accidental damage. Refer to the Visual
Mechanical Inspection guidelines.
iPhone 4 Symptom Charts — Connectivity Issues 59
Page 60
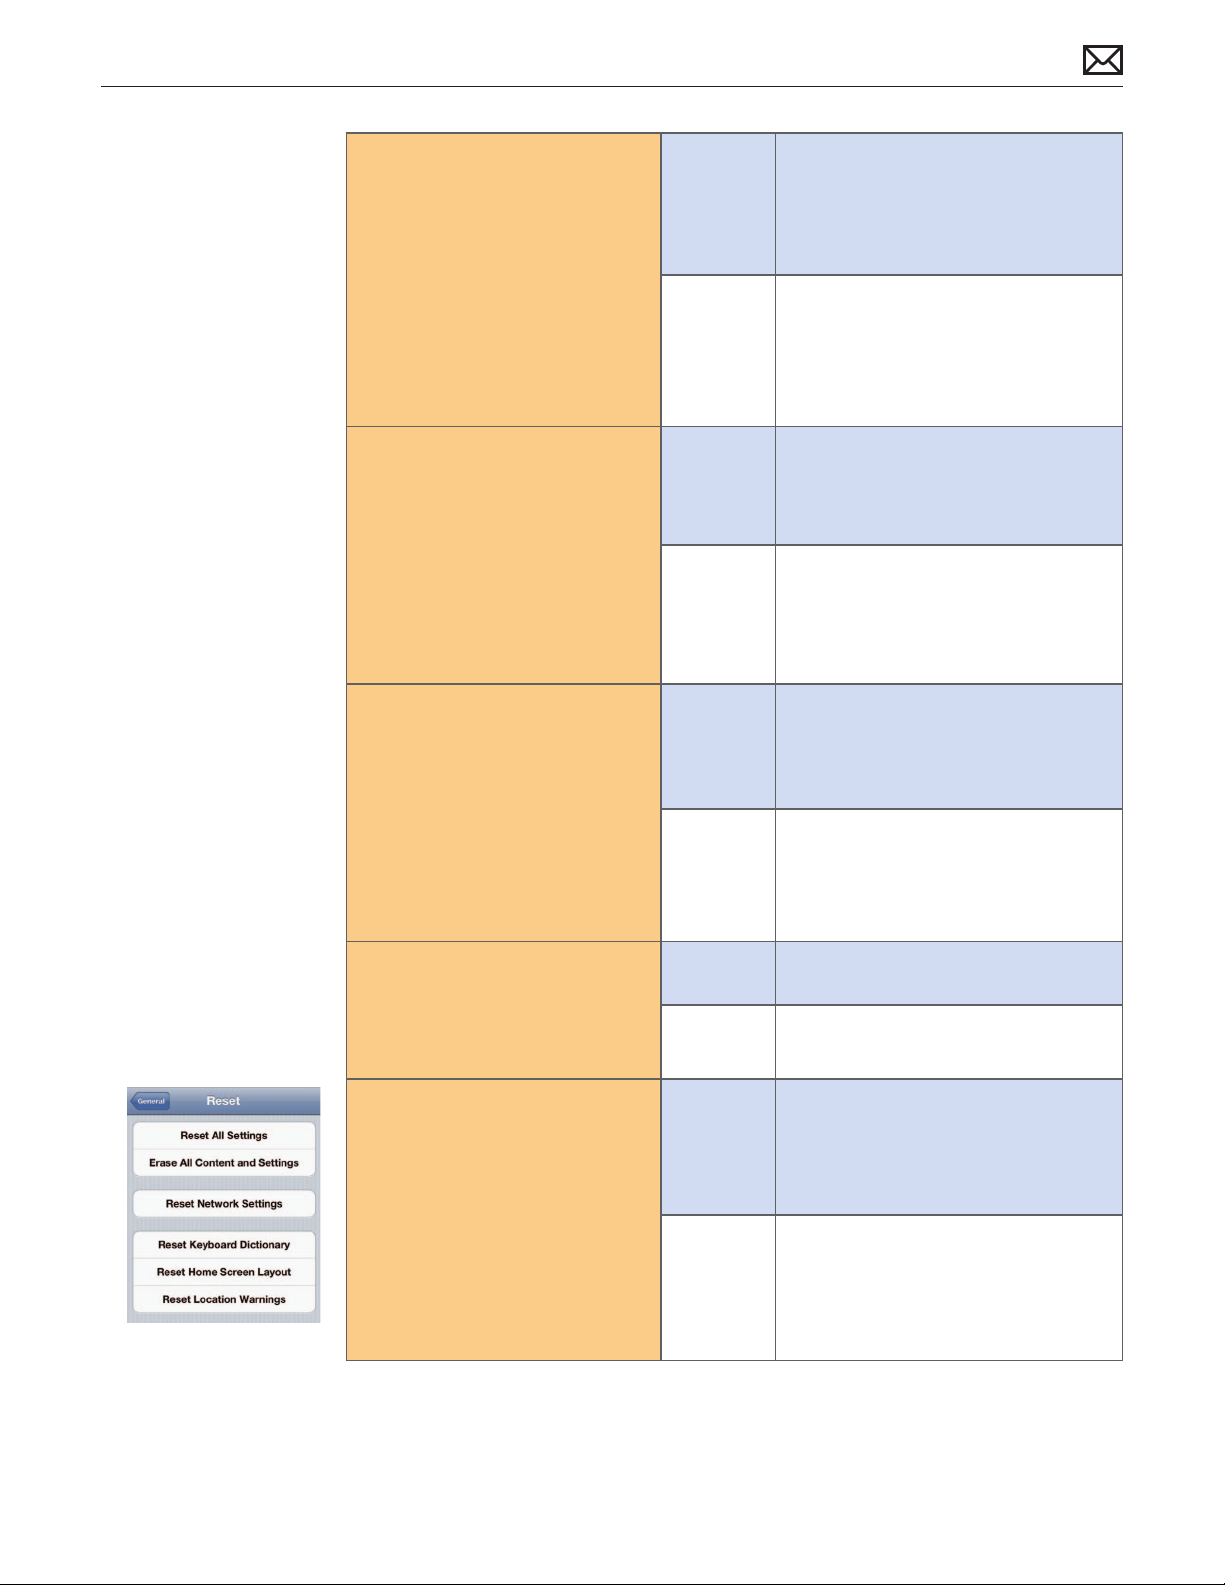
2. Verify device presence in
iTunes.
Connect the device to user’s
computer (if available) and see
if it is recognized in iTunes.
Yes Go to step 3.
If user’s computer is not
available, select the “No”
answer.
Does iTunes recognize the
device?
3. Test with known-good
computer.
Connect the device to a
known-good computer running
the latest version of iTunes and
see if the device is recognized
in iTunes.
Does iTunes recognize the
device?
4. Put device into recovery
mode.
Put the device into recovery
mode and reconnect to knowngood computer. Verify if the
device is now recognized in
iTunes.
Does iTunes recognize the
device?
No Go to step 5.
Yes User needs to reinstall iTunes and/or
troubleshoot issue with computer.
No Go to step 4.
Yes Go to step 7.
No Determine if the issue is caused by
accidental damage. Refer to the Visual
Mechanical Inspection guidelines.
2012-02-21
5. Sync with iTunes.
Attempt to sync the device
with iTunes.
Was the sync successful?
6. Erase all content and settings.
Go to Settings > General >
Reset > Erase All Content and
Settings.
Warning: This will delete all
user data on the device.
Attempt to sync the device
with iTunes.
Was the sync successful?
Yes Issue resolved.
No Go to step 6.
Yes Issue resolved.
No Go to step 7.
iPhone 4 Symptom Charts — Connectivity Issues 60
Page 61
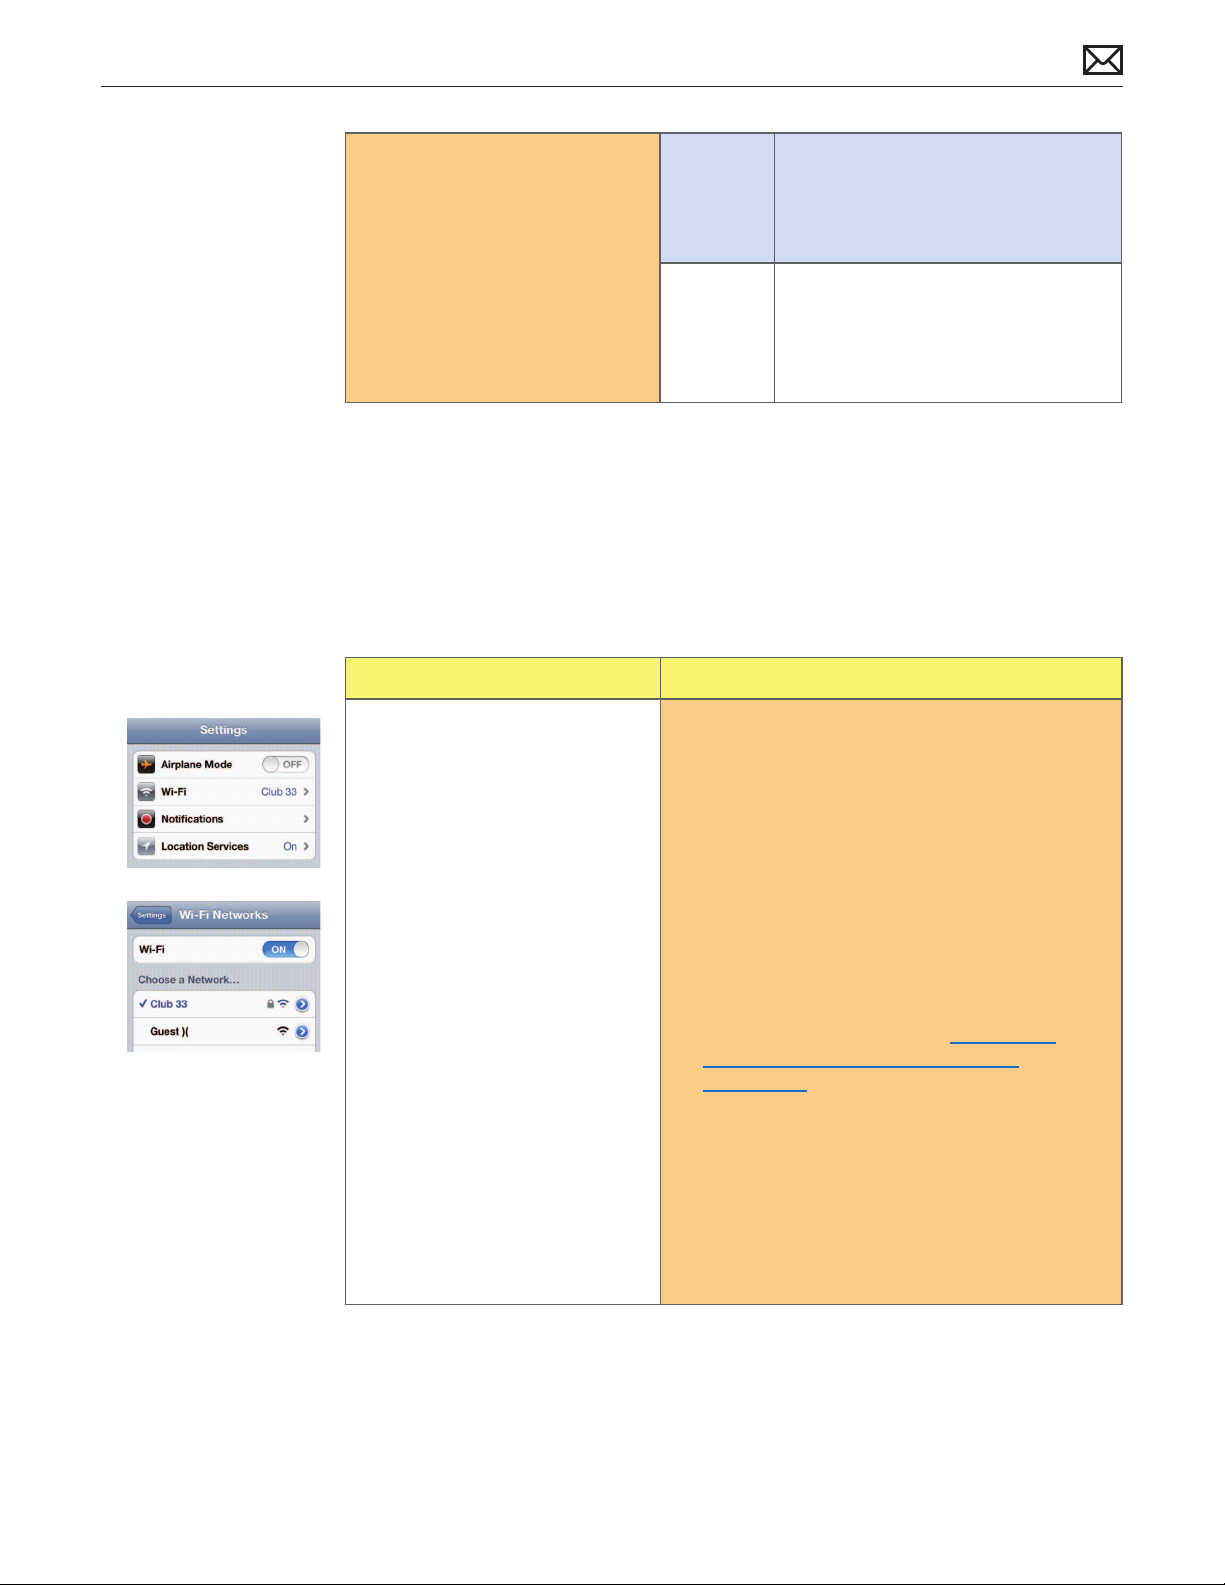
7. Recovery mode restore.
Restore the device in recovery
mode using the latest version
of iTunes. If recovery mode
restore fails, attempt DFU
restore.
Attempt to sync the device
with iTunes.
Was the sync successful?
Yes Issue resolved.
No Escalate with your usual technical
escalation process.
Wi-Fi Issues
Known-Good Parts & Materials Required: Wi-Fi network, Dock Connector to USB Cable,
computer running the latest version of iTunes with a known-good USB port
Quick Check
Symptoms Quick Check
• Unable to locate a nearby Wi-Fi
network
• Unable to connect to a Wi-Fi
network
• Unable to access the Internet
• Settings > Wi-Fi is grayed out
1. On the device, go to Settings and turn Airplane
Mode on for 15 seconds, then o. This resets all
wireless connections on the device.
2. Restart the device.
3. On the device, go to Settings > General >
Software Update to verify device has the most
up-to-date software. If unavailable, verify by
plugging the device into iTunes.
4. Verify that a third-party case is not interfering
with antennas. Remove any installed third-party
case and retest.
5. Refer to Apple Support article TS1398: iOS:
Troubleshooting Wi-Fi networks and
connections.
6. Verify that Wi-Fi is enabled and that device is
connected to a known-good Wi-Fi network.
7. Check Wi-Fi signal strength. If low, move closer to
Wi-Fi router or hotspot.
8. Reminder: If the network is closed or private, you
must select “other...” and enter the network name
to join.
2012-02-21
iPhone 4 Symptom Charts — Connectivity Issues 61
Page 62
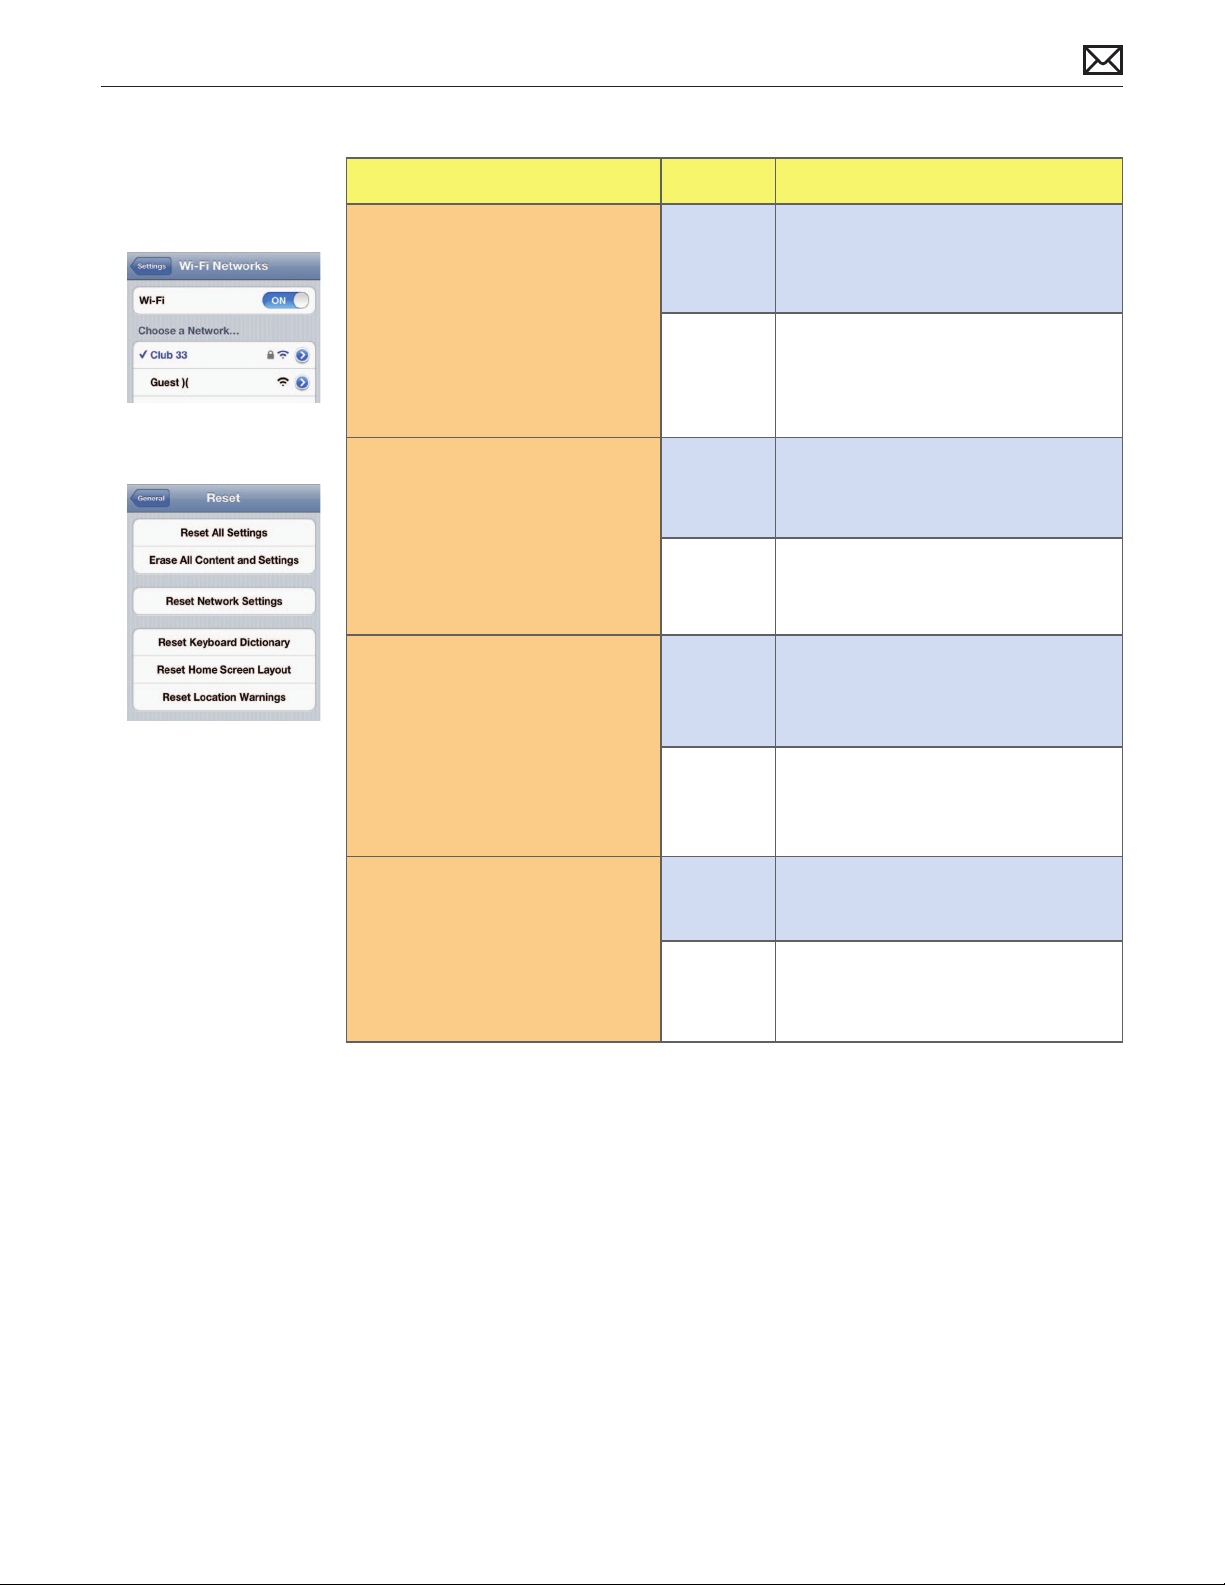
Deep Dive
Check Result Action
1. Forget the current network.
Go to Settings > Wi-Fi and tap
the blue circle to the right of
the network name and signal
strength. Choose “Forget this
Network” and then reconnect
to the network.
Is the Wi-Fi issue resolved?
2. Reset network settings.
Go to Settings > General >
Reset > Reset Network Settings.
Warning: This will erase all
stored Wi-Fi passwords.
Is the Wi-Fi issue resolved?
3. Erase all content and settings.
Go to Settings > General >
Reset > Erase All Content and
Settings.
Warning: This will delete all
user data on the device.
Yes Issue resolved.
No Go to step 2.
Yes Issue resolved.
No Go to step 3.
Yes Issue resolved.
No Go to step 4.
Is the Wi-Fi issue resolved?
4. Restore with iTunes.
Restore the device using
the latest version of iTunes.
If restore fails, attempt DFU
restore.
Is the Wi-Fi issue resolved?
Yes Issue resolved.
No Determine if the issue is caused by
accidental damage. Refer to the Visual
Mechanical Inspection guidelines.
2012-02-21
iPhone 4 Symptom Charts — Connectivity Issues 62
Page 63
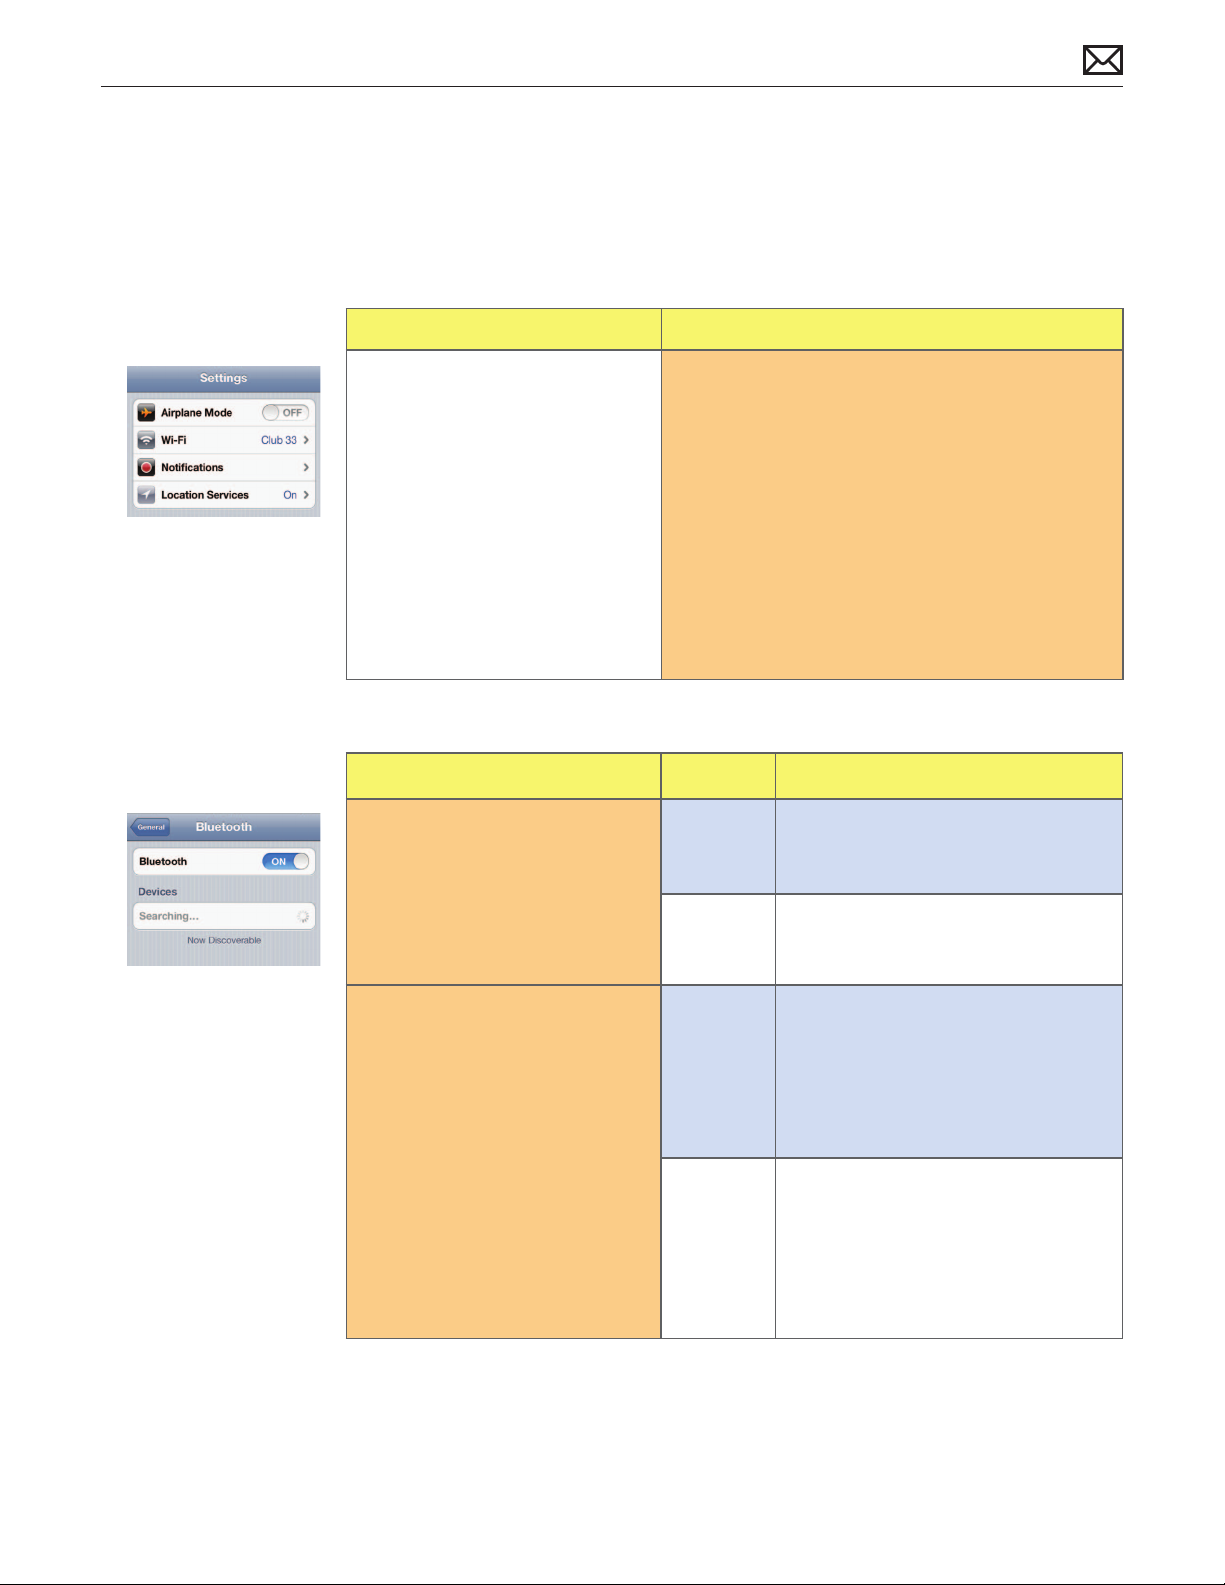
Bluetooth Issues
Known-Good Parts & Materials Required: Bluetooth accessory, Dock Connector to USB Cable,
computer running the latest version of iTunes with a known-good USB port
Quick Check
Symptoms Quick Check
• Bluetooth accessory not
recognized
• Bluetooth accessory not pairing
• Settings > General > Bluetooth
is grayed out
1. Verify that the Bluetooth accessory’s package
indicates “Works with iPhone.”
2. On the device, go to Settings and turn Airplane
Mode on for 15 seconds, then o. This resets all
wireless connections on the device.
3. Restart the device.
4. Reset the Bluetooth accessory.
5. On the device, go to Settings > General >
Software Update to verify device has the most
up-to-date software. If unavailable, verify by
plugging the device into iTunes.
Deep Dive
Check Result Action
1. Test device’s Bluetooth.
Go to Settings > General >
Bluetooth and verify that you
can power Bluetooth on/o.
Does Bluetooth successfully
turn on and o?
Yes Go to step 3.
No Go to step 2.
2012-02-21
2. Restore with iTunes.
Restore the device using
the latest version of iTunes.
If restore fails, attempt DFU
restore.
Warning: This will delete all
user data on the device.
Go to Settings > General >
Bluetooth and verify that you
can power Bluetooth on/o.
Does Bluetooth successfully
turn on and o?
Yes Go to step 3.
No Determine if the issue is caused by
accidental damage. Refer to the Visual
Mechanical Inspection guidelines.
iPhone 4 Symptom Charts — Connectivity Issues 63
Page 64
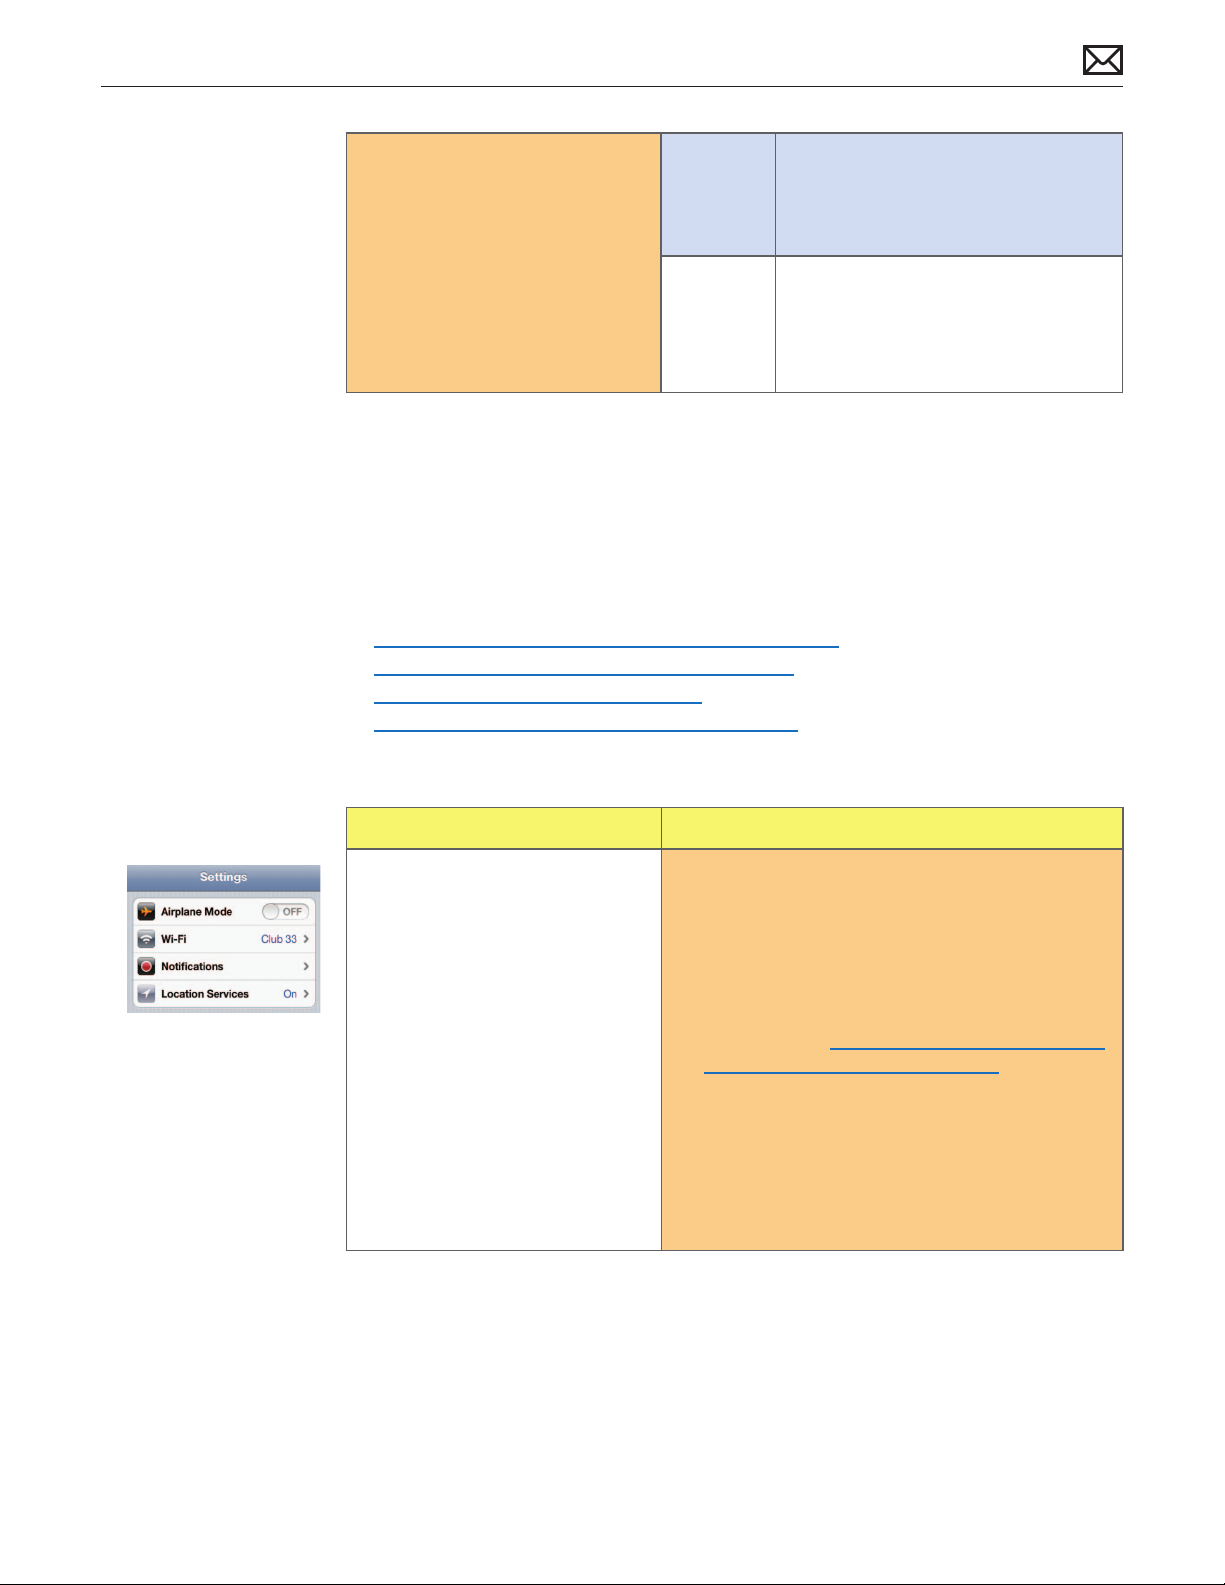
3. Test known-good Bluetooth
accessory.
Attempt to pair device with
a known-good Bluetooth
accessory. Test for accessory
functionality.
Does the device function as
expected with a known-good
Bluetooth accessory?
Yes Issue resolved. Bluetooth accessory is
not functioning as expected. Refer user
to manufacturer for support.
No Determine if the issue is caused by
accidental damage. Refer to the Visual
Mechanical Inspection guidelines.
Cellular Call/Text Issues
Known-Good Parts & Materials Required: SIM card, SIM removal tool, Dock Connector to USB
Cable, computer running the latest version of iTunes with a known-good USB port
Also see Apple Support articles:
• HT1976: iPhone: Understanding cellular data networks
• HT3529: iPhone: About SMS and MMS messaging
• TS2755: iPhone: Troubleshooting MMS
• HT2417: iPhone: Troubleshooting voicemail issues
Quick Check
Symptoms Quick Check
• Cannot make or receive calls
• Cannot send or receive text
messages
1. On the device, go to Settings and turn Airplane
Mode on for 15 seconds, then o. This resets all
wireless connections on the device.
2. Restart the device.
3. If the device is in a case, remove it from the case.
Power o (red slider) and back on. See Apple
Support article HT2342: iPhone: Signal or other
interference while in carrying case.
4. If there is not at least one bar of cellular signal
strength, try moving to another location and
check for a better signal.
5. For text messaging, make sure that the area code
is included with phone numbers in the contacts
list.
2012-02-21
iPhone 4 Symptom Charts — Connectivity Issues 64
Page 65
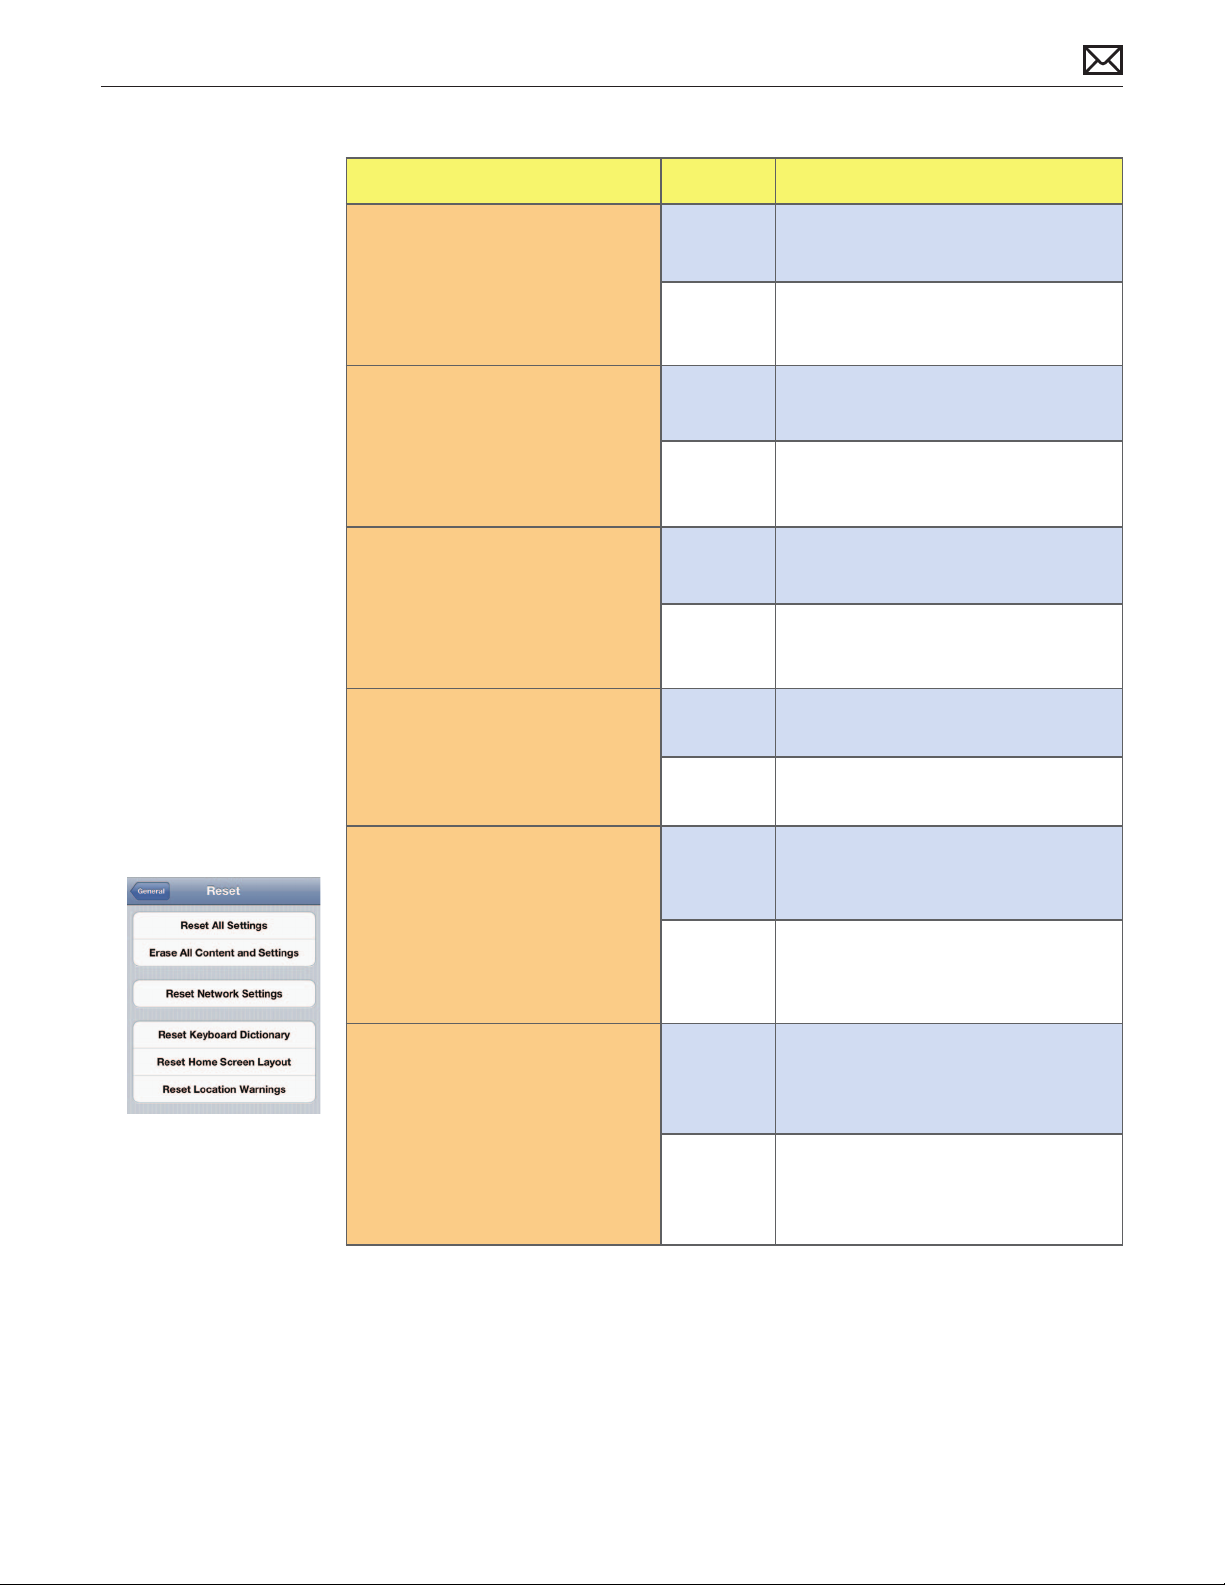
Deep Dive
Check Result Action
1. Identify carrier type.
Identify whether the carrier
uses CDMA or GSM.
Is the device running on a
CDMA or GSM network?
2. Contact cellular carrier.
Contact the carrier to update
the Preferred Roaming List and
verify that the account is active.
Is the cellular issue resolved?
3. Reseat SIM card.
Using the SIM removal tool,
eject the SIM card tray and
reseat the SIM card.
Is the cellular issue resolved?
4. Test known-good SIM card.
Substitute a known-good SIM
card.
Is the cellular issue resolved?
CDMA Go to step 2.
GSM Go to step 3.
Yes Issue resolved.
No Go to step 5.
Yes Issue resolved.
No Go to step 4.
Yes Issue resolved.
No Go to step 5.
5. Reset network settings.
Go to Settings > General >
Reset > Reset Network Settings.
Warning: This will erase all
stored Wi-Fi passwords.
Is the cellular issue resolved?
6. Erase all content and settings.
Go to Settings > General >
Reset > Erase All Content and
Settings.
Warning: This will delete all
user data on the device.
Is the cellular issue resolved?
Yes Issue resolved.
No Go to step 6.
Yes Issue resolved.
No Go to step 7.
2012-02-21
iPhone 4 Symptom Charts — Connectivity Issues 65
Page 66
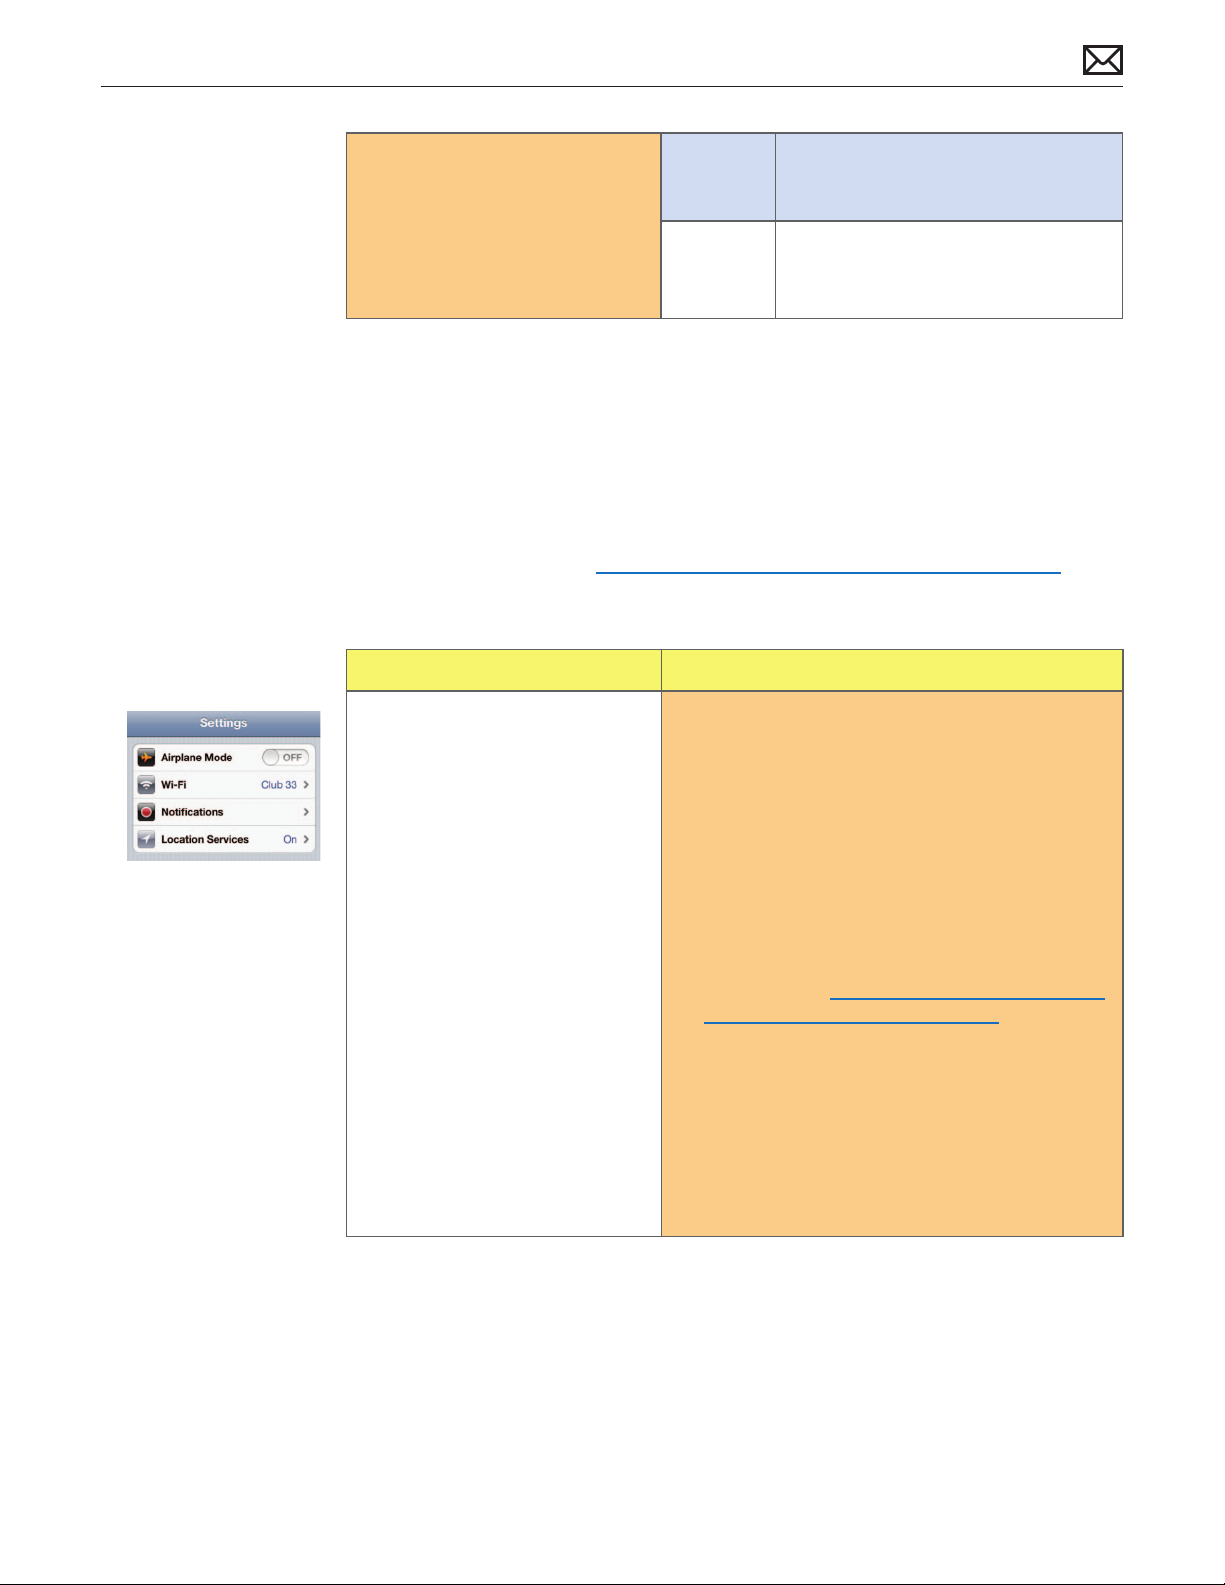
7. Restore with iTunes.
Restore the device using
the latest version of iTunes.
If restore fails, attempt DFU
restore.
Is the cellular issue resolved?
Yes Issue resolved.
No Determine if the issue is caused by
accidental damage. Refer to the Visual
Mechanical Inspection guidelines.
Cellular Data Issues
Known-Good Parts & Materials Required: SIM card, SIM removal tool, USB Power Adapter,
Dock Connector to USB Cable, computer running the latest version of iTunes with a knowngood USB port
Also see Apple Support article HT1976: iPhone: Understanding cellular data networks.
Quick Check
Symptoms Quick Check
• Cannot load web pages
• Cannot send or receive email
• Cannot send or receive cellular
data, such as maps, weather,
stocks
1. On the device, go to Settings and turn Airplane
Mode on for 15 seconds, then o. This resets all
wireless connections on the device.
2. Restart the device.
3. On the device, go to Settings > General >
Software Update to verify device has the most
up-to-date software. If unavailable, verify by
plugging the device into iTunes.
4. If the device is in a case, remove it from the case.
Power o (red slider) and back on. See Apple
Support article HT2342: iPhone: Signal or other
interference while in carrying case.
5. If there is not at least one bar of cellular signal
strength, try moving to another location and
check for a better signal.
6. If the issue is with email, verify that the user’s
email account credentials are accurate.
7. Turn o Wi-Fi (Settings > Wi-Fi) in order to isolate
the issue to carrier network activity.
2012-02-21
iPhone 4 Symptom Charts — Connectivity Issues 66
Page 67

Deep Dive
Check Result Action
1. Identify carrier type.
Identify whether the carrier
uses CDMA or GSM.
Is the device running on a
CDMA or GSM network?
2. Contact cellular carrier.
From another phone, call the
cellular carrier and verify that
the user’s account is active.
Also perform any updates
suggested by the carrier.
Is the cellular issue resolved?
3. Verify that SIM is not locked.
Go to Settings > Phone > SIM
PIN. If SIM is locked, unlock it.
Also see Apple Support article
HT1316: iOS: Understanding
the SIM PIN.
Is the cellular issue resolved?
CDMA Go to step 2.
GSM Go to step 3.
Yes Issue resolved.
No Go to step 7.
Yes Issue resolved.
No Go to step 4.
4. Reseat SIM card.
Using the SIM removal tool,
eject the SIM card tray and
reseat the SIM card.
Is the cellular issue resolved?
5. Test known-good SIM card.
Substitute a known-good SIM
card.
Is the cellular issue resolved?
6. Contact cellular carrier.
From another phone, call the
cellular carrier and verify that
the user’s account is active.
Is the cellular issue resolved?
Yes Issue resolved.
No Go to step 5.
Yes Issue resolved. User should contact
carrier to verify account status.
No Go to step 6.
Yes Issue resolved.
No Go to step 7.
2012-02-21
iPhone 4 Symptom Charts — Connectivity Issues 67
Page 68

7. Reset network settings.
Go to Settings > General >
Reset > Reset Network Settings.
Yes Issue resolved.
Warning: This will erase all
stored Wi-Fi passwords.
Is the cellular issue resolved?
8. Erase all content and settings.
Go to Settings > General >
Reset > Erase All Content and
Settings.
Warning: This will delete all
user data on the device.
Is the cellular issue resolved?
9. Restore with iTunes.
Restore the device using
the latest version of iTunes.
If restore fails, attempt DFU
restore.
Is the cellular issue resolved?
SIM Card Issues
No Go to step 8.
Yes Issue resolved.
No Go to step 9.
Yes Issue resolved.
No Determine if the issue is caused by
accidental damage. Refer to the Visual
Mechanical Inspection guidelines.
Known-Good Parts & Materials Required: SIM card, SIM removal tool
Note: The iPhone 4 (CDMA model) does not have a SIM card. This information does not apply
to this model of iPhone.
Quick Check
Symptoms Quick Check
• “Invalid SIM card installed.”
message
• “Dierent SIM detected. Please
connect to iTunes.” message
1. SIM alert messages can be caused by inserting a
non-Apple authorized carrier SIM card. Verify that
the SIM card is authorized to be used with this
particular device.
2. SIM alert messages can be caused by inserting a
SIM card that is not the SIM used for the device’s
current activation. For example, if a new SIM was
used to activate the device, but the previous SIM
is later inserted, or a dierent SIM card is inserted,
such as during testing.
3. Restart the device.
2012-02-21
iPhone 4 Symptom Charts — Connectivity Issues 68
Page 69

Deep Dive
Check Result Action
1. Inspect SIM card and tray.
Using the SIM removal tool,
eject the SIM card tray. Inspect
both the tray and the SIM
card for debris, corrosion, or
damage. Attempt to clean/x if
necessary.
Are both the SIM card and tray
undamaged?
2. Reseat SIM card.
Reinstall the original SIM card.
Is the SIM card issue resolved?
3. Test known-good SIM card.
Substitute a known-good SIM
card.
Is the SIM card issue resolved?
Yes Go to step 2.
No Determine if the issue is caused by
accidental damage. Refer to the Visual
Mechanical Inspection guidelines.
Replace SIM card and/or tray as
appropriate.
Yes Issue resolved.
No Go to step 3.
Yes Issue resolved. Replace SIM card with
the correct carrier-supported SIM card.
No Determine if the issue is caused by
accidental damage. Refer to the Visual
Mechanical Inspection guidelines.
Other Connectivity Issue
Deep Dive
Check Result Action
1. Verify whether any of the
troubleshooting ows apply to
the issue reported by the user.
Yes Jump to appropriate troubleshooting
ow.
No
Document reported failure and send
feedback to [email protected]
stating that a suitable troubleshooting
ow wasn’t found.
Escalate through your usual channels
for further troubleshooting support.
2012-02-21
iPhone 4 Symptom Charts — Connectivity Issues 69
Page 70
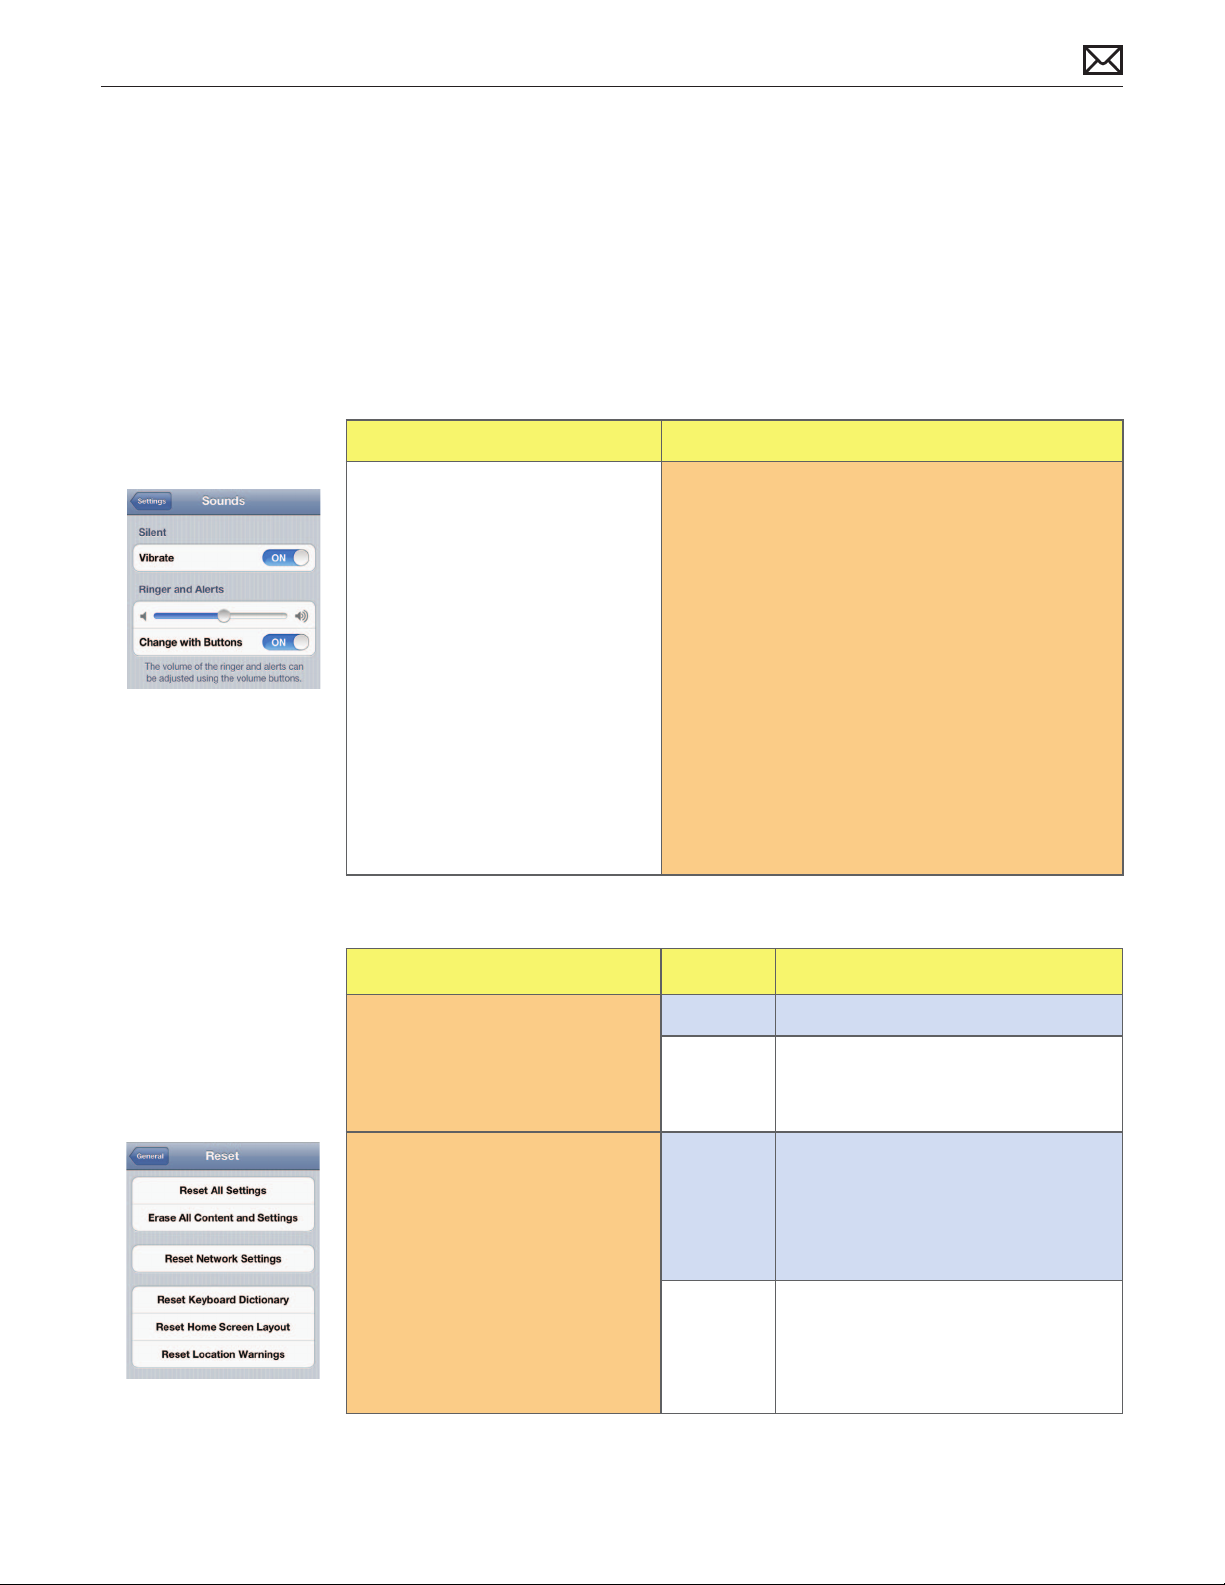
Sound Issues
No Ringer Sound
Known-Good Parts & Materials Required: Dock Connector to USB Cable, computer running
the latest version of iTunes with a known-good USB port
Quick Check
Symptoms Quick Check
• No ringer sound 1. On the device, go to Settings > General >
Software Update to verify device has the most
up-to-date software. If unavailable, verify by
plugging the device into iTunes.
2. Check that the ring/silent switch is set for ring
and not vibrate.
3. Check volume level with volume up/down
buttons.
4. Check Ringer/Alerts volume setting in Settings >
Sounds.
5. Clean speaker mesh. Caution: Compressed air
should NEVER be used to clean any part of an iOS
device. Use only an anti-static brush.
6. Restart the device.
Deep Dive
Check Result Action
1. Check for speaker audio.
Go to Settings > Sounds >
Ringtone and select a ringtone.
Does the device ring?
2. Erase all content and settings.
Go to Settings > General >
Reset > Erase All Content and
Settings.
Warning: This will delete all
user data on the device.
Go to Settings > Sounds >
Ringtone and select a ringtone.
Yes Go to step 2.
No Determine if the issue is caused by
accidental damage. Refer to the Visual
Mechanical Inspection guidelines.
Yes Issue resolved.
No Go to step 3.
2012-02-21
Does the device ring?
iPhone 4 Symptom Charts — Sound Issues 70
Page 71
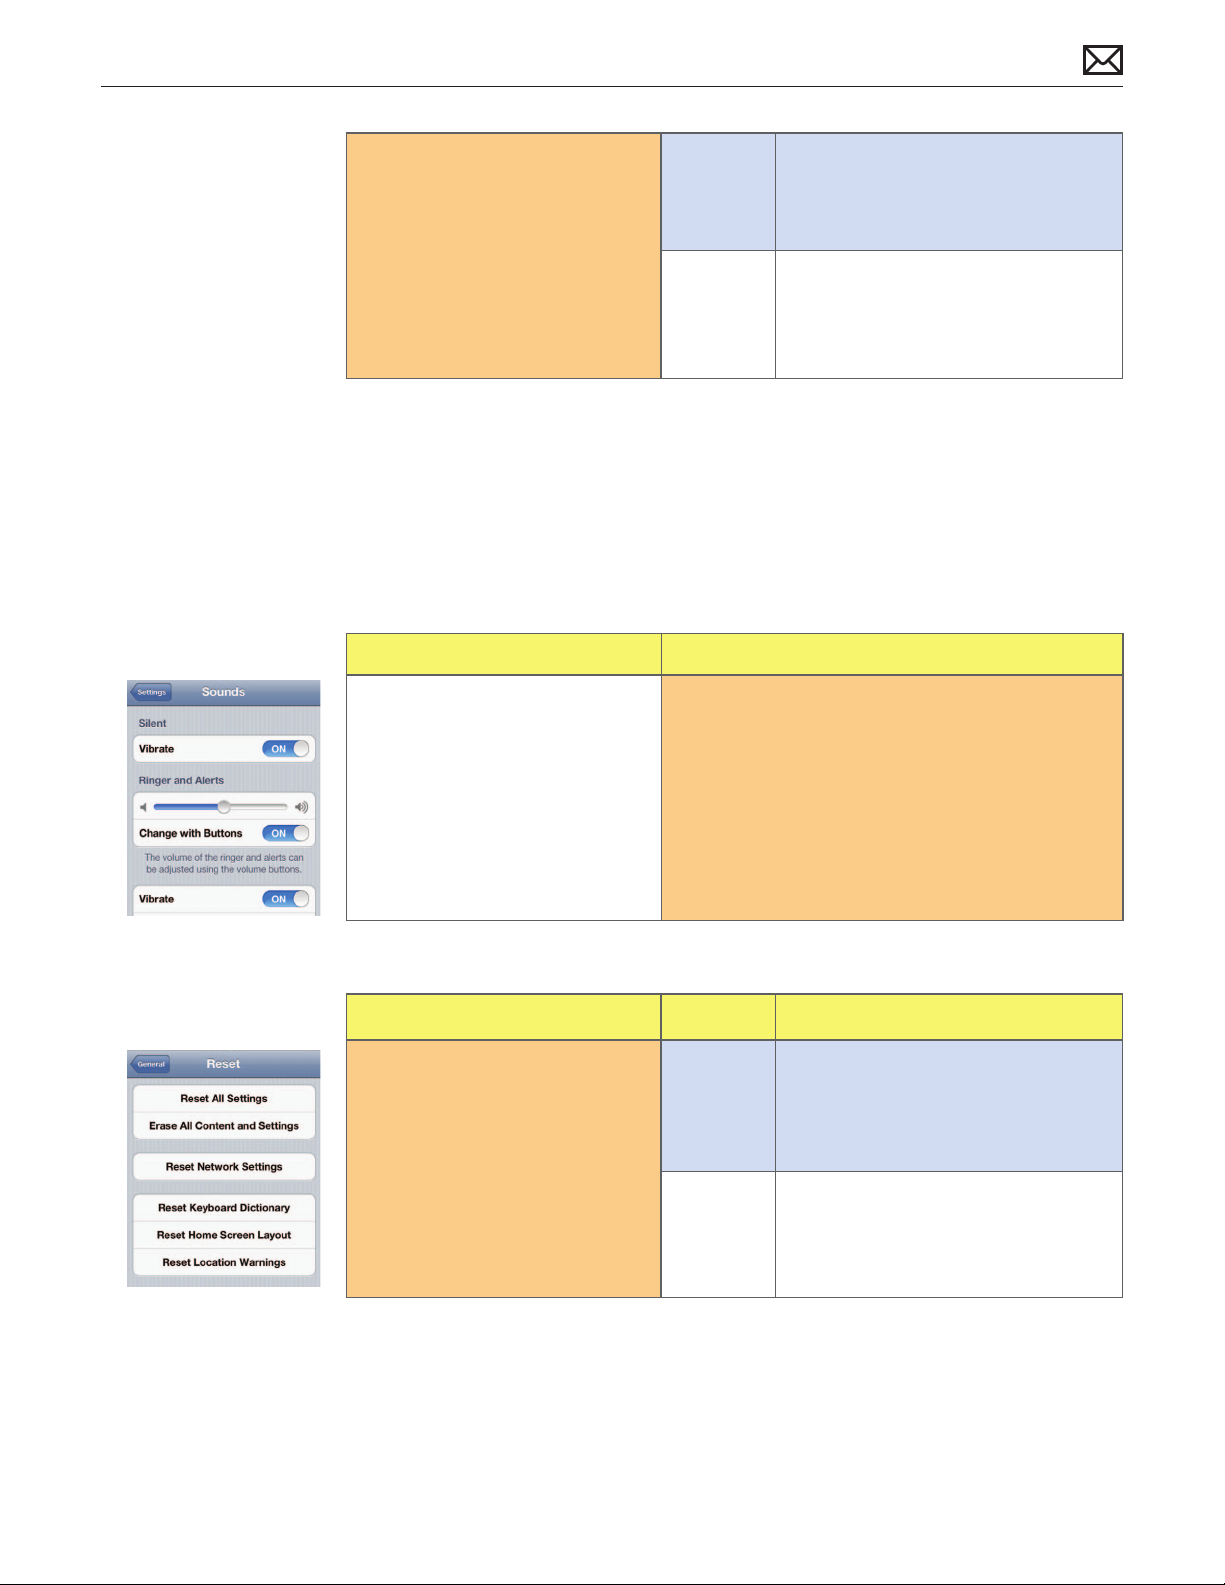
3. Restore with iTunes.
Restore the device using
the latest version of iTunes.
If restore fails, attempt DFU
restore.
Go to Settings > Sounds >
Ringtone and select a ringtone.
Does the device ring?
Yes Issue resolved.
No Determine if the issue is caused by
accidental damage. Refer to the Visual
Mechanical Inspection guidelines.
No Vibrate
Known-Good Parts & Materials Required: Dock Connector to USB Cable, computer running
the latest version of iTunes with a known-good USB port
Quick Check
Symptoms Quick Check
• No vibrate 1. Toggle the ring/silent switch.
2. Check Vibrate settings for both Silent and Ringer/
Alerts in Settings > Sounds.
3. Restart the device.
4. On the device, go to Settings > General >
Software Update to verify device has the most
up-to-date software. If unavailable, verify by
plugging the device into iTunes.
Deep Dive
Check Result Action
1. Erase all content and settings.
Go to Settings > General >
Reset > Erase All Content and
Settings.
Warning: This will delete all
user data on the device.
Toggle the ring/silent switch.
Is the vibrate issue resolved?
Yes Issue resolved.
No Go to step 2.
2012-02-21
iPhone 4 Symptom Charts — Sound Issues 71
Page 72
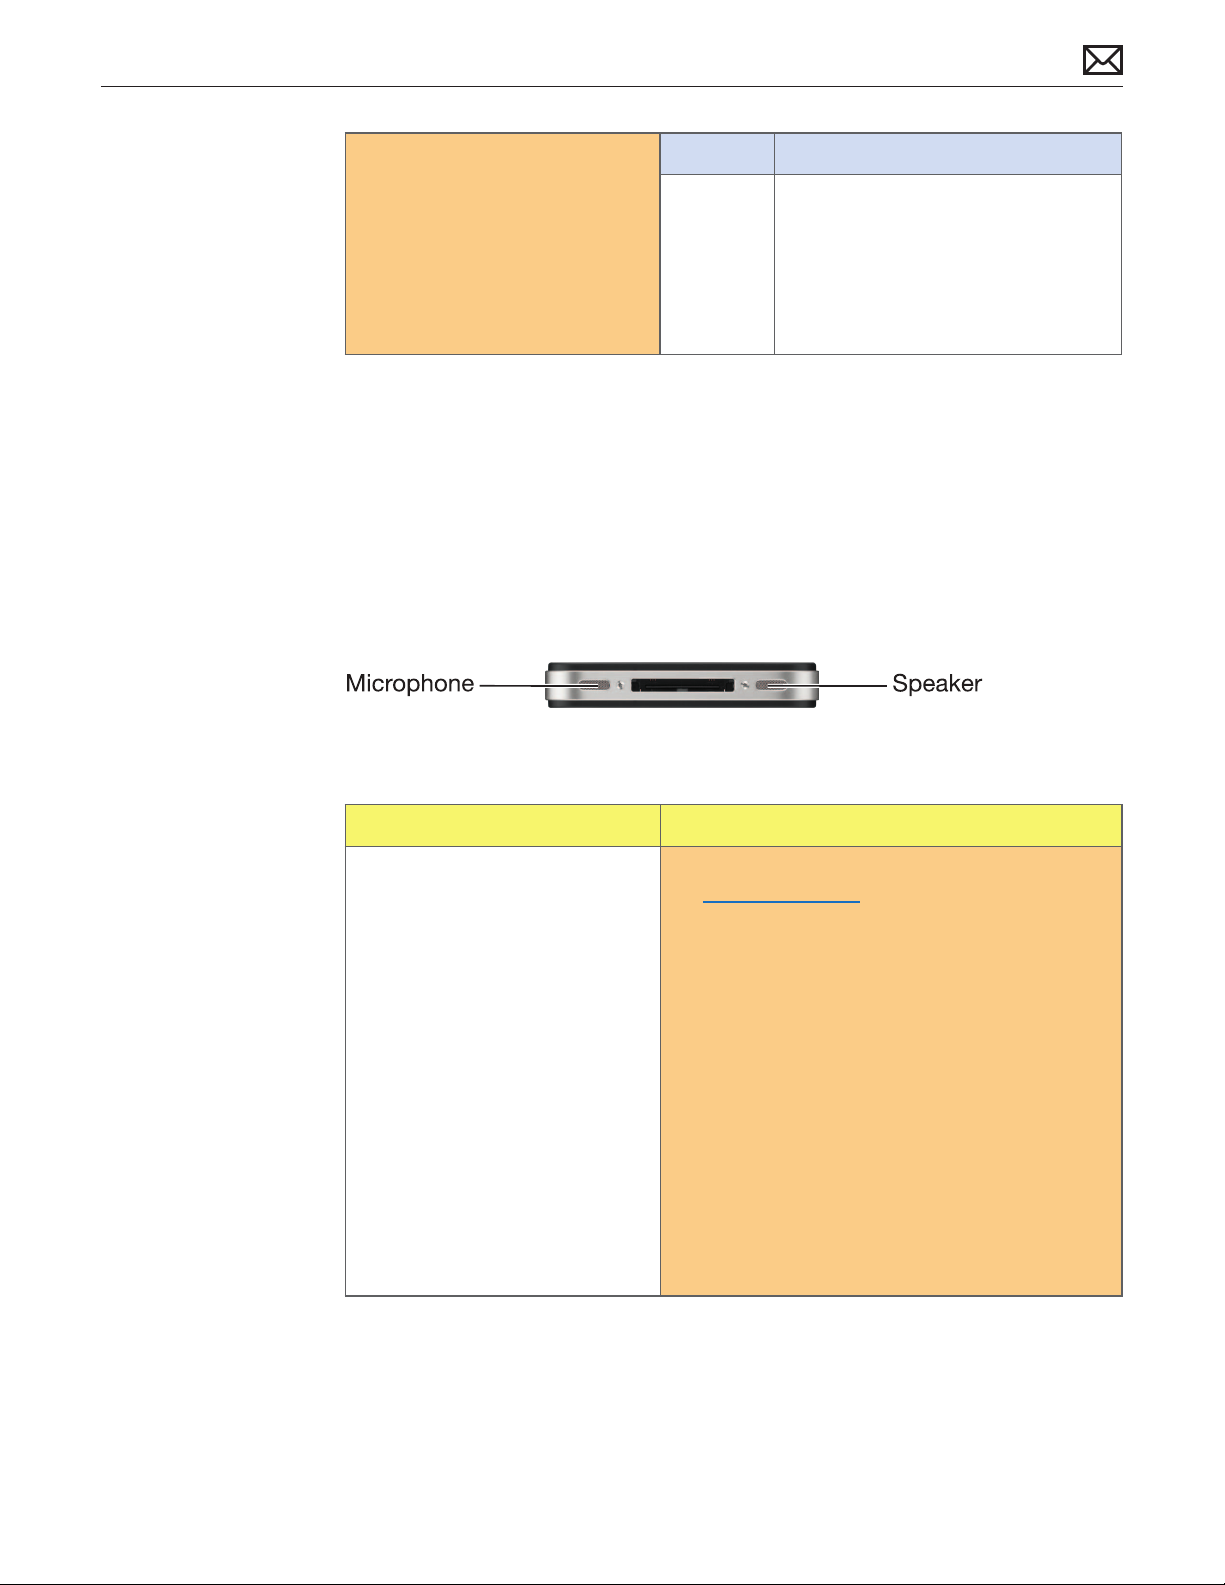
2. Restore with iTunes.
Yes Issue resolved.
Restore the device using
the latest version of iTunes.
If restore fails, attempt DFU
restore.
Toggle the ring/silent switch.
Is the vibrate issue resolved?
No Determine if the issue is caused by
accidental damage. Refer to the Visual
Mechanical Inspection guidelines.
For iPhone 4 (GSM model) only:
Replace vibe motor, if possible, rather
than replacing the whole unit.
Speaker/Receiver Issues
Known-Good Parts & Materials Required: Dock Connector to USB Cable, computer running
the latest version of iTunes with a known-good USB port
Note: The user may report that sound is not playing through both mesh openings on
the bottom edge of iPhone. Only one of the mesh openings is a speaker; the other is the
microphone. The speaker is located on the right side.
Quick Check
Symptoms Quick Check
• No sound from speaker on the
bottom edge of the device
• No sound from receiver
• Distorted sound from speaker
or receiver
1. If issue is with headphone audio, jump to
Headphone Issues.
2. Make sure case or protective lm is not
obstructing the speaker or receiver.
3. On the device, go to Settings > General >
Software Update to verify device has the most
up-to-date software. If unavailable, verify by
plugging the device into iTunes.
4. Check volume level with volume up/down
buttons.
5. Verify that music/audio is not paused.
6. Check Settings > Music (or iPod) > Volume Limit.
7. Go to Settings > General > Accessibility and
verify “Mono Audio” is not enabled (for those who
don’t require it.)
2012-02-21
iPhone 4 Symptom Charts — Sound Issues 72
Page 73
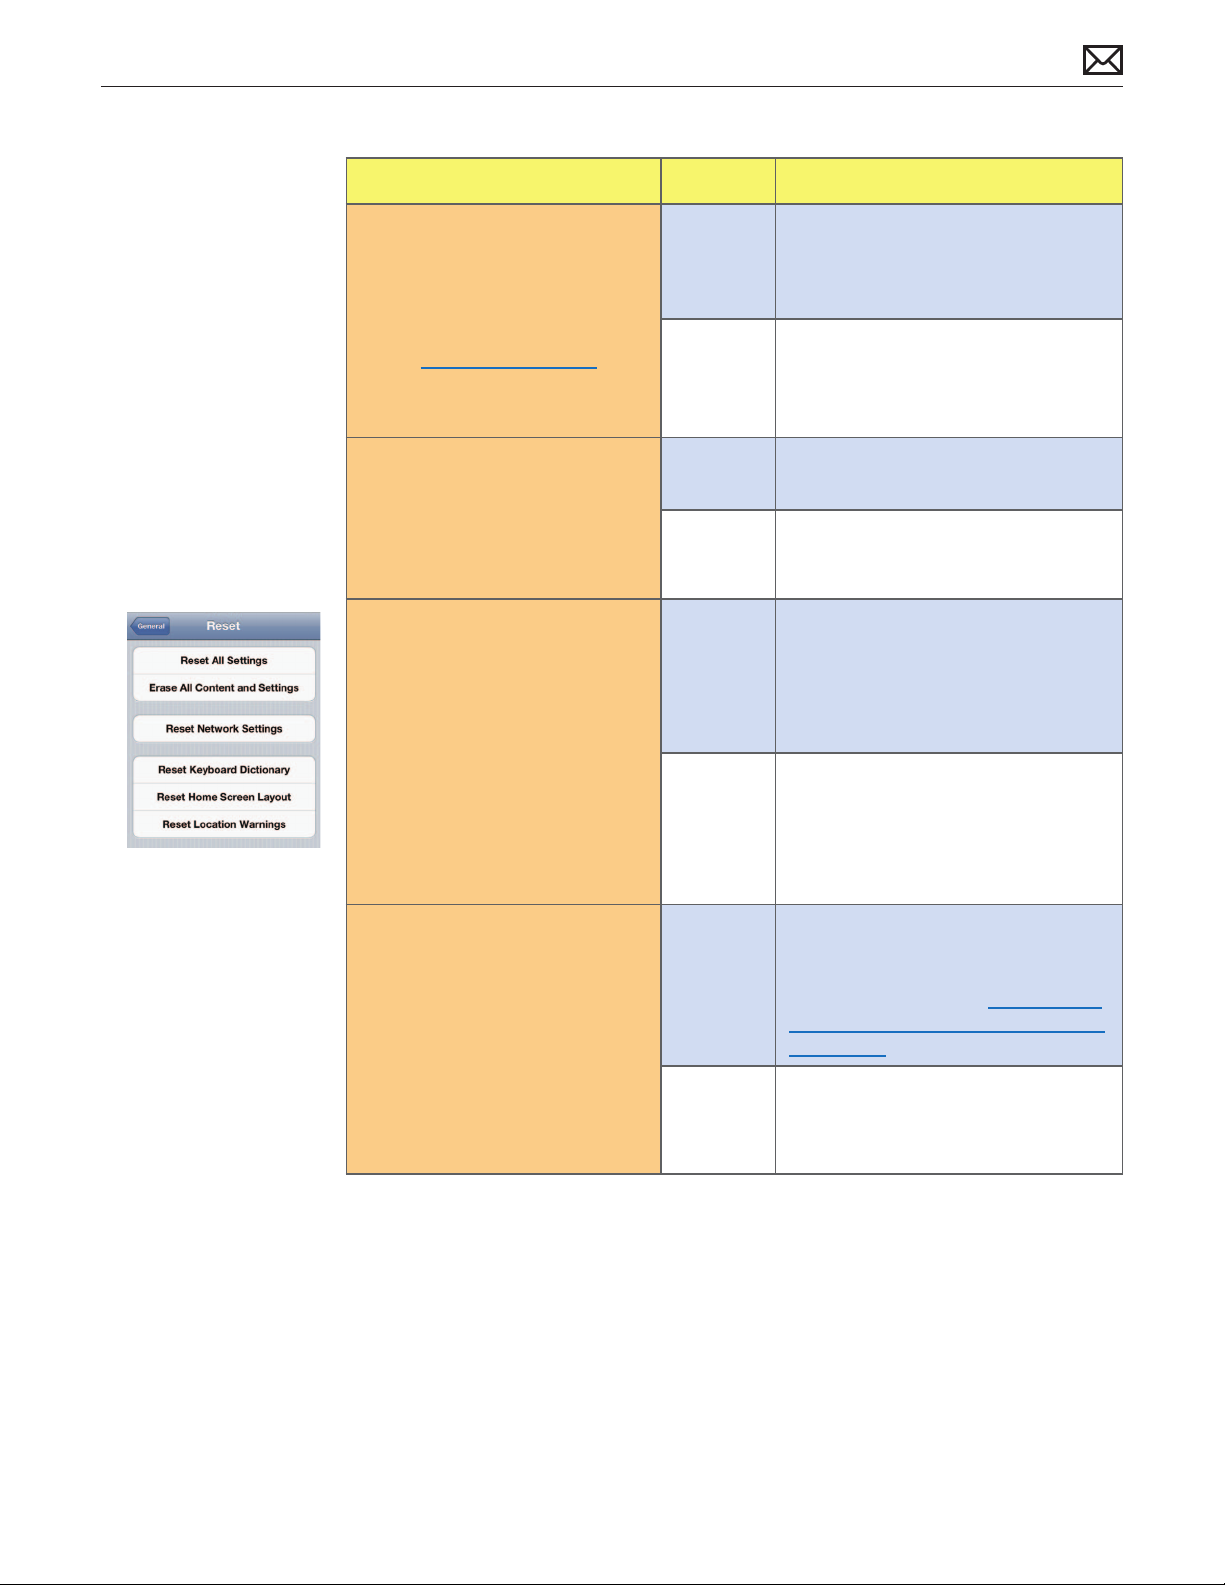
Deep Dive
Check Result Action
1. Clean the device.
Check that speaker or receiver
mesh are not obstructed with
lint or debris. Attempt to clean
any debris in accordance with
the Cleaning Procedures.
Are you able to clean the
device?
2. Retest the device.
Play known-good media or go
to Settings > Sound > Ringtone
and select a ringtone.
Is the audio issue resolved?
3. Erase all content and settings.
Go to Settings > General >
Reset > Erase All Content and
Settings.
Warning: This will delete all
user data on the device.
Play known-good media or go
to Settings > Sound > Ringtone
and select a ringtone.
Yes Go to step 2.
No Determine if the issue is caused by
accidental damage. Refer to the Visual
Mechanical Inspection guidelines.
Yes Issue resolved. User’s audio is
corrupted.
No Go to step 3.
Yes Issue resolved. User’s audio is
corrupted.
No Go to step 4.
Is the audio issue resolved?
4. Restore with iTunes.
Restore the device using
the latest version of iTunes.
If restore fails, attempt DFU
restore.
Play known-good media or go
to Settings > Sound > Ringtone
and select a ringtone.
Is the audio issue resolved?
Yes
No Determine if the issue is caused by
Issue resolved. Software corruption on
the device. Advise user to set up the
device as new, following instructions
in Apple Support article HT4137: How
to back up your data and set up as a
new device.
accidental damage. Refer to the Visual
Mechanical Inspection guidelines.
2012-02-21
iPhone 4 Symptom Charts — Sound Issues 73
Page 74
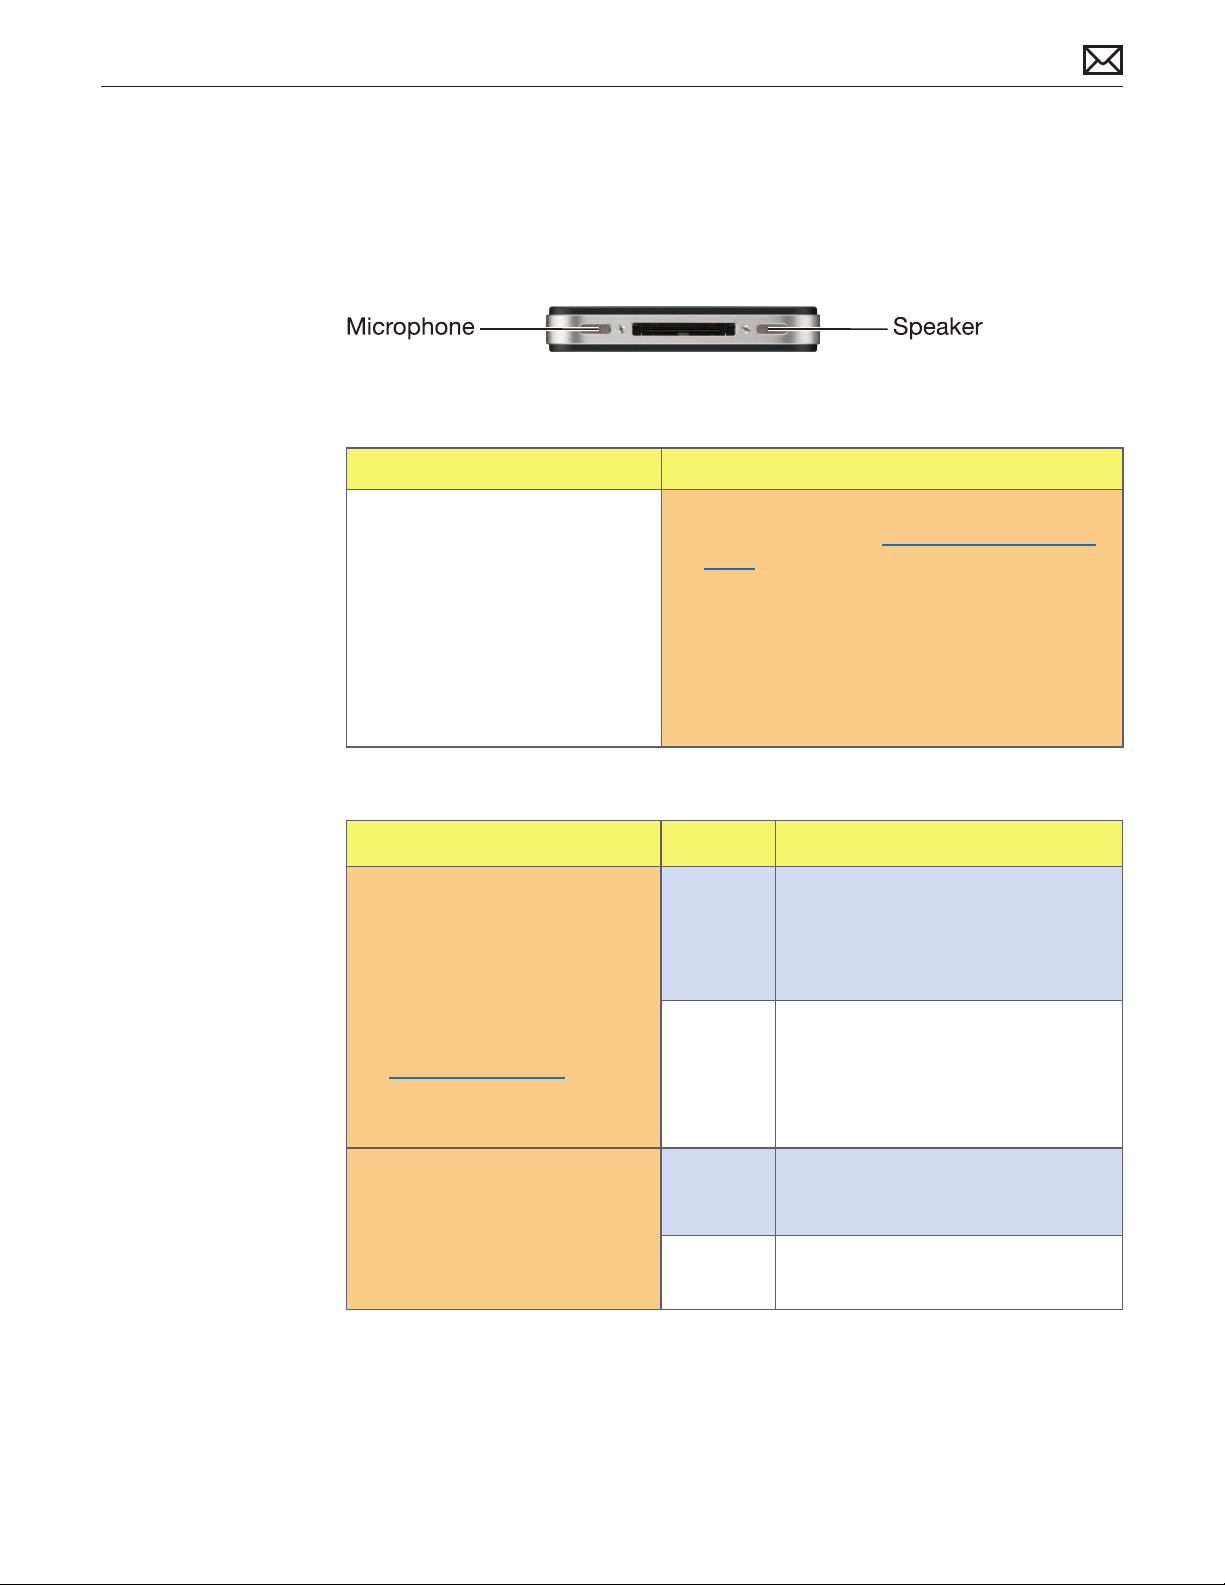
Microphone Issues
Known-Good Parts & Materials Required: Dock Connector to USB Cable, computer running
the latest version of iTunes with a known-good USB port
Note: The microphone is located on the bottom edge of iPhone, on the left side:
Quick Check
Symptoms Quick Check
• Microphone not functioning
• Distorted sound from
microphone
1. If issue is with microphone built-in to
headphones, jump to Headphone Microphone
Issues.
2. Make sure case or protective lm is not
obstructing the microphone.
3. On the device, go to Settings > General >
Software Update to verify device has the most
up-to-date software. If unavailable, verify by
plugging the device into iTunes.
Deep Dive
Check Result Action
1. Clean the device.
Check microphone mesh
on bottom of device and
secondary mic on top of device
are not obstructed with lint or
debris. Attempt to clean any
debris in accordance with the
Cleaning Procedures.
Yes Go to step 2.
No Determine if the issue is caused by
accidental damage. Refer to the Visual
Mechanical Inspection guidelines.
2012-02-21
Are you able to clean the
device?
2. Retest the device.
Open the Voice Memos app.
Create a recording and play it
back.
Did audio record as expected?
Yes Issue resolved.
No Go to step 3.
iPhone 4 Symptom Charts — Sound Issues 74
Page 75

3. Erase all content and settings.
Go to Settings > General >
Reset > Erase All Content and
Settings.
Warning: This will delete all
user data on the device.
Open the Voice Memos app.
Create a recording and play it
back.
Did audio record as expected?
Yes Issue resolved.
No Go to step 4.
4. Restore with iTunes.
Restore the device using
the latest version of iTunes.
If restore fails, attempt DFU
restore.
Open the Voice Memos app.
Create a recording and play it
back.
Did audio record as expected?
Yes Issue resolved.
No Determine if the issue is caused by
accidental damage. Refer to the Visual
Mechanical Inspection guidelines.
2012-02-21
iPhone 4 Symptom Charts — Sound Issues 75
Page 76

Headphone Issues
Known-Good Parts & Materials Required: Apple Earphones, Dock Connector to USB Cable,
computer running the latest version of iTunes with a known-good USB port
Quick Check
Symptoms Quick Check
• No sound in headphones
• Sound from only one channel
in headphones
• Distorted sound in headphones
1. If issue is with speaker audio, jump to
Speaker/Receiver Issues.
2. Verify that the headphones are fully inserted
into the headphone jack. Make sure a case or
protective lm is not interfering.
3. On the device, go to Settings > General >
Software Update to verify device has the most
up-to-date software. If unavailable, verify by
plugging the device into iTunes.
4. Check volume level with volume up/down
buttons.
5. Verify that music/audio is not paused.
6. Check Settings > Music (or iPod) > Volume Limit.
7. Go to Settings > General > Accessibility and
verify “Mono Audio” is not enabled (for those who
don’t require it.)
Deep Dive
Check Result Action
2012-02-21
1. Clean the device.
Check that headphone jack
is not obstructed with lint or
debris. Attempt to clean any
debris in accordance with the
Cleaning Procedures.
Are you able to clean the
device?
2. Retest the device.
Play known-good media or go
to Settings > Sound > Ringtone
and select a ringtone.
Is the headphone issue
resolved?
Yes Go to step 2.
No Determine if the issue is caused by
accidental damage. Refer to the Visual
Mechanical Inspection guidelines.
Yes Issue resolved.
No Go to step 3.
iPhone 4 Symptom Charts — Sound Issues 76
Page 77
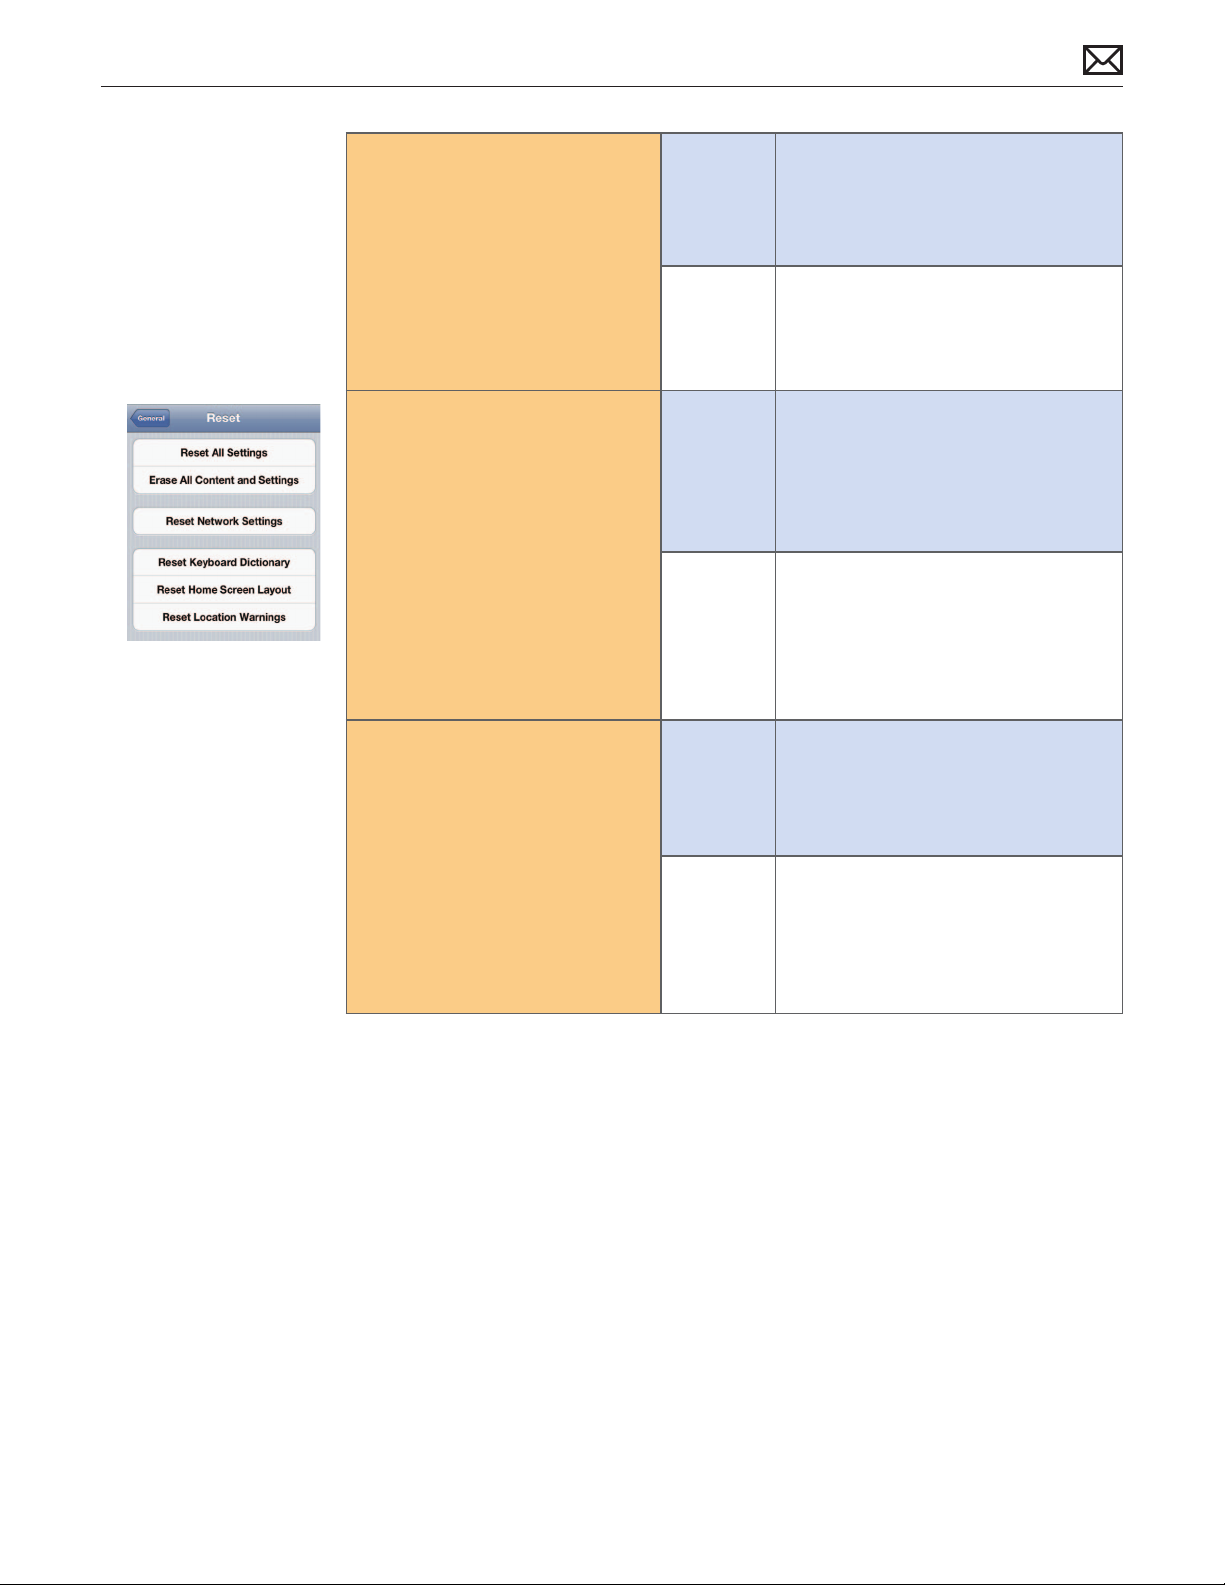
3. Test with known-good
headphones.
Substitute known-good Apple
Earphones. Play known-good
media or go to Settings >
Sound > Ringtone and select a
ringtone.
Is the headphone issue
resolved?
Yes Replace Apple Earphones. If user
has third-party headphones, refer to
manufacturer for support.
No Go to step 4.
4. Erase all content and settings.
Go to Settings > General >
Reset > Erase All Content and
Settings.
Warning: This will delete all
user data on the device.
Play known-good media or go
to Settings > Sound > Ringtone
and select a ringtone.
Is the headphone issue
resolved?
5. Restore with iTunes.
Restore the device using
the latest version of iTunes.
If restore fails, attempt DFU
restore.
Play known-good media or go
to Settings > Sound > Ringtone
and select a ringtone.
Is the headphone issue
resolved?
Yes Issue resolved.
No Go to step 5.
Yes Issue resolved.
No Determine if the issue is caused by
accidental damage. Refer to the Visual
Mechanical Inspection guidelines.
2012-02-21
iPhone 4 Symptom Charts — Sound Issues 77
Page 78

Headphone Microphone Issues
Known-Good Parts & Materials Required: Apple Earphones with Remote and Mic, Dock
Connector to USB Cable, computer running the latest version of iTunes with a known-good USB
port
Quick Check
Symptoms Quick Check
• No audio from headphone
microphone
• Distorted sound from
headphone microphone
1. If issue is with device microphone, jump to
Microphone Issues.
2. Verify that the headphones are fully inserted
into the headphone jack. Make sure a case or
protective lm is not interfering.
3. On the device, go to Settings > General >
Software Update to verify device has the most
up-to-date software. If unavailable, verify by
plugging the device into iTunes.
Deep Dive
Check Result Action
1. Clean the device.
Check that headphone jack
is not obstructed with lint or
debris. Attempt to clean any
debris in accordance with the
Cleaning Procedures.
Are you able to clean the
device?
Yes Go to step 2.
No Determine if the issue is caused by
accidental damage. Refer to the Visual
Mechanical Inspection guidelines.
2012-02-21
2. Retest the device.
Open the Voice Memos
app. Using the headphone
microphone, create a recording
and play it back.
Did the audio record as
expected?
Yes Issue resolved.
No Go to step 3.
iPhone 4 Symptom Charts — Sound Issues 78
Page 79
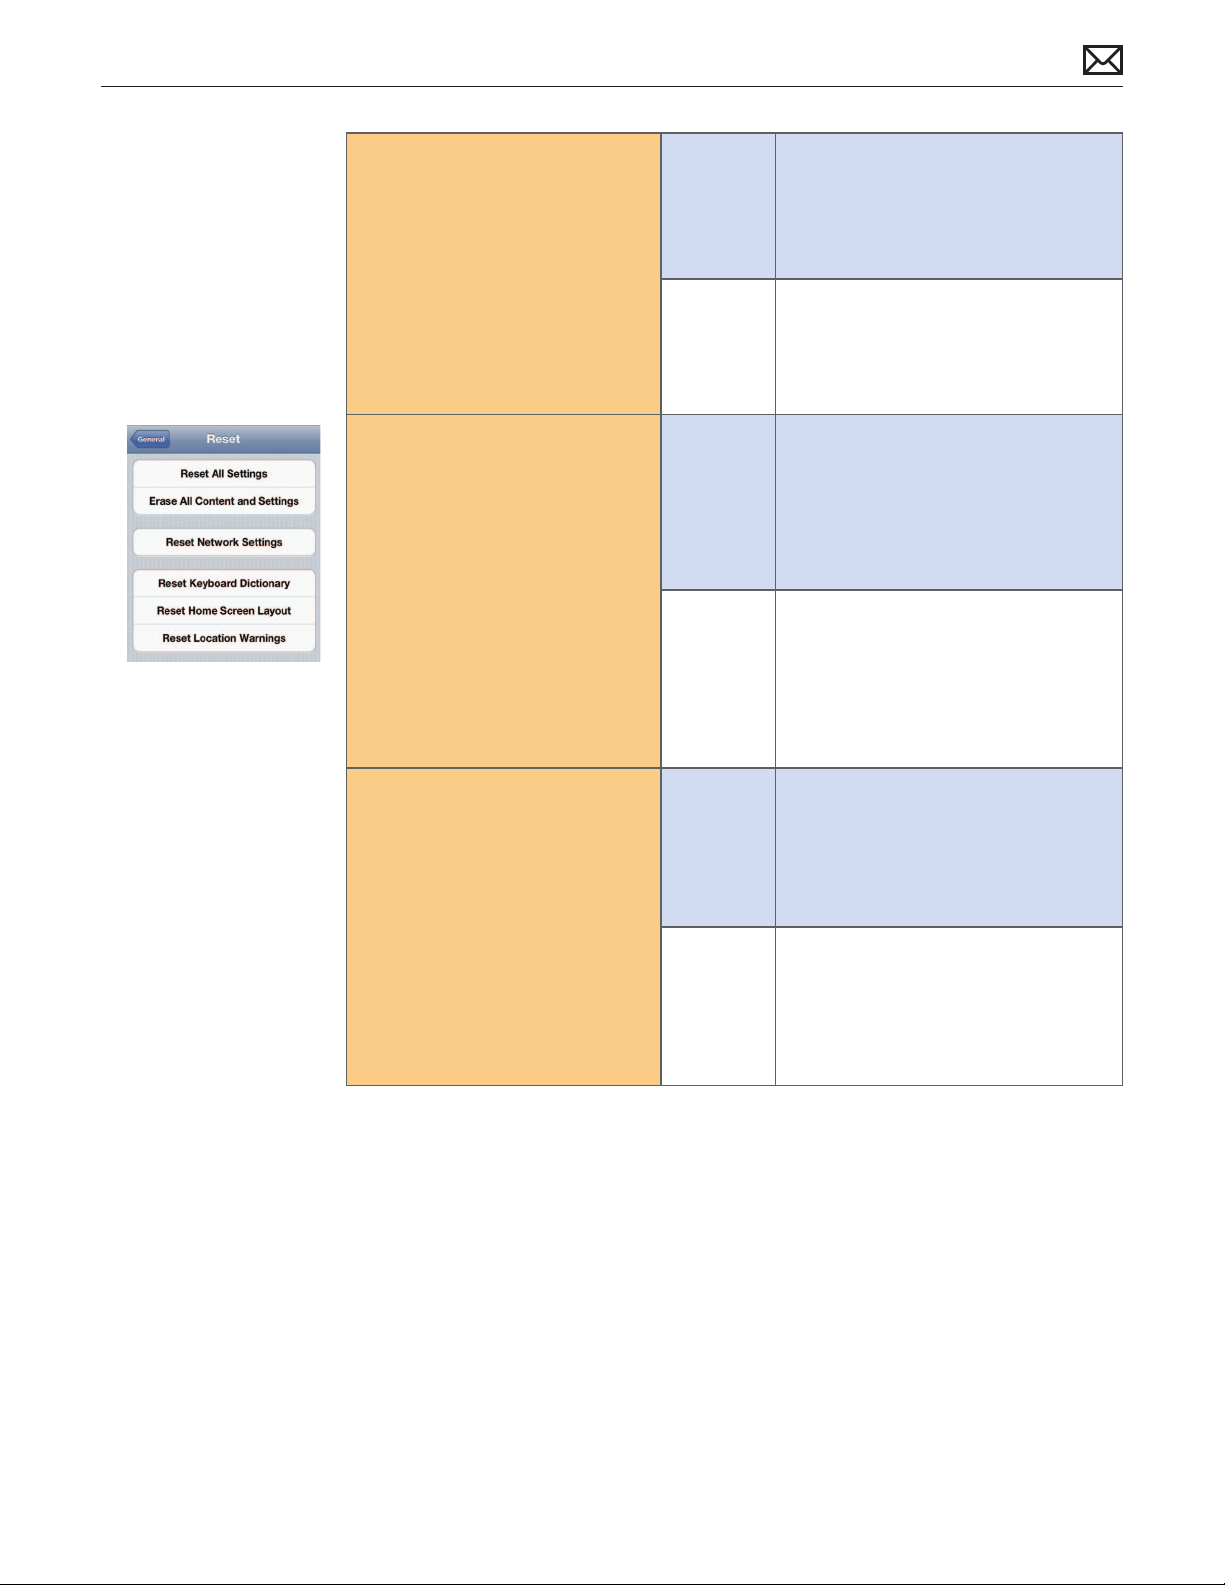
3. Test with known-good
headphones.
Substitute known-good Apple
Earphones with Remote and
Mic. Open the Voice Memos
app. Using the headphone
microphone, create a recording
and play it back.
Did the audio record as
expected?
Yes Replace Apple Earphones. If user
has third-party headphones, refer to
manufacturer for support.
No Go to step 4.
4. Erase all content and settings.
Go to Settings > General >
Reset > Erase All Content and
Settings.
Warning: This will delete all
user data on the device.
Open the Voice Memos
app. Using the headphone
microphone, create a recording
and play it back.
Did the audio record as
expected?
5. Restore with iTunes.
Restore the device using
the latest version of iTunes.
If restore fails, attempt DFU
restore.
Open the Voice Memos
app. Using the headphone
microphone, create a recording
and play it back.
Yes Issue resolved.
No Go to step 5.
Yes Issue resolved.
No Determine if the issue is caused by
accidental damage. Refer to the Visual
Mechanical Inspection guidelines.
2012-02-21
Did the audio record as
expected?
iPhone 4 Symptom Charts — Sound Issues 79
Page 80

Other Sound Issue
Deep Dive
Check Result Action
1. Verify whether any of the
troubleshooting ows apply to
the issue reported by the user.
Yes Jump to appropriate troubleshooting
ow.
No
Document reported failure and send
feedback to [email protected]
stating that a suitable troubleshooting
ow wasn’t found.
Escalate through your usual channels
for further troubleshooting support.
2012-02-21
iPhone 4 Symptom Charts — Sound Issues 80
Page 81

Accessories Issues
“Accessory not made to work”
Known-Good Parts & Materials Required: iPhone accessory
Quick Check
Symptoms Quick Check
• “This accessory is not made to
work with iPhone” message,
when a “Works with iPhone”
accessory is connected or when
nothing is connected
1. Make sure: the accessory’s package says “Works
with iPhone” and not “Made for iPod” or “Made for
iPad.”
2. Verify the device is securely connected to the
accessory; not loose, crooked or making partial
connection.
3. See Apple Support article TS1505: iPhone:
Compatibility message appears when
connected to a ‘Works with iPhone’ accessory.
4. On the device, go to Settings > General >
Software Update to verify device has the most
up-to-date software. If unavailable, verify by
plugging the device into iTunes.
Deep Dive
Check Result Action
1. Inspect connections.
Check for debris at the
connection points of both the
device and the accessory. Clean
if possible.
Yes Issue resolved.
No Go to step 2.
2012-02-21
Did cleaning resolve the issue?
2. Test known-good accessory.
Test the device with a knowngood similar accessory, if
available.
Is the accessory issue
resolved?
Yes Refer user to accessory manufacturer
for support.
No Determine if the issue is caused by
accidental damage. Refer to the Visual
Mechanical Inspection guidelines.
iPhone 4 Symptom Charts — Accessories Issues 81
Page 82

TV/Video Out Issues
Known-Good Parts & Materials Required: Display and compatible cables as listed in HT1454:
iPhone, iPad, iPod: TV out support, device compatible with cables
Quick Check
Symptoms Quick Check
• Unable to display device
content on TV
• Unable to display device
content on projector
1. Verify that accessory is compatible with device.
2. On the device, go to Settings > General >
Software Update to verify device has the most
up-to-date software. If unavailable, verify by
plugging the device into iTunes.
3. Verify cables are plugged into the appropriate
input jacks and correct input is selected on the
TV or projector.
4. Restart the device.
Deep Dive
Check Result Action
1. Inspect connections.
Check for debris at the
connection points of both the
device and the accessory. Clean
if possible.
Did cleaning resolve the issue?
2. Test with known-good cable.
Yes Issue resolved.
No Go to step 2.
Cable Replace Apple accessory.
2012-02-21
Using a known-good video-out
cable, isolate issue to the cable
or device.
Is the issue related to the
cable or the device?
Device Determine if the issue is caused by
accidental damage. Refer to the Visual
Mechanical Inspection guidelines.
iPhone 4 Symptom Charts — Accessories Issues 82
Page 83

Other Accessories Issue
Deep Dive
Check Result Action
1. Verify whether any of the
troubleshooting ows apply to
the issue reported by the user.
Yes Jump to appropriate troubleshooting
ow.
No
Document reported failure and send
feedback to [email protected]
stating that a suitable troubleshooting
ow wasn’t found.
Escalate through your usual channels
for further troubleshooting support.
2012-02-21
iPhone 4 Symptom Charts — Accessories Issues 83
Page 84

Apple Technician Guide
Take Apart
iPhone 4
© 2011 Apple Inc. All rights reserved.
Page 85

General Information
Before You Begin
• IMPORTANT: Refer to the Visual Mechanical Inspection guidelines to determine if the
device has any accidental damage. Check for Liquid Contact Indicator (LCI) activation
externally (in headset jack and dock connector) before opening the device.
• Remove any cases or screen protectors, which may inhibit proper testing.
• Verify the user-reported symptom(s) and identify the correct part(s) needed for repair.
• Make sure the device is powered o (red slider).
Electrostatic Discharge Precautions
Proper ESD precautions must always be used when opening an iPhone 4. Make sure you are
working on a properly grounded ESD-safe mat and are wearing a properly connected ESD-safe
wrist strap.
For more information about ESD, refer to:
• Apple Support article HT3451: Electrostatic Discharge Precautions and Myths
• AppleCare Service Training: ESD Precautions
Required Tools
The following tools are required to service an iPhone 4:
• ESD-safe wrist strap
• ESD-safe workstation
• SIM Removal Tool (922-8417) or paperclip (size #1)
• iPhone Torque Driver (923-0031)
• iPhone Torx Security Bit (922-9627)
• JCIS #00 Bit (922-9947) for cross-head screws
• iPhone 4 Dock Screws 10 Pack (922-9603)
• iPhone 4 Battery Fixture (923-0075)
• Nylon Probe Tool (black stick) (922-5065)
• ESD-safe tweezers
• Motorola DS6707 Scanner (922-9230) for iPhone 4 (GSM model) serial barcode
• Packing tape (provides a smooth surface for removal of a damaged back cover)
• Micro-ber polishing cloth
2012-02-21
iPhone 4 Take Apart — General Information 85
Page 86
Safety
Battery Handling
iPhone 4 includes a lithium-polymer rechargeable battery. Avoid exposure to heat and open
ame. Do not puncture, deform, crush or incinerate as exposure to ingredients contained within
or their combustion products could be harmful. During a re, the battery may emit irritating
and toxic gases and aerosols may be generated by thermal decomposition and combustion.
WARNING: If the battery is dented, punctured or otherwise damaged, do not remove
battery from iPhone. Reassemble and replace whole unit.
WARNING: Do not reuse or reinstall a battery after it has been removed from iPhone.
Fireghting
In case of re, use the following extinguishing media: water, carbon dioxide, dry chemical, foam.
These media may not extinguish a burning lithium-ion polymer battery. Burning batteries will
burn out themselves.
If re or explosion occurs while charging, shut o power to charger. Move unprotected
personnel and ammable equipment or substances upwind of re. Wear self-contained
breathing apparatus (SCBA) and full personal protective equipment while ghting re.
Cleanup
Use appropriate personal protective equipment during cleanup. Vacuum or sweep up
material for salvage or disposal according to applicable federal, state and local legislation and
regulations. Do not ush to drains.
Personal Protection
Respiratory
Protection
Eye/Face
Protection
Gloves Not necessary under normal conditions. Use neoprene or natural rubber
Not necessary under normal conditions.
Not necessary under normal conditions. Wear safety glasses with side
shields if handling an open or leaking battery.
gloves if handling an open or leaking battery.
2012-02-21
iPhone 4 Take Apart — Safety 86
Page 87

First Aid Measures
Under normal conditions the battery is hermetically sealed.
Inhalation Contents of an open battery may cause respiratory irritation. Leave area
immediately, seek fresh air and medical attention.
Ingestion Contents of an open battery may cause chemical burns to mouth,
esophagus and gastrointestinal tract. If ingested, do not induce vomiting
or give food or drink. Seek medical attention immediately.
Skin Contact Contents of an open battery may cause skin irritation or chemical burns.
Remove contaminated clothing and wash skin with soap and water. If
chemical burn occurs or irritation persist, seek medical attention.
Skin Absorption Contents of an open battery may be absorbed through the skin and
cause localized inammation.
Eye Contact Contents of an open battery may cause severe irritation or chemical
burns. Immediately ush eyes thoroughly with water for at least fteen
(15) minutes, lifting upper and lower lids, until no evidence of chemical
remains. Seek medical attention.
Disclaimer: The above information is provided for your information only. The information and
recommendations set forth above are made in good faith and are believed to be accurate as of
the date of preparation. Apple Inc. MAKES NO WARRANTY, EITHER EXPRESSED OR IMPLIED, WITH
RESPECT TO THIS INFORMATION AND DISCLAIMS ALL LIABILITY FROM RELIANCE ON IT.
Broken Glass Handling
The front and back covers of iPhone are made of glass, which could break if iPhone is dropped
on a hard surface or receives a substantial impact or is crushed, bent or deformed. If the glass
chips or cracks, do not attempt to remove the broken glass. Follow these steps:
• Wear gloves to protect yourself while handling iPhone.
• Cover the broken glass with clear packing tape.
• Refer to the Visual Mechanical Inspection guidelines for repair options.
2012-02-21
iPhone 4 Take Apart — Safety 87
Page 88

Apple Technician Guide
Take Apart – iPhone 4 (GSM model)
© 2011 Apple Inc. All rights reserved.
Page 89
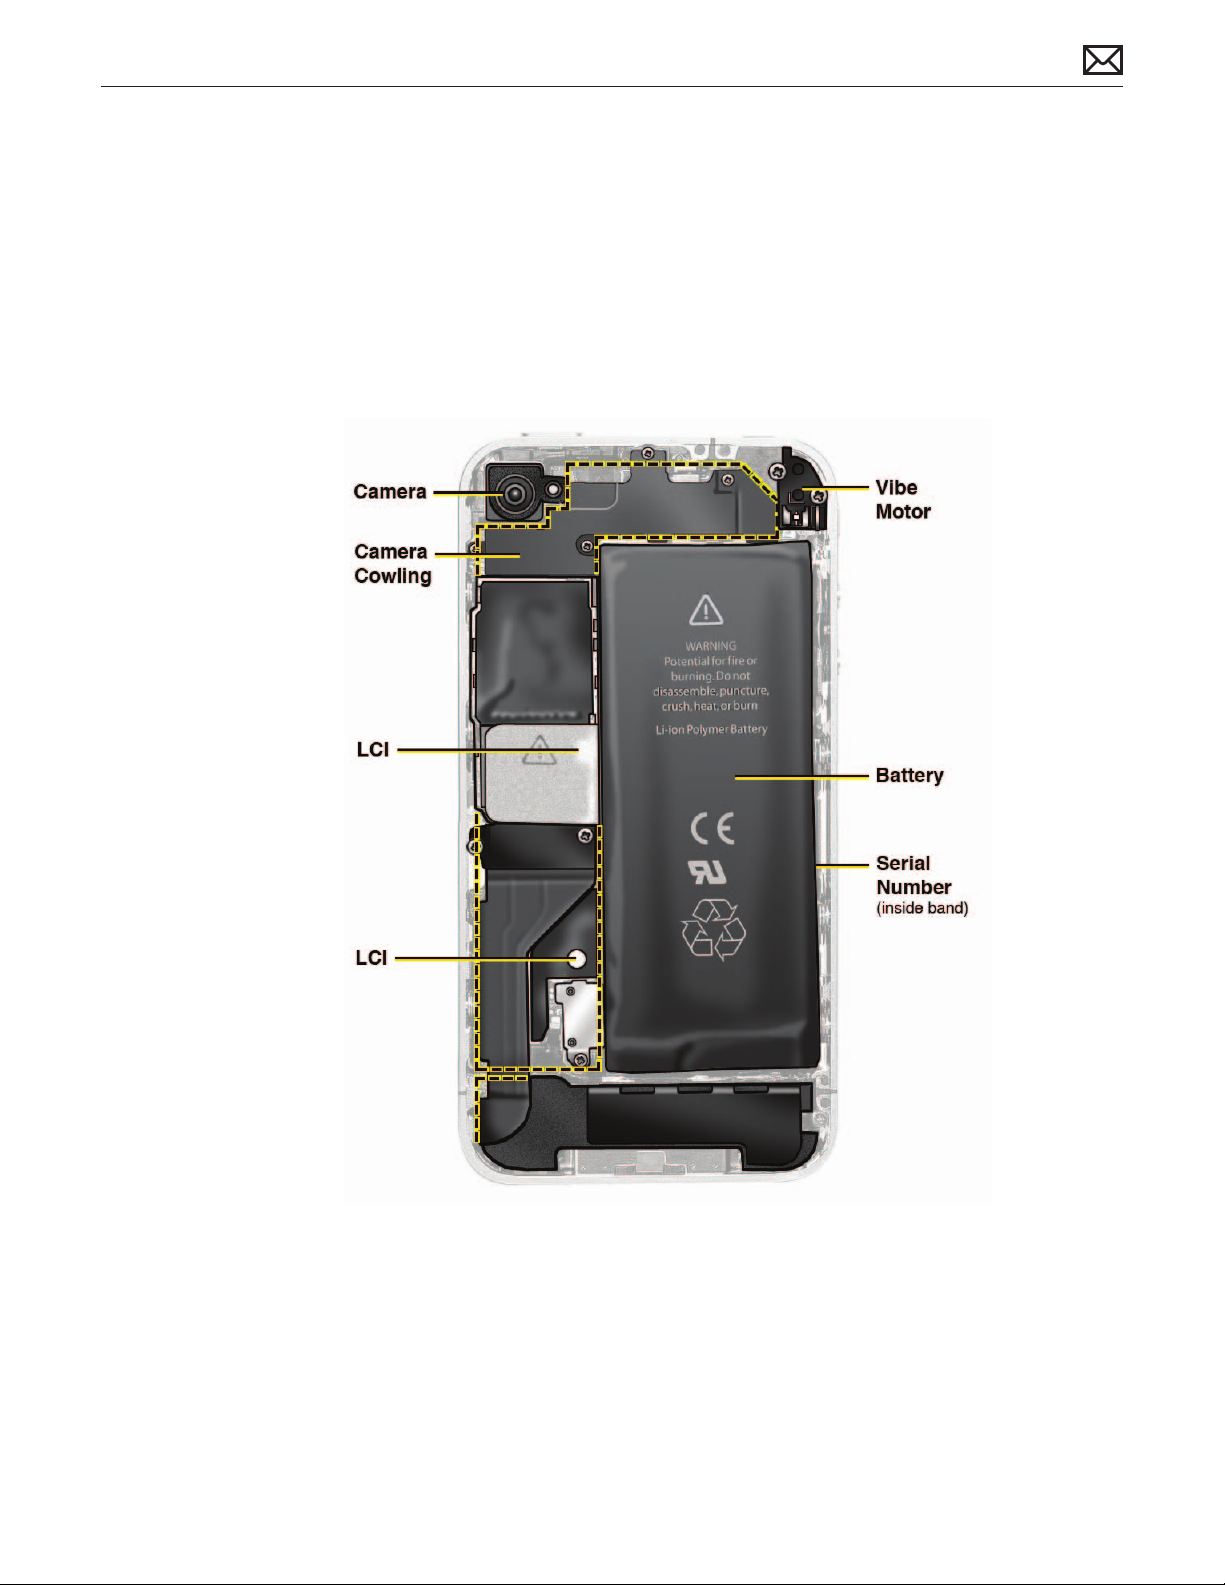
Internal View
Internal view of the iPhone 4 (GSM model), Model A1332:
2012-02-21
iPhone 4 (GSM model) Take Apart — Internal View 89
Page 90

Service Parts
Service Parts for iPhone 4 (GSM model)
Description Part Number Kit Contents
SIM Tray 922-9602 (1) SIM tray
(blank, no serial# or IMEI)
Back Cover see next page (1) back cover
Torx Security Screw Kit 922-9634 (200) dock screws
Camera Kit, Black 661-5692 (1) camera with black LED ring
(3) foam gaskets for camera
(1) camera cowling
(1) 452-1846 screw #1
(2) 452-1831 screws #2 & 5
(1) 452-1850 screw #3
(1) 452-1851 screw #4
Camera Kit, White 661-5693 (1) camera with silver LED ring
(3) foam gaskets for camera
(1) camera cowling
(1) 452-1846 screw #1
(2) 452-1831 screws #2 & 5
(1) 452-1850 screw #3
(1) 452-1851 screw #4
Vibe Motor Kit 661-5694 (1) vibe motor
(1) 452-1845 screw #1
(1) 452-1765 screw #2
Battery Kit 661-5691 (1) battery
(1) battery adhesive pack
(1) battery cowling
(1) 452-1849 screw
Battery Adhesive Kit 922-9635 (10) battery adhesive packs
2012-02-21
iPhone 4 (GSM model) Take Apart — Service Parts 90
Page 91
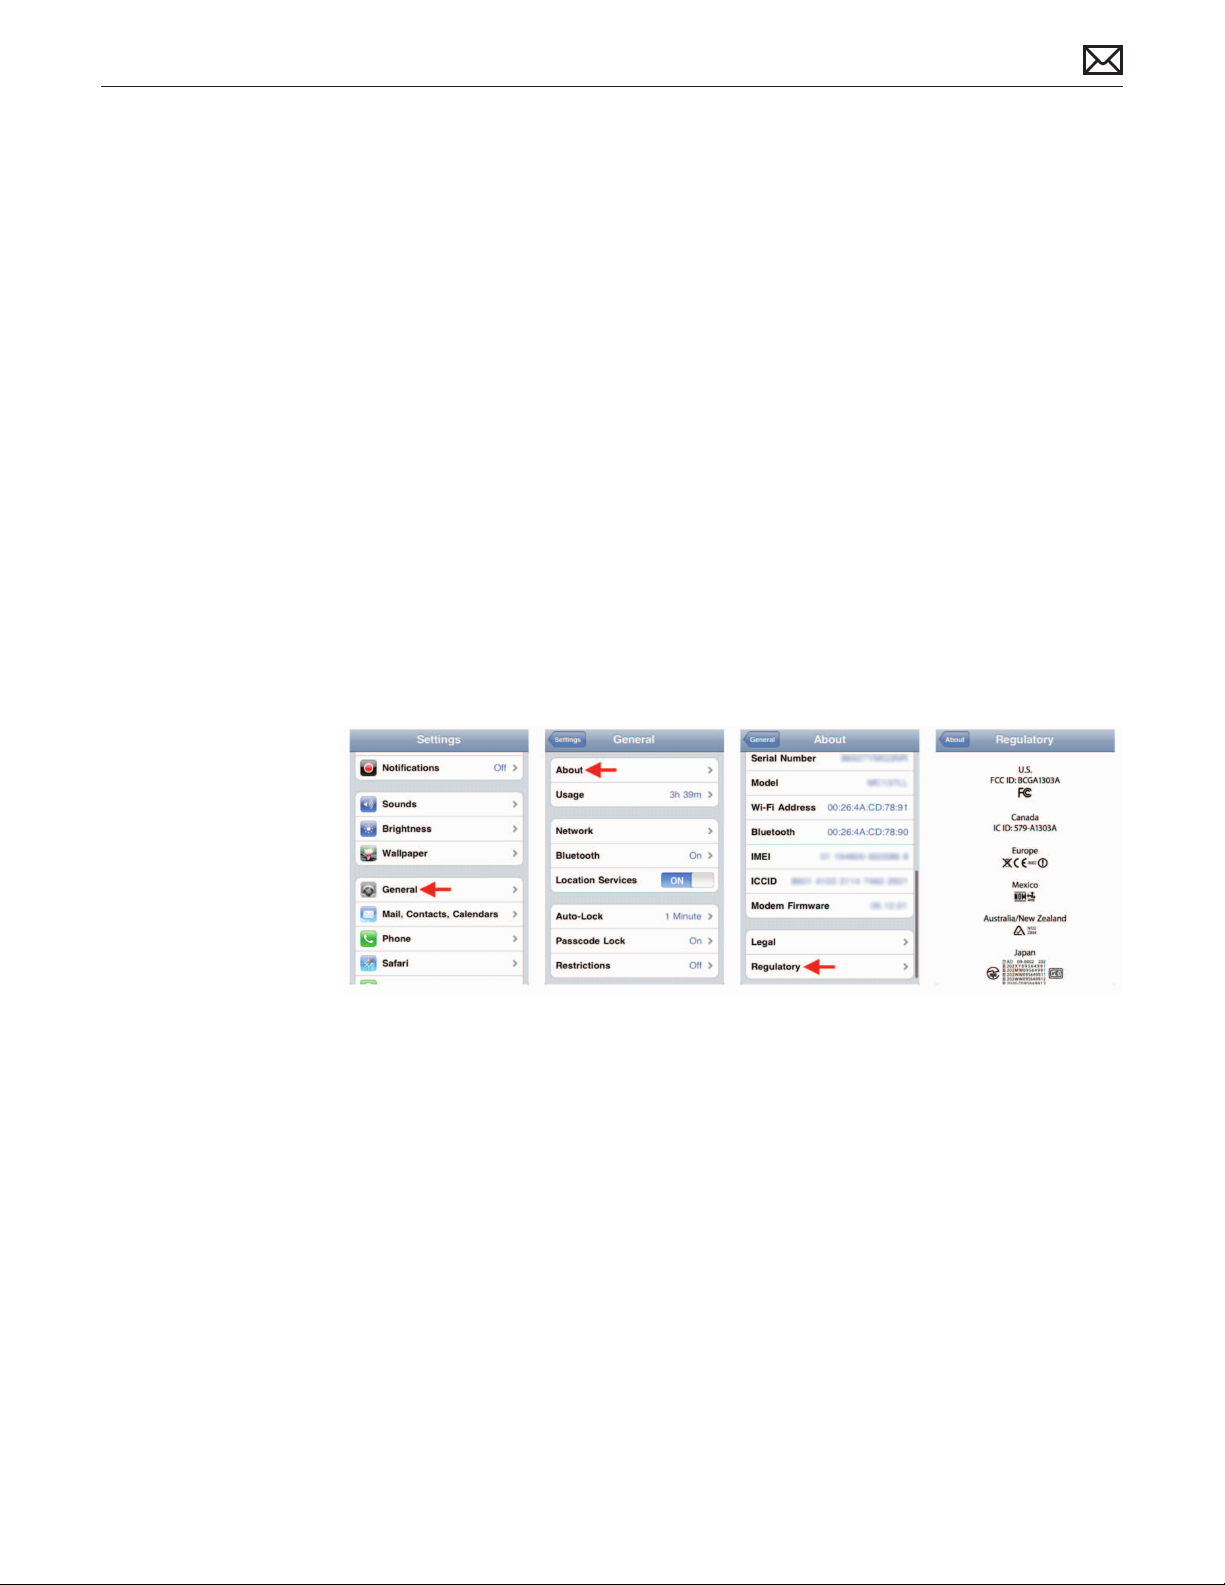
Back Cover Identication
The back cover of iPhone 4 includes glass that is very similar to the front cover glass. It is
possible to crack the back cover glass. A damaged back cover should be replaced if this occurs.
• Refer to the Visual Mechanical Inspection guidelines to determine warranty coverage for
cracked glass.
• Ax packing tape to damaged back cover glass before removal to prevent injury and
scattering of broken glass.
Regulatory Markings
Important: The back cover includes regulatory compliance markings and text. The replacement
back cover must be matched with the original, damaged back cover to comply with legal
requirements. See next page to determine the correct part number.
Replace the back cover only on devices that were purchased in the same country in which
service is being performed. Back covers are region- and country-specic in most cases.
If the regulatory markings and/or text are illegible, access regulatory information on iPhone:
Settings > General > About > Regulatory.
2012-02-21
iPhone 4 (GSM model) Take Apart — Service Parts 91
Page 92
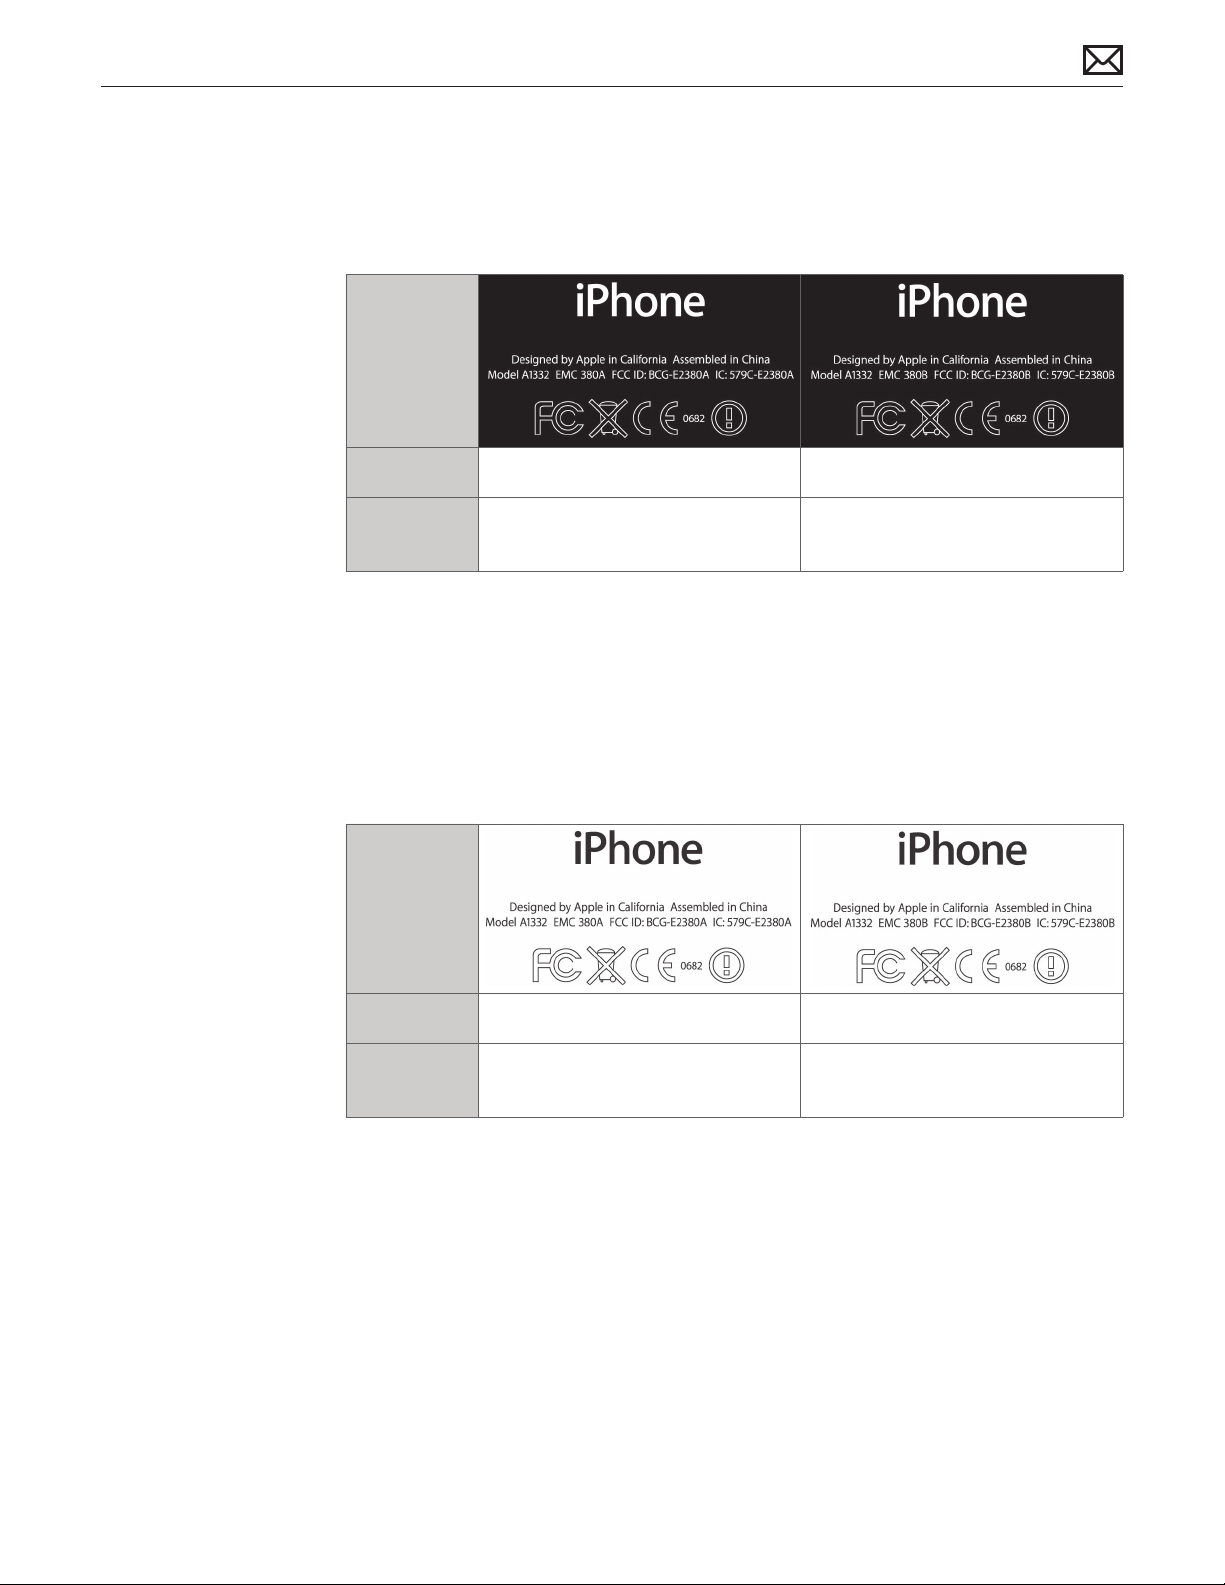
The following tables will help you identify the correct back cover for the model being repaired
by comparing regulatory registration numbers and country of origin on the user’s iPhone.
Black iPhone 4 (GSM model)
Regulatory
Markings
FCC ID BCG-E2380A BCG-E2380B
Worldwide
Part#
The following countries have distinct part numbers and regulatory markings:
• Brazil BZ922-9707
• China CH922-9707
• Korea KH922-9707
• Taiwan TA922-9707
922-9709 922-9707
White iPhone 4 (GSM model)
Regulatory
Markings
FCC ID BCG-E2380A BCG-E2380B
Worldwide
Part#
922-9710 922-9708
2012-02-21
The following countries have distinct part numbers and regulatory markings:
• Brazil BZ922-9708
• China CH922-9708
• Korea KH922-9708
• Taiwan TA922-9708
iPhone 4 (GSM model) Take Apart — Service Parts 92
Page 93
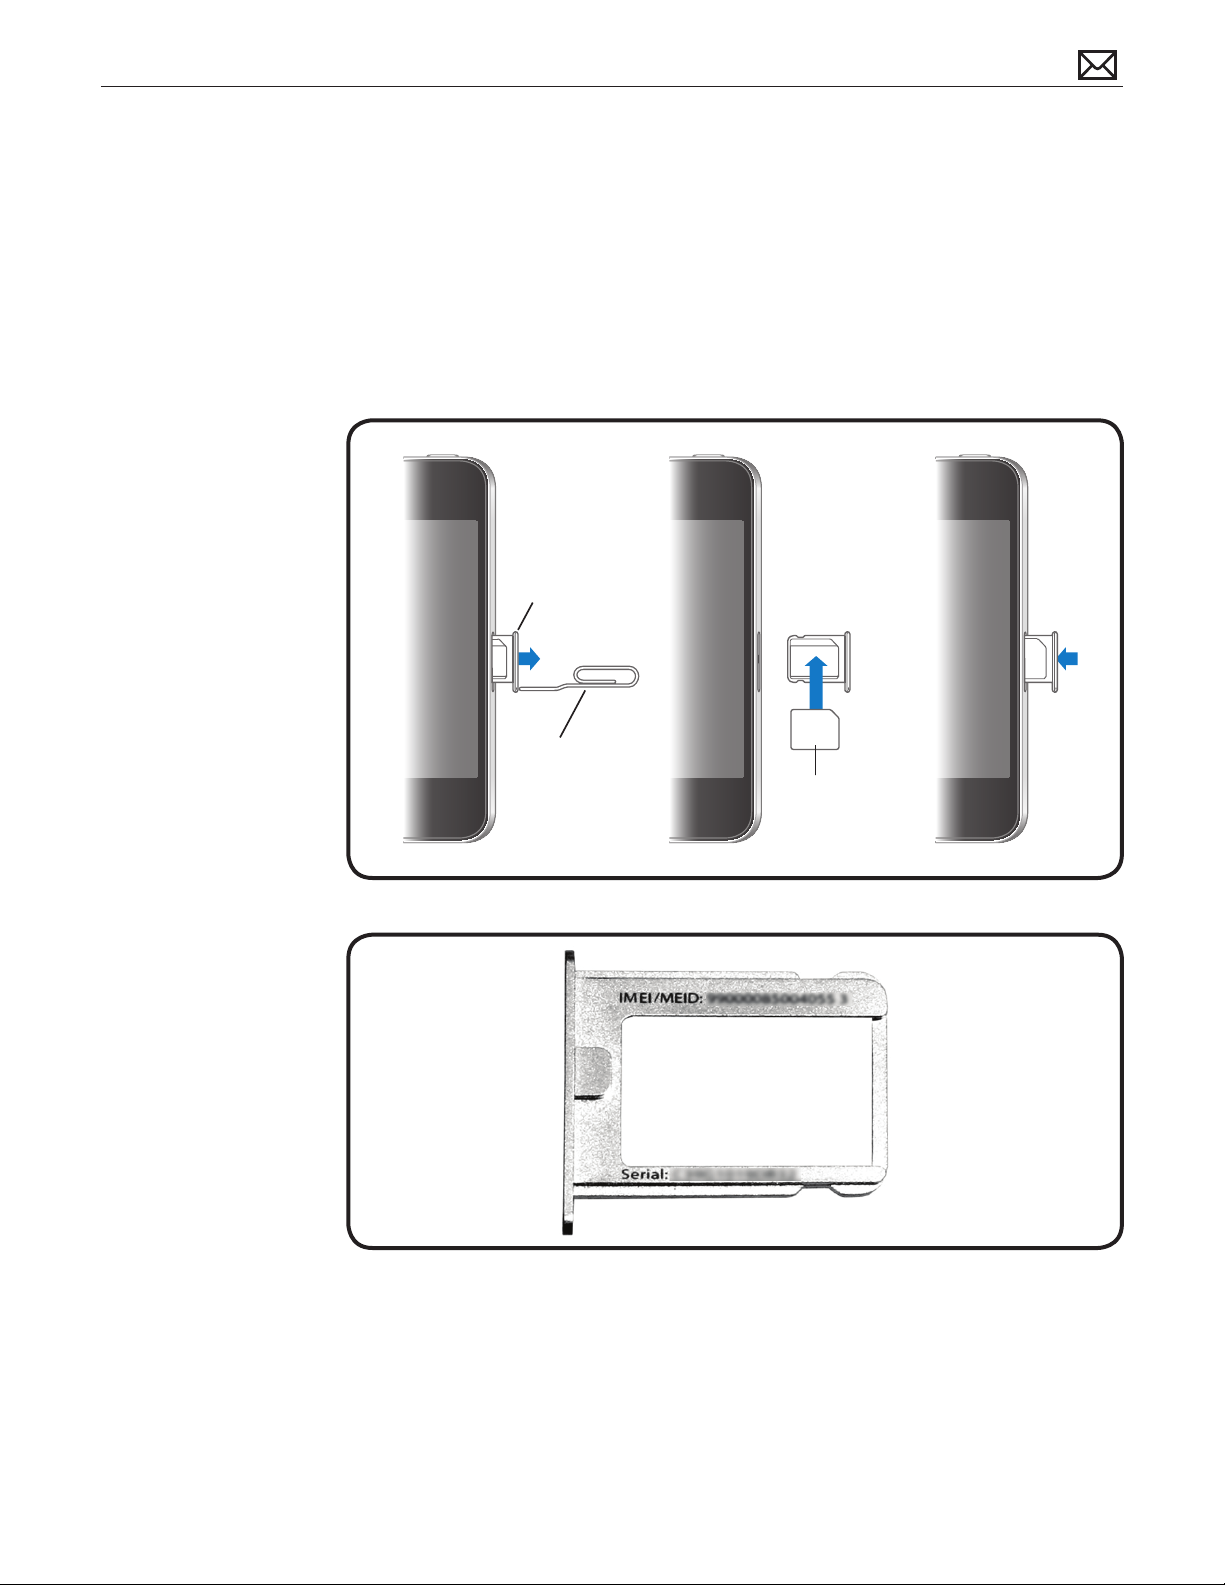
First Steps
• Power o iPhone
SIM Tray
Removal
1 Insert the end of a
SIM Removal Tool
(922-8417) or a small
thin paper clip into
hole on SIM tray.
2 Push the tool straight
in rmly until tray
pops out.
Note: The original
SIM tray shows the
device’s IMEI/MEID
and serial number.
Reassembly
Micro SIM
tray
Paper clip
Micro SIM
card
Note orientation of the
tray and Micro SIM prior to
inserting into iPhone.
Caution: Do not force
the SIM tray into position,
which could cause internal
damage to iPhone.
2012-02-21
iPhone 4 (GSM model) Take Apart — SIM Tray 93
Page 94
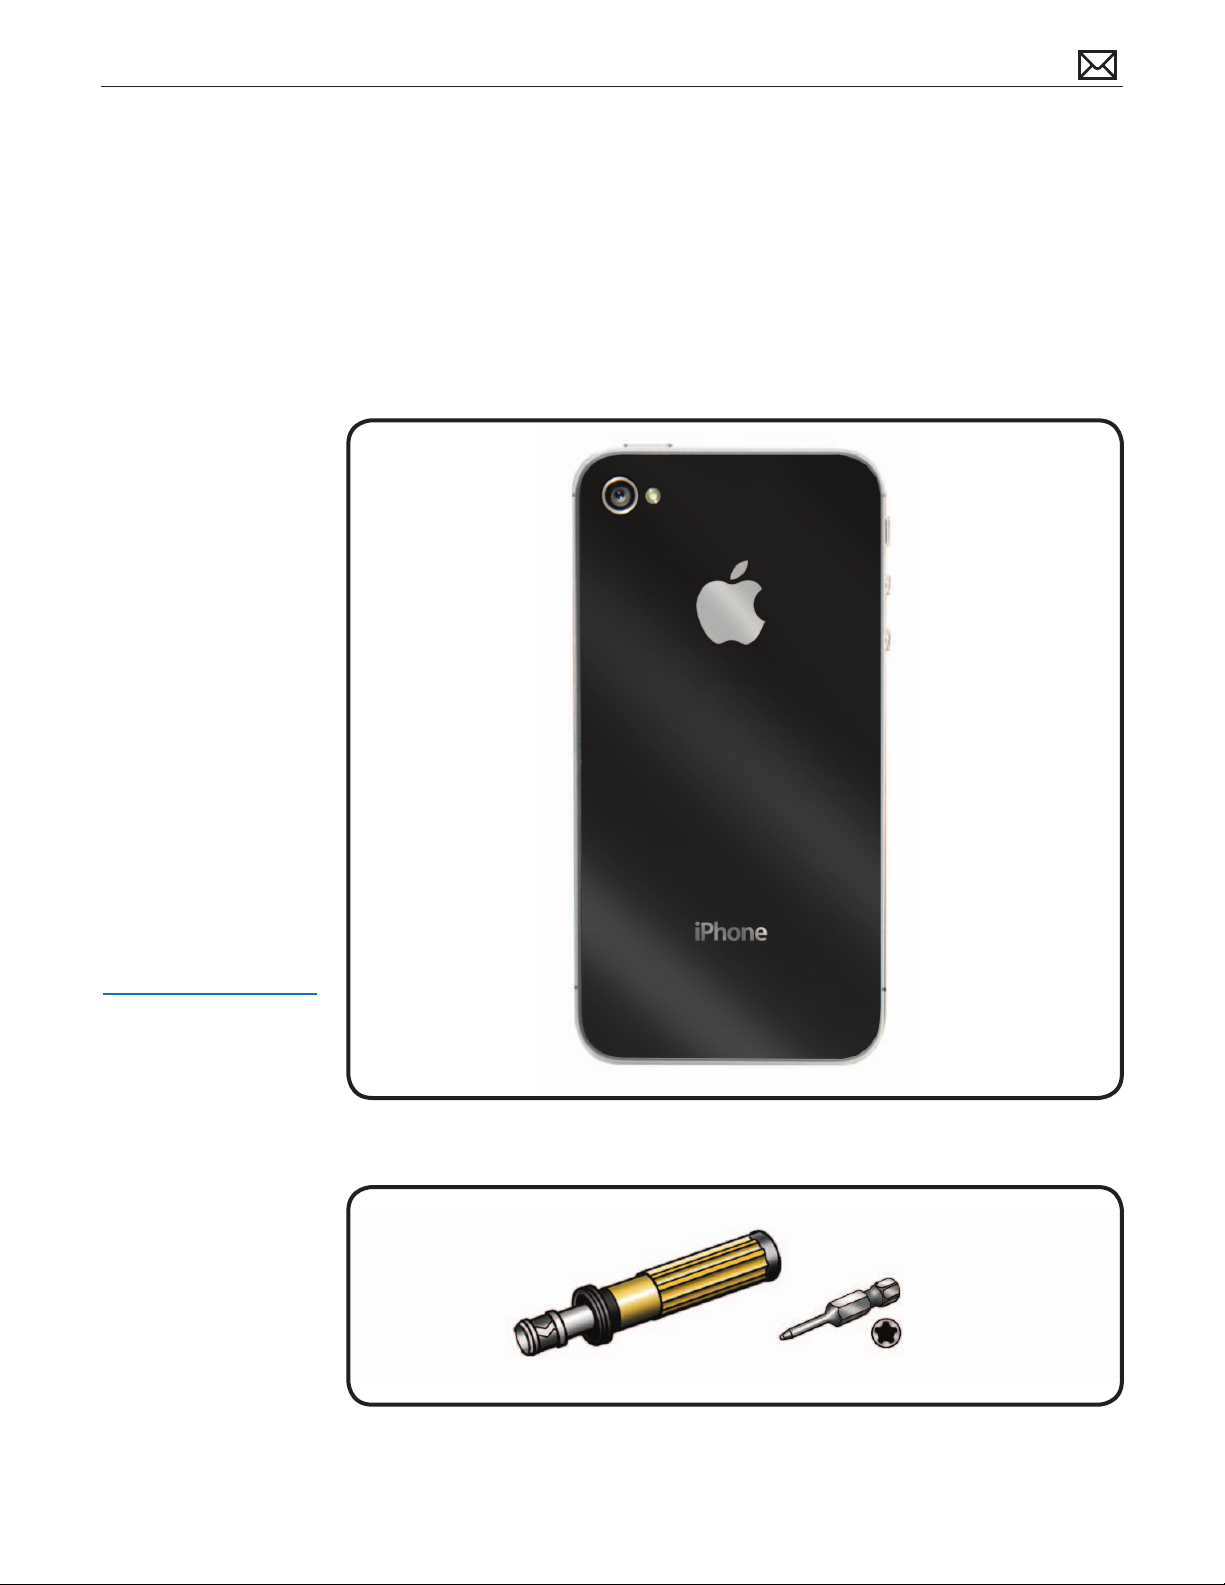
First Steps
• Refer to the
Visual Mechanical
Inspection guidelines
to determine any
accidental damage.
• Remove any cases or
screen protectors.
Caution: If back cover
glass is broken, ax
packing tape before
removal to prevent injury
and scattering of glass.
Back Cover
Important: The back
cover includes regulatory
compliance markings and
text, and must be replaced
like-for-like. Refer to
Back Cover Identication
section.
Tools
• iPhone Torque Driver
(923-0031)
• iPhone Torx Security Bit
(922-9627)
2012-02-21
iPhone 4 (GSM model) Take Apart — Back Cover 94
Page 95
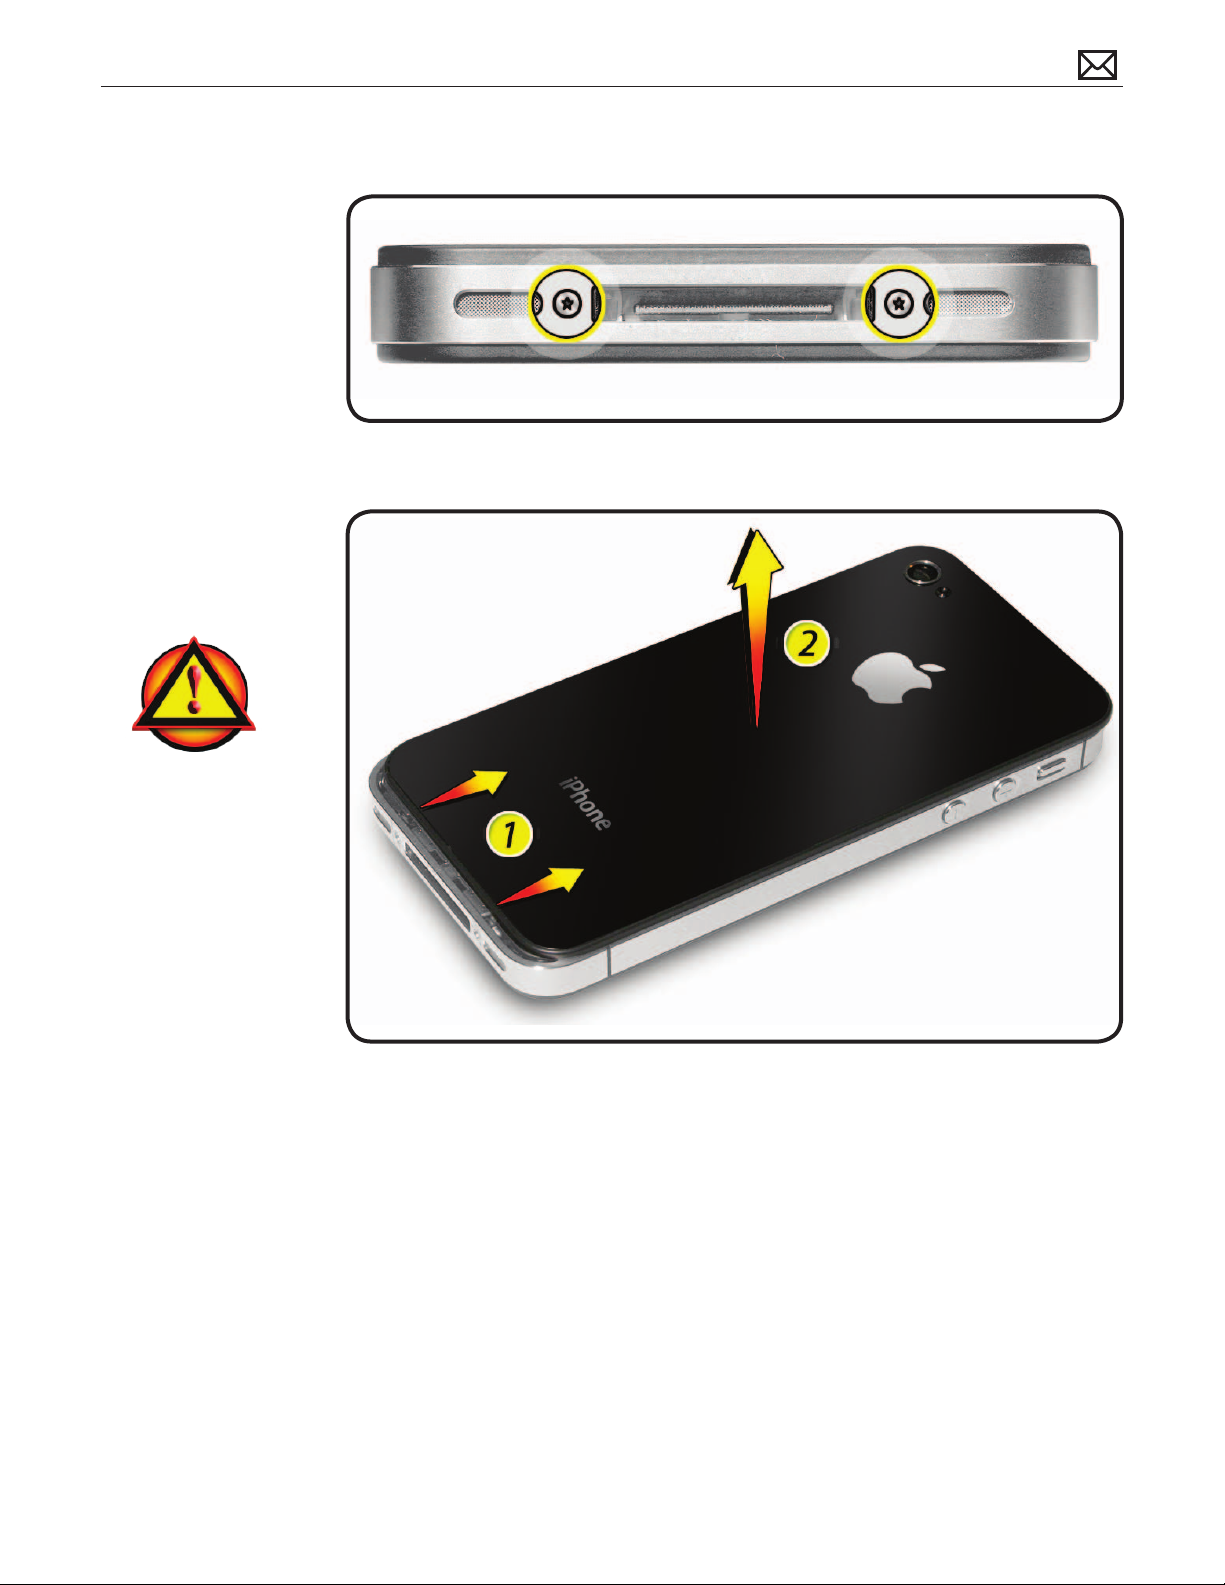
Removal
Remove (2) dock
1
screws on bottom of
phone using iPhone
Torque Driver and
iPhone Torx Security
Bit.
2 Slide back cover up to
release locking tabs
and lift o body of
iPhone.
WARNING: If battery is
dented, punctured or
otherwise damaged, STOP!
Reinstall back cover and
replace whole unit.
2012-02-21
iPhone 4 (GSM model) Take Apart — Back Cover 95
Page 96
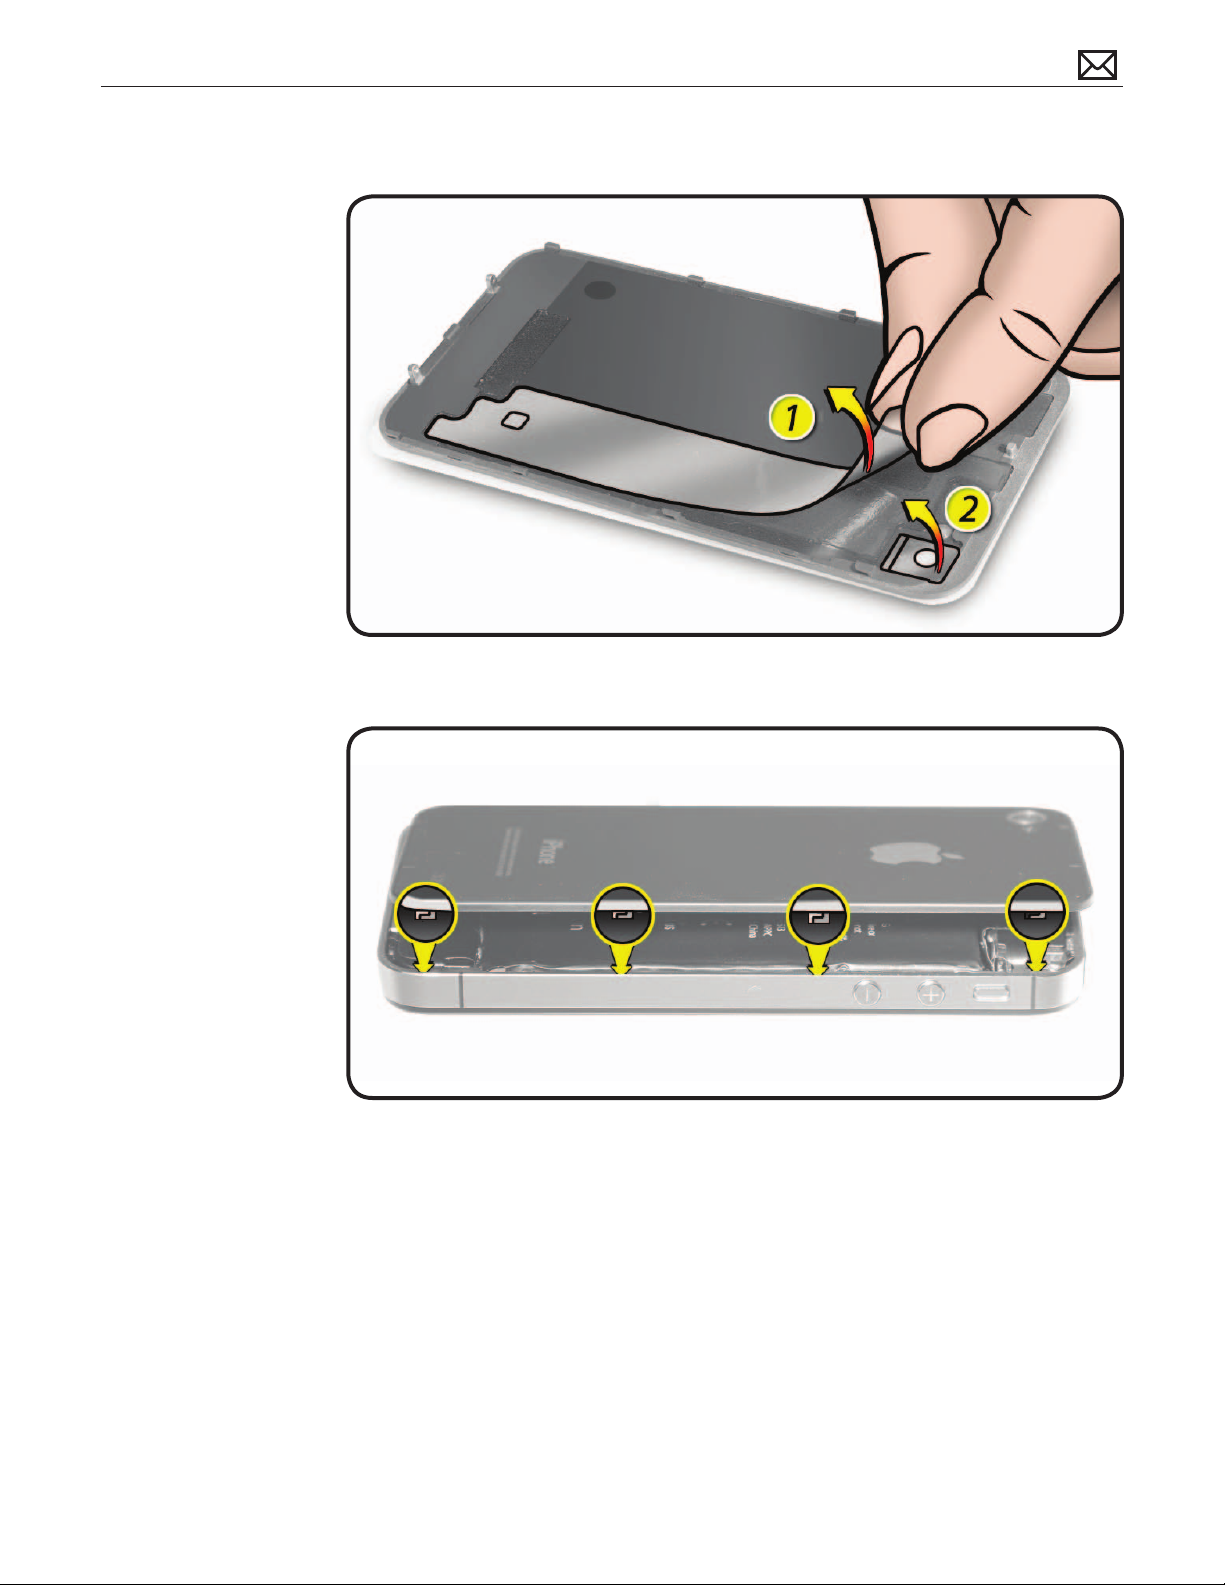
Reassembly
If installing a new
1
replacement back
cover, remove 2
pieces of clear
protective lm
covering camera lens.
Note: It may be
helpful to use a
black stick to peel
up a corner of the
protective lm.
2 Place back cover on
iPhone body, aligning
locking tabs so back
cover sits ush
against metal band.
2012-02-21
iPhone 4 (GSM model) Take Apart — Back Cover 96
Page 97
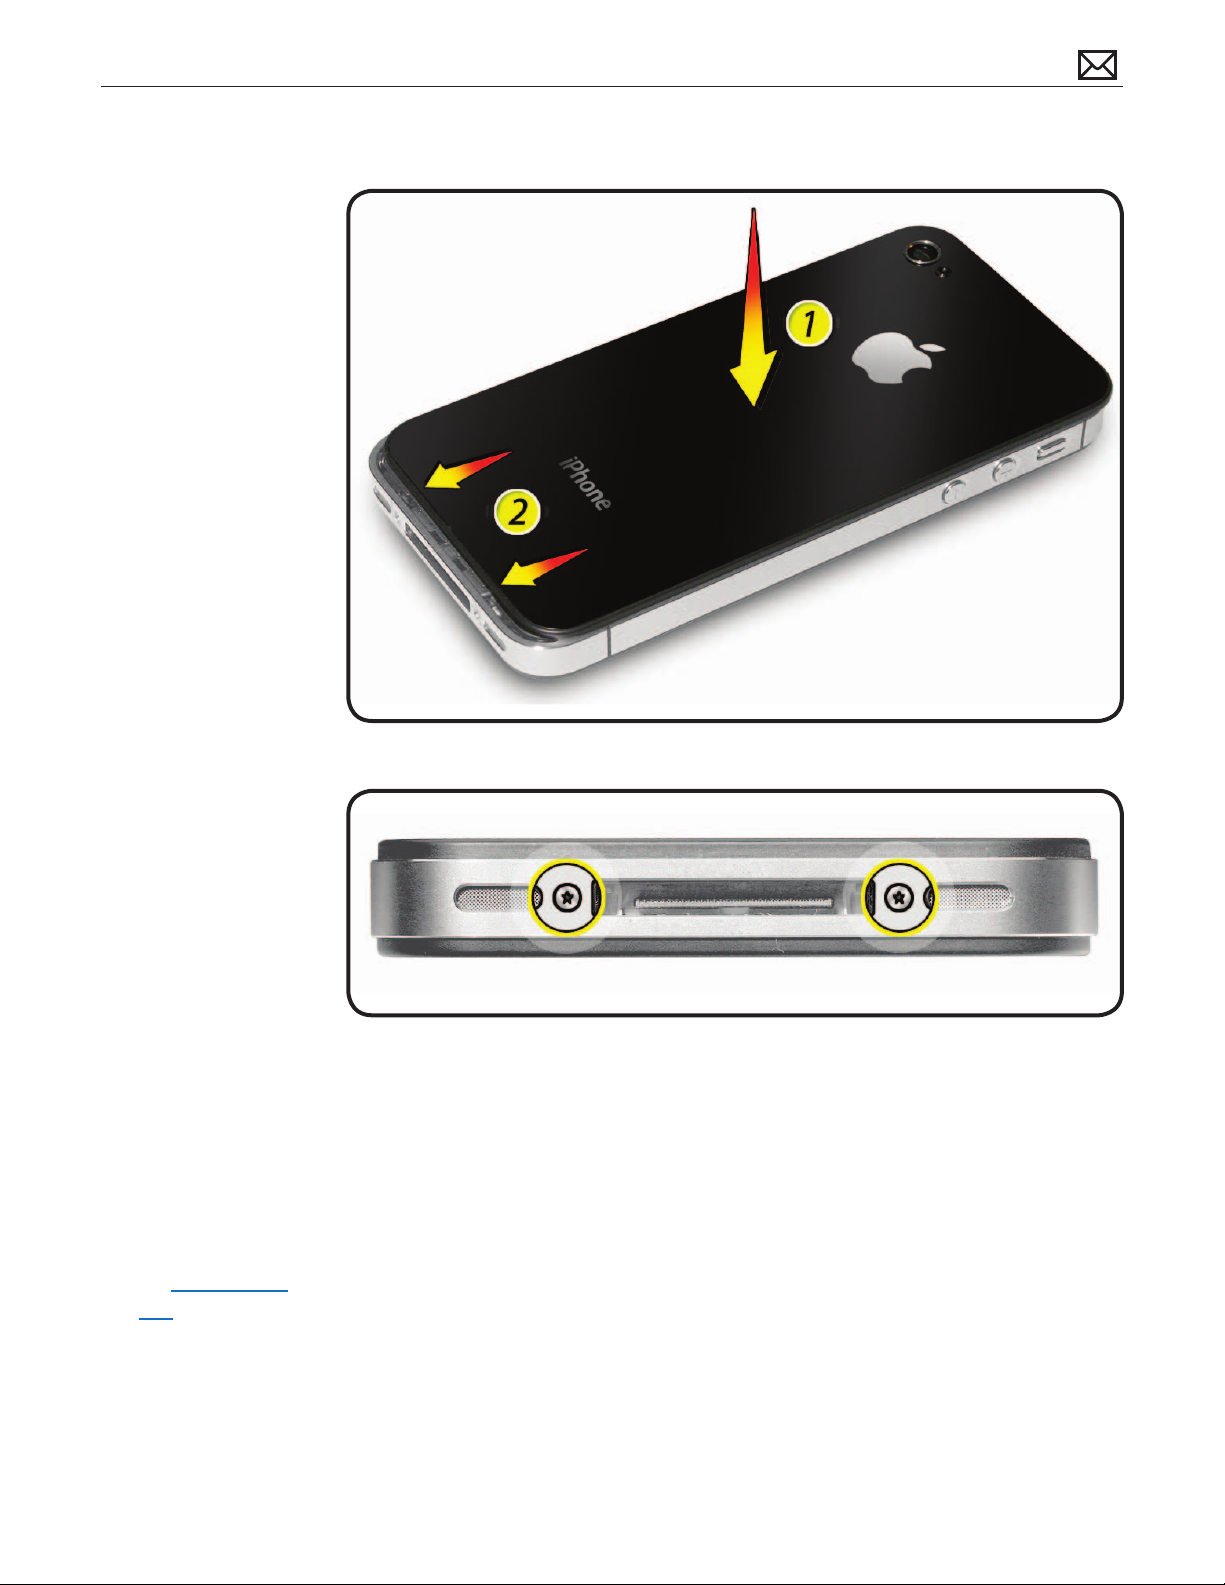
3 Slide back cover
down and into the
locked position.
4 Insert (2) new dock
screws on bottom of
phone and tighten
using iPhone Torque
Driver with iPhone
Torx Security Bit.
Important: Do not
reuse old screws. Use
iPhone Torque Driver
to prevent overtightening.
5 Important: Check
main camera
operation and LED
ash alignment with
the Main Camera
Test procedure. If test
fails, replace camera.
2012-02-21
iPhone 4 (GSM model) Take Apart — Back Cover 97
Page 98
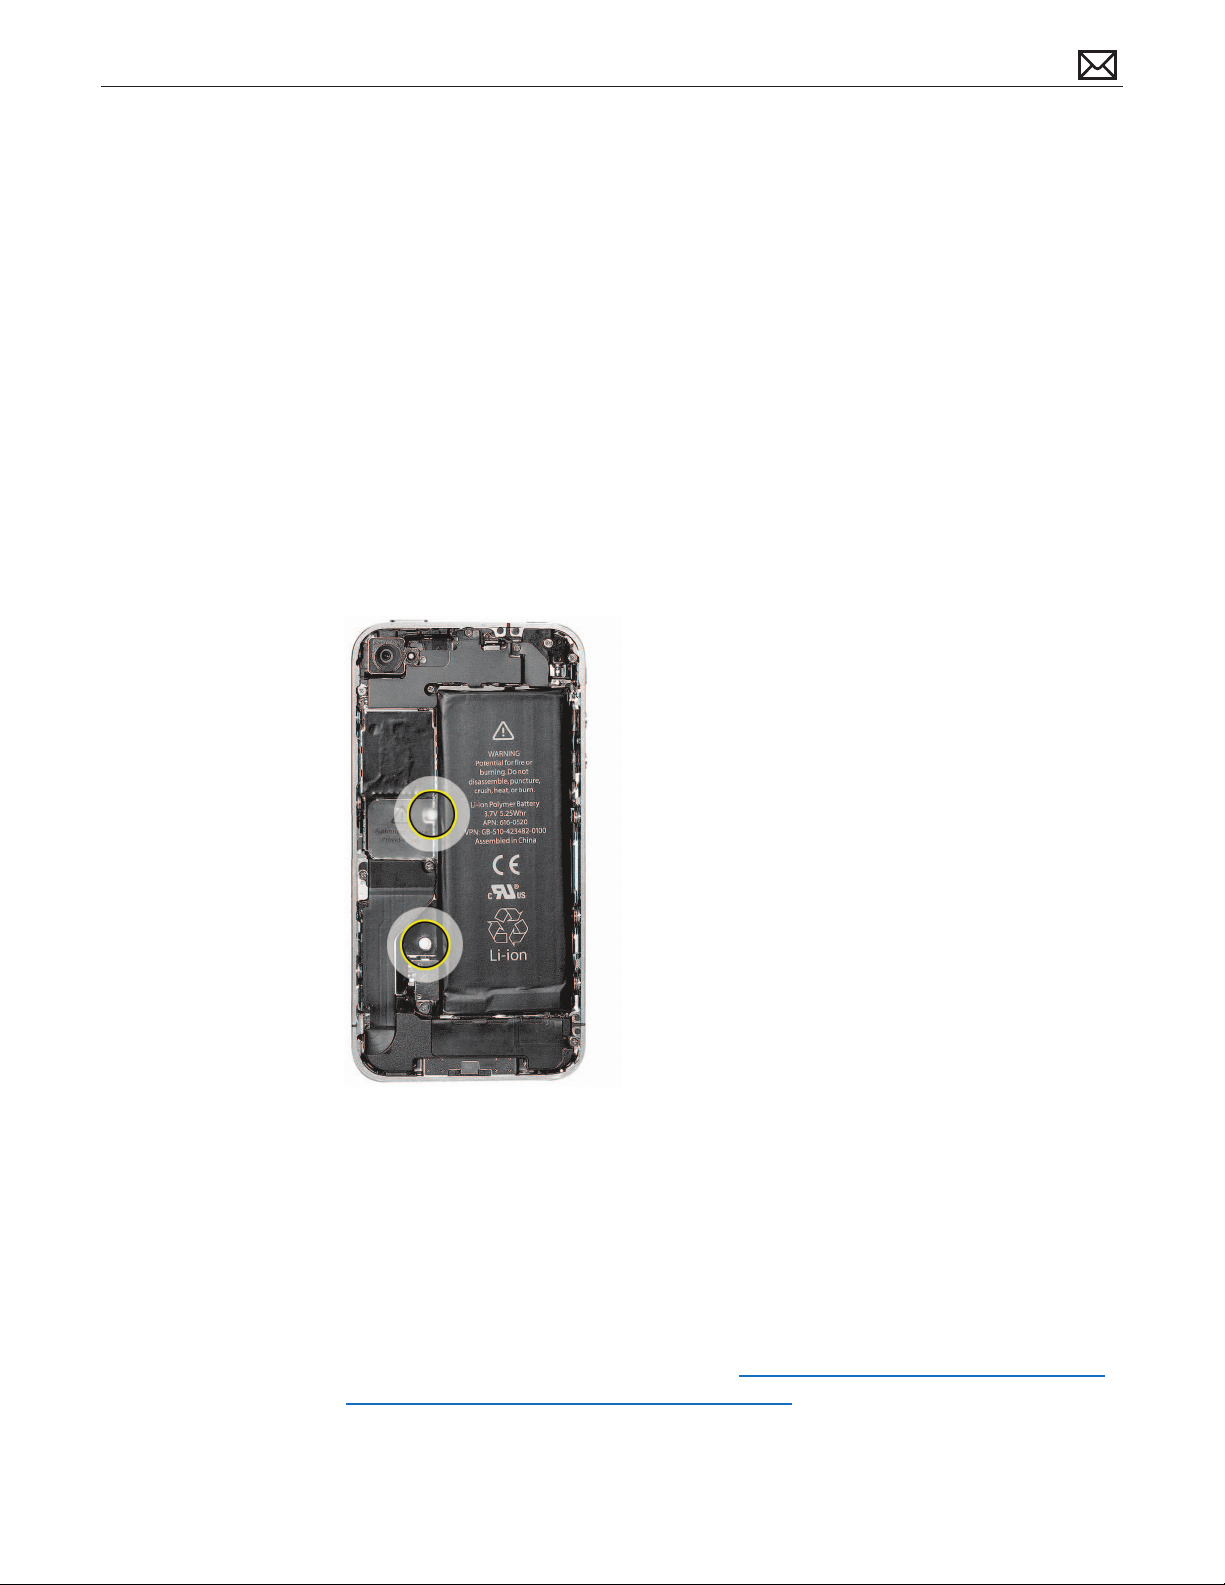
Internal Checks
Internal Liquid Contact Indicators
The iPhone 4 (GSM model) contains two internal liquid contact indicators (LCIs) on the logic
board. If an LCI is activated (red), it indicates contact with liquid, which can cause damage that
is not covered under warranty and is not eligible for modular repair, but is eligible for Out-ofWarranty (OOW) paid whole unit replacement.
Important: If an internal LCI is activated or corrosion is present, reassemble the device and do
not proceed with modular repair.
2012-02-21
Missing Internal Parts
If there are missing internal components or parts, it is considered evidence of disassembly or
modication, which:
• is NOT covered under warranty
• MAY qualify for a paid repair.
For more information, see Apple Support article TS3756: iPhone and iPad: Handling service
requests when device has missing or modied parts.
iPhone 4 (GSM model) Take Apart — Internal Checks 98
Page 99
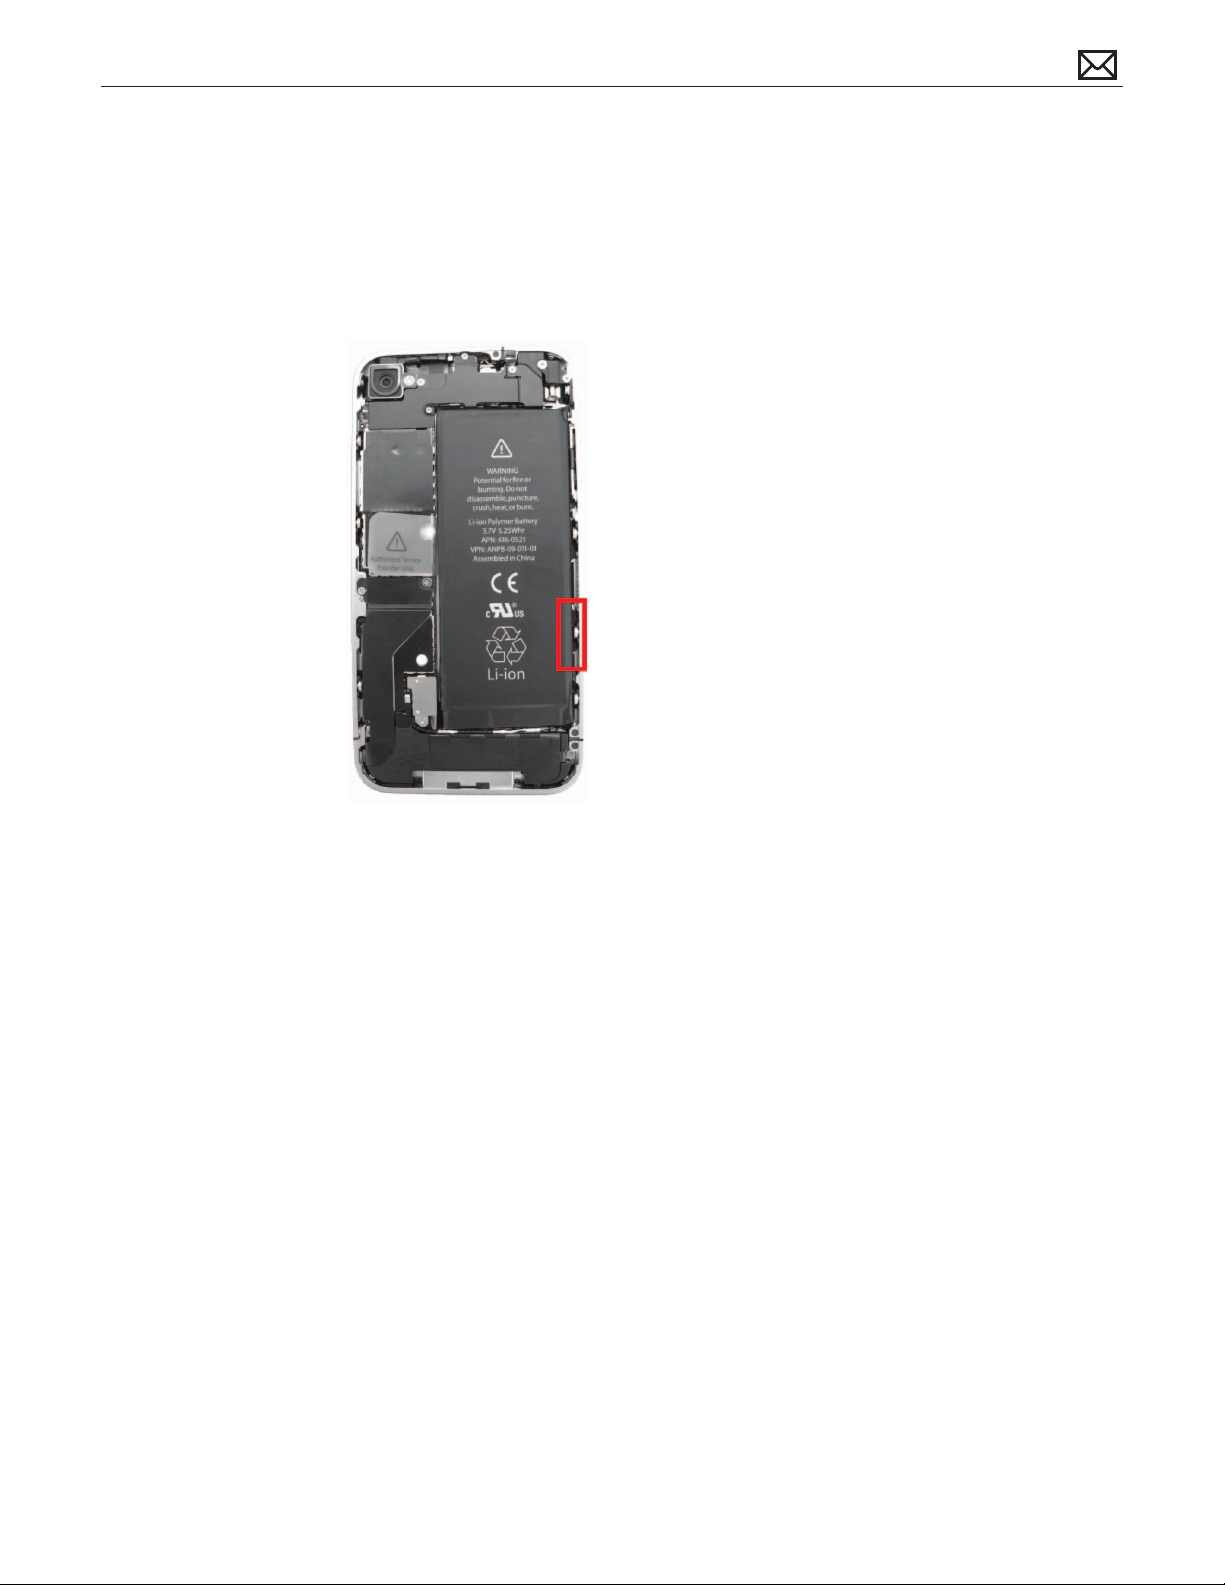
Serial Number Barcode
With the back cover removed, the serial number is printed in barcode format on the band, on
the right side of the battery well. Use Motorola DS6707 Scanner (Apple part #922-9230) to scan
the barcode.
2012-02-21
iPhone 4 (GSM model) Take Apart — Internal Checks 99
Page 100
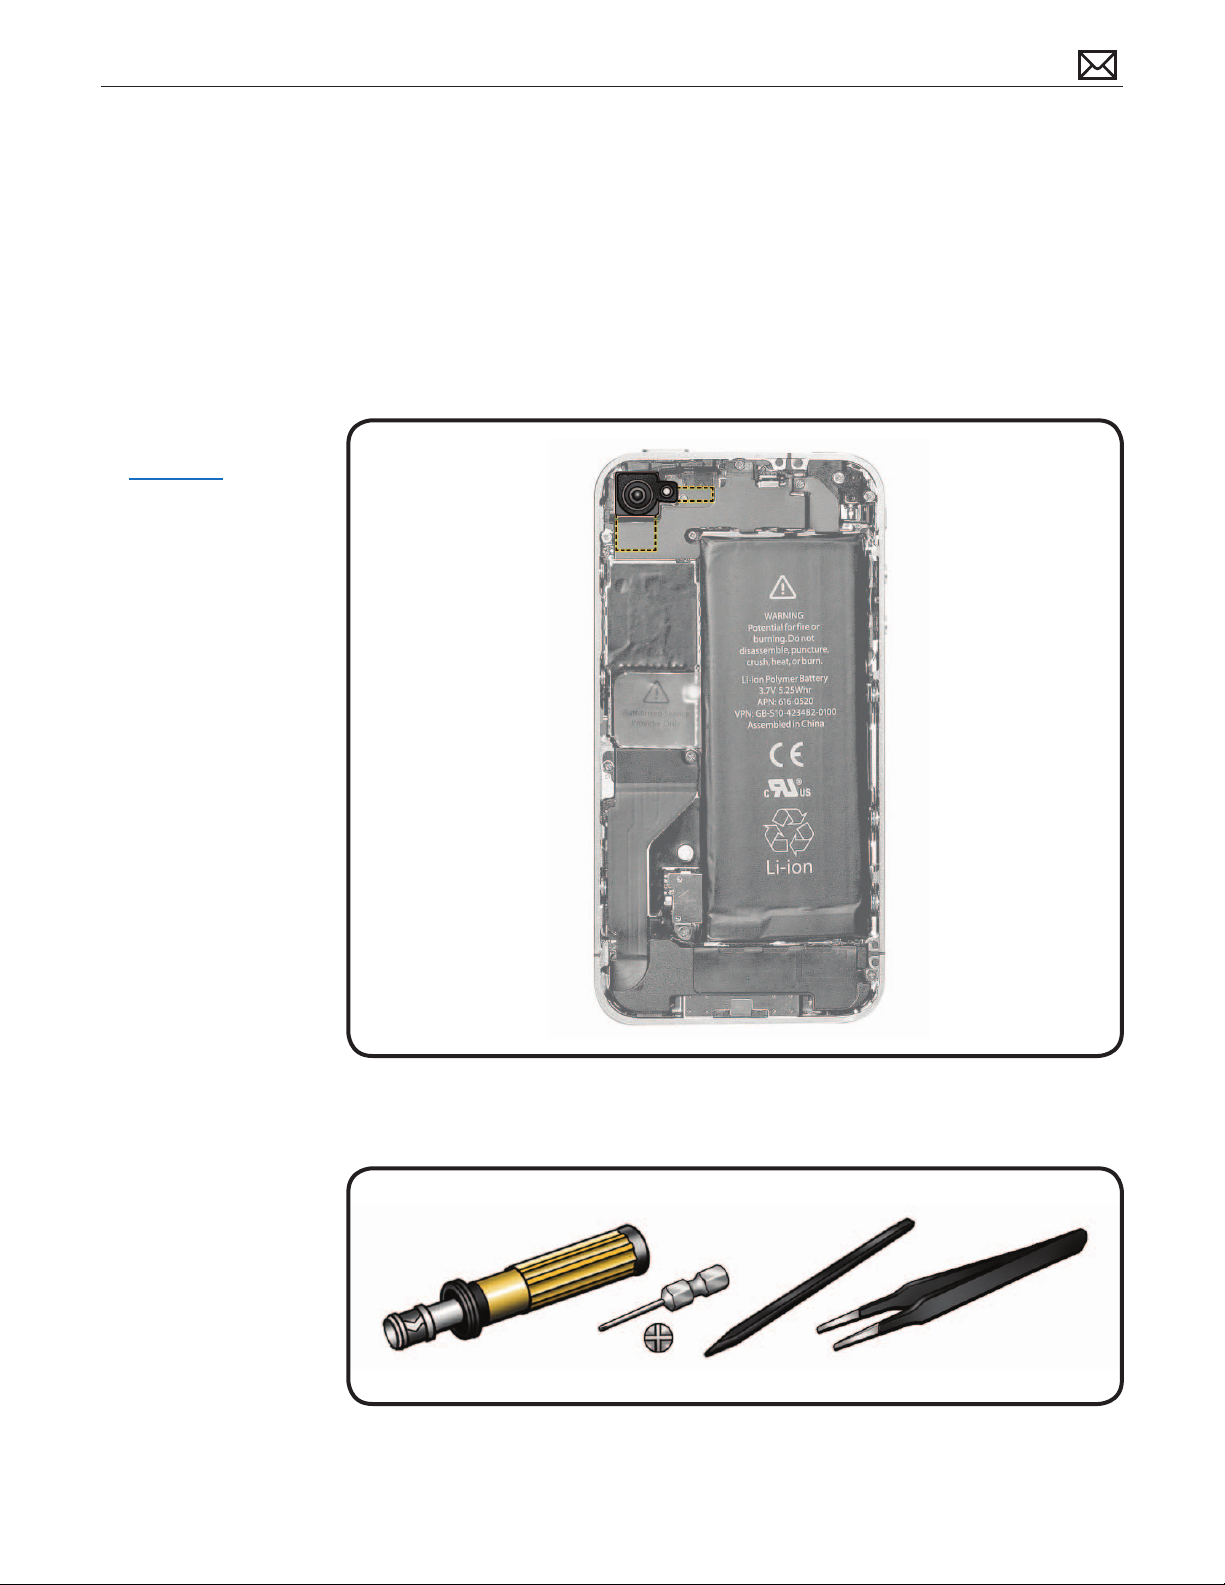
First Steps
• Back Cover
Note: A replacement
camera kit (661-5692
black, or 661-5693 white)
includes 3 foam gaskets,
new camera cowling and
5 new screws.
Important: Do not reuse
old screws.
Main Camera
Tools
• iPhone Torque Driver
(923-0031)
• JCIS #00 Bit (922-9947)
for cross-head screws
• Nylon Probe Tool
(black stick, 922-5065)
• ESD-safe tweezers
2012-02-21
iPhone 4 (GSM model) Take Apart — Main Camera 100
 Loading...