

Page 1

K Power Mac G4 Cube
ATA Hard Drive
Replacement Instructions
Be sure to follow these instructions carefully. Failure to follow these
instructions could result in damage to your equipment and may void your
warranty.
Replacing the ATA hard drive in your computer requires five basic steps:
• Turn off the computer.
• Remove the computer core from the enclosure.
• Remove the installed ATA drive.
• Install the replacement ATA drive.
• Replace the computer core in the enclosure.
Note:
Written and video instructions covering customer-installable parts
are available at
http://www.info.apple.com/installparts/.
Tools Required
• Flat-blade screwdriver
• Torx T-8 screwdriver
• Phillips screwdriver
Electrostatic Discharge (ESD)
Static electricity , a normal and natural phenomenon, builds up on y our body
as you walk around. You experience an electrostatic discharge (ESD) when
you touch an object and feel a spark. ESD can cause damage to the
internal components of your computer. To avoid ESD damage, read and
follow all instructions.
Backing Up Your Data
Warning: Before replacing your hard drive, make sure you back up all
data on the drive.
073-0541 Rev. C
Page 2
Removing the Computer Core From the Enclosure
1 Place your computer on a clean, flat surface.
2 Shut down your computer by opening the Special menu and choosing
Shut Down. Then wait five minutes for the computer’s internal
components to cool down.
3 Unplug all cables from the computer except the power cord.
Note:
If you have never plugged in your computer, connect the
computer’s power cord and plug it in.
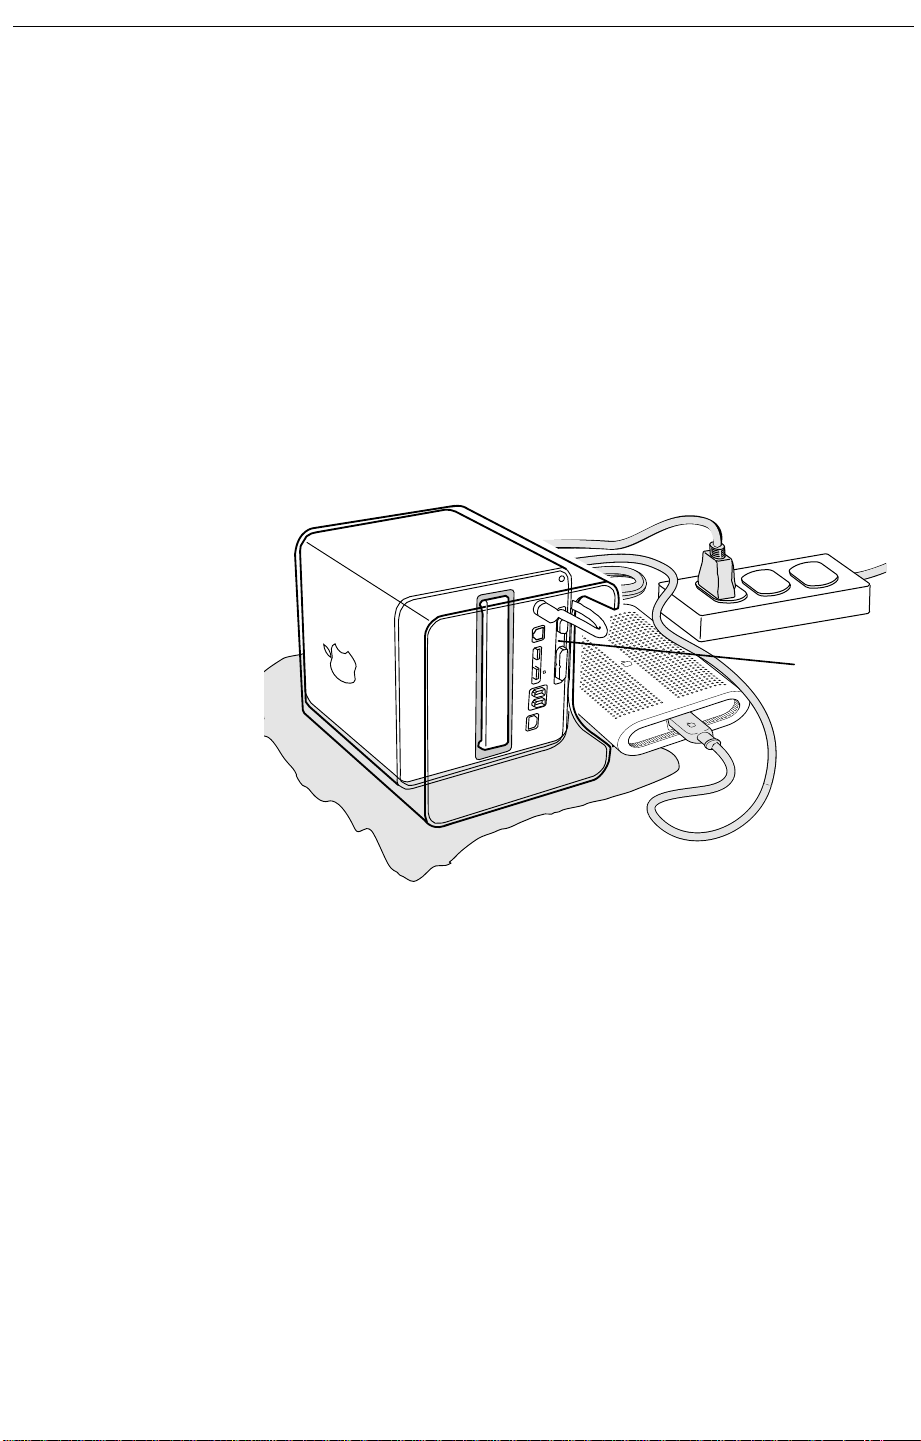
4 Turn the computer on its side on a soft, clean cloth, and ground yourself
by touching the bare metal between the video ports.
Important:
by touching the bare metal before you touch any parts or install any
components inside the computer. To avoid static electricity building
back up in your body, do not walk around the room until you have
completed the installation and closed the computer.
5 Unplug the power cord.
To avoid electrostatic discharge, always ground yourself
Touch
Bare
Metal
2
- Power Mac G4 Cube ATA Hard Drive
Page 3
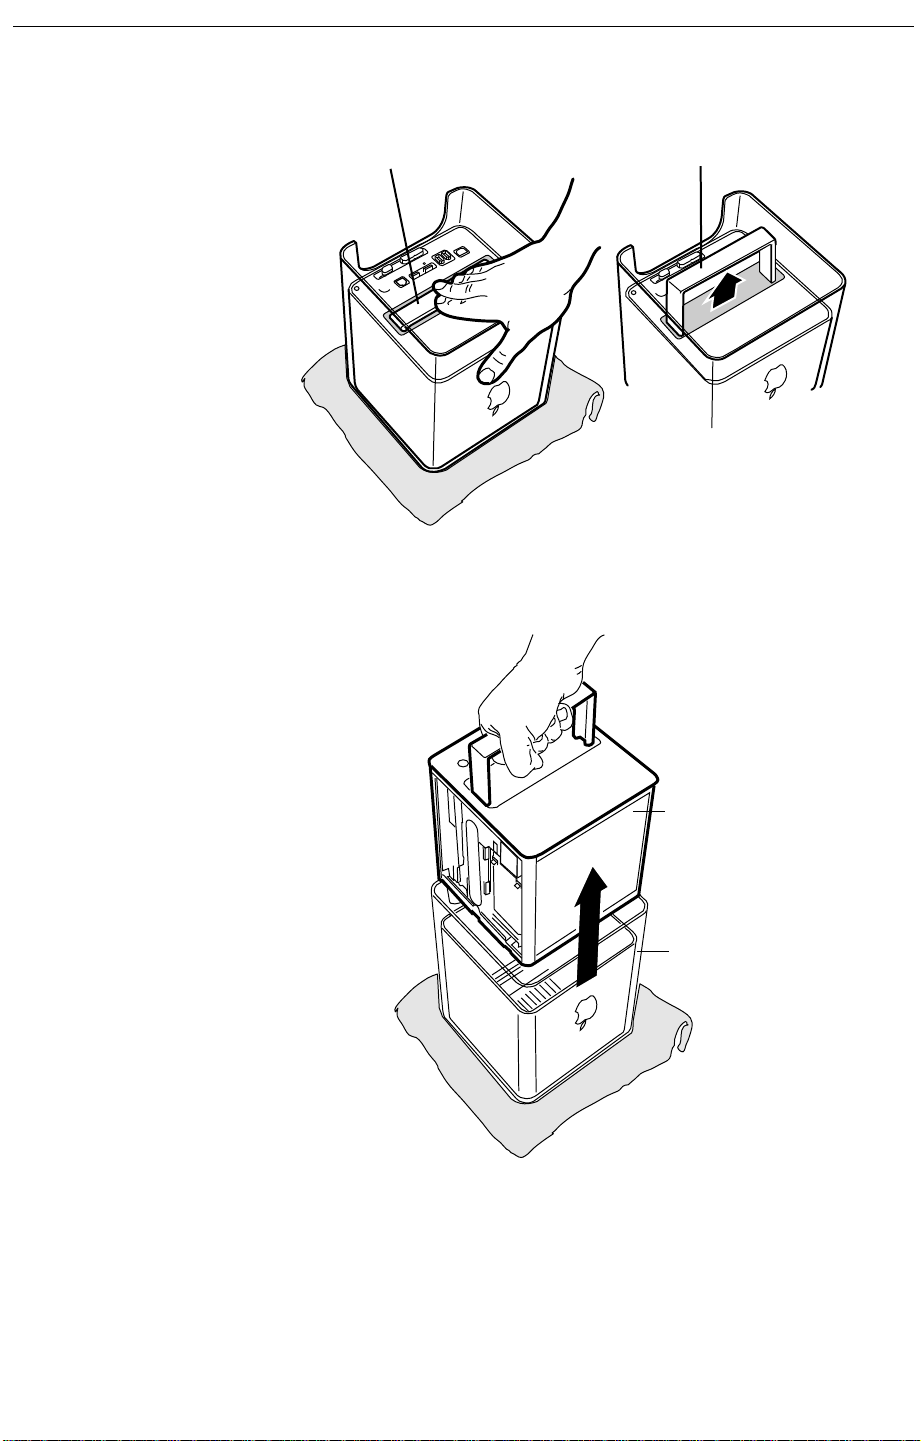
6 Turn the computer upside down, and push down on the latch to release
it. Allow the latch to extend completely.
Latch
Extended Latch
7 Gently pull the core from the computer enclosure and place the core on
a soft cloth.
Core
Enclosure
Power Mac G4 Cube ATA Hard Drive -
3
Page 4

Removing the Installed Drive
1 Remove the AirPort Card, if installed.
2 Press and hold the door latch, and then open the AirPort shield door.
.
Door Latch
3 With the AirPort shield door open, pull the tab to disconnect the ATA
ribbon cable connector from the hard drive.
4 Disconnect the power cable connector from the hard drive. (You might
need to use a flat-blade screwdriver to pry up and loosen the
connector.)
Pull Tab
Connector
Connector
Door
4
- Power Mac G4 Cube ATA Hard Drive
Page 5

5 Push in the core latch, and reposition the computer chassis so you can
access the heatsink and hard drive.
6 Loosen, but do not remove, the three captive screws at the heatsink.
7 Lift up the loosened heatsink, and slide the hard drive out of the carrier.
Screws
Heatsink
Hard Drive
Installing the Replacement Drive
1 Position the replacement drive on the drive carrier so that the ribbon
cable and power cable connectors align with the slots at the end of the
carrier.
2 Lift up the heatsink, and slide in the drive.
3 Align the heatsink fins to the opposite heatsink fins. Tighten the three
captive screws.
Power Mac G4 Cube ATA Hard Drive -
5
Page 6

4 Reconnect the power cable connector and the ATA ribbon cable
connector to the drive.
Pull Tab
Connector
Connector
Door
5 Close the AirPort shield door, and press it down so the door latch
engages.
Door Latch
6 Reinstall the AirPort Card, if applicable.
6
- Power Mac G4 Cube ATA Hard Drive
Page 7

Replacing the Computer Core in the Enclosure
1 Holding the core by the latch, insert the core into the computer.
Note:
The core fits into the enclosure only one way. Position the core
so the ports are toward the back of the enclosure.
Core
Enclosure
2 With a flat hand, press down on the latch until it locks into place. Firmly
press the core to ensure it is fully secured within the enclosure.
Important:
enclosure could fall off the core and be damaged.
Do not lift or carry your computer by the core latch. The
Latch
Power Mac G4 Cube ATA Hard Drive -
7
Page 8

3 Turn your computer upright and reconnect all cables.
4 Restart your computer and restore the data from your backup to the
new drive.
Warning: Never turn on your computer unless all of its internal
and external parts are in place and it is closed. Operating the
computer when it is open or missing parts can damage your
computer or cause injury.
Repackaging the Drive
Repackage the drive you remov ed from the computer in the static-proof bag
and box that you receiv ed with the replacement drive. Seal the box and affix
the return label with the tape and label included in the box.
K
Apple Computer, Inc.
© 2001 Apple Computer, Inc. All rights reserved.
Under the copyright laws, this document may not be copied, in whole or in
part, without the written consent of Apple.
The Apple logo is a trademark of Apple Computer, Inc., registered in the
U.S. and other countries. Use of the “keyboard” Apple logo (Option-Shift-K)
for commercial purposes without the prior written consent of Apple may
constitute trademark infringement and unfair competition in violation of
federal and state laws.
Every effort has been made to ensure that the information in this document
is accurate. Apple is not responsible for printing or clerical errors.
Apple Computer, Inc.
1 Infinite Loop
Cupertino, CA 95014-2084
408-996-1010
http://www.apple.com
Apple, the Apple logo, Mac , Macintosh, and the Mac logo are trademarks of
Apple Computer, Inc., registered in the U.S. and other countries.
AirPort and Power Mac are trademarks of Apple Computer, Inc.
Power Mac G4 Cube ATA Hard Drive -
8
 Loading...