

Page 1
INSTRUCTION MANUAL
For use with the PSP®PlayStation® Portable
Game Console
™
Page 2

GAMESHARK MEDIA MANAGER FOR PSP MANUAL
1) GETTING STARTED
a) Requirements
To use GameShark Media Manager for PSP you must have a PC running Windows 2000, or XP.
It is advisable to have over 300MB of disk space free for storing the various file types that are
available via GameShark Media Manager for PSP. You will need a CD-ROM drive and one free
USB port.
A PC modem and an account with an Internet Service Provider (ISP) or a dial-up Internet connection is required to use GameShark Media Manager for PSP online features.
b) Setting up GameShark Media Manager for PSP for the first time
1. Insert the GameShark Media Manager for PSP disc into the CD-ROM drive of your PC and
close the drawer.
2. After a few seconds, the installation launch panel will appear. If the launch panel does not
automatically appear, double-click on the My Computer Icon, then double-click on the
CD-ROM icon, and lastly double-click on the SETUP.EXE file to bring up the launch panel.
3. Follow the onscreen prompts to install GameShark Media Manager for PSP onto your PC.
c) Connecting your PSP™ Console to your PC
1. Ensure you have a Memory Stick inserted into your PSP console, and that it has been
formatted in the PSP.
2. Using the supplied USB cable, connect the smaller USB connector into the top of your PSP
console.
3. Insert the larger USB connector into a spare USB slot on your PC.
4. Turn on your PSP console. Use the D-Pad to scroll to the left.
5. Scroll up or down and select the “USB Connection” option. The PSP is now connected to
your PC.
d) Starting-up the GameShark Media Manager for PSP Interface
Make sure you have your PSP™ console connected via the supplied USB cable, and that the
console is in “USB Connection” mode. Double-click the GameShark Media Manager for PSP
icon on your PC desktop to start.
2) AN OVERVIEW OF THE GAMESHARK MEDIA MANAGER FOR PSP INTERFACE
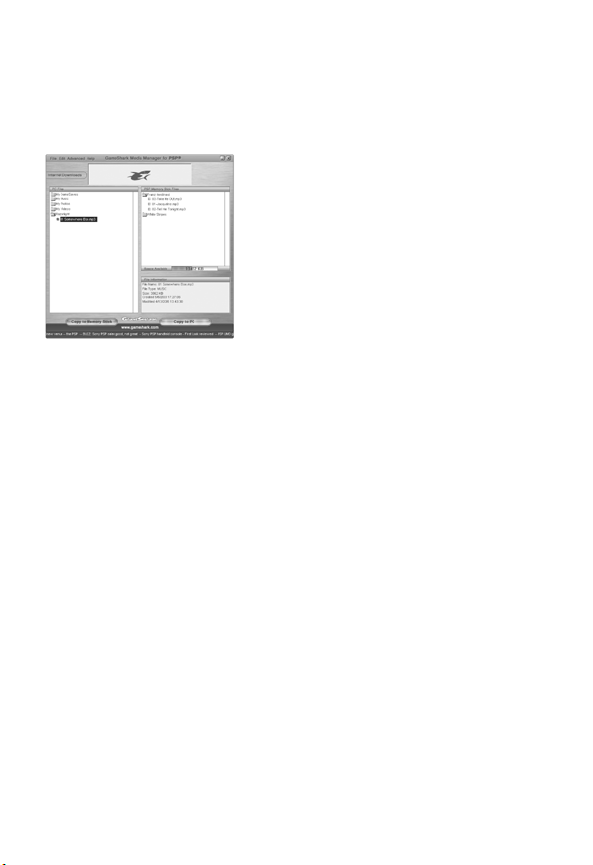
When you first start your GameShark Media Manager for PSP software, you will be presented
with an interface consisting of 2 different panels as shown below. Details of each panel and its
functions are explained in more detail below:
a) PC Panel
This is the left panel that displays all the Gamesave, Photo, Music and Video files stored on your
PC. The files are stored in Group Folders so you can identify and manage your own files by simply
grouping them together.
b) Memory Stick Panel
This is the Panel on the right and displays the files that are stored on your Memory Stick that is
in the PSP console.
Page 3

c) User Interface
1. FILE - This is the File menu option. It consists of the
following sub options:
Create folder- Creates a new folder
Add PC File- Adds a file to the selected folder
Delete- deletes the selected item
Refresh- refreshes the selected window
Minimize- minimizes the application
Close- closes the application
2. EDIT - This is the Edit menu option. It consists of the
following sub options:
PC FILES- allows you to edit the name/ information on a file
RSS URL- Allows you to edit the URL which the RSS feed
pulls from
3. ADVANCED - This is the advanced menu option. It consists of the following sub option:
User Configuration- allows you to enter details to logon to the online database.
4. HELP: This is the Help menu option. It consists of the following sub options:
About - Displays contact details and information on the product
Help - Displays a help diagram.
5. WEB BANNER- This is the Web Banner. It displays images, animations or messages from
the GameShark website. It may also be used to display offers that are available from
GameShark.com .
6. BACKGROUND- This is the background of the interface.
7. MINIMIZE - This button will minimize the application to the taskbar.
8. CLOSE - This button will close the application.
9. FILES/ FOLDERS ON MEMORY STICK - These are the files/folders on the PSP Memory stick.
10. MEMORY STICK PANEL - This panel displays the contents of the Memory Stick folders. To
view the Music files, click the My Music Folder on the PC Panel; to view photos, click the My
Photos folder, and so on.
11. CAPACITY BAR - This is the capacity bar and shows the amount of space available on
the Memory Stick.
12. COPY TO PC BUTTON - The Copy to PC button copies the selected file over to a pre
selected folder in the PC Window.
13. FILE INFORMATION - This is the File Information panel. When you click on a File or Folder
so it is selected, the information for that file appears here.
14. WEBSITE LINK - This button links through to the GameShark website.
15. COPY TO MEMORY STICK - This is the copy to Memory Stick button and copies a
pre-selected file/folder from the PC to the Memory Stick.
16. RSS FEED - The RSS Feed keeps the user updated with the latest news.
17. PC PANEL - This panel displays the folders and files that are stored on the PC.
18. PC FILES – These are the files that are stored on the PC.
19. PC FOLDERS - These are the default folders for the application, they consist of:
My GameSaves, My Music, My Pictures and My Videos. These folders are used to manage
one type of file at a time; for example clicking on My Music will display the Music contents of
the PSP Memory Stick, and you can only copy MP3 files to the My Music folder.
20. INTERNET DOWNLOADS BUTTON- This button opens the Internet downloads panel.
3) MANAGING FILES
GameShark Media Manager for PSP allows you to manage convert and download media files
and game saves. The application allows you to manage ONE category of files at a time. The
different categories are: VIDEOS, MUSIC, PHOTOS, and GAMESAVES.
Page 4
To select the type of file you want to manage click on one of the folders in the PC Panel that corresponds to the type of file you want to manage. So if you want to manage Music files, click on
the “My Music” folder in the PC Panel; the Memory Stick panel will now display the MP3 files
that are on your Memory Stick. If you want to convert and transfer video files to your PSP, click
the “My Videos” folder, and so on:
See diagram below-
Once you have chosen the type of file you want to
manage, you can use the various functions. The fur file
types of Video, Music, Photos and GameSaves are
explained below.
4) MY VIDEOS
GameShark Media Manager for PSP can convert your
PC video files so they can be played back on your PSP
console! The PSP only plays MPEG 4 videos that are
named correctly; GameShark Media Manager for PSP
takes care of this for you.
a) Video Conversion
GameShark Media Manager for PSP can convert the following types of video file for playback
on PSP:
• AVID
• MPEG 1
• MPEG 2
• DIX
• MOVE
• MP4
The video files are converted automatically when copied across to the PSP. Copying and converting files is easy, and is explained below.
b) Adding Video files to the “My Videos” folder
The Video files on your PC need to be added to the “My Videos” folder before they can be
copied to the Memory Stick.
1. To add a video file to the “My Videos” folder, select the “My Videos folder with a mouse click
so it is highlighted (to confirm the destination folder).
2. Now select the “File” menu option.
3. Select “Add PC File”.
4. Browse your PC directories until you find the video file you want to add to the folder.
5. Click OK and the video file will be added to the “My Videos” folder in
GameShark Media Manager for PSP.
6.Repeat these steps to add as many files as you wish to the My Videos folder.
Or if you are familiar with PC techniques, you can “drag and drop” video files into the “My
Videos” folder.
1. To drag and drop a video file into the My Videos folder, first select the “My Videos” folder with
a mouse click so it is highlighted (to confirm the destination folder).
Page 5

2. Now open the Windows folder that the video file is in (ensuring you can see the
GameShark Media Manager for PSP interface and the video file folder).
3. Now drag and drop the video file over the “My Videos” folder in the
GameShark Media Manager for PSP interface.
4. The file will now be added to the “My Videos” folder.
5. Repeat these steps to add as many files as you wish to the My Videos folder.
c) Converting and copying video files to the PSP Memory Stick
When video files are copied over to the Memory Stick, they are automatically converted into the
PSP compatible format, and renamed so the PSP will play them. Below are ways to copy files to
your PSP Memory Stick:
1. Ensure your PSP is in USB mode and connected to the PC.
2. Double click on the “My Videos” folder to open it. The video files available for copying
and converting will be shown.
3. Select the video file you want to copy to your PSP Memory Stick so it is highlighted
(ensure you have enough free space on your memory Stick by checking the Capacity bar).
4. Click the “Copy to Memory Stick” button on the GameShark Media Manager for PSP interface.
5. The conversion and copy process will now take place, so a progress bar will appear.
6. You will now see the file appear in the Memory Stick panel with the new name
“M4V0001.MP4”. The file must be called this to be viewed on the PSP.
7. To watch your newly converted video, close the GameShark Media Manager for PSP interface
and remove the PSP safely from your PC using the “Unplug or Eject Hardware” option
of Windows.
If you are familiar with PC techniques, you can “Drag and drop” video files from the PC panel to
the Memory Stick panel to convert and copy them across:
1. Ensure your PSP is in USB mode and connected to the PC.
2. Double click on the “My Videos” folder to open it. The video files available for copying
and converting will be shown.
3. Select the video file you want to copy to your PSP Memory Stick so it is highlighted
(ensure you have enough free space on your memory Stick by checking the Capacity bar).
4. Drag and drop the video file from the My Videos folder over to the Memory Stick panel.
5. You will now see the file appear in the Memory Stick panel with the new name
“M4V0001.MP4”. The file must be called this to be viewed on the PSP.
6. To watch your newly converted video, close the GameShark Media Manager for PSP interface
and remove the PSP safely from your PC using the “Unplug or Eject Hardware” option
of Windows.
After the conversion of a video file, an MP4 copy of the file will be left in the “My Videos” folder
with the same file name as the original file. If you delete the MP4 file from your Memory Stick,
and want to copy the file over again it does not have to be re-converted.
PLEASE NOTE
If you have transferred files to the Memory Stick, you MUST close the application and use the
Unplug or Eject Hardware option of Windows (usually found on the Taskbar). If you do not do
this then your file may not be saved to your Memory Stick. This is due to Windows and not the
GameShark Media Manager for PSP application.
d) Organizing Video Files
You do not have to store video files in the “My Videos” folder. You can create your own specific
folders and store certain video files in them.
Page 6

To create a new folder in which to store videos follow these steps:
1. Select the “File” menu option
2. Select “Create Folder” and the dialog below will appear:
3. Select Video from the drop down menu as the file type
and PC as the location.
4. Type in the name you want to call the folder.
5. Click OK and the folder will appear in the PC Panel.
6. You can now add files to this folder in the manner
described in the “Adding Video files to the “My Videos”
folder”, replacing “My Videos” with the folder you have just
created.
e) Deleting Video Files
Deleting Video files from the GameShark Media Manager for PSP interface is very easy.
To delete a file either from the PC Panel or from the Memory Stick panel simply click on the file
so it is highlighted.
Press the delete button on your keyboard, or select the File menu option, then select Delete.
Confirm the deletion of the file and the file is deleted.
PLEASE NOTE
If you delete a file from the Memory Stick Panel, the file cannot be recovered. You may want to
make a copy of the file to a PC folder before deleting the file from the Memory Stick.
If you delete a file from the PC panel, the file will be removed from the GameShark Media
Manager for PSP interface, but the source file originally copied from your Windows desktop will
still be intact.
5) MUSIC
GameShark Media Manager for PSP allows you to manage your MP3 files and copy them to
your PSP Memory Stick.You can even copy direct from iTunes™ into GameShark Media
Manager for PSP!
To start managing your MP3 music files, click the “My Music” folder on the PC panel. This will
show the music contents of your PSP Memory Stick (if any).
To copy your MP3’s over to your PSP Memory Stick you must first put them in the “My Music”
folder on the PC Panel of the interface.
a) Adding Music files to the “My Music” folder
The Music files on your PC need to be added to the “My Music” folder before they can be copied
to the Memory Stick.
1. To add an MP3 file to the “My Music” folder, select the “My Music” folder with a mouse click
so it is highlighted (to confirm the destination folder).
2. Now select the “File” menu option
3. Select “Add PC File”
4. Browse your PC directories until you find the MP3 file you want to add to the folder
5. Click OK and the MP3 will be added to the “My Music” folder in GameShark Media Manager
for PSP.
6. Repeat these steps to add as many files as you wish to the My Music folder.
Page 7

Or if you are familiar with PC techniques, you can “drag and drop” MP3 files into the “My Music”
folder. To do this:
1. To drag and drop a video file into the My Music folder, first select the “My Music” folder with a
mouse click so it is highlighted (to confirm the destination folder).
2. Now open the Windows folder that the MP3 is in (ensuring you can see the
GameShark Media Manager for PSP interface and the MP3 file folder).
3. Now drag and drop the MP3 over the “My Music” folder in the GameShark Media Manager
for PSP interface.
4. The file will now be added to the “My Music” folder.
5. Repeat these steps to add as many files as you wish to the My Music folder
b) Organizing your MP3 files
You can organize your MP3’s within the GameShark Media Manager for PSP interface, and catalogue your songs by artist, genre or any other method you prefer.
You do not have to store your MP3 files in the default “My Music” folder; you can create your
own specific folders and store certain music files in them.
To create a new folder in which to store MP3’s, follow these steps:
1. Select the “File” menu option
2. Select “Create Folder” and the dialog below will appear:
3. Select Music from the drop down menu as the file type
and PC as the location.
4. Type in the name you want to call the folder
(e.g. “Rock” if you want to store Rock MP3’s in it).
5. Click OK and the folder will appear in the PC Panel.
6. You can now add files to this folder in the manner
described in the “Adding Music files to the “My Music”
folder”, replacing “My Music” with the folder you have
just created.
c) Copying Music files to your PSP Memory Stick
You can copy music files across to your PSP Memory Stick very easily. You can either copy the
music folders you have created (see above) and all their contents across, or you can copy single
files across to the root of the PSP Music folder.
1. Ensure your PSP is in USB mode and connected to the PC.
2. Select the MP3 file or complete folder you want to copy to your PSP Memory Stick so it is
highlighted (ensure you have enough free space on your memory Stick by checking the
Capacity bar).
3. Click the “Copy to Memory Stick” button on the GameShark Media Manager for PSP interface.
4. The copy process will now take place, so a progress bar will appear.
5. You will now see the file or folder appear in the Memory Stick panel, so it is on the Memory Stick.
6. To listen to your MP3’s on your PSP, close the GameShark Media Manager for PSP interface
and remove the PSP safely from your PC using the “Unplug or Eject Hardware” option of
Windows.
7. Play the MP3’s as normal on your PSP (see your PSP manual for details).
If you are familiar with PC techniques, you can “drag and drop” music files or folders from the
PC panel to the Memory Stick panel to copy them across:
Page 8

1. Ensure your PSP is in USB mode and connected to the PC.
2. Select the MP3 file or complete folder you want to copy to your PSP Memory Stick so it is
highlighted (ensure you have enough free space on your memory Stick by checking the
Capacity bar).
3. Simply drag and drop the file or folder across into the Memory Stick panel.
4. The copy process will now take place, so a progress bar will appear.
5. You will now see the file or folder appear in the Memory Stick panel, so it is on the Memory Stick.
6. To listen to your MP3’s on your PSP, close the GameShark Media Manager for PSP interface
and remove the PSP safely from your PC using the “Unplug or Eject Hardware” option
of Windows.
7. Play the MP3’s as normal on your PSP (see your PSP manual for details).
PLEASE NOTE
If you have transferred files to the Memory Stick, you MUST close the application and use the
Unplug or Eject Hardware option of Windows (usually found on the Taskbar). If you do not do
this then your file may not be saved to your Memory Stick. This is due to Windows and not
the GameShark Media Manager for PSP application.
d) Copying songs from iTunes to GameShark Media Manager
If you use iTunes to organise your music, then you can copy your songs from iTunes into the
Gameshark Media Manager interface then copy the files to PSP!
The songs can be in MP3 or AAC format, but can only be songs from CD’s you have imported
yourself.
To copy songs from iTunes to GameShark Media Manager, follow the steps below:
1. Open iTunes and select the playlist/library you want to copy from.
2. Open GameShark Media Manager for PSP Music Studio and select the “My Music” folder, or
other music folder you want to copy the song to.
3. Simply click and drag the song from iTunes over the highlighted folder in
GameShark MediaManager for PSP.
4. The file will now be added to the folder. Repeat this with as many tracks as you wish.
5. You can now copy these files to your PSP Memory Stick as explained above.
6. If the file is an MP3 then the songs will just be copied. However if the songs are AAC
encoded .M4A files then the file extension will be changed to .MP4 when you copy to PSP.
This is so the PSP can play the songs.
PLEASE NOTE: YOU CANNOT COPY SONGS THAT HAVE BEEN PURCHASED FROM THE
ITUNES MUSIC STORE AS THESE SONGS ARE PROTECTED AND CONTAIN DRM (DIGITAL
RIGHTS MANAGEMENT).
e) Renaming your MP3 files
You can rename your MP3 files in the application. This is useful because it allows you to reorder
your tracks into the order you want them played when copied across to the PSP.
If you want a track to play first, put “01” at the start of the file name. The second track you want
to be played “02” and so on.
To rename your files or folders:
1. Select the file or folder you want to rename
2. Right Click on the file with your mouse and select the “Rename” option
3. Type in the name you wish to call the file or folder
Page 9

4. Click ok
5. The file/folder will refresh and the name will be saved
f) Deleting Music Files or folders
Deleting MP3 music files from the GameShark Media Manager for PSP interface is very easy.
1. To delete a file either from the PC panel or from the Memory Stick panel simply click on the
file so it is highlighted.
2. Press the delete button on your keyboard, or select the File menu option, then select Delete.
3. Confirm the deletion of the file and the file is deleted.
PLEASE NOTE
If you delete a file from the Memory Stick Panel, the file cannot be recovered. You may want to
make a copy of the file to a PC folder before deleting the file from the Memory Stick.
If you delete a file from the PC panel, the file will be removed from the GameShark Media
Manager for PSP interface, but the source file originally copied from your Windows desktop will
still be intact.
5) g) Importing your own CD collection to your PSP
GameShark Media Manager for PSP can also import your existing CD collection into the PC for
use on your PSP. The files are compressed to MP3 format to fit more songs onto your PSP and
there's also a handy internet database query feature which automatically shows the album, artist
and track names of your CD's!
To Import your own CD:
1. Insert a CD into the PC CD Tray. (If your PC window pops up to use the CD with any other
device, select "close" or "cancel")
2. Click on the IMPORT CD button (6).
3. GameShark Media Manager for PSP will now attempt to get the track and album name form
the Internet. If no internet connection is available or if the album information is not available
online, then a message box will pop up asking you to enter the name of the album.
4. The CD will now be imported into the “PC Saves” window, listed under the Album Name.
5. You can now drag and drop this album or selected tracks onto your PSP as described in
paragraph above.
PLEASE NOTE: IT IS AN OFFENCE TO COPY COPYRIGHT MATERIAL. PLEASE ENSURE
YOU SEEK THE PERMISSION OF THE COPYRIGHT OWNER BEFORE UTILISING THIS FEATURE FOR ANY COPYRIGHT MATERIAL.
6) PHOTOS
The PSP console can be used to display your JPG photos or images.
a) Adding Photos or images to the “My Photos” folder
The photo or image files on your PC need to be added to the “My Photos” folder before they can
be copied to the Memory Stick.
1. To add a JPG file to the “My Photos” folder, select the “My Photos” folder with a mouse click
Page 10

so it is highlighted (to confirm the destination folder).
2. Now select the “File” menu option
3. Select “Add PC File”
4. Browse your PC directories until you find the JPG file you want to add to the folder.
5. Click OK and the file will be added to the “My Photos” folder in GameShark Media Manager
for PSP.
6. Repeat these steps to add as many files as you wish to the “My Photos” folder.
.
Or if you are familiar with PC techniques, you can “drag and drop” JPG image files into the “My
Photos” folder. To do this:
1. To drag and drop a video file into the “My Photos” folder, first select the “My Photos” folder
with a mouse click so it is highlighted (to confirm the destination folder)
2. Now open the Windows folder that the JPG is in (ensuring you can see the GameShark
Media Manager for PSP interface and the JPG file folder)
3. Now drag and drop the JPG over the “My Photos” folder in the GameShark Media Manager
for PSP interface
4. The file will now be added to the “My Photos” folder
5. Repeat these steps to add as many files as you wish to the “My Photos” folder
b) Organizing your Image files
You can organize your JPG files within the GameShark Media Manager for PSP interface and
catalogue your images.
You do not have to store your JPG files in the default “My Photos” folder; you can create your
own specific folders and store certain JPG files in them.
To create a new folder in which to store your images follow these steps:
1. Select the “File” menu option
2. Select “Create Folder” and the dialog below will appear:
3. Select Photo from the drop down menu as the file type
and PC as the location.
4. Type in the name you want to call the folder.
5. Click OK and the folder will appear in the PC Panel.
6. You can now add files to this folder in the manner
described in the “Adding Photos” files to the “My
Photos” folder”, replacing “My Photo” with the folder
you have just created.
c) Copying Image files to your PSP Memory Stick
You can copy JPG image files across to your PSP Memory Stick very easily.
1. Ensure your PSP is in USB mode and connected to the PC.
2. Select the file you want to copy to your PSP Memory Stick so it is highlighted (ensure you
have enough free space on your memory Stick by checking the Capacity bar).
3. Click the “Copy to Memory Stick” button on the GameShark Media Manager for PSP interface.
4. The copy process will now take place, so a progress bar will appear.
5. You will now see the file or folder appear in the Memory Stick panel, so it is on the
Memory Stick.
6. To view your images on your PSP, close the GameShark Media Manager for PSP interface
and remove the PSP safely from your PC using the “Unplug or Eject Hardware” option
of Windows.
Page 11

7. View the images as normal on your PSP (see your PSP manual for details).
If you are familiar with PC techniques, you can “Drag and drop” JPG files from the PC panel to
the Memory Stick panel to copy them across:
1. Ensure your PSP is in USB mode and connected to the PC.
2. Select the file you want to copy to your PSP Memory Stick so it is highlighted (ensure you
have enough free space on your Memory Stick by checking the Capacity bar).
3. Simply drag and drop the file or folder across into the Memory Stick panel.
4. The copy process will now take place, so a progress bar will appear.
5. You will now see the file or folder appear in the Memory Stick panel, so it is on the
Memory Stick.
6. To view your images on your PSP close the GameShark Media Manager for PSP interface
and remove the PSP safely from your PC using the “Unplug or Eject Hardware” option
of Windows.
7. View the images as normal on your PSP (see your PSP manual for details).
PLEASE NOTE
If you have transferred files to the Memory Stick, you MUST close the application and use the
Unplug or Eject Hardware option of Windows (usually found on the Taskbar). If you do not do
this then your file may not be saved to your Memory Stick. This is due to Windows and not
the GameShark Media Manager for PSP application.
d) Renaming your JPG files
To rename your files or folders:
1. Select the file or folder you want to rename
2. Right Click on the file with your mouse and select the “Rename” option
3. Type in the name you wish to call the file or folder
4. Click ok
5. The file/folder will refresh and the name will be saved
e) Deleting Image Files or folders
Deleting JPG files from the GameShark Media Manager for PSP interface is very easy.
1. To delete a file either from the PC Panel or from the Memory Stick panel simply click on the
file so it is highlighted.
2. Press the delete button on your keyboard, or select the File menu option, then select Delete.
3. Confirm the deletion of the file and the file is deleted.
PLEASE NOTE
If you delete a file from the Memory Stick Panel, the file cannot be recovered. You may want to
make a copy of the file to a PC folder before deleting the file from the Memory Stick.
If you delete a file from the PC panel, the file will be removed from the GameShark Media
Manager for PSP interface, but the source file originally copied from your Windows desktop will
still be intact.
7) GAMESAVES
GameShark Media Manager for PSP includes CheatSaves for various games that let you get
ahead in your game. GameShark CheatSaves give you access to new levels, characters, items
and more!
Page 12
a) Copying GameSaves to your PSP Memory Stick
To use the CheatSaves on your PSP games you first need to copy the save to your PSP
Memory Stick. To do this, follow the steps below:
1. Double click on the “My GameSaves” folder to open it.
2. Select which gamesave you want to copy to your Memory stick.
3. Click the “Copy to Memory Stick” button
4. The save will be copied to your PSP Memory Stick.
5. The next time you play the game your save is for, the save will be loaded.
b) Backing up GameSaves to PC
You can back-up the GameSaves on your Memory Stick to a PC folder to save space on your
Memory Stick and always ensure you have a safe copy. To copy your saves off the Memory
Stick follow the steps below:
1. Click the “My GameSaves” folder so it is highlighted (this is the destination folder), and
the Gamesave files on your Memory Stick will show in the right panel.
2. Select which GameSaves you want to copy to the PC by clicking them. You can select more
than one by holding the “Ctrl” button your keyboard while you select them.
3. Click the “Copy to PC” button. You will be given the option to copy or move the files. If you
choose to “Copy” then a copy of the file(s) will be on both the PC panel and the Memory Stick.
If you choose to “Move” then the files will be moved off the Memory Stick to the PC folder.
4. After you select “Copy” or “Move” then the files will be in the “My GameSaves” folder.
8) INTERNET DOWNLOADS
You can download new GameSaves and media content from the GameShark server. To do this
your PC needs to be connected to the Internet.
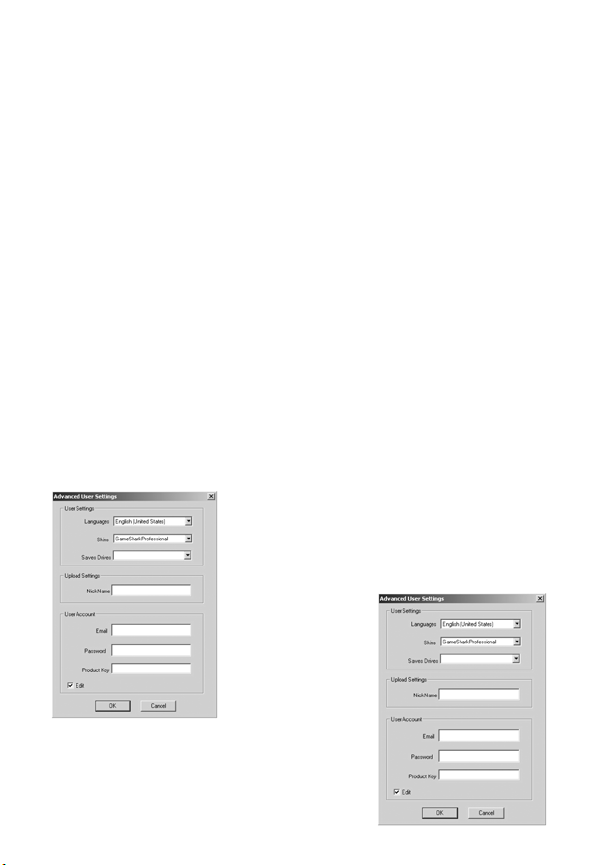
a) User Configuration box
When you first click the Internet Downloads button, the user configuration box will appear. This is
where you enter your details:
Enter your E-mail address, chosen password, a nickname
and product key into the boxes provided.
The product key is a 16-digit number that can be found on
the Product Key card inside the box of GameShark Media
Manager for PSP.
Once you have entered
all these details, press
OK and the Internet
Downloads panel will
appear:
Page 13

1. CLOSE - This button closes the Internet Downloads panel
2. INTERNET DOWNLOADS- This is the button pressed to open the panel, and can also be
used to close the panel.
3. SEARCH- This button brings up the search dialog box that is explained in further detail in
this manual.
4. INTERNET DOWNLOADS PANEL- This is the panel where all the files available for
download from the GameShark server are displayed.
5. DOWNLOAD TO PC – This button downloads the selected file to a pre-selected folder
in the PC panel.
6. FILES – These are the files available for download.
b) Searching for files
To search for GameSaves or media files from the online database follow the steps below:
1. With the Internet Downloads panel open, click the “Search” button.
2. A dialog box will appear:
3. Use the drop down menu to define what type of file you
want to search for, and enter the name of the game if you
are searching for GameSaves.
4. Click ok and a search will be performed. If you leave the
“Name” box blank, all the results for that media type will
be presented.
5. The search results will be displayed.
c) Downloading files from Internet Panel to PC folders
To download the files you have searched for to your PC folders, follow the steps below:
1. In the PC Panel, select the folder you want to download the file to (eg; select “My
GameSaves” if downloading GameSaves).
2. Now select the file you wish to download.
3. Click the “Download to PC” button and the file will be downloaded to the chosen folder.
4. Repeat this process to download as many files as you wish.
If you are familiar with PC techniques, you can “drag and drop” files from the Internet panel to
the PC panel to copy them across:
1. In the PC Panel, select the folder you want to download the file to (eg; select “My
GameSaves” if downloading GameSaves).
2. Now select the file you wish to download, keeping the left mouse button held down.
3. Drag and drop the file over the folder you selected in the PC panel.
4. Repeat this process to download as many files as you wish.
9) RSS Feed
The RSS feed is a text feed running along the bottom of the GameShark Media Manager for
PSP user interface. The RSS feed keeps you updated with the latest information on what saves
are available and other PSP related news.
You can change the RSS feed to one of your choice (for example MSN). To do this, follow these
steps:
1. Go to the “Edit” menu option, then select “RSS URL”
2. Type or paste in the RSS URL of your choice
3. Click OK
Page 14

The RSS feed will now be updated, and your chosen RSS feed displayed along the bottom of
the interface.
10) FAQ’s
Q: I can’t seem to get PSP GameShark to connect to the PSP. Why is this?
A: First, check you have connected your USB link cable up properly between your PC and the
PSP. Turn on your PSP and set it to USB Connection from the main menu. Run the PSP
GameShark and it should now work.
Q: I’ve copied a media file from the PC to the PSP but when I browse the Memory Stick
using my PSP browser the file is not there.
A: You might have disconnected the USB cable while the file was being copied. Always disconnect the PSP using the Windows Safely Remove Hardware.
Q: I have copied a file across from my PC to my PSP Memory Stick, but it does not
appear to be there. Why is this?
A: Select ‘Refresh Memory Stick’ from the File menu. This will refresh the Memory Stick Panel,
and your save should show up.
Q: Why doesn’t it work with Windows95 and Windows98?
A: These versions of Windows have been known to have issues with USB and today a majority
of users are running Windows XP.
Q: I seem to have various problems when running your software.
A: We suggest that if you have internet access, you should use Windows Updates to update
your version of Windows. Microsoft continually develops Windows to improve and fix various
issues. We therefore recommend you keep your version of Windows as up to date as possible.
Q: Does it matter which USB port I plug the cable into on the PC?
A: No.
Q: Can I plug it into a USB2.0/USB Hi-Speed port?
A: Yes, although the cable is a USB1.1 device.
Q: Can I plug the cable into a hub?
A: Yes, although if you have any problems, try plugging it directly into a USB port on your PC.
Q: I plug it into a hub and it seems to be Intermittent/fail to work promptly.
A: Although it should work through a hub, various factors could cause it to be unreliable. If you
have any problems, try plugging it directly into a USB port on your PC.
Q: Can I use a USB extension cable?
A: Yes, although if you have any problems, try plugging it directly into a USB port on your PC.
Q: Will this product cause damage to my Memory Stick?
A: No.
Q: Will this product cause damage to my PSP?
A: No.
Q: Will I get free upgrades, when available?
A: Major versions will be released as new products, but minor versions may be released for free
as an upgrade at GameShark’s discretion.
Page 15

11) CUSTOMER SUPPORT
Please refer to the frequently asked questions in the previous sections before contacting our
customer service department. If you still cannot resolve the problem, please contact us as follows.
Phone: (619) 683-2815
Email: support@gameshark.com
World Wide Web: http://www.gameshark.com
If you have any problems or queries with this product, feel free to write to:
Mailing Address:
Mad Catz, Inc.
ATTN: GameShark Support
7480 Mission Valley Road Suite 101
San Diego, CA 92108
Warranty Information
To receive warranty service you must:
- Call Mad Catz Technical Support at 619.683.2815
- Obtain a Return Authorization Number from Mad Catz Technical Support
- Ship the product to Mad Catz at your expense for service
- Enclose a copy of the original sales receipt showing a purchase date
- Enclose a full return address with daytime and evening phone numbers
Technical Support
Online Support and User Guides: www.gameshark.com
Email: support@gameshark.com
Telephone: Available 8am – 5pm PST Monday – Friday (excluding holidays) at 619.683.2815
©2006 Mad Catz, Inc. 7480 Mission Valley Rd., Suite 101, San Diego, CA 92108-4406.
DISK MADE IN ENGLAND, USB CABLE MADE IN HONG KONG, ASSEMBLED IN THE
UNITED STATES.
©2005 Mad Catz, Inc. GameShark, the GameShark Logo and Wanna Beat the Game are trademarks or registered trademarks of Mad Catz, Inc., its subsidiaries and/or affiliates. GameShark
codes © 1996 - 2005. Features, appearances and specifications may be subject to change without notice. PSP is a trademark or registered trademarks of Sony Computer Entertainment, Inc.
(SCEI). This product is not sponsored, endorsed or approved by SCEI. Memory Stick is a registered trademark of Sony Corporation. iTunes is a trademark or registered trademark of Apple
Computer, Inc. © 2004 Apple Computer, Inc.
 Loading...