

Page 1
THE STUDIO MANAGEMENT
SOFTWARE SOLUTION
by
Bob Clearmountain
and
R yan Freeland
FOR MACINTOSH & WINDOWS COMPUTERS
ST AND-ALONE AND IPX/SPX OR TCP/IP NETWORK OPERATION
Page 2

SessionTools
THE STUDIO MANAGEMENT SOFTWARE SOLUTION
by
Bob Clearmountain
and
Ryan Freeland
APOGEESESSIONTOOLSis a complete networkable, cross-platform database management system, specifically designed to
aid in commercial recording studio management – from individual project facilities to extensive multi-room recording
complexes.
Designed for use in his own studio by
award-winning mixer/producer Bob
Clearmountainand his assistant Ryan
Freeland,
Database, a Project Database, daily
Session Work Orders, an automatically
generated Invoice,a Tape Library Log, a
Media Labeling Systemfor all common
media, Track Sheetsfor common studio
formats, and a set of stunning templates
for many popular pieces of outboard
gear, used for noting and recalling settings.
SessionTools
ware, but because of the unique nature
of the recording studio business,
SessionTool
generating an invoice that summarizes
SessionTools
is not bookkeeping soft-
s addresses the problem of
consists of a Client
multiple session work orders from a
given project.
Besides calculating session hours with
five different possible rate categories
plus overtime,
of billable supplies, equipment rentals
and shipping costs, plus the Invoice
includes a list of titles worked on during
each session.
Taxes are calculated according to local
tax regulations defined by the user. Once
the daily work orders have been filled in
correctly, a perfect invoice is created in
seconds by merely entering a single project code number.
The J-card and labeling templates give
your tapes, CDs and disks a professional
look that will instill in your clients a high
level of confidence in your facility.
The Tape Library Log makes keeping
track of master tapes simple and will
give you the confidence that nothing gets
lost – at least at your place!
SessionTools
keeps track
Apogee SessionT ools is supplied on a hybrid Macintosh/Windows CD-ROM. SessionTools requires a 486 or
better PC running Windows 3.x, 95, 98 or NT 4.0, or a Macintosh running System 7.1 or later. At least 8
MB of memory is recommended. IPX/SPX and TCP/IP networking are supported for server/client operation, enabling the same data files to be accessed from anywhere in the facility, with either a Windows or
Macintosh computer. For network use, you can purchase additional serial numbers for use with the same CD.
APOGEE ELECTRONICS CORPORATION
3145 Donald Douglas Loop South, Santa Monica, CA90405-3210, USA.
Tel: +1 310/915-1000. Fax:+1 310/391-6262. Email:info@apogeedigital.com. Web:www.apogeedigital.com
Page 3

VERSION 2.0
USER GUIDE
For Macintosh, Windows 9x, NT
A
POGEE ELECTRONICS CORPORATION
3145 Donald Douglas Loop South
Santa Monica, CA 90405-3210
Tel: +1 310/915-1000 Fax: +1 310/391-6262
http://www.apogeedigital.com/
Database programming, layout design and user guide contents by
Bob Clearmountain with Ryan Freeland and David Boucher.
© 1999 Apogee Electronics Corporation. All rights reserved
Page 4

SessionTools Manual
Table Of Contents
Page
Credits .................................................................................................iv
Licensing Agreement ..........................................................................v
Other Licenses ..................................................................................viii
Introduction......................................................................................... 1
A word from Bob Clearmountain......................................................3
Installation
Macintosh................................................................................4
Windows .................................................................................6
SessionTools Rules ...............................................................................8
Modifying SessionTools ......................................................................9
Running SessionTools .......................................................................10
The Client File ....................................................................................10
Preferences ..........................................................................................12
Logo & Address ...................................................................12
Rates.......................................................................................12
Console Specifications.........................................................13
The Project File...................................................................................13
Project Order Worksheet.....................................................13
The Project Code..................................................................14
Rates, Taxes & Lockout Hours...........................................15
Project List.............................................................................16
Session Setup........................................................................16
Reel Number Generators....................................................18
Studio Supplies ..................................................................................18
Session Work Orders .........................................................................19
Work Order Numbers .........................................................20
Session Log ...........................................................................20
Supplies Log .........................................................................20
Studio Invoice.....................................................................................21
Alternate Invoice..................................................................23
Flat Rate Invoice...................................................................24
“Miscellaneous” Field ........................................................24
Work Order Request Box....................................................24
Terms & Notes Fields ..........................................................24
Invoicing Tips.....................................................................................25
Recall Sheets .......................................................................................26
iii
Page 5

SessionTools Manual
iv
Table of Contents
Upgrading Recall Drawings.............................................................27
The Label Log.....................................................................................28
Studio File Numbers ...........................................................29
Project Reel Numbers........................................................................30
Updating the Tape Log .......................................................31
Special Labels .......................................................................31
Using the MultiReel Label..................................................33
Cutting Out J-cards & Labels.............................................33
The Tape Log ......................................................................................34
Generating File Numbers in the Tape Log ......................34
Listing Logged Items...........................................................35
Track Sheets ........................................................................................37
Instrument Lists ...................................................................37
Stereo Track Boxes ...............................................................37
Gear Log..............................................................................................38
TIme Sheet...........................................................................................40
Quirks and Annoyances ...................................................................42
Different Printers .................................................................42
Font Handling under Macintosh and Windows.............42
New Additions in SessionTools v2.0...............................................43
Additional Information.....................................................................52
Upgrading from SessionTools 1.x —IMPORTANT .......................54
Credits
Layouts & manual .........Bob Clearmountain, Ryan Freeland & David Boucher
Installation graphics and icons .....................................................Julio Alvarez
Installer Programming.................................................................David Boucher
Manual design, editing & production..........................................Richard Elen
Beta Testing......................................................................................James P. Saez
Patience, and then more patience................................................Betty Bennett
Page 6

License Agreement
PLEASE READ THIS LICENSE CAREFULLY BEFORE USING THIS SOFTWARE. BY USING THIS SOFTWARE, YOU AGREE TO BECOME BOUND
BY THE TERMS OF THIS LICENSE. IF YOU DO NOT AGREE TO THE
TERMS OF THIS LICENSE, DO NOT USE THIS SOFTWARE AND PROMPTLY RETURN IT TO THE PLACE WHERE YOU OBTAINED IT FOR A FULL
REFUND.
The enclosed “SessionTools
™
” electronic studio management program
(“Software”) is licensed, not sold, to you by Apogee Electronics for use only
under the terms of this License, and Apogee Electronics reserves any rights
not expressly granted to you. You own the media on which the Software is
recorded or fixed, but Apogee Electronics and its licensors retain ownership
of the Software itself.
1. License. This License allows you to:
(a) Use one copy of the Software on each computer on a single local network
at a time. To “use” the Software means that the Software is either loaded in
the temporary memory (i.e., RAM) of a computer or installed on the permanent memory of a computer (i.e., hard disk, etc.).
(b) Make one copy of the Software in machine readable form solely for backup purposes. As an express condition of this License, you must reproduce on
each copy any copyright notice or other proprietary notice that is on the original copy supplied by Apogee Electronics.
(c) Permanently transfer all your rights under this License to another party by
providing to such party all copies of the Software licensed under this License
together with a copy of this License and the accompanying written materials,
provided that the other party reads and agrees to accept the terms and conditions of this License.
2. Restrictions. The Software contains trade secrets in its human perceivable
form and, to protect them, you may not REVERSE ENGINEER, DECOMPILE,
DISASSEMBLE OR OTHERWISE REDUCE THE SOFTWARE TO ANY
HUMAN PERCEIVABLE FORM. YOU MAY NOT MODIFY, ADAPT,
TRANSLATE, RENT, LEASE, LOAN OR CREATE DERIVATIVE WORKS
BASED UPON THE SOFTWARE OR ANY PART THEREOF. If The Software is
v
SessionTools Manual
Page 7

SessionTools Manual
vi
modified in any way,, for example by adding or changing layouts, Apogee and its
dealers and distributors will no longer be responsible for its performance, and technical support will no longer be available.
3. Termination. This License is effective until terminated. This License will
terminate immediately without notice from Apogee Electronics or judicial
resolution if you fail to comply with any provision of this License. Upon such
termination you must destroy the Software, all accompanying written materials and all copies thereof. Sections 6, 7 and 8 will survive any termination.
4. Passwords. The Software licensed to you may contain features which are
protected by certain passwords. You are not authorized to enter, remove or
change such passwords, and only Apogee Electronics is authorized to enter,
remove or change such passwords.
5. Export Law Assurances. You agree that neither the Software nor any direct
product thereof is being or will be shipped, transferred or re-exported, directly or indirectly, into any country prohibited by the United States Export
Administration Act and the regulations thereunder or will be used for any
purpose prohibited by the Act.
6. Limited Warranty. Apogee Electronics warrants for a period of ninety (90)
days from your date of purchase that (i) the media on which the Software is
recorded will be free from defects in materials and workmanship under normal use, and (ii) the Software as provided by Apogee Electronics will substantially conform to Apogee’s published specifications for the Software.
Apogee Electronics’ entire liability and your sole and exclusive remedy for
any breach of the foregoing limited warranty will be, at Apogee Electronics’
option, replacement of the media, refund of the purchase price or repair or
replacement of the Software.
THIS LIMITED WARRANTY IS THE ONLY WARRANTY PROVIDED BY
APOGEE ELECTRONICS AND ITS LICENSORS EXPRESSLY DISCLAIM
ALL OTHER WARRANTIES, EITHER EXPRESS OR IMPLIED, INCLUDING
BUT NOT LIMITED TO IMPLIED WARRANTIES OF MERCHANTABILITY
AND FITNESS FOR A PARTICULAR PURPOSE WITH REGARD TO THE
SOFTWARE AND ACCOMPANYING WRITTEN MATERIALS. BECAUSE
SOME JURISDICTIONS DO NOT ALLOW THE EXCLUSION OR LIMITATION OF IMPLIED WARRANTIES, THE ABOVE LIMITATION MAY NOT
APPLY TO YOU.
Page 8

vii
SessionTools Manual
7. Limitation of Remedies and Damages. In no event will Apogee Electronics,
its parent or subsidiaries or any of the licensors, directors, officers, employees
or affiliates of any of the foregoing be liable to you for any consequential, incidental, indirect or special damages whatsoever (including, without limitation, damages for loss of business profits, business interruption, loss of business information and the like), whether foreseeable or unforeseeable, arising
out of the use of or inability to use the Software or accompanying written
materials, regardless of the basis of the claim and even if Apogee Electronics
or a Apogee Electronics representative has been advised of the possibility of
such damage. Apogee Electronics’ liability to you for direct damages for any
cause whatsoever, and regardless of the form of the action, will be limited to
the money paid for the Software that caused the damages.
THIS LIMITATION WILL NOT APPLY IN CASE OF PERSONAL INJURY
ONLY WHERE AND TO THE EXTENT THAT APPLICABLE LAW
REQUIRES SUCH LIABILITY. BECAUSE SOME JURISDICTIONS DO NOT
ALLOW THE EXCLUSION OR LIMITATION OF LIABILITY FOR CONSEQUENTIAL OR INCIDENTAL DAMAGES, THE ABOVE LIMITATION MAY
NOT APPLY TO YOU.
8. General. This License will be construed under the laws of the State of
California, except for that body of law dealing with conflicts of law. If any
provision of this License shall be held by a court of competent jurisdiction to
be contrary to law, that provision will be enforced to the maximum extent
permissible, and the remaining provisions of this License will remain in full
force and effect. If the Software is supplied to the United States Government,
the Software is classified as “restricted computer software” as defined in
clause 52.227-19 of the FAR. The United States Government’s rights to the
Software are as provided in clause 52.227-19 of the FAR.
Page 9

SessionTools Manual
Other Licenses
Mindvision Software
The Installer VISE system used to install the Macintosh and WIndows versions of SessionTools is copyright ©1999 Mindvision Software.
viii
Page 10

1
SessionTools Manual
Introduction
Apogee SessionTools is a complete networkable, cross-platform database
management system, based on Filemaker Corporation’s reliable FileMaker
Pro Runtime Solutions system. It is specifically designed to aid in the management of small to large recording studios. SessionTools consists of a Client
Database, a Project Database, daily Session Work Orders, an automatically
generated Invoice, an Studio Supplies file that’s linked to the Work Order for
automatic tape & disk inventory control, a Tape Library Log, a Studio
Equipment Maintenance Log, a Tape & Disc Labeling System for all common
formats, Track Sheets for common studio formats, and a set of stunning templates for many popular pieces of outboard gear, used for noting and recalling settings. Twelve or more outboard gear templates can be easily and selectively printed on a single piece of letter sized paper. We’ve even thrown in an
Employee Time Sheet that acts like a networked punch clock.
SessionTools is not bookkeeping software, but because of the unique nature
of the recording studio business, SessionTools addresses the problem of generating an invoice that summarizes multiple session work orders from a
given project. Besides calculating session hours with five different possible
rate categories plus overtime, SessionTools keeps track of billable supplies,
equipment rentals and shipping costs, plus the Invoice includes a list of titles
worked on during each session. Taxes are calculated according to local tax
regulations defined by the user. Once the daily work orders have been filled
in correctly, a perfect invoice is created in seconds by merely entering a single
project code number.
The J-card and labeling templates give your tapes, CDs and disks a professional look that will instill in your clients a high level of confidence in your
facility. The Tape Library Log makes keeping track of master tapes simple and
will give you the confidence that nothing gets lost – at least at your place!
Although SessionTools consists of databases developed within FileMaker
Pro, they run as a stand-alone program utilizing the FileMaker Pro Runtime
Solutions Distribution System. This means that you don’t need to have
FileMaker Pro to run the software, but you must keep the SessionTools database files with the SessionTools application. FileMaker’s “Layout” mode,
along with other functions for creating and altering layouts, don’t exist in
SessionTools.
Page 11

2
SessionTools Manual
We believe you’ll find SessionTools can save you hours keeping track of your
day-to-day studio operations, while preventing valuable income from
“falling through the cracks” and giving all your paperwork a refreshingly
professional look.
The version of SessionTools you are holding is Version 2.0. This has a number
of additional features and modifications over the original Version 1.0. The
new features are described in the section immediately after the Installation
section so that you can go straight there if you already have the original version and you are going to update your system.
Note that there is a special procedure for updating SessionTools without losing all your existing data – see Page 54!
Page 12

3
SessionTools Manual
A Word on Software Piracy from Bob Clearmountain
It is quite possible some people have obtained copies of SessionTools by
means other than purchasing them from Apogee or their distributors. They
may or may not realize that this is illegal. Now, I’m fully aware that this fact
may mean little, if anything to many people. If you happen to be one of those
unfortunate pinheads that feels stealing software is OK, I feel sorry for you. I
think you should be aware that if everyone did it, very soon there would be
no software to steal.
I’d also like to ask a question of those hackers out there that feel quite proud
of themselves for cracking copy-protection codes so someone else’s software
can be pirated or freely distributed on the Internet: How would you feel if
you had used your talents productively (for a change) and spent months, or
possibly years developing software that ended up being stolen from you so
you got next to nothing for all your work – or are you simply not good
enough to actually write software?
SessionTools was developed by myself and my second engineers, Ryan
Freeland and David Boucher, in an attempt to organize and keep track of
important data in my personal mixing studio, “Mix This!”. Over the last few
years we have been enhancing the program and have been asked by some of
our clients to make this custom software available. After giving it some
thought, we decided it would be helpful to other small studios or project studios. (We would have bought the package if someone else had developed it.)
Therefore, Ryan, and more recently David and I spent an incredible amount
of our time expanding the program so that it would benefit a wider range of
applications.
If you feel you really need SessionTools and can’t afford to pay for it, please
get in touch with me through Apogee. If you can convince me why you can’t
part with three hundred or so dollars, while you’re running a recording studio and obviously billing for its services (otherwise you wouldn’t need
SessionTools) I’ll send you a copy for free.
—Bob Clearmountain
Page 13

4
SessionTools Manual
Installing SessionTools
If you’re going to use SessionTools over a network, before doing the installation you must first determine what network protocol you want to use. All the
necessary software for both Mac IPX and TCP/IP protocols will be installed
into your computer no matter which option you choose, (including the single
computer option) so you can change your mind later, but you must choose one
or the other to get the program running now. They both work equally well, but
if you’re using a Mac with a G3 processor, you should probably choose
TCP/IP because of compatibility issues with IPX.
Although it is conceivable that you could use Appletalk, we don’t advise it
because not only would it be quite difficult to network to a Windows
machine, the performance would be too slow for any productive efficiency
using that selection.
Important note: For a networked setup, the Server, or Host installation must
be done first!
If you’re not using it over a network, you need not think about the above
issues.
MACINTOSH:
Server or Non-Networked Installation
0. Insert the SessionTools Installation CD ROM into your Mac.
1. Click on the Installer.
2. When asked for the password, enter the serial number supplied by
Apogee for SessionTools for Macintosh. This is printed on the inside
cover of the manual.
3. After clicking through the obligatory logo and copyright screens, you’ll
be faced with the installation options box.
4. Check “IPX Server”, “TCP/IP Server” or “Single Computer”. For an
explanation of each option, click on the “I” icon to the right of each one.
Note: Ignore the memory requirement numbers. This installation actually requires approximately 12,000 bytes of hard disk space.
5. Click “Install”.
6. Select the appropriate Date format for your region. North America
should be “Month/Day/Year” while most other regions use
“Day/Month/Year”.
Page 14

5
SessionTools Manual
7. Select the appropriate currency symbol for your region. If your country
uses a currency other than Pounds (£) or Dollars ($), select “User
Definable”.
8. Next, if you had checked one of the network options, you’ll be asked if
your facility currently uses FileMaker Pro over your network. Clicking
“No” renames your old FileMaker prefs file (if any) “Filemaker Prefs.old”
and replaces it with a new one with your new network preference. (If a
Filemaker Prefs file from a previous Session Tools installation was found,
you will be asked if you want to replace it. Click “Replace”.) Clicking
“Yes” leaves your Filemaker Prefs intact, letting SessionTools use whatever network preference you had previously set for Filemaker Pro. Click
“Continue”.
9. Next you’ll be asked where you would like an alias for Session Tools.
Clicking “Apple Menu” makes SessionTools easier to get at while other
windows are open. Clicking “Desktop” puts an alias on your desktop.
That’s it! To run the program, double-click on the SessionTools alias. Use the
buttons at the bottom of the Welcome screen to open the group of files you’ll
need to use. If you’re going to do a Satellite installation on another computer, click on “Open All Files” first.
Satellite Installation
Before doing this installation, you must have done the Server installation on another
computer on your Ethernet network first.
0. Insert the SessionTools Installation CD ROM into your Mac.
1. Click on the Installer.
2. When asked for the password, enter the serial number supplied by
Apogee for SessionTools for Macintosh. This is printed on the inside
cover of the manual.
3. After clicking through the obligatory logo and copyright screens, you’ll
be faced with the installation options box.
4. Click on “IPX Satellite” or “TCP/IP Satellite”. Your network selection
must match the selection made on the Server (Mac or Windows) computer. For an explanation of each option, click on the “I” icon to the right of
each one. Note: Ignore the memory requirement numbers. This installation actually requires approximately 3,000 bytes of hard disk space.
5. Click “Install”.
6. Next you’ll be asked if your facility currently uses FileMaker Pro over
your network. Clicking “No” renames your old FileMaker prefs file (if
Page 15

6
SessionTools Manual
any) “Filemaker Prefs.old” and replaces it with a new one with your new
network preference. (If a previous Filemaker Prefs file was found, you
will be asked if you want to replace it. Click “Replace”.) Clicking “Yes”
leaves your Filemaker Prefs intact, letting SessionTools use whatever network preference you had previously set for Filemaker Pro. Click
“Continue”.
7. Next you’ll be asked where you would like an alias for SessionTools.
Clicking “Apple Menu” makes SessionTools easier to get at while other
windows are open. Clicking “Desktop” puts an alias on your desktop.
That’s it! To run the program, double-click on the SessionTools alias. Use the
buttons at the bottom of the Welcome screen to open the group of files you’ll
need to use.
Note: If, at a later date you need to change your network preference on a satellite
computer or lose your “Filemaker Prefs” file and you can’t get SessionTools open
because it can’t find the file “Welcome.STT”, click on the file “Setpref.STT” in the
SessionTools folder. This will open the Preferences menu selection and let you reset
the network preference. Once done, quit SessionTools and click on the SessionTools
Icon (or alias) to restart the program.
WINDOWS:
0. Insert the SessionTools Installation CD ROM into your PC.
1. From the Start Menu select “Run.”
2. In the dialog box that follows, select “Browse.”
3. You will be taken to a file system window wherein you should navigate
to your CD- ROM drive. Select “Setup” and press “OK.”
4. You will now see the same dialog box from Step 3. Choose “Run.”
5. The next few screens will include a confirmation that SessionTools’
installer is starting and a licensing agreement.
6. You will be prompted for Name and Company information, and for a
registration number. Enter the number printed on the inside cover of the
manual.
7. You will now be offered a default directory, “Program Files,” where
SessionTools will be installed. You can change the destination for
SessionTools if you like.
8. Select the appropriate Date format for your region. North America
should be “Month/Day/Year” while most other regions use
“Day/Month/Year”.
Page 16

7
SessionTools Manual
9. Select the appropriate currency symbol for your region. If your country
uses a currency other than Pounds (£) or Dollars ($), select “User
Definable”.
10. Next you will be given five options for installation. Select one which fits
your networking needs. There are descriptions for each if you are not
sure.
11. Session Tools’ installer will let you know that it has enough information
to finish the installation. Click “Finish.” If you picked the Single
Computer Installation, skip to step 13.
12. If you have selected either the Server or Satellite installations, at some
point you will see the message: “The next screen will include a dialog
box of preferences. Please select the appropriate networking protocol for
your system.” Click “Continue.”
13. The dialog box appears and you can set your preferences for Session
Tools Networking. NOTE: You may receive an error message that
“Setpref.STT” cannot be opened because it cannot be associated with an
application. This is not fatal. Simply click “OK” and when the installation is finished, double-click on “Setpref.STT” in the “Session Tools 2.0”
folder in the destination directory to set your networking preferences.
14. Session Tools will let you know that it is finished. Click “Close.
That’s it! To run the program, click on the Start Menu and from the Program
Group “Session Tools 2.0” select “Session Tools 2.0.” There will appear a
screen that includes buttons to open the group of files that you need.
NOTE: When networking, the files must be open on the Server Computer to be
accessed from any of the Satellites.
Page 17
8
SessionTools Rules
OK, we know what you’re thinking; “What’s gonna happen if I don’t follow
the rules?Are the Apogee police gonna come by and put me in ‘Session Jail’
or something?” Well, if we could… no, not really! But you’re going to want to
pay attention here because if you don’t, you’ll be very unhappy when this
software just won’t do what you want it to do!
1. The “Print” Button
It is extremely important that you always use the Print button to print your layouts
– especially the Studio Invoice, and for Labels and J-cards. Never use Command-P
(Mac), Ctrl-P (Windows) or print from the File menu.
The Invoice Print button performs a series of commands that deletes the
Project Code in the Project File, and keeps track of which Invoice format was
used. If you don’t use it, you run the risk of double-billing work orders,
because a new Project Code must be created for a continuing project after an
Invoice has been generated.
The Labels Print button fills in the “Format” box that helps you keep track of
what format J-card or label was used to print each record. This information is
also carried over to the Tape Log.
2. Navigation Buttons
It’s almost always a good idea to use the navigation buttons because some of
them automatically take you to the record that relates to the record you’re
coming from, and the proper layout. For example, the “Work Order” button
on the P. O. Worksheet layout takes you to the Work Orders and also does a
search for that particular project. In some cases no navigation button exists,
so once the file you need is open, select it from the “Window” menu. In the
Label Log, some layouts can only be accessed via the Layout Menu Button on
the upper left corner of the FileMaker screen.
SessionTools Manual
Page 18

3. Server Files
As stated in the Installation section, the master files, “Client”, “Invoice”,
“Label” etc. must only exist on one computer on your entire network. In other
words, you must only do the “Server” installation once on one computer on
your network. All other installations must be done using the “Terminal”
installation. If you don’t do it this way, your files and SessionTools will be
hopelessly confused.
4. Don’t Ever Delete...
...record number 1 from the Tape Log file. It contains the File Number
Generator.
...record number 1 from the Gear Log file. It contains the Trouble Alert indicator image. If you do accidentally delete it and the Trouble Alert indicator
won’t work, open the file from FileMaker Pro (see below), get into Layout
mode, switch to the Trouble layout, copy the red Trouble Alert image, switch
to Browse mode, go to record no. 1 (or create a new one if there are no
records) and paste the image into the Trouble On field. Do the same for the
Trouble Off image.
…record number 1 from the “Prefs” file (other “sample” records can be deleted).
5. No Whining
Once again, we won’t send the Apogee Police – for this we get Kenneth Starr
to open an investigation: his most significant one to date.
Modifying SessionTools
A few SessionTools users have asked if there was a way to modify the layouts
to suit their individual needs. Until now, they were out of luck. Although
Apogee doesn’t recommend this, and will not repair or support a copy of
SessionTools that has been modified, this version is completely modifiable. Here’s
how:
1 If you don’t already own it, buy a copy of FileMaker Pro (version 3.x or
later) from your favorite authorized software dealer.
2 Study the “Layout” section of the FileMaker manual carefully. If you don’t
have the manual, throw out your pirated copy of FileMaker Pro and go back to
Step 1.
3 Quit the SessionTools application, if it is open.
4 Start the FileMaker Pro application.
9
SessionTools Manual
Page 19

10
SessionTools Manual
5 Open the SessionTools file you wish to modify from the FileMaker start-
up dialog box, or with the “Open” command in the file menu if FileMaker
is already running. You won’t be able to open the individual SessionTools
files in FileMaker by clicking on their icons.
You can now enter Layout mode and modify to your heart’s content at your
own risk! And now a few words of advice:
Make a backup copy of the file you’re modifying first, in case you accidentally mess
things up beyond repair. Remember that there’s no “Save” command in FileMaker changes to the layout overwrite the file as you make them - there’s no going back!
REALLY IMPORTANT!: Don’t even think about modifying the scripts or field definitions! Most of them are extremely complex so if they’re changed, SessionTools will
most certainly fail. Apogee can not, and will not, be responsible for any modified copy
of SessionTools – particularly one that has modified scripts or field definitions!
Running SessionTools
To start SessionTools on the server, double-click on the SessionTools application icon. The Welcome screen will appear.
To open the other SessionTools files, select an appropriate group of files with
the buttons at the bottom of the screen.
Once you have the Client file open, you may select other groups of files from
the Clinet File’s “Scripts” menu.
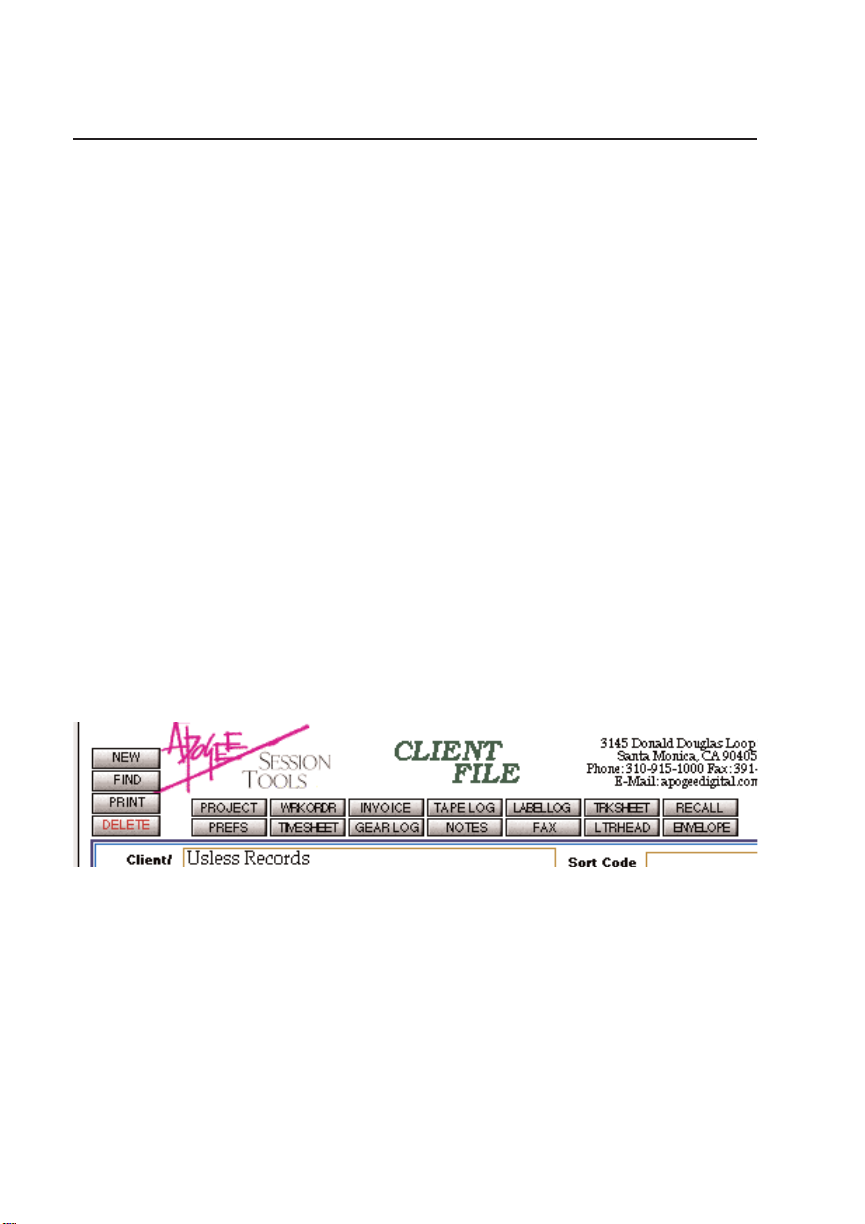
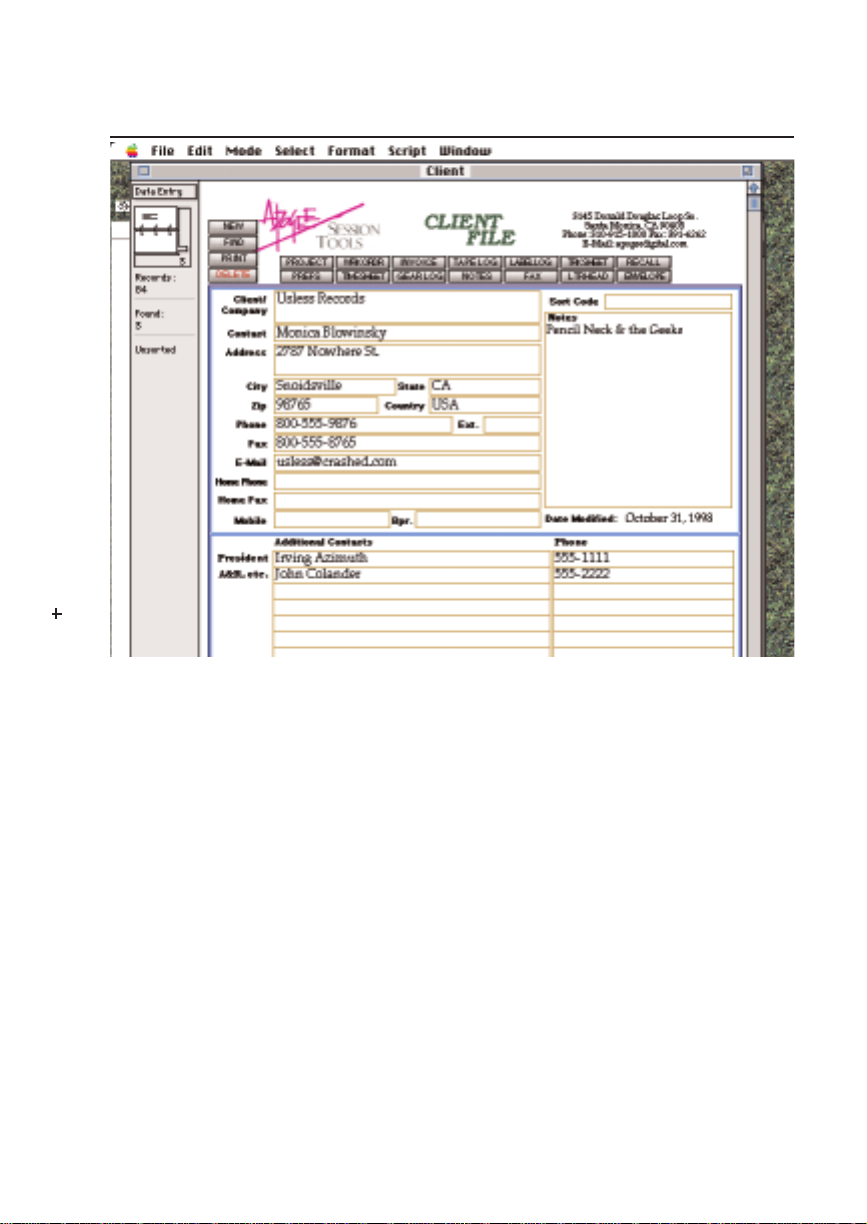
Client File
The Client File is simply a database that contains basic client/contact information and is fairly self explanatory. It also includes fax cover sheet and letterhead layouts, accessible with the buttons at the top of the screen.
Additionally there are print layouts for printing envelopes, client lists or
mailing labels. Always use the buttons to switch to and from the Envelope
layout (available from the Letterhead layout) because it adjusts the Page
Setup for edge-fed envelopes. The Project File (see below) uses the Client field
as a match field for finding client information. During such a search,
SessionTools stops at the first occurrence of a name, so you will not be permitted to enter a name that is not unique. For a company that has offices in
Page 20
11
SessionTools Manual
different cities, enter this information as part of the client name, like
“Columbia, NY” or “Warner Bros, LA”.
The Sort Code field is simply a convenience for any specific type of sort you
may need to do. For example, you might go through the file and put an “X”
in the Sort Code field on each record with a client that you wish to send a
Christmas card to. A subsequent search in that field for “X” will bring up all
such records.
The Client File has buttons that will take you to its Fax and Letterhead layouts. For convenience, the From field in the Fax layout displays a pop-up list
of every name that has been entered in all the other records in the file, with
duplications eliminated.
Navigation
The Client File can also act as a master menu page for SessionTools, because
it’s the only one that has navigation buttons to all the files, except Drawings
that can be gotten to via the Recall file. Keep in mind that once all the files are
open, they will all show up in the “Window” menu, although navigating that
Page 21

12
SessionTools Manual
way precludes automatic search/find functions attached to some of those
buttons. As mentioned above, the Client file also contains scripts that open
specific groups of files.
Preferences (Prefs)
Logo
The Apogee SessionTools Logo
and address are not part of the
layouts. They have actually been
pasted into fields that appear at
the top of each layout. This
means that you can easily replace
it with your facility’s logo
and/or address. Simply open the
Prefs file, click on the “Logo”
button and paste your logo
(that’s been saved as a PICT file,) address and phone numbers and your
return address (for envelopes) into the boxes— they will appear at the top of
all the file layouts, including the fax, letterhead and the return address on the
envelope in the Client and Project Files.
Rates
If your studio has standard rates,
open the Preferences file and
enter them here. The Project File
pulls the rate information from
this file using the Lockout Rate as
a match field. You can have as
many different default rate
schedules as you want, each
based on a different Lockout
Rate. For example, you may have
a C. O. D. lockout rate of $700 per
day, with hourly recording, mixing and editing rates of $90, dubbing & transfer rates of $40 and
minimum & maximum lockout
Page 22

hours of 8 and 12 hours respectively. Then, in another record you may have
your normal major record company lockout rate of $1500 with a recording,
etc. rate of $190, a dubbing rate of $80 and lockout hours of 10 & 14. If, in the
P. O. Worksheet (Project File) you enter $700 in the Lockout Rate field, the first
set of hourly rates and lockout hours will be filled in. If $1,500 is entered, the
second set will come up. You can modify any of these rates in the P. O.
Worksheet at any time.
Console Specifications
If you enter your particular console
type, channel number, EQ version,
computer type and software version
in this layout, this information will
appear on the floppy disk labels. Use
a different record for each room, putting the name of the studio (A, B, Z, or
whatever) in the “Studio” field.
Project File (Project)
Project Order Worksheet
When a client calls to book a session, you would first go to the Project Order
Worksheet layout in the Project File and enter the project name in the Project
field. When you enter the client name in the Client field, SessionTools searches the Client File for an exact match and copies over the address, phone, fax,
contact etc. information of the record company, or whomever is being billed
for the session. Now you can enter basic details about the session, like the
Producer, Engineer, 2nd Engineer, billing contacts, start date & time, billing
rates, etc. The date must be entered as “dd/mm/yy” or as “mm/dd/yy” in
North America.
The Project File is what the Work Order and Invoice files look for to retrieve
project & client information, so enter it accurately, and uniquely.
As you click on some fields you’ll find pop-up lists that contain names from
other records. In this example, there’s a list of names of all the producers that
have been entered in this field in all the other records, excluding redundancies.
13
SessionTools Manual
Page 23

14
SessionTools Manual
The Project Code
The Project Code field is used by the Studio Invoice file to find the range of
work orders from the project to be invoiced. You can make up your own project code, but we’ve found that using the initials, or the first two letters of the
Project name and the date of the first session to be invoiced works quite well.
Example: for a Rolling Stones project that starts on April 1st, 1999, the project
Page 24

15
SessionTools Manual
code might be RS990401. Note:
SessionTools will do this automatically for you if you click
on the words “Project Code”,
providing you’ve entered the
Project Name, and the date of
the first session in the Start
Date field. When you enter this
code number into a new record
in the Invoice file, a perfect
invoice is generated from the
Work Order and Project information almost instantly, but
more on that later. When the
project gets invoiced, the Project Code is automatically deleted from the
Project File when the “Print” button is
clicked. This avoids unintentionally
invoicing the same work orders twice.
So for a project that continues after an invoice has been sent, be sure to enter
a new Start Date and Project Code, which would correspond to the next billable session date.
Rates, Tax
& Lockout Hours
Studio time charges are calculated by the Invoice File using the
rate information entered in the P.
O. Worksheet. The Daily Lockout
Rate applies to sessions as long
or longer than what you enter
into the Minimum Lockout
Hours field. The Recording,
Mixing, Copy, Edit, and Transfer
Rates apply only to sessions
shorter than what is entered in
the Minimum Lockout Hours
field. Overtime Rate applies to
hours in excess of the Maximum
Lockout Hours for one session
Page 25

16
SessionTools Manual
and is added to the Daily Lockout Rate for a session. Also, the Tax Rate field
is used to calculate tax, so enter the tax rate for your state or country as a decimal number here. Example: a tax rate of 8.25% would be entered as “.0825”.
Entries in the Paid Up Front and Discount fields are subtracted from the
Invoice total, so be sure to delete these amounts when the invoice is created
and sent. The Overall Budget field is used by the Flat Rate Invoice layout, so
it’s not important unless you’re billing according to a flat rate, and even then,
you can always enter it, or any of the rates directly into the Invoice layouts.
If you had selected “User Defined” currency while installing SessionTools,
you must enter the correct currency symbol or abbreviation for your region
in the field at the bottom of this window. Once done, it will appear with all
the currency totals in the work orders and invoices, and with all the currency
fields in Supplies, Project and Prefs.
Project List
If you would like to view all the projects in the Project File, click the “List
Project” button. You will be presented with a list of all the projects, one on
each line. This page is especially handy for seeing what projects have yet to
be invoiced - they’d be the ones that still have project codes in their Project
Code fields. To list only the uninvoiced projects, click the “Find Outstanding”
button. To return to the Project Order Worksheet page for a particular project,
click on the “Worksheet” button to the left of the project of choice.
Session Setup
The Session Setup layout in the Project File (see opposite) is for the Second
Engineer and the techs to refer to when they are setting up the session. It carries over some basic information from the P. O.
Worksheet, like the contact and phone number in
case there are any questions about what’s going
on; the Producer, Engineer; Second Engineer and
who will be attending the session. It has fields for
the current date and the session start time. There’s
a section for Multitrack and Mix tape specs. that
feature fields with editable pop-up lists that contain common specs. for convenience.
If you need to change or add to a list, scroll to the
bottom of the list and click on the word “Edit…”.
Page 26

17
SessionTools Manual
Edit the list in the dialog box that appears, adding a carriage return after each
entry. Other fields include expected Producer’s and Engineer’s equipment
and the cartage companies expected to deliver it, and rental gear and company. There’s also a field (common to the P. O. Worksheet) for special requests
like… I don’t know, flowers… soda… dancing gorillas, or whatever.
Page 27

18
SessionTools Manual
Reel Number Generators
Reel numbers that can be included on the tape and
disk labels and J-cards (see “Labels”) are generated in
the Reel# Generator layout in the Project File. There is
a different set of reel numbers for each project, that
start at “0” when a new project record is created. (The
first log number will be “1”) If a project comes back
for, say, their second album, you can use the same project record and easily reset the generators in the layout
by clicking on the red “Reset #s” button. You can also
click on each field and reset them to the last reel number used, if you want to
continue a series of reel numbers already in use.
Studio Supplies (Supplies)
Before using the Session Work Orders file, you’ll want to
open the Studio Supplies file and enter prices for tape &
disks, etc. The Work Order uses these prices to calculate
tape and disk costs. The file consists of one record for
each media format in your stock, presented as a list of
records. Each record consists of Quantity (Qty.), Item,
and Price fields. There is also a line that indicates how
many items were last added to your stock and the date
they were added. We’ve already created a number of
common media format records for you to get you started. You can add or delete records in this file at any time.
When you first use this layout, the Quantity and Price
fields are set to “0”. Enter what you are currently charging for each item in the Price field. You should go
through your media supplies stock and enter the current
number of each item in your stock by clicking on the
“Add Stock” button in each item’s record. You will see a
dialog box: simply type in the number of items and press the Continue button on the left of the screen. You’ll notice each record to which you’ve added
stock indicates how many pieces are now in stock (Qty.), the current date and
how many pieces you’ve added, which at this point should be the same as the
Quantity. Adding additional stock is done exactly the same way, except the
dialog box displays how many pieces were added the last time, so if you’re
adding the same amount this time, just click Continue. If different, type the
Page 28

19
SessionTools Manual
new amount. When media items are indicated as being used in the Work
Order file, they are automatically subtracted from the supplies file.
If you use a media item not listed here, you can either change an existing
record that you’re not using, or click the “New” button to create a new record
for the item - it will be added to the end of the list.
Note: If, for some reason only one record is showing, select “View as List”
from the “Select” menu, and respond to the dialog box by clicking “Yes”.
Session Work Orders (Wrkordrs)
During each session, the
second engineer opens
the Session Work Orders
file, clicks the New
Record Button and enters
the Project Name in the
Project field. You can
select from a pop-up list
of all the projects in the
Project File. If you’re in
the middle of a project,
and you know that the
previous work order is
from the same project,
you can click on the word
“Project” to the left of the
project field and the project name from the previous work order will be
copied in. Then either
press the Enter (Mac) or
Tab keys (not the return
key) or click anywhere there’s no field. If an exact match is found in the
Project File, all pertinent info and the Project Code is copied in. The proper
(current) Date and Work Order number are automatically entered. If no
Project Code comes up and it’s the first session, it can be entered here by clicking on the “Project Code” label. This will also update the Project File’s Project
Code and Start Date (the current date) to match.
Page 29

20
SessionTools Manual
Work Order Numbers
The first time the Work Order file is used, “1” is automatically entered in the
Work Order No. field. If you already have a series of work order numbers in
use, click the Reset # button and select “Reset Work Order No.”, Select
“Replace with serial numbers” and enter your current work order number in
the “initial value” box.
Session Log
Next, the second engineer selects the Session Type (from the pop-up list) and
enters the actual Start Time of the session on the right side of the Session Log.
The column of times on the far left are all derived from the start and stop
times on the right, so they needn’t ever be touched (and can’t be altered.) We
advise rounding time segments to the nearest 1⁄4 hour. When the first title is
entered in the Title/Description field, it is also transferred to the Titles window above, which is where the Invoice gets the song title information from.
If other titles are worked on, they must be manually added in the Titles window. Titles in the Title window must be entered one after another, preferably
separated by commas with no carriage returns. This is because they must all
fit on a single line in the Session Invoice. As the session progresses, the
Session Type, song Title/Description and Start & Stop times for each different service/title are entered by the second engineer.
Note: When you’re finished filling in the Work Order, be sure the Titles field
(at the top of the Work Order) contains all the titles worked on during the session, or any notes that should show up on the Invoice, like “recall” or
“copies”. IMPORTANT: There must be no carriage returns in the Titles field.
Supplies Log
In the Supplies field you’ll find a pop up list containing most common studio
supplies. When a supply is chosen, the Supplies file is opened and the price
of the item is automatically copied over to the Item field. If you find there’s
anything missing, open the Supplies file and add it as a new record with the
price you wish to charge. The pop-up list in the Work Order will be automatically updated.
Page 30

21
SessionTools Manual
The Destination field also has a pop-up list where you can add common destinations, like producers you often work with or mastering rooms. This is not
a critical field, but it’s a good idea to fill it in so you have a record of who-gotwhat.
You’ll notice you can’t actually click into the Qty, (or Quantity) field. Clicking
the green “+” button next to the field increases the item count by one, and
subtracts one from the Supplies file. If you change your mind (or the producer decides the label needn’t get a rough mix yet) click the red “-” button, and
the count will decrease by one. The Quantity field multiplies the Cost of the
item by how many you used, and enters the result in the Total field. The totals
get summed to find the Total Supply Cost.
The next two sections, Outside Equipment Rentals and Shipping/Couriers
also have fields with editable pop-up lists and are self-explanatory. We suggest the invoice, or rental contract number get recorded along with the outside equipment rental, and that the airbill or courier I. D. number get recorded along with the courier company name for shipments.
The last section, Miscellaneous is for – you guessed it – anything else that gets
charged for: like ISDN charges, or fruit, if your facility happens to be The Hit
Factory.
Studio Invoice
And now the fun part! Once you’ve done a number of sessions (and would
like to get paid for them,) and have checked that the Work Orders have been
correctly inputted, open the Invoice file, press the “New Inv.” button, enter
the Project Code, (this can be copied from a Work Order by going to any one
of the Work Orders to be billed and clicking the “Copy P. Code” button and
pasting it into the Project Code field in the Invoice) press the “Enter” key
(“Tab” on a PC) and... voila! you have a completed invoice with all totals,
(pulling the Rates from the Project File) hours, tax, song titles, session dates
Page 31

22
SessionTools Manual
and work order numbers ready to mail or fax! The only possible hitch here
can be the way the song titles are displayed. The “portal” that contains the
Titles can only accommodate one line for each Work Order. If one or more of
the title lines is over written, click on the line above the one that is over written and modify its contents to fit in one line. This can be done by abbreviating, or selecting the text by clicking in the field and choosing “Condense”
from the Format/Style menu. If it still doesn’t fit, try making the font size
smaller (from the same format menu.)
Page 32

23
SessionTools Manual
If titles from the last Work Order in the list overrun, it’s not a problem. If you
need to look at a particular work order, click once on either the date, number
or title field of the work order you need to view, then click the WORK ORDER
button and that work order will be displayed. To get back to the Invoice file,
click the INVOICE button.
Check to make sure all the rates are correct. You can change them if you need
to. (The Hours can’t be changed from here, and the Totals are calculations, so
they can only be changed by altering the Rates.)
Alternate Invoice
If you don’t want to bother with five
different rate categories, or just feel
it’s too much to look at, you can use
the Alternate Invoice layout by clicking the Alt. Inv. button. This layout
combines the Recording, Mixing,
Editing and Transfer Hours into one
Hourly Rate. (The Hourly Rate on
this layout is actually the same field
as the Recording Rate from the Main
Invoice layout and gets its looked-up
data from the Recording rate in the
Project File accordingly.) If you
choose to use this layout for your
invoice, when you press the Print
button the Mixing, Editing and
Transfer rates on the Main Invoice will all be changed to match the Recording
Rate so both invoice layouts will reflect the same totals. However, if you use
the Main Invoice Layout with different rates, the Alt. Invoice will show different totals because it’s based on only one Hourly rate. There is a non-printing field that keeps track of which layout was used for the invoice (activated
by the Print button.) We suggest keeping a file of hard copies of all invoices
for your bookkeeper so this never becomes a confusing issue.
Page 33

24
SessionTools Manual
Flat Rate Invoice
If you prefer to invoice at a flat rate, you can use
the Flat Rate Layout. The rate is initially pulled
from the “Overall Budget” field in the Project
File but can, as with all the rates, be modified
here.
Miscellaneous Field
The Miscellaneous field pulls a total of the
Miscellaneous fields from the Work Orders. If
you would like this field label to be more specific, clicking on the field label brings up a pop-up
list of alternate labels, as shown above. Clicking
on “Edit...” allows you to modify this list.
Work Order Request Box
If you decide to send copies of the Work
Orders with the Invoice, clicking on the
“Work Orders available on request” field
(on all three Invoice layouts) brings up a
pop-up list with an alternate message that
states “Copies of Work Orders included.”, or you
can type in your own message.
Terms & Notes
At the bottom of the form you’ll find a field (three dotted lines) for any additional notes, like where the tapes went, or whatever.
There’s also a “Terms” field for entering payment terms, as well as a field for
entering payment or wire information, or anything else. Because these fields
are global, whatever you enter here will be common to all invoices, past and
future, but the change must be done on the Server computer to affect all future
invoices.
IMPORTANT NOTE: As mentioned earlier, it is extremely important that you
always use the PRINT button to print the invoice. Do not print from the File menu
or by using “Command-P”, or “Ctrl-P” in Windows (unless you want to print a
draft copy of the invoice)! If you do, you will override many of the automatic features
of SessionTools, and the whole thing could go a bit screwy!
Page 34

25
SessionTools Manual
Another important note: As mentioned earlier, one of the automatic functions linked
to the print button includes deleting the project start date from the Project File, to
prevent double billing any work orders. If the project will be continuing after you create and send an invoice, make sure you go to the Project File, enter a new start date
that is the date of the first session that will be billed on the project’s next invoice, and
create a new Project Code (manually, or by clicking the blue Project Code field label.)
If you forget to do this, the assistant engineer should click on the blue, underlined
Project Code field label if he creates a new Work Order that has no Project Code. You
can also do the same thing later by finding the first Work Order without a Project
Code, and pressing the button. If you do, don’t forget to copy the same Project Code
into all Work Orders from the same project that occurred after that one.
Invoicing Tips
Before sending an Invoice to a client, you’ll probably want to make sure it’s
correct. SessionTools makes reviewing work orders simple. Here’s how:
Find the project’s record in the Project file. This can be done by using the
“Find” button, or click the “List Project” button and then click the
“Worksheet” button next to the Project’s name. If the Project list is to massive
to look through, clicking the “Find Outstanding” button will list only the projects with active Project Codes. Click the “Work Order” navigation button.
If there is a project code in the Project Code field, (which there should be if
you haven’t yet printed an Invoice) The Work Order navigation button
switches you to the Work Order file and does a search for all the work orders
containing that project code. If there’s no project code in the Project file
record, all the work orders with the same project name will be found.
Look through the work orders carefully, making sure all the pertinent fields
are filled in.
Check that all titles in the Titles/Description field in the Session Log are
duplicated (once for each title) in the Titles field in the upper right corner of
the page, with no carriage returns.
Make sure there is a final “Stop Time” in the Session Log, and check that all
the hours make sense.
Check that all rental and shipping information makes sense and that rates are
filled in. You may want to reconcile the shipping and rental rates with their
invoices at this point, and enter the proper amounts.
Page 35

26
SessionTools Manual
Once you’re sure everything is correct:
• Click the “Copy P. Code” button. This copies the Project Code onto the
computer’s clipboard.
• Click on the “Invoice” navigation button. You will be taken to the Invoice
file.
• Click the “New” button. A new, empty invoice is created, leaving the cur-
sor in the Project Code field.
• Paste the project code into the Project Code field by selecting “Paste”
from the Edit menu, or press <Command-V> on the Mac, <Ctrl-V> in
Windows, and press <Return>.
If all the information in the project’s Project File and Work Orders records is
correct, a perfect invoice will appear in a few seconds. You can change any of
the Rates, Discount, Phone and Credit fields from here if you need to. The
Hours are calculations so they can’t be altered from here - they would have to
be changed in the Work Orders, as would amounts in the Supplies, Rentals,
Shipping and Misc. fields.
As mentioned earlier, you may find a problem with the way the song titles are
displayed. The “portal” that contains the Titles can only accommodate one
line for each Work Order. If one or more of the title lines is over written, click
on the line above the one that is over written and modify its contents to fit in
one line. This can be done by abbreviating, or selecting the text by clicking in
the field and choosing “Condense” from the Format/Style menu. If it still
doesn’t fit, try making the font size smaller (from the same format menu.)
Also, make sure there are no carriage returns.
Recall
SessionTools can print templates of virtually any piece of outboard gear to be
filled in manually (you know… like with a pencil – remember those?) by the
second engineer. Up to six pieces of outboard gear can be entered on a single
page and printed. Twelve, if both sides of the paper are used. Clicking in the
field just below DEVICE: brings up a menu of the currently available outboard gear templates. Choosing a device will pull its picture from the
Drawings file and place it in the open field to the right.
Page 36

27
SessionTools Manual
Upgrading the Drawings File & Default Settings
If your studio has a default setup for any pieces of outboard gear, you can
enter that information into the Drawings file. The easiest way to do this is to
copy the device into a drawing program (FreeHand, Visio, Canvas, etc.) and
add the necessary defaults. For example if your input gain is always unity,
you can draw in an input unity gain. You can then copy your updated image
into a new record in the drawings file. Be sure the device name is different
Page 37

28
SessionTools Manual
from the non-default image. For example, a default SPX990 image could be
called SPX990 DEF. Then when you enter “SPX990 DEF” in the device field of
the Recall layout it will bring up the default settings picture you have updated. It will also copy the patching information if you have entered that as well.
We hope to make more outboard gear drawings available from Apogee in the
future. Please let us know what devices you would like to see for future
updates. Or you can create your own outboard gear drawings and paste them
in the Drawings file. Why not send copies of the original drawing files to us?
Label Log (Label)
Page 38
29
SessionTools Manual
This layout contains most common label formats. Switching between formats
is done by choosing the desired format by clicking a button, clicking on the
Layout menu in the upper left-hand corner of the screen, or in the scripts pulldown menu. Some label layouts don’t contain buttons because of space limitations, so you’ll have to use the Layout or Scripts menu from those layouts.
The upper group of buttons are dual function – clicking on the left side takes
you to the J-cards and the right side to the sticky label layouts.
After you press the “New” button to create a new label record, (which we
advise doing for every tape or disc), you will be taken to the Description field,
with its pop-up list. The Format field gets filled in automatically when you
print a J- card or large format label using the “Print” button. Although these
fields are not actually part of the label, they are important because they get
carried over into the Tape Log file. Also, because there are many different
label format layouts that all share the same information, this will help if you
need to look up an older tape and forget which format a particular record was
used for. The yellow field on the spine of the label is a title field for the entire
tape, like “Sequence #1” or “Rough Mixes 11/3”.
If you use one tape per song when you mix, you
may want to put the song’s title here.
When you get to the Project field, (by clicking on it or using the TAB button)
you’ll see a pop-up list of all the projects in the Project File. Either scroll down
and click on the one you want, or press the DELETE button (to get rid of the
list) and type in the project name. If the spelling matches a project entered in
the Project File, pressing Tab (or pressing the Enter key on a Mac, the number
pad Enter key on a PC) copies in all the pertinent header information that had
been entered in the Project File.
Studio File Numbers
The green field on each label contains the date, the reel number (Master 1, Ref
3, etc.), and the studio file number. Each tape should have a different file
number. File numbers can be entered manually, or automatically by clicking
on the yellow “File#” button. Doing so increments the File number generator
that exists in the Tape Log, then enters the number in the J-card File number
field. In the “x2” layouts, the file number generator increments twice, and the
corresponding two numbers are entered into each J-Card sequentially. If you
manually enter in a duplicate file number, SessionTools will alert you of the
repetition, but will allow you to leave it if you choose. The file number is the
Page 39

30
SessionTools Manual
match field for the Tape Log, so it is
important to enter the Label information first, with a unique file number so
the Tape Log can find the Label information.
Project Reel Numbers
The reel numbers keep track of tapes
(or disks) within a given Project. They are optional, but may help the
Producer, Engineer or Assistant keep track of things. There are seven categories: Multitrack, Master Mix, Safety Mix, Reference Copy, Sequenced
Master, Hi-Res Master and Hi-Res Safety. The Reel Numbers are stored and
generated in the “Reel #s” layout in the related record in the Project File,
where they can be reset to “0” or manually updated, if need be. (See “Project
File: Reel Number Generators”) Pressing the green M # button increments the
Master Reel Number and enters “Master X” into the Reel # field. Likewise
with the S # (“Safety x”), Ref # (“Ref x”), Seq # (“Seq x”), and the Multi #
(“Multi x”) buttons. The Hi-Res buttons and numbers are for 20 or 24 bit masters. In the case of the ”x2” layouts, the Master #/Safety # button enters
“Master X” in the left J-Card and Safety X” in the right J-Card. (The same goes
for the purple HR # button.) The Ref # and Seq # buttons enter “Ref x” and
Ref x(+1)” or “Seq x” and “Seq x(+1)”. You can manually enter file & reel
numbers, but good luck keeping track of them! We think you’ll find the automatic method much easier, once you get used to it.
The rest of the fields should be self explanatory. The MIX field in yellow by
the titles should be used to identify one version of a song or mix from another. A good technique is to use the identifier number the mix computer uses (if
applicable) so you’ll know which mix to recall later. Also it helps to put an R
for recalls and an E for edits. So a recalled fifteenth computer mix that’s printed to tape and edited could be noted 15RE in the mix field. It’s good to develop a system that works for your studio. There’s nothing worse than a client
that wants to recall a particular mix and you don’t know which of the fiftyseven versions they liked. “It’s the sixteenth version on this reference copy
you made for me”. Unique mix numbers will help eliminate a lot of confusion.
From the Label Log, you have ability to automatically add tape (and disk)
information to the Tape Log without leaving the Label Log and without hav-
Page 40

31
SessionTools Manual
ing to re-enter a file number into the Tape Log. At the top of each J-card/label
layout you’ll find a Log In, a Log Out and a Find Unlogged button, along
with the word “Unlogged”. Once the J-card/label is complete with its
Description, Format, Titles, all the header information, and a file number has
been entered into the File Number field either manually or by clicking the
Next File # button, clicking Log In automatically copies all that information
into a new record in the Tape Log file. It then changes the “Unlogged” indication to “Logged”, indicating that the label information has been entered
into the Tape Log.
The Log Out button is for logging a tape that is either being taken by a client,
or being sent out the same day. It does essentially the same thing, except it
takes you to the Tape Log, enters the current date in the Date Out field. Once
there, you may make entries into the “Ordered By” and Destnation/Shipping
Information. Click on the “Continue” button (on the left) and you will be
returned to the Label Log.
Updating the Tape Log
If you’ve altered a tape or disk J-card or label that had previously been logged
in (indicated by the “Logged” sign) because you’ve added takes to it or any
other reason, just click the Log In button. The proper record in the tape file
will be found and updated with the new information from the Label. If you
need to update the Tape Log and enter shipping information because the tape
is gong out, click the Log Out button, enter the Ordered By and
Destination/Shipper/Courier information on the top line of those fields, then
click the “Continue” button which takes you back to the Label Log.
If you don’t have time to log an item out, or you’d prefer to let the tape librarian do it, unlogged items can be found later by clicking the “Find Unlogged”
button. Tapes and disks can then be leisurely be scanned and logged the same
way as described above.
Special Labels
There are a few special label layouts that are designed specifically for Apogee
Media Accessories. These layouts are designed to show J-card information for
all the dats contained in these cases, without having to manually reenter anything but the file numbers. They are:
Page 41

32
SessionTools Manual
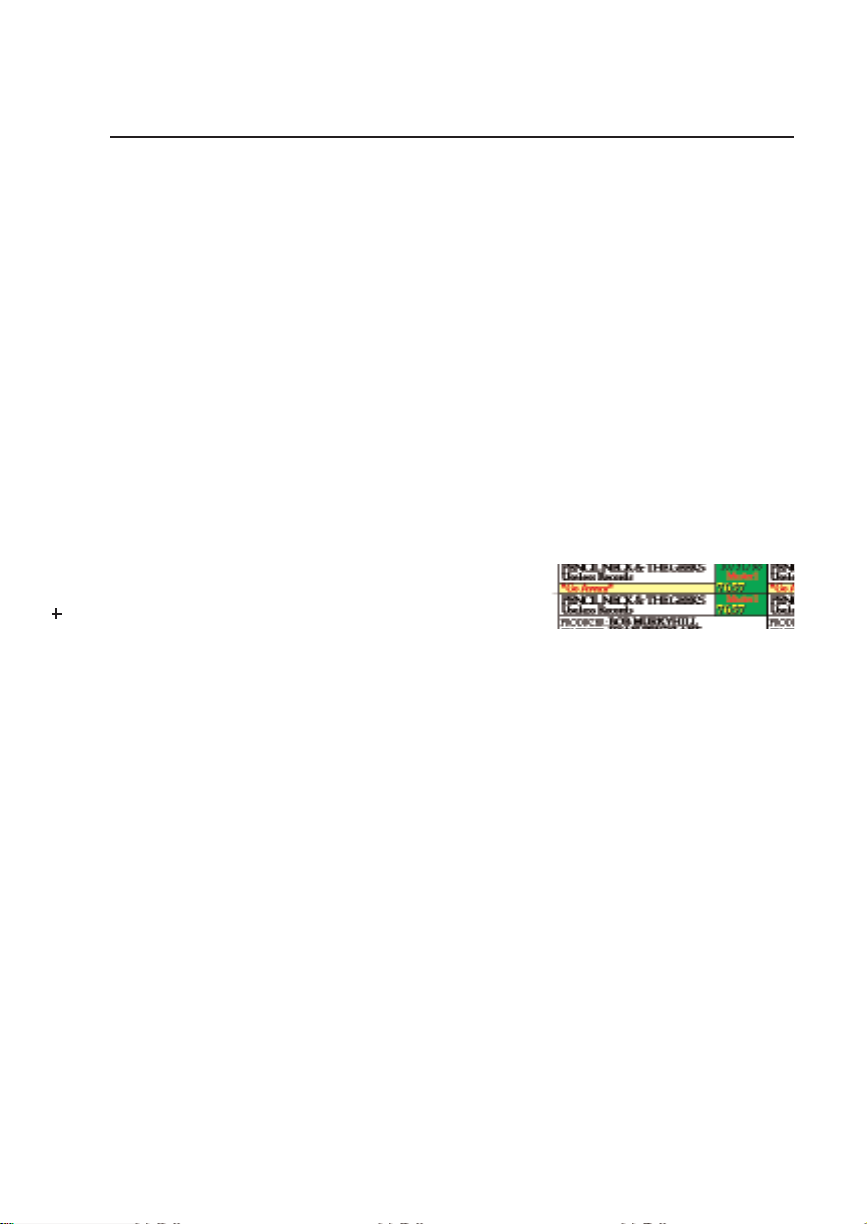
Producer Pak (holds ten dats, or three dats and three Hi-8 tapes)
Master Pak (holds two dats)
Project Pak (holds ten dats)
The Producer Pak cards fit the soft Apogee Producer Pak cases that come with
every box of Apogee DATs. When a large number of DATs leave the studio or
need to be archived, these Producer Paks are a perfect way to keep the DATs
together. We recommend keeping the DATs in the original cardboard carton
inside of the soft Producer Pak case for extra protection.
The Master Pak holds two DATs and the Project Pak holds ten DATs. Both are
designed for conveniently filing DAT tapes on standard shelves with other
larger tape formats. Both cases are available wherever Apogee Media
Products are sold.
To use these layouts, press the tab key. This will bring you to the first file
number field. (In the Producer Pak layout, you’re taken to the top left card.)
Enter the file number of the first DAT. The other information on the card is
automatically looked up in the Tape Log. Press the tab key and enter the file
number of the next DAT… and so on.
On the Producer Pak layout you will notice that there are three different card
formats plus a duplicate for each totaling six. Each of the three formats displays a different combination of information. Use the card format that best
suits your needs, depending on what information you need to be displayed.
Because there are two window slots on the Producer Paks, you can mix and
match these cards based on the current application, or use the same card for
each window slot so that the information is easily accessible on a shelf or in
a box. Be sure to print this layout with your printer set to portrait!
The bottom two cards on the Producer Pak layout displays the Tape/Disk
Title, and these layouts get their information through a lookup in the Tape
Log file. So for it to work, the Tape Title field in the Tape Log file must be filled
in for each tape. This is done automatically if the J-card for the DATs were
originally made in the Label Log, the File Number field and yellow spine
Tape Title fields are filled in and the “Log In” or “Log Out” button in the DAT
layout is clicked, automatically logging the tape.
Page 42

33
SessionTools Manual
Using the MultiReel Label
This layout is handy when a number of large reels (1/4”, 1/2”, 1”, and 2”)
come into the studio. Once the tapes are logged into the Tape Log, you can
use the reel labels to keep the actual reels matched to their respective boxes.
The labels also make the assistant’s life easier because the titles and absolute
start times are right there on the label. When he or she has to change reels or
songs, there is no confusion.
Press the Tab key. This will take you to the first file number field. Once you
enter the file number, Session Tools will automatically enter the reel number
and titles from the Tape Log. Hitting the tab key again will bring you to the
field just to the left of where the titles have appeared. Enter the corresponding absolute start times in this field. If it’s an analog tape, rewind the reel to
the top and reset the tape counter, then find the start of the first song and
enter the counter time. (You may also want to make a note of the runout time
after you wind the tape off.) Hitting the tab key again will bring you to the
next file number field, starting the cycle over again. You can make twelve reel
labels on one sheet of the label paper, reducing print time and waste that
would result from using the single reel label layout twelve times. Be sure to
print this layout with your printer set to portrait!
Note: There’s no button for this layout: select it from the layout menu.
No matter how you slice it...
The best way to handle the J-cards and sticky labels is to cut them out by
hand, with an X-acto knife, a razor blade or scissors, lightly scoring the fold
lines. We know it’s a pain, but it’s a lot easier than copying the information
over and over again. Another choice is to print on perforated card stock available from a few different companies. For us this has proven to be more frustrating as we have yet to find a printer that is accurate enough to consistently print in the right spots.
Also, this part of the program is designed for a facility that makes two to six
labels in a day in each room. It is not designed for mass production of labels
which would eliminate the possibility of hand doing anything, unless there’s
some lowly runner who wouldn’t mind cutting out 1000 DAT J-Cards.
For the sticky labels on the DATs & Cassettes you can buy Avery 5165 full
sheet sticky labels. These work great because you can use the portion you
Page 43

34
SessionTools Manual
need and save the rest for later. And as with the J-Cards, we’ve found it is easier just to cut the labels out with an X-acto knife, a paper cutter or scissors.
While the Label Log was intended to be printed on a color printer it works
well printed in grayscale.
Tape Log
The Tape Log is the main catalog of what tapes (& disks) have come into the
studio, what tapes have gone out, who ordered them, where they have gone
to and when.
In the Tape Log, each item has its own record. The main layout, Specifics,
clearly displays all pertinent information plus all titles/notes for each item.
There is also a History section that keeps track of every time the item left or
came back to your library, keeping the most recent occurrence at the top of the
list.
File Number Generator
It is a good idea to give every tape a log number and enter all its information
into the Tape Log. This way, any questions about a particular tape can be
searched for by file number and answered in a matter of seconds. This can be
done manually, in which case you’ll have to keep track of the last file number
used, or you can do it automatically, letting SessionTools do the work by
using the File Number Generator, as described below.
When you log a tape in, simply tab through the fields entering the pertinent
information as you go. If the project already exists in the Project File, much of
this will be entered automatically upon entering the Project name. If you’re
Page 44

35
SessionTools Manual
using the SessionTools File Number Generator, click on the New File # button - the next file number is entered into the File # field and the generator is
advanced. (Previous SessionTools users: this feature has been updated.) To
reset the generator, click the Reset File # button and follow the instructions in
the dialog box. Remember to enter the last file number used, not the next one!
We recommend that you always fill in the Tape Title field. This is for a general name of the tape or disk. Examples would be things like: “Go Away” (the
title of the song if it’s the only title on a mix tape), “Go Away vocal slave”
(multitrack slave), “Rough Mixes” (rough mix compilation), “Clearmountain
Mixes” (compilation of mixes by a particular mixer), “Ocean Way basics”
(tracking multitrack takes from a particular studio), etc. It serves as a quick
reference as to what is on the tape. If the Producer Pak layout in the Labels
file is used, this field must be filled in.
You’ll notice the Date In and Date Out field headings in the History section
are also buttons. To enter the current date in the Date In field, click the button. Same for the Date Out field, if you’re shipping an item out. If an item that
was previously logged in and had gone out returns, clicking the “Date In”
button moves all the previous entries in the History section down one line
and enters the current date on the top line. (You can edit the Date In/Out
fields if the tape actually came in or went out on a previous day.) This keeps
the latest entries at the top of the list, and makes them visible on the List layout (see below).
If you’re sending an item out for the second time, click the “Date Out” button, then enter the Ordered By and Destination/Shipper/Courier information on the top line of those columns.
Note: The date fields can be entered or edited manually.
Listing Logged Items
To list items for a particular project, click the “Search” button. After a few seconds you will see a dialog box with a pop-up list of all the projects in the Log.
Scroll through them, or type the first few letters of the project name and select
the one you want to list. Alternatively, press the delete button (on your keyboard) and type the name in. If you choose the latter, you must type the name
of the project exactly as it appears in the log or your search will be unsuccessful. You can now click the “All Formats” button to list, well… all the for-
Page 45

36
SessionTools Manual
mats, or click the “Choose Format” button to list only one format. Doing the
latter brings up another dialog box from which you can choose the format
you would like to list - say, just all “1/2” analog” tapes - for the selected project. At this point, if you change your mind, you can still list all the formats
by clicking the “All” button. If not, click “List”.
After a few seconds you’ll see the list of items you have requested, displaying a record on each line. From here you can list a different format for the
same project by clicking “New Format”; list all formats for the project by
clicking “All Formats”; or list everything in the Tape Log by clicking “Find
All”. You can also do a search for a new project by clicking “Search”. From the
List page you can quickly return to the Details page of any record in the displayed list by clicking its “Details” button. From the Details layout you can
quickly return to the same list by clicking the “List Current” button.
The header information is not modifiable from the List page and pertains to
the current record, which is indicated by a black marker just to the left of the
“Details” button. You can select a different record by clicking the “Select” button for any field in that record. Clicking the “Details” button does this but, of
course, also switches you to the Details layout.
The List page displays only the top line of each of the Origin, Dates, Ordered
By, Shipping and Titles fields. Clicking in these fields reveals all the information contained within, one field at a time. Clicking the “Details” button moves
you to the Details page which displays all the information in the record.
IMPORTANT NOTE: Don’t ever delete record number 1 from this file. It contains
the File Number Generator.
Page 46

37
SessionTools Manual
Track Sheets (Track)
There are a few different layouts for track sheets. The main ones are a 48-track
sheet and a 24-track sheet. The variations from there are to accommodate various modular 8-track formats. Look at each layout and see what will work for
your particular setup.
Instrument Lists
As you click on each track box or tab across, you’ll be presented with a popup list of most instruments we could think of, to keep typing to a minimum.
If you’d rather type, click on the box again to hide the list.
Stereo Track Boxes
The arrows pointing up, just below each bank of
eight tracks, allow entrance into the “in between”
tracks, for filling in “stereo” tracks without having
to enter the same information twice. Clicking on
the red arrow will get you into a field that goes
Page 47

38
SessionTools Manual
across the first two tracks in that line. Pressing Tab at that point will move you
into the second & third fields, and so on. There’s a lot of tabbing to get to the
last two tracks in that row, but it’s a lot less confusing than having the same
information repeated on two separate track boxes.
In the lower half of each track box, there is a separate field formatted in a
smaller font for entering extra information, like mic, EQ, engineer, etc. At the
bottom of each box, you’ll find a really small field for entering the date of
recording.
Note: To make these track sheets as versatile as they are, we had to include a lot of
fields. In order to do stereo tracks, there had to be an additional layer of fields, under
the single track box fields. Because of this, when you’re entering something in one
box, other boxes may be covered up. To see the other boxes, press the Enter key on the
Mac, or the numeric pad Enter key on a PC.
Gear Log
We’ve added this file by popular request. It will efficiently log pertinent information along with a maintenance history of every piece of equipment in your
facility. Gear can be quickly sorted and listed by category, (microphones, tape
machines, etc.) location, (studio A, 2, Z, etc.) manufacturer or vendor (where
you got it).
The main layout of the file contains fields for category, item, manufacturer,
location, vendor, your facility’s equipment log number, serial number, the
date purchased, and description. We recommend entering these fields as
accurately as possible, choosing items from the pop-up lists whenever you
can.
Page 48

39
SessionTools Manual
There’s also a picture field in the upper right-hand corner of the page, if you
would like to paste a PICT of the gear there. We recommend only using this
if necessary because doing so can slow down database operations drastically,
depending on the speed of your processor and if you’re using SessionTools
over a network. Clicking the “Big Picture” button takes you to the Big Picture
page, in case you need to see more detail.
The Maintenance History section is used when an engineer or assistant finds
a problem with a piece of gear. Just press the “Find” button, then enter the
Item and probably the location of the item into their respective fields before
clicking “Find” or pressing the enter key, and then scan through the records
to find the exact piece of gear, using the record scan gadget in the upper left
corner of the screen. Alternatively, the serial number field can be searched,
which will probably yield a single, exact match. Once found, enter a clear
description of the problem into the Problem Description field, then put the
engineer’s initials into the Eng. field. Clicking on the “Date” field heading
button automatically enters the current date into the Date field and displays
the Trouble Alert indicator.
When the maintenance department finally finds time to fix stuff, the tech simply clicks on the “Find Trouble” button and then scans through the records to
find the one they’d like to start with. If you just want to see the problems in,
say, Studio C, you would first click on the “List/Loc.” (List Location) button,
and select Studio C to list the gear in that studio. A little red “T” appears next
to any pieces of gear in need of service. To list only gear with problems, click
the “Find Trouble” button. Clicking the “History” button next to a piece of
gear gets you back to its Maintenance History page to see what the problem
is.
Once you complete the repair, enter the repair action, enter your initials and
click on the “Repair Date” field heading/button, you should then turn the
Trouble Alert sign off. It doesn’t go off automatically in case you weren’t able
to complete the repair.
Sorting/listing is pretty self-explanatory. Simply click the appropriate button,
e.g. “List/Cat.” to choose a category to list, List/Loc. to choose a location, etc.
After selecting criteria to list by from the pop-up menu, click Continue (on the
left) or press the Enter key. From each list, you can quickly view a piece of
gear’s details by clicking its “History” button.
Page 49
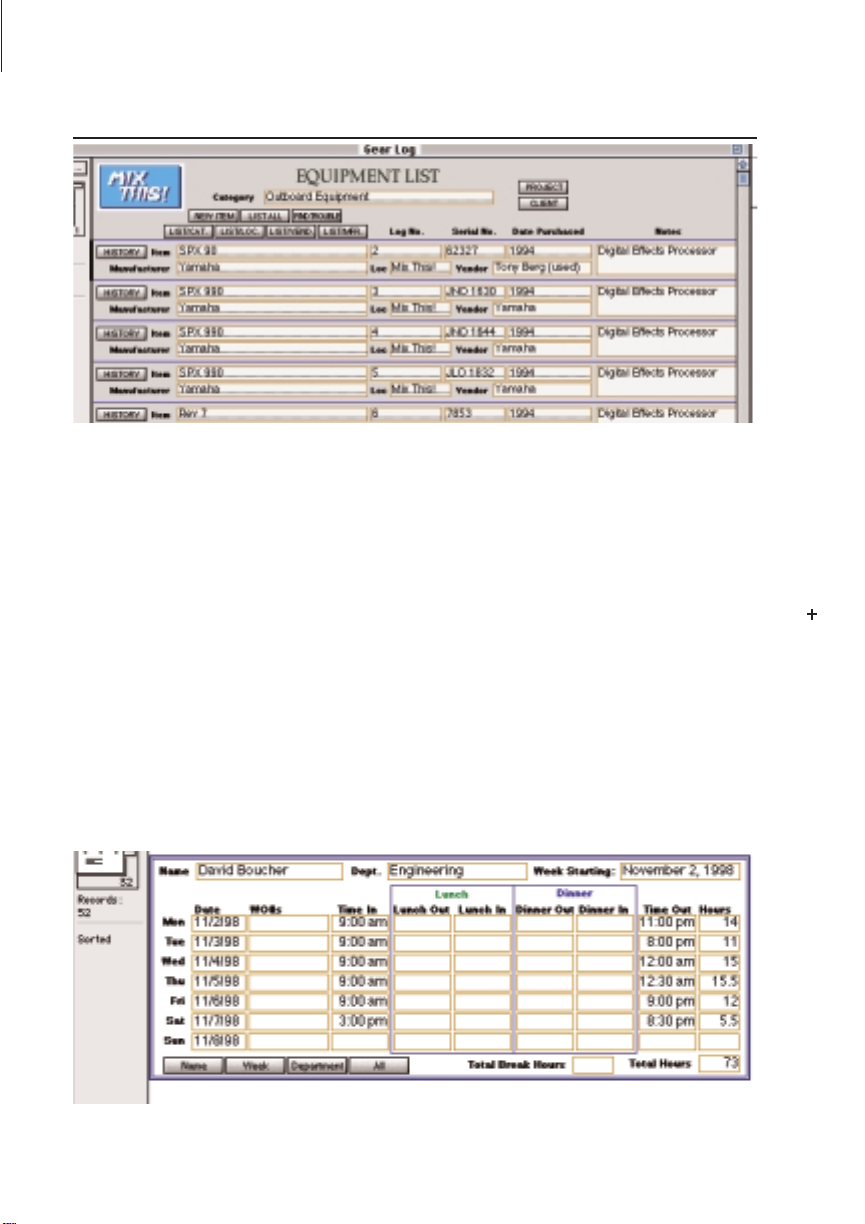
40
SessionTools Manual
You should note that the pop-up lists of categories, locations, vendors and
manufacturers that you will be selecting from for your sorts are created when
you enter the information into each record, e.g. once you have one or more
records for a microphone, (with the word “Microphone” entered into the
Category field) the word “microphone” will appear in a pop-up list when you
click on the List/Cat. button, besides appearing in the Category field pop-up
of subsequent new records. The same goes for Location, Manufacturer and
Vendor.
IMPORTANT NOTE: Don’t ever delete record number 1 from this file. It contains
the Trouble Alert indicator image. If you do accidentally delete it and the Trouble
Alert indicator won’t work, open the file from FileMaker Pro, get into Layout mode,
switch to the Trouble layout, copy the red Trouble Alert image, switch to Browse
mode, go to record no. 1 (or create a new one if there are no records) and paste the
image into the Trouble On field. Do the same for the Trouble Off image.
Time Sheet
Page 50

41
SessionTools Manual
This file basically works just like a punch clock except it will work over a
computer network. It keeps running totals of employee hours worked which
can be listed and printed, and your bookkeeper doesn’t have to read little
time stamps on a pile of cards each week.
To create a new sheet, first click “New Sheet”, select your name from the
Employee pop-up or click on the field and type it in if it doesn’t yet exist in
the pop-up, select or enter your department and press the Enter key (not
Return). The default start of the week is Monday, so no matter what day of
the week it currently is, the “Week Of” field will reflect Monday’s date of
your current week, and Mon. will be indicated on the top line of the sheet. If
your work week starts on a different day, say Wednesday, enter Wednesday’s
date in the “Week Of” field. Doing this makes Wednesday and it’s date the
top line of the grid.
Using it is as simple as punching a time clock: when you start work, click the
“Punch In” button. Just before you go home, click the “Punch Out” button.
We’re sure you can figure out lunch/dinner out and in. SessionTools finds the
appropriate day row and box and enters the current time. The total hours
you’ve worked is immediately calculated for the day and week when you
punch out.
You can list employee hour totals by clicking on the appropriate list parameter button, i.e. click “Week” to list all employees’ totals for a particular week,
or “Name” to list all totals for a particular employee. From any list you can
display any listed employee’s individual Time Sheet by clicking on the
record’s “Time Sheet” button.
You’ll find two versions of Time Sheet: they are Time Sheet and Time Sheet
Locked. In Time Sheet Locked the time fields cannot be entered manually:
only the current time can be entered by pressing the punch buttons. In Time
Sheet, times can be entered manually by clicking on the appropriate field and
typing in the time – the advantage being that if you forget to punch in or out,
the time can be entered later. Which one you use depends on how accurately
you feel your employees will enter the times if they have the option of doing
it manually.
IMPORTANT: If you decide to use Time Sheet Locked, once it’s installed, you must
remove the word “Locked” from the filename. Also, you may want to remove the
“Date & Time” control panel from your computer so Time Sheet can’t be fooled.
Page 51

42
SessionTools Manual
Quirks and Annoyances
While creating SessionTools, a few problems came up to which we were not
able to find reasonable programming solutions, because of what appear to be
limitations of the computer or FileMaker Pro. Instead of letting you eventually stumble on them yourselves and be annoyed at us, we figured we’d tell
you now so you can get being annoyed at us out of the way. Listed here are a
couple of problems we’ve come across, and some possible ways around them.
If you find any more (undoubtedly someone will), please let us know and we
will either try to fix them in a future version, or just add them to this list.
Thanks — Bob, Ryan & David
1. Various Printers
As you know, there are lots of different printers out there, with many different page setup specs. We set up the layouts for two different printers – an
Apple LaserWriter (16/600 PS) and the Hewlett-Packard Deskjet 870 Cse
color inkjet – both excellent choices, by the way. The layouts in the Client File,
Project File, Work Order and Invoice files are setup for the Apple LaserWriter.
The layouts in the Label Log, Tape Log, Track Sheet and Recall files are set up
for the HP. The others don’t matter because they don’t need to be printed.
Problem:
Unfortunately we’re unable to release a different version of SessionTools for
every possible page setup and printer spec. If you’re using a different printer, the margins may be off or the layout could be running onto another page.
Work-around:
Regrettably there are no simple solutions to this problem. If you own a copy
of FileMaker Pro 3.x or 4.x you can get into Layout Mode and adjust the layouts to work with the Page Setup for your specific printer. (See “Modifying
SessionTools”) This is also handy for changing the look of your layouts, like
the colors or fonts – but be careful! Always first make a backup copy of the
file you want to change, in case you screw up.
2. Fonts under Windows and Macintosh
We wrote SessionTools on Macintosh computers. Although it works well on
both Macintosh and Windows platforms, we’ve noticed some quirkiness in
the way some layouts display and print, in particular the large format tape
Page 52

43
SessionTools Manual
labels. These problems are largely due to the fact that font handling under
Windows is not nearly as sophisticated as on the Macintosh, and there are significant but unpredictable differences between character shapes and spacings
on what is apparently the same font on the two platforms. We chose TrueType
Arial (the original Windows default font) for the majority of SessionTools lay-
outs, because it is standard on Windows machines and Macintosh users have
many more font options and easier font installation than Windows users.
Arial is not standard on the Mac, so a TrueType version is installed in your
Fonts folder automatically along with SessionTools. If you have a different ver-
sion of Arial installed on a Macintosh (eg a PostScript version), it may give dif-
ferent character spacings: if you notice problems, check you’re using the version we supplied.
Problem:
You may find that line spacings get a bit weird on the large format labels,
especially if you reformat any text, like making a choice take bold or changing the font or size. Sometimes it’s totally unpredictable.
Workarounds:
a. Don’t reformat text.
b. On a Macintosh, check that you’re using the version of Arial supplied.
New Additions in Version 2.0
Thanks to feedback from owners of existing versions of SessionTools, and
from our need to expand the program for our own applications at Mix This!,
we are pleased to tell you that Version 2.0 of SessionTools has several additional functions, and many existing features have been improved or updated.
Please let us know your own “wish list” for SessionTools, and we’ll see what
we can do for future versions.
Gear Log
We’ve added this file by popular request. It will efficiently log pertinent information along with a maintenance history of every piece of equipment in your
facility. Gear can be quickly sorted and listed by category, (microphones, tape
machines, etc.) location, (studio A, 2, Z, etc.) manufacturer or vendor (where
you got it).
The main layout of the file contains fields for category, item, manufacturer,
location, vendor, your facility’s equipment log number, serial number, date
purchased and description.
Page 53

44
SessionTools Manual
We recommend entering these fields as accurately as possible, choosing items
from the pop-up lists whenever you can.
There’s also a picture field in the upper right-hand corner of the page, if you
would like to paste an image of the gear there. We recommend only using this
if necessary because doing so can slow down database operations drastically,
depending on the speed of your processor and if you’re using SessionTools
over a network. Clicking the “Big Picture” button takes you to the Big Picture
page, in case you need to see more detail.
The Maintenance History section is used when an engineer or assistant finds
a problem with a piece of gear. Just press the “Find” button, then enter the
Item and probably the location of the item into their respective fields before
clicking “Find” or pressing the enter key, and then scan through the records
to find the exact piece of gear, using the record scan gadget in the upper left
corner of the screen. Alternatively, the serial number field can be searched,
which will probably yield a single, exact match. Once found, enter a clear
description of the problem into the Problem Description field, then put the
engineer’s initials into the Eng. field. Clicking on the Date field heading button automatically enters the current date into the Date field and displays the
Trouble Alert indicator.
When the maintenance department finally finds time to fix stuff, the tech
simply clicks on the “Find Trouble” button and then scans through the
records to find the one they’d like to start with. If you just want to see the
problems in, say, Studio C, you would first click on the “List/Loc.” (List
Location) button, and select Studio C to list the gear in that studio. A little red
“T” appears next to any pieces of gear in need of service. To list only gear
with problems, click the “Find Trouble” button. Clicking the “History” button next to a piece of gear gets you back to its Maintenance History page to
see what the problem is.
Once you complete the repair, enter the repair action, enter your initials and
click on the “Repair Date” field heading/button, you should then turn the
Trouble Alert sign off. It doesn’t go off automatically in case you weren’t able
to complete the repair.
Sorting/listing is pretty self-explanatory. Simply click the appropriate button,
eg. “List/Cat.” to choose a category to list, List/Loc. to choose a location, etc.
After selecting criteria to list by from the pop-up menu, click Continue (on the
Page 54

45
SessionTools Manual
left) or press the Enter key. From each list, you can quickly view a piece of
gear’s details by clicking its “History” button.
You should note that the pop-up lists of categories, locations, vendors and
manufacturers that you will be selecting from for your sorts are created when
you enter the information into each record, eg. once you have one or more
records for a microphone, (with the word “Microphone” entered into the
Category field) the word “microphone” will appear in a pop-up list when you
click on the List/Cat. button, besides appearing in the Category field pop-up
of subsequent new records. The same goes for Location, Manufacturer and
Vendor.
Time Sheet
No one asked for this, but we thought it might come in handy anyway. This
file basically works just like a punch clock except it will work over a computer network. It keeps running totals of employee hours worked which can
be listed and printed, and your bookkeeper doesn’t have to read little time
stamps on a pile of cards each week.
To create a new sheet, first click “New Sheet”, select your name from the
Employee pop-up or click on the field and type it in if it doesn’t yet exist in
the pop-up, select or enter your department and press the Enter key (not
Return). The default start of the week is Monday, so no matter what day of
the week it currently is, the “Week Of” field will reflect Monday’s date of
your current week, and Mon will be indicated on the top line of the sheet. If
your work week starts on a different day, say Wednesday, enter Wednesday’s
date in the “Week Of” field. Doing this makes Wednesday and it’s date the
top line of the grid.
Using it is as simple as punching a time clock: when you start work, click the
“Punch In” button. Just before you go home, click the “Punch Out” button.
We’re sure you can figure out lunch/dinner out and in. SessionTools finds the
appropriate day row and box and enters the current time. The total hours
you’ve worked is immediately calculated for the day and week when you
punch out.
You can list employee hour totals by clicking on the appropriate list parameter button, ie. click “Week” to list all employees’ totals for a particular week,
or “Name” to list all totals for a particular employee. From any list you can
Page 55

46
SessionTools Manual
display any listed employee’s individual Time Sheet by clicking on the
record’s “Time Sheet” button.
You’ll find two versions of Time Sheet: they are Time Sheet and Time Sheet
Locked. In Time Sheet Locked the time fields cannot be entered manually:
only the current time can be entered by pressing the punch buttons. In Time
Sheet, times can be entered manually by clicking on the appropriate field and
typing in the time – the advantage being that if you forget to punch in or out,
the time can be entered later. Which one you use depends on how accurately
you feel your employees will enter the times if they have the option of doing
it manually.
IMPORTANT: If you decide to use Time Sheet Locked, once it’s installed, you must
remove the word “Locked” from the filename. Also, you may want to remove the
“Date & Time” control panel from your computer so Time Sheet can’t be fooled.
Supplies
New version!
Each item record in the Supplies layout now consists of a Quantity field, an
“Add Stock” button and an indication that notes when and how many pieces
of stock were last added to your inventory. When an item is entered into the
Work Order as being used, one item count is automatically subtracted from
the Quantity field of the item’s corresponding record in the Supplies file,
thereby automatically keeping an accurate record of the supplies used.
When you first use this layout, the Quantity fields are empty. Enter what you
are currently charging for each item in the Price field. You should go through
your current stock and enter the current number of each item in your stock
by clicking on the Add Stock button in each item’s record. You will see a dialog box: simply type the number and press the Continue button on the left of
the screen. You’ll notice each record to which you’ve added stock indicates
how many pieces are now in stock (Qty.), the current date and how many
pieces you’ve added, which at this point should be the same as the Quantity.
Adding additional stock is done exactly the same way, except the dialog box
displays how many pieces were added the last time, so if you’re adding the
same amount this time, just click Continue. If different, type the new amount.
Page 56

47
SessionTools Manual
The Work Order
New Version!
The supplies section of the Work Order layout now has + and - buttons on
either side of the Quantity (QTY) fields. Clicking on the + button adds one
item count to the quantity field next to it, and also subtracts one count of the
selected item from the Supplies file. Clicking the - button subtracts one count
from the work order and adds one back to the supplies file, in case your
clients change their mind about how many copies they want. You cannot
enter a value into the Quantity field by typing it in manually: you must use
the buttons.
Tape Log
New version!
In the Tape Log, each item now has its own record. The main layout, Details,
clearly displays all pertinent information plus all titles/notes for each item.
There is also a History section that keeps track of every time the item left or
came back to your library, keeping the most recent occurrence at the top of the
list.
When you log a tape in, simply tab through the fields entering the pertinent
information as you go. If the project already exists in the Project File, much of
this will be entered automatically upon entering the Project name. If you’re
using the SessionTools File Number Generator, click on the New File # button - the next file number is entered into the File # field and the generator is
advanced. (Previous SessionTools users: this feature has been updated.) To
reset the generator, click the Reset File # button and follow the instructions in
the dialog box. Remember to enter the last file number used, not the next one!
We recommend that you always fill in the Tape Title field. This is for a general name of the tape or disk. Examples would be things like: “Go Away” (the
title of the song if it’s the only title on a mix tape), “Go Away vocal slave”
(multitrack slave), “Rough Mixes” (rough mix compilation), “Clearmountain
Mixes” (compilation of mixes by a particular mixer), “Ocean Way basics”
(tracking multitrack takes from a particular studio), etc. It serves as a quick
reference as to what is on the tape. If the Producer Pak layout in the Labels
file is used, this field must be filled in.
You’ll notice the Date In and Date Out field headings in the History section
are also buttons.
Page 57

48
SessionTools Manual
To enter the current date in the Date In field, click the button. Same for the
Date Out field, if you’re shipping an item out. If an item that was previously
logged in and had gone out returns, clicking the “Date In”
button moves all the previous entries in the History section down one line
and enters the current date on the top line. (You can edit the Date In/Out
fields if the tape actually came in or went out on a previous day.) This keeps
the latest entries at the top of the list, and makes them visible on the List layout (see below).
If you’re sending an item out for the second time, click the “Date Out” button, then enter the Ordered By and Destination/Shipper/Courier information on the top line of those columns.
Note: The date fields can be entered or edited manually.
Listing Logged Items
To list items for a particular project, click the “Search” button. After a few seconds you will see a dialog box with a pop-up list of all the projects in the Log.
Scroll through them and select the one you want to list, or press the delete
button (on your keyboard) and type it in. If you choose the latter, you must
type the name of the project exactly as it appears in the log or your search will
be unsuccessful. You can now click the “All Formats” button to list, well… all
the formats, or click the “Choose Format” button to list only one format - say,
just all 1/2” analog tapes for the selected project. Doing the latter brings up
another dialog box from which you can choose the format you would like to
list. At this point, if you change your mind, you can still list all the formats by
clicking the “All” button. If not, click “List”.
After a few seconds you’ll see the list of items you requested. From here you
can list a different format for the same project by clicking “New Format”; list
all formats for the project by clicking “All Formats”; or list everything in the
Tape Log by clicking “Find All”. You can also do a search for a new project by
clicking “Search”. From the List page you can quickly return to the Details
page of any record in the displayed list by clicking its Details button. From
the Details layout you can quickly return to the same list by clicking the List
Current button.
The header information is not modifiable from the List page and pertains to
the current record, which is indicated by a black marker just to the left of the
Page 58

49
SessionTools Manual
“Details” button. You can select a different record by clicking any field in that
record. Clicking the “Details” button does this but, of course, also switches
you to the Details layout.
Label Log
From the Label Log, you now have ability to automatically add tape (and
disk) information to the Tape Log without leaving the Label Log and without
having to re-enter a file number into the Tape Log. At the top of each Jcard/label layout you’ll find a “Log In”, a “Log Out” and a “Find Unlogged”
button, along with the word “Unlogged”. Once the J-card/label is complete
with its Description, Format, Titles, all the header information, and a file
number has been entered into the File Number field either manually or by
clicking the Next File # button, clicking “Log In” automatically copies all that
information into a new record in the Tape Log file. It then changes the
“Unlogged” indication to “Logged”, indicating that the label information has
been entered into the Tape Log.
The “Log Out” button is for logging a tape that is either being taken by a
client, or being sent out the same day. It does essentially the same thing,
except it takes you to the Tape Log, enters the current date in the “Date Out”
field and places the cursor in the Ordered By field, anticipating your entering
who is getting the tape or disk, its destination and courier/shipping information. Once this is done, click on the “Continue” button (on the left) and
you will be returned to the Label Log.
Updating the Tape Log
If you’ve altered tape or disk J-card or label that had previously been logged
in (indicated by the “Logged” sign) because you’ve added takes to it or any
other reason, just click the “Log In” button. The proper record in the tape file
will be found and updated with the new information from the Label. If you
need to update the Tape Log and enter shipping information because the tape
is gong out, click the “Log Out” button, enter the Ordered By and
Destination/Shipper/Courier information on the top line of those fields, then
click the “Continue” button which takes you back to the Label Log.
If you don’t have time to log an item out, or you’d prefer to let the tape librarian do it, unlogged items can be found later by clicking the “Find Unlogged”
button. Tapes and disks can then be leisurely be scanned and logged the same
way as described above.
Page 59

50
SessionTools Manual
Special Labels
There are a few special label layouts that are designed specifically for Apogee
Media Accessories. These layouts are designed to show J-card information for
all the dats contained in these cases, without having to manually reenter anything but the file numbers. They are:
Producer Pak (holds ten DATs or three DATs and three Hi-8 tapes
Master Pak (holds two DATs)
Project Pak (holds ten DATs)
The Producer Pak cards fit the soft Apogee Producer Pak cases that come with
every box of Apogee DATs. When a large number of DATs leave the studio or
need to be archived, these Producer Paks are a perfect way to keep the DATs
together. We recommend keeping the DATs in the original cardboard carton
inside of the soft Producer Pak case for extra protection.
The Master Pak holds two dats and the Project Pak holds ten DATs. Both are
designed for conveniently filing dat tapes on standard shelves with other
larger tape formats. Both cases are available wherever Apogee Media
Products are sold.
To use these layouts, press the tab key. This will bring you to the first file
number field. (In the Producer Pak layout, you’re taken to the top left card.)
Enter the file number of the first DAT. The other information on the card is
automatically looked up in the Tape Log. Press the tab key and enter the file
number of the next dat... and so on.
On the Producer Pak layout you will notice that there are three different card
formats plus a duplicate for each totaling six. Each of the three formats displays a different combination of information. Use the card format that best
suits your needs, depending on what information you need to be displayed.
Because there are two window slots on the Producer Paks, you can mix and
match these cards based on the current application, or use the same card for
each window slot so that the information is easily accessible on a shelf or in
a box. Be sure to print this layout with your printer set to portrait!
The bottom two cards on the Producer Pak layout displays the Tape/Disk
Title, and these layouts get their information through a lookup in the Tape
Log file. So for it to work, the Tape Title field in the Tape Log file must be filled
Page 60

51
SessionTools Manual
in for each tape. This is done automatically if the J-card for the DATs were
originally made in the Label Log, the File Number field and yellow spine
Tape Title fields are filled in and the “Log In” or “Log Out” button in the DAT
layout is clicked, automatically logging the tape.
Using the MultiReel Label
This layout is handy when a number of large reels (1/4”, 1/2”, 1”, and 2”)
come into the studio. Once the tapes are logged into the Tape Log, you can
use the reel labels to keep the actual reels matched to their respective boxes.
The labels also make the assistant’s life easier because the titles and absolute
start times are right there on the label. When he or she has to change reels or
songs, there is no confusion.
Press the tab key. This will take you to the first file number field. Once you
enter the file number, Session Tools will automatically enter the reel number
and titles from the Tape Log. Hitting the tab key again will bring you to the
field just to the left of where the titles have appeared. Enter the corresponding absolute start times in this field. If it’s an analog tape, rewind the reel to
the top and reset the tape counter, then find the start of the first song and
enter the counter time. (You may also want to make a note of the runout time
after you wind the tape off.) Hitting the tab key again will bring you to the
next file number field, starting the cycle over again. You can make twelve reel
labels on one sheet of the label paper, reducing print time and waste that
would result from using the single reel label layout twelve times. Be sure to
print this layout with your printer set to portrait!
Note: There’s no button for this layout so you’ll have to select it from the layout
menu.
Page 61

52
SessionTools Manual
Additional Information
Here’s some additional SessionTools features and information not covered
elsewhere in the manual.
A word about Files, Layouts Records and Fields:
Some SessionTools users unaccustomed to using database programs can be
confused by the distinction between Files, Layouts, Records and Fields.
A File consists of Fields, Layouts, and – once you start using it – will contain
Records. A SessionTools file exists as a separate entity on your hard disk, and
opens under the SessionTools Runtime program, much as a word processor
document opens under a word processor program.
A Field can contain a single piece of information that is generally entered by
you: like a project name or a client name. Field contents can be text (like notes
or a letter); a date; a number; or a picture. A Field can even contain the result
of a calculation.
A Record is a group of these fields containing information. Records don’t
exist until you create one by clicking the NEW button; then you can enter specific information into each field. (But note that some of the files, like the
Supplies and Client files, already have a number of records entered for your
convenience.)
Layouts are different ways of displaying and printing the information you’ve
entered in a Record. This is where it can get a little confusing, so pay attention! Depending on the particular file, the information in a given Record can
be displayed or printed using different Layouts. The Label Log is a good
example of this: create a new record in the Label Log by clicking the NEW
button, click on the DAT J-Card button and enter header and titles information into the fields. You’ll notice that if you now click on the Cassette J-Card
button (to switch to the Cassette Layout), the same information is displayed,
only using the Cassette J-Card Layout.
This is one reason the Format field exists: if you wanted to go back through
the Label Log to see what tapes had been made for a project, this field keeps
track of what layout was used to print a given record – without it you wouldn’t know if it had been a DAT, cassette, CD or whatever.
Page 62

53
SessionTools Manual
In the case of the sticky label layouts, the Titles and many of the other fields
are left out, leaving only the pertinent Project, Client and Description information needed for the labels.
Page 63

54
SessionTools Manual
Upgrading from SessionTools 1.x
Upgrading your SessionTools software is a bit trickier than upgrading other
types of programs because SessionTools consists of actual database files containing information that you’ve entered, which means that you need to get all
the information from your old files into the new ones – or not, if you simply
wish to start from scratch! If you wish to save what you’ve entered so far, read
on…
Because the filenames have changed from the filenames found in version 1.x,
all files that have information you would like to save must be updated.
1. Install the new SessionTools from the CD-ROM, following the installation
instructions in this manual.
2. Using the old version of SessionTools, get into each of the files and select
“Find All” from the “Select” menu. This is necessary to make sure all
information is transferred.
3. If you’re not already there, click the “CLIENT” navigation button to get
to the Client File layout.
4. From the FILE menu, select “Import/Export”, then “Export Records”.
5. In the next dialog box, click on the “Desktop” button.
6. Click the “New Folder” button at the right of the dialog box. (The button
actually has the word “New” and a folder icon next to it.)
7. Name the new folder “Temp ST Export Files”.
8. In the “Save As” box, type “Temp Client Export”.
9. In the “Type” pull-down menu, select “FileMaker Pro”.
10. Click SAVE.
11. In the next dialog box, click MOVE ALL.
12. Select “Don’t format output”.
13. Click EXPORT. A new FileMaker Pro “CLIENT” data file will be created
in the new temporary folder.
14. Now repeat steps 3 through 13 for all the files that contain information
you wish to save, (using the same “Temp Export ST Files” folder) substituting each subsequent filename for “CLIENT”. (Don’t bother with the
DRAWINGS file unless you’ve added drawings of your own.) You can
now close SessionTools 1.x.
15. Launch SessionTools 2.0 by double-clicking its application icon, or its
alias.
Page 64

55
SessionTools Manual
16. Click the “CLIENT” navigation button to get to the Client.STT file, if
you’re not already there.
17. From the File menu, select “Import/Export” then “Import Records”.
18. From the dialog box, navigate to the “Temp ST Export Files” folder on the
desktop and open the file named “Temp Client Export”.
19. In the upper right-hand corner of the dialog box you’ll find a field named
“ View By”. Change it to “Matching Names” if it’s not already selected.
20. For the Client File only, select “Replace data in current found set”. All
others, leave “Add new records” selected.
21. Click the “Import” button.
22. In the next dialog box, do not select “Perform auto-enter options while
importing”, do select “Import values in repeating fields by keeping them
in the original records”.
23. Click OK.
24. Now repeat steps 16 through 23 for all the other files that you had created export files for, except TapeLog/TapeLog.STT
25. Repeat steps 16 through 21 for the Tape Log but at step 22, select “Import
values in repeating fields by splitting them into separate records”.
IMPORTANT: Once the Tape Log is imported, from the Script menu, select
“Fill in missing titles”. It is necessary to run this script only if you’ve made
any entries directly into the “Titles” field of the Tape Log, otherwise those
entries will not appear in the Details layout of the Tape Log, but will appear
in the List layout. If they had all been automatically transferred from the
Label Log by entering a file number, this will not be necessary, but won’t hurt
if you’re not sure. Depending on the speed of your computer, it should take
about 5 to 10 minutes per thousand records in the file to run the script.
When you’re done, you can keep the old files as backup. The Temporary
export files can be trashed.
 Loading...