

Page 1
SERVICE MANUAL
SERVICE MODE AND BUS DATA
1. How to Enter the Service Mode with the Remote Control
1) Decrease volume to 0.
2) Press the MUTE button on the remote control and VIDEO button on the TV at the same time.
3) Adjust the TV with the MENU SELECT buttons on the remote control.
4) Press the button on the remote control to quit the Service mode.
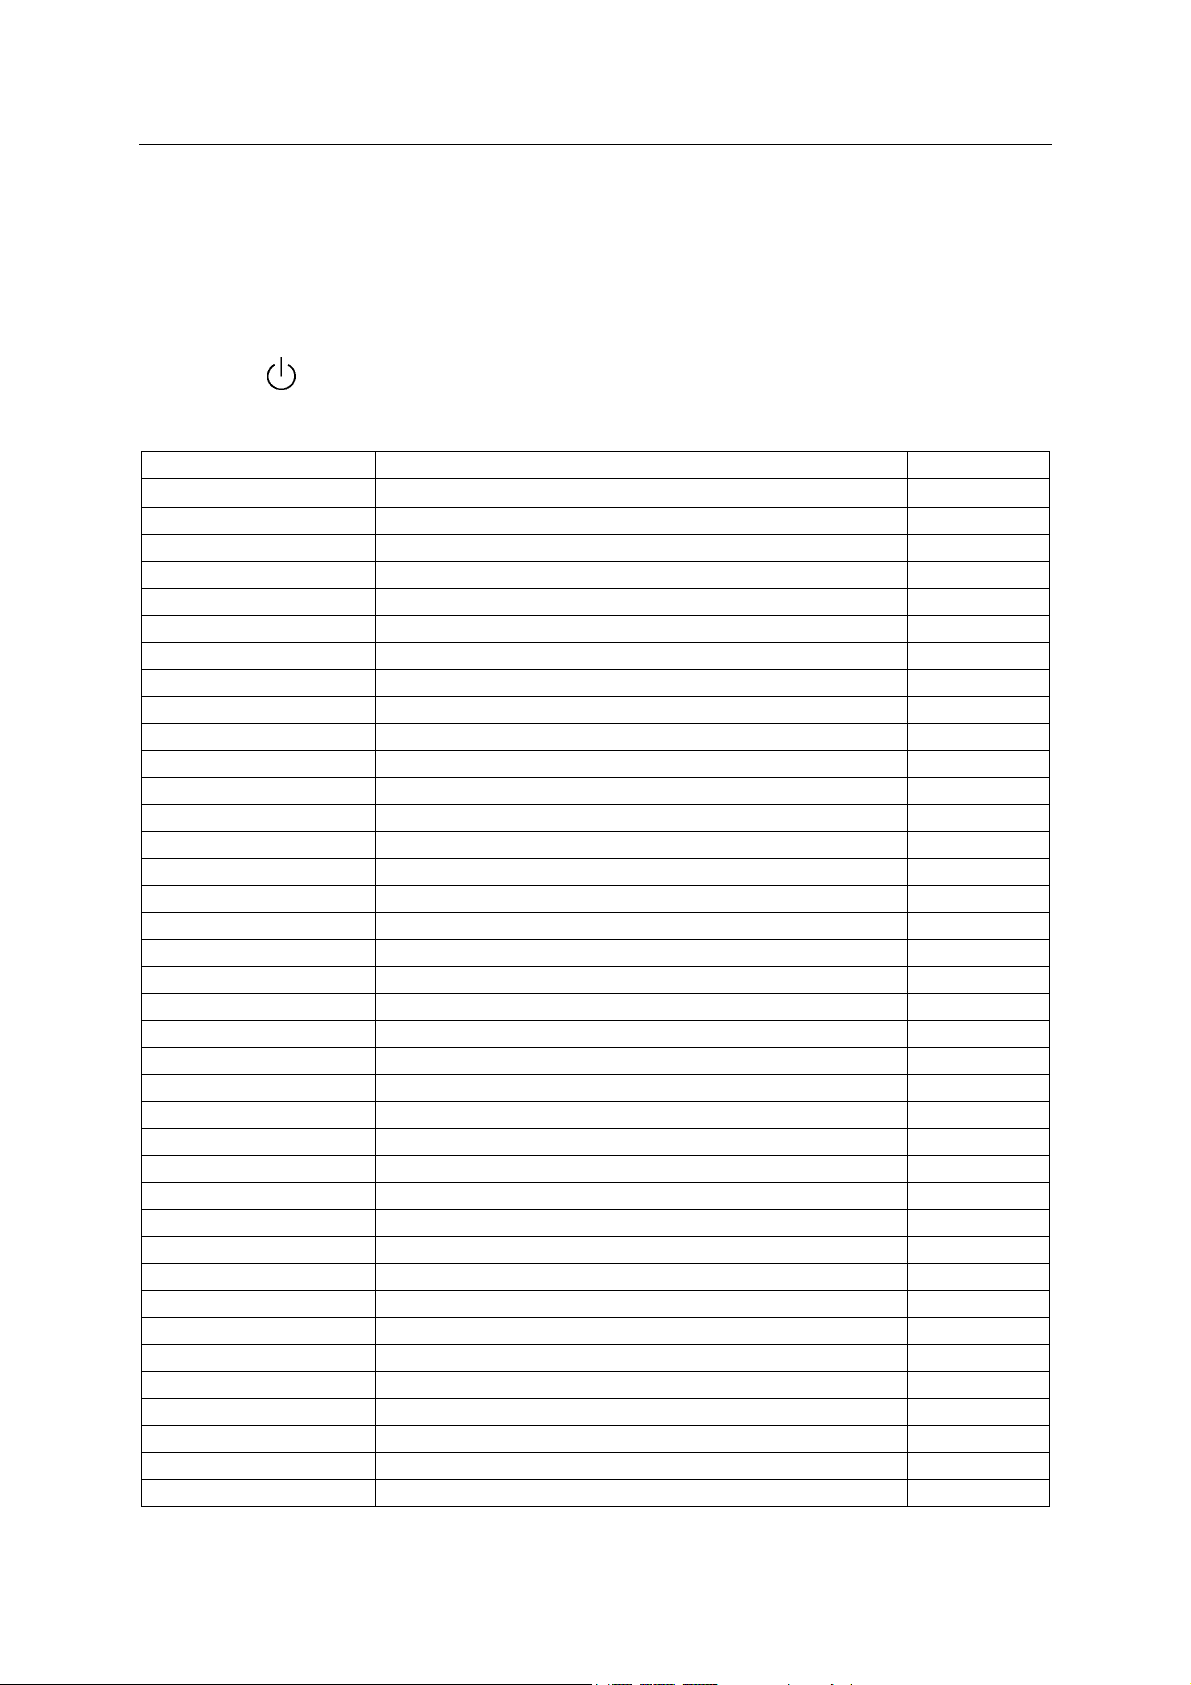
2. Bus Data
Item Symbol Description Bus Data
MENU.00
V.POS /50H VERTICAL POSITION /50Hz 39
H.PHSH /50H HORIZONTAL PHASE /50Hz 9
V.SIZE /50H VERTICAL SIZE /50Hz 78
V.POS /60H VERTICAL POSITION /60Hz 32
V.PH /60H HORIZONTAL PHASE /60Hz 12
V.SIZE /60H VERTICAL SIZE /60Hz 93
V.SC VERTICAL S-CORRECTION 4
V,LINE VERTICAL LINE 18
V.SIZE CMP VERTICAL SIZE COMPENSATION 7
MENU.01
SUB.BIGHT SUB-BRIGHT 63
SUB.CONT SUB-CONTRAST 45
V.KILL VERTICAL KILL 0
RF.AGC RF AGC 15
R.BIAS RED BIAS 60
G.BIAS GREEN BIAS 120
B.BIAS BLUE BIAS 60
R.DRIVE RED DRIVE 90
G.DRIVE GREEN DRIVE 15
B.DRIVE BLUE DRIVE 90
MENU.02
H.AFC GAIN HORIZONTAL AFC GAIN 0
H.BLK.L HORIZONTAL BLANKING LEFT 4
H.BLK.R HORIZONTAL BLANKING RIGHT 3
CROS.B/W CROSSHATCH BLACK/WHITE 0
VIDEO.LVL VIDEO LEVEL 4
FM.LEVEL FM LEVEL 16
MENU.03
FM.MUTE FM MUTE 0
AUD.MUTE AUDIO MUIE 0
VIDEO.MUTE VIDEO MUTE 0
SND.TRAP SOUND TRAP 0
MENU.04
SUB.COLOR SUB COLOR 31
SUB.TINT SUB TINT 31
S.SHARP SUB SHARP 32
CORING. CORING GAIN 1
29
Page 2
SERVICE MANUAL
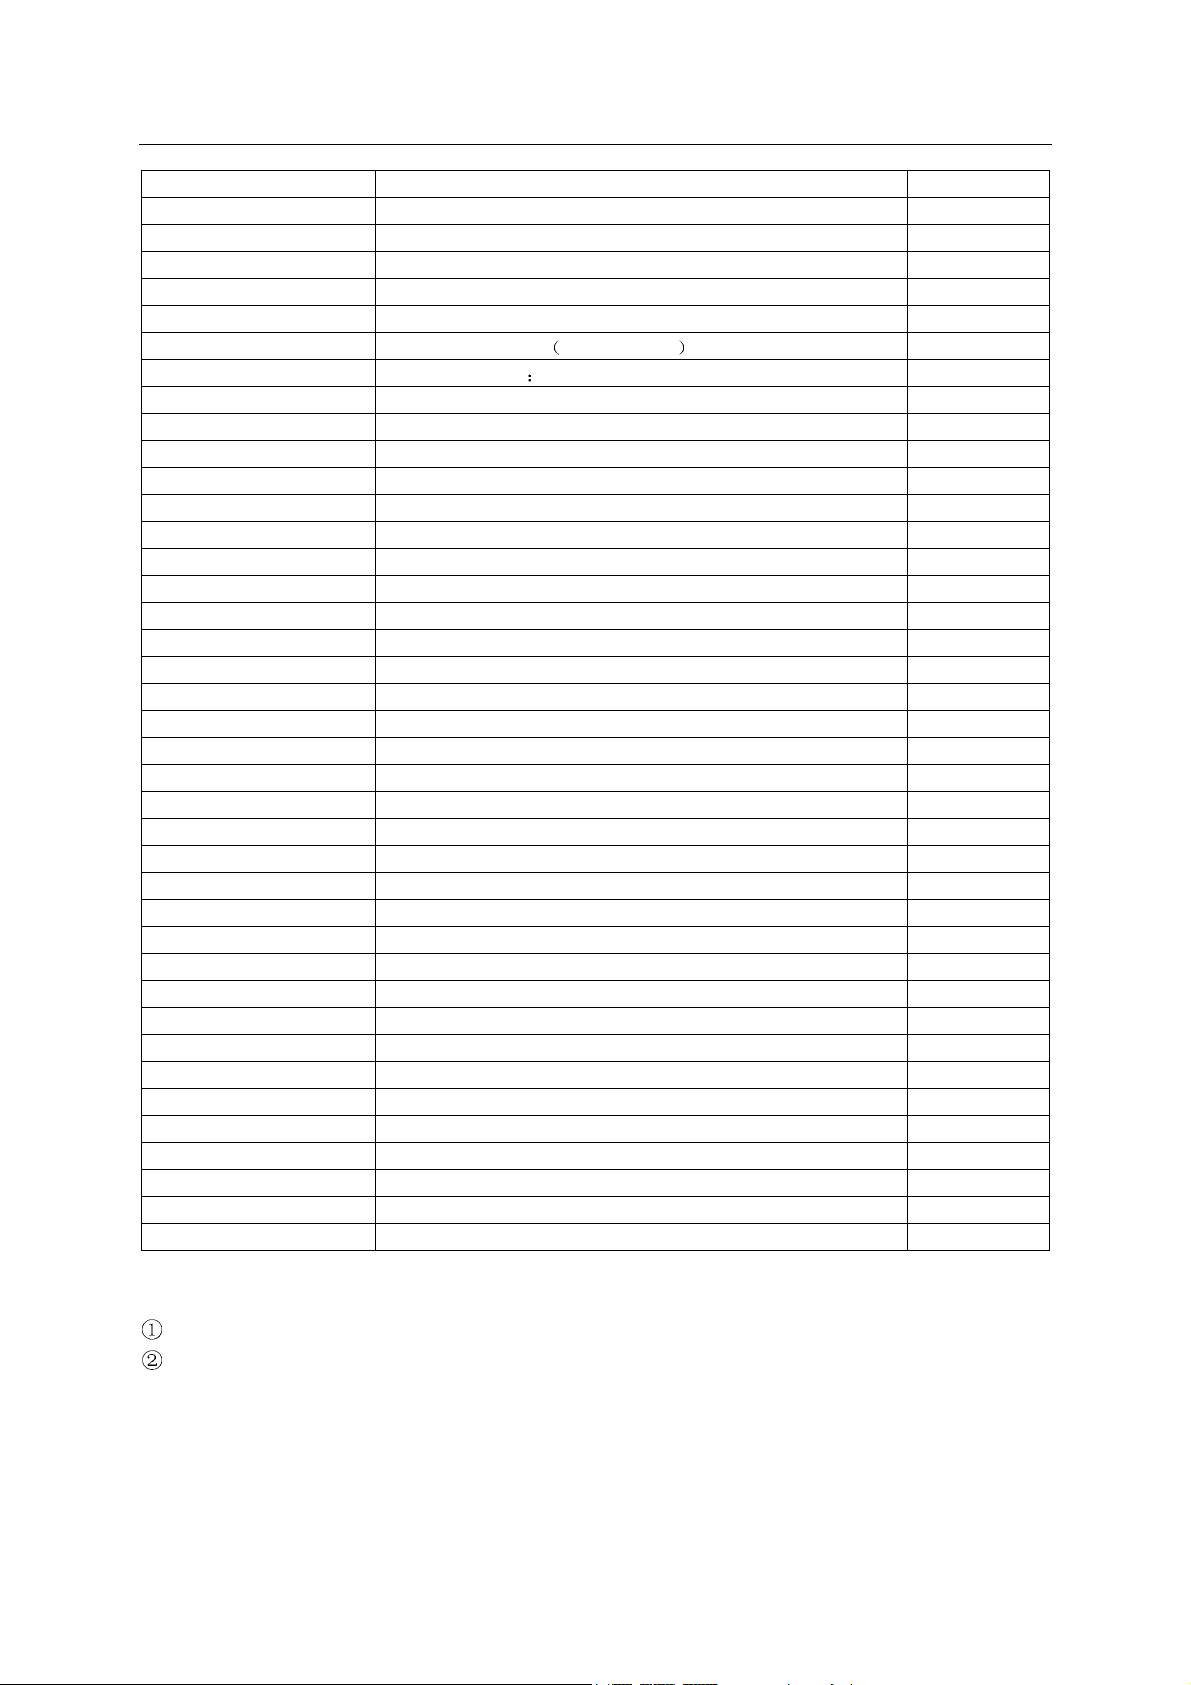
C.EXT EXTERNAL CHROMA 0
C.BYPASS CHROMA BAND-PASS BYPASS 0
C.KILL ON COLOR KILL ON 0
MENU.05
BLANK.DEF BLANK DEFEAT 0
BLK.ST.DEF 0
FBP.BLK.SW FLYBACK PULSES HORIZONTAL BLANKING SWITCH 0
FILT.SYS FILTER SYSTEM SELECT Y/C FILTER MODE 0
VOL.FIL VOLUME FILTER 0
VIF.SYS VIF SYSTEM 0
VIDEO.SW VIDEO SWITCH 0
MENU.06
R/B ANGLE R-Y/B-Y ANGLE 9
GREY MODE GREY MODE 0
V.SETUP VERTICAL SETUP 1
B.GAM.SEL 3
RG.GAM.DEF 1
MENU.07
BRT.ABL.TH BRIGHT ABL THRESHOLD 7
EM.ABL.DEF 0
BRT.ABL.DF BRIGHT ABL DEFEAT 1
MID.STP.DF BRIGHT MID STOP DEFEAT 1
MENU.08
DIGITAL.OSD DIGITAL OSD MODE 0
OSD.CONT OSD CONTRAST CONTROL 1
OSD.H.POS OSD HORIZONTAL POSITION 22
MENU.09
H.FREQ HORIZONTAL FREQUENCY 27
C.KILL.OFF COLOR KILL OFF 0
AUDIO.SW AUDIO SWITCH 0
T.DISBLE TEST MODE SWITCH DISABLE 1
MENU.10
OPT.TV.AV OPTION TV/AV 1
OPT.COLOR OPTION COLOR 0
OPT.V-CHIP OPTION V-CHIP 1
OPT.CCD OPTION CCD 1
OPT.CLOCK OPTION CLOCK 1
OPT.P-ON OPTION P-ON 0
SRCH.SPEED SEARCH SPEED 0
ROM.CORREC ROM CORRECTION 0
Notes:
The data sheet may differ dependent on different models.
The data sheet may differ dependent on different CRTs for the same model.
3. Service Mode Adjustment
1) Sub-brightness
a) Receive colour signals.
30
Page 3

SERVICE MANUAL
b) Set the contrast to maximum and brightness to medium.
c) Set the chroma to medium.
Enter the TV to the Service mode. Select “SUB-BRIGHT” by pressing the
remote control
5 minutes in the mode.
d) Adjust the sub-bright data until blurry picture does not appear on the high bright area of the screen
and too dim picture not on the low-bright area.
e) Set the contrast and brightness to maximum or minimum, and then test normal picture alternation.
If the picture does not become dark when the contrast and brightness are set to minimum, or not
f)
become bright when set to maximum
2) White balance adjustment
a) Turn on the TV and preheat it for over 7 minutes.
b) Use the remote control to set the contrast to maximum and the brightness to medium. Set the
chroma to minimum.
c) Enter the TV to the Service mode, and set the following data without changing other items.
d) Pull out the external antenna and press the MUTE button once on the remote control until a right
horizontal line appears on the screen. Adjust the R-DRV data to get 160V±0.5 green gun voltage
across the CRT RGB PCB.
e) Adjust the G-DRV and B-DRV data according to Step 4 so that the bright horizontal line turns to
yellow, then to white.
3) Horizontal centering adjustment
Enter the TV to the Service mode and receive Philips test pattern. Select “H.PH/60H” by pressing the
/ buttons on the remote control, and adjust horizontal picture position in the center of screen by
pressing the data adjustment buttons.
4) Vertical centering adjustment
Enter the TV to the Service mode and receive Philips test pattern. Select “V.POS/60H” by pressing the
/ buttons on the remote control, and adjust vertical picture position in the center of screen by
pressing the data adjustment buttons.
5) Vertical amplitude adjustment
Enter the TV to the Service mode and receive crosshatch test pattern. Select “V.SIZE” by pressing the
/ buttons on the remote control, and adjust vertical amplitude by pressing the data adjustment
buttons so that vertical amplitude is not enough. Continue to adjust vertical amplitude by pressing the
data adjustment button until the first bar on the pattern touches edge of the screen.
and set the data to 31 by pressing the data adjustment buttons. Operate the TV for
then adjust the sub-bright data to get normal picture.
R-DRIVE············70
G-DRIVE············15
B-DRIVE············70
/ buttons on the
31
 Loading...