

Page 1
MERCHANT OPERATING GUIDE
ANZ POS TURBO 2
SIMPLE AND RELIABLE PAYMENT SOLUTIONS
Page 2

CONTENTS
1. Welcome 4
1.1 Merchant Agreement 4
1.2 Important Contact Details 4
1.3 Authorisation 4
1.4 Floor Limits 5
1.5 Change of Business Details 6
2. Cards You Can Accept 7
3. Merchant Cards 8
4. Equipment Maintenance 8
5. Stationery 9
6. Fraud Minimisation 9
6.1 Card Present Card Checklist 9
6.2 Fraud Minimisation for Credit Cards 11
6.3 Fraud Minimisation for Debit Cards 13
6.4 Cards Left at Premises 13
7. Handling Cardholder information securely & PCI DSS 13
7.1 PCI DSS – Payment Card Industry Data Security Standard 14
7.2 Securing transaction Records 15
8. Errors and Disputes 16
8.1 Typical Causes of Return and Corrections 16
8.2 Chargebacks 16
9. ANZ POS Turbo 2 17
9.1 Terminal Features 17
9.2 Terminal Keypad 18
9.3 Card Reader 18
9.4 How to Load Printer Paper 19
9.5 How to install ANZ POS Turbo 2 terminal 19
9.6 How to secure the Multi-com Adapter 24
10. Modes of Operation 25
10.1 Start Screen 25
10.2 Security Mode 25
10.3 Training Mode 27
2
Page 3

11. Processing a Sale 29
11.1 How to Process a Cheque or Savings Purchase transaction (Applies to both Magnetic
Stripe and Chip Cards) 29
11.2 How to Process a Credit Purchase transaction using a Magnetic Stripe Card or a Chip
Card 31
11.3 How to Process a Purchase transaction using a Contactless Card or Smartphone 35
12. Processing a Cash-out Only transaction 37
13. Processing a Refund transaction 39
14. Electronic Fallback (EFB) Processing 45
15. Manual transaction Processing 51
15.1 Paper Voucher Processing 51
15.2 Hand key (Manual Entry) Processing 57
16. Mail, Telephone and eCommerce Order Processing 60
16.1 How to Process a Mail Order transaction (Scheme Cards only) 61
16.2 How to Process a Telephone Order transaction (Scheme Cards only) 63
16.3 How to Process an eCommerce Order transaction (Scheme Cards only) 65
17. Optional Features 67
17.1 Tip@Terminal (Tip with PIN) transactions 67
17.2 Pre-Authorisation 72
17.3 Customer Preferred Currency 83
17.4 Low Value Payments 86
17.5 Multi-Merchant Facilities 88
18. Terminal Error Messages 92
19. Settlement 96
20. Print Totals 97
21. Reprint the Last Record 100
22. Transaction Detail Report 100
23. Configuring Comms 101
24. Filing and Retention of Transaction Records and Vouchers 110
3
Page 4

1. WELCOME
We are pleased to welcome you as an ANZ Merchant and look forward to a long association with you.
This Operating Guide provides you with information on cards you can accept, ways to reduce
fraud and what to do if errors or disputes are incurred. It also contains clear and easy-to-follow
instructions on how to process transactions via your ANZ Terminal.
Please take time to read this manual thoroughly and ensure that your staff read it too.
1.1 MERCHANT AGREEMENT
Your ANZ Merchant Agreement contains valuable information and important requirements
relating to operating procedures. This Merchant Operating Guide forms part of the ANZ Merchant
Agreement and may be changed or replaced by us in accordance with the terms of the merchant
agreement.
ANZ strongly recommends that you follow the security checks and procedures in this guide to
assist in identifying and minimising fraudulent, invalid or unacceptable transactions.
ANZ may conduct an investigation if a transaction is believed to be fraudulent. The operators of the
applicable card schemes may also conduct their own investigations. Your Merchant Agreement
outlines the circumstances in which you will be liable for such transactions. If it is found that you have
processed invalid or unacceptable transactions, you may be liable for the value of those transactions.
Please refer to General Conditions, ANZ Merchant Services for more details.
1.2 IMPORTANT CONTACT DETAILS
ANZ Merchant Services (24 hours a day/7 days a week): 1800 039 025 or [email protected]
Online Stationery Ordering: anz.com/merchantconnect
Authorisation Centre:
• Credit Cards (Visa® and MasterCard®) 1800 999 205
• Charge Cards (Diners Club) 1800 331 112
• Charge Cards (American Express/JCB) 1300 363 614
• Debit Cards (Cheque/Savings Accounts) 1800 039 025
NOTE: Calls to 1800 numbers from a mobile phone will incur normal mobile phone charges.
1.3 AUTHORISATION
Your terminal is designed to automatically seek authorisation from the cardholder’s Card Issuer
while processing an electronic transaction.
Authorisation confirms that the card number is a valid card number and that there are sufficient
funds in the account. Despite a transaction being ‘authorised’, the merchant bears the risk that the
customer is not the true cardholder.
Authorisation does not amount to verification that the transaction is genuine nor does it
authenticate the customer.
4
Page 5

• Authorisation of the transaction does not mean that the true cardholder has authorised
the transaction
• Authorisation does not protect the merchant from chargebacks
• The bank, ANZ cannot guarantee that a transaction has been conducted by the true
cardholder.
Authorisation Declined
Where an Authorisation is declined, please seek an alternative method of payment. If the
customer cannot pay, the goods should be reclaimed. For goods that cannot be reclaimed (e.g.
food items, petrol etc.), request photographic identification such as a Driver’s Licence or take a
description of the person and arrange with the customer to provide an alternative method of
payment. If unsuccessful, report the incident to the Police.
1.4 FLOOR LIMITS
A Floor Limit is a dollar amount set for a particular type of card transaction processed via your
merchant facility. Please note that Floor Limits relate to all transactions. Your Letter of Offer
outlines all Authorised Floor Limits that are specific to your business. Some of these limits are
specific to your business or industry, please insert these Authorised Floor Limits in the appropriate
spaces provided.
Authorised Floor Limits
Credit Card Floor Limits (including Visa® and MasterCard® Debit transactions)
Manual (Imprinter):
Electronic Fallback:
Please insert your Authorised Floor Limit
Please insert your Authorised Floor Limit
Internet: $0
Mail Order & Telephone Order: $0
All Other Electronic transactions: $0
NOTE: Please refer to your Merchant Agreement for further information on Floor Limits that apply to Manual
Imprinter and Electronic Fallback.
Debit Card Floor Limits (not including Visa® and MasterCard® transactions)
• All Merchants cash/combined purchase/cash $0
• Service stations, taxis/limousines, liquor and convenience stores $60
• Supermarkets $200
• All Other $100
Charge Card Floor Limits
Diners Club: American Express:
NOTE: A $0 Floor Limit applies to all Hand key Mail/ Telephone Order and eCommerce transactions.
For transactions over the Authorised Floor Limit, you must phone the Authorisation Centre using
the phone numbers outlined in section 1.2 to verify if the account has sufficient funds available to
cover the transaction. If approval is not obtained for transactions above your Authorised Floor Limit,
you risk the transaction being charged back.
5
Page 6

When you contact the Authorisation Centre, a transaction will be ‘approved’ or ‘declined’.
Ifdeclined, please advise the customer to contact the Card Issuer and seek an alternative method
of payment.
NOTE: An alpha character may be provided as part of the approval code. Select the numeric key
corresponding to the alpha character and press <▼> key to scroll through options. Example: If character ‘C’ is
required, select number ‘2’ on the pinpad and press the <▼>key until you scroll to character ‘C’, then press
ENTER.
NOTE: A transaction may still be charged back despite being authorised by the Authorisation Centre.
NOTE: A $0 floor limit applies to all card transactions.
1.5 CHANGE OF BUSINESS DETAILS
General Conditions describes various situations in which you must notify us of a change to your
circumstances.
Please visit anz.com/merchantconnect to complete and submit the respective form or contact
ANZ Merchant Services on 1800 039 025 if there are any changes to your:
• Business name and/or address
• Business type or activities including changes in the nature or mode of operation of
your business
• Mailing address
• Ownership
• Bank/branch banking details
• Telephone or fax numbers
• Industry
• Email address.
Should your business be sold, cease to trade or no longer require an ANZ Merchant Facility, please
contact ANZ Merchant Services on 1800 039 025.
The ANZ Merchant Services General Conditions sets out your obligations when your business is
sold, ceases to trade or no longer requires an ANZ Merchant Facility.
You must ensure that all stationery, promotional material, transaction Vouchers, Card Imprinters
and equipment (including Electronic Terminals) is returned to ANZ, based on the closure
instructions provided by ANZ Merchant Services.
Please note that it is the authorised merchant’s responsibility to ensure that the Merchant Facility
is returned. Failure to do so, may result in the continual charge of Terminal Rental Fees until all
equipment is returned in accordance with condition 16(iv) of the ANZ Merchant Services General
Conditions.
6
Page 7

2. CARDS YOU CAN ACCEPT
Credit Cards
Cardholders can use credit cards (Visa, MasterCard and UnionPay) to access their credit card
accounts. Cardholders can also access cheque and savings accounts where those accounts are
linked to the credit card.
Cardholders can access these accounts through the ANZ terminal using their PIN (Personal
Identification Number) or in certain circumstances, their signature. Cardholders can also use their
contactless card or Smartphone to make the purchase by tapping the terminal’s contactless
reader. For contactless transactions under a certain purchase value, PIN or signature may not be
required to verify a transaction.
Debit Cards
Cardholders possessing a debit card will use a PIN for verification in most circumstances.
Cardholders can also use their contactless card or Smartphone to make the purchase by tapping
the terminal’s contactless reader. For contactless transactions under or equal to the certain
purchase value, PIN or signature may not be required to verify a transaction.
Note: Debit Cards are not allowed to process Electronic Fallback, Paper Voucher or Manual transactions
unless an authorisation has been obtained, (refer to section 1.4 Floor Limits).
Charge Cards
Processing charge cards is essentially the same as processing credit card transactions. To accept
charge cards, you must have an agreement with the charge card Issuer (e.g. Diners Club, American
Express and JCB).
NOTE: Pre-authorisation transactions still require you to swipe or insert the customer’s debit cards and credit
cards in order to complete the transaction. You are unable to tap the customer’s contactless card or
Smartphone to complete these transactions.
7
Page 8
3. MERCHANT CARDS
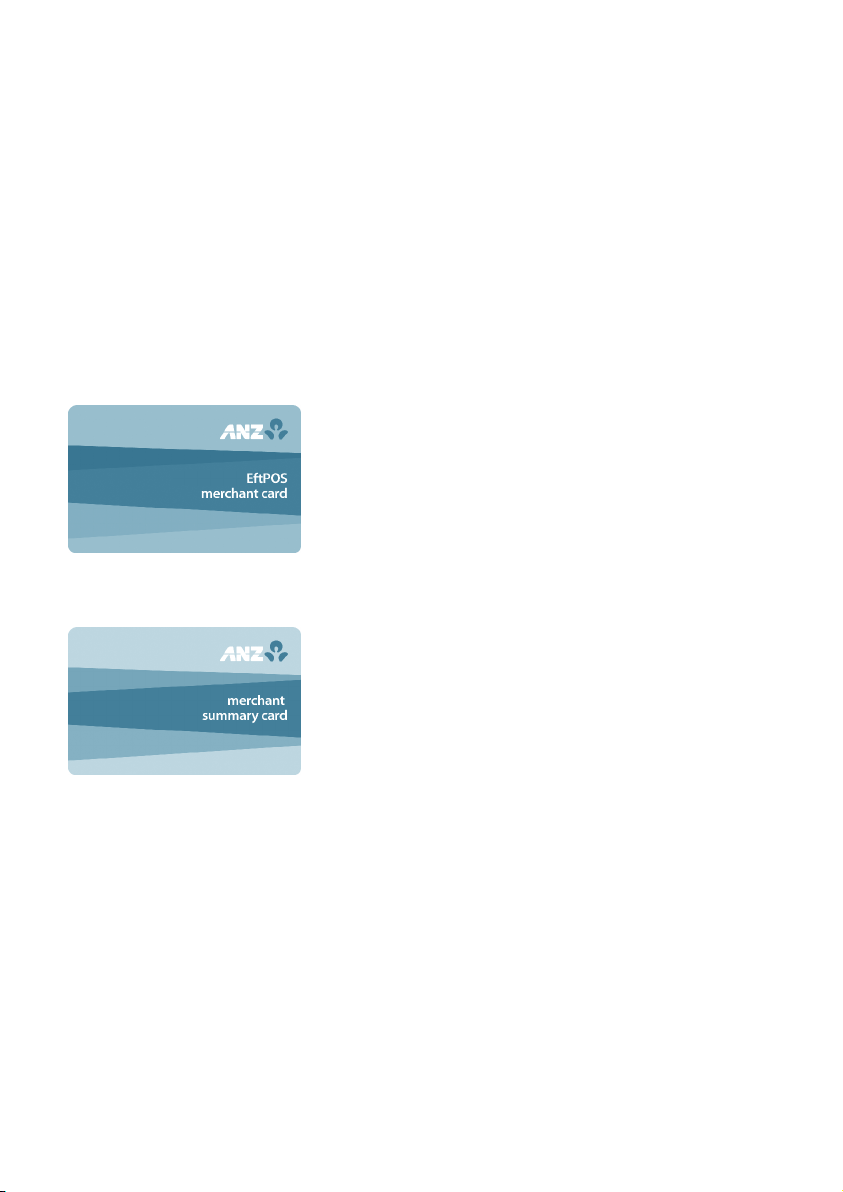
You have been provided with two different types of Merchant Cards. These are designed to assist
you with different tasks, including processing Refund transactions and Manual Paper Voucher
transactions.
It is your responsibility to always keep your Merchant Cards in a safe place, and ensure only
authorised staff have access to these cards. Unauthorised access to these cards can result in
unauthorised refunds via your merchant facility resulting in theft from your business.
It is important that the correct cards are used at all times.
Replacement Merchant Cards can be ordered from ANZ Merchant Services on 1800 039 025 by the
authorised person from your business.
EFTPOS Merchant Card (Terminal ID card)
• To authorise a refund transaction, swipe through Magnetic
Stripe Card Reader
• To exit Security Mode, swipe through Magnetic Stripe Card
Reader
• To imprint your manual EFTPOS Merchant Summary
Vouchers for cheque and savings transactions
• As reference for your Terminal Identification Number (TID).
Merchant Summary Card (Merchant ID Card)
Your Merchant Summary Card is required when you imprint
your Merchant Summary Voucher for Manual Credit Card
transactions and as a reference for your ANZ Merchant
Identification Number (MID).
4. EQUIPMENT MAINTENANCE
It is your responsibility to provide a clean operating environment for your terminal. Liquids and
dust may damage the terminal components and can prevent it from operating. To order a
Magnetic Stripe Card Reader Cleaner, please visit anz.com/merchantconnect or contact ANZ
Merchant Services on 1800 039 025.
To prevent a fire, power units and cords should be inspected regularly. If any damage to the
power units or cords are found on your terminal, please contact ANZ Merchant Services on
1800 039 025 for assistance.
It is important to clean your terminal regularly to maintain its operating efficiency as you may
be charged if it is damaged. The terminal and screen may be wiped clean using a damp cloth.
Do not use abrasive materials. Use a soft brush to keep the keypad dust-free.
8
Page 9

NOTE:
• Please do not tamper with or remove the terminal housing
• Do not place the stickers on the terminals
• Do not disconnect your terminal’s power supply or communication line unless instructed to do so by ANZ
Merchant Services.
5. STATIONERY
You have been supplied with an initial stock of stationery including:
• 4 x Paper Rolls (for electronic terminals only)
• 25 x Credit Card Summary Envelopes
• 25 x Credit Card Sales Vouchers
• 25 x Credit Card Refund Vouchers
• 25 x Merchant Summary Vouchers
• 25 x Cheque/Savings Summary Envelopes
• 25 x Cheque/Savings Sales Vouchers
• 25 x Cheque/Savings Refund Vouchers
• 25 x EFTPOS Summary Vouchers
• Magnetic Stripe Card Reader Cleaner.
To re-order stationery, please visit anz.com/merchantconnect or contact ANZ Merchant Services
on 1800 039 025. Please note that you are only allowed to use the stationery approved by ANZ.
6. FRAUD MINIMISATION
Before commencing any transactions, please take time to read through the Fraud Minimisation,
Data Security and Chargeback guide at anz.com for further detailed, fraud information to assist
you in protecting your business.
6.1 CARD PRESENT CARD CHECKLIST
How to Safeguard Against Fraud:
• Do not let anyone service or remove your terminal without viewing proper identification
• Do not allow equipment to be used by unauthorised persons
• Keep Merchant Cards secure from unauthorised use
• Do not divulge cardholder information (e.g. card names or numbers)
• Retain the card until you have completed the security checks and obtained Authorisation for
the transaction
• Do not locate your terminal under a security camera or any other CCTV device.
9
Page 10

Be alert for customers acting suspicious or who
• Appear nervous, overly talkative or in a hurry
• Arrive on closing time
• Try to rush you or distract you
• Carry the card loose or by itself
• Have no means of identification
• Make numerous purchases under your Authorised Floor Limit
• Make purchases without regard to size, quality or price of goods
• Ask to split transactions into smaller amounts
• Ask for transactions to be manually entered
• Sign the Voucher or transaction Voucher slowly or unnaturally.
What to do if you are suspicious of a transaction
• Ask for photographic identification (e.g. Driver’s Licence or passport) and ensure that the
details match the cardholder’s name. Record the details on your copy of the transaction
Voucher
Remember:
• Don’t risk it: If you remain suspicious about the transactions, refund the credit transaction and
ask your customer for a direct deposit or some other form of payment (particularly for large
value sales)
Please report all fraudulent activities to the Police immediately.
Split Ticket Transactions
A transaction may be deemed invalid and charged back to you if, in ANZ’s reasonable opinion, it
relates to one or more purchases made in the same merchant establishment which have been
split into two or more transactions.
Chip Card Processing
Chip Cards are embedded with a security microchip that provides further protection to assist in
decreasing the risk of fraudulent transactions and chargeback disputes. Look at the card and if
there is a chip, always insert the card into the chip reader at the first instance.
10
Page 11

As with any other transaction, a degree of caution must also be exhibited when processing chip
card transactions.
If:
• The terminal displays “Insert Chip” when the card is swiped through the terminal and the card
in question does not have a chip on it, do not proceed with the transaction
• The terminal displays “Insert Chip” and the chip, when inserted, cannot be read by the
terminal, do not proceed with the transaction.
6.2 FRAUD MINIMISATION FOR CREDIT CARDS
The following checks are vital in helping you identify and minimise fraudulent credit card
transactions via your ANZ Merchant Facility.
Before commencing any transaction
Check:
• Confirm that you are authorised to accept that particular card
• Check whether the card appears damaged or altered.
Check on the front of the card that:
• Ensure that the name on the card is appropriate to the customer. Identity theft may have
occurred if you are presented with a card containing the name of a cartoon character, a
feminine name on a card presented by a male or other questionable scenarios
• The printing on the card should look professional
• The card must have current validity dates (a card can only be used from the first day of the
‘valid from’ month to the last day of the ‘until end’ month)
Note: Some Union Pay cards may be issued with zero's as the expiry date. These cards are still valid.
• Cards should look 3-dimensional and contain familiar security features such as a hologram,
signature panel and CVC2 (explanation to follow). It should not appear suspicious or be made
of inferior material.
Embossed Cards:
• The cardholder name and number should be raised and not flattened (unless it is a genuine
unembossed card)
• The first four digits of the embossed number must match the pre-printed four digits on
the card
• The embossing should be clear and even.
11
Page 12
Unembossed Cards:
• A cardholder name may or may not be included
• Can be used for electronic transactions only
• The cardholder name and number are printed rather than raised.
Check the signature during the transaction:
• A signature should appear within the signature panel on the card
• The signature or signature panel should not appear to have been altered
• The customer’s signature on the transaction Voucher should match the signature on the card.
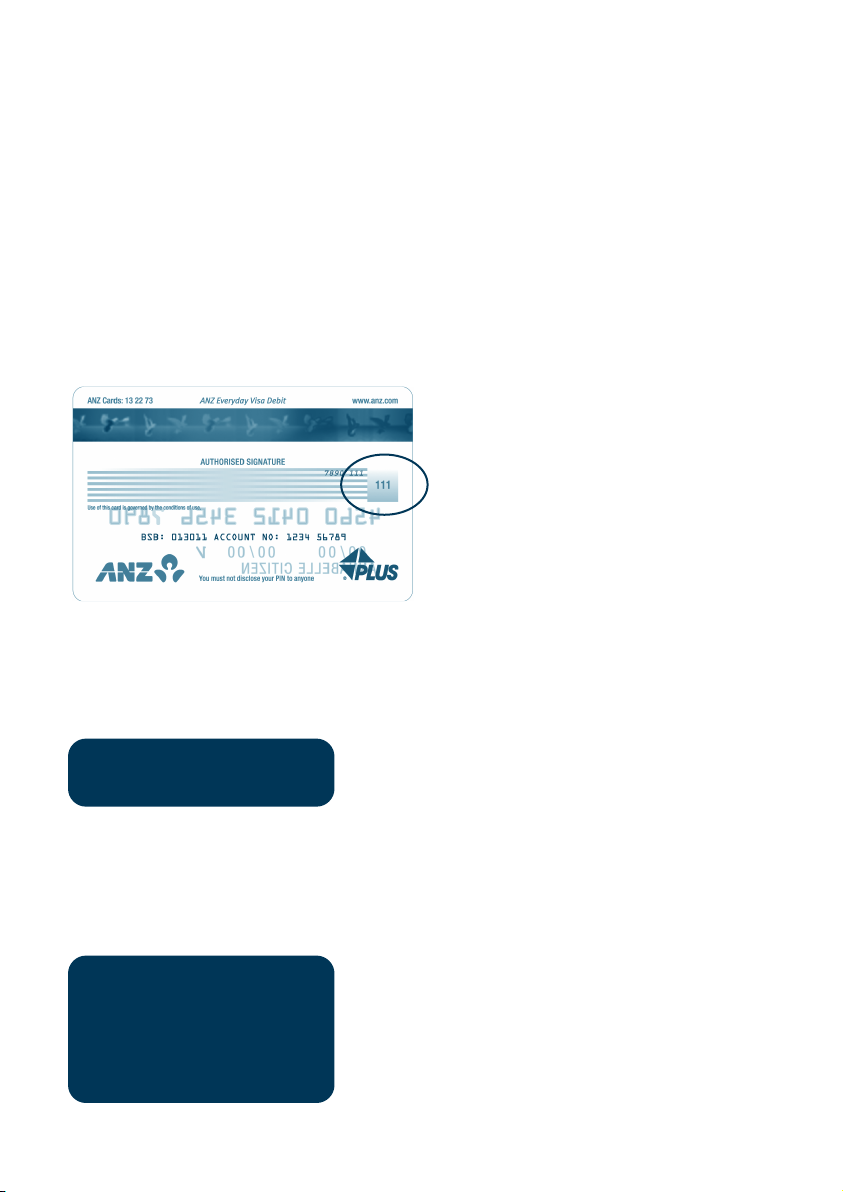
Card Validation Code (CVC2):
The Card Validation security feature is
activated in all ANZ POS Terminals when
processing Mail Order and Telephone Order
transactions. To activate the CVC2 for other
transactions please contact ANZ Merchant
Services on 1800 039 025.
If activated, a new screen will appear when
processing financial transactions.
Card Validation Code
Turn the cardholder’s credit card over and locate the last 3-digits of the number printed on the
signature panel. If the transaction is initiated via mail, telephone or Internet, instruct the
cardholder to locate and quote the 3-digits on the signature panel.
Terminal Display
At this display screen, key in the Card Validation Code
VERIFICATION NO?
then press ENTER.
NOTE: American Express cards have a four digit code located on the front of the card. Diners Club cards have
a three digit code on the reverse of the signature panel.
If the Card Validation Code has been bypassed (only pressed ENTER rather than entering CVC) the
following screen will be displayed:
REASON CODE
1. NOT PROVIDED
2. ILLEGIBLE
3. NO IMPRINT ON CARD
12
Page 13

When the transaction has been processed, check:
• The card number details against those printed on the transaction record
• The trading name and address details are correct
• Ensure that ‘Approved’ or an approval number/code is printed on the transaction record.
6.3 FRAUD MINIMISATION FOR DEBIT CARDS
The following procedures are vital in helping you identify and minimise fraudulent debit card
transactions via your Merchant Facility.
Debit transactions are to be processed by swiping or inserting the presented card and having the
customer enter their PIN or, in certain circumstances, their signature.
6.4 CARDS LEFT AT PREMISES
From time to time customers may accidentally leave their debit or credit cards behind at your
premises. To ensure any potential fraud is minimised and to better align with broader industry
practices, a change to existing handling process is required.
Upon discovering a card left at your premises, you are to perform the following tasks:
• Retain the card in a safe place for a period of up to two business days;
• Hand the card to the customer claiming the card only after having established the claimant’s
identity by comparing signatures;
• If the requisite two business days have passed, destroy the card;
• Should the cardholder enquire about their missing card, instruct them to contact their issuing
institution.
7. HANDLING CARDHOLDER INFORMATION
SECURELY & PCI DSS
You are responsible for the security of all cardholder and transaction information you receive,
process or store.
Businesses store credit card details for various purposes. While sometimes this is necessary to
support legitimate business practices, storage of card data can lead to theft of customer
information and significant impact to your business. ANZ recommends that card data is never
stored on your systems.
If your business accepts MOTO (Mail Order/Telephone Order), eCommerce, Pre-Authorisation,
Manual or Recurring transactions, you must ensure all cardholder data and transaction records are
received, processed and stored in compliance with the Payment Card Industry Data Security
Standard (PCI DSS).
If you need to process MOTO, eCommerce or recurring transactions regularly, talk to ANZ about our
secure eCommerce payment solutions. Using a secure eCommerce solution, like a Bank-hosted payment
page or PCI-compliant payment gateway, can remove most of the requirements for your business to
store or handle card data directly, ensuring enhanced security for your business.
13
Page 14

7.1 PCI DSS – PAYMENT CARD INDUSTRY DATA SECURITY STANDARD
The PCI DSS is a global security standard developed by Visa®, MasterCard®, AMEX and other card
schemes to ensure consistent security standards for all organisations that store, process or transmit
Cardholder information. Visa® and MasterCard® require all ANZ merchants to be compliant with
PCI DSS.
PCI DSS covers the following principles:
• Build and Maintain a Secure Network
• Protect Cardholder Data
• Maintain a Vulnerability Management Program
• Implement Strong Access Control Measures
• Regularly Monitor and Test Networks
• Maintain an Information Security Policy.
What are the benefits of PCI DSS compliance?
PCI DSS compliance assists your business in protecting Payment Card data and minimising risk of
theft of Cardholder information or compromise of your business systems. Maintaining a PCI DSS
compliance program helps your business identify potential vulnerabilities and may reduce the
financial penalties and remediation costs from a data breach.
Validating PCI DSS Compliance
To validate compliance with PCI DSS, your business must complete the following validation tasks:
1) Annual PCI DSS Assessment
The Self-Assessment Questionnaire (SAQ) is a free assessment tool used to assess compliance with
the PCI DSS standards. There are 4 different SAQs, covering a variety of payment processing
environments, available to download from the PCI SSC website at: https://www.
pcisecuritystandards.org/merchants/self_assessment_form.php
Compliance assessments may also be performed by completing an onsite audit with an
independent PCI approved Qualified Security Assessor (QSA). PCI maintains a list of PCI approved
QSAs at: https://www.pcisecuritystandards.org/approved_companies_providers/index.php
2) Quarterly Network Vulnerability Scans
If your business accepts payments via the Internet, or has any electronic storage of Cardholder or
transaction information, then Quarterly Network Vulnerability Scanning is required to ensure
compliance with PCI DSS.
An external vulnerability scan enables your business to assess your level of security from potential
external threats.
PCI-Approved scanning tools are used to generate traffic that tests your network equipment,
hosts, and applications for known vulnerabilities; the scan is intended to identify such
vulnerabilities so they can be corrected.
14
Page 15

ANZ provides a complimentary PCI DSS Compliance Program to our merchants, including PCI-approved
Network Vulnerability Scanning – please email [email protected] or contact ANZ on 1800 039
025 to request access to our PCI DSS program.
7.2 SECURING TRANSACTION RECORDS
In general, no Cardholder data should be stored unless it is strictly for use within the business and
absolutely necessary.
However, if you have authority from ANZ to process mail order / telephone order, eCommerce,
recurring or manual payments you may be required to store cardholder data and transaction
records. Please ensure all paper and electronic records containing cardholder data are secured
(e.g. locked filing cabinet), these may include: MOTO order forms, merchant copies of Manual
transactions, cardholder records for recurring or pre-authorisation transactions.
Where storage of cardholder data is required, you must ensure both the type of cardholder data
retained, and the method used to store it is compliant with PCI DSS and ANZ requirements.
Here are a few simple guidelines:
• Never email credit card numbers or request your customers provide their credit card number
by email
• Ensure that you process eCommerce transactions with security codes (CVV2/CVC2), but do not
store these codes after they have been authorised
• Keep cardholder data storage to a minimum, only what is necessary for business or legal needs
• Once a transaction is processed, obscure all digits except the first 6 and last 4 digits of the
credit card Number (e.g. 1234 56XX XXXX 7890) on all paper and electronic records
• Store cardholder data in a secure environment with strict controls and restricted access
• Use strong passwords which are changed at least every 90 days for all administrator roles and
users with access to your customer’s card details
• Avoid storing cardholder data on PC’s, laptops or mobile phones
• Do not store your customer’s card details online or unencrypted on your computer
• Securely dispose of cardholder data as soon as its use has expired. PCI DSS recommends
shredding, pulping, incinerating or other methods which make it impossible to reconstruct the
cardholder data. ANZ requires you keep transaction records for 30 months minimum.
Under no circumstances should sensitive information be stored; this information includes security
codes (CVV2, CVC2), PIN or magnetic stripe data.
The following sources provide guidance on card data storage:
The General Conditions – see Section 14 ‘Information collection, storage and disclosure’.
For more information, visit the PCI Security Standards Council website at
https://www.pcisecuritystandards.org/index.shtml
15
Page 16

8. ERRORS AND DISPUTES
A Return and Correction (R&C) refers to a Voucher from a debit or credit card transaction that
cannot be processed. Consequently the transaction is debited from your bank account and then
the Voucher is returned to you for correction.
8.1 TYPICAL CAUSES OF RETURN AND CORRECTIONS
• Incorrect Vouchers used and incorrect additions on Merchant Summary Vouchers
• Incomplete information e.g. card imprint cannot be read on the Voucher
• Banking of Vouchers from other card schemes e.g. American Express.
When you receive a R&C, an explanation will be given as to why it cannot be processed.
Make sure you rectify the problem before re-submitting the Voucher for processing.
Please ensure that the corrected Vouchers are submitted as soon as possible to ensure that the
Issuing Bank does not reject them as a result of being banked out of time.
8.2 CHARGEBACKS
A Chargeback is the term used for debiting a merchant’s bank account with the amount of a
transaction that had previously been credited. Chargebacks can have a financial impact on your
business. It is important that you are fully aware of your obligations, the processes involved and
possible outcomes. Please take time to carefully read through the Fraud Minimisation, Data
Security and Chargeback guide at anz.com
Please refer to the General Conditions. You may be charged back for the value of a credit or debit
(Card schemes-issued) card sale where you have failed to follow the Bank’s procedures as stated in
this Merchant Operating Guide or in the General Conditions.
NOTE: You must securely retain information about a transaction whether processed manually or
electronically for a period of 30 months from the date of the transaction or such other period required by Law
or notified by ANZ.
Chargebacks can occur for a number of reasons including a scenario where a Cardholder or their
issuing bank justifiably disputes liability for the transaction for any reason or where the Merchant
fails to comply with its obligations under the Merchant Agreement in connection with the
transaction.
A Chargeback will also occur if a Retrieval Request is left unanswered or returned out of time by
the merchant or if the supporting documentation supplied to the issuing bank is not acceptable.
In most cases, the value of the disputed transaction will be automatically debited from the
merchant’s account.
Chargebacks can occur for a number of reasons:
• Processing errors
• Unauthorised use of a card
• No signature on the receipt
• Unauthorised transactions
16
• Invalid card account number
Page 17

• transaction exceeds floor limit
• Card details not imprinted on the sales voucher
• Incorrect transaction amount
• Expired card
• transactions performed on a lost or stolen card
• Illegible details on the sales voucher
• Failing to respond to a retrieval request
• Merchandise not received by purchaser or wrong goods sent.
NOTE: The examples given above are not an exhaustive list of the circumstances in which a transaction may
be charged back to you. Please refer to the General Conditions of your Merchant Agreement for further
information on Chargebacks.
If you need assistance understanding a particular Return and Correction or Chargeback, please
contact ANZ Merchant Services on 1800 039 025 (24 hours a day, 7 days a week).
9. ANZ POS TURBO 2
This Operating Guide provides important information about processing debit and credit
transactions using your ANZ POS Turbo 2 Terminal by showing the terminal screen displays. This
terminal is designed to accept payment using Magnetic Stripe and Chip Cards as well as
Contactless Cards and Smartphones.
Please take time to read it thoroughly and ensure that your staff read it too.
9.1 TERMINAL FEATURES
The ANZ POS Turbo 2 terminal incorporates a colour graphic screen with large graphic display,
18-key backlit keypad and thermal ‘easy loading’ printer.
Contactless
status lights
Internal Contactless
Reader
Soft-function keys
CLEAR key ENTER keyCANCEL key
Magnetic Stripe
Card Reader
Function key
Chip Card
Reader
17
Page 18

9.2 TERMINAL KEYPAD
SOFT-FUNCTION KEYS
These soft-function keys allow you to access the particular account type required. They are also
used as function keys for navigating the ANZ EFTPOS MENU and Sub MENUs.
NUMBER KEYS (Black)
Use the number keys to enter in the transaction amounts, Authorisation Numbers and when the
hand key function is required.
ENTER (Green)
The ENTER key will direct you to the ANZ EFTPOS MENU. It also confirms that all values and details
(including signatures and PINs) are correct in the EFT portion of the purchase, cash-out (refer to
section 12) and Refund transactions (refer to section 13). It confirms that the transaction can be
sent to the Bank for verification and approval.
CANCEL (Red)
The CANCEL key is used to cancel the current function and return the terminal to the idle state.
CLEAR (Yellow)
Press the CLEAR key to correct any invalid data entry. The CLEAR key is also used as a FEED key.
Func (Black)
Use the FUNC key to access the terminals function menus and manual hand key processing.
9.3 CARD READER
Magnetic Stripe Card Reader
The card can be read via the Magnetic Stripe Card Reader located on
theright hand side of the terminal.
The card can be read by swiping from the top to the bottom of the terminal
(or vice versa), with the magnetic stripe facing down towards the terminal.
Advise the customer to use a regular movement to ensure a reliable
card reading.
Chip Card Reader
Advise the customer to insert the Chip Card horizontally into the bottom of
the terminal with themetal chip facing upwards. Leave the Chip Card in this
position throughout the transaction.
The Chip Card can be removed from the terminal when signature
verification is required or as instructed by the terminal.
18
Page 19
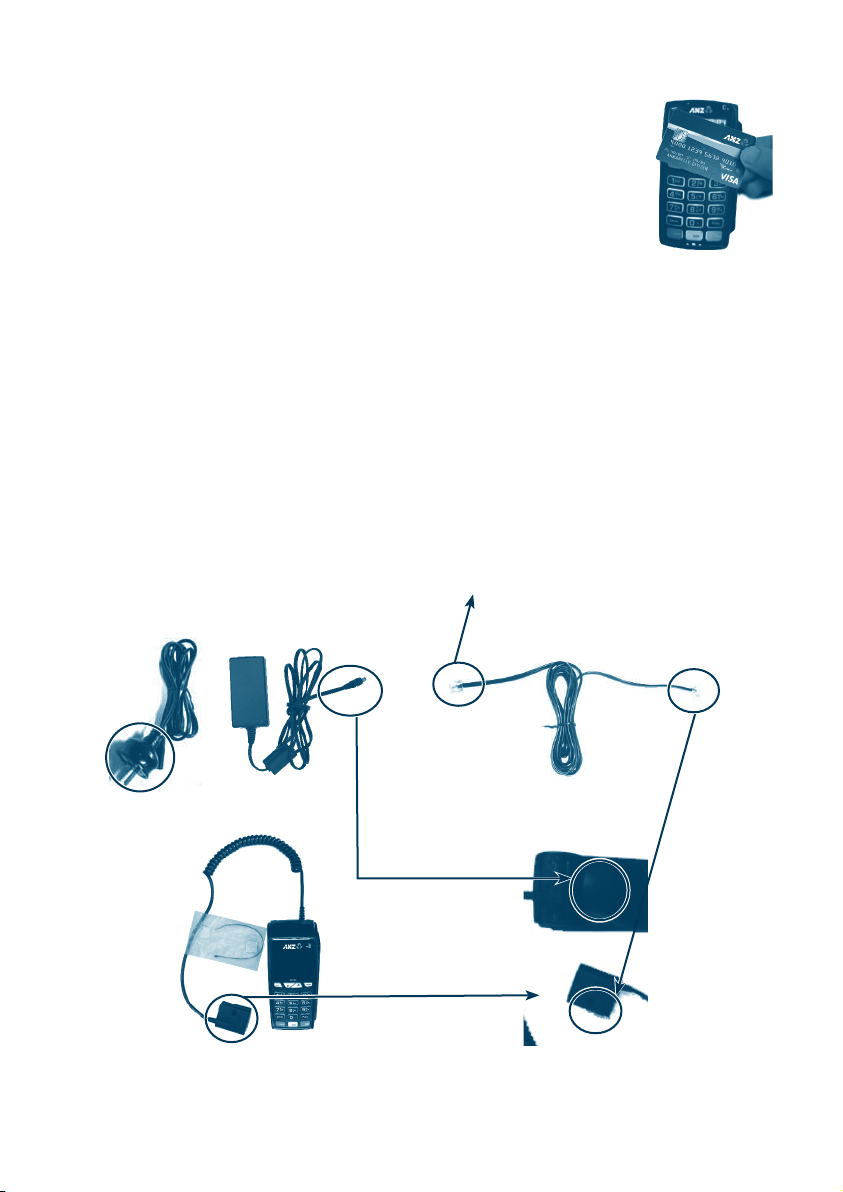
Contactless Reader
Advise the customer to tap the contactless-enabled card or Smartphone
within 4cm of the main screen on the ANZ POS Turbo 2 terminal until the
lights are lit in sequence above the top of the terminal screen, when all four
status lights are illuminated, you will hear the long "Beep", then follow the
terminal prompts to complete the transaction.
9.4 HOW TO LOAD PRINTER PAPER
• Open the paper compartment by lifting the catch located at the rear of the terminal and pull
the cover to the rear of the terminal
• Insert the paper roll (diameter 40mm) in the compartment
• Pull the paper up to the top of the terminal and hold in position
• Maintain the paper and close the lid
• Press the top of the lid in the centre until it clips into position.
NOTE: Do not tamper with or remove the terminal housing.
9.5 HOW TO INSTALL ANZ POS TURBO 2 TERMINAL
Connect to telephone
socket at wall
2.
Example of power supply
A. Example of Multi-com Adapter
1.
4.
3.
Example of communication cable
(Ethernet cable or telephone line)
1.
3.
B Example of Multi-com Adapter
19
Page 20

Please plug in the terminal using the above Multi-com Adapter by following the below installation
instructions.
A. Place your ANZ POS Turbo 2 terminal on a clear, flat surface near the mains power outlet and a
telephone socket (if dial-up communication is required) or Ethernet IP socket (if IP
communication is required).
B. Connect the power supply (number 1) to the power supply connector on the Multi-com
Adapter. Then connect the telephone line or Ethernet cable (number 3) to the phone line
connector (if dial-up communication is required) or Ethernet connector (if IP communication is
required). Once the communication and power supply has been connected, it is
recommended that it stays with the terminal at all times.
C. Connect the power supply (number 2) to the main power outlet and the phone line or
Ethernet IP socket (if IP communication is required) (number 4) to the telephone socket at the
wall (if dial-up communication is required).
Once the terminal is connected, please follow the following instruction when installing your
terminal.
Swipe your EFTPOS Merchant Card (please refer to
SWIPE
MERCHANT CARD
section 3 for more information).
Note: If you do not have this, press <CLEAR> and manually key
in the Terminal ID, then press <ENTER>.
Press ENTER.
POS?
HDLC ID?
00
INTERFACE TYPE?
1-STANDALONE
COMMS MODE
1-DIAL-UP CNP
CONNECTION
1-STANDALONE
20
Press ENTER.
Press ENTER.
Press 1 to choose Dial-up CNP and press ENTER.
Please select 1 for Standalone and press ENTER.
Page 21

ANZ LINE SPEED?
1-1200
TMS LINE SPEED?
3-14400
PRE/POST DIAL?
1-PRE-DIAL
DIAL MODE?
1-TONE
PABX?
0
HOST PHONE NO?
1800xxxxxx
Please select 1 for 1200 and press ENTER.
Please select 3 for 14400 and press ENTER.
Please select 1 for PRE-DIAL and press ENTER.
Please select 1 for TONE and press ENTER.
Press ENTER.
If a 0 is required for an outside line, please ensure this is
shown on this screen, otherwise press ENTER.
Press ENTER.
TMS PHONE NO?
1800xxxxxx
QUICK DIAL?
1-ON
TMS NII
xxx
ANZ SHA?
48xxxxxxx
Press ENTER.
Press ENTER.
Press ENTER.
Press ENTER.
21
Page 22
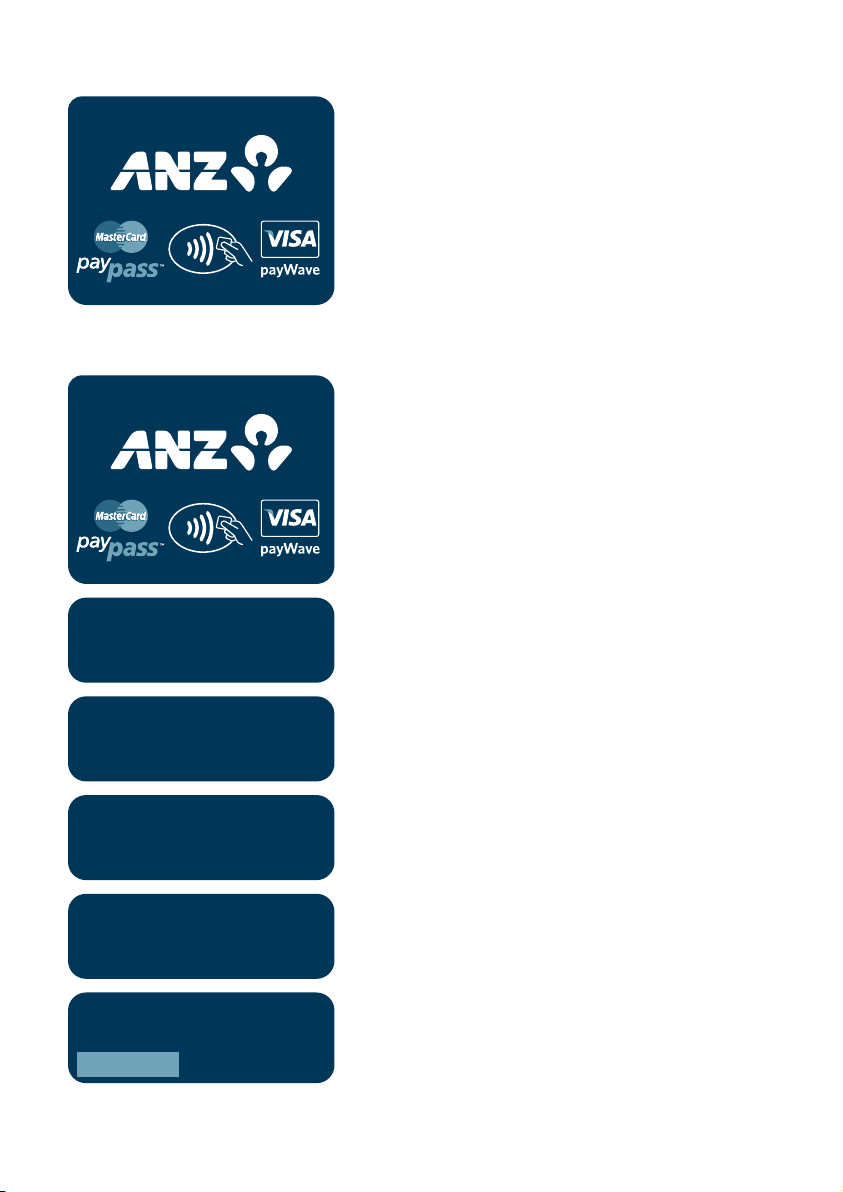
TMS Logon
TMS REQUIRED
The terminal has completed the initialisation and
returned to the main screen with a “TMS REQUIRED”
message.
TMS REQUIRED
FUNCTION?
TMS LOGON?
ENTER OR CLEAR
TMS ACTION
CONNECTING
TMS ACTION
LOGON
This screen is displayed if the terminal is required to log
on to TMS.
Press FUNC Key and key in 2468 then press ENTER.
Press ENTER.
Terminal status is displayed.
Press ENTER.
2222
TMS ACTION
PLEASE WAIT
/
Page 23

TMS LOGON
SUCCESSFUL
This screen is displayed when TMS logon is
successful.
INIT REQUIRED
Terminal Initialisation
INIT REQUIRED
FUNCTION?
Once the TMS LOGON is successful, please press ENTER
to go back to main screen with “INIT REQUIRED”
message.
This screen is displayed if the terminal is required
to initialise.
Press FUNC key and key in 87 then press ENTER.
REMOTE INIT?
ENTER OR CLEAR
REMOTE INIT
IN PROGRESS
INITIALISING
PLEASE WAIT
Press ENTER.
Terminal status is displayed.
2323
Page 24
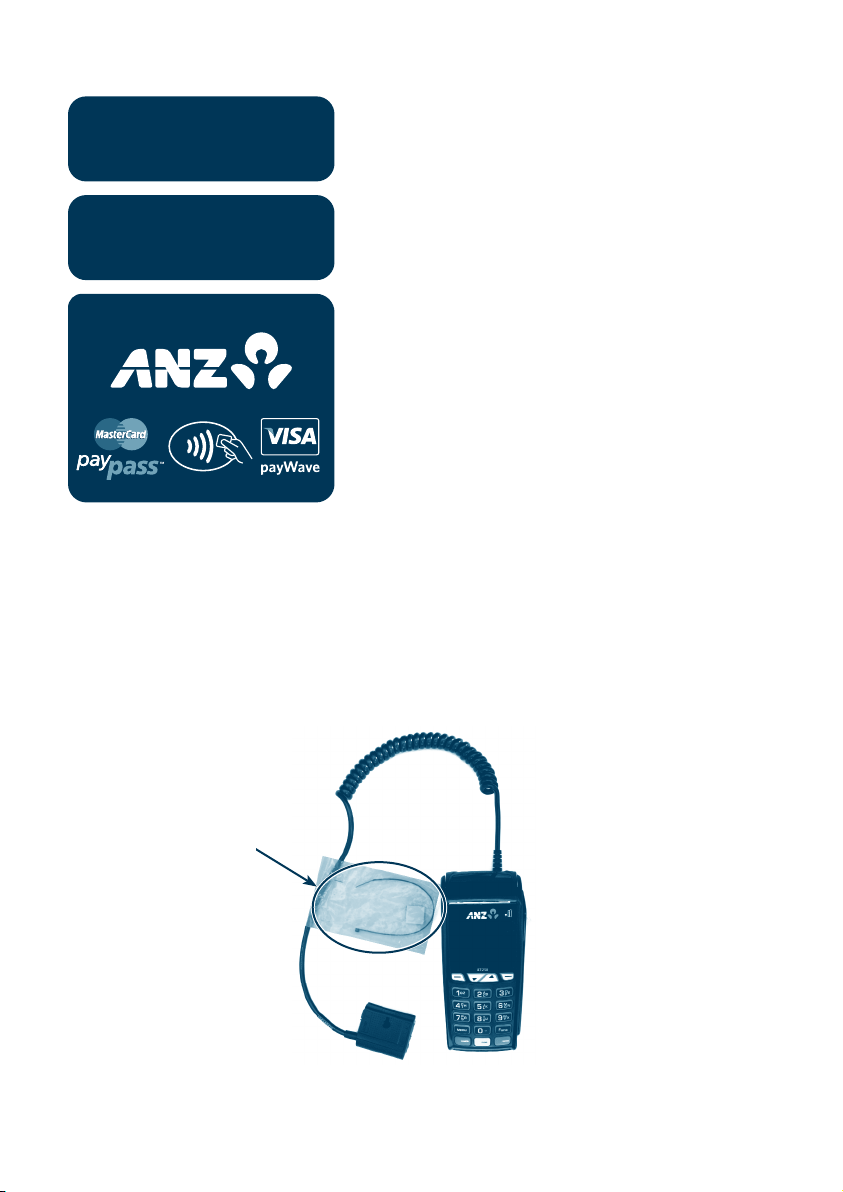
REMOTE INIT
IN PROGRESS
INITIALISING
PLEASE WAIT
READY
The terminal has completed the initialisation and
returned to the main screen.
9.6 HOW TO SECURE THE MULTI-COM ADAPTER
The cable tie and self-adhesive are provided with ANZ POS Turbo 2 terminal, please follow the
below instructions to secure your Multi-com Adapter.
Please note that it is highly recommended to attach the Multi-com Adapter to the terminal’s work
area in order to reduce the stress on the terminal and connections.
Cable tie &
self-adhesive
24
Example of Cable tie & self-adhesive
Page 25
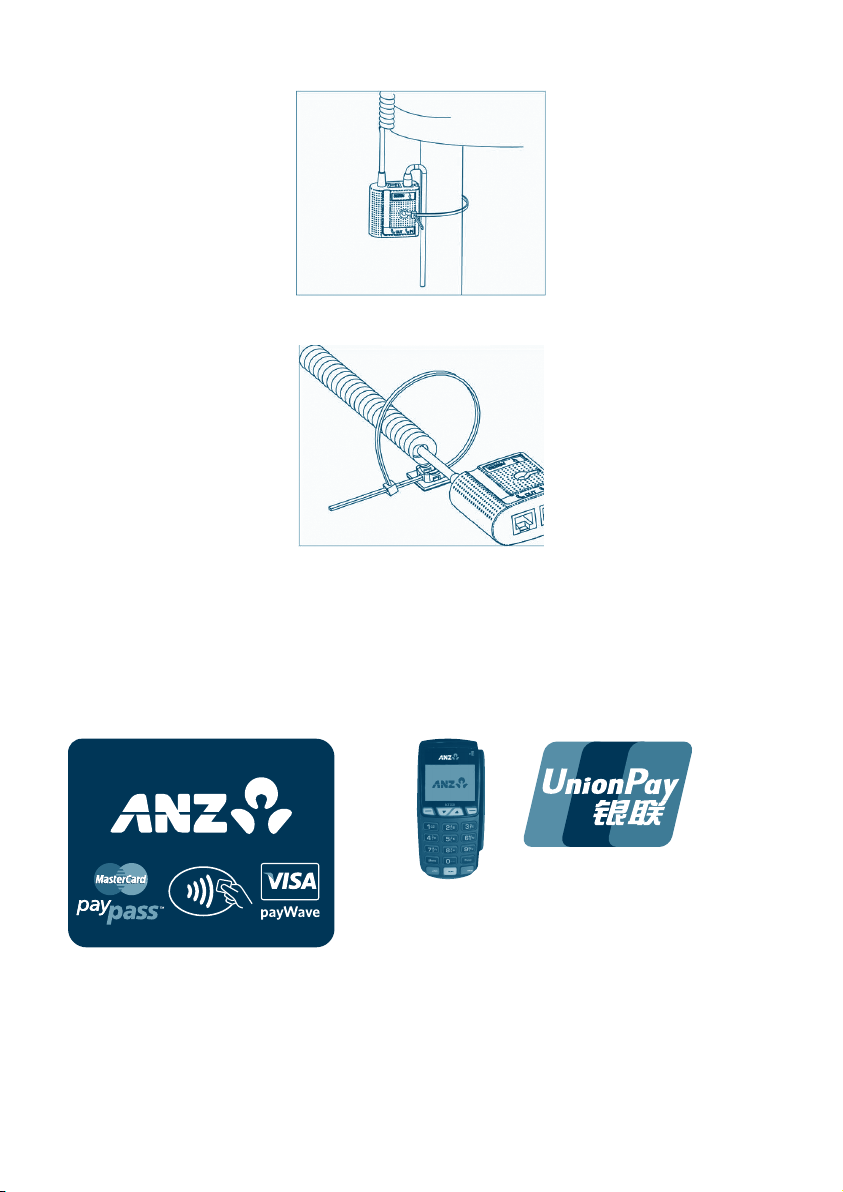
1) Secure the Multi-com Adapter with cable tie to attach to a pole or pillar.
2) Secure the Multi-com Adapter with cable tie & adhesive.
10. MODES OF OPERATION
10.1 START SCREEN
Your ANZ terminal is ready to begin accepting transactions.
READY
Note: The screen display with alternate scheme logos accepted
on your terminal. Charge card logo's may also appear if you
accept these.
10.2 SECURITY MODE
Security Mode is used to prevent unauthorised use of the terminal when it is left unattended.
NOTE: Your EFTPOS Merchant Card must be used to exit Security Mode. Please ensure that the card is
available prior to entering Security Mode.
25
Page 26
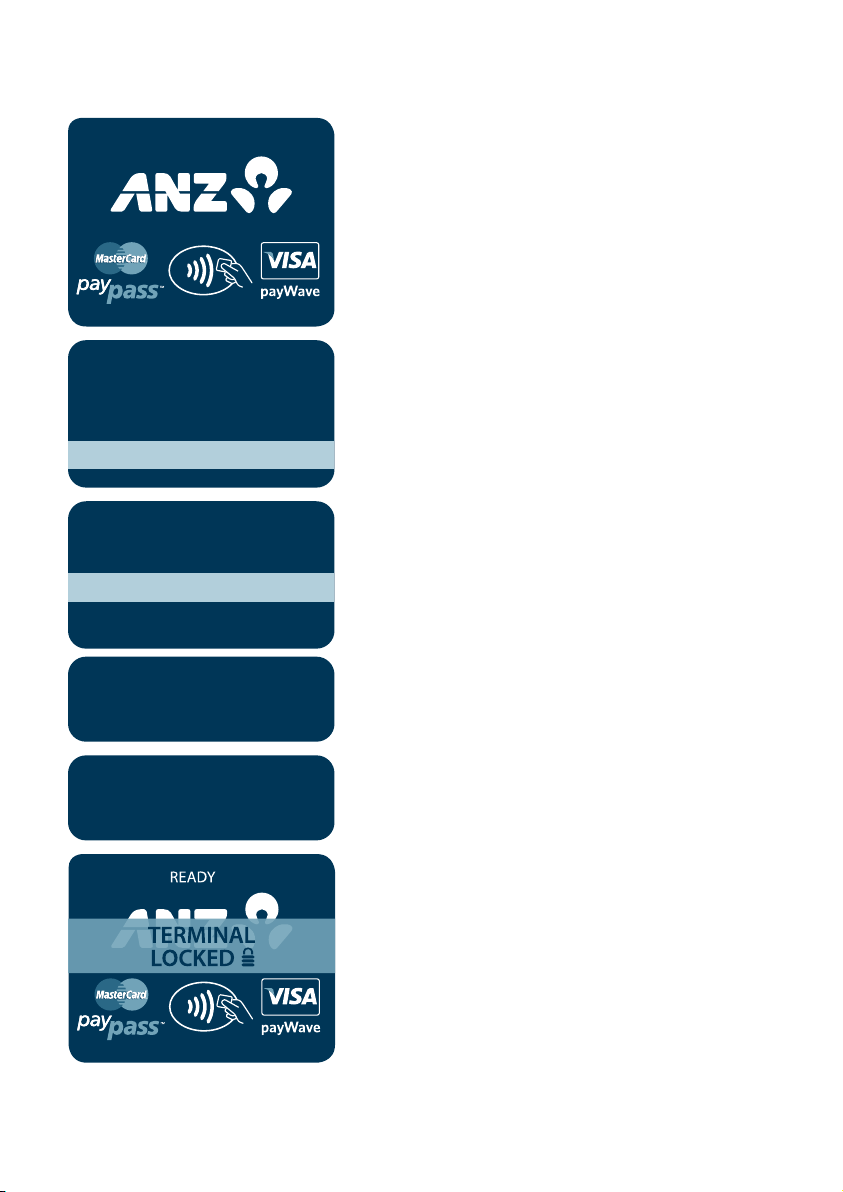
How to Enter Security Mode
READY
ANZ EFTPOS MENU
6. TIPPING
7. REPORTS
8. SUPERVISOR
SUPERVISOR MENU
1. INITIALISATION
2. XTRA FUNCTIONS
3. COPY
TERMINAL
FUNCTIONS
Press ENTER to go to ANZ EFTPOS MENU.
Press <▼> key to go to SUPERVISOR and then press
ENTER or the number associated to select it.
Press <▼> key to go to XTRA FUNCTIONS and then
press ENTER or the number associated to select it.
Press 1 to enter Security Mode.
SECURITY MODE?
ENTER OR CLEAR
26
Press ENTER to confirm Security Mode is required.
This screen will display when the terminal is locked in
Security Mode.
Page 27
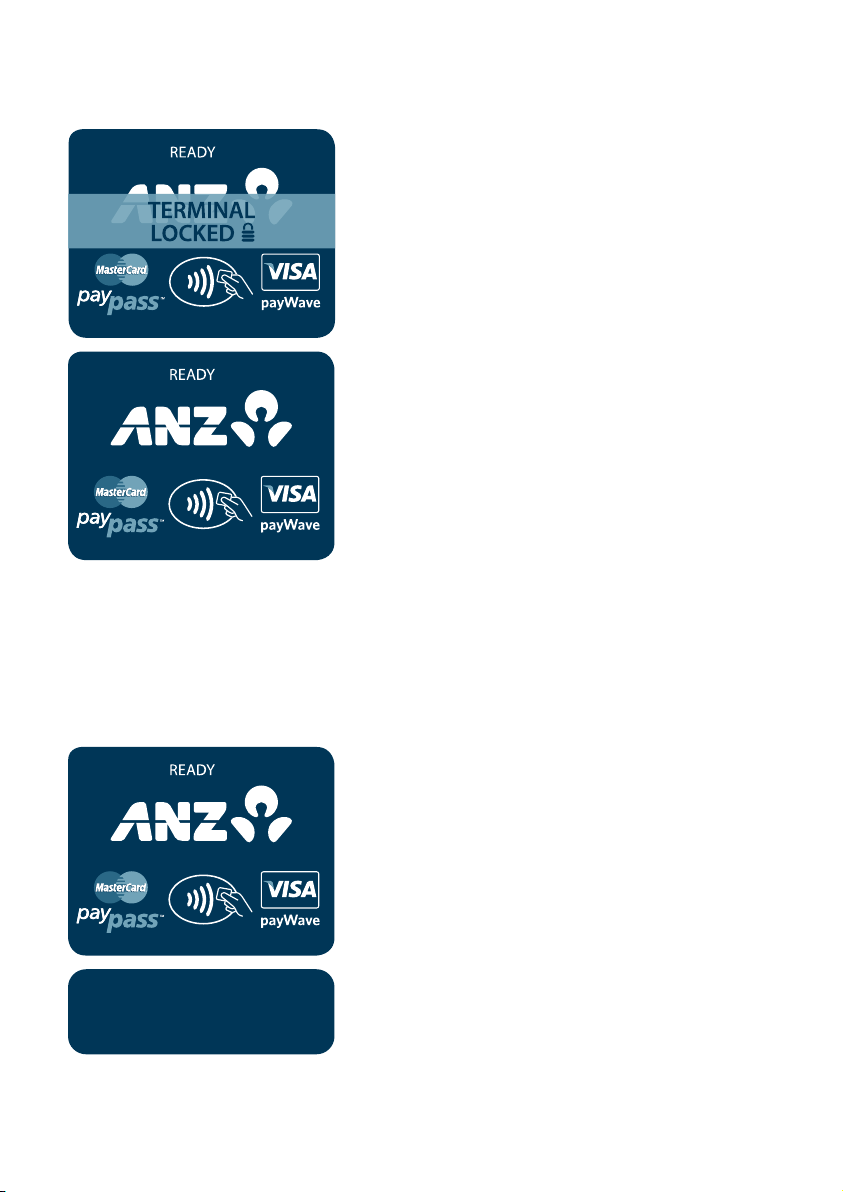
How to Exit Security Mode
Swipe your EFTPOS Merchant Card.
10.3 TRAINING MODE
Training mode is an ideal tool for familiarising yourself and your staff with basic functions.
NOTE: Magnetic Stripe Transaction, Chip Card Transaction and Contactless Card or Smartphone Transaction
training are supported.
How to Enter Training Mode
FUNCTIONS?
Press the FUNC key.
Key in 9999 then press ENTER.
27
Page 28
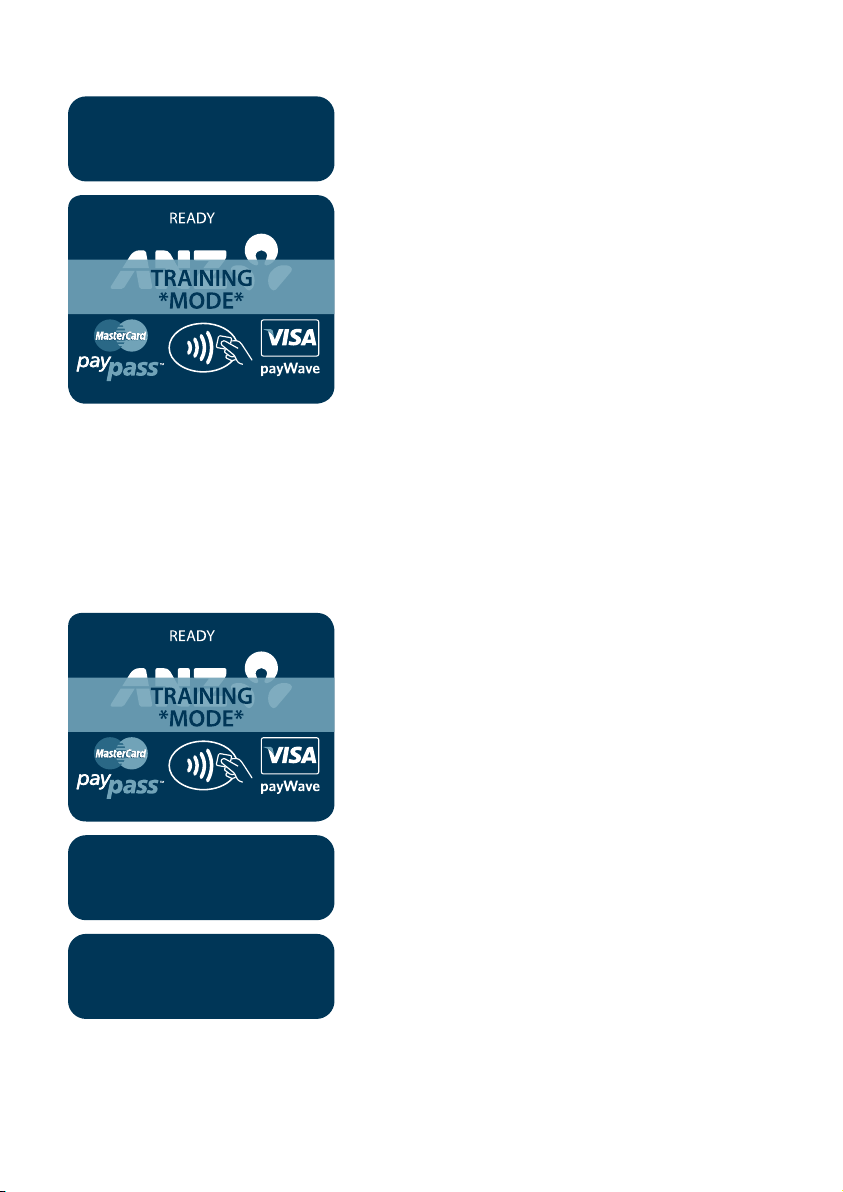
TRAINING MODE?
ENTER OR CLEAR
How to Exit Training Mode
Press ENTER.
Transactions can be processed from this point
(ie. initialisation, purchase, cash-out, refund, totals,
settlement and the reprint last record function).
The merchant name and address for all transaction
Records is replaced with:
ANZ BANK
***TRAINING ONLY***
NOT A VALID TRANSACTION
The message lines at the bottom of the receipt will not
be printed and the Terminal ID will always be
12345678901.
Log on, transaction, totals, settlement and reprint receipt
functions are available in training mode.
NOTE: Remember to exit Training Mode to process ‘live’
transactions.
Press the FUNC key.
28
FUNCTIONS?
TRAINING MODE?
ENTER OR CLEAR
Key in 9999 then press ENTER.
Press CLEAR. The start screen will be displayed to allow
transactions.
Page 29
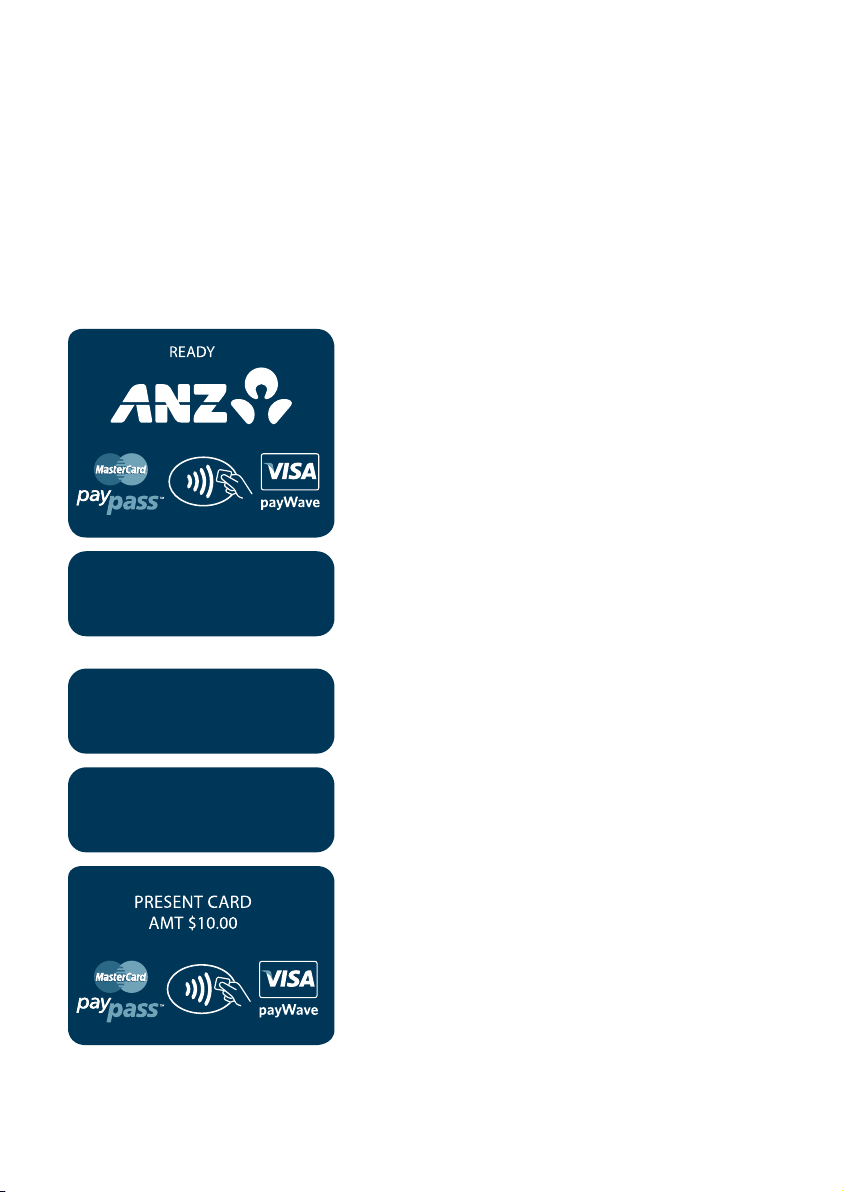
11. PROCESSING A SALE
11.1 HOW TO PROCESS A CHEQUE OR SAVINGS PURCHASE
TRANSACTION (APPLIES TO BOTH MAGNETIC STRIPE AND
CHIP CARDS)
Except in the case of purchases in separate departments within a retail outlet, you must include all
items, goods and services purchased in a single transaction for the total amount of such
purchases, except in the case of a partial payment or delayed delivery situation. Please refer to the
General Conditions, Section 6(iv) for further information on these exceptions.
Perform card security checks , please refer to section 6
Fraud minimisation for further information.
Key in the purchase amount then press ENTER.
PURCHASE AMOUNT?
$10.00
Key in the cash amount using the numeric keys if
CASH OUT AMOUNT?
0.00
cash-out is required. If not, just press ENTER.
TOTAL AMOUNT?
$10.00
Verify the amount is correct and accept by
pressing ENTER.
Insert or Swipe cardholder’s card. Chip Cards are to be
inserted and left in the Chip Card Reader. Magnetic
Stripe Cards are to be swiped through the Magnetic
Stripe Card Reader.
29
Page 30
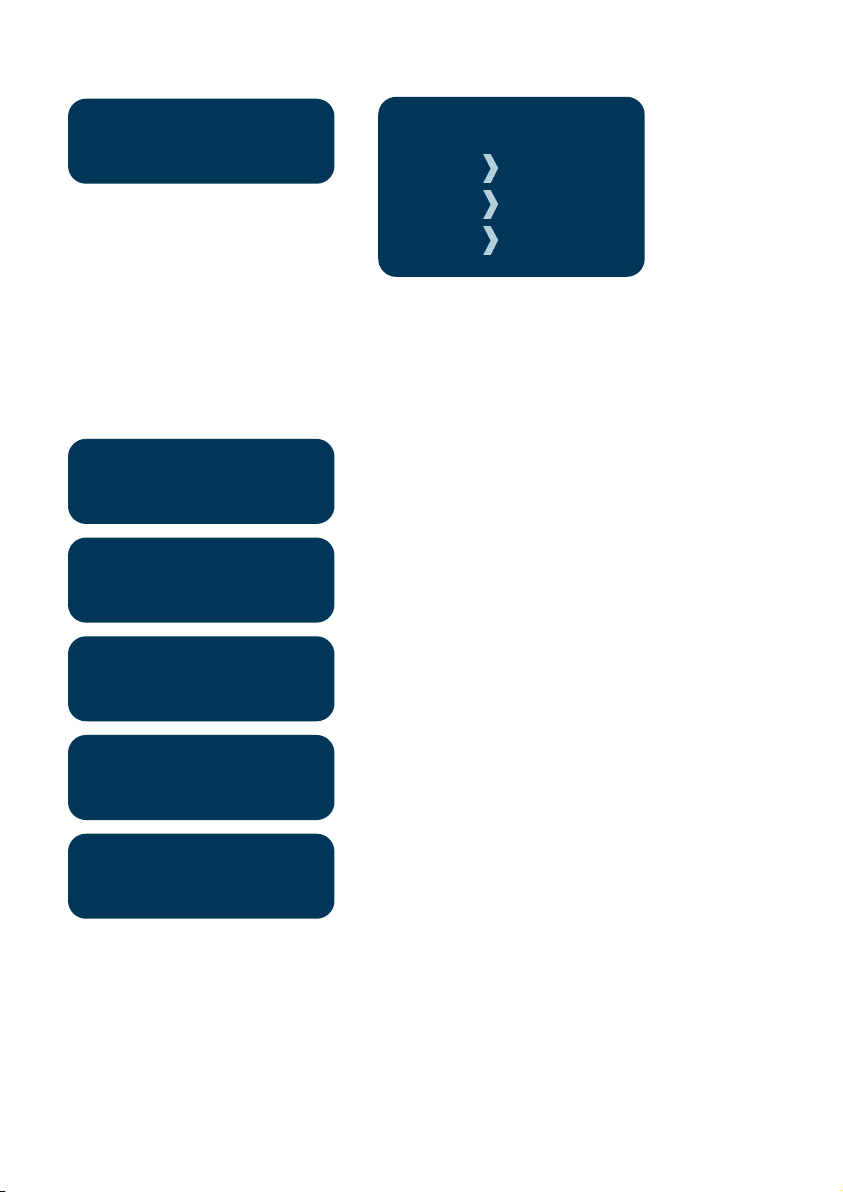
SELECT ACCOUNT
CHQ SAV CR
OR
PLEASE SELECT
PRESS 1 VISA DEBIT
Select Account
Press <-> key for cheque account or <
▼ > key for savings account.
CHEQUE ACCOUNT
$10.00 KEY PIN
PROCESSING
PLEASE WAIT
TRANSACTION
APPROVED
PRESS 2 EFTPOS SAV
PRESS 3 EFTPOS CHQ
Select Application*
Press the number on the keypad to make selection or
scroll and press ENTER to select.
*Application names and order can vary depending on
the Card that is used.
The selected account is displayed.
Have the cardholder enter their PIN then
press ENTER.
Terminal status is displayed.
Please ensure that you check for approval of the
transaction before completing the sale.
Press ENTER to print the customer copy or CLEAR to
CUSTOMER COPY?
return to the start screen.
ENTER OR CLEAR
NOTE: If the transaction is rejected, the terminal displays an error message outlining the reason. Notify the
customer, advise them to contact their Card Issuer and seek an alternative form of payment.
30
Page 31
11.2 HOW TO PROCESS A CREDIT PURCHASE TRANSACTION USING A
MAGNETIC STRIPE CARD OR A CHIP CARD
The process below provides a sample of a typical Magnetic Stripe or chip-based transaction.
Please be aware that there may be variances in the transaction flow based on the card
configuration chosen by the Card Issuer. Please ensure the terminal prompts are followed at all
times and the cardholder is requested to interact with the terminal whenever applicable.
Perform card security checks , please refer to section 6
Fraud minimisation for further information.
Key in the purchase amount then press ENTER.
PURCHASE AMOUNT?
$10.00
Key in the cash amount using the numeric keys if
CASH OUT AMOUNT?
0.00
TOTAL AMOUNT?
$10.00
cash-out is required. If not, just press ENTER.
Verify the amount is correct and accept by
pressing ENTER.
Insert or Swipe cardholder’s card. Chip Cards are to be
inserted and left in the Chip Card Reader. Magnetic
Stripe Cards are to be swiped through the Magnetic
Stripe Card Reader.
31
Page 32

SELECT ACCOUNT
CHQ SAV CR
OR
PLEASE SELECT
PRESS 1 VISA DEBIT
Select Account
Press <▲> key for credit account.
CREDIT ACCOUNT
$10.00 KEY PIN
PROCESSING
PLEASE WAIT
TRANSACTION
APPROVED
PRESS 2 EFTPOS SAV
PRESS 3 EFTPOS CHQ
Select Application*
Press the number 1 on the keypad to make selection
or scroll and press ENTER to select.
*Application names and order can vary depending on
the Card that is used.
The selected account is displayed.
Have the cardholder enter their PIN then
press ENTER.
NOTE: If Low Value Payment is turned on the terminal, it may
not request signature or PIN authorisation. See section 17.4.
Terminal status is displayed.
If the transaction is approved, this screen is displayed
and the Merchant transaction Record is printed.
Please check for approval of the transaction before
completing the sale. If rejected, the terminal displays an
error message outlining the reason (please refer to
section 18 Terminal Error Messages). Notify the customer,
advise them to contact their Card Issuer and seek an
alternative form of payment.
Press ENTER to print the customer copy or CLEAR to
CUSTOMER COPY?
ENTER OR CLEAR
NOTE: If ENTER, CLEAR or CANCEL are not pressed within one minute, the transaction is assumed to be
approved and the terminal will return to the start screen.
32
return to the start screen. Hand the customer their copy
of the transaction Record and their card.
Page 33

Signature Authorisation
The preferred method of card payment authorisation in Australia is PIN. However, in certain
circumstances the terminal will prompt for a signature. In these cases, the terminal will display the
following screens:
Press ENTER here to bypass PIN for a signature.
$10.00 KEY PIN
NOTE: Only some cards will allow the terminal to bypass PIN. If
only PIN is accepted, then the terminal will beep and this screen
will remain until a PIN is entered.
Terminal status is displayed.
PROCESSING
PLEASE WAIT
If signature is required this is prompted. Terminal prints a
SIGNATURE
signature record.
REQUIRED
If the signature is required for a Magnetic Stripe Card, this
SIGNATURE
screen is displayed; or
VERIFIED?
ENTER=YES CLR=NO
If the signature is required for a Chip Card, this screen is
REMOVE CARD
SIGNATURE
VERIFIED?
ENTER=YES CLR=NO
prompted.
For either one of the above screens, have the customer
sign the receipt and compare it to the signature on the
reverse of the customers card. If the signatures match,
press ENTER. If they do not, press the CANCEL or CLEAR
key to abort the transaction.
If the transaction is approved, this screen is displayed
TRANSACTION
APPROVED
and the Merchant Transaction Record isprinted.
Please check for approval of the transaction
beforecompleting the sale. If rejected, the
terminaldisplays an error message outlining the reason
(please refer to section 18 Terminal Error Messages).
Notify the customer, advise them to contact their Card
issuer and seek an alternative form of payment.
33
Page 34

Press ENTER to print the customer copy or CLEAR to
CUSTOMER COPY?
ENTER OR CLEAR
NOTE: If ENTER, CLEAR or CANCEL are not pressed within one minute, the Transaction is assumed to be
approved and the terminal will return to the start screen. UnionPay cards may require both a pin and signature
return to the start screen. Hand the customer their copy
of the Transaction Record and their card.
Additional Screens Associated with a Chip Card transaction
Alternative screens that you may also see during a chip transaction are as follows:
This screen is displayed if the card needs to be removed
REMOVE CARD
from the terminal.
The terminal requires the Chip Card to be inserted
INSERT CARD
during the transaction.
Displays when there are no applications on the Chip
CHIP CARD NOT
SUPPORTED
Card supported by the terminal. If magnetic stripe
fallback is supported the terminal will prompt to swipe
the card.
Remove the card from the Chip Reader and swipe it
REMOVE CARD
through the Magnetic Stripe Card Reader.
34
SWIPE CARD
SELECT APP
VISA CREDIT 1
VISA DEBIT 1
USE APPLICATION?
ANZSmartPay
ENTER=YES CLR=NO
This screen is for application selection for chip cards that
contain two or more applications from the same card
scheme (e.g. Visa®, MasterCard®, UnionPay, Amex, etc.).
The cardholder presses ENTER to confirm
application selection.
Page 35
11.3 HOW TO PROCESS A PURCHASE TRANSACTION USING A
CONTACTLESS CARD OR SMARTPHONE
Perform card security checks , please refer to section 6
Fraud minimisation for further information.
Key in the purchase amount then press ENTER.
PURCHASE AMOUNT?
$10.00
Press ENTER.
CASH OUT AMOUNT?
0.00
NOTE: Cash-out is not available for contactless transactions
or from a credit account.
Verify the amount is correct and accept by
TOTAL AMOUNT?
pressing ENTER.
$10.00
Have the cardholder tap their contactless card or
Smartphone on the screen.
35
Page 36

If the total transaction amount is equal to or less than a certain Contactless transaction limit,
then the terminal will display an “APPROVED” or
APPROVED
If the total transaction amount exceeds a certain transaction limit, the following screen prompts
may appear and should be followed.
$105.00 KEY PIN
PROCESSING
PLEASE WAIT
TRANSACTION
APPROVED
“DECLINED” message. If the transaction has been
rejected, please notify the customer, advise them
to contact their Card Issuer and seek an alternative form
of payment.
Have the cardholder enter their PIN then press ENTER.
Terminal status is displayed.
If the transaction is approved, this screen is displayed
and the merchant transaction record is printed.
Please check for approval of the transaction before
completing the sale. If rejected, the terminal displays an
error message outlining the reason (please refer to
section 18 Terminal Error Messages). Notify the customer,
advise them to contact their Card Issuer and seek an
alternative form of payment.
Press ENTER to print the customer copy or CLEAR to
CUSTOMER COPY?
ENTER OR CLEAR
Additional Screens Associated with a Contactless transaction
Alternative screens that you may also see during a Contactless transaction are as follows:
CONTACTLESS NOT
AVAILABLE
SWIPE OR
INSERT CARD
36
return to the start screen. Hand the customer their copy
of the transaction Record and their card.
Contactless is not available, please follow the terminal
screen prompt for next action.
The terminal requires the Magnetic Stripe Card to be
swiped or Chip Card to be inserted during the
transaction.
Page 37
SIGNATURE
REQUIRED?
This screen requires the customer to sign the receipt.
SIGNATURE
VERIFIED?
ENTER=YES CLR=NO
PLEASE SEE PHONE
Have the customer sign the receipt and compare it to
the signature on the reverse of the customer’s card. If the
signatures match, press ENTER.
Have the customer authenticate themselves on their
Smartphone. Advise them to follow the prompts on their
Smartphone.
12. PROCESSING A CASH-OUT ONLY
TRANSACTION
Customers may request cash-out (with or without making a purchase) by debiting their cheque or
savings account. Cash-out is only available if this transaction type has been enabled on the
terminal otherwise the option will not appear on the display. To include or remove this option, you
must call ANZ Merchant Services. If cash-out is enabled on the terminal, the cash-out transaction
can only be processed when the terminal is online and an approved authorisation has been
received from the issuing bank for this transaction. Please note that the cash-out is not available
for contactless or UnionPay transactions.
Perform card security checks then press ENTER.
Please refer to section 6 Fraud minimisation for further
information on the card security checks.
ANZ EFTPOS MENU
1. PURCHASE
2. CASHOUT
3. REFUND
CASH OUT AMOUNT?
$10.00
Scroll through to ANZ EFTPOS MENU screen by pressing
ENTER and then <▼> key to go to CASHOUT and then
press ENTER or the number associated to select it.
Key in the cash-out amount then press ENTER.
37
Page 38
TOTAL AMOUNT?
$10.00
SWIPE OR
INSERT CARD
Verify the amount is correct and accept by
pressing ENTER.
Insert or Swipe the cardholder’s card. Chip Cards are to
be inserted and left in the Chip CardReader. Magnetic
Stripe Cards are to be swiped through the Magnetic
Stripe Card Reader.
SELECT ACCOUNT
CHQ SAV CR
Select Account
Select the appropriate account type
(<-> key for cheque or < ▼ > key for
savings).
CHEQUE ACCOUNT
$10.00 KEY PIN
PROCESSING
PLEASE WAIT
OR
Select Application*
Press the number on the keypad to make selection or
scroll and press ENTER to select.
*Application names and order can vary depending on
the Card that is used.
The selected account is displayed.
Have the cardholder enter their PIN then press ENTER.
The Terminal status is displayed.
PLEASE SELECT
PRESS 1 VISA DEBIT
PRESS 2 EFTPOS SAV
PRESS 3 EFTPOS CHQ
38
TRANSACTION
APPROVED
If the transaction is approved, this screen is displayed
and the merchant transaction Record is printed.
Please check for approval of the transaction before
completing the sale. If rejected, the terminal displays an
error message outlining the reason (please refer to section
18 Terminal Error Messages). Notify the customer, advise
them to contact their Card Issuer and seek an alternative
form of payment.
Page 39

Press ENTER to print the customer copy or CLEAR to
CUSTOMER COPY?
ENTER OR CLEAR
return to the start screen. Hand the customer their copy
of the transaction Record and their card.
13. PROCESSING A REFUND TRANSACTION
Refunds are easy to process if a customer returns goods purchased from you or for services
terminated or cancelled.
Visa and MasterCard
For any goods purchased with a Visa or MasterCard scheme card that is accepted for return, or for
any services that are terminated or cancelled, or where any price adjustment is made, you must
first attempt to process the refund (credit transaction) to the same Card that was used for the
original purchase transaction.
If the card that was used for the original purchase transaction is not available (e.g. it is expired) and
therefore a refund is required to be processed by other means, please ensure you keep all
supporting documentation to show:
• the method used to refund;
• the cardholder contact details; and
• details of the original purchase.
This is in order to provide evidence if a chargeback claim is submitted. However, this does not
guarantee you will not be liable in the event of a chargeback claim.
Provided that you have adequate supporting documentation proving that the original purchase
transaction took place on the original Card, you may process the refund onto an alternate Card,
which belongs to the same Cardholder as the Card used for the original purchase transaction,
under any of the following types of circumstances:
• The original account is no longer available or valid (for example, the original card has been
replaced due to expiration or being reported lost or stolen).
• The authorisation request for the refund transaction was declined by the issuer.
When a refund cannot be processed to the original Card or to an alternate Card, and provided that
you have adequate supporting documentation proving that the original purchase transaction
took place on the original Card you may offer an alternate form of refund (for example, cash,
cheque, in-store credit, prepaid card, etc.), under any of the following types of circumstances:
• The refund is made to a recipient of a gift (instead of to the cardholder who made the original
purchase).
• The original sale took place on a Visa or MasterCard prepaid card, which has since been
discarded.
• The authorisation request for the credit transaction was declined.
• In order to comply with any applicable Laws, including but not limited to the “Australian
Consumer Law ”, as set out in Schedule 2 of the Competition and Consumer Act 2010 (Cth)
(Australian Consumer Law).
39
Page 40
Other Card Schemes
For any goods purchased with a card belonging to schemes other than the Visa or MasterCard
schemes, that is accepted for return, or for any services that are terminated or cancelled, or where
any price adjustment is made, you must not make either any cash-based refund to the Cardholder
or a refund to another card number unless you are required to do so in order to comply with any
applicable Laws, including but not limited to the Australian Consumer Law. If you do so, you may
be liable for a chargeback should a cardholder dispute the original sales transaction, which may
result in a debit to your Merchant Account for the relevant “disputed” transaction.
Note:
• Refund is only available if this transaction type has been enabled on the terminal, otherwise
the option will not appear on the display. If Refund is not enabled on the terminal, please
contact ANZ Merchant Services on 1800 039 025 for assistance.
• If a refund transaction is performed on an international card, please advise the cardholder that
the refund amount displayed on their statement may vary from the purchase amount due to
the changes in currency exchange rates.
• For more information on processing international card payments, please refer to the ‘Customer
Preferred Currency’ section 17.3.
How to Process a Cheque or Savings Refund transaction
Perform card security checks then press ENTER.
Please refer to section 6 Fraud Minimisation for further
information on the card security checks.
ANZ EFTPOS MENU
1. PURCHASE
2. CASHOUT
3. REFUND
MERCHANT CARD
REFUND AMOUNT?
$10.00
40
SWIPE
Scroll through to ANZ EFTPOS MENU screen by pressing
ENTER and then <▼> key to go to REFUND and then
press ENTER or the number associated to select it.
Swipe your EFTPOS Merchant Card please (refer to
section 3 for more information).
Key in the refund amount then please press ENTER.
Page 41
TOTAL AMOUNT?
$10.00
Verify the amount is correct and accept by
pressing ENTER.
Insert or Swipe the cardholder’s card. Chip Cards are to
be inserted and left in the Chip Card Reader. Magnetic
Stripe Cards are to be swiped through the Magnetic
Stripe Card Reader.
SELECT ACCOUNT
CHQ SAV CR
Select Account
Press <-> key for cheque or < ▼ > key
for savings.
CHEQUE ACCOUNT
$10.00 KEY PIN
PROCESSING
PLEASE WAIT
OR
Select Application*
Press the number on the keypad to make selection or
scroll and press ENTER to select.
*Application names and order can vary depending on
the Card that is used.
The selected account is displayed.
Have the cardholder enter their PIN then
press ENTER.
Terminal status is displayed.
PLEASE SELECT
PRESS 1 VISA DEBIT
PRESS 2 EFTPOS SAV
PRESS 3 EFTPOS CHQ
TRANSACTION
APPROVED
If the transaction is approved, this screen is displayed
and the merchant transaction Record is printed.
41
Page 42
Please check for approval of the transaction before
CUSTOMER COPY?
ENTER OR CLEAR
How to Process a Credit Refund transaction (including Chip Card and Contactless Refunds)
ANZ EFTPOS MENU
1. PURCHASE
2. CASHOUT
3. REFUND
completing the refund. If rejected, the terminal will
display an error message outlining the reason. Check the
message in the Terminal Error Messages section (section
18) and advise the cardholder as appropriate.
Press ENTER to print a customer copy or CLEAR to return
to the start screen. Hand the customer their copy of the
transaction Record and their card.
Perform card security checks then press ENTER.
Please refer to section 6 Fraud Minimisation for further
information on the card security checks.
Scroll through to ANZ EFTPOS MENU screen by pressing
ENTER and then <▼> key to go to REFUND and then
press ENTER or the number associated to select it.
MERCHANT CARD
REFUND AMOUNT?
$10.00
TOTAL AMOUNT?
$10.00
4242
SWIPE
Swipe your EFTPOS Merchant Card please (refer to
section 3 for more information).
Please key in the refund amount then press ENTER.
Verify the amount is correct and accept by
pressing ENTER.
Page 43
Tap, insert or swipe the cardholder’s card. Chip Cards are
to be inserted and left in the Chip Card Reader.
Contactless cards or Smartphones are to be tapped
on the screen. Magnetic Stripe Cards are to be swiped
through the Magnetic Stripe Card Reader.
SELECT ACCOUNT
CHQ SAV CR
Select Account
Press < ▲ > key for credit account.
Please note that for contactless
transactions account selection will not
be presented.
CREDIT ACCOUNT
$10.00 KEY PIN
PROCESSING
PLEASE WAIT
OR
Select Application*
Press the number 1 on the keypad to make selection
or scroll and press ENTER to select.
*Application names and order can vary depending on
the Card that is used.
The selected account is displayed.
Have the cardholder enter their PIN then
press ENTER.
Terminal status is displayed.
PLEASE SELECT
PRESS 1 VISA DEBIT
PRESS 2 EFTPOS SAV
PRESS 3 EFTPOS CHQ
TRANSACTION
APPROVED
If the transaction is approved, this screen is displayed
and the merchant transaction Record is printed.
Please check for approval of the transaction before
completing the Refund. If rejected, the terminal will
display an error message outlining the reason (please
refer to section 18). Notify the customer and advise them
to contact their Card Issuer.
4343
Page 44

Press ENTER to print the customer copy or CLEAR to
CUSTOMER COPY?
ENTER OR CLEAR
return to the start screen.
Hand the customer their copy of the transaction Record
and their card.
Signature Authorisation
In certain circumstances the terminal will prompt for a signature. In these cases, the terminal will
display the following screens:
If signature is required this is prompted.
SIGNATURE
Terminal prints a signature record.
REQUIRED
If the signature is required for a Magnetic Stripe Card, this
SIGNATURE
screen is displayed; or
VERIFIED?
ENTER=YES CLR=NO
If the signature is required for a Chip Card, this screen is
REMOVE CARD
SIGNATURE
VERIFIED?
ENTER=YES CLR=NO
prompted.
For either one of the above screens, have the customer
sign the receipt and compare it to the signature on the
reverse of the customers card. If the signatures match,
press ENTER. If they do not, press the CANCEL or CLEAR
key to abort the transaction.
If the transaction is approved, this screen is displayed
TRANSACTION
APPROVED
and the Merchant Transaction Record isprinted.
Please check for approval of the transaction
beforecompleting the sale. If rejected, the
terminaldisplays an error message outlining the reason
(please refer to section 18 Terminal Error Messages).
Notify the customer, advise them to contact their Card
issuer and seek an alternative form of payment.
Press ENTER to print the customer copy or CLEAR to
CUSTOMER COPY?
ENTER OR CLEAR
NOTE: If ENTER, CLEAR or CANCEL are not pressed within one minute, the Transaction is assumed to be
approved and the terminal will return to the start screen.
return to the start screen. Hand the customer their copy
of the Transaction Record and their card.
44
Page 45

14. ELECTRONIC FALLBACK (EFB) PROCESSING
Electronic Fallback Processing (EFB) allows you to process transactions using your Electronic
Terminal when:
• A communications time-out occurs
• The Card Issuer is not available.
The transactions are stored in the Electronic Terminal and are uploaded for processing once the
Electronic Terminal communications lines are restored. If your Electronic Terminal is rendered
inoperable, you will be able to continue processing transactions using the Imprinter for Manual
Processing (please refer to section 14.1).
PLEASE NOTE: There may be instances where the Nominated Card Scheme and/or the Nominated Card
Issuer will allow a Transaction to be performed when your Electronic Terminal is offline, without requiring an
Authorisation Number. If this is the case, your Electronic Terminal may approve the Transaction without
requesting that you obtain an Authorisation Number.
You will know the Electronic Terminal is offline when the following occurs:
• The Electronic Terminal may request an Authorisation Number before processing a transaction.
If the Electronic Terminal requests for an Authorisation Number, you must call the appropriate
Authorisation Centre for a manual authorisation.
• ‘APPROVED *’ is printed on the Merchant Copy of the Transaction Record.
For each transaction, the Electronic Terminal will check to see if it is online again. Once online, the
stored transactions will trickle through for processing on the back of other transactions.
The Electronic Terminal has the capacity to store 100 EFB transactions. For any EFB transactions
attempted thereafter, the Electronic Terminal will display an “EFB DISALLOWED” message.
If a card is swiped, you MUST phone for Authorisation if an Authorisation Code is requested via the
Electronic Terminal (refer to section 1.3).
NOTE: When processing a Chip transaction in Fallback mode, the Chip Card may choose to decline the
transaction as it may have specific protection software programmed onto its chip. Please request an
alternative method of payment.
45
Page 46
How to Process a Cheque or Savings Purchase transaction in EFB
Perform card security checks , please refer to section 6
Fraud minimisation for further information on the card
security checks.
Key in the purchase amount then press ENTER.
PURCHASE AMOUNT?
$10.00
Key in the cash amount using the numeric keys if cash-out
CASH OUT AMOUNT?
0.00
TOTAL AMOUNT?
$10.00
is required. If not, just press ENTER.
Verify the amount is correct and accept by
pressing ENTER.
Insert or Swipe the cardholder’s card. Chip Cards are to
be inserted and left in the Chip Card Reader. Magnetic
Stripe Cards are to be swiped through the Magnetic
Stripe Card Reader.
Please note that the EFB processing is not available for
contactless transactions.
CHQ SAV CR
$10.00 KEY PIN
46
Press <–> key for cheque or <▼> for savings.
SELECT ACCOUNT
The selected account is displayed.
CHEQUE ACCOUNT
Have the customer enter their PIN then
press ENTER.
Page 47

PROCESSING
PLEASE WAIT
AUTH CODE?
SIGNATURE
REQUIRED?
Depending on the reason the terminal has entered EFB
mode, this or the following screen will be displayed.
If the transaction amount exceeds your EFB
Authorisation Limit, this screen will be displayed. Phone
the Authorisation Centre. Key in the Authorisation
Number and press ENTER.
(Please refer to section 1.3 for more information on
gaining Authorisation).
Have the customer sign the merchant copy signature
record and compare it to the signature on the reverse of
the customer’s card.
SIGNATURE
VERIFIED?
ENTER=YES CLR=NO
If they do not, press the CANCEL or CLEAR key to abort
the transaction.
Please check for approval of the transaction before
If the signatures match, press ENTER.
TRANSACTION
APPROVED
completing the sale. If rejected, the terminal will display
an error message outlining the reason (please refer to
section 18). Notify the customer and advise them to
contact their Card Issuer.
Press ENTER to print a customer copy or CLEAR to return
CUSTOMER COPY?
ENTER OR CLEAR
NOTE: If ENTER or CANCEL are not pressed within one minute, the transaction is assumed to be approved
and the terminal will return to the start screen.
to the start screen. Hand the customer their copy of the
transaction Record and their card.
47
Page 48
How To Process a Credit Purchase Transaction in EFB
Perform card security checks, please refer to section 6
Fraud minimisation for further information on the card
security checks.
Key in the purchase amount then press ENTER.
PURCHASE AMOUNT?
$10.00
Press ENTER (cash-out on credit is not available to go
CASH OUT AMOUNT?
0.00
TOTAL AMOUNT?
$10.00
through EFB).
Verify the amount is correct and accept by
pressing ENTER.
Insert or Swipe the cardholder’s card. Chip Cards are to
be inserted and left in the Chip Card Reader. Magnetic
Stripe Cards are to be swiped through the Magnetic
Stripe Card Reader.
Please note that the EFB processing is not available for
contactless transactions.
CHQ SAV CR
$10.00 KEY PIN
48
Press <▲> key for credit account.
SELECT ACCOUNT
The selected account is displayed.
CREDIT ACCOUNT
Have the cardholder enter their PIN then press ENTER
or if the terminal allows, just press ENTER.
Page 49

PROCESSING
PLEASE WAIT
AUTH CODE?
SIGNATURE
REQUIRED?
Depending on the reason the terminal has entered
EFB mode, this screen or the following screen will
be displayed.
If the transaction amount exceeds your EFB Floor Limit,
this screen will be displayed. Phone the Authorisation
Centre. Key in the Authorisation Number and press
ENTER. (Please refer to section 1.3 for more information
on gaining Authorisation).
The terminal will print a signature record. Have the
customer sign this and compare it to the signature on
the reverse of the customer’s card.
SIGNATURE
VERIFIED?
ENTER=YES CLR=NO
If the signatures match, press ENTER.
If they do not, press the CANCEL or CLEAR key to abort
the transaction.
Please check for approval of the transaction before
TRANSACTION
APPROVED
completing the sale. If rejected, the terminal will display
an error message outlining the reason. Check the
message in the Terminal Error Messages section (section
18) and notify the cardholder as appropriate.
Press ENTER to print the customer copy or CLEAR to
CUSTOMER COPY?
return to the start screen.
ENTER OR CLEAR
NOTE: If ENTER or CANCEL are not pressed within one minute, the transaction is assumed to be approved
and the terminal will return to the start screen.
Clearing Electronic Fallback transactions
This function can only be used when the terminal is online and should be used to force through
EFB transactions before:
• The terminal reaches its limit of approximately 100 stored EFB transactions
• The final online transactions for that day (which means EFB transactions will not automatically
trickle through)
• Terminals are swapped to another location in the same store, for example from one lane to
another in a supermarket.
NOTE: Pre-Authorisation, Authorisation Completion and Cancellation of Authorisation transactions can only
be processed when the terminal is online.
49
Page 50
When re-connected, EFB transactions will trickle through for processing with other transactions.
The terminal is also capable of uploading transactions during settlement, logon, printing of totals
report and when terminal is in idle for a certain amount of time.
ANZ strongly recommends that you clear all EFB transactions prior to Settlement.
NOTE: If the terminal is rendered inoperable and needs to be swapped out, you will be unable to clear
transactions using the method described below. You MUST call ANZ Merchant Services on 1800 039 025 for
advice on how to retrieve and redeem your stored EFB transactions.
An asterisk on the display screen represents a stored EFB transaction.
Press FUNC key.
Key in the number '88' and then press ENTER.
FUNCTION?
The terminal displays the number of EFB transactions
EXTRACT 001 EFB
for ANZ
stored in the terminal. Press ENTER.
50
EXTRACT ALL?
ENTER OR CLEAR
CONNECTION
PLEASE WAIT
SENDING STORED
TXNS TO ANZ
Press ENTER.
The stored EFB transactions are being sent to
be processed.
Page 51

15. MANUAL TRANSACTION PROCESSING
15.1 PAPER VOUCHER PROCESSING
If you are unable to process transactions electronically due to terminal failure, please report the
failure to ANZ Merchant Services immediately and obtain authorisation to process transactions
manually. You must not split the transaction and use two or more sales vouchers to avoid
authorisation calls.
NOTE: Use the correct Paper Voucher for the type of card being used and account being accessed.
Paper Voucher transaction processing can not be performed with UnionPay cards.
Please record your Floor Limits in section 1.4 of this guide and obtain authorisation for all
transactions over these Floor Limits.
Manually Processing Credit Card transactions (Embossed Cards Only)
For Purchases For Refunds
Perform security checks described in the
Fraud Minimisation section of this guide
(section 6)
• Imprint the customer’s card onto the Sales
Voucher
• Remove the cover sheet and destroy
• Check that the imprinted details are clear
• Complete the Voucher and enter the final
amount
• Have your customer sign the Voucher
• Compare the signature on the Voucher
with that on the card. If the signatures
match, please call the Authorisation Centre
on 1800 999 205 (select option 2). If they do
not match, do not complete the transaction
and seek an alternative form of payment.
NOTE: Seek Authorisation for all purchases over
your Floor Limit. Cardholder must be present when
gaining authorisation.
• If the transaction is approved, record the
Authorisation Number on the Voucher
• If the transaction is declined, seek an
alternative method of payment and advise
the customer to contact their Card Issuer.
If a Refund is required on a transaction that
has not been deposited to ANZ, you must (if
obtained) cancel the Authorisation. Please
contact the appropriate Authorisation Centre
(Please refer to section 1.2).
To process a Refund using a transaction
Voucher (Credit Voucher), you should:
• Perform security checks described in the
Fraud Minimisation section of this guide
(section 6)
• Imprint the customer’s card onto the
Credit Voucher (Embossed Cards Only)
• Remove the cover sheet and destroy
• Check that the imprinted details are clear
• Complete the Voucher
• Sign the Voucher to authorise the Refund.
51
Page 52
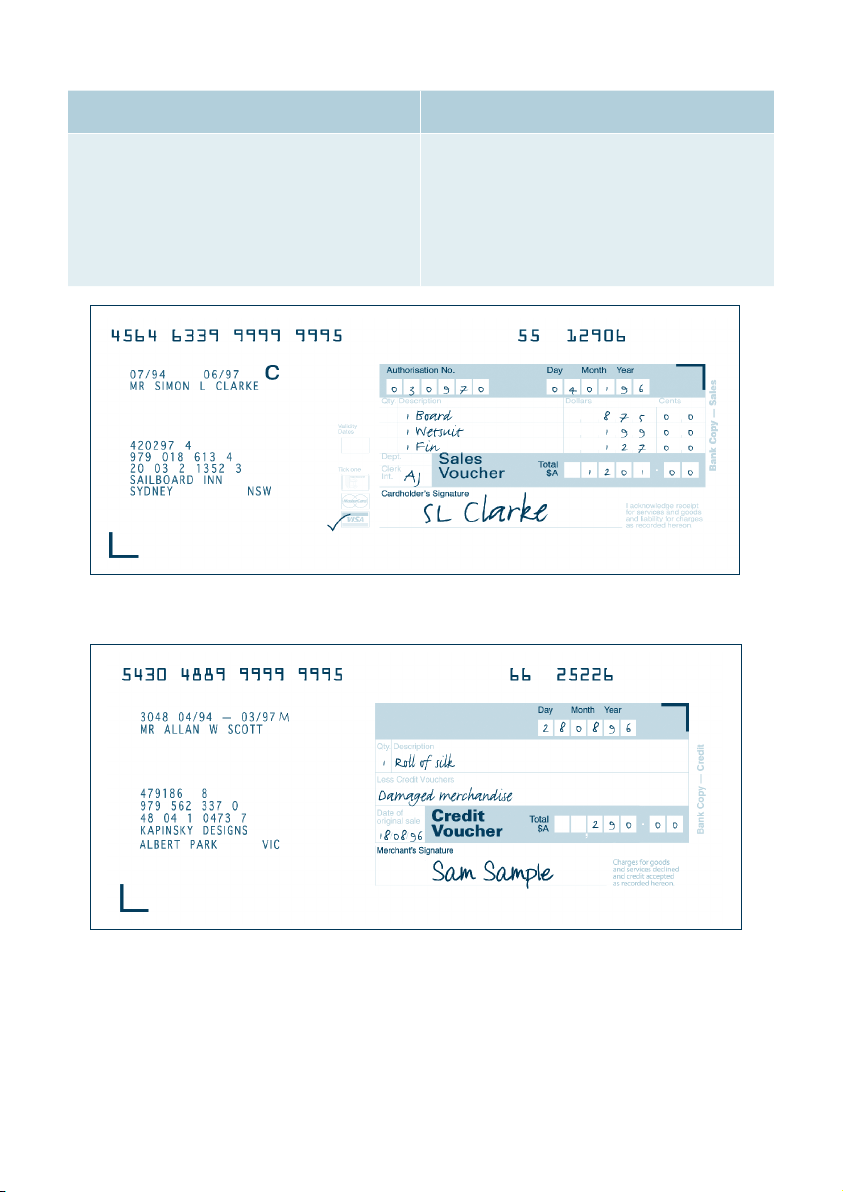
For Purchases For Refunds
• When the transaction is in order, hand the
customer the customer copy (yellow) of
the Voucher and their card
• Retain the Merchant copy for your records
and the Bank copy for banking.
Example of a Sales Voucher
• Hand the customer the customer copy
(yellow) of the Voucher and their card
• Retain the Merchant copy for your records
and the Bank copy for banking.
Any merchant charges relating to the original
purchase will be refunded.
52
Example of a Credit Voucher
Page 53
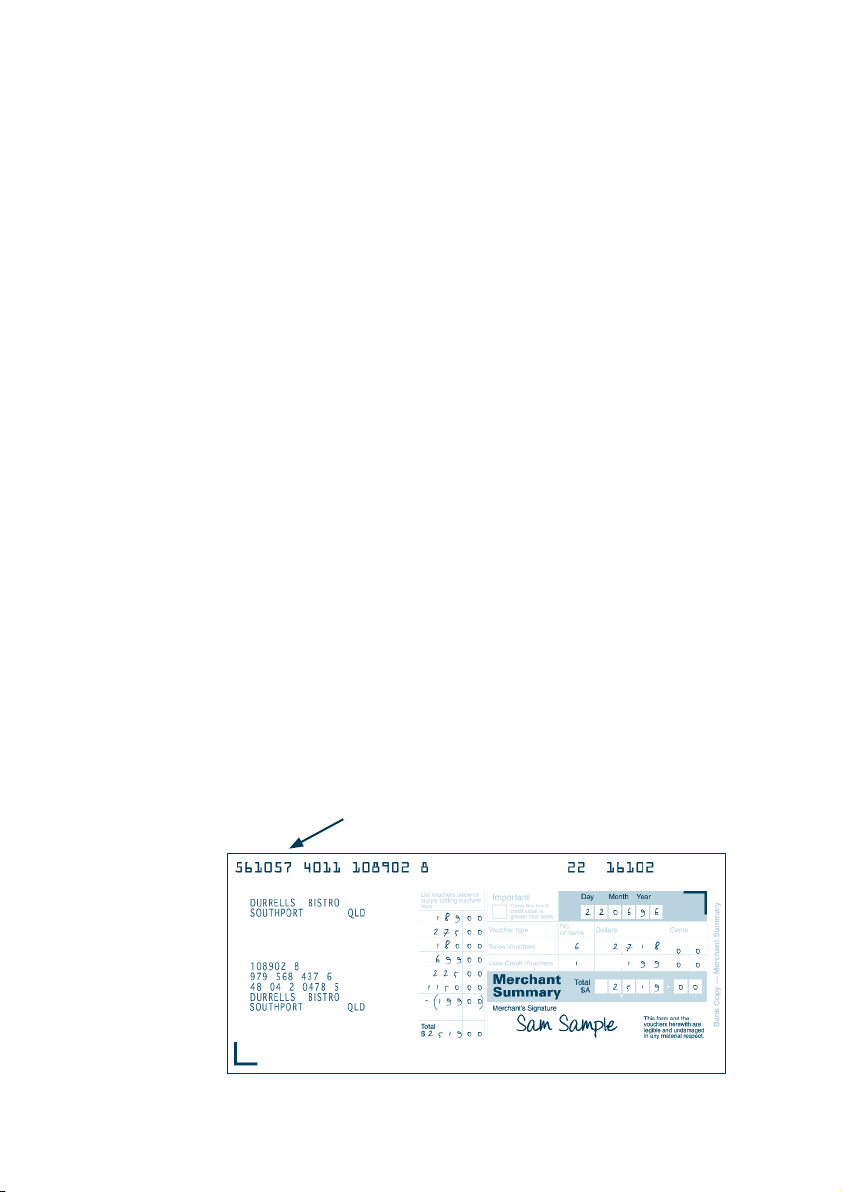
Banking Manual Credit Card transactions
To receive value for your credit card transactions, you must deposit the Bank copies (white)
of Vouchers with a completed credit card Merchant Summary Voucher within three business days
of the date of the transactions.
Preparing Your Deposit
• If possible, produce an adding machine tape showing the value of each Sales and Credit
Voucher and the total value of the Vouchers (or write up to 8 Voucher values directly on the
Merchant Summary)
• No more than 50 Vouchers can be banked with any one Merchant Summary Voucher
• Imprint your ANZ Merchant Summary Card on a Merchant Summary Voucher
• Complete the Voucher.
Place into your Credit Card Summary envelope:
• Bank copies of all Sales and Credit Vouchers
• Bank copy of Merchant Summary Voucher
• Adding machine tape (if any).
Do not pin, staple, clip or fold the envelope contents.
NOTE: Do not include cheques, cash or other card scheme Vouchers e.g. American Express, Diners Club or
JCB as ANZ cannot process these card types.
• Complete your normal bank deposit slip. Produce an adding machine tape showing the value
of each Sales and Credit Voucher and the total value of the Vouchers (or write up to 8 Voucher
values directly on the Merchant Summary)
• Merchants with an ANZ account, please deposit your Merchant Summary envelopes at any
ANZ branch.
• For merchants without an ANZ account, the Merchant Summary envelope should be mailed to
Not for Value Merchant Envelopes, Settlement & Control Team,
Level 5B, 833 Collins St Docklands VIC 3008
Full merchant number is to be
imprinted on Merchant Summary
Example of a Merchant Summary Voucher.
NOTE: Make sure that the envelope contains only credit card Vouchers.
53
Page 54
Envelopes which have a Credit Value
When the value of credits are greater than sales, enter an ‘x’ in the box on front of Credit Card
Summary Envelope.
When you bank the Vouchers, hand the teller cash or cheque(s) to the value of the net credit amount.
Example of a Credit Card Summary Envelope
MasterCard UnionPay
54
Visa Diners Club
AMEX
JCB
Page 55

Manually Processing Cheque or Savings Account transactions
Use the paper EFTPOS transaction Voucher to manually process debit or credit card transactions
to cheque or savings accounts. The account selected must be linked to the card.
• Perform security checks as described in the Fraud Minimisation section of this guide (section 6)
• Imprint customer’s card on appropriate transaction Voucher.
For Purchases For Refunds
Use an EFTPOS transaction Voucher for
cheque and savings account purchases.
Complete:
• Date and time
• Customer name (if not clearly imprinted)
• Account type CHQ or SAV
• Amount and description of purchase
• Amount of cash out
• Total amount of transaction
• Cardholder to sign Voucher.
Seek authorisation for a purchase transaction
over your Floor Limit from the appropriate
Authorisation Centre e.g. cheque and savings
account purchase transactions over Floor
Limit must be authorised by ANZ Merchant
Services (please refer to section 1.2).
Record the Authorisation Number on
the Voucher.
Compare the signature on the Voucher with that on the card. If the signatures match, complete
the transaction. When the transaction is complete, give the customer their copy of the Voucher
and their card.
Use an EFTPOS Refund Voucher for cheque
and savings account refunds.
Complete:
• Date and time
• Customer name (if not clearly imprinted)
• Account type CHQ or SAV
• Reason for refund
• Date of original purchase
• Total amount of transaction
• Merchant to sign Voucher.
55
Page 56
Example of EFTPOS Sales voucher
Example of an EFTPOS Credit Voucher
Banking Manual Cheque and Savings Account transactions
To receive value for your Manual transactions, you must deposit the Bank copies (white) of the
EFTPOS transaction Vouchers with a completed EFTPOS Summary Voucher within three bank
business days of the date of the transactions.
Preparing Your Deposit
• Produce an adding machine tape showing the value of each transaction and Refund Voucher
plus the total value of the Vouchers (or write up to 10 Voucher values directly on the EFTPOS
Summary Voucher)
• Imprint the EFTPOS Merchant Card on your EFTPOS Summary Voucher
• Complete the Voucher. If the value of refunds is greater than purchases, enter a minus sign and
circle the amount.
Place Into Your EFTPOS Merchant Summary Envelope
• Bank copy of the EFTPOS Merchant Summary Voucher (must be at the front)
• Bank copies of all transaction and Refund Vouchers
• Adding machine tape (if any). No more than 50 Vouchers can be banked with any one EFTPOS
Merchant Summary Voucher. Do not pin, staple or clip envelope contents. Make sure the
envelope only contains transaction and Refund Vouchers.
NOTE: Do not include cheques, cash or other card scheme Vouchers e.g. American Express, Diners Club or
56
JCB as ANZ cannot process these card types.
Page 57
• Complete your normal bank deposit slip. Produce an adding machine tape showing the value
of each transaction and Refund Voucher plus the total value of the Vouchers (or write up to 10
Voucher values directly on the EFTPOS Summary Voucher)
• Merchants with an ANZ account, please deposit your Merchant Summary envelopes at any
ANZ branch
• For merchants without an ANZ account, the Merchant Summary envelope should be mailed to
Not for Value Merchant Envelopes, Settlement & Control Team,
Level 5B, 833 Collins St Docklands VIC 3008
• If the value of refunds is greater than purchases, hand the teller cash or cheque(s) to the value
of the net credit amount (do not include in your deposit).
Example of an EFTPOS Summary voucher
Example of an EFTPOS Cheque & Saving Envelope
15.2 HAND KEY (MANUAL ENTRY) PROCESSING
If the terminal cannot read a card when it is swiped or inserted, please advise the cardholder to
contact their Card Issuer and seek an alternative form of payment. Otherwise you can choose to
manually key credit card details using the terminal (provided you have approval from ANZ).
NOTE: It is recommended that you DO NOT hand key a card if the customer’s card does not swipe through
your terminal. The risk of hand keying rests with the Merchant. Performing card security checks can minimise
any potential financial loss, please refer to section 6 Fraud minimisation for further information on the card
security checks.
You cannot hand key UnionPay or debit cards for sales transactions.
57
Page 58
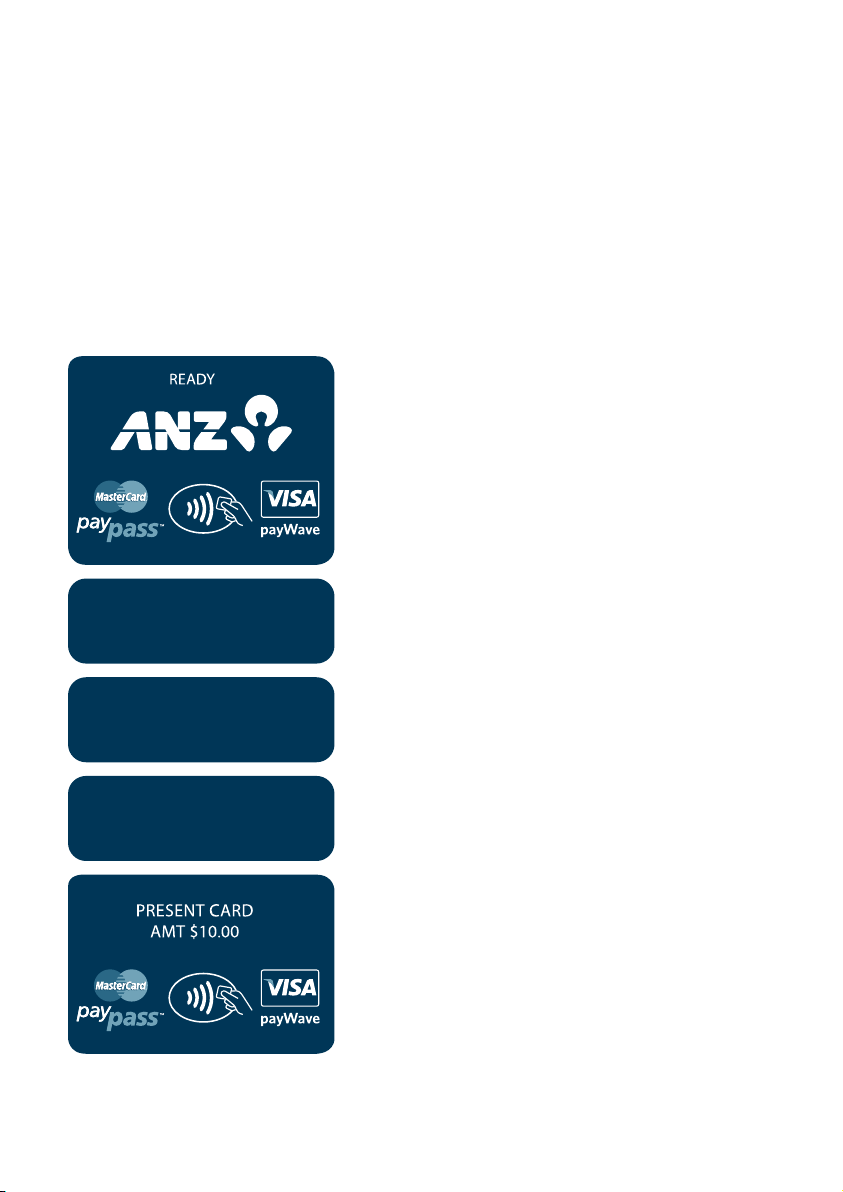
When you hand key credit card details, we recommend that you seek a form of photographic
identification e.g. A current Driver’s Licence and record the details including licence number and
expiry date. Make an imprint of the credit or debit card using your Imprinter and record these
details on the back of your copy of the Sales Voucher. Please note that this may not protect you
from chargebacks if the transaction is disputed by cardholder or cardholder’s issuing bank– you
may still be held liable which results in a debit to your merchant account for the amount of the
relevant “disputed” transaction.
Please contact ANZ Merchant Services on 1800 039 025 before you hand key credit card details for
Mail/Telephone Order and eCommerce Processing. You may only hand key credit card details for
Mail/Telephone Order and eCommerce Processing if authorised by ANZ.
Processing a Hand key transaction With A Cardholder Present (Credit Cards only)
Perform card security checks, please refer to section 6
Fraud Minimisation for further information on the card
security checks.
Key in the purchase amount then press ENTER.
PURCHASE AMOUNT?
$10.00
CASH OUT AMOUNT?
0.00
TOTAL AMOUNT?
$10.00
58
Press ENTER.
(Cash-out is not available for credit card accounts)
Verify the amount is correct and accept by
pressing ENTER.
Press the FUNC key to manually key the card details.
Page 59

CARD NUMBER:
EXPIRY <MMYY>:
CREDIT ACCOUNT
VERIFICATION NO?
REASON CODE
1. NOT PROVIDED
2. ILLEGIBLE
3. NO IMPRINT ON CARD
Key in the customer’s credit card number then
press ENTER.
Key in the expiry date of the credit card then
press ENTER.
Credit account displayed.
Key in the Card Validation Code then press ENTER.
If ‘ENTER ’ was selected at the ‘VERIFICATION NO?’
prompt, the reason must be entered as follows:
1 - CVV2 has not been provided by the cardholder
2 - CVV2 on the card is illegible
3 - Cardholder states the card has no CVV2 imprint.
Press ENTER.
$10.00 KEY OK
SIGNATURE
REQUIRED
SIGNATURE
VERIFIED?
ENTER=YES CLR=NO
TRANSACTION
APPROVED
Have the customer sign the merchant copy signature
record and compare it to the signature on the reverse
of the customer’s card.
If the signatures match, press ENTER.
If they do not, press the CANCEL or CLEAR key to abort
the transaction.
Please check for approval of the transaction before
completing the sale. If rejected, the terminal will display
an error message outlining the reason. Check the
message in the Terminal Error Messages section (section
18) and notify the cardholder as appropriate.
59
Page 60

Press ENTER to print the customer copy or CLEAR to
CUSTOMER COPY?
return to the start screen.
ENTER OR CLEAR
NOTE: If you decide to process hand key transactions, you are required to also take an imprint of the credit
card. Ask the Cardholder for photo ID and record the details on the back of the imprinter Voucher. Keep the
Voucher with your merchant copy of the transaction in case of a Chargeback claim. Please note that this may
not protect you from chargebacks if the transaction is disputed by the cardholder or the cardholders issuing
bank. You may still be held liable which results in a debit to your merchant account for the amount of the
relevant “disputed” transaction.
16. MAIL, TELEPHONE AND ECOMMERCE ORDER
PROCESSING
For merchants authorised by ANZ to process Mail Order, Telephone Order, Electronic and Recurring
payments, the terminal will request that you identify the ‘source’ and the ‘nature’ of the transaction.
NOTE: You are liable for any disputed transactions. The cardholder may dispute transactions for any reason.
To minimise disputes, you should keep the following records of each mail, telephone or eCommerce order:
• Cardholder’s name (as it appears on the card)
• Cardholder’s address (not a PO Box)
• Cardholder’s signature (if mail order)
• Type of card (MasterCard®, UnionPay and Visa®)
• Card number (First 6 and last 4 digits only, e.g. 1234 56XX XXXX 7890)
• Card valid from/to dates
• Authorised dollar amount(s) to be debited
• Period that standing authority is valid
• Contact telephone number
• Details of the goods or services required
• transaction date.
When the transaction has been processed, promptly dispatch the goods.
NOTE: You must retain information about a transaction whether processed manually or electronically for a
period of 30 months from the date of the transaction or such other period required by Law or notified by ANZ.
60
Page 61
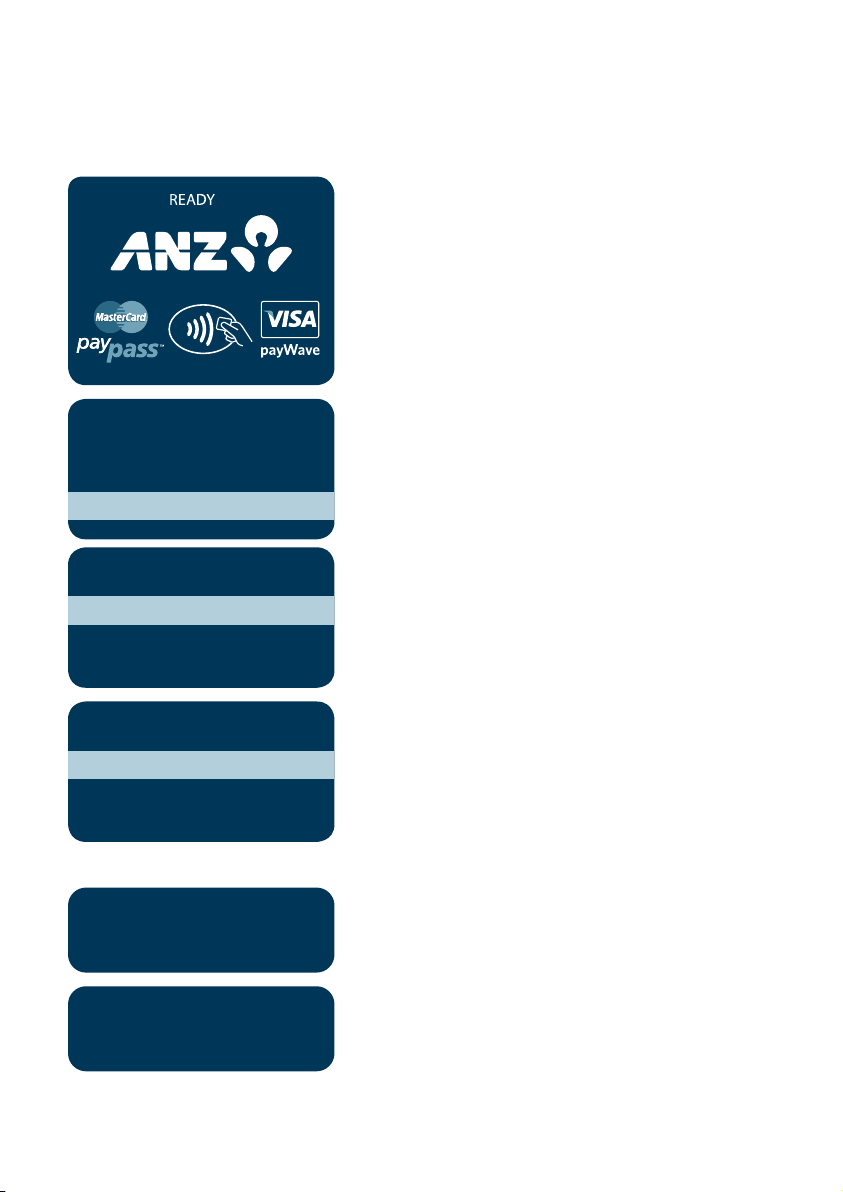
16.1 HOW TO PROCESS A MAIL ORDER TRANSACTION (SCHEME
CARDS ONLY)
NOTE: It is only available if you have approval from ANZ.
From this screen, continue to press ENTER until the
ANZ EFTPOS MENU screen appears.
Scroll through to ANZ EFTPOS MENU screen
ANZ EFTPOS MENU
3. REFUND
4. PRE AUTHORISATION
by pressing ENTER and then <▼> key to go to CARD
NOT PRESENT and then press ENTER or the number
associated to select it.
5. CARD NOT PRESENT
Press ENTER key to select MAIL ORDER or the number
CARD NOT PRESENT
associated to it.
1. MAIL ORDER
2. TELEPHONE ORDER
3. ECOMMERCE
PAYMENT TYPE
1. SINGLE
2. INSTALMENT
3. RECURRING
PURCHASE AMOUNT?
$10.00
CARD NUMBER:
Select the ‘nature’ of the transaction:
SINGLE– Single payment, press ENTER or the number
associated for it
INSTALMENT– Instalment payment, press the <▼> key
and ENTER or the number associated for it
RECURRING – Recurring payment, press the <▼> key
and ENTER or the number associated for it.
Key in the purchase amount then press ENTER.
Key in the customer’s credit card number then
press ENTER.
61
Page 62

EXPIRY <MMYY>:
CREDIT ACCOUNT
VERIFICATION NO?
REASON CODE
1. NOT PROVIDED
2. ILLEGIBLE
3. NO IMPRINT ON CARD
TOTAL AMOUNT?
$10.00
PROCESSING
PLEASE WAIT
Key in the expiry date on the credit card then
press ENTER.
Credit account displayed.
Key in the Card Validation Code then press ENTER.
If ‘ENTER ’ was selected at the ‘VERIFICATION NO?’
prompt, the reason must be entered as follows:
1 - CVV2 has not been provided by the cardholder
2 - CVV2 on the card is illegible
3 - Cardholder states the card has no CVV2 imprint
Verify the amount is correct and accept by
pressing ENTER.
Terminal status is displayed.
CUSTOMER COPY?
ENTER OR CLEAR
62
TRANSACTION
APPROVED
Please check for approval of the transaction before
completing the sale. If rejected, the terminal will display
an error message outlining the reason (Please refer to
section 18). Notify the customer and advise them to
contact their Card Issuer.
Press ENTER to print a customer receipt or press CLEAR
to return to the start screen.
Page 63
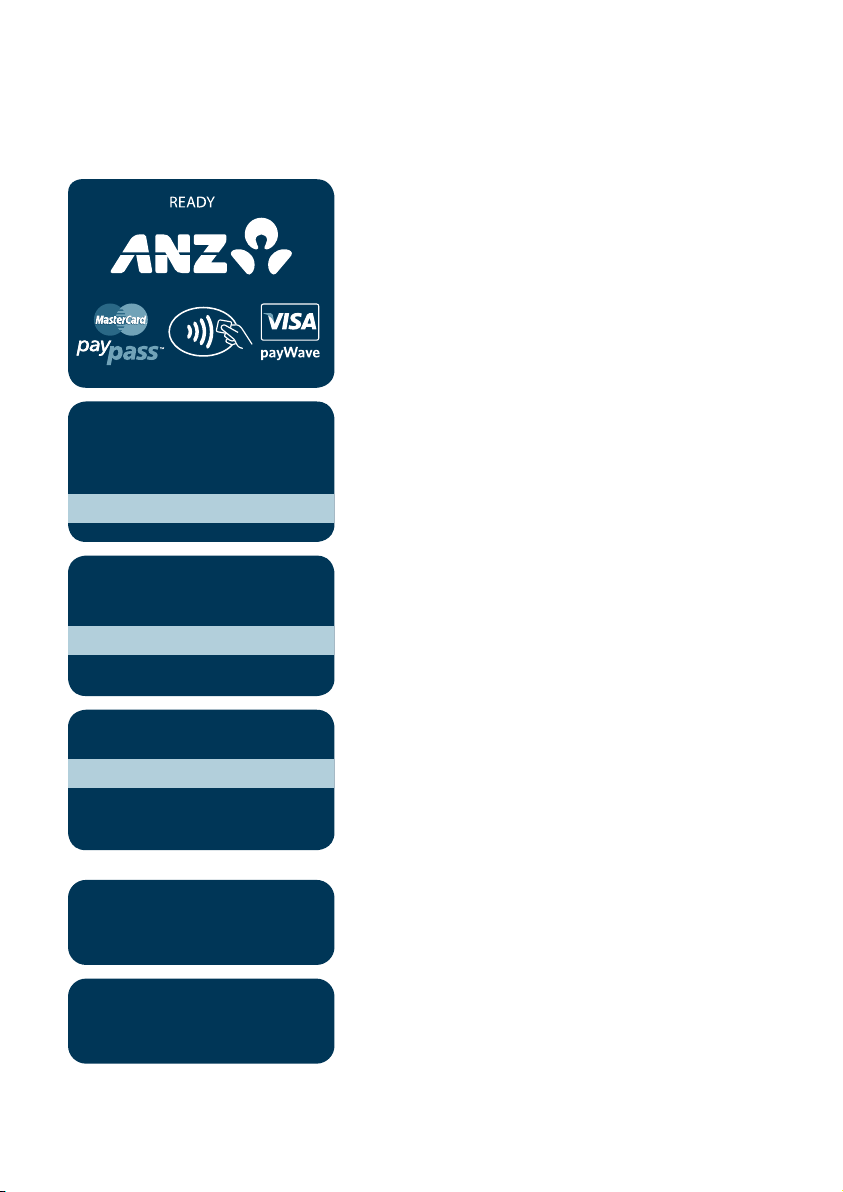
16.2 HOW TO PROCESS A TELEPHONE ORDER TRANSACTION
(SCHEME CARDS ONLY)
NOTE: it is only available if you have approval from ANZ.
From this screen, continue to press ENTER until the
ANZ EFTPOS MENU screen appears.
Scroll through to ANZ EFTPOS MENU screen by pressing
ANZ EFTPOS MENU
3. REFUND
4. PRE AUTHORISATION
ENTER and then <▼> key to go to CARD NOT PRESENT
and then press ENTER or the number associated to select
it.
5. CARD NOT PRESENT
Press<▼> key to go to TELEPHONE ORDER and press
CARD NOT PRESENT
ENTER or the number associated to select it.
1. MAIL ORDER
2. TELEPHONE ORDER
3. ECOMMERCE
PAYMENT TYPE
1. SINGLE
2. INSTALMENT
3. RECURRING
PURCHASE AMOUNT?
$10.00
CARD NUMBER:
Select the ‘nature’ of the transaction:
SINGLE– Single payment, press ENTER or the number
associated for it
INSTALMENT– Instalment payment, press the <▼> key
and ENTER or the number associated for it
RECURRING – Recurring payment, press the <▼> key
and ENTER or the number associated for it.
Key in the purchase amount then press ENTER.
Key in the customer’s credit card number then
press ENTER.
63
Page 64

EXPIRY <MMYY>:
CREDIT ACCOUNT
VERIFICATION NO?
REASON CODE
1. NOT PROVIDED
2. ILLEGIBLE
3. NO IMPRINT ON CARD
TOTAL AMOUNT?
$10.00
PROCESSING
PLEASE WAIT
Key in the expiry date on the credit card then
press ENTER.
Credit account displayed.
Key in the Card Validation Code then press ENTER.
If ‘ENTER ’ was selected at the ‘VERIFICATION NO?’
prompt, the reason must be entered as follows:
1 - CVV2 has not been provided by the cardholder
2 - CVV2 on the card is illegible
3 - Cardholder states the card has no CVV2 imprint.
Verify the amount is correct and accept by
pressing ENTER.
Terminal status is displayed.
Please check for approval of the transaction before
TRANSACTION
APPROVED
completing the sale. If rejected, the terminal will display
an error message outlining the reason (Please refer to
section 18). Notify the customer and advise them to
contact their Card Issuer.
Press ENTER to print a customer receipt or press
CUSTOMER COPY?
CLEAR to return to the start screen.
ENTER OR CLEAR
** Instalment transactions are transactions with a fixed instalment amount and fixed term with a predetermined expiry date and period. These transactions usually represent mail order goods with terms.
*** Recurring transactions occur where a merchant has an ongoing signed authority to process transactions
against a cardholder’s credit card account. Signed authority is required to be able to process a transaction as
recurring. If you misrepresent a transaction as recurring, you may face a fine or other consequences
(including, but not limited to, a Chargeback of that transaction). All recurring transactions must be authorised.
64
Page 65
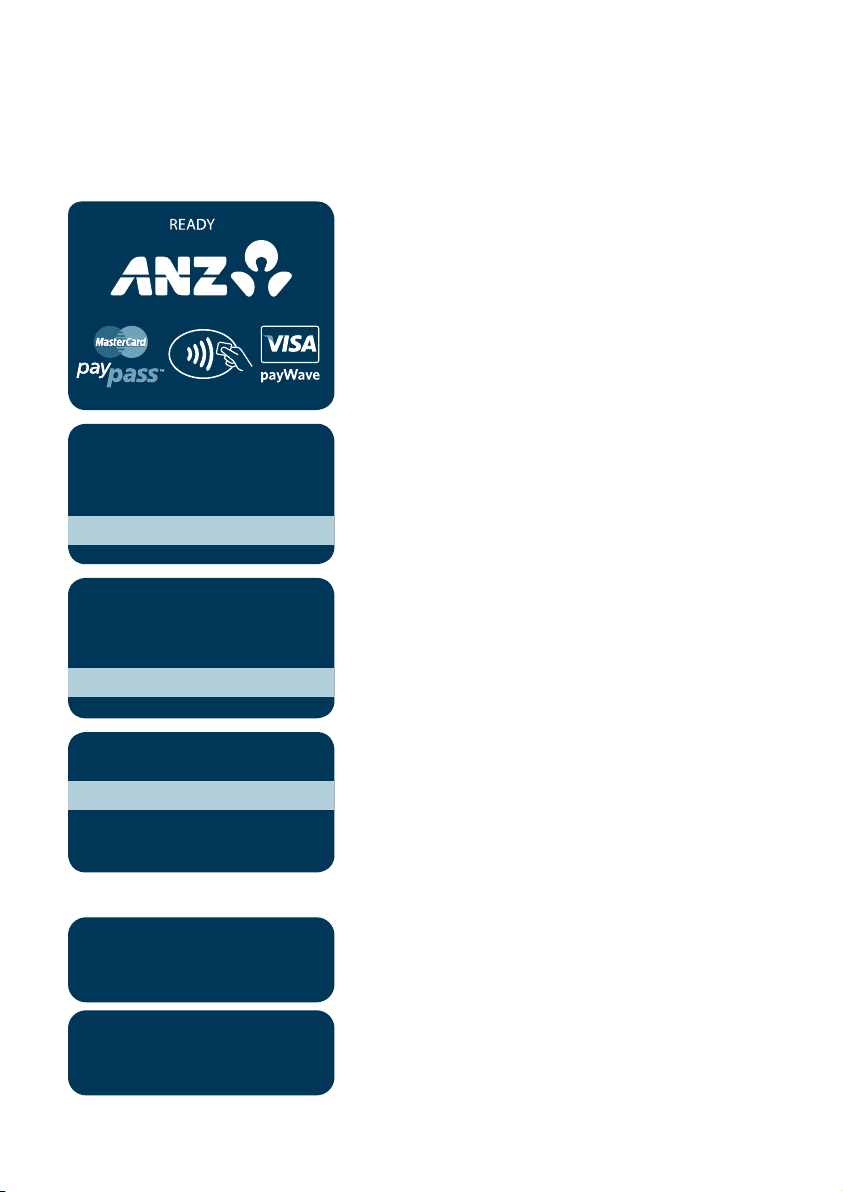
16.3 HOW TO PROCESS AN ECOMMERCE ORDER TRANSACTION
(SCHEME CARDS ONLY)
eCommerce transactions are card transactions that are initiated by the cardholder via the Internet.
NOTE: it is only available if you have approval from ANZ.
From this screen, continue to press ENTER until the ANZ
EFTPOS MENU screen appears.
Scroll through to ANZ EFTPOS MENU screen by pressing
ANZ EFTPOS MENU
3. REFUND
4. PRE AUTHORISATION
ENTER and then <▼> key to go to CARD NOT PRESENT
and then press ENTER or the number associated to select
it.
5. CARD NOT PRESENT
Press <▼> key to go to ECOMMERCE and press ENTER
CARD NOT PRESENT
or the number associated to select it.
1. MAIL ORDER
2. TELEPHONE ORDER
3. ECOMMERCE
PAYMENT TYPE
1. SINGLE
2. INSTALMENT
3. RECURRING
PURCHASE AMOUNT?
$10.00
CARD NUMBER:
Select the ‘nature’ of the transaction:
SINGLE– Single payment, press ENTER or the number
associated for it
INSTALMENT– Instalment payment, press the <▼> key
and ENTER or the number associated for it
RECURRING – Recurring payment, press the <▼> key and
ENTER or the number associated for it.
Key in the purchase amount then press ENTER.
Key in the customer’s credit card number then
press ENTER.
65
Page 66

EXPIRY <MMYY>:
CREDIT ACCOUNT
VERIFICATION NO?
REASON CODE
1. NOT PROVIDED
2. ILLEGIBLE
3. NO IMPRINT ON CARD
TOTAL AMOUNT?
$10.00
PROCESSING
PLEASE WAIT
Key in the expiry date on the credit card then
press ENTER.
Credit account displayed.
Key in the Card Validation Code then press ENTER.
If ‘ENTER ’ was selected at the ‘VERIFICATION NO?’
prompt, the reason must be entered as follows:
1 - CVV2 has not been provided by the cardholder
2 - CVV2 on the card is illegible
3 - Cardholder states the card has no CVV2 imprint.
Verify the amount is correct and accept by
pressing ENTER.
Terminal status is displayed.
Please check for approval of the transaction before
TRANSACTION
APPROVED
completing the sale. If rejected, the terminal will display
an error message outlining the reason (Please refer to
section 18). Notify the customer and advise them to
contact their Card Issuer.
Press ENTER to print a customer receipt or press
CUSTOMER COPY?
CLEAR to return to the start screen.
ENTER OR CLEAR
** Instalment transactions are transactions with a fixed amount and fixed term with a pre-determined expiry
date and period. These transactions usually represent mail order goods with instalment terms.
***Recurring transactions occur where a merchant has an ongoing signed authority to process transactions
against a cardholder’s credit card account. Signed authority is required to be able to process a transaction as
recurring. If you misrepresent a transaction as recurring, you may face a fine or other consequences (including,
but not limited to, a Chargeback of that transaction). All recurring transactions must be authorised.
66
Page 67
17. OPTIONAL FEATURES
17.1 TIP@TERMINAL (TIP WITH PIN) TRANSACTIONS
A Tip with PIN transaction allows a specified Tip amount to be included as part of the original
Credit or Debit Purchase transaction.
This functionality allows the cardholder to retain possession of their card at all times. The PIN is
inputted directly in to the terminal. For international cards and a small minority of cards, a
signature can be accepted as a form of verification.
Tip with PIN is only available if it has been enabled on the terminal otherwise the option will not
appear on the display.
A server identification number (between 1-20) can be allocated to differentiate service personnel
for the purposes of reporting or Tip allocation.
NOTE: Due to card schemes requirements, the Tip amount must be equal to or less than 15% (20% for
restaurants) of the purchase transaction amount. To increase your Tip limit, please contact ANZ Merchant
Services on 1800 039 025.
How to Process a Tip@Terminal (Tip with PIN) transaction
Perform card security checks, please refer to section 6
Fraud minimisation for further information.
PURCHASE AMOUNT?
$10.00
SERVER ID?
01
TOTAL AMOUNT?
$10.00
TIP AMOUNT?
0.00
Key in the purchase amount then press ENTER.
Key in the Server ID then press ENTER.
Key in the TIP amount and verify the total amount then
press ENTER.
67
Page 68
SELECT ACCOUNT
CHQ SAV CR
CREDIT ACCOUNT
$10.00 KEY PIN
PROCESSING
PLEASE WAIT
Tap, Insert or Swipe cardholder’s card. Chip Cards are to
be inserted and left in the Chip Card Reader. Contactless
Cards or Smartphones are to be tapped on to the screen.
Magnetic Stripe Cards are to be swiped through the
Magnetic Stripe Reader.
Select the appropriate account type (<–> key for cheque,
<▼> key for savings, <▲> key for credit).
The selected account is displayed.
Have the cardholder enter their PIN then press ENTER.
NOTE: Verification may not be required for contactless
transactions.
Terminal status is displayed.
CUSTOMER COPY?
ENTER OR CLEAR
68
TRANSACTION
APPROVED
Please check for approval of the Transaction before
completing the sale. If rejected, the terminal displays an
error message outlining the reason. Notify the customer,
advise them to contact their Card Issuer and seek an
alternative form of payment. If the Transaction is
cancelled, the terminal will also print out a second
merchant Transaction Record with “DECLINED TL” and
“SIGNATURE ERROR” printed on the bottom of the
receipt. No signatures are required.
Press ENTER to print the customer copy or CLEAR to
return to the start screen. Hand the customer their copy
of the Transaction Record and their card.
NOTE: If ENTER, CLEAR or CANCEL are not pressed within one
minute, the Transaction is assumed to be approved and the
terminal will return to the star t screen.
Page 69

Signature Authorisation
The preferred method of card payment authorisation in Australia is PIN. However, in certain
circumstances the terminal will promt for a signature. In the cases, the terminal will display the
following screens:
Press ENTER here to bypass PIN for a signature.
$10.00 KEY PIN
NOTE: Only some cards will allow the terminal to bypass PIN. If
only PIN is accepted, then the terminal will beep and this screen
will remain until a PIN is created.
Terminal status is displayed.
PROCESSING
PLEASE WAIT
If signature is required this is prompted.
SIGNATURE
Terminal prints a signature record.
REQUIRED
If the signature is required for a Magnetic Stripe Card,
SIGNATURE
this screen is displayed; or
VERIFIED?
ENTER=YES CLR=NO
REMOVE CARD
SIGNATURE
VERIFIED?
ENTER=YES CLR=NO
TRANSACTION
APPROVED
If the signature is required for a Chip Card, this screen is
prompted.
For either one of the above screens, have the customer
sign the receipt and compare it to the signature on the
reverse of the customer's card. If the signatures match,
press ENTER. If they do not, press the CANCEL or CLEAR
key to abort the transaction.
If the transaction is approved, this screen is displayed
and the Merchant Transaction Record isprinted.
Please check for approvel of the transaction before
completing the sale. If rejected, the terminal displays an
error message outlining the reason (please refer to
section 18 Terminal Error Messages). Notify the customer,
advise them to contact their Card issuer and seek an
alternative form of payment.
69
Page 70
Press ENTER to print the customer copy or CLEAR to
CUSTOMER COPY?
ENTER=YES CLR=NO
NOTE: If ENTER, CLEAR or CANCEL are not pressed within one minute, the transaction is assumed to be
approved and the terminal will return to the start screen.
return to the start screen. Hand the customer their copy
of the Transaction Record and their card.
Tipping Reports
Please note that only Server Report and Total Report will be displayed on the TIPPING MENU screen.
How to Print a Tip Totals Report
The Tip Totals report lists all Tip transactions and Tip totals for each server made since the last
Settlement.
Scroll through to ANZ EFTPOS MENU screen by pressing
ENTER and then <▼> key to go TIPPING and then press
ENTER or the number associated to select it.
ANZ EFTPOS MENU
4. PRE AUTHORISATION
5. CARD NOT PRESENT
6. TIPPING
TIPPING MENU
1. SERVER REPORT
2. TOTAL REPORT
70
Press <▼> key to go to TOTAL REPORT and then press
ENTER or the number associated to select it.
Page 71
When printing has completed, the terminal returns
to idle.
How to Print a Server Tip Report
The Server Tip report lists all the Tip transactions and a Tip totals for the selected server made
since the last Settlement.
Scroll through to ANZ EFTPOS MENU screen by
pressing ENTER and then <▼> key to go TIPPING
and then press ENTER or the number associated to
select it.
ANZ EFTPOS MENU
4. PRE AUTHORISATION
5. CARD NOT PRESENT
6. TIPPING
TIPPING MENU
1. SERVER REPORT
2. TOTAL REPORT
SERVER ID?
01
PRINTING
Press <▼> key to go to SERVER REPORT and then
press ENTER or the number associated to select it.
Key in your two-digit server ID then press ENTER.
The server ID number must be between 1 and 20.
Enter 01 if no server ID is allowed.
The terminal will print out a copy of the selected
report.
71
Page 72

When printing has completed, the terminal returns
to idle.
17.2 PRE-AUTHORISATION
A merchant who operates a Hotel, Car Rental or Cruise Line business can process a PreAuthorisation Transaction. Access to Pre-Authorisation menu screens (PRE AUTH) will be available
to approved merchants within these specific industry groups.
Pre-Authorisation authorises a transaction that will be completed at a later time. These
transactions can only be performed on credit card accounts.
Some examples are listed below to assist in estimating your Pre-Authorisation amount:
Example 1: A hotel may estimate transaction amounts based on:
• Cardholder’s intended length of stay at check-in time
• Room rate
• Applicable tax
• Service charge rates
• Other allowable charges e.g. mini-bar and telephone calls.
Example 2: A Car Rental Company may estimate transaction amounts based on:
• Cardholder’s intended car rental period
• Rental rate
• Applicable tax
• Mileage rates
• Other allowable charges e.g. petrol and extra mileage.
It is important to estimate Pre-Authorisation amounts accurately as cardholder funds are placed
on hold. The completion amount should be within 15% of the Pre-Authorisation transaction. If the
completion amount varies by greater than 15%, the terminal will display an ‘AMOUNT NOT
MATCHED’ screen. In this instance, process a completion transaction to the value of the PreAuthorisation, then complete another purchase transaction for the difference. Please note that
Visa® Card schemes require the completion amount of a car rental transaction to be within 15% of
the Pre-Authorisation transaction or US$75.00.
The Card Issuer determines the number of days the cardholders funds remain on hold. As a guide,
the funds may be held between 4 and 10 days for Australian banks but may be longer for overseas
banks.
If the terminal goes offline during Pre-Authorisation, you will receive a declined error message as
Pre-Authorisation transactions are not processed when the terminal is offline. Please contact the
72
appropriate Authorisation Centre (please refer to section 1.2) for a manual authorisation and
complete the transaction using Manual Processing. An Authorisation number must be recorded.
Page 73
How to process a Pre-Authorisation transaction
Perform card security checks.
NOTE: Please refer to section 6 Fraud Minimisation for
further information on card security checks.
Press ENTER to go to ANZ EFTPOS MENU screen. Press
ANZ EFTPOS MENU
4. PRE AUTHORISATION
<▼> key to go PRE AUTHORISATION and then press
ENTER or the number associated to select it.
5. CARD NOT PRESENT
6. TIPPING
Press ENTER key or the number associated
PRE AUTHORISATION
for AUTHORISATION.
1. AUTHORISATION
2. COMPLETION
3. CANCELLATION
Key in the amount to be authorised then
AUTH AMOUNT?
press ENTER.
$10.00
Insert or Swipe the customer’s card or press Func key
SWIPE OR
INSERT CARD
to hand key card details. Chip Cards are to be inserted
and left in the Chip Card Reader. Magnetic Stripe
Cards are to be swiped through the Magnetic Stripe
Card Reader.
The following two screen instructions only apply to Hand key transactions.
Key in the card number then press ENTER.
CARD NUMBER:
Key in the expiry date then press ENTER.
EXPIRY <MMYY>:
73
Page 74

CREDIT ACCOUNT
VERIFICATION NO?
REASON CODE
1. NOT PROVIDED
2. ILLEGIBLE
3. NO IMPRINT ON CARD
$10.00 KEY PIN
TRANSACTION
APPROVED
Credit account will automatically be selected.
Key in the Card Validation Code then press ENTER.
If ‘ENTER ’ was selected at the ‘VERIFICATION NO?’
prompt, the reason must be entered as follows:
1 - CVV2 has not been provided by the cardholder
2 - CVV2 on the card is illegible
3 - Cardholder states the card has no CVV2 imprint.
Have the cardholder enter their PIN then press ENTER.
The terminal prints out a merchant copy of the PreAuthorisation record.
Please check for approval of the transaction before
completing the authorisation. If rejected, the terminal
will display an error message outlining the reason (Please
refer to section 18). Notify the customer and advise them
to contact their Card Issuer.
Press ENTER to print the customer copy or CLEAR to
CUSTOMER COPY?
ENTER OR CLEAR
return to the start screen.
Signature Authorisation
The preferred method of card payment authorisation in Australia is PIN. However, in certain
circumstances the terminal will prompt for a signature. In these cases, the terminal will display the
following screens:
Press ENTER here to bypass PIN for a signature.
$10.00 KEY PIN
NOTE: Only some cards will allow the terminal to bypass PIN. If
only PIN is accepted, then the terminal will beep and this screen
will remain until a PIN is entered.
74
Page 75

PROCESSING
PLEASE WAIT
SIGNATURE
REQUIRED
SIGNATURE
VERIFIED?
ENTER=YES CLR=NO
REMOVE CARD
SIGNATURE
VERIFIED?
ENTER=YES CLR=NO
TRANSACTION
APPROVED
Terminal status is displayed.
If signature is required this is prompted.
Terminal prints a signature record.
If the signature is required for a Magnetic Stripe Card,
this screen is displayed; or
If the signature is required for a Chip Card, this screen is
prompted.
For either one of the above screens, have the customer
sign the receipt and compare it to the signature on the
reverse of the customers card. If the signatures match,
press ENTER. If they do not, press the CANCEL or CLEAR
key to abort the transaction.
If the transaction is approved, this screen is displayed
and the Merchant Transaction Record isprinted.
Please check for approval of the transaction
beforecompleting the sale. If rejected, the
terminaldisplays an error message outlining the reason
(please refer to section 18 Terminal Error Messages).
Notify the customer, advise them to contact their Card
issuer and seek an alternative form of payment.
Press ENTER to print the customer copy or CLEAR to
CUSTOMER COPY?
ENTER OR CLEAR
NOTE: If ENTER, CLEAR or CANCEL are not pressed within one minute, the transaction is assumed to be
approved and the terminal will return to the start screen.
return to the start screen. Hand the customer their copy
of the Transaction Record and their card.
75
Page 76
How to Perform an Authorisation Value enquiry
You may check the total value of funds placed on hold prior
to completing a Pre-Authorisation transaction.
Perform card security checks. Press ENTER to go to ANZ
ANZ EFTPOS MENU
4. PRE AUTHORISATION
5. CARD NOT PRESENT
6. TIPPING
PRE AUTHORISATION
2. COMPLETION
3. CANCELLATION
4. ENQUIRY
SWIPE CARD
EFTPOS MENU screen. Press <▼> key to go PRE
AUTHORISATION and then press ENTER or the number
associated to select it.
Note: Please refer to section 6 Fraud minimisation for
further information on card security checks.
Press <▼> key to go to ENQUIRY and then press ENTER
or the number associated to select it.
Swipe the customer’s card or press FUNC key to hand key
card details. Magnetic Stripe cards are to be swiped
through the Magnetic Stripe Card Reader.
The following two screen instructions only apply to hand key transactions.
Key in the card number then press ENTER.
CARD NUMBER:
Key in the expiry date then press ENTER.
EXPIRY <MMYY>:
Credit Account will automatically be selected
CREDIT ACCOUNT
76
and displayed.
Page 77
The total value of funds on hold will be displayed for
AMOUNT ON HOLD
$100.00
30 seconds or until a key is pressed. The terminal will
return to the start screen or press CANCEL to return to
the start screen.
How to Complete a Pre-Authorisation Transaction
When you have calculated the final bill for your customer, you need to complete the sale with a
final payment. It is recommended that you complete an imprinted sales Voucher with an itemised
bill and obtain the customer’s signature. This is to protect you in the event that your customer
disputes the transaction. The Voucher should be retained for a period of 30 months or other
period as required by Law or stated by ANZ.
The completion amount should be within 15% of the Pre-Authorisation transaction. If the
completion amount varies by greater than 15% the terminal will display an ‘AMOUNT NOT
MATCHED’ screen. In this instance, process a completion transaction to the value of the PreAuthorisation, and then complete another purchase transaction for the difference. Please note
that Visa® Card schemes require the completion amount of a car rental transaction to be within
15% of the Pre-Authorisation transaction or US$75.00.
You must send your completion transaction within three days of the Pre-Authorisation for Visa
and Master card transactions. For UnionPay card transactions you must send the completion
transaction within 30 days of pre-authorisation.
NOTE: The examples above act as a guide only. Please remember that Pre-Authorisation places cardholder
funds on hold for a time determined by the Card Issuer.
These rules relate to the Visa® International Scheme. MasterCard® Scheme rules around lodging,
cruise line, and vehicle rental states that the pre-authorisation completion amounts should be
within 15% of the Pre-Authorisation Transaction. If the completion amount varies by greater than
15%, you must request a secondary authorization for the additional amount.
Perform card security check.
ANZ EFTPOS MENU
4. PRE AUTHORISATION
5. CARD NOT PRESENT
6. TIPPING
Press ENTER to go to ANZ EFTPOS MENU screen. Pres
<▼> key to go PRE AUTHORISATION and then press
ENTER or the number associated to select it.
NOTE: Please refer to section 6 Fraud minimisation for further
information on card security checks.
77
Page 78

Press <▼> key to go to COMPLETION and then
PRE AUTHORISATION
1. AUTHORISATION
2. COMPLETION
3. CANCELLATION
PURCHASE AMOUNT?
$10.00
SWIPE OR
INSERT CARD
The following two screen instructions only apply to hand key transactions.
CARD NUMBER:
EXPIRY <MMYY>:
press ENTER or the number associated to select it.
Key in the purchase amount and then press ENTER.
Insert or Swipe the customer’s card or press Func key to
hand key card details. Chip Cards are to be inserted and
left in the Chip Card Reader Magnetic Stripe Cards are to
be swiped through the Magnetic Stripe Card Reader.
Key in the card number then press ENTER.
Key in the expiry date then press ENTER.
78
CREDIT ACCOUNT
$10.00 KEY PIN
SIGNATURE
REQUIRED
SIGNATURE
VERIFIED?
Credit account will automatically be selected
and displayed.
If PIN is required, have the cardholder enter their PIN if
known then press ENTER or if the card allows just press
ENTER.
Signature record is printed if a PIN has not been entered.
Have the customer sign this and compare it to the signature
on the reverse of the customer’s card.
For a Magnetic Stripe transaction, this screen will be
displayed. If the signatures match,If the signatures match,
press ENTER.If they do not, press the CANCEL or CLEAR
key to abort the transaction.
Page 79
REMOVE CARD
SIGNATURE
VERFIED?
For a Chip Card transaction, this screen is displayed.
Remove the card from the terminal and compare it to
the signature on the reverse of the customer’s card. If the
signatures match, press ENTER. If they do not, press the
CANCEL or CLEAR key to abort the transaction.
NOTE: If a PIN is entered at the KEY PIN screen, a signature may
not be required.
The terminal prints out the merchant copy of the
TRANSACTION
APPROVED
Completion of Pre-Authorisation record.
Please check for approval of the transaction before
completing the Authorisation. If rejected, the terminal
will display an error message outlining the reason (Please
refer to section 18). Notify the customer and advise them
to contact their Card Issuer.
Once approved, hand the customer their copy of the
CUSTOMER COPY?
transaction Record and return their card.
ENTER OR CLEAR
Cancellation of a Pre-Authorisation transaction (on ANZ Australian-issued cards)
A Pre-Authorisation transaction reduces the available funds on a cardholder’s credit card account.
If a customer does not proceed with a sale after Authorisation has been obtained, you should
cancel the Pre-Authorisation as soon as possible.
You can cancel a Pre-Authorisation on ANZ Australian-issued cards which have been previously
authorised through an ANZ POS Turbo 2 terminal. Where more than one Pre-Authorisation has
been performed, one or all transactions may be cancelled. You cannot cancel a Pre-Authorisation
on non-ANZ cards. Only a cardholder can instruct the Card Issuer to remove the hold on funds in
their account.
ANZ EFTPOS MENU
4. PRE AUTHORISATION
5. CARD NOT PRESENT
6. TIPPING
Perform card security checks.
NOTE: Please refer to section 6 Fraud minimisation for further
information on card security checks.
Press ENTER to go to ANZ EFTPOS MENU screen.
Press <▼> key to go PRE AUTHORISATION and then
press ENTER or the number associated to select it.
79
Page 80

PRE AUTHORISATION
1. AUTHORISATION
2. COMPLETION
3. CANCELLATION
CANCEL ALL?
CANCEL ONE?
REFERENCE NO?
AUTH AMOUNT?
$10.00
ENTER AUTH CODE
Press <▼> key to go to CANCELLATION and then
press ENTER or the number associated to select it.
Press CLEAR (no to cancelling all pre authorisations).
Press ENTER if cancelling one Pre Authorisation.
Key in the six-digit number next to the REFERENCE
NUMBER located on the Pre-Authorisation record then
press ENTER.
Key in the amount of the original Pre-Authorisation
then press ENTER.
Key in the Authorisation Number (please refer to the
number next to APPROVED from the successful
Authorisation transaction Record).
Swipe or press FUNC key to hand key card details.
SWIPE CARD
The following two screen instructions only apply to hand key transactions.
CARD NUMBER:
EXPIRY <MMYY>:
80
Magnetic Stripe cards are to be processed through the
Magnetic Stripe Card.
Key in the card number then press ENTER.
Key in the expiry date then press ENTER.
Page 81
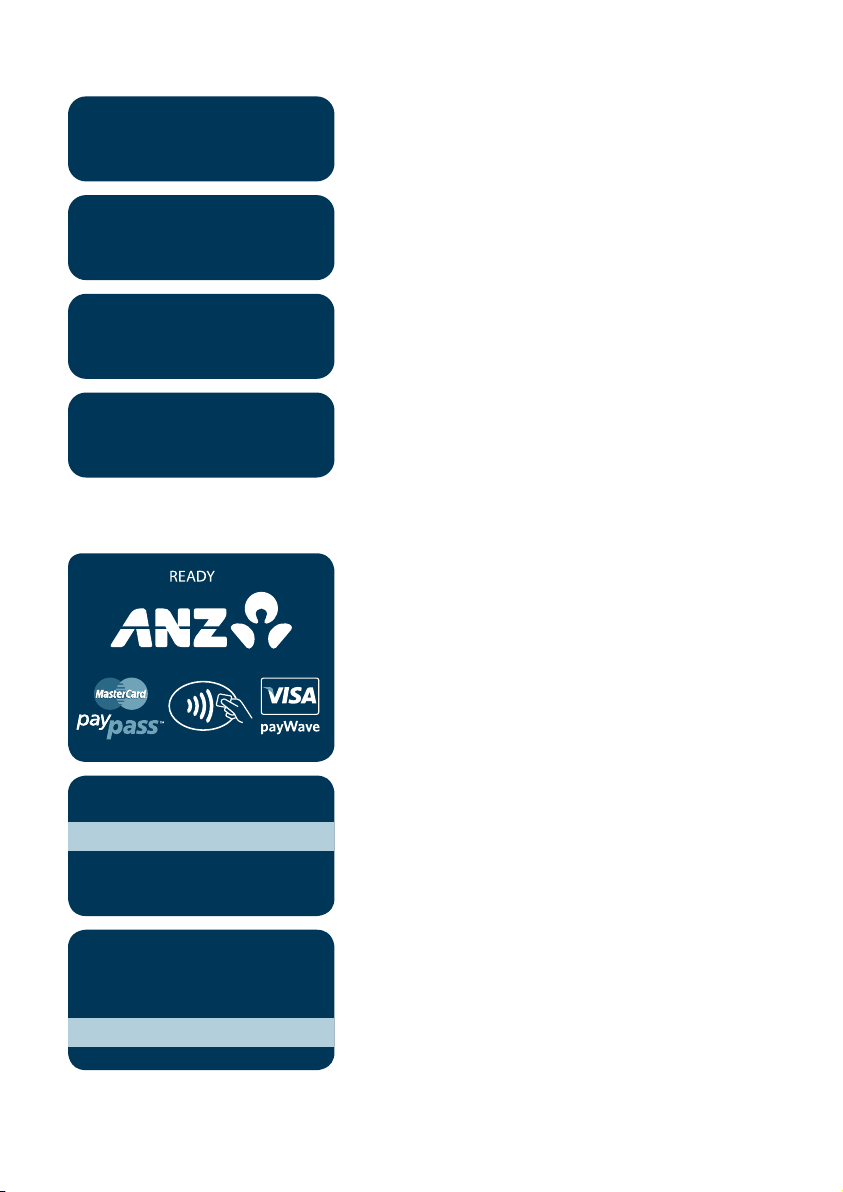
Credit account will automatically be selected
CREDIT ACCOUNT
$10.00 KEY OK
TRANSACTION
APPROVED
CUSTOMER COPY?
ENTER OR CLEAR
Cancellation of all Pre-Authorisation transactions (on ANZ Australian-issued cards)
and displayed.
Press ENTER.
The terminal prints out a merchant copy of the
Cancellation of Pre-Authorisation transaction Record.
Press ENTER to print the customer copy or CLEAR to
return to the start screen.
Perform card security checks, please refer to section 6
Fraud minimisation for further information on card
security checks.
ANZ EFTPOS MENU
4. PRE AUTHORISATION
5. CARD NOT PRESENT
6. TIPPING
PRE AUTHORISATION
1. AUTHORISATION
2. COMPLETION
3. CANCELLATION
Press ENTER to go to ANZ EFTPOS MENU screen. Press
<▼> key to go PRE AUTHORISATION and then press
ENTER or the number associated to select it.
Press <▼> key to go to CANCELLATION and then
press ENTER or the number associated to select it.
81
Page 82

Press ENTER.
CANCEL ALL?
Swipe or press FUNC key to hand key card details.
SWIPE CARD
The following two screen instructions only apply to hand key Transactions.
CARD NUMBER:
EXPIRY <MMYY>:
CREDIT ACCOUNT
CANCEL ALL?
YES OR NO?
Magnetic Stripe cards are to be processed through
the Magnetic Stripe Card.
Key in the card number then press ENTER.
Key in the expiry date then press ENTER.
Credit account will automatically be selected and
displayed.
Press ENTER to confirm cancellation of
Pre Authorisations.
CUSTOMER COPY?
ENTER OR CLEAR
82
TRANSACTION
APPROVED
The terminal prints out a merchant copy of the
Cancellation of Pre-Authorisation transaction Record.
Press ENTER to print the customer copy or CLEAR to
return to the start screen.
Page 83

17.3 CUSTOMER PREFERRED CURRENCY
Customer Preferred Currency (CPC) may have been activated on ANZ POS Turbo 2 for eligible
merchants who deal with overseas cardholders within selected merchant categories.
This optional feature is offered in association with The WorldPay Limited and allows merchants to
offer overseas MasterCard® and Visa® cardholders the option of converting Australian currency
purchases into a customer’s card billing currency at the time of purchase.
How it Works
CPC identifies the card’s country of issue and offers the cardholder the option of paying for the
goods or services in their billing currency at the time of purchase.
The exchange rate and price in the cardholder’s billing currency are displayed on the terminal
making the process for currency conversion easier for both you and your customers by processing
transactions in currencies which are familiar to your customers.
CPC complies with operating requirements for cards issued by MasterCard® and Visa®.
Your settlement is unaffected with funds continuing to settle into your account in Australian Dollars.
Currencies Available
CAD Canadian Dollars HKD Hong Kong Dollars THB Thai Bhat
CHF Swiss Franc SEK Swedish Krona NOK Norwegian Kroner
DKK Danish Krone JPY Japanese Yen USD US Dollars
EUR Euro SGD Singapore Dollars NZD New Zealand Dollars
GBP Pounds Sterling MYR Malaysian Ringgit ZAR South African Rand
* Available currencies may vary from time to time.
Requirements before Commencing a transaction
Customer Preferred Currency can prove to be a valuable tool for your customers when completing
transactions outside their home country. To use CPC, you must ensure that:
1. Your EFTPOS terminal will be automatically configured to recognise when an international
MasterCard®, or Visa® card, is initiated.
2. If “Acceptance Rate” comes up on the terminal, the cardholder must be informed that
CPC is optional and has a choice of currencies between the customer’s local currency and
Australian dollars.
3. The transaction amount will contain a 2.5% exchange rate mark-up.
4. The cardholder has acknowledged that the merchant will conduct the CPC services.
NOTE: Exchange rate mark-up is payable to ANZ and WorldPay. Please do not impose any additional
requirements or charges on the cardholder to process the transaction in the card’s local currency.
83
Page 84
Card Not Present CPC transactions
• Disclose the following to the cardholder:
- Total transaction amount in Australian Dollars
- Exchange rate
- Total transaction amount in the selected overseas currency (ie. the cardholder’s billing
currency).
• Provide a receipt that:
- Confirms that the cardholder agrees to use CPC
- Records the overseas currency agreed between the cardholder and merchant
- Records the exchange rate utilised by the merchant to complete the transaction
- Confirms that the cardholder’s selection is final.
How to process a CPC transaction
Perform card security checks, please refer to section 6
Fraud minimisation for further information on card
security checks.
PURCHASE AMOUNT?
$10.00
CASH OUT AMOUNT?
0.00
TOTAL AMOUNT?
$10.00
84
Key in the purchase amount then press ENTER.
Press ENTER.
Verify the amount is correct and accept by
pressing ENTER.
Page 85
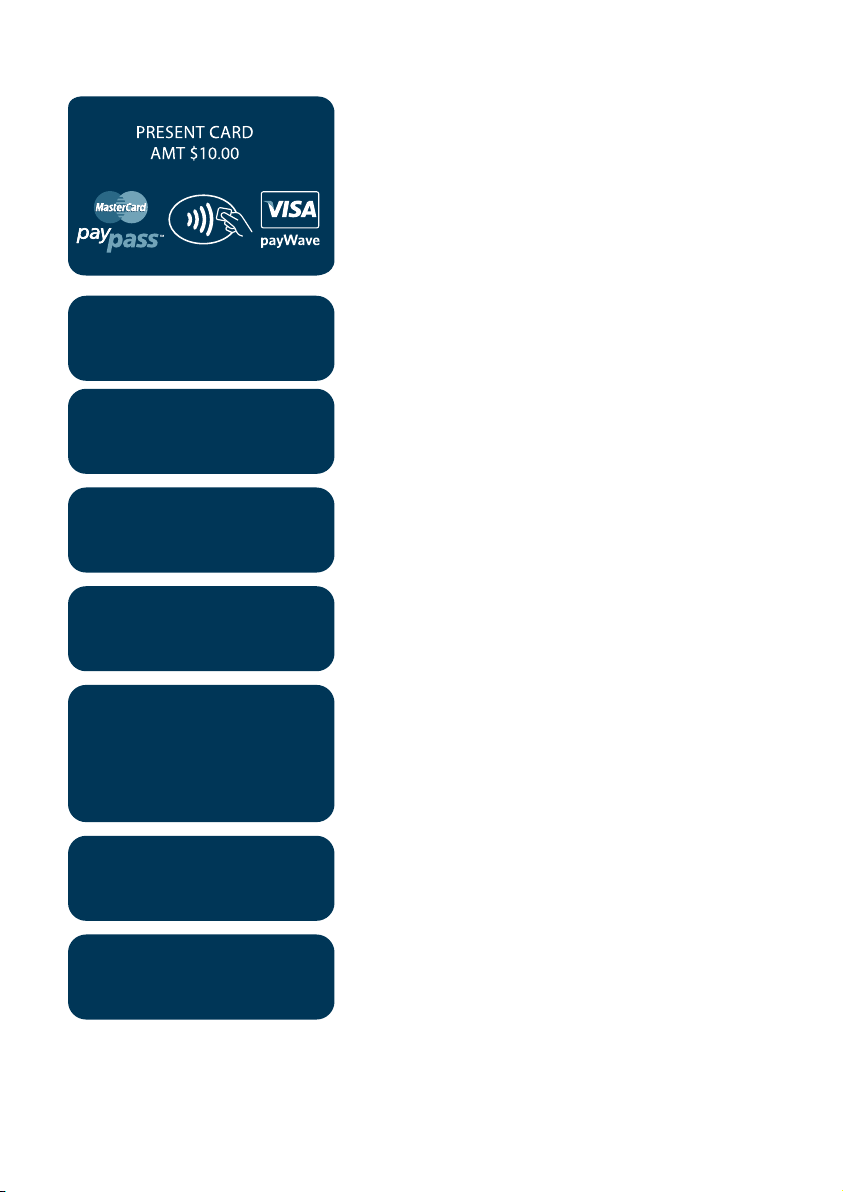
SELECT ACCOUNT
CHQ SAV CR
CREDIT ACCOUNT
$10.00 KEY PIN
PROCESSING
PLEASE WAIT
Insert or Swipe cardholder’s card. Chip Cards are to be
inserted and left in the Chip Card Reader Magnetic
Stripe Cards are to be swiped through the Magnetic
Stripe Card Reader.
Please note that CPC is not available for contactless
transactions.
Press <▲> key for credit account.
The selected account is displayed.
Have the cardholder enter their PIN then press ENTER.
Terminal status is displayed.
EXCH 0.7792
USD 7.79
ACCEPT RATE?
ENTER= YES CLR=NO
USD 7.79 KEY PIN
TRANSACTION
APPROVED
When this screen appears, you must offer the
cardholder the choice to accept CPC or to pay in
Australian Dollars. To accept CPC, the Cardholder
should press ENTER (YES). To decline CPC, the
Cardholder should press CLEAR (NO) and the
transaction will continue in Australian dollars.
Have the cardholder enter their PIN if known then
press ENTER or if the card allows just press ENTER.
NOTE: This screen only displays for Chip transactions when
cardholder has accepted the exchange rate.
Please ensure that you check for approval of the
transaction before completing the sale.
85
Page 86

SIGNATURE
REQUIRED
If signature is required, have the customer sign the
merchant copy signature record and compare it to
the signature on the reverse of the customer’s card.
The customer copy is printed.
NOTE: For Visa® and MasterCard® CPC transactions, an
additional checkbox will be printed on the receipt. The
customer is required to tick this checkbox signifying
acceptance of the conversion of the transaction amount
into the currency of the card origin. Please refer to an
example of CPC receipt on section 24 Filing and Retention
of transaction Records and Vouchers for further information.
SIGNATURE
VERIFIED?
ENTER=YES CLR=NO
REMOVE CARD
SIGNATURE
VERIFIED?
Press ENTER if the signatures match, if not press CANCEL
to abort the transaction. If the transaction is approved a
customer transaction Record will be printed.
For a Chip Card transaction, this screen is displayed.
Remove the card from the terminal and compare it to
the signature on the reverse of the customer’s card. If
the signatures match, press ENTER. If they do not,
press the CANCEL or CLEAR key to abort
thetransaction.
Press ENTER to print the customer copy or CLEAR to
CUSTOMER COPY?
return to the start screen.
ENTER OR CLEAR
17.4 LOW VALUE PAYMENTS
Low Value Payments (LVP) is a convenient and efficient way of paying for goods and services when a
small ticket payment transaction is detected. LVP is limited to scheme determined Merchant
Category Codes. LVP processing will only be initiated if the low value payment function has been
switched on and the selected account is credit, therefore the processing flow will be as per normal
ANZ purchase transaction but PIN entry or Signature will not be required for the transaction if that is
equal to or less than the respective card scheme’s LVP limit.
This optional feature is promoted by the card schemes under following names or brandings:
• MasterCard® Quick Payment Service – QPS
• Visa® Easy Payment Service – VEPS
• AMEX Small Ticket – AST.
When LVP function has been switched on, the requirements before Commencing a transaction
for ‘LVP’ processing after ‘Account Selection’ as follows:
• Transaction type = Purchase
• Account Type = Credit
86
• Amount of ‘Purchase’ is equal to or less than the ‘LVP’ transaction limit.
Page 87
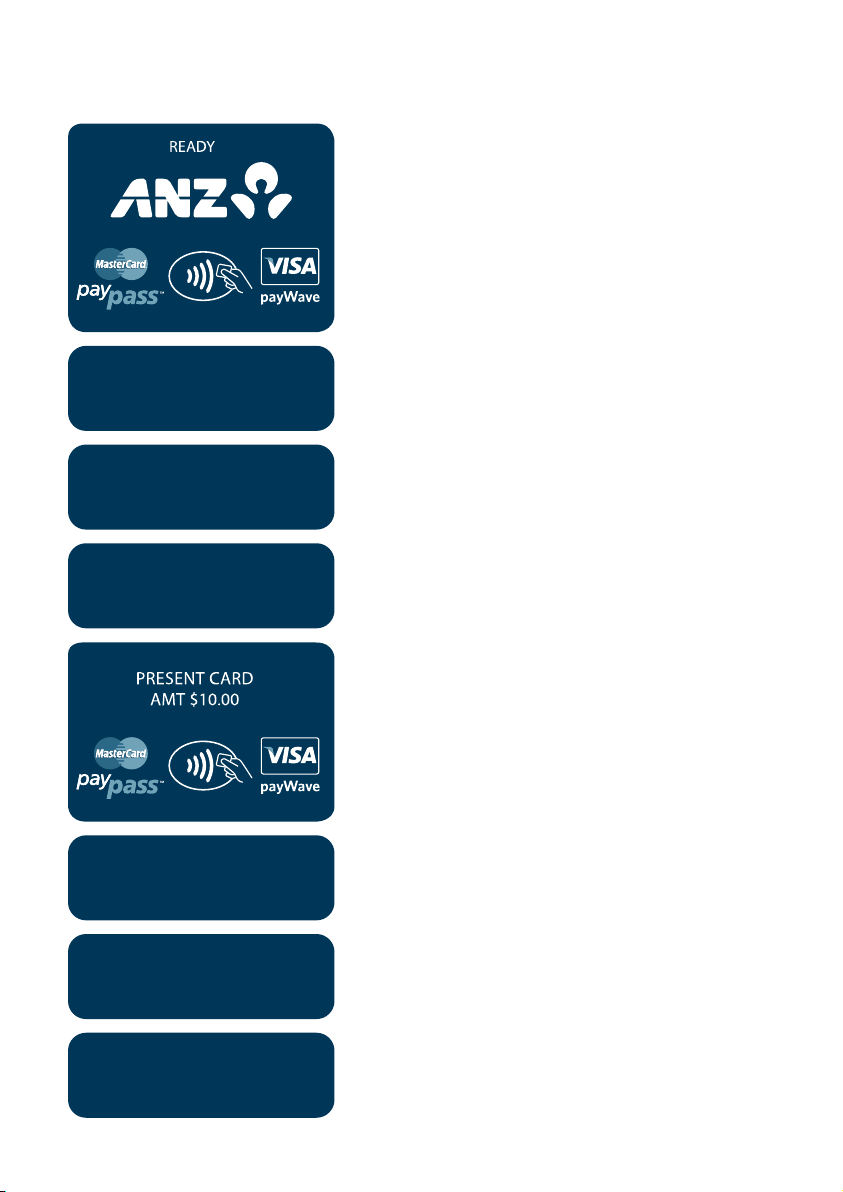
How to process a LVP transaction
PURCHASE AMOUNT?
$10.00
CASH OUT AMOUNT?
0.00
TOTAL AMOUNT?
$10.00
Perform card security checks .
NOTE: Please refer to section 6 Fraud minimisation for
further information on card security checks.
Key in the purchase amount then press ENTER.
Press ENTER.
NOTE: Cash-out is not available for LVP transaction.
Verify the amount is correct and accept by
pressing ENTER.
Insert or Swipe cardholder’s card. Chip Cards are to be
inserted and left in the Chip Card Reader. Magnetic
Stripe Cards are to be swiped through the Magnetic
Stripe Card Reader.
PROCESSING
PLEASE WAIT
SELECT ACCOUNT
CHQ SAV CR
CREDIT ACCOUNT
Press <▲> key for credit account.
The selected account is displayed.
87
Page 88

Terminal status is displayed.
PROCESSING
PLEASE WAIT
Please ensure that you check for approval of the
TRANSACTION
transaction before completing the sale.
APPROVED
Press ENTER to print the customer copy or CLEAR to
CUSTOMER COPY?
return to the start screen.
ENTER OR CLEAR
17.5 MULTI-MERCHANT FACILITIES
About ANZ Multi-Merchant Facilities
The ANZ Multi-Merchant Facitlities allows multiple merchants to process transactions on one
Electronic Terminal with separate settlements on each individual’s Merchant facility.
Definitions
Primary Merchant means the Merchant to whom the Electronic Terminal has been provided in
accordance with the terms of its Merchant Agreement.
Secondary Merchant means the Merchant who has been granted use of an Electronic Terminal
by a Primary Merchant pursuant to a Primary Approval Form.
Note: Electronic Terminals (including the welcome kit) are dispatched to the Primar y Merchant only.
Supported Transaction Types
Multi-Merchant Facilities are available for the following transaction types:
• • Purchase
• • Purchase + Cashout
• • Cashout Only
• • Refund
• • Card Not Present
• • Pre-Authorisation
• - Authorisation
• - Completion
• - Cancellation.
• - Enquiry
Please note:
Transactions are not able to be processed when the Electronic Terminal is offline.
88
Page 89
Processing Multi-Merchant Facility Transactions
After the amount entry prompt, please follow the instructions below to select the relevant
Merchant:
Use the UP/DOWN arrows or the corresponding
SELECT MERCHANT
1. MERCHANT 1
2. MERCHANT 2
3. MERCHANT 3
4. MERCHANT 4
SEARCH
Merchant 1
CONTINUE?
ENTER=YES/CLR=NO
Using the search option
NUMERIC key to select the relevant Merchant.
Select ENTER to proceed.
Refer to 4.1 for instructions on how to use the search
function.
Select ENTER to proceed.
Where a Merchant list is too large to display, you
SELECT MERCHANT
1. MERCHANT 1
2. MERCHANT 2
3. MERCHANT 3
4. MERCHANT 4
SEARCH
can use the search function.
Select SEARCH to proceed.
ENTER MERCHANT NAME
DR F
DR F NERI
DR F TOTTI
BACK
Merchant 1
CONTINUE?
ENTER=YES/CLR=NO
Using the alphanumeric keyboard, type the
name of the desired Merchant.
Use the UP/DO WN arrows to select the relevant
Merchant.
Select ENTER to proceed.
Select ENTER to proceed.
89
Page 90

Refunds
Each Merchant will be provided with their own Merchant Card.
To refund a transaction select the correct Merchant on the Electronic Terminal prior to swiping the
Merchant Card:
Use the UP/DOWN arrows or the corresponding
SELECT MERCHANT
1. MERCHANT 1
2. MERCHANT 2
3. MERCHANT 3
4. MERCHANT 4
SEARCH
Merchant 1
CONTINUE?
ENTER=YES/CLR=NO
SWIPE MERCHANT CARD
Please note:
It is important that each Merchant takes responsibility for storing and securing their Merchant
Refund Card.
It is important that refunds are processed against the same Merchant who processed the
original purchase.
NUMERIC key to select the relevant Merchant.
Select ENTER to proceed.
Refer to 4.1 for instructions on how to use the search
function.
Select ENTER to proceed.
Swipe Merchant Card (for the selected merchant)
through the Magnetic Stripe Card Reader.
Refund Errors
If the incorrect Merchant Card has been swiped, the
Invalid Merchant Card
Use card for
<Merchant Name>
Settlement
ANZ automatically performs settlement for you at 9pm AEST every day.
Please note:
Multi Merchant Electronic Terminals will not allow you to perform manual settlements
throughout the day. All Merchants’ accounts on the Electronic Terminal must be settled at the
90
same time, which is 9pm AEST every day.
Electronic Terminal will prompt the user to use the
correct card.
Page 91

Primary Merchant Settlements Reconciliation
Each day, Primary Merchants will receive a settlement amount in their account for each Electronic
Terminal.
To reconcile totals with the account settlement, Primary Merchants should print a Summary Totals
report on completion of trading each day. This report should be printed for each of the Electronic
Terminals at the site.
Note: If completion of trading occurs after 9pm, a Last Summary Totals report should be printed instead of a
Summary Totals report.
Secondary Merchant Settlements Reconciliation
Secondary Merchants will receive a single settlement amount in their account daily.
This will be total amount they have processed across all Electronic Terminals at the site.
To reconcile totals with the account settlement, Secondary Merchants should print a Summary
Totals report on one of the Electronic Terminals on completion of trading each day. The totals will
summarise all transactions processed by the Secondary Merchant for that settlement period.
Note: If completion of trading occurs after 9pm , a Last Summary Totals report should be printed instead of a
Summary Totals report.
Reports
• The following reports are still available for Multi-Merchant customers:
• Sub-totals
• Summary Totals
• La st Totals
1
1
• Detailed Report.
1
Does not include American Express, Diners Club or JCB totals if report is printed for all Merchants.
When selecting these reports, users can choose to print a report for a single Merchant or all
Merchants:
SELECT MERCHANT
1. ALL MERCHANTS
2. MERCHANT 1
3. MERCHANT 2
4. MERCHANT 3
Use the UP/DOWN arrows or the corresponding
NUMERIC key to select the relevant Merchant.
Select ENTER to proceed.
Refer to 4.1 for instructions on how to use the search
function.
SEARCH
Please note:
Multi-Merchant Electronic Terminal receipts are slightly different. It is important to take note of which
Merchant the transaction was processed against, and file it accordingly.
Primary Merchants receive an Electronic Terminal total only.
91
Page 92

Shift Totals reporting is not available with Multi-Merchant Facilities. If this function is attempted, The
Electronic Terminal will return error code 12 (invalid transaction).
Force settlement reports are not available for Multi-Merchant Facilities.
Please refer to the appendix for report examples.
Report Errors
This error will be displayed when the Totals for the
TOTALS NOT
AVAILABLE
settlement period is not available.
This error may be displayed when a new terminal is
first installed, or when a terminal is swapped into an
existing site.
18. TERMINAL ERROR MESSAGES
Most messages are self-explanatory. Some may require assistance from ANZ Merchant Services.
When contacting ANZ Merchant Services, please ensure you have your Merchant Identification or
Terminal Identification number available.
If an error message appears on the terminal but is not listed below, please call ANZ Merchant
Services on 1800 039 025 for assistance.
Magnetic Stripe Card Processing
92
ACCOUNT TYPE
ERROR
TRAN CANCELLED
CARD ERROR REFER
TRAN CANCELLED
EXPIRED CARD
CARD MUST BE
SWIPED
CARD
NOT ACCEPTED
CARD NUMBER
INVALID
The account selected is not available. Press CLEAR
and ask the cardholder to select another account.
The Issuing Bank has rejected the card. Refer the
cardholder to the Issuer and request an alternative
method of payment.
The card is no longer valid. Refer the cardholder to the
Issuer and request an alternative method of payment.
A card number for a debit card account (CHQ or SAV)
cannot be manually entered. Press CLEAR then swipe
the card through the Magnetic Stripe Card Reader.
Follow the display screen prompts.
The ANZ network does not accept this card. Refer the
cardholder to the Issuer and request an alternative
method of payment.
Card number keyed incorrectly. Press CLEAR then
re-key the card number.
Page 93

INVALID
EXPIRY DATE
TRAN CANCELLED
TRAN NOT ALLOWED
NO LINE
TRAN CANCELLED
NO SIGNAL
SIM ERROR
TRAN CANCELLED
NOT AUTHORISED
The “expiry” date entered is not the correct format.
Press CLEAR and re-key the date in the format “mmyy”
e. g. 0614.
An invalid Cash-out or Refund transaction has been
attempted where the transaction type has been
disabled. Please contact ANZ Merchant Services.
The telephone cable has been disconnected or the line is
not operational. Check the connection points are
inserted correctly and whether the line is operational.
Re-try the transaction. If this fails, revert to Manual
Processing and seek authorisation for the transaction
from the appropriate Authorisation Centre.
A mobile signal cannot be detected. Please move to a
site with a better signal.
An invalid SIM has been detected. Press ENTER to
retry or CANCEL to cancel the transaction. If issue
continues, please check the SIM and contact ANZ
Merchant Services.
Amount exceeds authorised limit or usage with that
card. Refer the cardholder to their Issuer and request
an alternative method of payment.
PIN INCORRECT
PLEASE TRY AGAIN
TRAN CANCELLED
PIN ERROR REFER
TIP AMOUNT
EXCEEDS LIMIT
The customer PIN was keyed incorrectly. Advise the
customer to re-enter their PIN.
The customer has incorrectly keyed the PIN three
times. Refer the cardholder to their Issuer and request
an alternative method of payment.
If the Tip amount exceeds 20% of the purchase
transaction amount, the terminal displays this screen.
93
Page 94
READY*
Chip Card Processing
TRAN CANCELLED
CARD REMOVED
CHIP CARD
NOT SUPPORTED
TRAN CANCELLED
CARD BLOCKED
CHIP APPLICATION
NOT ACCEPTED
An asterisk sign (*) is displayed when the terminal has
stored Electronic Fallback (EFB) transactions.
Displayed if the card is removed before the
transaction is completed. Please ensure that
the card remains in the terminal during the
transaction process.
Displays when there are no applications on the chip
supported by the terminal. If magnetic stripe fallback
is supported, the terminal will prompt to swipe the
Chip Card, alternatively request another method of
payment.
Displayed if the card has been blocked by the Issuing
Bank. Refer the cardholder to the Issuer and request
an alternative method of payment.
Refer the cardholder to the Issuer and request an
alternative method of payment.
TRAN CANCELLED
TRACK 2 MISMATCH
TRAN CANCELLED TRN LMT
EXCEEDED
TRAN CANCELLED TOPUP NOT
ALLOWED
94
The transaction has been declined as details on the
chip and card do not match. Refer the cardholder to
the Issuer and request an alternative method
of payment.
Per transaction limit amount exceeds the set
transaction limit for the card. This is due to Merchant
category code falls under restricted list.
Topup functionality is not available for the card.
Page 95

Contactless Processing
USE ONE CARD
PLEASE TRY AGAIN
CONTACTLESS NOT
AVAILABLE
TIMEOUT EXPIRED
Displays when the multiple cards presented, please
ensure that only one card is presented and it is
presented within 4cm of the Contactless Terminal
reader, follow the prompt and try again.
This error message displays when,
1. Card tapped incorrectly , please follow the prompt and
try again.
2. Transaction not allowed (e.g. Card blocked or Card
Data Error), please follow the prompt for next action.
Contactless transaction timed out, please follow the
prompt and try again.
TRAN CANCELLED
CHIP DECLINED
CTLESS ERR 35
TRAN NOT ALLOWED
CTLESS ERR 34
NO MATCHING AID
CTLESS ERR 33
NO APPLICATION
CTLESS ERR 32
USE CONTACT INTERFACE
CTLESS ERR 30
CARD BLOCKED
CTLESS ERR 29
TXN LIMIT EXCEEDED
Contactless transaction declined by card, please seek
alternative payment.
transaction not allowed due to Chip card data
missing, please follow the prompt and try again.
Displays when the chip card AID(Application ID) not
match, please follow the prompt and try again.
This error message displays if there is no application
in the card, please follow the prompt and try again.
Contactless is not allowed, please tap or swipe card.
Displays when the card is blocked please follow the
prompt and try again.
The transaction amount exceeds the set transaction limit
for the card, please follow the prompt and try again.
CTLESS ERR 31
TRAN NOT ALLOWED
Display when transaction is not allowed, please follow
the terminal prompt and try again.
95
Page 96

19. SETTLEMENT
ANZ offers same day settlement, every day.*
*For ANZ business account holders, funds are available on the same day for online transactions, processed
through the ANZ POS Turbo 2 and settled before 09:00 pm (AEST). For non-ANZ business account holders, for
online transactions processed through the ANZ POS Turbo 2, ANZ will transfer the funds to the merchant’s
bank on the following business day and the availability of the funds will be determined by the merchant’s
bank. For transactions processed offline or via Paper Merchant Vouchers, these settlement times do not apply.
American Express, Diners Club and JCB will credit your bank account separately. Please check
directly with these third parties for when funds are available as times may vary.
ANZ automatically performs Settlement for you if it has not been completed by 9pm (AEST). After
ANZ has automatically settled, the terminal will print the Settlement report at the time you next
perform a transaction. Remember to clear all EFB transactions and print your reports prior to
Settlement.
The terminal cannot be used while Settlement is being processed, so it is strongly recommended
to initiate settlement during a quiet period and at the same time each day.
How to initiate manual settlement
Press ENTER to go to ANZ EFTPOS MENU screen. Press
ANZ EFTPOS MENU
5. CARD NOT PRESENT
6. TIPPING
7. REPORTS
REPORTS MENU
1. TOTAL
2. DETAIL REPORT
3. SETTLEMENT
<▼> key to go to REPORTS and then press ENTER or
the number associated to select it.
Press <▼> key to go to SETTLEMENT or the number
associated to select it.
SUB SUM
96
TOTALS REQD
CONNECTING
PLEASE WAIT
SUB TOTAL
Select Sub Totals (SUB) by pressing the <–> key or
Summary Totals (SUM) by pressing the <▼> key.
The terminal connects to ANZ.
If you select SUB, this screen displays. The terminal
will generate a totals report prior to completing
Settlement.
Page 97

If you select SUMM, this screen displays. The terminal
SUMMARY TOTALS
will generate a summary report prior to completing
Settlement.
20. PRINT TOTALS
The Sub Totals report lists the total number and amount of all transactions made since the last
Settlement by card type. This report includes all card types accepted by the terminal.
The Summary Totals report lists the total number and amount of credit and debit card
transactions made since the last by transaction type. This does not include American Express,
Diners Club or JCB totals.
The Last Settlement Totals report lists the amounts credited to your bank account at the last
Settlement period. This does not include American Express, Diners Club or JCB totals.
The Shift Totals report lists the total number and amount of credit and debit card transactions
made since the last shift closure by transaction type. It does not include American Express, Diners
Club or JCB totals.
Refer to transaction Reports section for diagram examples of Totals reports.
How to Print a Totals Report
Press ENTER to go to ANZ EFTPOS MENU screen.
ANZ EFTPOS MENU
5. CARD NOT PRESENT
6. TIPPING
7. REPORTS
Press<▼> key to go to REPORTS and then press
ENTER or the number associated to select it.
REPORTS MENU
1. TOTAL
2. DETAIL REPORT
3. SETTLEMENT
TOTALS
SUB SUM LAST
Press ENTER key to select TOTAL or the number
associated to select it.
Select SUB to produce a Sub Totals report, by pressing
the <–> key.
Select SUMM to produce a Summary Totals report,
by pressing the <▼> key.
Select LAST to produce a Last Settlement Summary
Totals report, by pressing the <▲> key.
The terminal will print out a copy of the selected report.
97
Page 98

How to Print a Shift Report
If your business operates over an extended trading period and you have a shift process in place, you may
find the Shift Report useful to provide information on the transactions performed during each shift.
This operates independently from your Settlement period. When you close off your shift, the Shift Total
report will automatically print. You may also print the running total of your current shift without closing
the Shift transactions.
How to Start and Close a Shift
Press ENTER to go to ANZ EFTPOS MENU screen.
ANZ EFTPOS MENU
5. CARD NOT PRESENT
6. TIPPING
7. REPORTS
REPORTS MENU
1. TOTAL
2. DETAIL REPORT
3. SETTLEMENT
Press <▼> key to go to REPORTS and then press
ENTER or the number associated to select it.
Press ENTER key to select TOTAL or the number
associated to select it.
Press ENTER.
TOTALS
SUB SUM LAST
Select SHFT by pressing the <–> key.
SHIFT TOTALS
SHIFT LAST
Press ENTER to close off your shift and print the Shift
CLOSE TOTALS
ENTER OR CLEAR
Total Report.
98
A new shift will begin.
CONNECTING
PLEASE WAIT
PROCESSING
PLEASE WAIT
TRANSACTION
APPROVED
Page 99

How to Print Previous Shift Totals
ANZ EFTPOS MENU
5. CARD NOT PRESENT
6. TIPPING
7. REPORTS
REPORTS MENU
1. TOTAL
2. DETAIL REPORT
3. SETTLEMENT
TOTALS
SUB SUM LAST
SHIFT TOTALS
SHIFT LAST
LAST SHIFT
TOTALS?
Press ENTER to go to ANZ EFTPOS MENU screen. Press
<▼> key to go to REPORTS and then press ENTER or
the number associated to select it.
Press ENTER key to select TOTAL or the number
associated to select it.
Press ENTER.
Select LAST by pressing the <▼> key to print the
previous Shift Totals.
Press ENTER.
CONNECTING
PLEASE WAIT
99
Page 100

21. REPRINT THE LAST RECORD
This function is provided for the operator to reprint when the terminal runs out of paper or a
paper jam occurs.
How to Reprint the Last Customer transaction Record
Press ENTER to go to ANZ EFTPOS MENU screen. Press
ANZ EFTPOS MENU
6. TIPPING
7. REPORTS
8. SUPERVISOR
SUPERVISOR MENU
1. INITIALISATION
2. XTRA FUNCTIONS
3. COPY
The format of the reprinted receipt or report is exactly the same as the original with the addition
of the text **DUPLICATE COPY** printed at the top.
<▼> key to go to SUPERVISOR and then press ENTER
or the number associated to select it.
Press <▼> key to go to COPY and then press ENTER
or the number associated to select it.
22. TRANSACTION DETAIL REPORT
The transaction Detail report lists the masked card number, transaction reference number and
transaction amount for each transaction for the Settlement date displayed.
ANZ EFTPOS MENU
5. CARD NOT PRESENT
6. TIPPING
7. REPORTS
REPORTS MENU
1. TOTAL
2. DETAIL REPORT
3. SETTLEMENT
100
Press ENTER to go to ANZ EFTPOS MENU screen. Press
<▼> key to go to REPORTS and then press ENTER or
the number associated to select it.
Press <▼> key to go to DETAIL REPORT and then
ENTER or the number associated to select it.
 Loading...