

Page 1

BLUETOOTH PARTY SPEAKER
42940197
Page 2
Warning
CAUT IO N
RISK O F EL ECTRIC
SHOC K DO N OT OPE N
Contents
Warning 1
Importan t precautions 1
Package co ntents 2
Descript ion of top panel 3
Descript ion of rear panel 4
Descript ion of Remote Control 5
Getting St arted 6
Function I nstructions 7
Connect Wi red Microphone 9
Warranty 10
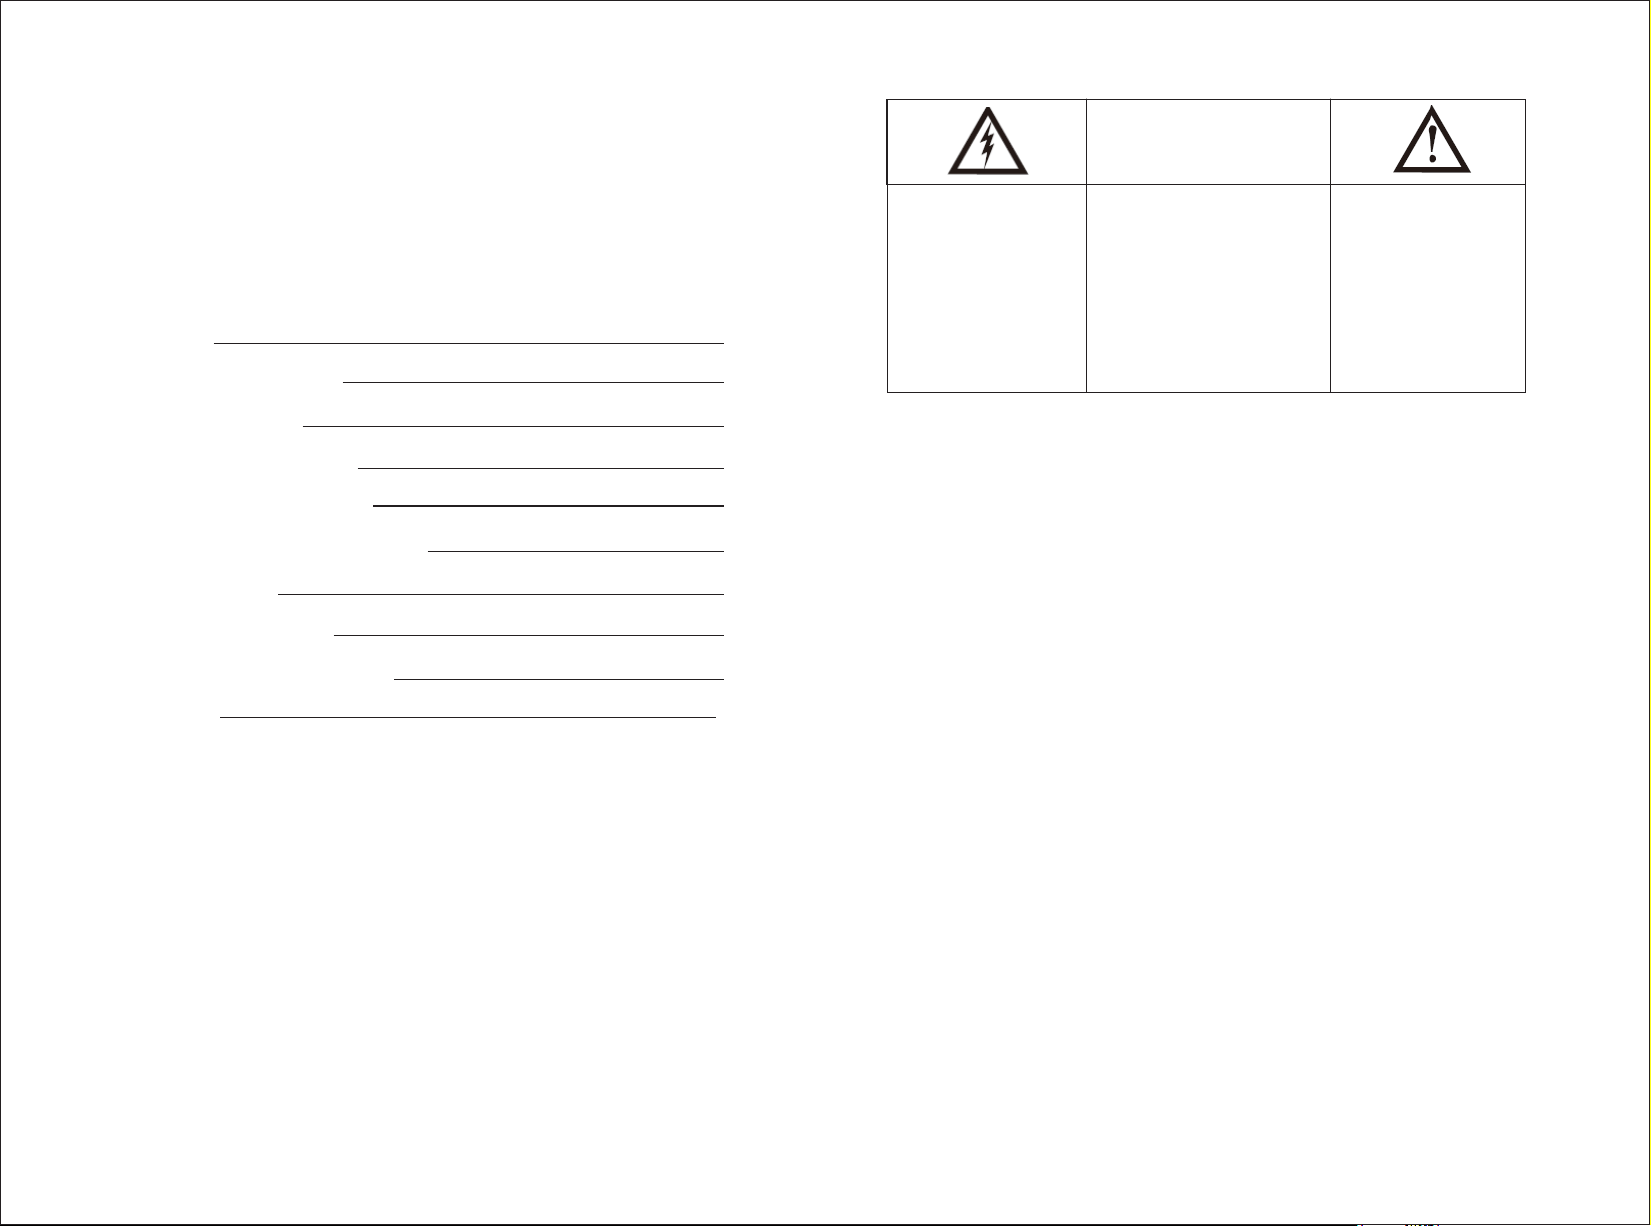
The lighting fla sh w it h
arrowhead sym bo l, w it h an
equilateral t ri an gl e is
intended to ale rt t he u se r to
the presence of u ni ns ul at ed
dangerous vol ta ge w it hi n
the products en cl os ur e th at
may be sufficien t ma gn it ud e
to constitute a r is k of el ec tr ic
shock toperso ns .
CAUTION: TO REDUCE THE
RISK OF SHOCK, DO N OT
REMOVE COVER (O R BA CK ).
NO USER SERICEA LB E PARTS
INSIDE REFEER S ER VI CING TO
QUALIFIED SER VI CE
PERSONNEL.
The exclamati on p oi nt
within an equil at er al
triangle is int en de d al er t
the user tithe pr es en ce o f
important ope ra ti ng a nd
maintenance ( se rv ic in g)
instruction s in t he l
iterature acc om pa ny in g
the appliance .
Importan t precautions:
1. The ap pa ratus shall n ot b e exposed t o dr ipping or spl as hing and th at n o ob jects fill ed w ith
liqu id s, suchas vas es , shall be pl ac ed on the appar at us.
2. Mini mu m distances 1 00 c m around th e ap paratus for s uf ficient vent il ation.
3. The ve nt ilation sho ul d not be impe de d by covering t he v entilat io n op ening swi th i tems,
such a s ne ws papers, ta bl e-cloth s or c ur tains.
4. No nak ed fl ame sources s uc h as lighte d ca ndles,sho ul d be placed o n th e ap paratus .
5. When t he m ainsplug or a nd a pplianc e co upler is used a s th e disconn ec t de vice, the
disc on nect device s ha ll remain r ea dily operab le .
6.Workin gt emperatur e: -10℃~+45℃ .
7.Ba tt ery cannot be s ub jected to h ig h or l ow extrem e te mperature s, l ow air pres su re at high
alti tu de during use , st orage or tr an sp ortatio n.
8.Re pl acement of a ba tt ery with an i nc orrect type t ha t can result in a n ex plosion o r th e
leak ag e of flammable l iq uid or gas.
9.Di sp osal of a batte ry i nto fire or a ho t ov en , or mechan ic ally crushi ng o r cutting o f a ba ttery,
that c an r esult in an exp lo sion.
10.L ea ving a batter y in a n extreme ly h igh tempera tu re surrou nd in g environ me nt that can
resu lt i n an explosio n or t he leakag e of fl am mable liq ui d or gas.
11.A battery s ub jected to ext re mely low ai r pr essure that m ay r esult in an e xp lo sion or the
leak ag e of flammable l iq uid or gas.
12.T hi s product sha ll n ot be conne ct ed to d.c. powe r su pply source e xc eeding PS 2 (1 2V
d.c. 2 A) .
13.T he u se of apparat us i n moderat e cl imates.
14.A tt ention shou ld b e drawn to th e en vironment al a spects of b at te ry dispos al .
15.B at teries shal l no t be expose d to e xcessive he at s uch as sunshi ne , fire or the li ke .
16.E xc essive soun d pr essure fr om e arphones an d he adphone s ca n ca use heari ng l oss.
17.T he i nternal bat te ry is non-u se r re placeab le .
18.D o no t use this appa ra tus near th e wa ter.
1
Page 3
Package contents
1.Speaker x 1
2.Remote control x 1
3.AC power cable x 1
4.User manual x 1
5.Line In / FM Antenna Cable x 1 ( the same one cable)
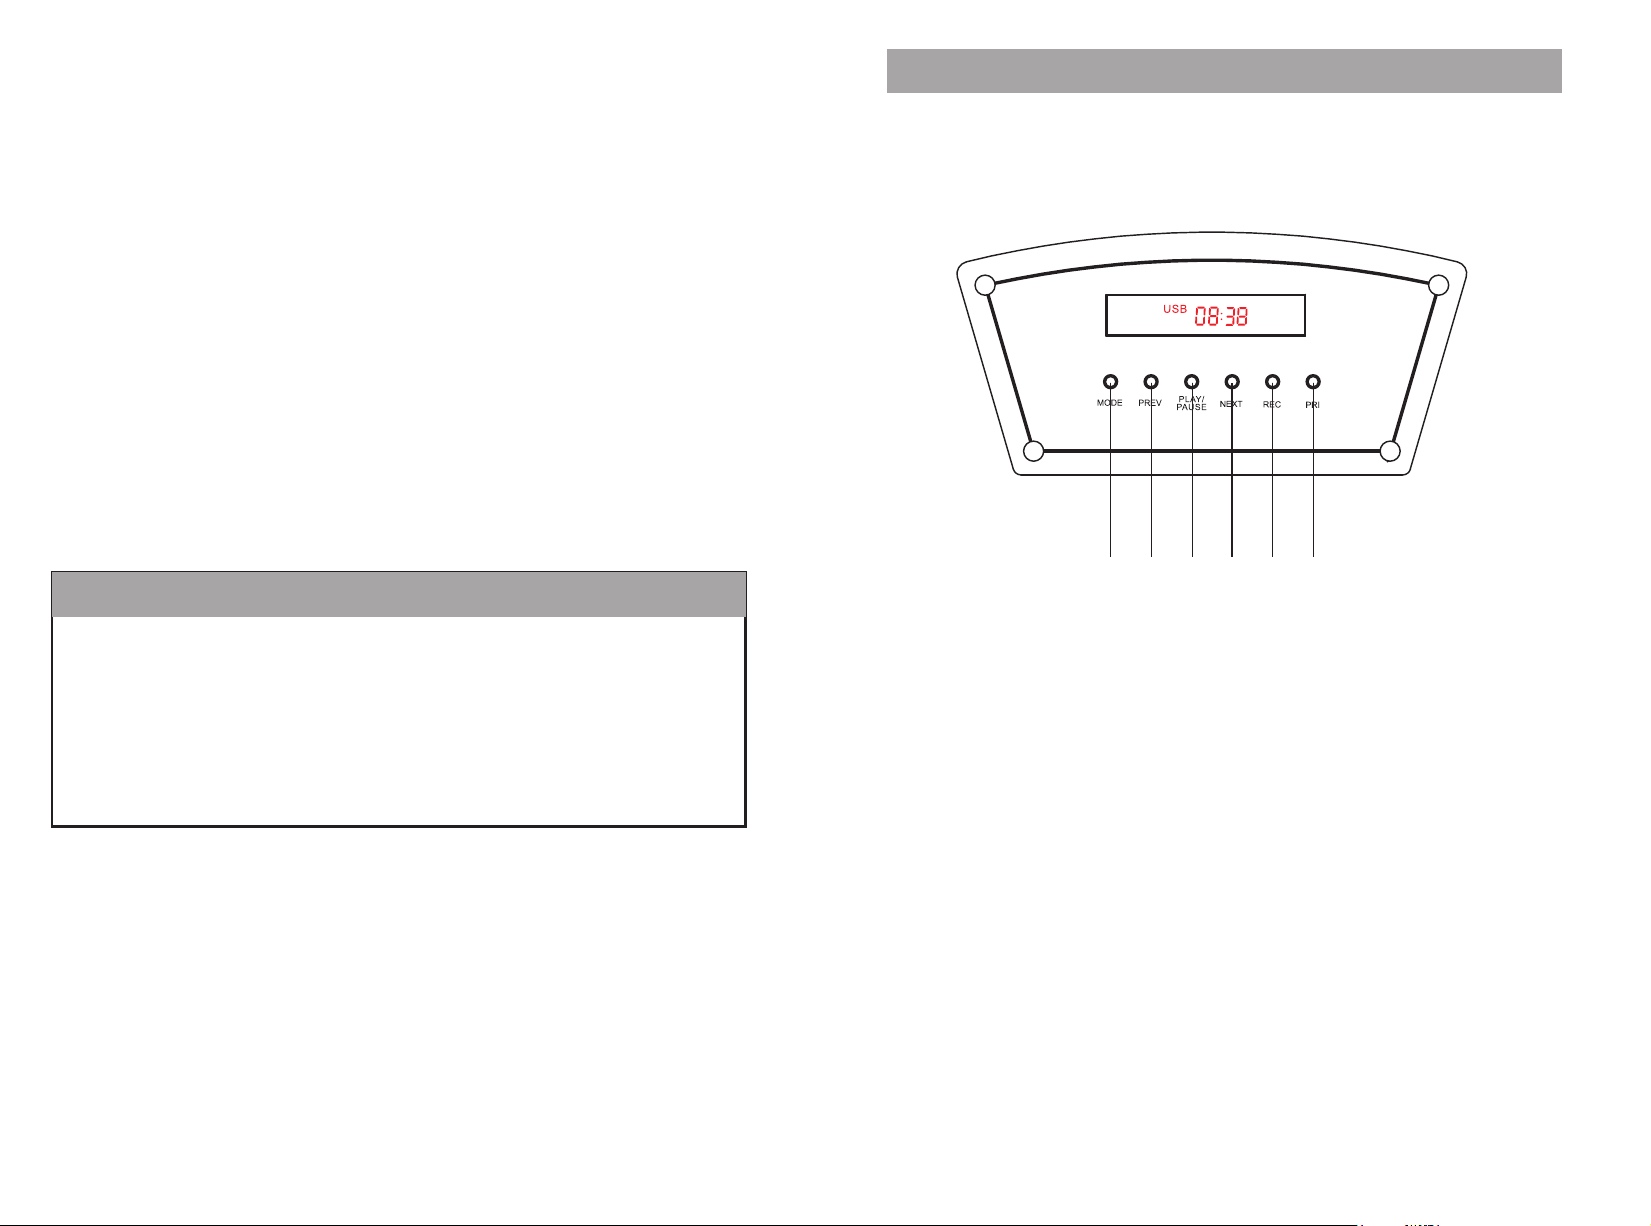
DESCRIPTION OF TOP PANEL
Product specications
Speaker
Powe r Su pply : 22 0-240V~ 5 0H z
DC Inp ut : 5V
FM Rad io : 8 7. 5-108MH z
Spea ke r Size : 6.5 Inch + 2 In ch
Batt er y : Re chargea bl e li thium bat te ry
Line I n : 3. 5m m
Micr op hone Input : 6. 35 mm
DC Inp ut (external ) : 12 V
1 2 3 4
1.Mode Sw itchi ng Button
2.Previ ous But ton
3.Play/ Pause B utton
4.Next Bu tton
5.REC But ton
6.Micro phone P riority Bu tton
5
6
2 3
Page 4

DESCRIPTION OF REAR PANEL
1
2
3
4
5
6
7
8
9
10
11
12
13
14
DESCRIPTION OF REMOTE CONTROL
1. Power on /off
2. Mode
3. Mute
4. Volume+
5. Previo us Track /CH-
6. Scan
7. 0-9 keys
8. EQ Funct ion
9. Play/P ause
10. Next Tra ck/CH +
11. Volume -
12. Repea t
1.LED On/ Off
2.Power O n/Off and Vo lume knob
3.Treble Volum e Knob
4.Bass Vol ume Kno b+
5.Batte ry Char ge light Ind icato r
6.Line in I nput Ja ck
7.USB Inp ut Slot
8.TF Inpu t Slot
9.Micro phone Vo lume Knob
10.Echo Vo lume Kn ob
11.Microph one Input Jack
12.DC 12V E xtern al Input
13.DC 5V In put
14.AC Inp ut Sock et
4 5
2
To insert the remot e co nt ro l ba tt er ies:
1.Open the batt er y co mp ar tm en t.
2.Insert 2 x AAA batt er ie s wi th c or re ct polarity (+/-) a s in di ca te d.
The 2 xA AA ba tt er y no t in clude in our produc ts .
3.Close the bat te ry c om pa rt me nt.
CAUTION:
Danger of explo si on i f ba tt er y is i ncorrectly repl ac ed .
Replace only wi th t he s am e or e qu iv al ent type.
1
3
Page 5

Getting Started
Function Instructions
Connecti ng Power Cable
War ning:Ensu re t he is in OF F po sition befo re p lugin.Plu gi n Power on/o ff switch
the AC connector i nt o the 220-240 V 50 Hz inlet so ck et in the rear pa ne l of the unit and
the ot he r end into the st an dard AC 24 0V w all socke t.
1. Do not p lu g or unplug the p ow er cable wh il e you have wet ha nd s.
2. To prote ct t his apparat us f rom aligh tn ing storm, or w he n left unatte nd ed and unus ed f or
long p er iods of time, u np lug power c ab le from the wal l ou tlet.
3. Whe n un plugging th e po wer cord fr om a w all outlet, a lw ays pull on t he p ow er plug onl y.
Neve r un plug it by pull in g the power c or d.
Charging t he internal Battery
The sp ea ker comes wit h a bu ilt-in re ch argeable ba tt ery, fo llow the be lo w steps
to cha rg e it:
AC INP UT (220-240V ) Ch arging
1. Ple as e connect the p ow er cable on t he r ear panel and p lu gin to the 22 0- 24 0V 50Hz wal l
sock et t o charge the sp ea ker.
2.Pl ea se charge abo ut 2 -3hours t o ch arged fully.
DC 5V IN C ha rging
1.Pl ea se connect US B ch arger to th e DC 5 V input slot, t he n plugin to the 2 20 -240V 50H z
wall s oc ket to charge t he s peaker.
2.Th e Re d charging LE D in dicator o n th e rear panel wi ll l ight up, th e ba tt ery is bein g ch arge.
3.If f ul ly charged, t he R ED indica to r li ght will ke ep fl ashing sl ow ly. U np lu g the power c ab le to
stop c ha rging.
4.Th e ch arging time f or U SB input is a bo ut 4hours.
DC 12V I NP UT
Conn ec t the DC cable of t he e xternal p ow er supply to th e DC 1 2V IN termi na ls o f the speak er
rear p an el, please co rr espondi ng c onnect to the R ed ( +) and Blac k (- ) in dicated .
Note d: T his DC input isn ot f or the batt er y ch arging, o nl y supply the po we r to work for t he
spea ke r.
Intrenal B attery Level indicat or
1.Th er e is a full grid ba tt ery indic at or s ymbol kee pi ng static on th e ri ght botto m co rner of the
disp la y screen, mea ni ng batter y ca pa city is ful l.
2.If t he h alf grid batt er y indicat or s ym bol will li gh t on on the left bo tt om corner o f th e display
scre en , meaning bat te ry capaci ty i s lo w.
3.If t he h alf grid batt er y indicat or s ym bol keepi ng fl ashing on the l ef t bottom co rn er of the
disp la y screen, mea ni ng batter y ca pa city is alm os t running out , pl ease char ge t he battery
on tim e.
Note : pl ease fully ch ar ge the prod uc t when it is not go in g to be used fo r a lo ng t ime and
char ge o nce a month to ke ep l onger bat te ry life.
Turning ON/OFF the speaker
Tur n the Power ON/ OF F & Volume Knob on t he r ear funct io n panel to righ t di rection t o po wer
on the S pe aker, and turn t o le ft direct io n to p ower off the Spea ke r.
6 7
USB Operat ion
This unit ha s a US B port for play b ac k MP3 music .
· Inse rt y our USB devic e in to the USB po rt a nd t he unit wil l st art playing a ut omatica ll y.
Pres s th e [MODE] butt on t o USB mode is sel ec ted.
· Pres s th e or key to the pre vi ous or next tra ck .
· Pres s th e bu tton to pla y or p ause music
· Pres s bu tt on on the rem ot e to repeat the c ur rent trac k, p ress it again t o re peat all
trac ks .
FM Operati on
This s pe aker suppor ts F M radio fun ct io n.
1.In se rt the Line In Ca bl e/ FM anten na c ab le (suppl ie d in the acce ss or ies) to the L in e input
jack o n th e rear panel an d ex tend the ca bl e.
2.Pr es s [ MODE ] button o n th e top panel o r on t he r emote con tr ol repeated ly u ntil FM
func ti on is selecte d.
3.Sh or t press butto n on t he top pane l to s ea rch the FM ra di o station aut om aticall y.
4.Pr es s or to select th e pr evious or n ex t FM r adio stat io n.
Bluetoot h function
1.Pr es s [ MODE ] button o n th e top panel s wi tc h to the Blue to oth mode if the s pe aker on
othe r mo de, there is a pr om pt sound.
2.On ce o n the Bluetoo th m ode," bLU E " wi ll k eep flashi ng o n the displ ay s cr een.
3.Op en t he Bluetoot h fu nciton of t he e xt ernal dev ic e and search th e Bl uetooth d ev ice name
"429 40 197 " to pair.
4.Pr es s connect to "PAIR" wi th t he speake r.
5.On ce c onnected, " b LU E " will keep s ta ti c on the disp la y screen and ca n he ar a prompt
soun d, y ou can play the m us ic with the s pe ak er.
6.You can use butto n or b utton on top pa ne l to contro l th e songs of the ex te rnal devi ce .
TWS Connec ting
This s pe aker suppor ts TWS p ai ring func ti on, please bu y tw o same spea ke r to e njoy this
func ti on.
1.Turn on the Blue to oth functio n of t he one spea ke r, connected t he b luetoot h an d playing
musi c.
2.Lo ng p ress MODE but to n on the func ti on p anel to ope n th e TW S fu nction, " " wil l
shor t di splay on the sc re en.
3.Turn on the blue to oth of anot he r sp eaker and " b LU E " will keep flas hi ng on the scr ee n,
then l on g press [ MODE ] bu tt on of this spea ke r to open the TWS fun ct ion, " " will
shor t di splay on the sc re en and "bLU E " wi ll k eep stati c.
4.Bo th s peakers' TWS will p ai r automat ic ally if above o pe ration co rr ec t. Once TWS paire d
succ es sully, " bLUE " of both sp ea ker will ke ep s tatic.
5.Turn the volum e kn ob on the fun ct io n panel of an y sp eaker incre as e or decrea se t he
musi c vo lume. 6.If no t us ing the TWS funct io n, p lease lon g pr ess [ MODE ] to
deco nn ected TWS, " " will sho rt s how on the di sp la y screen, a nd " b LUE " will keep
flash in g on another sp ea ker.
Page 6

Function Instructions
Connect with Wired Microphone
Connect wi th AUX Line in
1.Pr es s [ MODE ] button o n th e functio n pa ne l to switch t o th e Line in mode, " AUH " w ill be
disp la yed on the scre en .
2.Co nn ect this spea ke r Line in inp ut j ack and the dev ic e Earphon e ja ck b y provide d Li ne in
cabl e (s upplied in th e ac cessori es )
3.On ce c onnected, tu rn on your ex te rn al device a nd p lay music .
Caut io n: Please tur n off th e un it before c on nect AUX cable i n or der to avoi di ng u nexpect ed
nois e.
Micropho ne REC Function
Note :
Note : Re cording fun ct ion only re co rd the voice fr om m icropho ne i np ut.
Blue to oth and AUX inpu t ar e not recor de d.
Insc tr uction:
1.Pl ea se must inser t a US B driver to s av e th e record fil e du ring the reco rd ing.
2.In se rt a micropho ne a nd long pre ss R EC button on th e to p panel to tu rn o n th e recordi ng
func ti on and the disp la y will show “ ” .
2.Th e sp eaker will re co rd and save t he s ound from the m ic rohone in to U SB d river
3.Sh or t press REC but to n can play th e re co rded soun d fr om the USB driv er.
4.Sh or t press REC but to n again can w it hdraw the pla yi ng record m od e an d back to USB
play in g mode.
Connect to Wired Microphone
Insert 6.3 5mm wired microphone , and use control knob to ad just
the sound le vel.
When playi ng with the wired microp hone, please use this kn ob
to adjust th e volume of microphone .
When playing with the wired microphone, please use this knob to adjust the echo
volume of microphone.
Importan t Notes
While usin g the microphone, avoi d being put the micropho ne opposite
the bass of Pa rty Speaker,as they may h ave Whistler Noisy.
To get the best si nging performance, k eep the micro phone with in
5-15cm of th e mouth and at a 45 degree ang le.
When using t he microphone, alway s pay attention to the bat ter y.
If the batte ry is low, the indicator li ght will come on and the
performa nce will progressive ly become poor.
PRI(Prio rity) Function
1.Lo ng p ress PRI butt on o n the top pan el t o tu rn on the wea ke ning of human v oc al from the
musi c wh en playing mu si c, l , the disp la y wi ll show " "
2.Lo ng p ress PRI butt on a gain to tur n off th e we akening of hu ma n vocal fro m th e mu sic , the
disp la y will show " "
3.Sh or t press PRI but to n on the top pa ne l to t urn on the mi cr ophone prio ri ty functi on , the
disp la y will show " "
4.Sh or t press PRI but to n on the top pa ne l to t urn off the micro ph one prior it y fu nction, t he
disp la y will show " ”
8 9
Caution: P lease do not put the micro phone directly face to t he
Party spea ker, it may damage the spea ker.
Page 7

Warranty
10
 Loading...