

Page 1
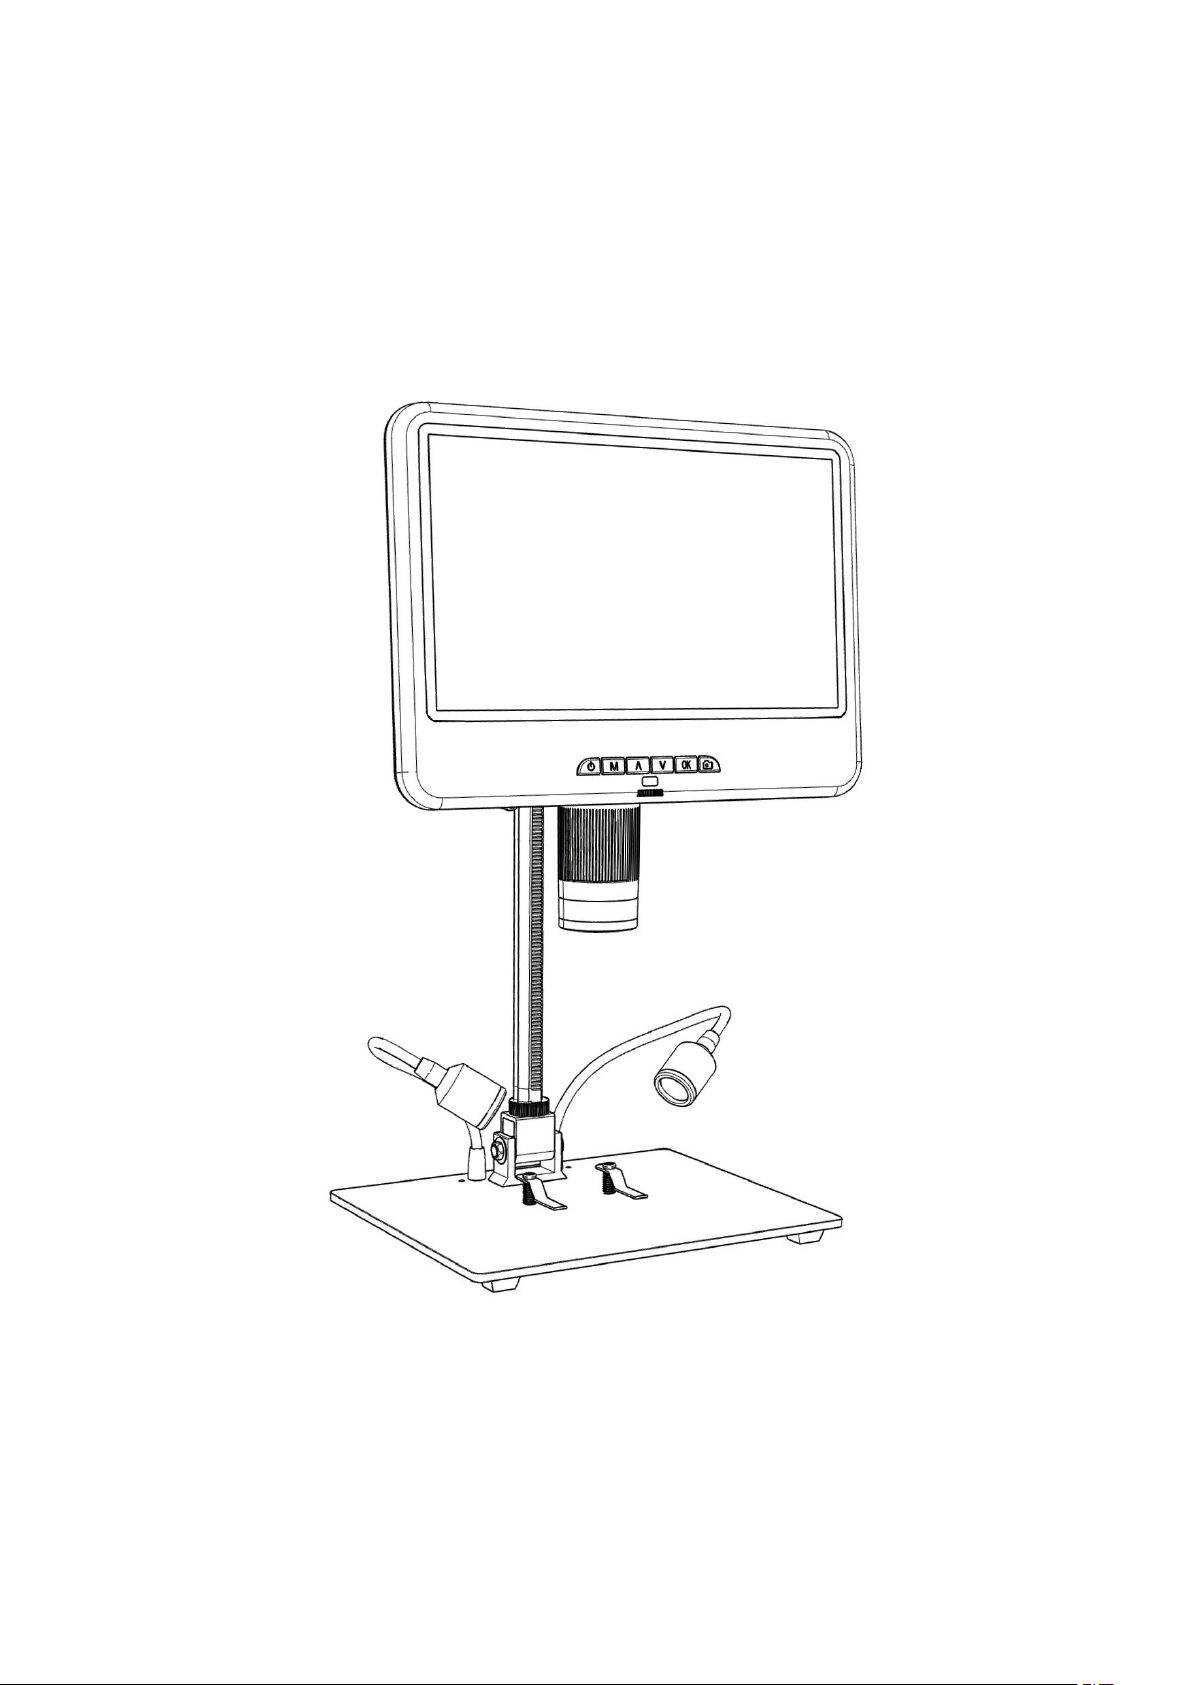
Digital Microscope Users Manual
Page 2

1
CONTENTS
Basic Parameters
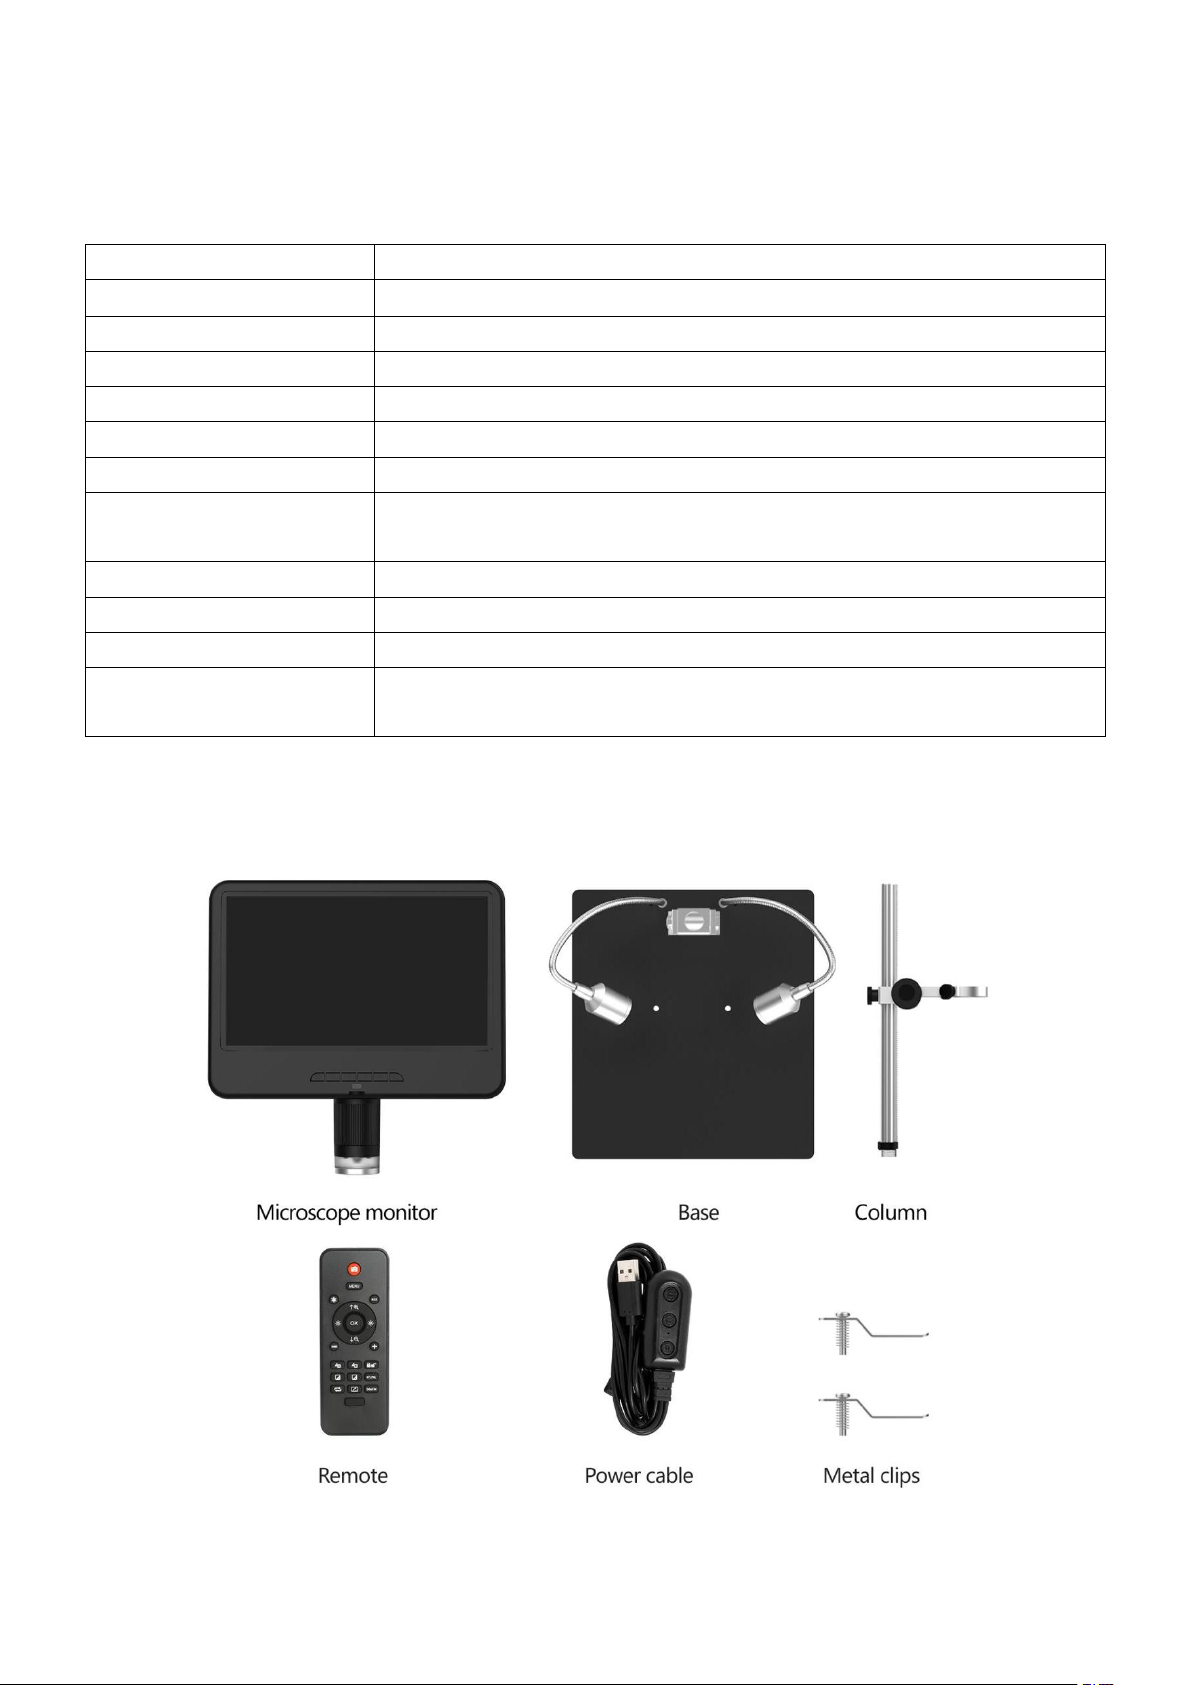
What’s In The Box
Installation
.................................................................................................3
Button Instructions
Quick Start
................................................................................................. 5
....................................................................................... 2
..................................................................................... 2
................................................................................... 4
Adjust Magnification & Focus
Take Photos and Videos
....................................................................... 5
Review and Manage Images
Remote Control Instructions
Settings
...................................................................................................... 8
.............................................................. 5
................................................................ 6
.................................................................... 7
Safety and Maintenance
FAQ
............................................................................................................. 9
Warranty Card
......................................................................................... 10
............................................................................ 9
Page 3
2
Basic Parameters
Image sensor
2 Mega Pixels HD Sensor
Video output
FHD1920X1080 30FPS; 1080P 1440X1080 30FPS; 720P 1280X720 30FPS
Video format
AVI
Photo resolution
Max 12M (4032*3024)
Photo format
JPG
Focus distance
Minimum 2cm
Frame Rate
Max 30f/s
Storage
Micro-SD card up to 32G
(Not included, Class10 high-speed card is recommended)
Power source
USB 5V 2A DC
Stand size
18*20*32cm
Screen size & Resolution
10.1 inch
Package contents
Microscope monitor, Base(with light), Column, Remote, Power cable, Metal
clip×2, Users Manual
What’s In The Box
(P1: What’s in the box)
Page 4
3
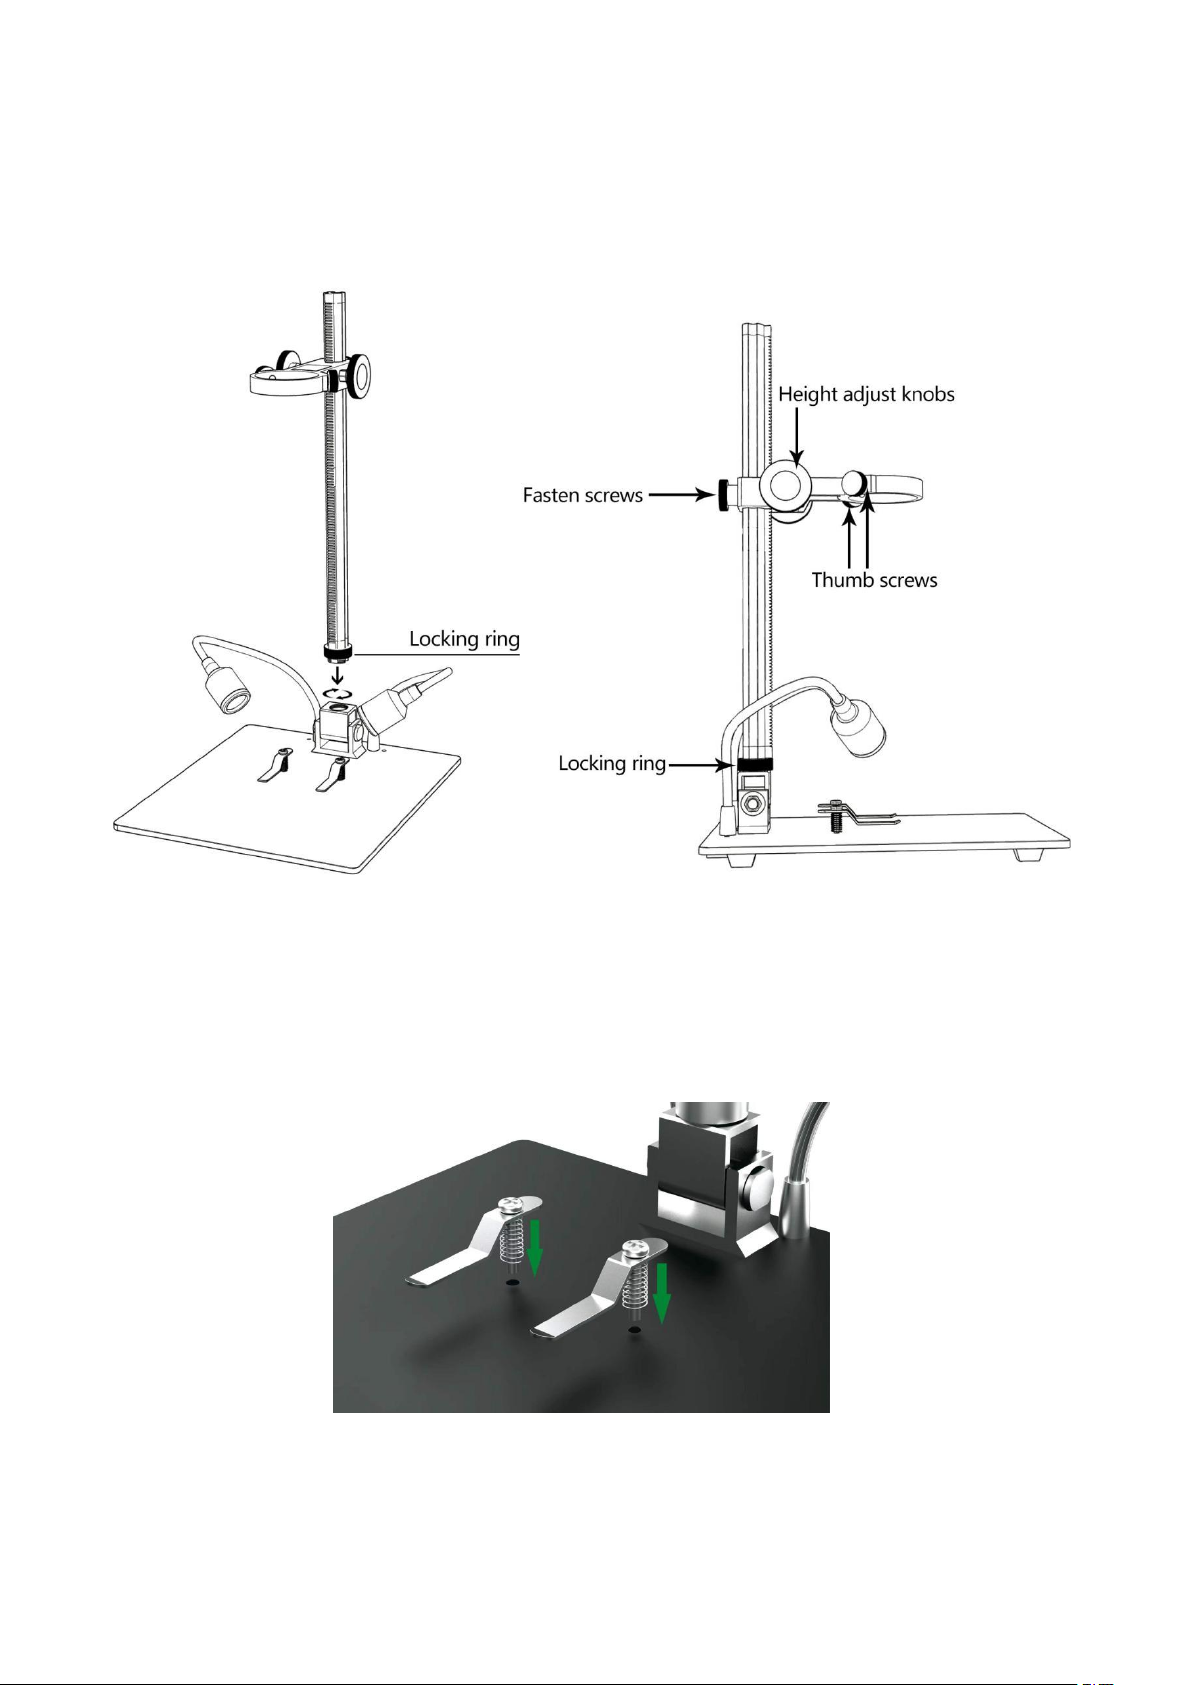
Installation
(P2: Install the stand)
(P3: Install the metal clips)(optional)
Page 5
4
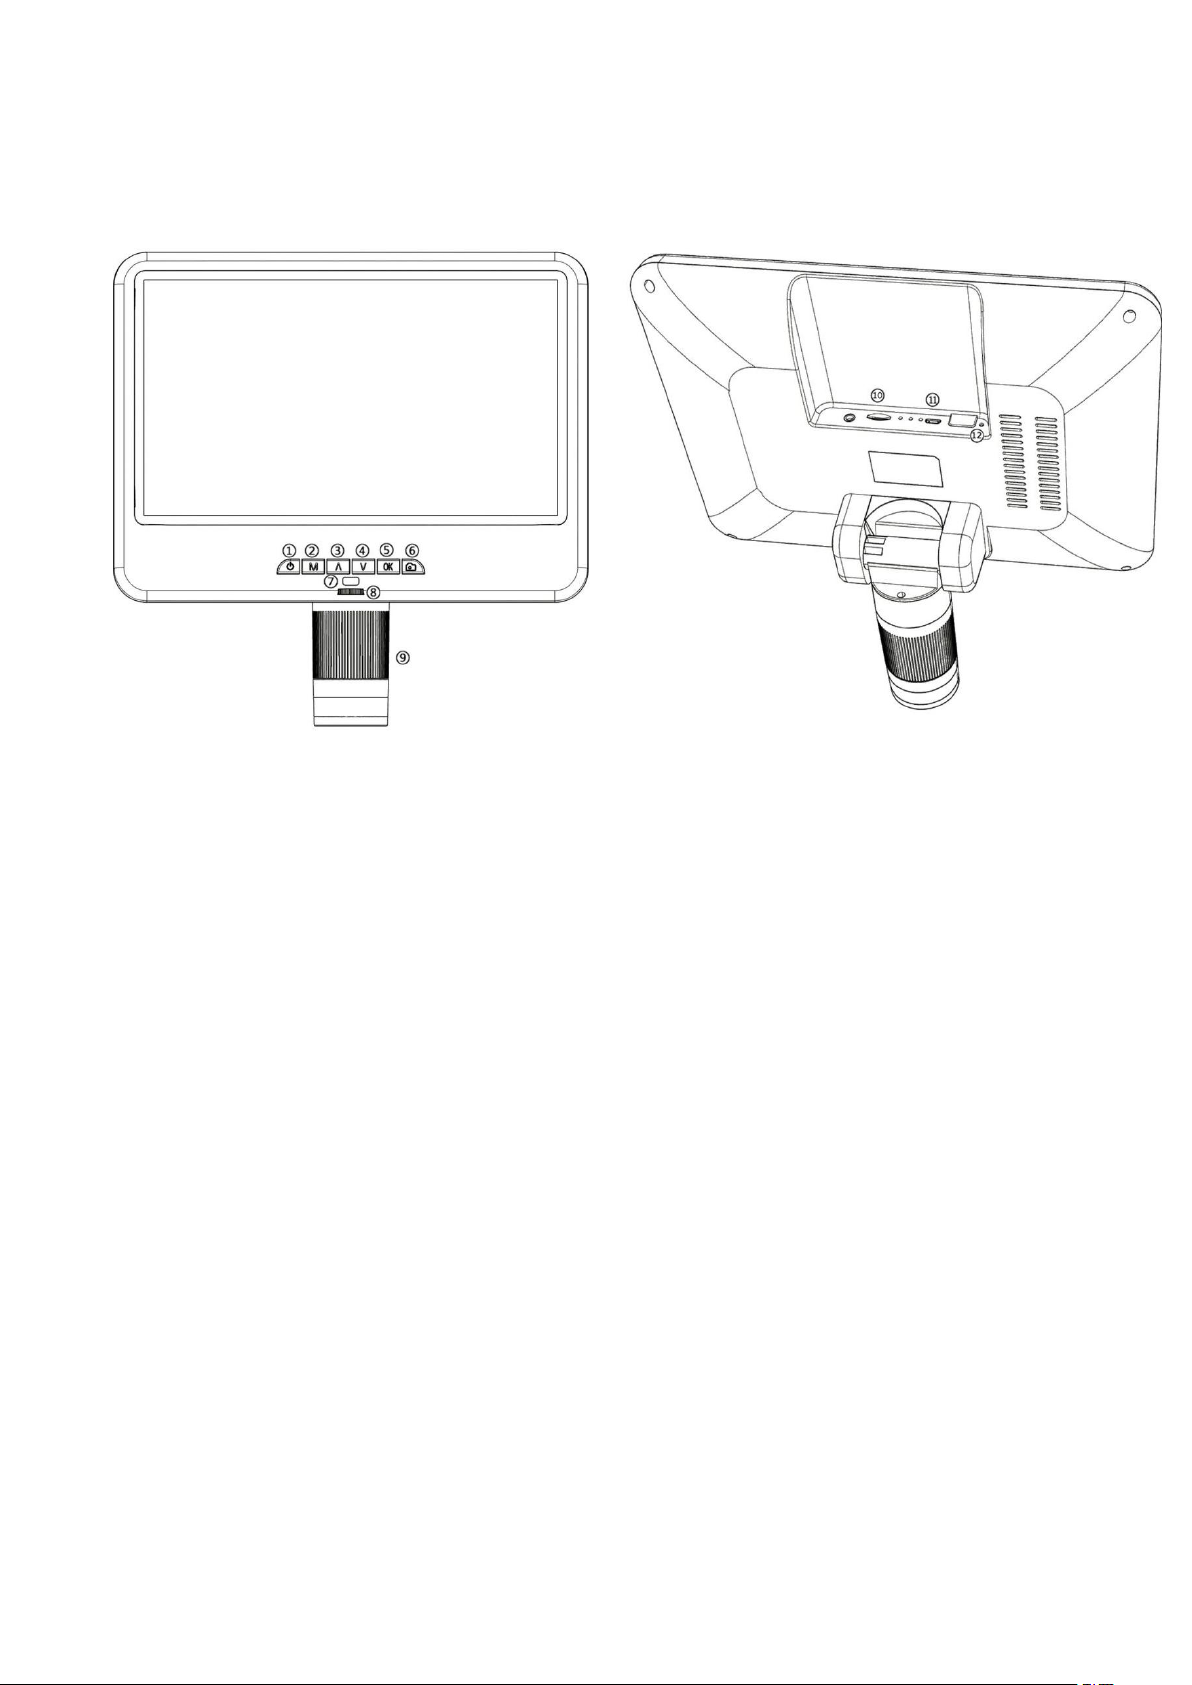
Button Instructions
①Power on/off
②Menu/Mode
(Long press Menu/press Mode)
③Up(Zoom+)
④Down(Zoom-
)
⑤OK/Start video record
⑥Picture capture
⑦Infrared sensor
⑧Light controller
⑨Focus controller
⑩Memory card slot
⑪USB port
⑫Reset hole
(P4: Button Instructions)
Page 6
5
Quick Start
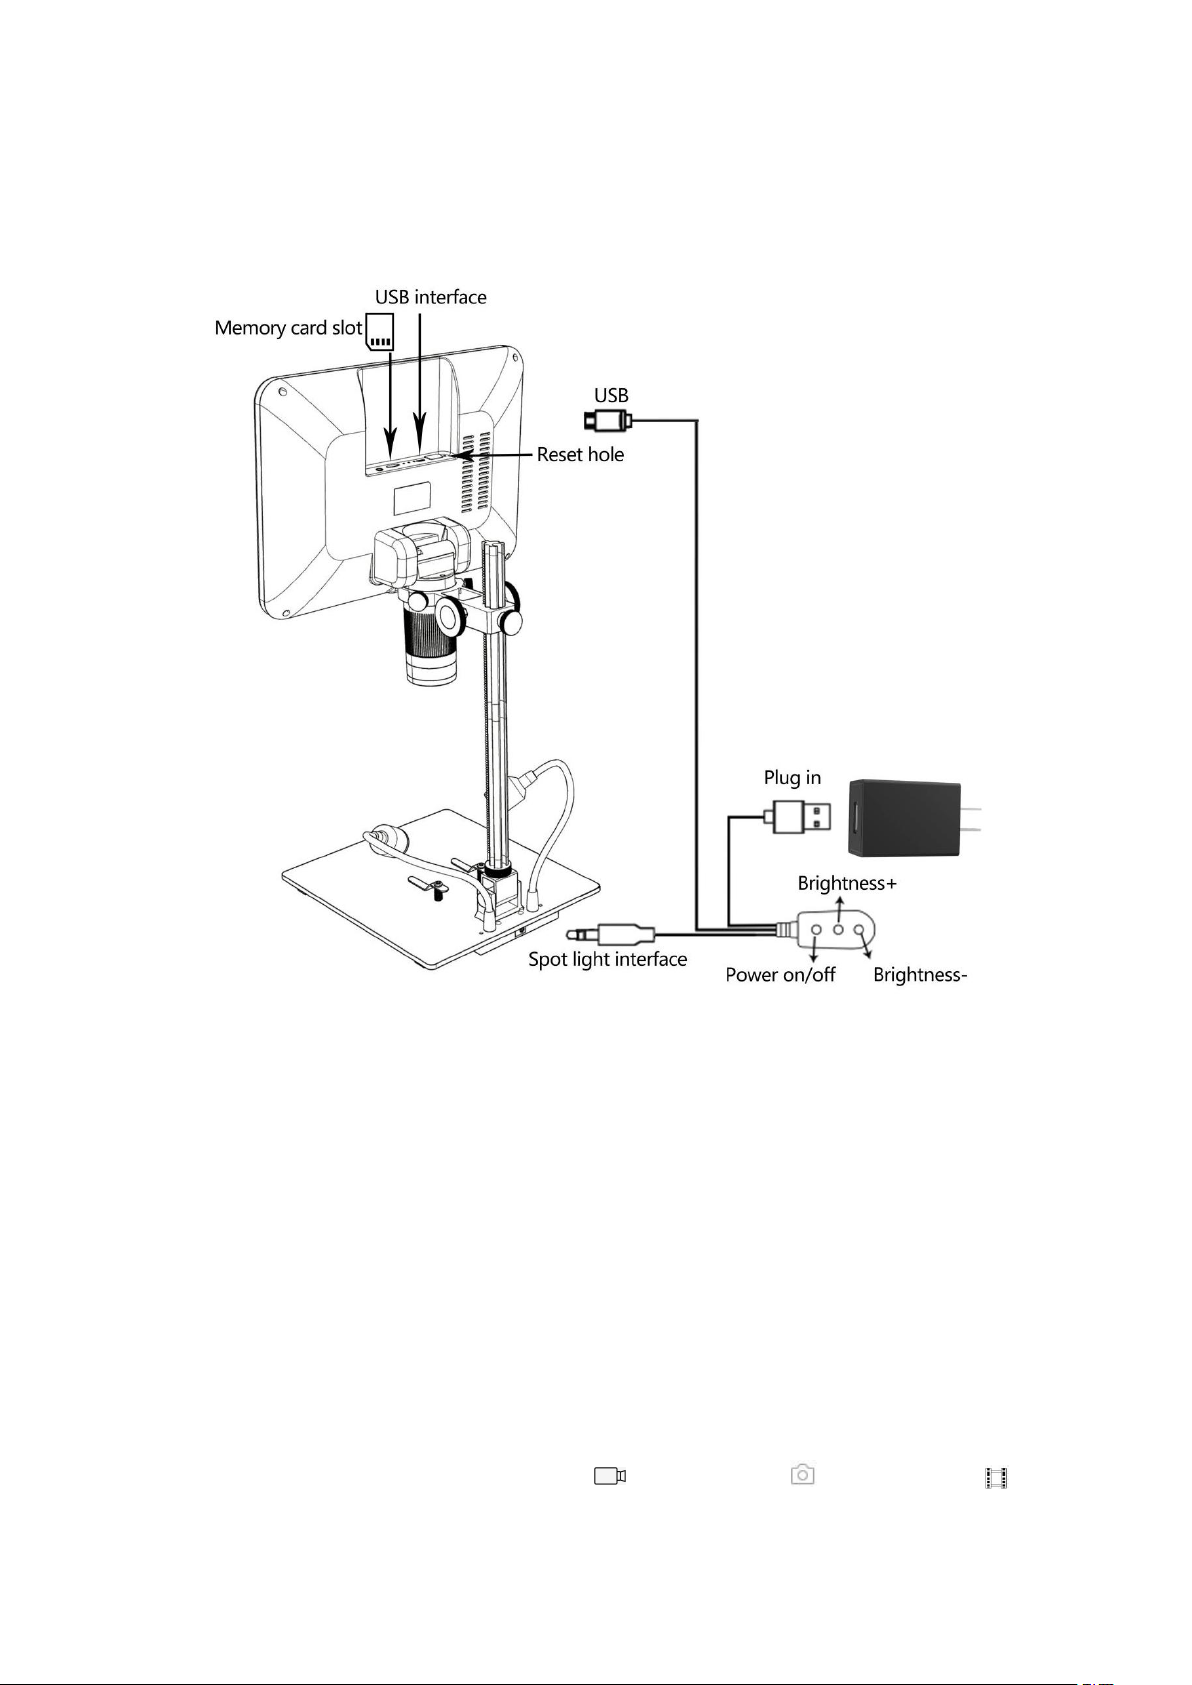
(P5: Connection)
Adjust Magnification & Focus
Rotate the height adjust knob (P2) to adjust object distance , and rotate the focus controller (P4/⑨) to
focus.
Take Photos and Videos
Insert the memory card in the direction shown in P5, the memory card does not support hot swap. Press the
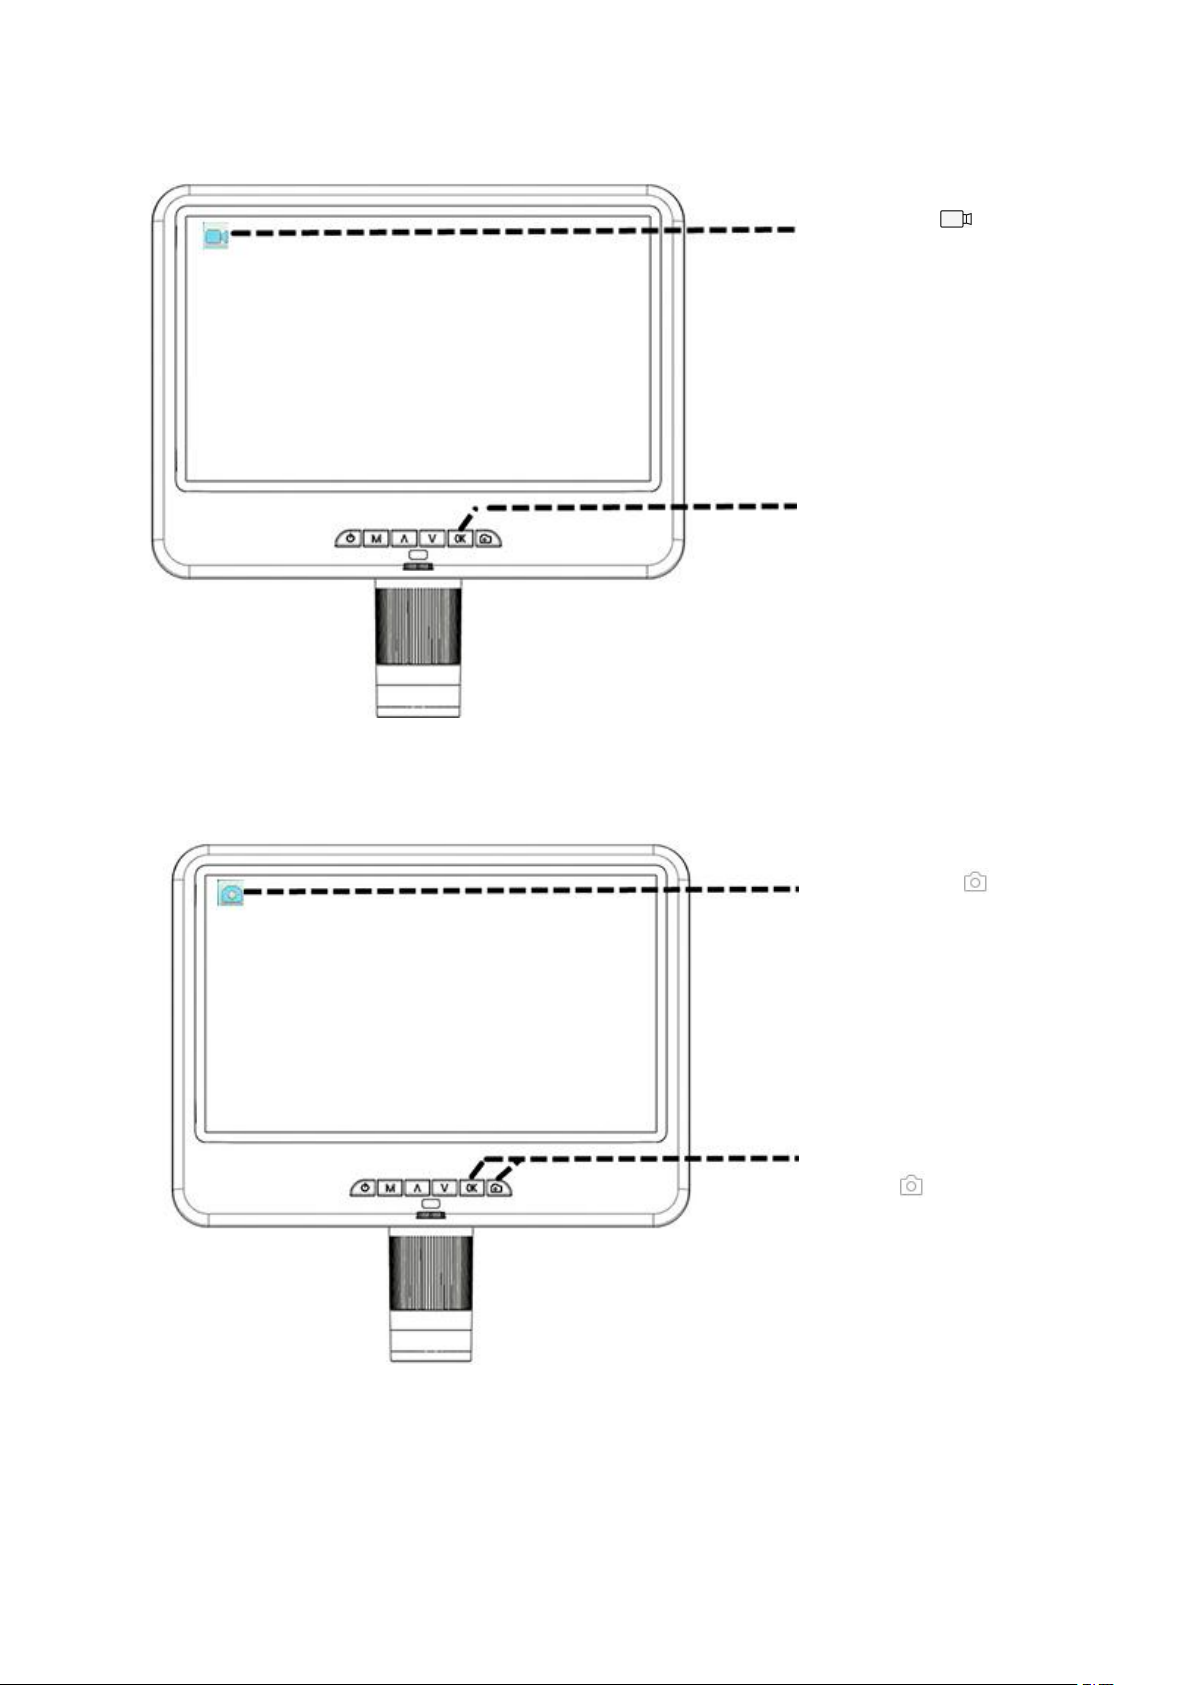
'M' key to switch between three modes:Video mode( ), Camera mode( ), Playback mode( ).
Page 7
6
Record Videos
Video mode( )
In video mode, press the
"OK" button to start
recording. Press the "OK"
button again to stop
recording.
(Press the "capture" button
to take a snapshot during the
video recording process.)
Camera mode( )
In camera mode, press the
"OK" button or "capture"
button( )to take photos.
Take Photos
Review and Manage Images
Press the "MODE" (M) button to enter playback mode. Press the “Up” and “Down” keys to cycle through
pictures and videos. When reviewing pictures or videos, long press the "MENU" (M) button to manage files.
Page 8
7
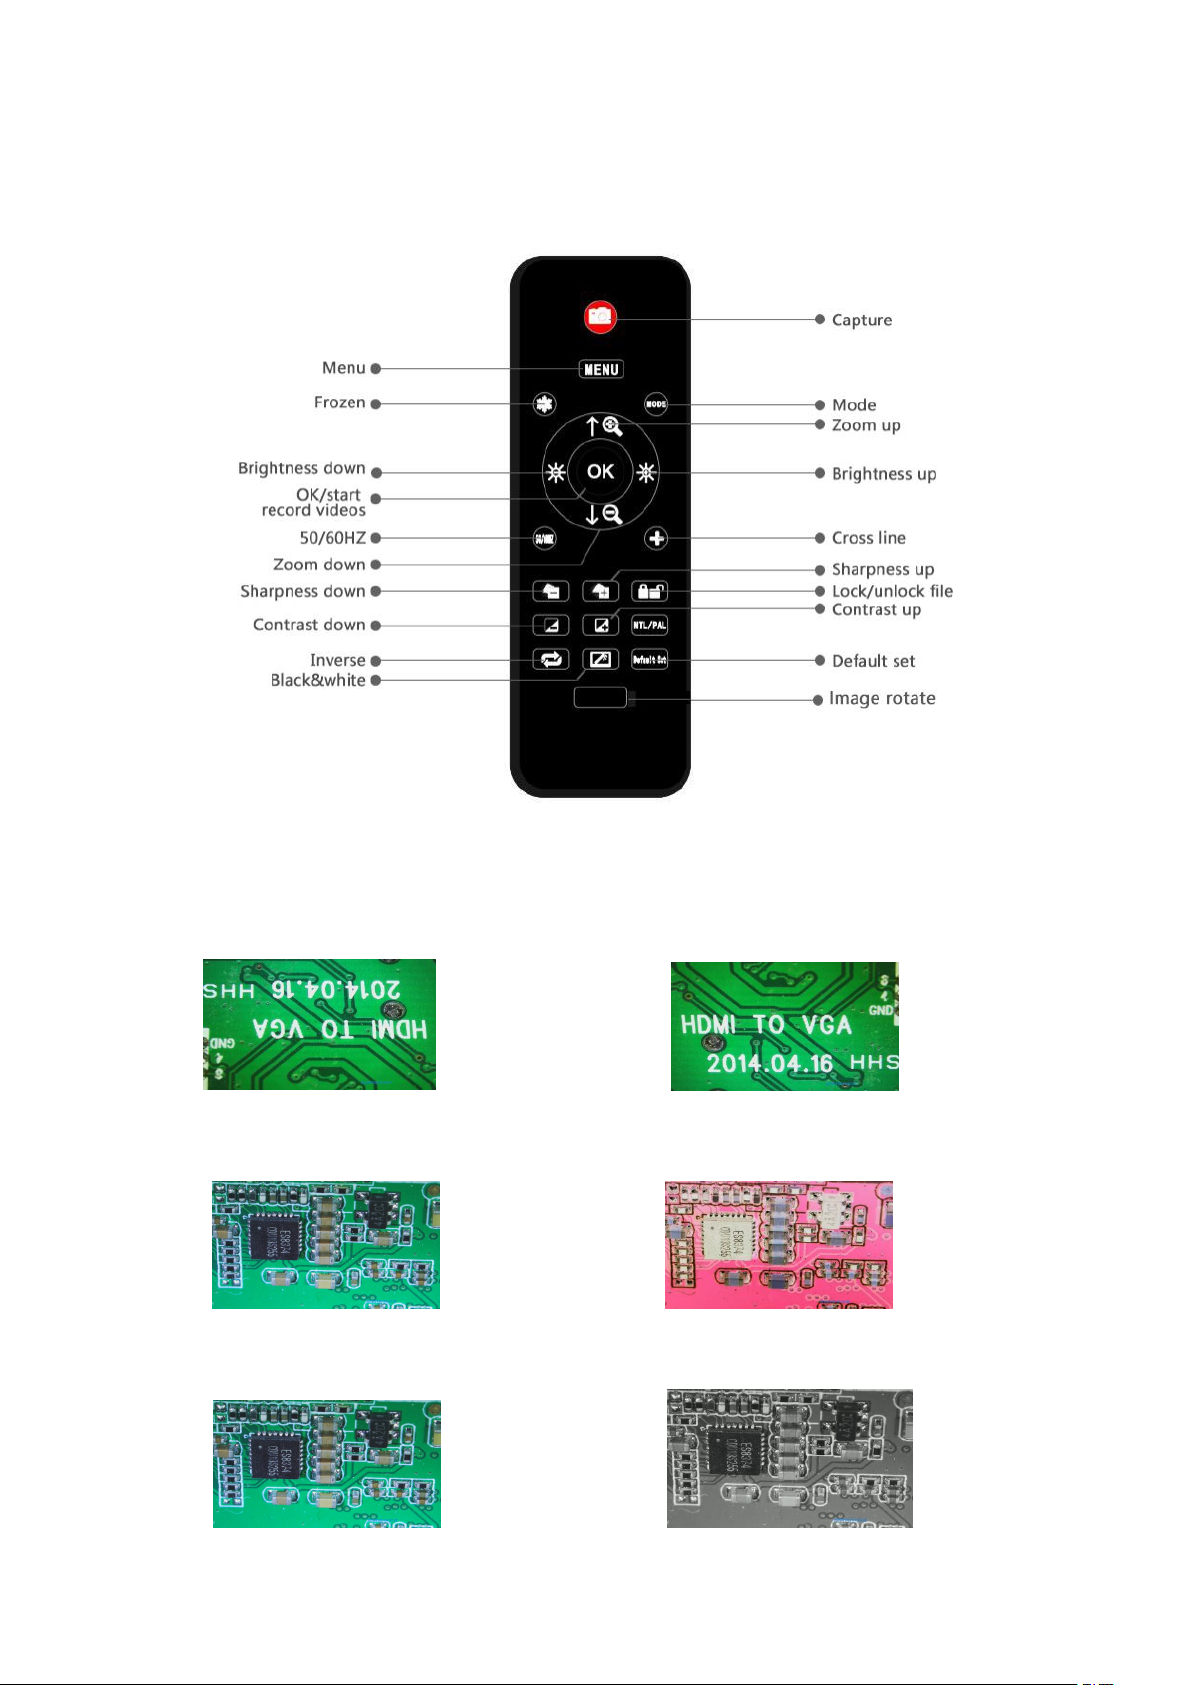
Remote Control Instructions
*Image Rotate effect:
Normal Image Rotate
*Inverse effect:
Normal Inverse
*Black & White effect:
Normal Black & White
(P6: Remote Control Instructions)
Page 9
8
Settings
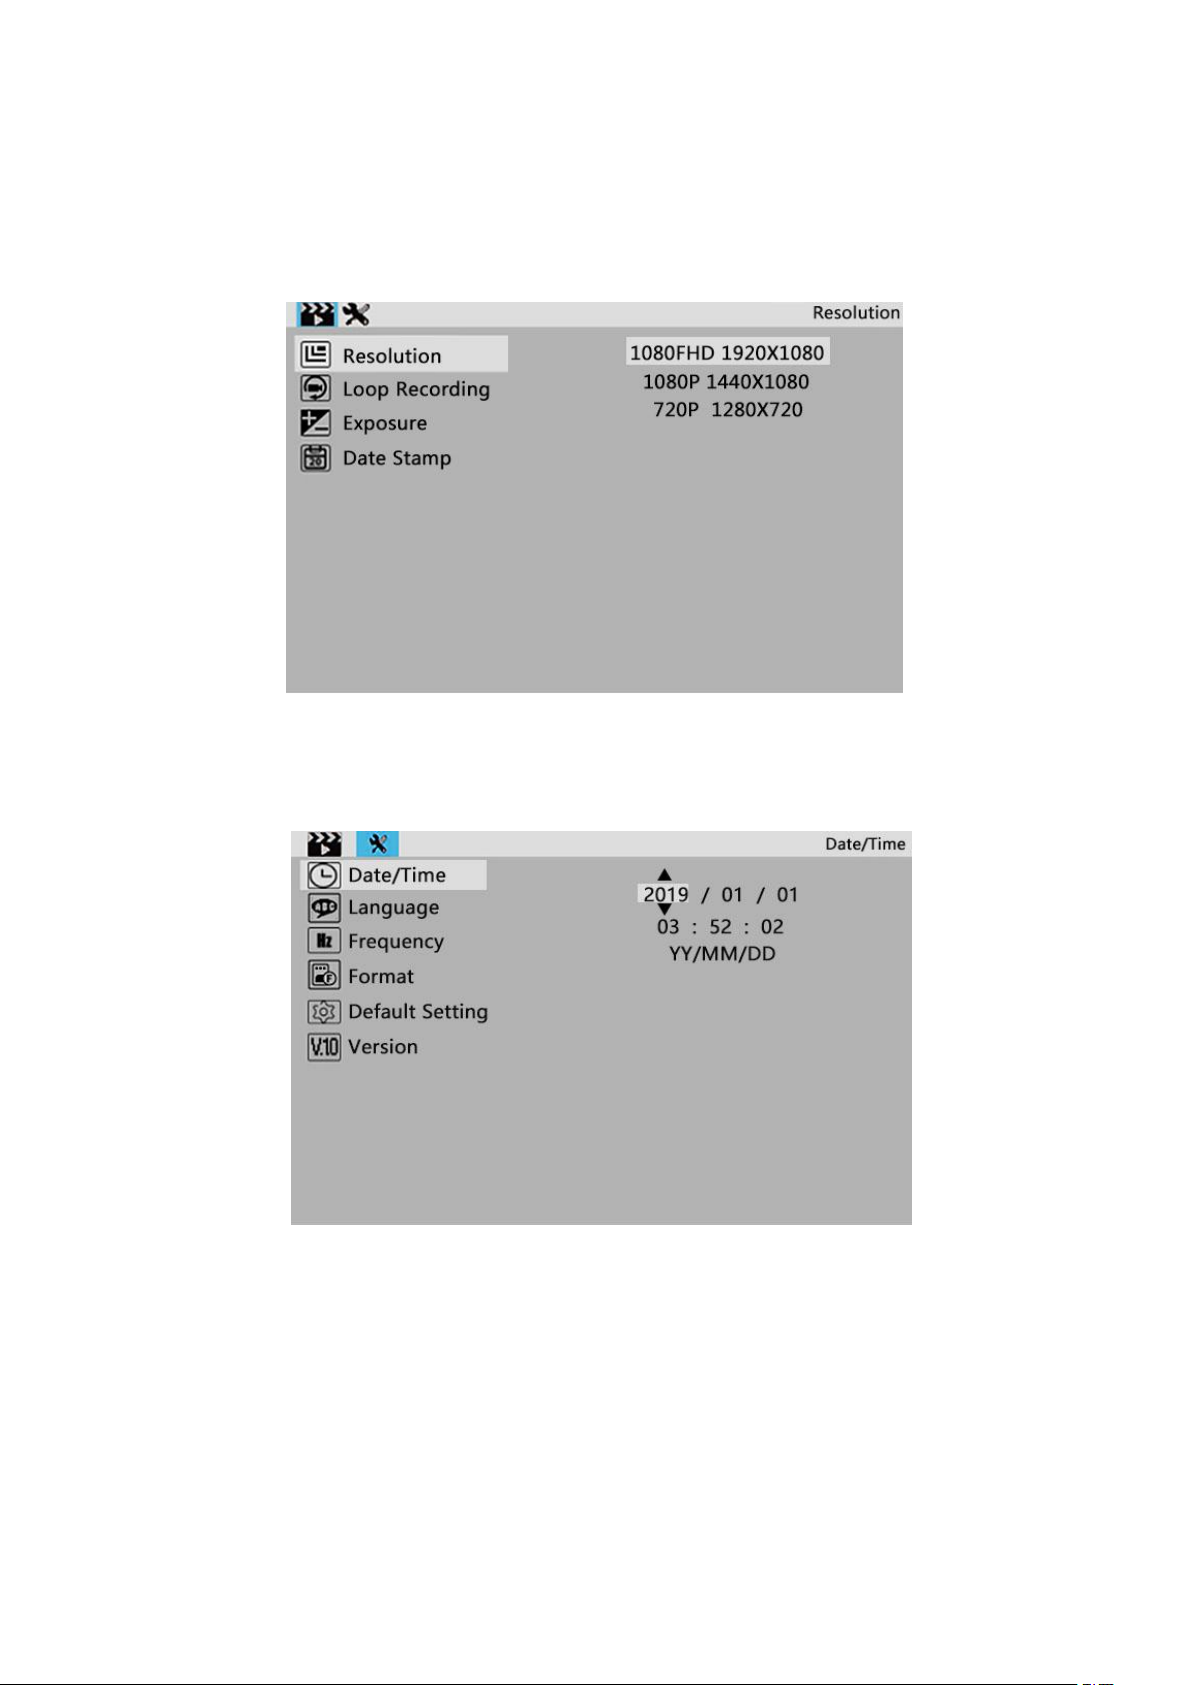
①Long press the "M" button to enter the video menu of video standby mode:
(P7: video menu)
②Then press the "M"button to get into the set up menu
(P8: set up menu)
Save Settings
:
If you need to save the settings, long press the power button (P4/ ①) to turn off the device after you set
everything right. Disrupting the power source directly will result in the loss of any unsaved settings.
Page 10

9
Safety and Maintenance
1. Please keep the device in a clean and dry environment, away from oil, water, gas and other materials that
may cause corrosion. The product contains tiny parts and is not edible, please operate under the guidance of
guardians or teachers to avoid accidental ingestion.
2. When the image quality is poor, clean the lens with a dry, soft cloth.
3. Do not press hard or hit the display with sharp objects. To clean dust from the screen surface or case, wipe
with a dry and soft cloth. Never spray water or cleaners directly on the display.
FAQ
1. Why is the device unable to turn on properly?
Please check the circuit and power supply according to the installation instructions (5V 2A power adapter is
recommended).
2. Why can't I obtain a clear image?
Please adjust the LED light, object distance, and refocus. If you still can’t get a clear image, please wipe the
lens gently with a clean cotton cloth etc.
3. Why are the settings unable to be saved?
After all settings are completed, long press the power button to shut down the device. The settings will not
be saved if the power is turned off by the power cable or if the power is cut off directly.
4. Why is there a message of crash, memory card error or memory card full after inserting the TF
card?
After inserting the TF card, please format it first. It is recommended to use a high-quality TF card with class
10 and above specifications.
Page 11
10
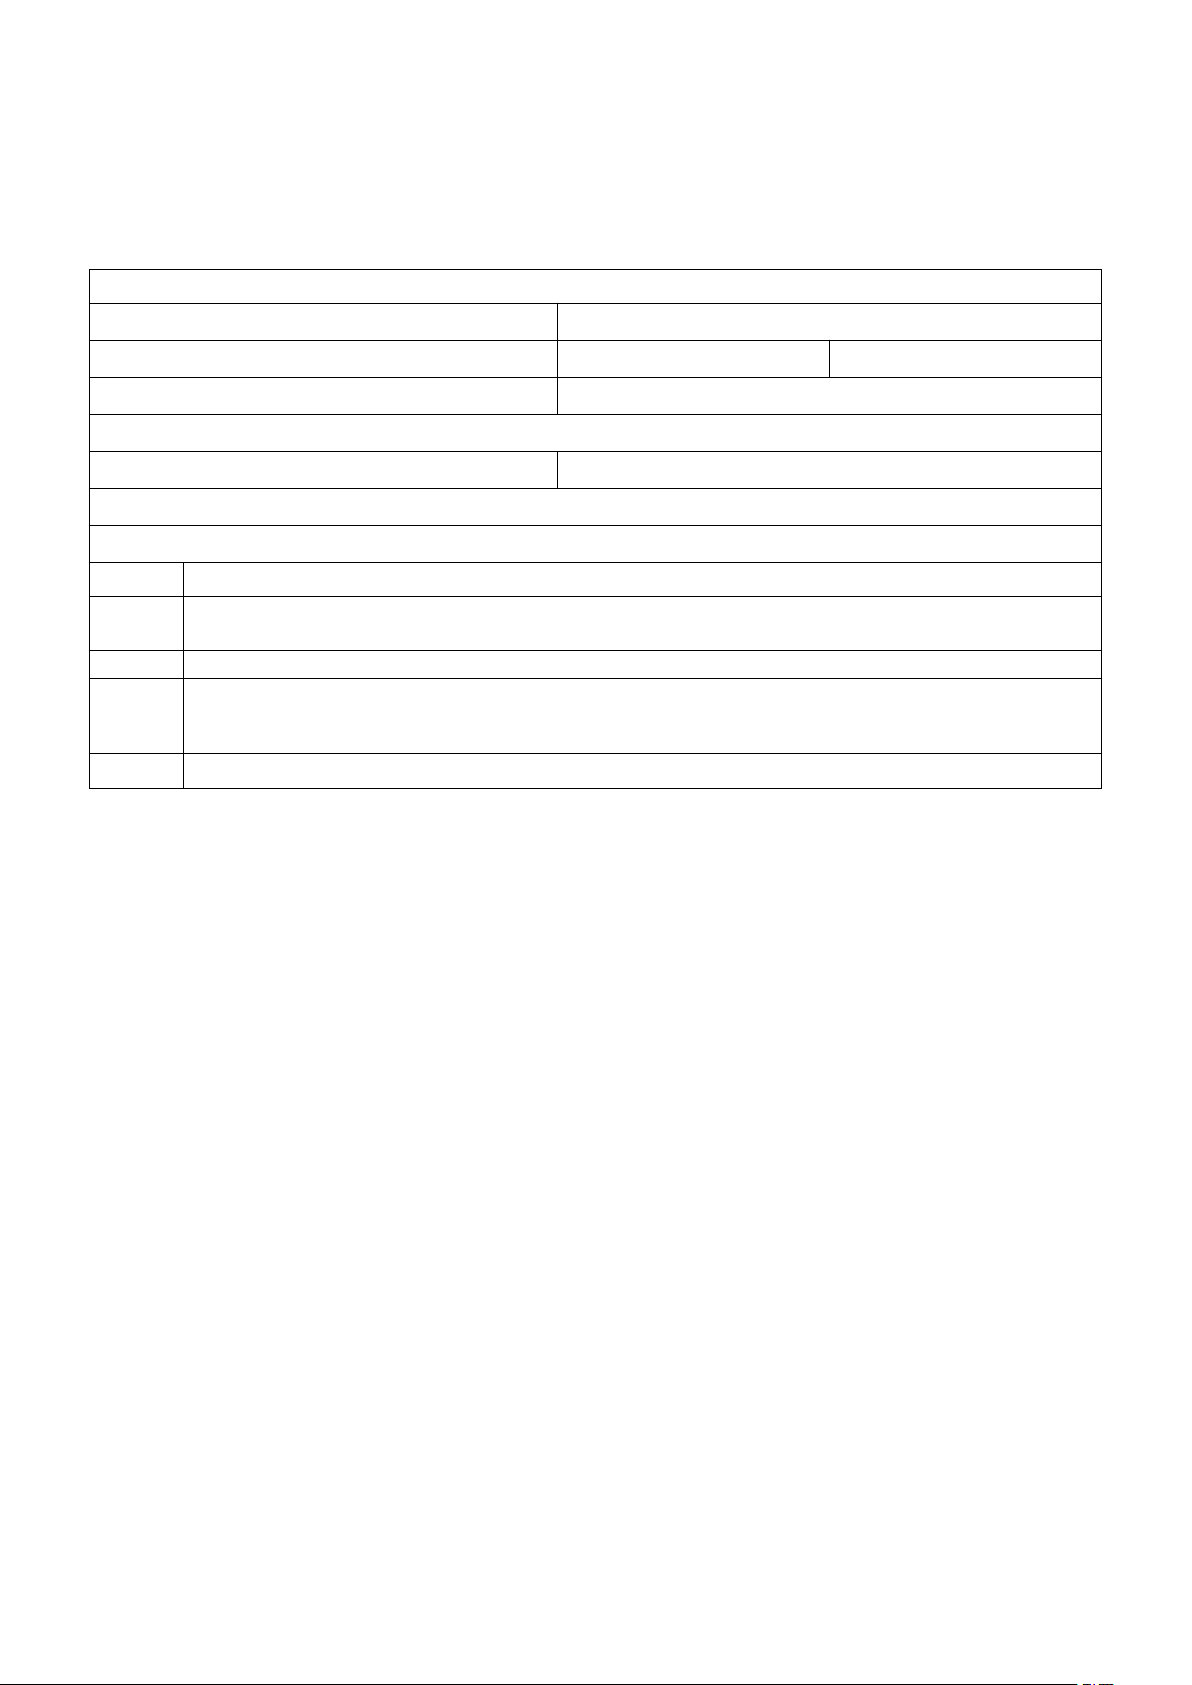
Warranty Card
Warranty Card
User’s name
:
Address
:
Phone number:
Post code:
email:
Model name:
Purchase date:
Fault feedback:
Date:
Fault:
Notice:
Our warranty doesn’t cover:
1
If users can not provide the purchase proof or the Warranty.
2
If users use it in an improper environment or conditions, such as incompatible power supply, hot
and humid environment etc.
3
If the fault caused by accident, oversight, misoperation or natural disasters etc.
4
If the fault caused by people who are not belong to authorized organizations of our company during
repacking, repair, dismantle, Or if users repack, repair or dismantle the device not following our
advice.
5
Out of warranty period.
 Loading...