

Page 1

Language Reference Guide
NetLinx
Programming Language
NetLinx Programming
Document ID: 033-004-2255
Last Revised: 10/05/2006
Page 2

Software License and Warranty Agreement
LICENSE GRANT.
AMX grants to Licensee the non-exclusive right to use the AMX Software in the manner described in this License. The AMX Software is
licensed, not sold. This license does not grant Licensee the right to create derivative works of the AMX Software. The AMX Software consists
of generally available programming and development software, product documentation, sample applications, tools and utilities, and
miscellaneous technical information. Please refer to the README.TXT file on the compact disc or download for further information regarding
the components of the AMX Software. The AMX Software is subject to restrictions on distribution described in this License Agreement.
LICENSEE MAY NOT SUBLICENSE, RENT, OR LEASE THE AMX SOFTWARE. Licensee may not reverse engineer, decompile, or
disassemble the AMX Software.
INTELLECTUAL PROPERTY.
The AMX Software is owned by AMX and is protected by United States copyright laws, patent laws, international treaty provisions, and/or state
of Texas trade secret laws. Licensee may make copies of the AMX Software solely for backup or archival purposes. Licensee may not copy
the written materials accompanying the AMX Software.
TERMINATION.
AMX RESERVES THE RIGHT, IN ITS SOLE DISCRETION, TO TERMINATE THIS LICENSE FOR ANY REASON AND UPON WRITTEN
NOTICE TO LICENSEE. In the event that AMX terminates this License, the Licensee shall return or destroy all originals and copies of the
AMX Software to AMX and certify in writing that all originals and copies have been returned or destroyed.
PRE-RELEASE CODE.
Portions of the AMX Software may, from time to time, as identified in the AMX Software, include PRE-RELEASE CODE and such
code may not be at the level of performance, compatibility and functionality of the final code. The PRE-RELEASE CODE may not
operate correctly and may be substantially modified prior to final release or certain features may not be generally released. AMX is
not obligated to make or support any PRE-RELEASE CODE. ALL PRE-RELEASE CODE IS PROVIDED "AS IS" WITH NO
WARRANTIES.
LIMITED WARRANTY.
AMX warrants that the AMX Software will perform substantially in accordance with the accompanying written materials for a period of ninety
(90) days from the date of receipt. AMX DISCLAIMS ALL OTHER WARRANTIES, EITHER EXPRESS OR IMPLIED, INCLUDING, BUT NOT
LIMITED TO IMPLIED WARRANTIES OF MERCHANTABILITY AND FITNESS FOR A PARTICULAR PURPOSE, WITH REGARD TO THE
AMX SOFTWARE. THIS LIMITED WARRANTY GIVES LICENSEE SPECIFIC LEGAL RIGHTS. Any supplements or updates to the AMX
SOFTWARE, including without limitation, any (if any) service packs or hot fixes provided to Licensee after the expiration of the ninety (90) day
Limited Warranty period are not covered by any warranty or condition, express, implied or statutory.
LICENSEE REMEDIES.
AMX's entire liability and Licensee's exclusive remedy shall be repair or replacement of the AMX Software that does not meet AMX's Limited
Warranty and which is returned to AMX. This Limited Warranty is void if failure of the AMX Software has resulted from accident, abuse, or
misapplication. Any replacement AMX Software will be warranted for the remainder of the original warranty period or thirty (30) days,
whichever is longer. Outside the United States, these remedies may not available.
NO LIABILITY FOR CONSEQUENTIAL DAMAGES. IN NO EVENT SHALL AMX BE LIABLE FOR ANY DAMAGES WHATSOEVER
(INCLUDING, WITHOUT LIMITATION, DAMAGES FOR LOSS OF BUSINESS PROFITS, BUSINESS INTERRUPTION, LOSS OF BUSINESS
INFORMATION, OR ANY OTHER PECUNIARY LOSS) ARISING OUT OF THE USE OF OR INABILITY TO USE THIS AMX SOFTWARE,
EVEN IF AMX HAS BEEN ADVISED OF THE POSSIBILITY OF SUCH DAMAGES. BECAUSE SOME STATES/COUNTRIES DO NOT
ALLOW THE EXCLUSION OR LIMITATION OF LIABILITY FOR CONSEQUENTIAL OR INCIDENTAL DAMAGES, THE ABOVE LIMITATION
MAY NOT APPLY TO LICENSEE.
U.S. GOVERNMENT RESTRICTED RIGHTS.
The AMX Software is provided with RESTRICTED RIGHTS. Use, duplication, or disclosure by the Government is subject to
restrictions as set forth in subparagraph ©(1)(ii) of The Rights in Technical Data and Computer Software clause at DFARS 252.2277013 or subparagraphs ©(1) and (2) of the Commercial Computer Software Restricted Rights at 48 CFR 52.227-19, as applicable.
SOFTWARE AND OTHER MATERIALS FROM AMX.COM MAY BE SUBJECT TO EXPORT CONTROL.
The United States Export Control laws prohibit the export of certain technical data and software to certain territories. No software from this Site
may be downloaded or exported (i) into (or to a national or resident of) Cuba, Iraq, Libya, North Korea, Iran, Syria, or any other country to
which the United States has embargoed goods; or (ii) anyone on the United States Treasury Department's list of Specially Designated Nationals or the U.S. Commerce Department's Table of Deny Orders. AMX does not authorize the downloading or exporting of any software or
technical data from this site to any jurisdiction prohibited by the United States Export Laws.
This Agreement replaces and supersedes all previous AMX Software License Agreements and is governed by the laws of the State of Texas,
and all disputes will be resolved in the courts in Collin County, Texas, USA. For any questions concerning this Agreement, or to contact AMX
for any reason, please write: AMX, 3000 Research Drive, Richardson, TX 75082.
Page 3

Table of Contents
Table of Contents
Introduction ........................................................................................................1
Conventions Used in this Document ......................................................................... 1
Related Instruction Manuals...................................................................................... 1
NetLinx Programming Overview ........................................................................ 3
Defining the Superset............................................................................................... 3
NetLinx vs. Axcess - Comparison by Structure.......................................................... 4
DEFINE_DEVICE.............................................................................................................. 4
DEFINE_CONSTANT ...................................................................................................... 4
DEFINE_VARIABLES........................................................................................................ 5
DEFINE_CALL (Subroutines) ........................................................................................... 6
DEFINE_START ............................................................................................................... 7
DEFINE_EVENT .............................................................................................................. 7
DEFINE_PROGRAM ........................................................................................................ 8
Operators ................................................................................................................. 8
Axcess/NetLinx Incompatibility................................................................................. 9
Data Types.............................................................................................................. 10
Constants................................................................................................................ 10
Variables ................................................................................................................. 11
Persistent Variables ................................................................................................ 12
Arrays ..................................................................................................................... 12
Structures ............................................................................................................... 14
Data sets ....................................................................................................................... 15
Conditionals & Loops.............................................................................................. 17
SWITCH...CASE statements........................................................................................... 17
FOR loops ..................................................................................................................... 18
Functions ................................................................................................................ 19
DEFINE_CALL................................................................................................................ 19
DEFINE_FUNCTION ...................................................................................................... 20
Events ..................................................................................................................... 21
Button Events................................................................................................................ 21
Channel Events.............................................................................................................. 22
Data Events ................................................................................................................... 24
Level Events .................................................................................................................. 27
Combining Devices, Channels and Levels ............................................................... 28
Virtual devices, levels and device/channel sets ............................................................. 28
Combining and uncombining devices............................................................................ 28
Combining and uncombining levels............................................................................... 28
NetLinx Programming Language Reference Guide
i
Page 4

Table of Contents
Combining and uncombining channels .......................................................................... 29
String Comparisons................................................................................................. 29
Axcess code - string comparison ................................................................................... 29
Netlinx code - string comparison .................................................................................. 29
Modules .................................................................................................................. 29
Language Elements ..........................................................................................31
Statements and Expressions ................................................................................... 31
Assignments............................................................................................................ 31
Variables........................................................................................................................ 31
Output channels ............................................................................................................ 31
Conditionals............................................................................................................ 32
IF…ELSE ........................................................................................................................ 32
SELECT…ACTIVE........................................................................................................... 32
SWITCH…CASE ............................................................................................................. 33
Loops ...................................................................................................................... 34
WHILE statements ......................................................................................................... 34
MEDIUM_WHILE statements ......................................................................................... 34
LONG_WHILE statements ............................................................................................. 35
FOR loop structure ........................................................................................................ 35
Waits....................................................................................................................... 36
Naming Waits ................................................................................................................ 36
Types of Waits............................................................................................................... 36
Nesting Waits ................................................................................................................ 37
Pausing and restarting Waits......................................................................................... 38
Canceling Waits............................................................................................................. 38
Using Waits - Limitations ............................................................................................... 38
Comments............................................................................................................... 39
Operators ............................................................................................................... 39
Arithmetic operators ..................................................................................................... 39
Relational operators ...................................................................................................... 39
Logical operators .......................................................................................................... 40
Bitwise operators .......................................................................................................... 40
Assignment operators ................................................................................................... 40
Operator precedence .................................................................................................... 41
Identifiers................................................................................................................ 41
Devices .......................................................................................................................... 41
Device arrays ................................................................................................................. 42
Device array examples .................................................................................................. 43
Device-channels and device-channel arrays ................................................................... 43
Device-level arrays ........................................................................................................ 44
ii
NetLinx Programming Language Reference Guide
Page 5

Table of Contents
Variables ................................................................................................................. 45
Scope ............................................................................................................................ 45
Local variables............................................................................................................... 45
Global variables............................................................................................................. 47
Constancy...................................................................................................................... 48
Persistence .................................................................................................................... 48
Constants................................................................................................................ 49
Data Types.............................................................................................................. 50
Intrinsic types ................................................................................................................ 50
Type conversion ............................................................................................................ 50
Type conversion rules.................................................................................................... 50
Strings .................................................................................................................... 51
String expressions ......................................................................................................... 51
Wide strings .................................................................................................................. 51
Arrays .................................................................................................................... 52
Multi-dimensional arrays ............................................................................................... 53
Structures ............................................................................................................... 55
Subroutines............................................................................................................. 56
DEFINE_CALL subroutines ............................................................................................ 56
SYSTEM_CALL subroutines ........................................................................................... 56
Function Subroutines .................................................................................................... 57
Calling parameters ........................................................................................................ 59
Event Handlers .................................................................................................61
Button events................................................................................................................ 62
Channel events.............................................................................................................. 63
Data events ................................................................................................................... 64
Level events .................................................................................................................. 65
Custom events .............................................................................................................. 67
Event Parameters .......................................................................................................... 68
Timeline Functions .................................................................................................. 71
Creating a timeline........................................................................................................ 71
TIMELINE example ........................................................................................................ 74
TIMELINE IDs ................................................................................................................ 78
Combining Devices, Levels, and Channels ........................................................79
Combining and Un-Combining Devices................................................................... 79
Combining devices ........................................................................................................ 79
Un-combining devices ................................................................................................... 81
Combining and Un-Combining Levels ..................................................................... 82
Combining levels........................................................................................................... 83
NetLinx Programming Language Reference Guide
iii
Page 6

Table of Contents
Un-combining levels ...................................................................................................... 83
Combining and Un-combining Channels ................................................................. 84
Combining channels ...................................................................................................... 84
Un-combining channels.................................................................................................. 84
Master-To-Master (M2M) ..................................................................................91
Master Routing ....................................................................................................... 92
Design considerations and constraints .......................................................................... 93
Control/NetLinx Language Support........................................................................ 95
Design considerations and constraints .......................................................................... 95
General Master-to-Master Issues ................................................................................... 95
Mainline ............................................................................................................97
Reserved Identifiers ..........................................................................................99
Compiler Directives ................................................................................................ 99
#DEFINE ................................................................................................................................ 99
#END_IF ................................................................................................................................ 99
#ELSE .................................................................................................................................... 99
#IF_DEFINED ........................................................................................................................ 99
#IF_NOT_DEFINED ............................................................................................................... 99
Keywords & Run-Time Library Functions............................................................... 100
__DATE__ ............................................................................................................................ 100
__FILE__ .............................................................................................................................. 100
__LDATE__ .......................................................................................................................... 100
__LINE__ ............................................................................................................................. 100
__NAME__ ........................................................................................................................... 100
__TIME__ ............................................................................................................................. 100
ABS_VALUE ........................................................................................................................ 100
ACTIVE ................................................................................................................................ 100
#INCLUDE ........................................................................................................................... 100
#WARN ................................................................................................................................ 100
ADD_URL_ENTRY .............................................................................................................. 101
AND (&&) ............................................................................................................................. 101
ASTRO_CLOCK .................................................................................................................. 101
ATOI ..................................................................................................................................... 102
ATOF .................................................................................................................................... 102
ATOL .................................................................................................................................... 102
BAND (&) ............................................................................................................................. 102
BNOT (~) .............................................................................................................................. 102
BOR (|) ................................................................................................................................. 102
BREAK ................................................................................................................................. 103
BUTTON_EVENT ................................................................................................................ 103
BXOR (^) .............................................................................................................................. 103
CALL .................................................................................................................................... 103
CANCEL_ALL_WAIT ........................................................................................................... 103
CANCEL_ALL_WAIT_UNTIL ............................................................................................... 103
CANCEL_WAIT ....................................................................................................................103
CANCEL_WAIT_UNTIL ....................................................................................................... 104
CASE ................................................................................................................................... 104
CHANNEL_EVENT .............................................................................................................. 104
iv
NetLinx Programming Language Reference Guide
Page 7

Table of Contents
CHAR ................................................................................................................................... 104
CHARD ................................................................................................................................ 104
CHARDM ............................................................................................................................. 104
CLEAR_BUFFER ................................................................................................................. 104
CLKMGR_ADD_USERDEFINED_TIMESERVER ............................................................... 105
CLKMGR_DELETE_USERDEFINED_TIMESERVER ......................................................... 105
CLKMGR_GET_ACTIVE_TIMESERVER ............................................................................ 105
CLKMGR_GET_DAYLIGHTSAVINGS_OFFSET ................................................................ 105
CLKMGR_GET_END_DAYLIGHTSAVINGS_RULE ........................................................... 105
CLKMGR_GET_RESYNC_PERIOD .................................................................................... 105
CLKMGR_GET_START_DAYLIGHTSAVINGS_RULE ....................................................... 105
CLKMGR_GET_TIMESERVERS ......................................................................................... 106
CLKMGR_GET_TIMEZONE ................................................................................................ 106
CLKMGR_IS_DAYLIGHTSAVINGS_ON ............................................................................. 106
CLKMGR_IS_NETWORK_SOURCED ................................................................................ 106
CLKMGR_SET_ACTIVE_TIMESERVER ............................................................................ 106
CLKMGR_SET_CLK_SOURCE .......................................................................................... 106
CLKMGR_SET_DAYLIGHTSAVINGS_MODE .................................................................... 106
CLKMGR_SET_DAYLIGHTSAVINGS_OFFSET ................................................................. 106
CLKMGR_SET_END_DAYLIGHTSAVINGS_RULE ............................................................ 106
CLKMGR_SET_RESYNC_PERIOD .................................................................................... 107
CLKMGR_SET_START_DAYLIGHTSAVINGS_RULE ....................................................... 107
CLKMGR_SET_TIMEZONE ................................................................................................ 107
CLOCK ................................................................................................................................. 107
COMBINE_CHANNELS ....................................................................................................... 107
COMBINE_DEVICES ........................................................................................................... 108
COMBINE_LEVELS ............................................................................................................. 108
COMMAND .......................................................................................................................... 108
COMPARE_STRING ........................................................................................................... 109
CONSTANT ......................................................................................................................... 109
CREATE_BUFFER .............................................................................................................. 109
CREATE_LEVEL ................................................................................................................. 110
CREATE_MULTI_BUFFER ................................................................................................. 110
DATA_EVENT ....................................................................................................................
.. 111
DATE .................................................................................................................................... 112
DAY ...................................................................................................................................... 112
DATE_TO_DAY ................................................................................................................... 112
DATE_TO_MONTH ............................................................................................................. 112
DATE_TO_YEAR ................................................................................................................. 112
DAY_OF_WEEK .................................................................................................................. 112
DEFAULT ............................................................................................................................. 112
DEFINE_CALL ..................................................................................................................... 113
DEFINE_COMBINE ............................................................................................................. 113
DEFINE_CONNECT_LEVEL ............................................................................................... 113
DEFINE_CONSTANT .......................................................................................................... 113
DEFINE_DEVICE ................................................................................................................. 114
DEFINE_EVENT .................................................................................................................. 114
DEFINE_FUNCTION ........................................................................................................... 114
DEFINE_LATCHING ............................................................................................................ 114
DEFINE_MODULE ............................................................................................................... 114
DEFINE_MUTUALLY_EXCLUSIVE ..................................................................................... 115
DEFINE_PROGRAM ........................................................................................................... 115
DEFINE_START .................................................................................................................. 115
DEFINE_TOGGLING ........................................................................................................... 115
NetLinx Programming Language Reference Guide
v
Page 8

Table of Contents
DEFINE_TYPE ..................................................................................................................... 115
DEFINE_VARIABLE ............................................................................................................ 116
DELETE_URL_ENTRY ........................................................................................................ 116
DEV ...................................................................................................................................... 116
DEVCHAN ............................................................................................................................ 116
DEVICE_ID .......................................................................................................................... 116
DEVICE_ID_STRING ........................................................................................................... 116
DEVICE_INFO ..................................................................................................................... 117
DEVLEV ............................................................................................................................... 118
DO_PUSH ............................................................................................................................ 119
DO_PUSH_TIMED ............................................................................................................... 119
DO_RELEASE .....................................................................................................................119
DOUBLE .............................................................................................................................. 119
DUET_MEM_SIZE_GET ...................................................................................................... 119
DUET_MEM_SIZE_SET ...................................................................................................... 119
ELSE .................................................................................................................................... 119
FALSE .................................................................................................................................. 119
FILE_CLOSE ....................................................................................................................... 120
FILE_COPY ......................................................................................................................... 120
FILE_CREATEDIR ............................................................................................................... 121
FILE_DELETE ...................................................................................................................... 121
FILE_DIR ............................................................................................................................. 121
FILE_GETDIR ...................................................................................................................... 122
FILE_OPEN ......................................................................................................................... 122
FILE_READ .......................................................................................................................... 123
FILE_READ_LINE ................................................................................................................ 123
FILE_REMOVEDIR .............................................................................................................. 124
FILE_RENAME ....................................................................................................................124
FILE_SEEK .......................................................................................................................... 124
FILE_SETDIR ...................................................................................................................... 125
FILE_WRITE ........................................................................................................................ 125
FILE_WRITE_LINE .............................................................................................................. 125
FIND_STRING ..................................................................................................................... 126
FIRST_LOCAL_PORT ......................................................................................................... 126
FLOAT .................................................................................................................................. 126
FOR ...................................................................................................................................... 126
FORMAT .............................................................................................................................. 127
FTOA .................................................................................................................................... 128
GET_BUFFER_CHAR ......................................................................................................... 128
GET_BUFFER_STRING ...................................................................................................... 128
GET_DNS_LIST ...................................................................................................................129
GET_IP_ADDRESS ............................................................................................................. 129
GET_LAST ........................................................................................................................... 130
GET_MULTI_BUFFER_STRING ......................................................................................... 131
GET_PULSE_TIME ............................................................................................................. 131
GET_SERIAL_NUMBER ..................................................................................................... 131
GET_SYSTEM_NUMBER ................................................................................................... 131
GET_TIMER ......................................................................................................................... 131
GET_UNIQUE_ID ................................................................................................................ 131
GET_URL_LIST ...................................................................................................................132
HEXTOI ................................................................................................................................ 133
HOLD ................................................................................................................................... 134
IF .......................................................................................................................................... 134
INCLUDE ............................................................................................................................. 134
vi
NetLinx Programming Language Reference Guide
Page 9

Table of Contents
INTEGER ............................................................................................................................. 134
IP_CLIENT_CLOSE ............................................................................................................. 134
IP_CLIENT_OPEN ............................................................................................................... 135
IP_MC_SERVER_OPEN ..................................................................................................... 136
IP_SERVER_CLOSE ........................................................................................................... 136
IP_SERVER_OPEN ............................................................................................................. 137
ITOA ..................................................................................................................................... 137
ITOHEX ................................................................................................................................ 137
LDATE .................................................................................................................................. 137
LEFT_STRING ..................................................................................................................... 138
LENGTH_ARRAY ................................................................................................................ 138
LENGTH_STRING ............................................................................................................... 139
LENGTH_VARIABLE_TO_STRING (VARIABLE Encode) .................................................. 139
LENGTH_VARIABLE_TO_XML ........................................................................................... 139
LEVEL_EVENT ....................................................................................................................139
LOCAL_VAR ........................................................................................................................ 139
LONG ................................................................................................................................... 139
LONG_WHILE ...................................................................................................................... 140
LOWER_STRING ................................................................................................................ 140
LSHIFT ................................................................................................................................. 140
MASTER_SN ....................................................................................................................... 140
MASTER_SLOT ................................................................................................................... 140
MAX_VALUE ........................................................................................................................ 140
MAX_LENGTH_ARRAY ...................................................................................................... 140
MAX_LENGTH_STRING ..................................................................................................... 141
MEDIUM_WHILE ................................................................................................................. 141
MID_STRING ....................................................................................................................... 141
MIN_VALUE ......................................................................................................................... 141
MIN_TO ................................................................................................................................ 141
MOD (%) .............................................................................................................................. 142
MODULE_NAME ................................................................................................................. 142
NOT (!) ................................................................................................................................. 142
NON_VOLATILE .................................................................................................................. 142
OFF ...................................................................................................................................... 142
OFFLINE .............................................................................................................................. 142
ON ........................................................................................................................................ 142
ONERROR ........................................................................................................................... 142
ONLINE ................................................................................................................................ 142
OR (||) .................................................................................................................................. 142
PAUSE_ALL_WAIT .............................................................................................................. 142
PAUSE_WAIT ...................................................................................................................... 142
PERSISTENT ....................................................................................................................... 143
PROGRAM_NAME .............................................................................................................. 143
PULSE ................................................................................................................................. 143
PUSH ................................................................................................................................... 143
PUSH_CHANNEL ................................................................................................................ 143
PUSH_DEVCHAN ................................................................................................................ 143
PUSH_DEVICE ....................................................................................................................143
RANDOM_NUMBER ............................................................................................................ 143
RAW_BE .............................................................................................................................. 143
RAW_LE .............................................................................................................................. 143
REBOOT .............................................................................................................................. 144
REBUILD_EVENT() ............................................................................................................. 144
REDIRECT_STRING ........................................................................................................... 146
NetLinx Programming Language Reference Guide
vii
Page 10

Table of Contents
RELEASE ............................................................................................................................. 146
RELEASE_CHANNEL ......................................................................................................... 146
RELEASE_DEVCHAN ......................................................................................................... 146
RELEASE_DEVICE ............................................................................................................. 146
REMOVE_STRING .............................................................................................................. 147
REPEAT ............................................................................................................................... 147
RESTART_ALL_WAIT ......................................................................................................... 147
RESTART_WAIT ................................................................................................................. 147
RETURN .............................................................................................................................. 147
RIGHT_STRING .................................................................................................................. 147
RSHIFT ................................................................................................................................ 148
SELECT…ACTIVE ............................................................................................................... 148
SEND_COMMAND .............................................................................................................. 148
SEND_LEVEL ...................................................................................................................... 148
SEND_STRING ....................................................................................................................148
SET_DNS_LIST ...................................................................................................................149
SET_IP_ADDRESS ............................................................................................................. 149
SET_LENGTH_ARRAY ....................................................................................................... 150
SET_LENGTH_STRING ...................................................................................................... 150
SET_OUTDOOR_TEMPERATURE ..................................................................................... 150
SET_PULSE_TIME .............................................................................................................. 150
SET_SYSTEM_NUMBER .................................................................................................... 151
SET_TIMER ......................................................................................................................... 151
SET_VIRTUAL_CHANNEL_COUNT ................................................................................... 151
SET_VIRTUAL_LEVEL_COUNT ......................................................................................... 151
SET_VIRTUAL_PORT_COUNT .......................................................................................... 151
SINTEGER ........................................................................................................................... 151
SLONG ................................................................................................................................. 151
STACK_VAR ........................................................................................................................ 152
STRING ................................................................................................................................ 152
STRING_TO_VARIABLE (VARIABLE DECODE) ................................................................ 152
STRUCTURE ....................................................................................................................... 152
SWITCH...CASE ..................................................................................................................153
SYSTEM_CALL ................................................................................................................... 153
SYSTEM_NUMBER ............................................................................................................. 153
TIME ..................................................................................................................................... 153
TIME_TO_HOUR ................................................................................................................. 153
TIME_TO_MINUTE .............................................................................................................. 153
TIME_TO_SECOND ............................................................................................................ 154
TIMED_WAIT_UNTIL ........................................................................................................... 154
TIMELINE_ACTIVE .............................................................................................................. 154
TIMELINE_CREATE ............................................................................................................ 154
TIMELINE_EVENT ............................................................................................................... 155
TIMELINE_GET ...................................................................................................................155
TIMELINE_KILL ................................................................................................................... 155
TIMELINE_PAUSE .............................................................................................................. 155
TIMELINE_RELOAD ............................................................................................................ 156
TIMELINE_RESTART .......................................................................................................... 156
TIMELINE_SET .................................................................................................................... 156
TO ........................................................................................................................................ 157
TOTAL_OFF ........................................................................................................................ 157
TRUE ................................................................................................................................... 157
TYPE_CAST ........................................................................................................................ 157
UNCOMBINE_CHANNELS .................................................................................................. 157
viii
NetLinx Programming Language Reference Guide
Page 11

Table of Contents
UNCOMBINE_DEVICES ..................................................................................................... 157
UNCOMBINE_LEVELS ........................................................................................................ 158
UPPER_STRING ................................................................................................................. 158
VARIABLE_TO_STRING (VARIABLE ENCODE) ................................................................ 158
VARIABLE_TO_XML ........................................................................................................... 159
VOLATILE ............................................................................................................................ 161
WAIT .................................................................................................................................... 161
WAIT_UNTIL ........................................................................................................................ 161
WHILE .................................................................................................................................. 161
WIDECHAR .......................................................................................................................... 161
XML_TO_VARIABLE ........................................................................................................... 162
Send_Commands .................................................................................................. 164
DEFINE_MUTUALLY_EXCLUSIVE and Variables .......................................................... 164
XOR (^^) ............................................................................................................................... 164
Compiler Messages ........................................................................................167
Compiler Warnings ............................................................................................... 167
(w) Cannot assign unlike types .................................................................................... 167
(w) Define_Call is not used .......................................................................................... 167
(w) Integer applies to arrays only ................................................................................ 167
(w) Long_While within While ....................................................................................... 167
(w) Possibly too many nested levels ............................................................................ 167
(w) Variable is not used ............................................................................................... 168
Compiler Errors .................................................................................................... 168
A "<symbol>" was expected ...................................................................................... 168
ACTIVE keyword expected ......................................................................................... 168
Allowed only in DEFINE_START .................................................................................. 168
Attempted CALL to undefined subroutine .................................................................. 168
Comment never ends, EOF encountered .................................................................... 168
Conditional compile nesting too deep ........................................................................ 168
Constant type not allowed .......................................................................................... 168
DEFINE_CALL must have a name ................................................................................ 168
DEFINE_CALL name already used ............................................................................... 168
Device values must be equal ....................................................................................... 168
Duplicate symbol......................................................................................................... 168
Evaluation stack overflow ........................................................................................... 169
Evaluation stack underflow ......................................................................................... 169
Identifier expected...................................................................................................... 169
Identifier is not an array type ...................................................................................... 169
Include file not found .................................................................................................. 169
Invalid include file name.............................................................................................. 169
Library file not found .................................................................................................. 169
Maximum string length exceeded ............................................................................... 169
Must be char array reference ...................................................................................... 169
NetLinx Programming Language Reference Guide
ix
Page 12

Table of Contents
Must be integer reference........................................................................................... 169
Out of memory............................................................................................................ 169
Parameter mismatch in CALL....................................................................................... 169
Program_Name must be on line 1 ............................................................................... 169
Push/Release not allowed within Push/Release ........................................................... 169
Push/Release not allowed within Wait......................................................................... 169
PUSH_CHANNEL not allowed within Wait .................................................................. 170
RELEASE_CHANNEL not allowed within Wait............................................................. 170
PUSH_DEVICE not allowed within Wait....................................................................... 170
RELEASE_DEVICE not allowed within Wait ................................................................. 170
String constant expected ............................................................................................ 170
String constant never ends, EOF encountered............................................................ 170
String literal expected................................................................................................. 170
Subroutine may not call itself ...................................................................................... 170
Syntax error................................................................................................................. 170
SYSTEM_CALL name not same as PROGRAM_NAME in <file> ................................... 170
This variable type not allowed .................................................................................... 170
TO statements that occur outside the data flow of PUSH events/statements may not work
170
Too few parameters in CALL ....................................................................................... 171
Too many include files ................................................................................................. 171
Too many parameters in CALL .................................................................................... 171
Type mismatch in function CALL ................................................................................. 171
Undefined identifier .................................................................................................... 171
Unmatched #END_IF ................................................................................................... 171
Unrecognized character in input file............................................................................ 171
Use SYSTEM_CALL [instance] 'name'........................................................................... 171
Variable assignment not allowed here ........................................................................ 171
Wait not found ............................................................................................................ 171
Run-Time Errors .................................................................................................... 171
Bad assign 2dim... ....................................................................................................... 171
Bad assign Call... ......................................................................................................... 172
Bad element assign... .................................................................................................. 172
Bad Off... Bad On... Bad To......................................................................................... 172
Bad re-assign Call... ..................................................................................................... 172
Bad run token.............................................................................................................. 172
Bad Set_Length... ........................................................................................................ 172
Bad While .................................................................................................................... 172
NetLinx UniCode Functions ............................................................................173
Overview .............................................................................................................. 173
x
NetLinx Programming Language Reference Guide
Page 13

Table of Contents
_WC ..................................................................................................................................... 173
CH_TO_WC ......................................................................................................................... 173
WC_COMPARE_STRING ................................................................................................... 173
WC_CONCAT_STRING ...................................................................................................... 173
WC_DECODE ......................................................................................................................174
WC_ENCODE ......................................................................................................................174
WC_FILE_CLOSE ............................................................................................................... 175
WC_FILE_OPEN ................................................................................................................. 176
WC_FILE_READ .................................................................................................................. 177
WC_FILE_READ_LINE ........................................................................................................ 177
WC_FILE_WRITE ................................................................................................................ 178
WC_FILE_WRITE_LINE ...................................................................................................... 178
WC_FIND_STRING ............................................................................................................. 178
WC_GET_BUFFER_CHAR ................................................................................................. 179
WC_GET_BUFFER_STRING .............................................................................................. 179
WC_LEFT_STRING ............................................................................................................. 179
WC_LENGTH_STRING ....................................................................................................... 179
WC_LOWER_STRING ........................................................................................................ 180
WC_MAX_LENGTH_STRING ............................................................................................. 180
WC_MID_STRING ............................................................................................................... 180
WC_REMOVE_STRING ...................................................................................................... 180
WC_RIGHT_STRING .......................................................................................................... 181
WC_SET_LENGTH_STRING .............................................................................................. 181
WC_TO_CH ......................................................................................................................... 181
WC_TP_ENCODE ............................................................................................................... 181
WC_UPPER_STRING ......................................................................................................... 181
Working With UniCode in NetLinx Studio v2.4..................................................... 182
Configuring NetLinx Studio......................................................................................... 182
Including the Unicode Library ..................................................................................... 183
Defining a Unicode String Literal ................................................................................ 183
Storing a Unicode String ............................................................................................. 184
Working with WIDECHAR arrays and Unicode Strings ................................................ 184
Character Case Mappings ........................................................................................... 185
Concatenating String .................................................................................................. 185
Converting between WIDECHAR and CHAR ............................................................... 185
Using FORMAT............................................................................................................ 185
Reading and Writing to Files ....................................................................................... 186
Send strings to a User Interface .................................................................................. 186
Right-to-Left Unicode Strings ...................................................................................... 186
Compiler Errors ........................................................................................................... 187
IP Communication ..........................................................................................189
Client Programming.............................................................................................. 189
Initiating a conversation .............................................................................................. 189
Terminating a conversation ......................................................................................... 190
Sending data ............................................................................................................... 190
Receiving data............................................................................................................. 190
NetLinx Programming Language Reference Guide
xi
Page 14

Table of Contents
Server Programming............................................................................................. 191
Listening for client requests ........................................................................................ 191
Multiple client connections.......................................................................................... 192
Closing a local port ..................................................................................................... 192
Connection-oriented notifications ............................................................................... 192
Receiving data............................................................................................................. 193
Sending data ............................................................................................................... 193
Receiving Data with UDP ............................................................................................ 193
Multicast...................................................................................................................... 194
Example IP Code ......................................................................................................... 194
NetLinx Modules ............................................................................................197
Defining a module ....................................................................................................... 197
Using a module in a program ...................................................................................... 204
Internet Inside ................................................................................................207
Java TPClasses............................................................................................................. 207
WDM Configuration .................................................................................................... 208
Encoding and Decoding: Binary and XML ......................................................209
Appendix A: Marshalling Protocol ..................................................................215
Marshalling Protocol (Group of Bytes) .................................................................. 215
Marshalled Stream Format .......................................................................................... 215
Marshalling Protocol (Variables) ........................................................................... 217
Marshalled Stream format ........................................................................................... 217
Encoding notes:........................................................................................................... 219
String encoding ........................................................................................................... 219
Binary array encoding.................................................................................................. 219
Binary Encoding Result................................................................................................ 221
XML Encoding Result .................................................................................................. 223
Appendix B: Glossary .....................................................................................225
xii
NetLinx Programming Language Reference Guide
Page 15

Table of Contents
NetLinx Programming Language Reference Guide
xiii
Page 16

Table of Contents
xiv
NetLinx Programming Language Reference Guide
Page 17

Introduction
NetLinx® is the second generation of the Axcess® programming language and is a superset of the
original Axcess language with extensions for additional data types, new event handlers, structure
support, multi-dimensional arrays, and other features. This document assumes that you are familiar with
Axcess; the focus is on the new language elements and how they extend the functionality of the existing
language.
For background information on Axcess, refer to the Axcess Programming Language instruction manual.
For a side-by-side comparison of programming in Axcess and NetLinx, refer to the NetLinx
Programming Overview section on page 3.
Conventions Used in this Document
NetLinx contains a number of keywords that define various available operations to perform in a NetLinx
command, such as the word
CALL 'Read Data' (Buffer)
Keywords are case insensitive. For example, the PUSH command is the same as push. Keywords are
reserved, meaning that identifiers (device names, constants, or variables) must have unique names. These
keywords are listed and defined in the Reserved Identifiers section on page 99. All references to NetLinx
language keywords in this document appear in
Programming examples appear in the same fixed font. For example:
DEFINE_VARIABLE
CHAR MyString[32]
INTEGER StrLen
Introduction
CALL in the statement:
THE FONT SHOWN HERE, in all capital letters.
Square brackets indicate an optional element in a command. Angle brackets indicate substitution. In the
example below, the notation
FLOAT) must be substituted for <return type>. The square brackets surrounding it indicate that
or
the return type is optional.
DEFINE_FUNCTION [<return type>] <name> [(Param1, Param2, …)]
{
(* body of subroutine *)
}
<return type> indicates that a valid data type (such as CHAR, INTEGER,
Related Instruction Manuals
These instruction manuals contain additional information that relates to the NetLinx Programming
Language:
Axcess Programming Language Instruction Manual
NetLinx Studio Program Instruction Manual
NetLinx Programming Language Reference Guide
1
Page 18

Introduction
2
NetLinx Programming Language Reference Guide
Page 19

NetLinx Programming Overview
The NetLinx control system was designed to upgrade the processor bus and improve the power of the
Axcess programming language. Originally named Axcess2, the NetLinx was designed to be a superset of
the Axcess programming language. The relationship between the new language (NetLinx) and Axcess is
very similar to the relationship between C++ and C.
Just as C++ brought a whole new level of power to C programming, NetLinx offers a variety of new tools
and commands to dynamically increase the speed and power of present and future applications.
Use the NetLinx Studio software program to create, compile, and transfer Axcess/
NetLinx code.
Defining the Superset
NetLinx contains all of the elements of Axcess. Largely, you can use the same code from Axcess
systems in NetLinx systems. Some exceptions include variable names conflicting with new NetLinx
keywords; however, Axcess keywords are valid in NetLinx.
You cannot compile NetLinx code on an Axcess compiler, or download NetLinx code to an Axcess
control system. To upgrade an existing Axcess control system to NetLinx you must upgrade the Axcess
Master to a NetLinx Master. You can still use the existing Axcess equipment as long as you can disable
the existing Axcess Central Controller.
The exceptions are the Axcent, the Axcent2, the AXB-EM232, and the AXB-MPE+
Master Port Expander. None of these integrated controllers allow you to disable the
Central Controller. Both Axcess Card Frame Systems and Axcent
to either remove or disable the Axcess Central Controller. If you are using an
3
Axcent
You can connect the Axcent3 / Axcent3 Pro to a NetLinx Master Module via AXlink.
Then you can compile and download the existing Axcess code.
/ Axcent3 Pro, you can disable the Master with the OpenAxcess program.
NetLinx Programming Overview
3
systems allow you
Several Axcess control limitations have been fixed in NetLinx.
NetLinx expands the types of data and variables from Axcess.
NetLinx provides multiple processes and event threads beyond the Mainline in Axcess.
NetLinx offers more options in distributed processing. NetLinx expands and strengthens
Master-to-Master communications and expands the traditional AXlink bus to include ICSNet
and Ethernet Network communications.
Axcess is linear in its process. At run time, Axcess runs the
is loaded or restarted. Axcess then makes a pass through mainline code, polls the bus for activity, checks
the wait and pulse stacks, and repeats the process again. The length of mainline and the activity on the
bus affect runtime speeds. The mainline process is considered a single thread.
NetLinx runs on multiple threads; mainline and event handlers run on parallel threads. Event handlers
are defined within NetLinx and operate like mini-mainlines. They contain far less code and run faster
than mainline. If an event occurs, and an event handler has been defined for that event, NetLinx bypasses
mainline and runs the event handler.
NetLinx Programming Language Reference Guide
DEFINE_START code once when the system
3
Page 20

NetLinx Programming Overview
NetLinx vs. Axcess - Comparison by Structure
DEFINE_DEVICE
Axcess Language NetLinx Language
Axcess defines devices with a single number (sometimes called an address) from 1 to 255. Axcess permits a maximum of 255 devices on the AXlink bus.
DEFINE_DEVICE
VCR = 1 (* AXC-IRS *)
VPROJ= 2 (* AXC-IRS *)
TP = 128 (* AXT-CA10*)
NetLinx defines the device by Device:Port:System.
• Device is a 16-bit integer representing the device
number. Physical devices range from 1 to 32,767.
Virtual devices range from 32,768 to 36,863.
Note: These numbers do not seem so random when
represented in hexadecimal. Physical devices range
from $0001 to $7FFF. Virtual devices range from
$8000 to $8FFF.
• Port is a 16-bit integer representing the port number in
a range of 1 through the number of ports on the
device.
• System is a 16-bit integer representing the system
number (0 indicates this system).
DEFINE_DEVICE
VCR = 1:1:0 (* NXC-IRS4 PORT 1 *)
VPROJ= 1:2:0 (* PORT 2 *)
TP = 128:1:0 (* AXT-CA10 *)
DEFINE_CONSTANT
Axcess Language NetLinx Language
Axcess defines constants as either a fixed integer
value between 0 and 65,535 or an array with a maximum length of 255 bytes in which each element can
hold a value from 0 to 255. These values can be
expressed in ASCII, Decimal, or Hexadecimal.
DEFINE_CONSTANT
VALUE_MAX = 140
DEFAULT_NAME = 'Axcess'
ETX = "$FE,$FF"
VALUE_MAX = VALUE_MIN + 100
NetLinx processes constants just like Axcess. NetLinx
also allows you to define an expression in the
DEFINE_CONSTANT section. The expression cannot
contain any variables.
DEFINE_CONSTANT
VALUE_MIN = 40
DEFAULT_NAME = 'Axcess'
ETX [] = {$FE,$FF}
VALUE_MAX = VALUE_MIN + 100
4
NetLinx Programming Language Reference Guide
Page 21

DEFINE_VARIABLES
Axcess Language NetLinx Language
Axcess supports 5 types of variables:
• Integer Variables (default) can contain a value
from 0 to 65,535.
• Character Arrays are single element arrays, in
which each element has a value from 0 to 255 with
a maximum of 255 elements
• 2-Dimensional Arrays equate to a maximum of
255 single element character arrays. Each
element can have a value from 0 to 255.
• Integer Arrays are single element arrays, in which
each element can contain a value from 0 to 65,535
with a maximum of 255 elements
• 2-Dimensional Integer Arrays may have a
maximum value of 65,535.
Variables are Non-Volatile (the variable loses its
value when the program is loaded, but retains its
value if the controller is reset).
DEFINE_VARIABLE
VALUE
ARRAY[3]
ARRAY_2DIM[4][6]
INTEGER INT_ARRAY[6]
NetLinx substantially increased the number of supported
variable types. In addition to more data types, NetLinx
also supports Sets, Structures, and Multi-dimensional
arrays.
Arrays default to Character Arrays. Variables default to
Integer Variables. Variables default to Non-Volatile, but
can be set as Non-Volatile or Volatile (Volatile variables
are initialized when code is loaded or when the system
is reset).
DEFINE_VARIABLE
CHAR VALUE1
WIDECHAR BIGCHAR
INTEGER VALUE2
SINTEGER SIGNED1
LONG BIGVALUE
SLONG SIGNED2
FLOAT DECIMAL
DOUBLE VERYBIGVALUE
INTEGER ARRAY[3][3][3]
VOLATILE INTEGER RESET_VAR
NetLinx Programming Overview
NetLinx Programming Language Reference Guide
5
Page 22

NetLinx Programming Overview
DEFINE_CALL (Subroutines)
Axcess Language NetLinx Language
Axcess provides two methods for incorporating subroutines into your program.
• DEFINE_CALL subroutines are defined in the
program and support parameter passing into the
call. Changing the parameter value inside the call
changes the value of the variable passed to the
parameter. The DEFINE_CALL can use global
variables or defined local variables.
DEFINE_CALL is for standalone statements and
cannot be used in-line as an expression.
• SYSTEM_CALL is an externally defined subroutine
with a '.LIB' extension. SYSTEM_CALL programs
are produced by AMX and are available on
CD-ROM and on the Tech Support Web site at
www.amx.com.
DEFINE_CALL 'SWITCH' (CARD,IN,OUT)
{
SEND_STRING CARD,
"ITOA(IN),'*',ITOA(OUT),'!'"
}
DEFINE_CALL 'MULTIPLY' (X,Y,RESULT)
{
RESULT = X * Y
}
DEFINE_PROGRAM
PUSH[TP,11]
{
CALL 'SWITCH' (SWITCHER,4,1)
}
PUSH[TP,12]
{
CALL 'MULTIPLY' (3,4,VALUE)
}
SYSTEM_CALL [1] 'VCR1'
(VCR,TP,21,22,23,24,25,26,27,28,0)
Like Axcess, NetLinx supports DEFINE_CALL and
SYSTEM_CALL. NetLinx also supports functions, which
are similar to a DEFINE_CALL(s). They can be used
standalone or in-line as an expression.
Functions are defined in the DEFINE_CALL section of
the code as a global function.
Defining a function differs slightly from a DEFINE_CALL:
• The data type of the function's return value must be
specified.
• The function name is not enclosed with quotes or case
sensitive.
DEFINE_CALL 'SWITCH' (CARD,IN,OUT)
{
SEND_STRING CARD,
"ITOA(IN),'*',ITOA(OUT),'!'"
}
DEFINE_FUNCTION INTEGER MULTIPLY
(INTEGER X, INTEGER Y)
{
RETURN (X * Y)
}
DEFINE_PROGRAM
PUSH[TP,11]
{
CALL 'SWITCH' (SWITCHER,4,1)
}
PUSH[TP,12]
{
VALUE = MULTIPLY(3, 4)
}
SYSTEM_CALL [1] 'VCR1'
(VCR,TP,21,22,23,24,25,26,27,28,0)
6
NetLinx Programming Language Reference Guide
Page 23

NetLinx Programming Overview
DEFINE_START
Axcess Language NetLinx Language
DEFINE_START sets the initialization parameters for
the Axcess program. This section defines buffers,
levels, sets communication settings, and initializes
variables.
DEFINE_START is run once when the program is
loaded or the system is reset.
DEFINE_START
CREATE_BUFFER TP, TP_BUFFER
CREATE_LEVEL VOL, 1, VOL_LEVEL1
SEND_COMMAND SWT,
'SET BAUD 9600,N,8,1,DISABLE'
ON[CLEAR_TO_SEND]
There is no difference between the way Axcess and
NetLinx handle the DEFINE_START section of the program; however, the role of the DEFINE_START section
is greatly reduced. Variable initializations are handled in
the DEFINE_VARIABLE section. Device initializations
are handled with a DATA_EVENT in the DEFINE_EVENT
section.
DEFINE_START
ON[CLEAR_TO_SEND]
DEFINE_EVENT
Axcess Language NetLinx Language
Axcess does not support events. Events are a new process in NetLinx. The events thread
runs parallel to the mainline thread. Events describe certain types of conditions within the control system. If the
conditions are defined as a DEFINE_EVENT, the event
code is run and mainline is bypassed.
There are five different types of events: Button Events,
Channel Events, Data Events, Level Events, and Timeline Events.
DEFINE_EVENT
BUTTON_EVENT[TP,21]
(* KC REPEAT 'A' *)
{
PUSH:
{SEND_STRING KC, 'A'
}
RELEASE:
{
}
HOLD[5,REPEAT]:
{
SEND_STRING KC, 'A'
}
}
NetLinx Programming Language Reference Guide
7
Page 24

NetLinx Programming Overview
DEFINE_PROGRAM
Axcess Language NetLinx Language
The DEFINE_PROGRAM or mainline section of the
Axcess program is where most of the programming
process takes place. Axcess supports 99 reserved
identifiers or keywords. 83 of these keywords can be
used in the mainline.
Axcess runs through a loop where:
• The AXlink bus is queried for any changes.
• Mainline code is run.
• Axcess checks the wait stack and the pulse stacks
for any expired waits and pulses.
• The process is repeated.
Operators
NetLinx added several operators to the language consistent with C++ programming. In conditional
statements (True or False statements), the double equal signs (==) can be used to evaluate whether two
statements are equal. The double equal signs perform the same function as a single equal sign.
There are two Bitwise operators:
Shift Left shifts the bits of a value to the left n binary positions or effectively multiplies the
Shift Right shifts the bits of a value to the right n binary positions or effectively divides the
An example of both is shown below.
X = 1
Y = 8
X = X << 2 (* X is now equal to 4 *)
Z = Y >> 3 (* Z is now equal to 1 *)
The DEFINE_PROGRAM or mainline section of the
NetLinx program and the DEFINE_EVENTS section of
code are responsible for processing events in a NetLinx
system. NetLinx has expanded the list of keywords to
194 reserved identifiers. NetLinx also supports loops,
data conversions, string processing, and file handling.
NetLinx handles mainline in a similar fashion to Axcess,
with a couple of differences. Because NetLinx supports
multiple bus formats (AXlink, ICSNet, and Ethernet),
events and changes in bus status are handled through a
connection manager and message queue. NetLinx
checks the message queue to see if an event is defined
for the message. If not, NetLinx makes a pass through
mainline. When NetLinx finishes the event handler or
mainline, NetLinx processes the Wait list and Pulse list,
and returns to the message queue to start the process
again.
value by 2n, where n is the number of places to shift. Shift Left is designated by a double lessthan sign (
<<) or the LSHIFT keyword.
value by 2n, where n is the number of places to shift. Shift Right is designated by a double
greater-than sign (
>>)or the RSHIFT keyword.
NetLinx also includes value increment and decrement operators. These operators with variables as
statements work just like an Assignment operator or the equal sign does. The Increment-by-One operator
or double plus sign (
Decrement-by-One operator or double minus sign (
++) increments the value of its variable by one. The
--) decrements the value of its variable by one.
An example of value increment and decrement operators is shown below.
X = 1
Y = 5
X++ (* X is now equal to 2 *)
Y-- (* Y is now equal to 4 *)X = Y++(* This is not a legal statement *)
8
NetLinx Programming Language Reference Guide
Page 25

NetLinx Programming Overview
Axcess/NetLinx Incompatibility
According to previous versions of each of their language reference manuals, Axcess and NetLinx each
give the operator
following code, however, the two systems behave differently. In reality, Axcess gives the operator
lowest precedence.
DEFINE_VARIABLE
C D E
DEFINE_CALL 'GO' (A,B)
{
C = !A && B
D = B && !A
E = !B && !A
}
DEFINE_PROGRAM
PUSH[1,1]
CALL 'GO' (0,0)
PUSH[1,2]
CALL 'GO' (1,0)
PUSH[1,3]
CALL 'GO' (0,1)
PUSH[1,4]
CALL 'GO' (1,1)
NOT highest precedence while giving AND and OR lowest. As demonstrated in the
NOT
Axcess RESULTS
A B !A && B B && !A !B && !A
0 0 1 0 1
1 0 1 0 1
0 1 1 1 0
1 1 0 0 1
NETLINX RESULTS
A B !A && B B && !A !B && !A
0 0 0 0 1
1 0 0 0 0
0 1 1 1 0
1 1 0 0 0
The problem applies whether A and B are channels, variables, or expressions, and for OR as well as AND.
To solve the problem, AMX always recommends the use of
(!A) && B instead of !A && B; however,
and this is critical, some programs out there are taking advantage of the logic flaw. Where the Axcess
programmer intended the truth table of
!(A && B) he/she may have coded !A && B and gotten the
desired result. If these systems are converted to NetLinx Masters, the logic will not work as desired.
Please be aware of this difference as you support programs being converted from Axcess to NetLinx.
When it occurs, Axcess-like operation can generally be achieved by including all the conditions to the
right of the
NOT in a single set of parentheses. For example:
IF (SYSTEM_POWER && ![VCR,PLAY] || [VCR,RECORD])
becomes:
IF (SYSTEM_POWER && !([VCR,PLAY] || [VCR,RECORD]))
NetLinx Programming Language Reference Guide
9
Page 26
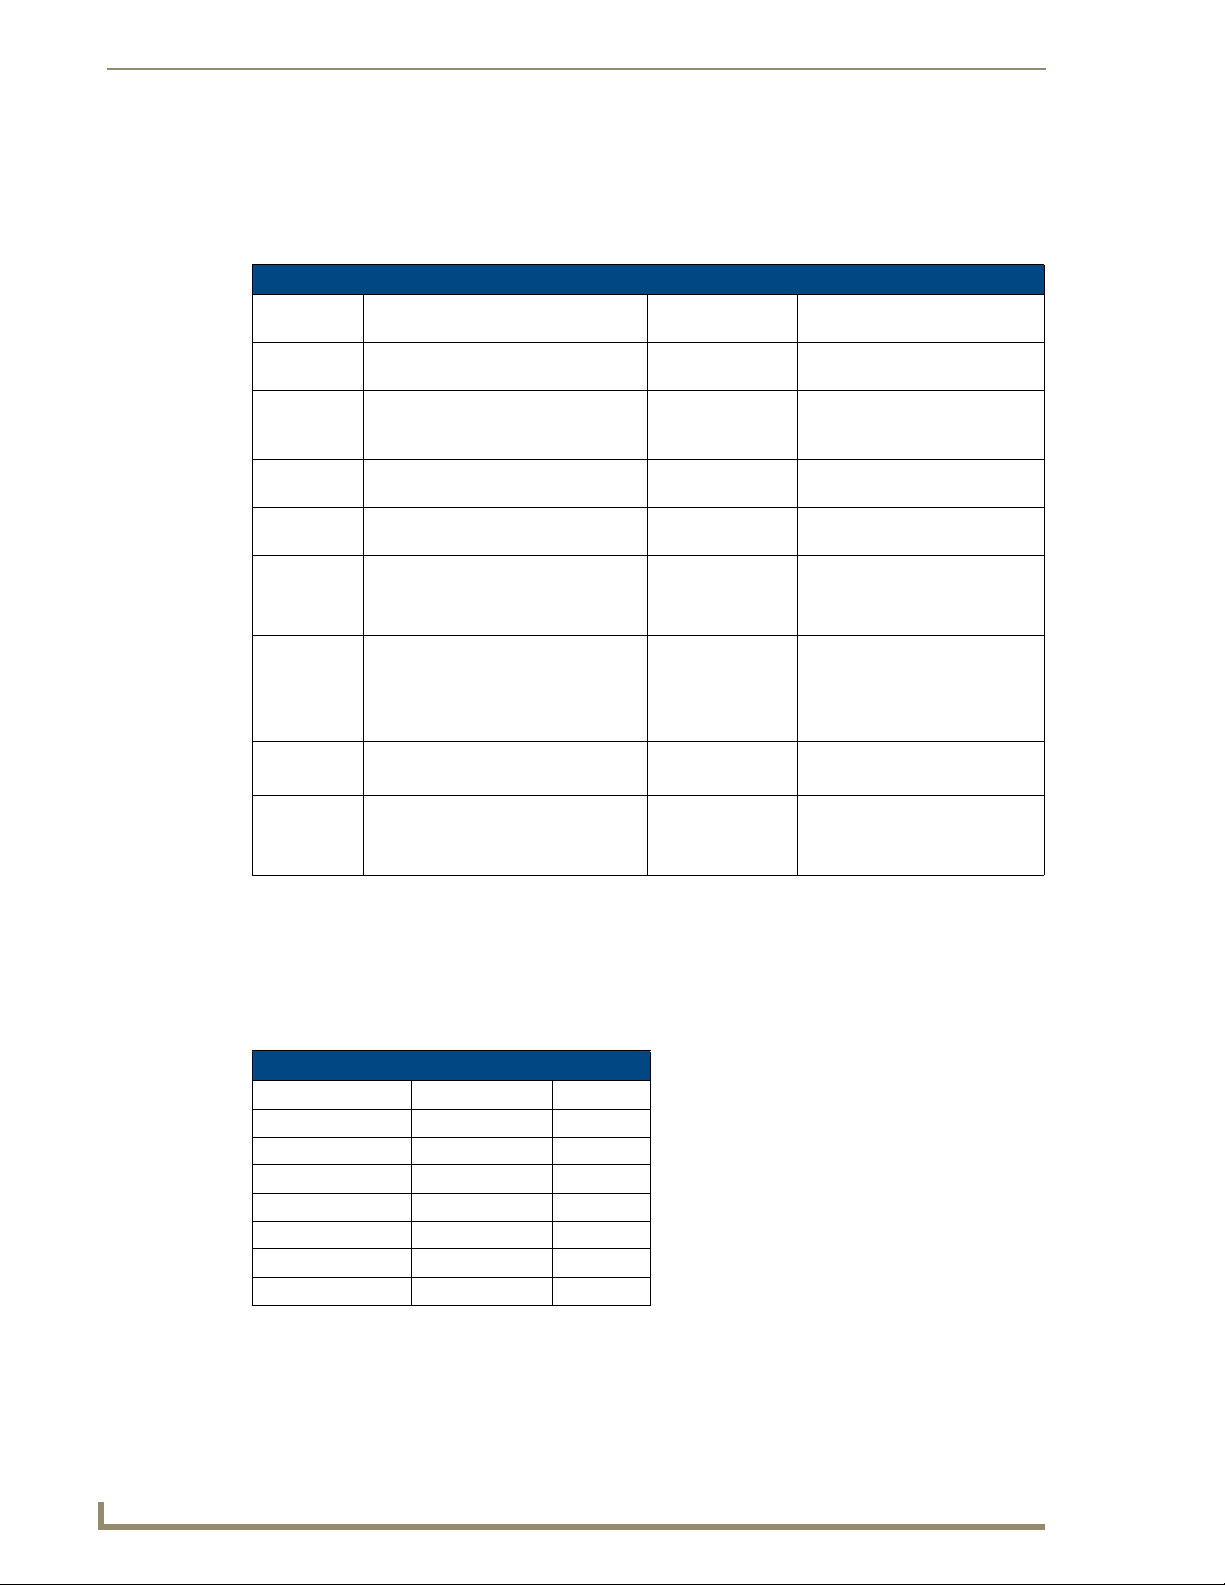
NetLinx Programming Overview
Data Types
NetLinx expanded the types of data handled beyond the 8-bit and 16-bit integers handled by Axcess.
NetLinx supports integers up to 32-bits and signed values to allow positive and negative values. The
following table lists the data types available to NetLinx.
Data Types Supported by NetLinx
Type
Names
CHAR Single byte values and character
WIDECHAR Wide character strings dealing with
INTEGER Default variable value to store values
SINTEGER Signed integer values both greater
FLOAT Small real numbers with 5 digits of
DOUBLE Large real numbers with 15 digits of
LONG Stores large integer values esp.
SLONG Signed large integer values less than -
Used to Store Data Ranges Sample of Stored Values
0 to 255 (8-bit) 'a', 145, $FE, 'The quick gray fox'
strings
0 to 65,535 (16-bit) "'OFF',500"
Unicode fonts that use 16-bit character
codes (and most Far-eastern fonts)
up to 65,535
than and less than zero
precision
precision
greater than 65,535
32,767 and greater than 32,767
0 to 65,535 (16-bit) 512, 32468, 12
32,767 to 32,767
(16-bit)
10e-38 to 10e38 1.2345
10e-308 to 10e308 1.23456789012345
0 to 4,294,967,295
(32-bit)
-2,147,483,647 to
2,147,483,647
(32-bit)
24, -24, 568, -568
123.451.2345e5
-16.323.1415
12,345,678.9012545
3.14159265358979
-0.048512934
1,000,000
2,000,046
-1,000,000
1,000,000-2,000,000
2,000,000
Constants
The DEFINE_CONSTANT section in NetLinx is similar to the DEFINE_CONSTANTS section in Axcess.
The scope of the constant extends throughout the module in which it is defined. If the
DEFINE_CONSTANT section appears in the main program or in an include file, the constant's scope
extends globally throughout the program.
DEFINE_CONSTANT Data Formats
Types Formats Examples
Decimal Integer 0000 1500
Hexadecimal Integer $000 $DE60
Binary Integer 000b 01110011b
Floating Point 000.0 924.5
Exponential Notation 0.0e0 .5e-12
Character 'c' or <char code> 'R' or 255
String Literal 'ssss’ 'Reverse'
The standard format for
<constant name> = <constant expression>
DEFINE_CONSTANT is:
DEFINE_CONSTANT accepts data in these formats:
10
NetLinx Programming Language Reference Guide
Page 27

NetLinx Programming Overview
NetLinx allows variables to be defined as constants in the DEFINE_VARIABLE section of the program
or module, and in the
LOCAL_VAR section of a DEFINE_CALL or a DEFINE_FUNCTION. Assigning
constants is consistent with C++ programming conventions.
Variables
The role of the DEFINE_VARIABLE section is enhanced for NetLinx. The structure of a variable
definition is:
[NON_VOLATILE|VOLATILE][CONSTANT][<type>]<variable name> [= <value>]
NetLinx handles variables just like Axcess. NetLinx defaults non-array variables to the integer data types
and defaults array variables to character data type array. The variable must be explicitly declared if using
any other data type.
NON_VOLATILE and VOLATILE keywords specify what happens to a variable when the program is
The
downloaded or after a system reset.
NON_VOLATILE variables (the default) lose their values when the program is downloaded, but
retain their values when the system resets.
VOLATILE variables lose their values when the system is loaded and after the system resets.
If you initialize a
time the code is loaded or after a system reset. The variable initializes like it would in the
DEFINE_START section. If you initialize a NON_VOLATILE variable within the DEFINE_VARIABLE
section, the variable only initializes when the system is loaded, and it retains any changed values after
system resets.
Variables can now be defined as constant variables. Since the
allow you to explicitly declare a constant's data type, using the
explicitly declare the data type of a constant, and to define constant values for structures and arrays of
structures.
CONSTANT STR_TV CHAN_5 = {'KXAS', 5}
CONSTANT SINTEGER ABS_ZERO = -273
VOLATILE variable in the DEFINE_VARIABLE section, the variable initializes every
DEFINE_CONSTANT section does not
CONSTANT keyword allows you to
With Axcess, the DEFINE_CALL section allowed you to define local variables with the LOCAL_VAR
keyword. NetLinx expands the scope of
LOCAL_VAR beyond the DEFINE_CALL section of code. Local
variables now come in two flavors:
LOCAL_VAR now defines a static (fixed) local variable (the next time a DEFINE_CALL is
called, the last value of the
This is how Axcess handles variables defined with
LOCAL_VAR definitions strictly to the DEFINE_CALL section. LOCAL_VAR definitions can
appear within any statement block. This includes (but is not limited to)
DEFINE_EVENT, WHILE statements, WAIT statements, etc.
STACK_VAR defines a non-static local variable. STACK_VAR defines local variables the same
LOCAL_VAR, and like LOCAL_VAR, STACK_VAR can appear in any statement block.
way as
LOCAL_VAR will be in memory unless the variable is initialized).
LOCAL_VAR. NetLinx does not limit
DEFINE_FUNCTION,
The difference is that the value stored in the variable is initialized to zero whenever the
statement block is called, and the value is destroyed when the statement block is finished. The
structure for
LOCAL_VAR [NON_VOLATILE | VOLATILE] [CONSTANT] [<type>] name [= <value>]STACK_VAR
[<type>] name [= <value>]
LOCAL_VAR and STACK_VAR variables include:
NetLinx Programming Language Reference Guide
11
Page 28

NetLinx Programming Overview
Persistent Variables
Persistent variables have been implemented in the second release of NetLinx. Persistent variables are
NetLinx program variables that maintain their value between updates to the NetLinx program. The user
can define a variable to be persistent using the
PERSISTENT CHAR cMyString[100]
All persistent variables are automatically non-volatile. It is not legal to define a variable as VOLATILE
PERSISTENT.
and
When a NetLinx program has a persistent variable declared, subsequent downloads of new NetLinx
programs containing the same persistent variable will retain the variable settings. By default, nonpersistent variables are set to zero after a NetLinx program download. Persistence overrides this behavior
by setting the variable in the newly downloaded program to be the same as it was before the download.
Typically, persistent variables are used for saving preset information. Suppose you have a system that
contains several PosiTrack camera positioning systems, and that the user interface to the system allows
the user to set the position of any of the cameras and record that position for recalling later. The position
presets are stored in a non-volatile array variable so they are maintained during a power cycle. Without
persistent variables, an update to the NetLinx program would zero out all of the presets the user had
stored. With persistent variables, the new NetLinx program can be downloaded and all of the presets
remain intact.
When a new NetLinx program is downloaded to the Master, the Master iterates through all non-volatile
variables from the new program looking for persistent ones. When it finds a persistent variable in the
new program, it searches the old programs persistent variable space for the same variable. When it finds
the same variable, the value of the new variable is set to the same value as the old variable. The Master
identifies the same variable by verifying the following:
Variable name
Variable source location
Variable type
Therefore, in order for persistence to function properly the name, type, and file location declared must be
the same as the previously downloaded NetLinx program. If you changed any of the three, the new
persistent variable will not be set with the old variable's value.
PERSISTENT storage modifier as show below:
12
Arrays
Arrays are the most common way of combining a number of data items into a single unit. Axcess uses
three methods to store data in arrays:
8-bit single dimensional arrays
16-bit single dimensional arrays
8-bit two-dimensional arrays
Axcess arrays are limited to storing 255 elements per dimension. Axcess does not allow you to store
two-dimensional arrays as constants; instead, you set and initialize a two-dimensional array in the
DEFINE_START section. You are responsible for maintaining the integrity of the initialized value.
NetLinx enhances the handling of arrays. You can define arrays of any data type in single and multidimensional arrays. You can define arrays of structures, initialize arrays within the
section, and define arrays as constants.
NetLinx handles arrays similar to C++, except that the first index value of the array is 1 rather than an
index of 0 used by C++. With array initialization you don't need to count how many items are initialized.
These definitions are functionally the same:
NetLinx Programming Language Reference Guide
DEFINE_VARIABLE
Page 29

NetLinx Programming Overview
CHAR TV_CHAN[11] = {2, 3, 4, 5, 8, 11, 13, 21, 27, 33, 39}
CHAR TV_CHAN[] = {2, 3, 4, 5, 8, 11, 13, 21, 27, 33, 39}
Multi-dimensional arrays allow multiple collections of data. NetLinx allows up to five array dimensions;
array size is limited only by available memory. A two-dimensional array is a collection of single
dimensional arrays. Three-dimensional arrays are collections of two-dimensional arrays. Here are
examples of multi-dimensional arrays:
INTEGER NUM1D[10] (* [COLUMN] *)
INTEGER NUM2D[5][10] (* [ROW][COLUMN] *)
INTEGER NUM3D[2][5][10] (* [TABLE][ROW][COLUMN] *)
NUM3D[1] refers to the 1st table
NUM3D[1][4] refers to the 4th row of the 1st table
NUM3D[1][3][7] refers to the 7th column of the 3rd row of the 1st table
CHAR NAME[16] (* [PRESET NAME] *)
CHAR PRESET[10][16] (* [PRESET NUM][PRESET NAME] *)
CHAR USER_PRESET[10][10][16] (* [USER][PRESET NUM][PRESET NAME] *)
CHAR USER_PRESET[10][10][16] allows you to define tables that can store ten 16-character preset
names for ten users. With Axcess, you would either store ten two-dimensional arrays or index one twodimensional array (
USER_PRESET[100][16]). For example, the fifth user would occupy
USER_PRESET[41] through USER_PRESET[50].
It is sometimes difficult for people to envision multi-dimensional arrays beyond three-dimensions. We
sometimes try to define the arrays spatially, as in a three-dimensional array. If we take the approach of
cascading arrays, it is easier to understand. Using the previous example of defining user presets, you can
expand the array to five dimensions by classifying the preset name by location and department. For
example: AMX has three domestic locations; each location has a sales team, a professional services team
and a tech support team; each team has a maximum of ten employees; each employee has the ability to
store 10 preset names; each preset name can have up to 16 characters. The array would look like this:
CHAR USER_PRESET[3][3][10][10][16]
(*[LOCATION][DEPT][USER][PRESET][NAME]*)
NetLinx has a new set of functions to better deal with arrays. LENGTH_ARRAY and
MAX_LENGTH_ARRAY determine the effective length and defined length of an array. When used with
multi-dimensional arrays,
LENGTH_ARRAY and MAX_LENGTH_ARRAY return the lengths associated
with the level of the array supplied as the argument. For example:
INTEGER NUM_LIST [10] = {1, 2, 3, 4, 5}
LEN = MAX_LENGTH_ARRAY (NUM_LIST) (* LEN = 10 *)
LEN = LENGTH_ARRAY (NUM_LIST) (* LEN = 5 *)
INTEGER NEW_LIST[] = {10, 20, 30, 40}
LEN = MAX_LENGTH_ARRAY (NEW_LIST) (* LEN = 4 *)
LEN = LENGTH_ARRAY (NEW_LIST) (* LEN = 4 *)
INTEGER MULTI_LIST[4][10] = { {1, 2, 3}, {4, 5, 6, 7}, {8, 9} }
LEN = MAX_LENGTH_ARRAY (MULTI_LIST[2]) (* LEN = 10 *)
LEN = LENGTH_ARRAY (MULTI_LIST[2]) (* LEN = 4 *)
LEN = MAX_LENGTH_ARRAY (MULTI_LIST) (* LEN = 4 *)
LEN = LENGTH_ARRAY (MULTI_LIST) (* LEN = 3 *)
NetLinx Programming Language Reference Guide
13
Page 30

NetLinx Programming Overview
NetLinx expands the capabilities of the assignment operator '=' to support arrays. Similar array levels are
assigned to another array using the '
data type of the array. You cannot assign a two-dimensional long array to a one-dimensional character
array. The
LENGTH_ARRAY of the array to the right of the '=' operator.
to the
INTEGER ARRAY1[10] = {1, 2, 3, 4}
INTEGER ARRAY2[10] = {5, 6, 7}
INTEGER ARRAY3[10]
INTEGER DIM2ARRAY1[3][4] = { {1, 2, 3}, {4, 5, 6} }
INTEGER DIM2ARRAY2[3][4] = { {7, 8, 9} }
INTEGER DIM2ARRAY3[3][4]
ARRAY3 = ARRAY1 (* ARRAY3 = {1, 2, 3, 4} *)
DIM2ARRAY2[2] = ARRAY1 (* DIM2ARRAY2 = { {7, 8, 9}, {1, 2, 3, 4} } *)
DIM2ARRAY3 = DIM2ARRAY1 (* DIM2ARRAY3 = { {1, 2, 3}, {4, 5, 6} } *)
Structures
Arrays are limited by their inability to have multiple data-types within one array. NetLinx supports
Structures to remove this limitation. Structures group different data types together as one data unit.
Structures also group arrays of structures together so that each element of the array contains all of the
elements of the structure. This may sound complex, but it is actually very familiar.
A database table is an array of structures. The database table is an array of records. Each record is a
structure. Each record contains data of different types. Let's first consider the elements of a database
table. We then show how to define the structure and create a variable that uses the data structure in an
array. We show how to access the individual elements of the structure.
Employee Number (* INDEX - Integer Value *)
Employee National Insurance Number (* National Insurance Number - Long *)
Employee First Name (* First Name - Character Array *)
Employee Last Name (* Last Name - Character Array *)
Contribution to Pension (* Contribution in % - Float *)
=' operator, if the arrays match the number of dimensions and the
MAX_LENGTH_ARRAY of the array to the left of the '=' operator must be greater than or equal
14
The DEFINE_TYPE section is added to the basic structure of a NetLinx Program. Structures are defined
within the
DEFINE_TYPE section. The DEFINE_TYPE section appears between the
DEFINE_CONSTANT section and the DEFINE_VARIABLE section. Since structures cannot be used
within the
DEFINE_CONSTANT section but must be declared before they are used within the
DEFINE_VARIABLE section, placing DEFINE_TYPE between DEFINE_CONSTANT and
DEFINE_VARIABLE is the logical location.
The attributes
NON_VOLATILE, VOLATILE, and CONSTANT do not apply to the individual data
elements of the structure, but can be attributed to the instances of the structure as defined in the
DEFINE_VARIABLE section.
The standard format for structures is:
STRUCTURE <name>
{
[<type>] <data1>
[<type>] <data2>
.
.
}
Using this format, we define our 'employee' structure in the DEFINE_TYPE section:
NetLinx Programming Language Reference Guide
Page 31

NetLinx Programming Overview
DEFINE_TYPE
STRUCTURE EMP
{
INTEGER EMP_NUM
CHAR NI_NUM[9]
CHAR F_NAME[16]
CHAR L_NAME[16]
FLOAT CONT_PENSION
}
Then, within the DEFINE_VARIABLE section, you create an instance of the structure and an array of
the structure as follows:
DEFINE_VARIABLE
EMP JOHN_DOE
EMP AMX_EMP[1000]
Within the program, we use the information stored within the structure and assign information to the
structure in the following manner:
JOHN_DOE.EMP_NUM = 101
JOHN_DOE.NI_NUM = ’155426367’
JOHN_DOE.F_NAME = ’JOHN’
JOHN_DOE.L_NAME = ’DOE’
JOHN_DOE.CONT_PENSION = 0.01
EMP_INDEX = JOHNDOE.EMP_NUM (* EMP_INDEX = 101 *)
AMX_EMP[101] = JOHNDOE
(* AMX_EMP[101] = {101, '155426367', 'JOHN', 'DOE',
0.01}*)
AMX_EMP[60].EMP_NUM = 60
AMX_EMP[60].F_NAME = 'BOB'
Other uses for arrays of structures include channel listings, speed-dial lists, and user password lists.
Data sets
NetLinx predefines several structures designed to work with NetLinx device numbers, channels, and
levels. Data sets allow you to group and combine certain elements of NetLinx devices. There are three
data set structures supported by NetLinx:
DEV (Device Sets)
DEVCHAN (Device-Channel Sets)
DEVLEV (Device-Level Sets)
You have already seen the structure
the structure
STRUCTURE DEV
{
INTEGER DEVICE
INTEGER PORT
INTEGER SYSTEM
}
DEV in the DEFINE_TYPE section, it would look like this:
DEV structure in the DEFINE_DEVICE section. If we were to define
NetLinx Programming Language Reference Guide
15
Page 32

NetLinx Programming Overview
The actual instancing of the structure is unique to the DEV structure because you separate the individual
structure's elements with colons (:) instead of enclosing the structure with braces
elements with commas (
DEV PANEL_A = 128:1:0 (* correct *)
DEV PANEL_B = {128, 1, 0} (* wrong *)
Using the DEV structure, you create the structures DEVCHAN and DEVLEV like this:
STRUCTURE DEVCHAN
{
DEV DEVICE
INTEGER CHANNEL
}
STRUCTURE DEVLEV
{
DEV DEVICE
INTEGER LEVEL
}
DEVCHAN and DEVLEV instance and initialize similarly to other NetLinx structures:
DEV PANEL_A = 192:1:0
DEV PANEL_B = 129:1:0
DEVCHAN BUTTON_A = { PANEL_A, 1 }
DEVCHAN BUTTON_B = { 128:1:0, 2 }
DEVLEV LEVEL_1 = { PANEL_A, 1 }
DEVLEV LEVEL_2 = { 128:1:0, 2 }
{} and separating the
,). For example:
DEV, DEVCHAN, and DEVLEV are structures built into the NetLinx language. You can do more with DEV,
DEVCHAN, and DEVLEV than you could with structures you create within the code.
DEV PANEL_GROUP1[] = { 128:1:0, 129:1:0, 130:1:0 }
DEV MSP_GROUP[5] = { MSP1, MSP2, MSP3 }
DEVCHAN PRESET1_BUTTONS[5] = { {TP1, 21}, {MSP1, 1}, {134:1:0, 1} }
DEVLEV VOL1_LEVEL[] = { {TP1, 1}, {MSP1, 1}, {192:1:0, 1} }
You can use the structures and arrays of the structures within many commands and situations where you
would use a device number, a device and channel combination, or a device and level combination. These
data sets allow you to combine devices, devices and channels, and devices and levels without using the
DEFINE_COMBINE or DEFINE_CONNECT_LEVEL sections. This gives you the ability to combine
certain pages of panels or to combine panels under certain conditions. In Axcess, once the panels were
combined you were locked into that system configuration.
Instead of writing the following statements:
PUSH[MSP1, 1]
PUSH[MSP2, 1]
PUSH[MSP3, 1]
[RELAY, 1] = ![RELAY, 1]
[MSP1, 1] = [RELAY, 1]
[MSP2, 1] = [RELAY, 1]
[MSP3, 1] = [RELAY, 1]
You can use device sets or channel sets to accomplish the same functionality:
16
NetLinx Programming Language Reference Guide
Page 33

NetLinx Programming Overview
PUSH[MSP_GROUP,1] (* MSP_GROUP IS A DEV SET *)
[RELAY, 1] = ![RELAY, 1]
[MSP_GROUP, 1] = [RELAY, 1]
- or -
PUSH[MSP_PRESET1] (* MSP_PRESET1 IS A DEVCHAN SET *)
[RELAY,1] = ![RELAY, 1]
[MSP_PRESET1] = [RELAY, 1]
Conditionals & Loops
Axcess supports two types of conditional statements and three types of loops:
Conditional statements:
IF...ELSE statements
SELECT...ACTIVE statements
Loops:
WHILE statements
MEDIUM_WHILE statements
LONG_WHILE statements
NetLinx supports:
Conditional statements:
IF...ELSE statements
SELECT...ACTIVE statements
SWITCH...CASE statements
Loops:
FOR statements
WHILE statements
LONG_WHILE statements
MEDIUM_WHILE statements are obsolete in NetLinx due to eliminating the timeout of WHILE loops.
LONG_WHILE loops now differ from WHILE loops in the way input change notifications are processed
during the programming loop.
WHILE, MEDIUM_WHILE and LONG_WHILE statements are all still
accepted syntax to provide compatibility with existing Axcess programs.
SWITCH...CASE statements
NetLinx adds the SWITCH...CASE conditional statements. The SWITCH...CASE statements provide
selective execution of code blocks evaluated by a single condition. The value of the
is tested against each
found, the statements associated with the
no match is found, the
CASE value (which must be a numeric constant or a string literal). If a match is
CASE are executed. All other CASE statements are ignored. If
DEFAULT case statements (if any) are executed. The SWITCH expression is
SWITCH expression
evaluated only once.
The following rules apply to
SWITCH...CASE statements:
NetLinx Programming Language Reference Guide
17
Page 34

NetLinx Programming Overview
Only the statements associated with the first case that matches the value of the expression are
If no CASE matches the SWITCH expression, then the statements under the default case (if
All cases must be unique.
Braces should be used to bracket the statements in a case. They are required only if variables
The BREAK statement applies to the SWITCH and takes execution to the end of the SWITCH.
The following is the structure for the
SWITCH (<expression>)
{
CASE <numeric constant or string literal>:
{
(* statements for CASE 1 *)
}
CASE <numeric constant or string literal>:
{
(* statements for CASE 2 *)
}
CASE <numeric constant or string literal>:
{
(* statements for CASE n; there can be as many cases as necessary *)
}
DEFAULT <numeric constant or string literal>:
{
(* statements for DEFAULT case *)
}
}
executed. Multiple
the value matches one of the
CASE statements can be stacked within the SWITCH...CASE statement. If
CASE statements, the statements associated with the stack will be
executed.
available) are executed. The default statement must be the last case within the
SWITCH...CASE, otherwise the remaining case statements will not execute.
are declared within the case.
Unlike C and C++, cases do not fall through to the next case if a break is not used. Because of
BREAK statements are not required between cases.
this,
SWITCH...CASE statement:
18
FOR loops
FOR loops are an alternative to traditional loops. Functionally they do the same thing, but FOR loops are
more readable.
structure for a
FOR (<INITIAL>;<condition>;<after pass>)
{
(* loop statements *)
}
FOR loops, like WHILE loops, do not process input changes from the message buffer. The
FOR loop is shown below:
NetLinx Programming Language Reference Guide
Page 35

NetLinx Programming Overview
Parameters:
<INITIAL> Contains one or more statements that are executed one time before any
FOR loop statements are executed; each statement must be separated by a
comma (,).
<condition> The condition for which the loop is evaluated before each pass. If the condi-
tion evaluates TRUE, the FOR loop statements execute. If the condition evaluates FALSE, the loop terminates.
<after pass> Contains one or more statements that are executed after each pass through
The number of loop executions is usually stated at the beginning of the loop, unlike
the loop statements; each statement is separated by a comma (,). This is
typically a statement that increments the FOR-loop index.
WHILE and
LONG_WHILE loops.
In Axcess, a typical loop may look something like this:
COUNT = 0
WHILE (COUNT<10)
{
COUNT = COUNT + 1
(* loop statements *)
}
In NetLinx you can write the same loop with a FOR statement and clarify how the loop operates:
FOR (COUNT=0 ; COUNT<10 ; COUNT++)
{
(* loop statements *)
}
By defining the loop like this, you clearly see how it is initialized and incremented. No errors appear if
you forget to initialize the
WHILE loop or counter. The FOR loop helps to insure proper structure.
Functions
Axcess only supports one method to create subroutines: DEFINE_CALL. The DEFINE_CALL does not
return values very eloquently. If you pass a variable to a parameter of the
change the parameter value within the subroutine, the program updates the value of the global variable in
the mainline code.
NetLinx has two methods for creating subroutines:
DEFINE_CALL
DEFINE_CALL is intended to run segments of code that are repeated throughout the program, but don't
require a return value. For example, this
projector, and set the lights to Preset 1. The subroutine executes three commands and no values are
returned to the program.
DEFINE_CALL 'PRESENTATION MACRO'
{
SYSTEM_CALL [1] 'SCREEN1' (0, 0, 1, 0, SCREEN, 1, 2, 3, 0)
SEND_STRING VPROJ, "'PON',$0D,$0A"
SEND_STRING RADIA, "'1B',$0D"
}
NetLinx Programming Language Reference Guide
DEFINE_CALL and then
DEFINE_CALL and DEFINE_FUNCTION.
DEFINE_CALL creates a macro to lower a screen, turn on the
19
Page 36

NetLinx Programming Overview
The NetLinx compiler passes all variables by reference. This means that the variable the subroutine
operates on is the same variable the caller passed. Any change made to the variable, passed as a calling
parameter, updates the variable's value from the caller's perspective. You can take advantage of this pass
by reference feature by returning an updated value through a calling parameter rather than as the return
value.
Constants, on the other hand, are passed by value. When this happens, a copy of the parameter is
delivered to the subroutine. Any change made to the variable representing the constant is lost once the
function or subroutine is lost.
To specify an array as a function or subroutine parameter, one set of brackets for each array dimension
must follow the variable name, as shown in the following example:
DEFINE_CALL 'READ INPUT' (CHAR BUFFER[][])
{
(* body of the subroutine *)
}
The parameter BUFFER is declared to be a two-dimensional array by including two sets of brackets after
the name. For compatibility with existing programs, the array dimensions may be specified inside the
brackets. These dimensions, however, are not required and are ignored by the compiler. The NetLinx
Interpreter will do bounds checking on the array and generate a run-time error if the array bounds are
exceeded.
DEFINE_FUNCTION
DEFINE_FUNCTION provides a way to return a value to a statement. It has the same functionality as a
DEFINE_CALL. The DEFINE_FUNCTION is used inline in a statement, where a DEFINE_CALL must be
used as a standalone statement. The basic structure is:
DEFINE_FUNCTION [<return type>]<name>[(<param1>,<param2>, … <parameN>)]
{
(* statements *)
}
The following DEFINE_FUNCTION creates a subroutine to cube a number and returns a LONG integer
value:
DEFINE_FUNCTION LONG CUBEIT (LONG VALUE)
{
STACK_VAR RESULT
RESULT = VALUE * VALUE * VALUE
RETURN RESULT
}
DEFINE_PROGRAM
PUSH[TP1, 1]
{
CUBED_VAL = CUBEIT ( 3 )
(* CUBED_VAL = 27 *)
}
20
NetLinx Programming Language Reference Guide
Page 37

NetLinx Programming Overview
Events
Axcess is a linear environment. All interactions between external devices and the master processor are
handled within mainline code. The processor runs mainline code, services the wait and pulse queues, and
checks the bus for any changes in device status. We view these interactions or changes in status as
Events, which fall into one of four categories: Button Events, Channel Events, Data Events, and Level
Events.
NetLinx has a special program section called
processing that previously could only occur within mainline code can now be handled in the
DEFINE_EVENT section.
NetLinx maintains a table of defined event handlers. When a new event comes into the NetLinx
processing queue, the event is compared against the table of events. If the event is found, only the code in
the event definition is evaluated and executed; mainline is bypassed. If an event handler is not defined,
mainline is run and the event is evaluated against the mainline code. This provides a more efficient
mechanism for processing events, since mainline is not required to process a single
I/O request. If no events are pending, mainline is run. Mainline becomes an idle time process.
With the addition of the
DEFINE_EVENT section for processing events, the mainline's role in NetLinx
becomes greatly diminished, if not totally eliminated. Programs can still be written using the traditional
technique of processing events and providing feedback in mainline code; however, programs written
using the event table structure will run faster and be much easier to maintain.
DEFINE_EVENT to handle incoming events. The event
Button Events
Events associated with a button on a touch panel or an AXD-MSP32 will fall into one of three
categories:
What happens when the button is pushed.
What happens when the button is released.
What happens if the button is held.
The structure for Button Events is as follows:
BUTTON_EVENT [<device>,<channel>]
{
PUSH:
{
(* push event handler code *)
}
RELEASE:
{
(* release event handler code *)
}
HOLD [<time>,[REPEAT]]
{
(* hold event handler code *)
}
}
The [<device>, <channel>] declaration can contain a DEV device set, or a DEVCHAN devicechannel set in addition to individual device and channel declarations. The
actions to be performed when a button is pressed and held for a minimum length of time indicated by the
<time> parameter, which is specified in tenth seconds.
NetLinx Programming Language Reference Guide
HOLD event specifies the
21
Page 38

NetLinx Programming Overview
The following is an example of how a block of existing Axcess code can be rewritten using the NetLinx
BUTTON_EVENT handler. The code below will send an 'A' to an RS-232 port defined as KC1 upon a
button push and will repeat the 'A' string every 0.5 seconds until the button is released.
Axcess Language NetLinx Language
DEFINE_PROGRAM
.
.
PUSH[TP1,10]
{
SEND_STRING KC1, 'A'
ON[REPEAT_KC]
}
RELEASE[TP1,10]
{
CANCEL_WAIT 'REPEAT KC'
OFF[REPEAT_KC]
}
IF (REPEAT_KC)
{
WAIT 5 'REPEAT KC'
SEND_STRING KC1, 'A'
}
[TP1,10] = REPEAT_KC
.
.
DEFINE_EVENT
.
.
BUTTON_EVENT[TP1,10]
{
PUSH:
{
TO[TP1,10]
SEND_STRING KC1, 'A'
}
RELEASE:
{
}
HOLD[5,REPEAT]:
{
SEND_STRING KC1, 'A'
}
}
.
.
DEFINE_PROGRAM
.
.
In addition to evaluating the push within the event handler structure, you can see the simplified logic for
creating the repeating 'A' string using the
HOLD event handler.
Channel Events
Channel Events are similar to Button Events. Channel Events are generated by ON, OFF, PULSE, TO, or
MIN_TO. The format for a Channel Event is shown below:
CHANNEL_EVENT[<device>,<channel>]
{
ON:
{
(* on event handler code *)
}
OFF:
{
(* off event handler code *)
}
}
Like Button Events, the [<device>, <channel>] declaration can contain a DEV device set, or a
DEVCHAN device-channel set in addition to individual device and channel declarations.
In the following example, a Channel Event is defined to turn off a video projector every time the
projector lift is raised. In Axcess, you need to include the code to turn off the projector whenever the
projector lift is raised. In NetLinx, you define a Channel Event for the 'Projector Lift Up' relay and tell
the system to turn off the projector every time this relay is turned on. Since turning on or pulsing the
relay does not produce a push, a Button Event is not generated.
22
NetLinx Programming Language Reference Guide
Page 39

NetLinx Programming Overview
Here is the existing Axcess Code:
DEFINE_PROGRAM
.
.
PUSH[TP1,21] (* LIFT UP BUTTON *)
{
PULSE[RELAY,LIFT_UP]
PULSE[VPROJ,VP_POWER_OFF]
}
PUSH[TP1,22] (* SYSTEM OFF BUTTON *)
{
PULSE[RELAY,RACK_OFF]
PULSE[RELAY,LIFT_UP]
PULSE[VPROJ,VP_POWER_OFF]
}
.
.
NetLinx Channel Event:
DEFINE_EVENT
.
.
BUTTON_EVENT[TP1,21] (* LIFT UP BUTTON *)
{
PUSH:
{
PULSE[RELAY,LIFT_UP]
}
}
BUTTON_EVENT[TP1,22] (* SYSTEM OFF BUTTON *)
{
PUSH:
{
PULSE[RELAY,RACK_OFF]
PULSE[RELAY,LIFT_UP]
}
}
CHANNEL_EVENT[RELAY,LIFT_UP] (* LIFT UP RELAY EVENT *)
{
ON:
{
PULSE[VPROJ,VP_POWER_OFF]
}
}
NetLinx Programming Language Reference Guide
23
Page 40

NetLinx Programming Overview
Data Events
Data Events provide some interesting capabilities in a NetLinx system. At first glance, it seems to be
concerned with receiving strings of data either from a serial data device such as an NXC-COM2 card or
an interface device such as a touch panel or WebLinx. While this is a valid function,
many more capabilities and works with many devices. The structure for a
DATA_EVENT [<device>]
{
COMMAND:
{
(* command data event handler *)
}
STRING:
{
(* string data event handler *)
}
ONLINE:
{
(* online data event handler *)
}
OFFLINE:
{
(* offline data event handler *)
}
DATA_EVENT has
DATA_EVENT is:
ONERROR:
{
(* error data event handler *)
}
}
In Axcess, strings are handled in mainline code. Between each pass through mainline, the data received
by a device is placed within a created buffer. The next pass through mainline allows the Axcess program
to evaluate the string. This has two limitations:
First, Axcess must evaluate the contents of the buffer with each pass through mainline,
whether there is data in the buffer or not. This adds to the length of mainline and slows
mainline.
Second, data is only received into the buffer between passes through mainline. In large
systems, data processing is delayed, and some buffers may be overrun and some data may be
lost.
Because the role of mainline is diminished in NetLinx and events can be processed quickly, NetLinx is
able to process data received by a
DATA_EVENT in real time. When data is received, it enters the
message queue and triggers a data event. If a buffer has been created for the device, the data is placed
within the buffer and can be used by either the
DATA_EVENT or mainline.
The data can be evaluated in two ways. The actual string that is received by the message queue can be
evaluated using the
DATA.TEXT object within the event. The string in DATA.TEXT is also added to the
end of the device's buffer. This becomes a factor when receiving large strings, or when receiving strings
with an embedded string length or start and end characters.
DATA_EVENT then evaluates the buffer to see
if the entire string has been received before processing it; however, the evaluation is done immediately
24
NetLinx Programming Language Reference Guide
Page 41

NetLinx Programming Overview
upon receipt of another chunk of data, and is only done when data is received. For example, DATA.TEXT
may equal
{'over the lazy brown dog',ETX} and the DATA_BUFFER[500] might equal
{STX,'The quick gray fox jumps over the lazy brown dog',ETX}. By evaluating the
buffer value, you can evaluate the entire string at once.
Two other important aspects of the
DATA_EVENT are the ONLINE and OFFLINE event handlers.
ONLINE and OFFLINE events are triggered when the master recognizes a device has come on the bus or
has dropped off the bus.
In Axcess, device initialization is primarily handled with the
alternative was to evaluate the
DEVICE_ID on each pass through mainline. If the
DEFINE_START section of code. The other
DEVICE_ID(<device>) equaled the DEVICE_ID of the device, the device was online. If
DEVICE_ID(<device>) equaled 0, the device was offline. Within the conditional statements, the
device could be initialized or a warning could be sent. The downfall of these approaches is that
DEFINE_START initializations are only run when the master is reset, and evaluations of the DEVICE_ID
must run with each pass of mainline and are dependent on the speed of mainline.
NetLinx handles all device initializations and offline warning through the
device triggers an
ONLINE event when the master is reset, this not only ensures that the device will be
DATA_EVENT. Since every
initialized on startup, but also insures that the device will be initialized any time the device comes online.
DATA_EVENT is also evaluated on a need to know basis, rather than on each pass through mainline.
The
The following example shows basic code for tracking a touch panel page in Axcess. Assume that the
variables have been properly defined in the
contains the creation of the buffer and the
DEFINE_VARIABLE section. The DEFINE_START section
DEFINE_PROGRAM section contains the string evaluation.
Existing Axcess code:
DEFINE_START
.
.
CREATE_BUFFER TP1, TP1_BUFFER
SEND_COMMAND TP1, 'TPAGEON'
.
.
DEFINE_PROGRAM
.
.
IF (LENGTH_STRING (TP1_BUFFER))
{
SELECT
{
ACTIVE (FIND_STRING (TP1_BUFFER,'PAGE-',1)):
{
JUNK = REMOVE_STRING (TP1_BUFFER,'PAGE-',1)
CUR_PAGE = TP1_BUFFER
}
ACTIVE (FIND_STRING (TP1_BUFFER,'KEYP-',1)):
{
(* keypad code *)
}
ACTIVE (FIND_STRING (TP1_BUFFER,'KEYB-',1)):
{
(* keyboard code *)
Continued
NetLinx Programming Language Reference Guide
25
Page 42

NetLinx Programming Overview
}
ACTIVE (1):
{
(* keypad code *)
}
}
}
.
.
NetLinx Data Event:
DEFINE_START
CREATE_BUFFER TP1, TP1_BUFFER
.
.
DEFINE_EVENT
..
DATA_EVENT[TP1](* EVALUATE TP1 DATA *)
{
STRING:
{
SELECT
{
ACTIVE (FIND_STRING (DATA.TEXT,'PAGE-',1)):
{
JUNK = REMOVE_STRING (DATA.TEXT,'PAGE-',1)
CUR_PAGE = DATA.TEXT
}
ACTIVE (FIND_STRING (DATA.TEXT,'KEYP-',1)):
{
(* keypad code *)
}
ACTIVE (FIND_STRING (DATA.TEXT,'KEYB-',1)):
{
(* keyboard code *)
}
ACTIVE (1):
{
(* default code *)
}
}
CLEAR_BUFFER TP1_BUFFER
}
ONLINE:
{
SEND_COMMAND TP1, 'TPAGEON'
}
}
Continued
26
NetLinx Programming Language Reference Guide
Page 43

NetLinx Programming Overview
.
.
Each event handler contains several imbedded data objects that pass data values into the event handler
code.
Level Events
Level Events are triggered by a level change on a particular device. This eliminates constantly evaluating
a level against a previous value. In Axcess, a level would need to be created in the
DEFINE_START
section and a conditional statement would appear in mainline to evaluate and update the level. The
format for the
LEVEL_EVENT[<device>,<level>]
{
(* level event handler *)
}
LEVEL_EVENT is:
Existing Axcess code:
DEFINE_START
.
.
CREATE_LEVEL TEMP, 1, TEMP_LEVEL
.
.
DEFINE_PROGRAM
.
.
IF (TEMP_LEVEL >= COOL_POINT)
{
ON[RELAY,FAN]
}
ELSE IF (TEMP_LEVEL <= HEAT_POINT)
{
OFF[RELAY,FAN]
}
NetLinx Level Event:
LEVEL_EVENT [ TEMP, 1 ]
{
IF (LEVEL.VALUE >= COOL_POINT)
{
ON[RELAY,FAN]
}
ELSE IF (LEVEL.VALUE <= HEAT_POINT)
{
OFF[RELAY,FAN]
}
LEVEL.VALUE is an embedded object value in the LEVEL_EVENT statement. The LEVEL.VALUE
object eliminates the need to create a level for the
NetLinx Programming Language Reference Guide
TEMP device.
27
Page 44

NetLinx Programming Overview
Combining Devices, Channels and Levels
Axcess allows you to combine devices and levels within the DEFINE_COMBINE and
DEFINE_CONNECT_LEVEL sections. This method is static and is fixed when the program compiles. You
can combine functionality within mainline by stacking push and release statements. Stacking pushes
allows you the flexibility to conditionally change what elements of the program share functionality, but
the program can be more difficult to maintain over time than if the panels were combined using
DEFINE_COMBINE.
NetLinx provides several new methods for combining the functionality of devices, channels, and levels.
DEV, DEVCHAN and DEVLEV accomplishes the same thing as stacking pushes in Axcess, and it
Using
reduce the overall maintenance associated with stacking pushes; however, data sets are statically
implemented within the
sets in the
Virtual devices, levels and device/channel sets
One of the drawbacks to combining devices and levels in Axcess is the way the central controller
handled the first device in the combine list going online and offline. This resulted in unexpected device
behavior and inconsistent feedback.
NetLinx uses virtual devices. Virtual devices carry a device number ranging from 32,768 to 36,863, a
port number of 1, and a system number of 0. Virtual Devices are devices that cannot be taken off the bus.
By listing a virtual device as the first device in a
COMBINE_LEVELS, or COMBINE_CHANNELS statement, the abnormalities seen in Axcess
DEFINE_COMBINE statements are eliminated.
DEFINE_EVENT section. When the program compiles, the references to the data
DEFINE_EVENT are set and cannot change at run time.
DEFINE_COMBINE, COMBINE_DEVICES,
Combining and uncombining devices
NetLinx still recognizes the DEFINE_COMBINE section. This section still operates as it did in Axcess;
however, once the
two functions:
UNCOMBINE_DEVICES dynamically change the devices combined together. When devices are
combined the combine list and
COMBINE_DEVICES and UNCOMBINE_DEVICES are used as stand-alone statements in an event,
mainline or in assignment statements.
DEFINE_COMBINE section has been compiled it remains static. NetLinx introduces
COMBINE_DEVICES and UNCOMBINE_DEVICES. COMBINE_DEVICES and
DEV set lists are reevaluated and updated during run time.
COMBINE_DEVICES and UNCOMBINE_DEVICES will return a
value of 0 or -1, depending on the success or failure of the operation. The first device in a
COMBINE_DEVICES statement should be a virtual device. The devices, listed after the virtual device, are
either a list of individual device numbers,
UNCOMBINE_DEVICES statement requires only the first device in the COMBINE_DEVICES list, which
should be a virtual device. The format for
COMBINE_DEVICES (<virtual device>, <device1>, <device2>…)
UNCOMBINE_DEVICES (<virtual device>)
DEV sets, or any combination of devices and DEV sets. The
COMBINE_DEVICES and UNCOMBINE_DEVICES is:
Devices combined with COMBINE_DEVICES respond like devices combined using the
DEFINE_COMBINE section. The central controller recognizes any input from the devices in the combine
list as the first device in the list.
Combining and uncombining levels
The NetLinx functions COMBINE_LEVELS and UNCOMBINE_LEVELS work similar to the
DEFINE_CONNECT_LEVEL section in Axcess. For compatibility with Axcess code, the
DEFINE_CONNECT_LEVEL section is still valid. Like COMBINE_DEVICES, COMBINE_LEVELS and
UNCOMBINE_LEVELS can be used within events and mainline code to dynamically change what levels
are connected to each other. It is also recommended that a Virtual
DEVLEV set in the COMBINE_LEVELS function. The format for COMBINE_LEVELS and
UNCOMBINE_LEVELS is:
DEVLEV set be used as the first
28
NetLinx Programming Language Reference Guide
Page 45

NetLinx Programming Overview
COMBINE_LEVELS (<virtual DEVLEV>, <DEVLEV1>, <DEVLEV2>…)
UNCOMBINE_LEVELS (<virtual DEVLEV>)
DEVLEV structures defined within the COMBINE_LEVELS are either individual DEVLEV structures or
one dimension of a
DEVLEV array. Any reference to the levels is handled through the first device in the
list.
Combining and uncombining channels
Combining DEVCHANs is unique to NetLinx. The NetLinx function COMBINE_CHANNELS combines an
individual channel on a virtual device to one or more channels on another device (or devices). The
format for
COMBINE_CHANNELS and UNCOMBINE_CHANNELS is:
COMBINE_CHANNELS (<virtual DEVCHAN>, <DEVCHAN1[]>, <DEVCHAN2[]>…)
UNCOMBINE_CHANNELS (<virtual DEVCHAN>)
String Comparisons
While in Axcess it is possible to perform a string comparison using the '?' wildcard, Netlinx requires the
COMPARE_STRING function to be used instead.
Axcess code - string comparison
IF (TIME = '12:00:??')
(* Do something at noon - evaluation is valid for an entire minute *)
Netlinx code - string comparison
IF (COMPARE_STRING(TIME,''12:00:??'))
// Do something at noon - evaluation is valid for an entire minute
Modules
There are two ways to reuse code in different Axcess programs: Include Files and System Calls.
Include files redirect the compiler to files with an .AXI extension. The .AXI files can contain
the same type of information present within an Axcess program. All data is accessible both
within the Include file and within the primary Axcess program. Include files are limited
because they are static. Mainline statements within the Include file cannot be adapted from
program to program without altering the Include file. To update the Include files in a program,
the entire program must be compiled and loaded.
System calls are external subroutines that can be instanced and referenced in the main
program. Like
System Call to the needs of different programs. System Calls have been one of the primary
tools for creating standardized reusable blocks of code. To update the System Calls within a
program, the entire program must be compiled and loaded.
Modules are unique to NetLinx. Like Include files, the code within the Module is not limited to the
DEFINE_CALL section. Modules can contain variable definitions, functions, subroutines, startup code,
events, and mainline. Modules are passed parameters that are used to adapt the information and variables
used within the Module (similar to System calls).
Modules are similar to programs loaded into AXB-232++ boxes. They operate as stand-alone programs
inside the NetLinx program. Interaction between the Module and the NetLinx Program is done through
User Interface (UI) pushes and releases, turning virtual device channels on and off, and passing variables
and arrays to the Module. The code in the Module is local, or is restricted to use only within the Module.
This means that functions and subroutines defined with Module cannot be directly used with the main
NetLinx code.
DEFINE_CALL subroutines, System Calls can pass parameters to adapt the
NetLinx Programming Language Reference Guide
29
Page 46

NetLinx Programming Overview
Modules will eventually replace System calls. Where several system calls are currently needed to
provide device initialization, buffer processing, and device functionality, one module will handle all
three functions.
The first line of a Module contains the
list. The format is shown below:
MODULE_NAME = '<module name>' [(<param1>, <param2>, … , <paramN>)]
The <module name> must match the file name, but has the .AXS extension. The module name can be
64 characters long and contain valid file name characters. The parameter name is optional and follows
the same restrictions as subroutine parameters, with the exception that constants and expressions cannot
be used as arguments.
Within the NetLinx program, the Module is referenced using the following format:
DEFINE_MODULE '<module name>' <instance name> [(<pass1>, <pass2>, … , <passN>)]
The <module name> must match the module name specified in the Module file, as shown above. The
<instance name> is a unique name given to each occurrence of the module within the program. If
the module is used twice within the program, each occurrence gets a unique instance name. The
parameter list passed to the module must match number and types of parameters listed in the module file
above. The
DEFINE_FUNCTION sections, but before the DEFINE_START section.
DEFINE_MODULE statements cannot appear within the DEFINE_PROGRAM or DEFINE_EVENTS
The
section.
MODULE_NAME keyword, the Module name, and the parameter
DEFINE_MODULE statements are listed in the code after the DEFINE_CALL and
In order to use a module, the module must be compiled with the Source Code, and
the Master must be rebooted to run the new module.
30
NetLinx Programming Language Reference Guide
Page 47

Language Elements
Statements and Expressions
A statement refers to a complete programming instructions such as:
Y = X (* Variable Assignment Statement *)
X = X + 1 (* Arithmetic Assignment Statement *)
IF (Y < 10) Y = Y + 1 (* IF Statement *)
[TP, 5] = [VCR, 1] (* Feedback Statement *)
Each of these statements compile, providing the referenced variables are defined.
Expressions are sub-components of statements. The following expressions are used in the above
example:
Language Elements
X + 1 (* Arithmetic Expression *)
Y < 10 (* Logical Expression *)
Y + 1 (* Arithmetic Expression *)
[TP, 5] (* I/O Device Expression *)
[VCR, 1] (* I/O Device Expression *)
Expressions will not compile outside the context of a statement.
It is strongly recommended that each statement appear on a separate line. The compiler cannot
enforce this since full backward compatibility with the previous Axcess language must be
maintained.
It is also strongly recommended that semicolons be used to terminate each statement (as in the
C language).
Assignments
Assignment statements include:
Va r ia b l es
Output Channels
Variables
The simplest type of assignment statement is a variable, which assigns the value of an expression to a
variable. The expression may be a constant, a variable / mathematical / logical expression, or a return
from function. The data type associated with the expression should match the data type of the variable
receiving the assignment. If not, the value of the expression is typecast to match the destination variable.
An example is:
VariableName = <expression>
Output channels
This type of statement is typically used for feedback. It sends an output change to the specified channel
on the given device. An example is:
[Device, Channel] = <expression>
The expression is evaluated as follows:
NetLinx Programming Language Reference Guide
31
Page 48

Language Elements
If it is non-zero, the channel associated with the device is turned on.
If it is zero, the channel is turned off.
Conditionals
IF…ELSE
The IF...ELSE statement provides a structure for conditional branching of program execution. If a
condition evaluates to true, the statement(s) associated with it are executed; otherwise, statements are not
executed. An example is:
IF (<conditional expression 1>)
{
(* statements for condition 1 *)
}
ELSE IF (<conditional expression 2>)
{
(* statements for condition 2 *)
}
ELSE
{
(* statements for all other conditions *)
}
Regarding IF statements:
ELSE IF is optional.
Braces are generally recommended in all cases but are only required if multiple statements are
assigned to a given condition.
IF statements may be nested to any number of levels.
SELECT…ACTIVE
The SELECT…ACTIVE statement provides a programming structure for selective execution of code
blocks based on the evaluation of a series of conditions. The first block whose
evaluates to true is executed; the remaining blocks are ignored. If no
ACTIVE condition evaluates to true,
ACTIVE condition
no statements are executed. An example is:
SELECT
{
ACTIVE (<condition 1>) :
{
(* statements for condition 1*)
}
ACTIVE (<condition 2>) :
{
(* statements for condition 2*)
}
ACTIVE (<condition n>) :
{
ACTIVE (1)
(* statements for condition n*)
}
}
32
NetLinx Programming Language Reference Guide
Page 49

Language Elements
Regarding SELECT...ACTIVE statements:
Only the statements associated with the first condition evaluated to true are executed.
If no condition evaluates to true, no statements are executed.
Braces underneath individual ACTIVE statements are required only if multiple statements are
assigned to a given condition.
SWITCH…CASE
The SWITCH…CASE statement provides a programming structure for selective execution of code blocks
based on the evaluation of a single condition. The value of the
SWITCH expression is tested against each
CASE value (numeric constant or string literal). If a match is found, the statements associated with the
CASE are executed. All other CASE statements are ignored. If no match is found, the DEFAULT case
statements (if any) are executed. The
SWITCH (x)
{
CASE 1 : //do stuff when x = 1
{
}
CASE 2 : //do stuff when x = 2
{
}
default : // do stuff when x is not 1 or 2
{
}
}
SWITCH expression is evaluated only once. An example is:
This is programmatically the same programmatically as:
If (x = 1) //do stuff when x = 1
{
}
else if (x = 2) //do stuff when x = 2
{
}
else // do stuff when x is not 1 or 2
Regarding SWITCH...CASE statements:
Only the statements associated with the first case that matches the value of the expression are
executed.
If no CASE matches the SWITCH expression, the statements under the default case (if
available) are executed.
All cases must be unique.
Braces should be used to bracket the statements in a case. They are required only if variables
are declared within the case.
The BREAK statement applies to the SWITCH. It takes execution to the end of the SWITCH.
Unlike the C language, cases do not fall through to the next case if a break is not used.
BREAKs are recommended between cases. For example:
NetLinx Programming Language Reference Guide
33
Page 50

Language Elements
SWITCH (var)
{
CASE 1:
{
(*statements go here*)
BREAK
}
CASE 3:
{
(*statements go here*)
BREAK
}
CASE 5:
{
(*statements go here*)
BREAK
}
DEFAULT:
{
(*statements go here*)
BREAK
}
}
Loops
WHILE statements
A WHILE statement executes its statement block as long as its associated condition evaluates to true. The
condition is evaluated before the first pass through the statements. Therefore, if the conditional
expression is never true, the conditional statements are never executed. An example is:
WHILE (<conditional expression>)
{
(* conditional statements *)
}
Regarding WHILE statements:
Statements are executed repeatedly while the conditional expression evaluates to true.
The condition is tested before each pass through the conditional statements.
There is no timeout period as was the case with Axcess. The original intent of the timeout
period was to prevent
NetLinx Central Controller handles bus updates through a separate execution thread, thereby
eliminating this potential problem.
MEDIUM_WHILE statements
The MEDIUM_WHILE statement is obsolete in NetLinx. The compiler accepts the statement but converts
it internally to a
WHILE statement. For example:
WHILE loops from locking out updates to/from the AXlink bus. The
34
NetLinx Programming Language Reference Guide
Page 51

Language Elements
MEDIUM_WHILE (<conditional expression>)
{
(* conditional statements *)
}
LONG_WHILE statements
A LONG_WHILE differs from a WHILE statement in the way input change notifications are processed
during the programming loop. The system checks the input queue for a change notification message
before execution of each loop, beginning with the second loop. The message is retrieved if one exists.
This message must be processed before another one is retrieved, either at the start of the next loop or the
beginning of the next mainline iteration. Otherwise, the message is lost. For example:
LONG_WHILE (<conditional expression>)
{
(* conditional statements *)
}
DEFINE_EVENT events are still processed even if mainline is in a LONG_WHILE.
LONG_WHILE should not be used in Events. It may cause unexpected results.
FOR loop structure
The FOR loop structure allows you to define initialization statements; statements to execute after each
pass through the loop and a condition to test after each pass. If the condition evaluates to true, another
pass is made. Otherwise, the loop is terminated. The syntax of the
FOR (<INITIAL>; <condition>; <after pass>)
{
(* loop statements *)
}
FOR loop is as follows:
Parameters:
<INITIAL> One or more statements that are executed one time before any FOR loop state-
ments are executed. Each statement must be separated with a comma; this is
typically a FOR loop index initialization statement.
<condition> A condition whose value is computed before each pass. If the condition evalu-
<after pass> One or more statements that are executed after each pass through the state-
ates to TRUE, the FOR loop statements are executed. If the condition evaluates
to FALSE, the loop is terminated.
ments. Each statement must be separated with a comma. This is typically a
statement that increments the FOR loop index.
NetLinx Programming Language Reference Guide
35
Page 52

Language Elements
Waits
Wait instructions allow delayed execution of one or more program statements. When a wait statement is
executed, it is added to a list of currently active wait requests and the program continues running.
Naming Waits
Supplying a unique name in the wait statement allows the wait to be identified for purposes of canceling,
pausing, or restarting the wait request. The name must not conflict with previously defined constants,
variables, buffers, subroutines, or functions. Unlike other NetLinx identifiers, wait names may contain
spaces.
If a wait instruction that uses a name currently in the wait list is encountered, the new wait instruction is
thrown away so as not to conflict with the one currently in progress. If this feature is not desired, the
current wait must be canceled before processing the new request. For information, refer to the Canceling
Waits section on page 38.
Types of Waits
Types of Wait statements include:
Timed Waits have an associated parameter that indicates the amount of time that must elapse
before the associated wait instruction(s) are to be executed.
Conditional Waits require that a specified condition be met before the instructions are
executed.
Timed Conditional Waits have a timeout parameter; if the condition is not met before the
specified time elapses, the wait request is cancelled.
Types of Waits
Timed Waits Syntax:
WAIT time ['<name>']
{
(* wait statements *)
}
Parameters:
• time: A constant or variable indicating the wait time. Time is expressed in 1/
10th second units. The statement below specifies a wait time of 5 seconds
for the wait named FIRST WAIT.
• <name>: The name to assign to the wait. This name must be a literal string.
The wait name is optional, although unless a wait is named it cannot be
individually cancelled, paused, or restarted.
If greater precision is required, the time parameter can be expressed as a decimal fraction, for example 0.1 to specify a wait time of 1/100th of a second. The
range is from 0.1 to 0.9.
WAIT 50 'FIRST WAIT'
{
(* wait statements *)
}
Continued
36
NetLinx Programming Language Reference Guide
Page 53

Types of Waits (Cont.)
Conditional Waits WAIT_UNTIL is a conditional Wait request.
Syntax:
WAIT_UNTIL <condition> ['<name>']
{
(* wait statements *)
}
Parameters:
• <condition>: Any single or compound expression that can be evaluated as
a logical expression. The Wait statements are executed if and when the wait
condition becomes True.
• <name>: The name to assign to the Wait. This name must be a literal string.
The Wait name is optional, although unless a Wait is named it cannot be
individually cancelled, paused, or restarted.
Timed Conditional Waits TIMED_WAIT_UNTIL is a Timed Conditional Wait request.
Syntax:
TIMED_WAIT_UNTIL <condition> timeout ['<name>']
{
(* wait statements *)
}
Parameters:
• <condition>: Any single or compound expression that can be evaluated as
a logical expression. The Wait statements are executed if and when the Wait
condition becomes true.
• timeout: A constant or variable indicating the timeout value in 1/10th
seconds. If the Wait condition is not met within the time indicated by this
parameter, the Wait is cancelled, in which case no wait statements are
executed.
• <name>: The name to assign to the Wait. This name must be a literal string.
The Wait name is optional, although unless a Wait is named it cannot be
individually cancelled, paused, or restarted.
Language Elements
Nesting Waits
The wait time for a nested wait is the sum of it's own wait time, plus that of the enclosing waits. In the
example below,
SECOND WAIT occurs 0.5 seconds after FIRST WAIT is executed, or 1.5 seconds after
FIRST WAIT is added to the wait list.
WAIT 10 'FIRST WAIT'
{
(* FIRST WAIT statements *)
WAIT 5 'SECOND WAIT'
{
(* SECOND WAIT statements *)
}
}
To execute the inner wait of a nested conditional wait, the conditions must be met in the order specified
(condition 1, then condition 2) but not necessarily at the same time.
NetLinx Programming Language Reference Guide
37
Page 54
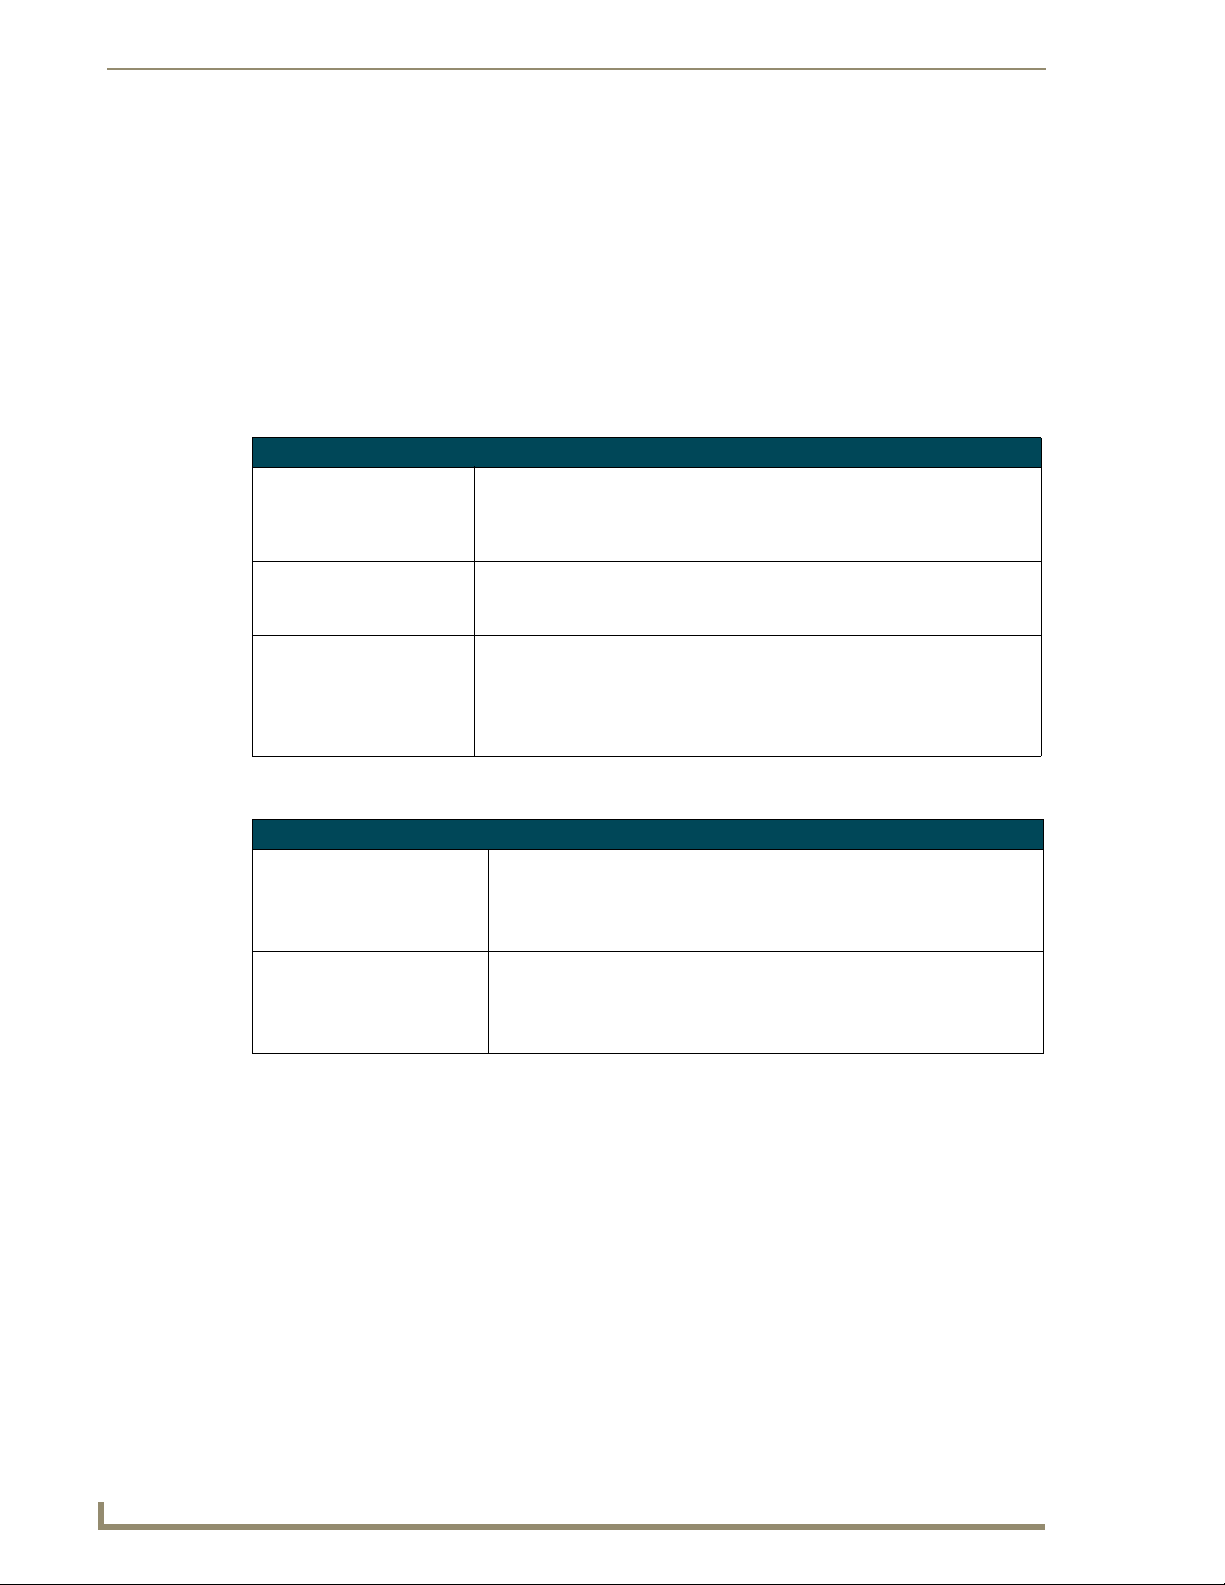
Language Elements
WAIT_UNTIL <condition 1> 'FIRST WAIT'
{
(* FIRST WAIT statements *)
WAIT_UNTIL <condition 2> 'SECOND WAIT'
{
(* SECOND WAIT statements *)
}
}
Pausing and restarting Waits
The following commands relate to pausing and restarting waits.
Pausing and Restarting Waits
PAUSE_WAIT PAUSE_WAIT puts a scheduled wait on hold. The wait being paused is identi-
fied by the parameter name. The wait timer stops counting down until it is
resumed with a RESTART_WAIT command. Here's a syntax sample:
PAUSE_WAIT '<name>'
RESTART_WAIT RESTART_WAIT resumes the countdown for a wait suspended with
PAUSE_ALL_WAIT &
RESTART_ALL_WAIT
PAUSE_WAIT. The wait to be restarted is identified by the parameter name.
RESTART_WAIT '<name>'
PAUSE_ALL_WAIT and RESTART_ALL_WAIT commands are used to pause or
restart all scheduled waits, regardless of whether or not they are named. They
have no parameters.
PAUSE_ALL_WAIT
RESTART_ALL_WAIT
Canceling Waits
Canceling Waits
CANCEL_WAIT /
CANCEL_WAIT_UNTIL
CANCEL_ALL_WAIT /
CANCEL_ALL_WAIT_UNTIL
CANCEL_WAIT and CANCEL_WAIT_UNTIL removes the wait specified by
name from the appropriate wait list. The syntax:
CANCEL_WAIT '<name>
CANCEL_WAIT_UNTIL '<name>'
CANCEL_ALL_WAIT and CANCEL_ALL_WAIT_UNTIL cancels all waits
(named or unnamed) from the appropriate wait list. The syntax:
CANCEL_ALL_WAIT
CANCEL_ALL_WAIT_UNTIL
Using Waits - Limitations
References to STACK_VAR variables are not allowed within waits (STACK_VAR are temporary
variables that cease to exist when the block in which they are declared is exited).
Variable copies are made of functions and subroutine parameters. This can have speed/
execution penalties.
A RETURN is not allowed within a WAIT within functions and subroutines.
A BREAK or CONTINUE cannot appear within a WAIT if it takes execution out of the scope of
WAIT.
the
The code within a WAIT cannot reference a function or subroutine array parameter whose
bounds are unspecified.
38
NetLinx Programming Language Reference Guide
Page 55

Language Elements
Comments
Comments are designated with a parentheses-asterisk to begin the comment and asterisk-parentheses to
end the comment; for example,
length. NetLinx supports a second type of comment with a double forward-slash (
All text following the double forward-slash is treated as a comment. This type of comment closely
follows the conventions of C++.
Comments are not part of the actual program code; they are not compiled. Comments can appear
anywhere except within literal strings, either on the same line as a programming statement or on a
separate line. Comments can span multiple lines with a single set of comment delimiters and can be
nested. The compiler recognizes nested comments by pairing up sets of comment delimiters. For
example:
(* The section to follow contains all variable declarations. *)
Single line comments can be specified using the double forward slash (//) notation. When a pair of
forward slash characters is encountered, all text on the same line following the slash pair, except the
end comment sequence, is considered a comment and ignored by the compiler. For example:
(*INTEGER Vol1 // volume for room 1 *)
The "*)" in the line above terminates the open "(*" command even though it appears after a double
slash comment command.
(*COMMENT*). These comments can span lines and are not limited in
//).
*)
Operators
An operator is a character (or group of characters) that performs a specific mathematical or relational
function. Each operator type is described below.
Arithmetic operators
Arithmetic operators create a numeric value from one or more operations such as addition,
multiplication, and division.
Arithmetic Operators
Operator Function
+ Addition
- Subtraction
* Multiplication
/ Division
% Modulo (remainder after division)
Relational operators
A relational operator is a conditional statement; it tells NetLinx whether to execute a particular
function(s) in the program.
Relational Operators
Operator Function
< Less Than
> Greater Than
= Equal To
== Equal To
<= Less Than or Equal To
>= Greater Than or Equal To
<> Not Equal To
NetLinx Programming Language Reference Guide
39
Page 56

Language Elements
Logical operators
Logical operators compare two conditions or, in the case of NOT, invert one condition. A true or false
result is produced.
Logical Operators
Operator Function Keyword
&& Logical And AND
|| Logical Or OR
^^ Logical Xor XOR
! Logical Not NOT
Bitwise operators
Bitwise operators are keywords or symbols that perform a bit-by-bit operation between two items.
Bitwise Operators
Operator Function Keyword
& Bitwise And BAND
| Bitwise Or BOR
^ Bitwise Xor BXOR
~ Bitwise Not BNOT
<< Shift Left LSHIFT
>> Shift Right RSHIFT
Assignment operators
The assignment operators may appear only once in a single NetLinx statement.
Assignment Operators
Operator Function
= Assignment
++ Increment by 1
-- Decrement by 1
The following rules apply to the use of assignment operators:
The "=" operator may be used to assign:
Expressions to intrinsic type variables (see theData Types section on page 50)
Arrays to other arrays of matching size and type
Structures to other structures of the same type
The "++" and "--" operators are statements and cannot appear within expressions. For
example:
FOR (I=1; I<10; I++) // Legal
I = j++; // Illegal
Refer to the Structures section on page 55 for information on structures.
40
NetLinx Programming Language Reference Guide
Page 57
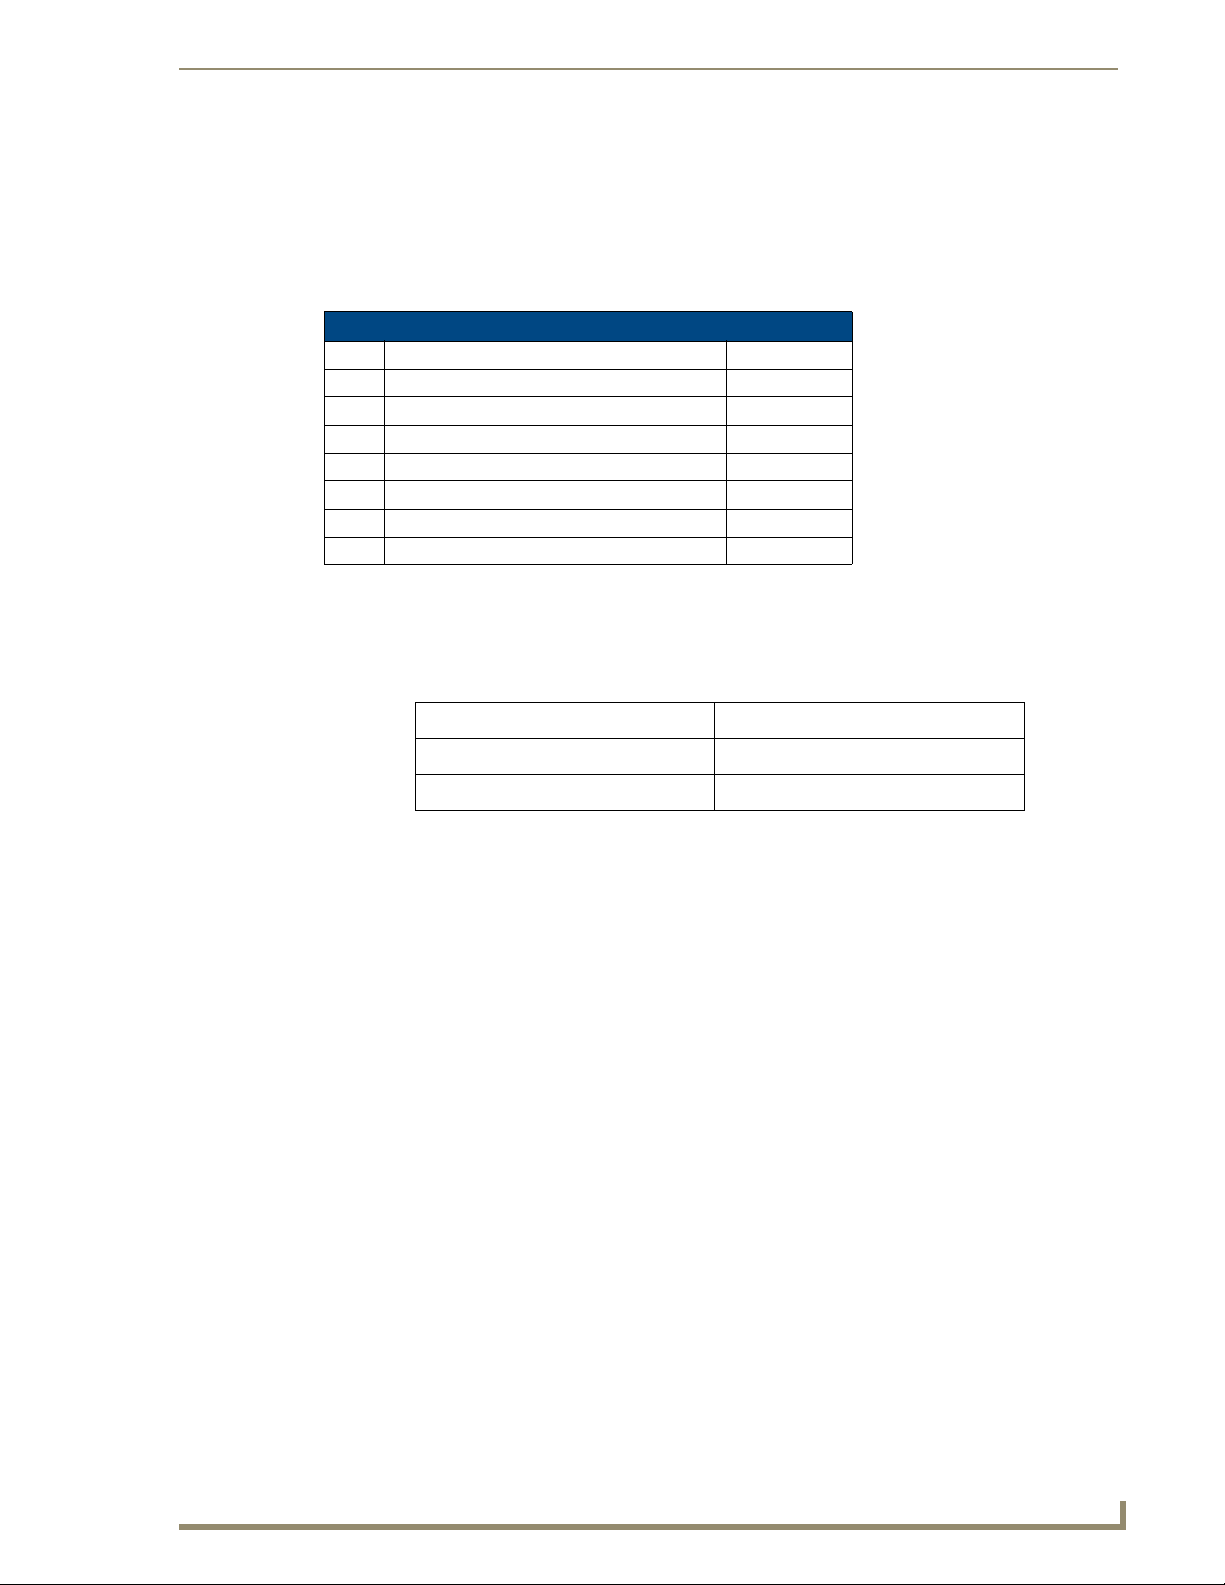
Language Elements
Operator precedence
The table below shows the inherent precedence assigned to the operators. As noted in the chart, the NOT
(!)
operator has the highest precedence in NetLinx systems but the lowest precedence in Axcess
systems. Axcess programs that are converted to NetLinx may exhibit logic problems if they use
statements that combine
NOT (!) and other operators. Contact AMX Technical Support for help
resolving these issues.
Operator Precedence
Level Operators Associability
1 ! ~ Left To Right
2 * / % Left To Right
3 << >> Left To Right
4 + - Left To Right
5 < <= > >= = == <> Left To Right
6 & | ^ Left To Right
7 && || ^^ Left To Right
Identifiers
An Identifier is a combination of letters, numbers, or underscores that represents a device, constant, or
variable. Identifier types include:
• Devices • Device-Channel Arrays
• Device Arrays • Level Arrays
• Channel Arrays • Device-Level Arrays
Devices
A device is any hardware component that can be connected to the NetLinx bus. Each device must be
assigned a unique number to identify it on the bus. While the Axcess language allows physical device
numbers in the range 0-255, the NetLinx language allows numbers in the range 0-32767. Device 0 refers
to the Master; numbers above 32767 are reserved for internal use.
NetLinx requires a Device:Port:System (D:P:S) specification where Axcess expected only a device
number. This D:P:S triplet can be expressed as a series of constants, variables separated by colons, or a
DEV structure. For example:
STRUCTURE DEV
{
INTEGER Number // Device number
INTEGER Port // Port on device
INTEGER System // System device belongs to
}
A device specification in NetLinx can be expressed in one of two ways:
Device Number: The compiler replaces the device number with an internally generated DEV
structure. This DEV structure contains the specified device Number. If the system and port
specifications are omitted (e.g. 128), system zero (indicating this system - the system
executing the code), and port one (indicating the first port), is assumed.
NetLinx Programming Language Reference Guide
41
Page 58

Language Elements
Device:Port:System (D:P:S): This notation is used to explicitly represent a device number,
port, and system. For example, 128:1:0 represents the first port of the device number 128 on
this system. The syntax:
NUMBER:PORT:SYSTEM
Parameters:
Number 16-bit integer representing the Device number
Port 16-bit integer representing the Port number (in the range 1 through
the number of ports on the device)
System 16-bit integer representing the System number (0 = this system).
Device arrays
In order to specify a group of devices for a command or event handler, NetLinx provides the capability to
define an array of
DEVs and treat it as a device array. A device array may be used anywhere a device
specification is required. The result provides a range of targets for the command or instruction where it is
used.
Device arrays are declared in the
DEV DSName[ ] = {Dev1, Dev2, ..., Devn}
DEV DSName[MaxLen] = {Dev1, Dev2, ..., Devn}
DEFINE_VARIABLE section of the program in one of two ways:
Each device name appearing on the right-hand side of the declaration should be defined as a device in the
DEFINE_DEVICE section; however, it can also be defined in the DEFINE_VARIABLE or
DEFINE_CONSTANT section.
The first statement above declares a device array whose maximum length is determined by the number of
elements in the initialization array on the right-hand side.
The second form uses
MaxLen to specify the maximum length of the device array. In either case, the
number of elements in the initialization array determines the effective length of the device array. That
value can be determined at run-time by calling
device array can be determined by calling
LENGTH_ARRAY. The maximum length available for a
MAX_LENGTH_ARRAY.
The following program fragment illustrates device array initialization:
DEFINE_DEVICE
panel3 = 130
DEFINE_CONSTANT
DEV panel1 = 128:1:0
integer panel2 = 129
DEFINE_VARIABLE
// dvs is an array of three devices:
// 128:1:0
// 129:1:0
// 130:1:0
DEV dvs[ ] = {panel1, panel2, panel3}
42
The individual elements of a device array can be referenced by their defined names (Dev1, Dev2, etc.)
or by using array notation with the device array name. For example, the 3rd device in the device array,
MyDeviceSet, would be referenced by MyDeviceSet[3].
NetLinx Programming Language Reference Guide
Page 59

Language Elements
The index of the last member of the array for which an event notification was received can be determined
by calling
GET_LAST(MydeviceSet). This is useful for determining which device in an array is
referenced in a particular notification message.
Device array examples
The command below sends 'CHARD10' to all devices in the array, DeviceSetA.
DEV DeviceSetA[ ] = {Device1, Device2, Device3}
SEND_COMMAND DeviceSetA, 'CHARD10'
The command below sends 'CHARD10' to the third device in the array, DeviceSetA,
SEND_COMMAND DeviceSetA[3], 'CHARD10'
and is equivalent to:
SEND_COMMAND Device3, 'CHARD10'
The intent of the feedback statement is to set channel 1 in every device in DeviceSetA to either on or
off, depending on the value of the right-hand expression; it is unclear what the right-hand expression
evaluates to. The compiler will issue a warning indicating the syntax is unclear and that
DeviceSetB[1] is assumed. To avoid this warning, specify a particular device in the array. Here's an
example:
[DeviceSetA, 1] = [DeviceSetB[1], 2] (* Correct *)
Device-channels and device-channel arrays
As the name implies, a device-channel (DEVCHAN) is a combination of a device and a channel. It is
represented internally as a
DEVCHAN structure. This structure combines the fields of a DEV structure
representing the device with a field representing the channel number.
STRUCTURE DEVCHAN
{
DEV //Device
INTEGER //Channel
}
The first component of a device-channel pair represents the device number, port, and system. It can be
specified as either a single device number, a constant
device specified in a device-channel pair should be defined in the
Channels are expressed as integer constants. A
DEFINE_CONSTANT section. For example, "[128, 1]", "[CONSTANTDPS, 9]" and "[128:1:0,
or
" are all valid representations of device-channel pairs.
5]
A
DEVCHAN enclosed within square brackets implies an evaluation, whereas a DEVCHAN enclosed within
DEV structure or as a D:P:S specification. Each
DEFINE_DEVICE section.
DEVCHAN is declared in either the DEFINE_VARIABLE
curly braces does not, as illustrated below:
DEFINE_VARIABLE
DEVCHAN dc1 = {128:1:0, 1}
DEVCHAN dcset[ ] = { {128:1:0, 1}, {128:1:0, 2}, {128:1:0, 3} }
DEFINE_PROGRAM
IF ( [dc1] || [128:1:0, 2] ) // evaluation of 2 devchans
[dc1] = 1 // feedback
dc1 = {129:1:0, 2} // assigns a new value to dc1
[dc1] = {129:1:0, 2} // Syntax Error!
NetLinx Programming Language Reference Guide
43
Page 60

Language Elements
A DEVCHAN array is declared in the DEFINE_VARIABLE or DEFINE_CONSTANT section in one of two
ways:
Declare a DEVCHAN array whose maximum length is determined by the number of elements in
the initialization array on the right-hand side, as shown below:
DEVCHAN[ ] DCSName = {{Dev1,Chan1}, {Dev2,Chan2}, ...}
Use MAXLEN to specify the maximum length of the array, as shown below:
DEVCHAN[ ] DCSName[MAXLEN] = {{Dev1,Chan1}, {Dev2,Chan2}, ...}
In either case, the number of elements in the initialization array determines the effective length of the
array. That value can be determined at run-time by calling
available for a
The individual elements of a
DEVCHAN[ ] array can be determined by calling MAX_LENGTH_ARRAY.
DEVCHAN array can be referenced by their defined names (Dev1, Chan1,
LENGTH_ARRAY. The maximum length
Dev2, Chan2, etc.) or by using array notation with the device-channel array name. For example, the
third element in the device-channel array,
Furthermore, since a
DEVCHAN array is an array of DEVCHAN structures, DEVCHAN members can be
referenced using the dot operator notation such as
A
DEVCHAN array can be used anywhere a [Device, Channel] specification is required with the
MyDCSet, would be referenced by MyDCSet[3].
MyDCSet[3].Device or MyDCSet[1].Channel.
result of providing a range of targets for the command or instruction where it is used. This implies an
alternate form for the following commands:
Button[(DEVCHAN)] PULSE[(DEVCHAN)]
DO_PUSH[(DEVCHAN)] PUSH[(DEVCHAN)]
DO_RELEASE[(DEVCHAN)] RELEASE[(DEVCHAN)]
OFF[(DEVCHAN)] TO[(DEVCHAN)]
ON[(DEVCHAN)]
The index of the last member of the array for which an event notification was received can be determined
by calling
GET_LAST(MyDCSet). This is useful for determining which device and channel in an array
is referenced to in a particular notification message.
Device-level arrays
A device-level array (DEVLEV array) is an array of device-level pairs. Each element is represented
internally as a
DEVLEV structure. This structure combines the fields of a DEV structure representing the
device with a field representing the level number.
STRUCTURE DEVLEV
{
DEV // Device
INTEGER // Level
}
The first component of a device-level pair (Device) represents the device number, port, and system. It
can be specified as either a single device number, a constant
Each device specified in a device-level pair should be defined in the
DEV structure or as a D:P:S specification.
DEFINE_DEVICE section. The
second component is the level number on the device. The level number is expressed as an integer
constant.
DEVLEV array is declared in the DEFINE_VARIABLE or DEFINE_CONSTANT section in one of two
A
ways:
44
NetLinx Programming Language Reference Guide
Page 61

Language Elements
Declare a DEVLEV array whose maximum length is determined by the number of elements in
the initialization array on the right-hand side.
DEVLEV DLName[ ] = {{Dev1,Level1}, {Dev2,Level2}, ...}
Use MAXLEN to specify the maximum length of the array.
DEVLEV DLName[MAXLEN] = {{Dev1,Level1}, {Dev2,Level2}, ...}
In either case, the number of elements in the initialization array determines the effective length of the
array. That value can be determined at run-time by calling
available for a
DEVLEV array can be determined by calling MAX_LENGTH_ARRAY.
The individual elements of a level array can be referenced by their defined names (
Dev2, Level2, etc.) or alternatively, by using array notation with the device-level array name. For
example, the 3rd element in the device-level array,
Furthermore, since a
referenced using the dot operator notation such as
DEVLEV array is an array of DEVLEV structures, DEVLEV members can be
MyDLSet[3].Device or MyDLSet[1].Level.
LENGTH_ARRAY. The maximum length
Dev1, Level1,
MyDLSet, would be referenced by MyDLSet[3].
The index of the last member of the array for which an event notification was received can be determined
by calling
GET_LAST(MyDLSet). This is useful for determining which device and level in an array is
referenced to in a particular notification message.
Variables
NetLinx provides support for several different types of variables distinguished by attributes, such as:
Scope
Constancy
Persistence
Scope
Scope is a term used in reference to program variables that describe where in the program they can be
accessed. There are two types:
Local scope: a variable can only be accessed in the subroutine or method that it is declared.
Global scope: a variable can be accessed anywhere in the program.
Scope differentiates the two basic classes of NetLinx variables:
Local variable: a variable declared within a subroutine or function whose scope is limited to
that subroutine or function.
Global variable: a variable declared in the DEFINE_VARIABLE section; its scope extends
throughout the module in which it is declared.
Local variables
Local variables are restricted in scope to the statement block in which they are declared. A statement
block is one or more NetLinx statements enclosed in a pair of braces, like the blocks following
subroutines, functions, conditionals, loops, waits, and so on. Local variables must be declared
immediately after the opening brace of a block but before the first executable statement. To provide
compatibility with the Axcess language, local variables may be declared right before the opening brace
DEFINE_CALL declarations only. For example, both formats shown below are legal in the NetLinx
for
language:
NetLinx Programming Language Reference Guide
45
Page 62

Language Elements
DEFINE_CALL 'My Subroutine' (INTEGER INT1)
LOCAL_VAR INTEGER INT2
{
(* body of subroutine *)
}
DEFINE_CALL 'My Subroutine' (INTEGER INT1)
{
LOCAL_VAR INTEGER INT2
(* body of subroutine *)
}
The scope of a local variable is restricted to the statement block in which it is declared. A local variable
is either static or non-static, depending on whether it is declared as
LOCAL_VAR or STACK_VAR:
A static variable maintains its value throughout the execution of the program,
regardless of whether it is within scope of the current program instruction.
The keyword LOCAL_VAR specifies a static variable. A static variable's value is initialized the
first time the statement block in which it is declared is executed and retained after execution of
the statement block has finished.
The STACK_VAR keyword specifies a non-static variable. A non-static variable's value is re-
initialized every time the statement block in which it is declared is executed.
If neither the LOCAL_VAR nor the STACK_VAR keyword is specified, STACK_VAR is assumed
(default).
IF (X > 10)
{
LOCAL_VAR INTEGER INT2 // static (permanent)
STACK_VAR CHAR ARRAY1[10] // non-static (temporary)
(* statements *)
}
46
Variable declarations outside of DEFINE_VARIABLE will default to STACK_VAR if
neither "local" or "stack" is specified.
LOCAL_VAR and STACK_VAR can be used interchangeably in any statement block except for waits.
LOCAL_VAR variables may be declared inside a wait block.
Only
WAIT 10, 'My Wait Name'
{
LOCAL_VAR CHAR TempBuf[80]
(* statements *)
}
A name assigned to a local variable must be unique within the statement block in which it is declared and
any statement block enclosing that block. Therefore, non-nested statement blocks can define the same
local variable name without conflict. For example:
NetLinx Programming Language Reference Guide
Page 63

Define_function integer MyFunc(INTEGER nFlag)
{
LOCAL_VAR INTEGER n
IF (nFlag > 0)
{
LOCAL_VAR INTEGER n // illegal declaration
.
.
}
.
.
}
Define_function integer MyFunc(INTEGER nFlag)
{
IF (nFlag > 0)
{
LOCAL_VAR INTEGER n
.
.
}
else
{
LOCAL_VAR INTEGER n // legal declaration
}
}
Language Elements
The general form of a static local variable declaration is:
[LOCAL_VAR] [VOLATILE | PERSISTENT] [CONSTANT] [<type>] name
The general form of the non-static local variable declaration is:
[STACK_VAR] [<type>] name
Since non-static local variables are allocated on the program stack (a block of memory reserved for
allocation of temporary variables), the keywords
VOLATILE, PERSISTENT, and CONSTANT do not
apply.
Global variables
Global variables are defined in the DEFINE_VARIABLE section of any program module. For example:
DEFINE_VARIABLE
CONSTANT INTEGER MAXLEN = 64
CHAR STR[MAXLEN] = 'No errors were found.'
INTEGER ARRAY[ ] = {100, 200, 300}
A global variable is accessible throughout the module or program in which it is defined. Global variables
retain their value as long as the program runs. They may retain their value after powering down or
reloading the system, depending on the variable's persistence attributes (
VOLATILE and PERSISTENT).
NetLinx Programming Language Reference Guide
47
Page 64

Language Elements
Modules are reusable NetLinx sub-programs that can be inserted into the main
program. The main program is also a module. Refer to the NetLinx Modules section
on page 143 for information on program modules.
If a local variable shares the same name as a global variable, the local variable always takes precedence.
The general form of a global variable definition is:
[NON_VOLATILE | VOLATILE | PERSISTENT] [CONSTANT] [<type>] name [= <value>]
Constancy
Any variable may also be assigned the attribute CONSTANT. This declares a variable to be immutable
(cannot change at run-time). The variable must be initialized as part of its declaration if this keyword is
used.
Persistence
The persistence of a variable is controlled through the NON_VOLATILE, VOLATILE and PERSISTENT
keywords.
Non-volatile variables: A variable declared with the NON_VOLATILE keyword is stored in
non-volatile memory. It will retain its value in the event of a system power-down, but is reset
to zero if the program is reloaded. Unless specified otherwise, all variables are stored in nonvolatile memory.
Volatile variables: A variable declared with the VOLATILE keyword is stored in volatile
memory and resets to zero after either a power-down or reload. Volatile memory is generally
faster and more plentiful than non-volatile memory. For this reason, you should use the
VOLATILE keyword when declaring large data arrays where persistence of the data is not a
requirement.
Persistent variables: If a variable is declared with the PERSISTENT keyword, it is initialized
to zero the first time the program is loaded but will retain its value after either power-down or
reload.
If the data type is omitted from the variable definition, the following defaults are assumed:
Single variables are INTEGER type.
Arrays are CHAR type.
You can define a variable to be persistent using the
DEFINE_VARIABLE
PERSISTENT CHAR cMyString[100]
PERSISTENT storage modifier as show below:
48
All persistent variables are automatically non-volatile, and it’s not legal to define a variable as
VOLATILE and PERSISTENT.
Any time after a NetLinx program that has a persistent variable declared subsequent downloads of new
NetLinx programs that contain the same persistent variable will automatically be set to contain the same
value as it previously did. The default behavior for non-persistent variables is they are set to zero after a
NetLinx program downloads. Persistence overrides this behavior by setting the variable in the newly
downloaded program to be the same as it was before the download.
Typically, persistent variables are used for saving preset information. Suppose you have a system that
contains several Positrack camera positioning systems and that the user interface to the system allows the
user to set the position of any of the cameras and record that position for recalling later. The position
presets are stored in a non-volatile array variable so they are maintained during a power cycle. Without
persistent variables, an update to the NetLinx program would zero out all of the presets that the user had
NetLinx Programming Language Reference Guide
Page 65

Language Elements
stored. With persistent variables, the new NetLinx program can be downloaded and all of the presets
remain intact.
When a new NetLinx program is downloaded to the Master, the Master iterates through all non-volatile
variables from the new program looking for persistent ones. When it finds a persistent variable in the
new program, it searches the old programs persistent variable space for the "same variable". When it
finds the same variable, the value of the new variable is set to the same value as the old programs
variable. It is important to note what is considered to be the "same variable". The master identifies the
"same variable" by verifying for duplicity the following:
Variable name
Variable source location
Variable type
Therefore, in order for persistence to function properly, the name, type, and file declared in must be the
same as the previously downloaded NetLinx program. If you changed any of the three, the new persistent
variable will not be set with the old variable’s value.
Constants
Constants are defined in the DEFINE_CONSTANT section. The scope of a constant extends throughout
the module or program in which it is defined. The name assigned to a constant must be unique among all
other identifiers defined in the module or program. The syntax is:
DEFINE_CONSTANT
<constant name> = <constant expression>
Constants may be assigned expressions that consist only of other constants and operators. Variables are
not allowed in constant expressions. An example is:
VALUE_OFFSET = 500
VALUE1 = VALUE_OFFSET + 1
STR1 = 'This is a string constant.'
Constants can be used anywhere that a numeric or string constant is allowed. The value assigned to a
constant can be specified in one of the formats listed in the following table.
Valid Formats for Constants
Type Format Example
Decimal Integer 0000 1500
Hexadecimal Integer $000 $DE60
Floating Point 000.0 924.5
Exponential Notation 0.0e0 1.5e-12
Character 'c' or <char code> 'R' or 255
String Literal 'ssss' 'Reverse'
NetLinx Programming Language Reference Guide
49
Page 66

Language Elements
Data Types
Intrinsic types
The following table lists the data types inherently supported by the NetLinx language.
NetLinx Intrinsic Data Types
Keyword Data Type Sign Size Range
CHAR Byte Unsigned 8-bit 0 - 255
WIDECHAR Integer Unsigned 16-bit 0 - 65535
INTEGER Integer Unsigned 16-bit 0 - 65536
SINTEGER Integer Signed 16-bit -32768 to +32768
LONG Long Integer Unsigned 32-bit 4,294,967,295
SLONG Long Integer Signed 32-bit + 2,147,483,647
+308
FLOAT Floating Point Signed 32-bit 1.79769313 E
DOUBLE Double Precision
Floating Point
Signed 32-bit 3.40282347 E
to 2.22507385 E
+38
to 1.17549435 E
Type conversion
Although explicit type casting is not supported in the NetLinx language, the compiler is forced to do type
conversion in situations where an arithmetic assignment or other operation is defined with constants and/
or variables having mixed data types. Type conversions will occur under the following circumstances:
A value of one type is assigned to a variable of another type.
A value passed as a parameter to a subroutine does not match the declared parameter type.
The value returned by a subroutine does not match the declared return type.
-308
-38
Type conversion rules
If the expression contains a 32 or 64-bit floating-point variable or constant, all variables and
constants in the expression are converted to 64-bit floating point before resolving.
If the expression contains only whole number value variables and constants, all variables and
constants in the expression are converted to 32-bit integers before resolving.
If type conversion is required for an assignment or as a result of a parameter or return type
mismatch, the value is converted to fit the type of the target variable. This may involve
truncating the high order bytes(s) when converting to a smaller size variable, or sign
conversion when converting signed values to unsigned or vice versa.
50
NetLinx Programming Language Reference Guide
Page 67

Language Elements
Strings
A string is an array of characters of known length. This length may be less than the dimensioned length.
For example:
DEFINE_VARIABLE
CHAR MyString[32]
INTEGER StrLen
DEFINE_START
MyString = 'STOP'
StrLen = LENGTH_STRING(MyString)
In the example above, StrLen holds the value 4, the length of MyString. The length of MyString can
range from 0 to 32. If an attempt is made to assign a string longer than the capacity of the destination
string, the copied string is truncated to fit. The string length is implicitly set when a string literal, string
expression, or variable is assigned to the string. The function
explicitly set the length of a string to any arbitrary length between 0 and the dimension of the character
array. Here's an example:
SET_LENGTH_STRING(MyString, 3)
SET_LENGTH_STRING can be used to
This causes the contents of MyString to read 'STO', even though the character 'P' still resides in
MYSTRING[4].
String expressions
A string expression is a string enclosed in double quotes containing a series of constants and/or variables
evaluated at run-time to form a string result. String expressions can contain up to 16000 characters
consisting of string literals, variables, arrays, and ASCII values between 0 and 255. Here's an example:
CHAR StrExp[6]
StrExp = "STOP, 25, 'OFF', X"
In the example above, the string expression contains the constant STOP, the value 25, the string literal
'OFF', and the variable X. Assuming STOP is 2 and X = 5, the string expression will evaluate to "2,
25, 'OFF', 5"
.
Wide strings
A wide character string data type is provided for dealing with Unicode fonts, which use 16-bit character
codes (used for many Far-Eastern fonts) instead of the standard 8-bit codes (used with most Western
fonts). Here's a syntax sample for a wide character string:
WIDECHAR WChar[40]
The statement above declares a wide character string containing 40 elements, for a total of 80 bytes. A
wide character string can be used in the same manner as other character strings. It maintains a length
field that can be retrieved using
LENGTH_STRING and set using SET_LENGTH_STRING. Here's an
example:
WIDECHAR StrExp[6]
INTEGER StrLen
StrExp = {STOP, 500, 'OFF', X}
StrLen = LENGTH_STRING(StrExp)
NetLinx Programming Language Reference Guide
51
Page 68

Language Elements
In the example above, if STOP is 2 and X is a wide character whose value is 1000, the string expression
will evaluate to "
2, 500, 79, 70, 70, 1000" and StrLen is 6. Each array element can now
assume a value of up to 65,535, rather than the limit of 255 imposed by the standard character string.
CHAR string may be assigned or compared to a wide character string. For example:
A
WChar = 'FFWD'
- or -
IF (WChar = 'REV')
{
(* statements *)
}
Each 8-bit character in the CHAR string is converted to 16-bit before the assignment or comparison
operation is performed.
Arrays
In the Axcess language, arrays can be declared with 8-bit (string) or 16-bit (integer) fields.
The syntax for an 8-bit (string) field is:
Name[20] // 8-bit character array
The syntax for a 16-bit (integer) field is:
INTEGER Number[10] // 16-bit integer array
The NetLinx language allows arrays of any data type supported by the language, as well as, arrays of
user-defined structures and classes. If an initialization statement is included in the variable declaration,
the array dimension is not required. If the array dimension is omitted, both the maximum and effective
length is set to the length needed to hold the data contained in the initialization string.
CHAR STRING[ ] = 'character string'
WIDECHAR WideString[ ] = 'wide character string'
INTEGER IntegerNum[ ] = {1, 2, 3, 4, 5}
SINTEGER SINTEGERNum[ ] = {-1, 5, -6}
LONG LONGNum[ ] = {$EFFF, 0, 89000}
SLONG LONGNum[ ] = {-99000, 50, 100, 100000}
FLOAT FloatingNum[ ] = {1.0, 20000.0, 17.5, 80.0}
DOUBLE DoubleNum[ ] = {1.0e28, 5.12e-6, 128000.0}
String expressions are not allowed for initialization statements.
The initialization statement for a single dimension character string is enclosed in single quotes; data for
other types is enclosed in braces. In the case of a multidimensional character string, the strings in the
initialization statement are separated by commas and enclosed in braces. In order to populate the array,
for example:
52
NetLinx Programming Language Reference Guide
Page 69

Language Elements
DEFINE_VARIABLE
CHAR StringTable_3[3][5]
DEFINE_START
CHAR StringTable_3[1] = 'Str 1'
CHAR StringTable_3[2] = 'Str 2'
CHAR StringTable_3[3] = 'Str 3'
For multidimensional array types, the data pertaining to each dimension is delimited using braces, as
shown below:
INTEGER Num2D[ ][ ] = {{1, 3}, {2, 4}, {7, 8}}
(* This sets the dimensions to Num2D[3][2] *)
Arrays can be manipulated using the operator "=". The "=" operator is used to assign one array to
another. In the example below, the contents of
Array1 = Array2
Array1 are replaced by the contents of Array2.
The arrays must match in number of dimensions and type. The size of each dimension of the destination
array must be greater than or equal to the corresponding dimension of the array being assigned;
otherwise, the contents of the array being assigned are truncated to fit into the destination array. If a type
mismatch is detected, the compiler will issue an appropriate warning.
The length of an array is determined by calling
LENGTH_ARRAY and MAX_LENGTH_ARRAY.
LENGTH_ARRAY returns the effective length of a dimension of an array; the length set implicitly through
array initialization or array manipulation operations (+ and -) or explicitly through a call to
SET_LENGTH_ARRAY. MAX_LENGTH_ARRAY is used to determine the maximum length of a dimension
of an array. For example:
INTEGER Len
INTEGER Array[1] = {3, 4, 5, 6, 7}
INTEGER Array2[10] = {1, 2}
Len = MAX_LENGTH_ARRAY(Array1) // Len = 5
Len = MAX_LENGTH_ARRAY(Array2) // Len = 10
LENGTH_ARRAY is called to determine the effective length of Array1 and Array2. This value is set
automatically when the arrays are initialized.
Len = LENGTH_ARRAY(Array1) // Len = 5
Len = LENGTH_ARRAY(Array2) // Len = 2
Multi-dimensional arrays
Any of the single dimension array types listed above can be used to define an array of n-dimensions. A
2-dimensional array is simply a collection of 1-dimensional arrays; a 3-dimensional array is a collection
of 2-dimensional arrays, and so forth. Here's an example:
INTEGER Num1D[10] // [Column]
INTEGER Num2D[5][10] // [Row][Column]
INTEGER Num3D[2][5][10] // [Table][Row][Column]
One way to view these arrays is to think of Num2D as being a collection of five Num1D's and Num3D as
being a collection of two
Num2D's.
When referencing elements of the above arrays:
NetLinx Programming Language Reference Guide
53
Page 70

Language Elements
Num1D[1] refers to the 1st element
Num2D[1] refers to the 1st row
Num2D[1][1] refers to the 1st element of the 1st row
Num3D[1] refers to the 1st table
Num3D[1][1] refers to the 1st row of the 1st table
Num3D[1][1][1] refers to the 1st element of the 1st row of the 1st table
The following operations are legal:
Num2D[2] = Num1D
Num2D[5][5] = Num1D[5]
Num3D[2] = Num2D
Num3D[2][1] = Num1D
Num3D[2][1][1] = Num1D[1]
LENGTH_ARRAY and MAX_LENGTH_ARRAY are used to determine the effective and maximum lengths
of multidimensional arrays as shown in the following examples:
INTEGER Len
INTEGER My3DArray[5][3][4]
Len = MAX_LENGTH_ARRAY(My3Darray) // Len = 5
Len = MAX_LENGTH_ARRAY(My3Darray[1]) // Len = 3
Len = MAX_LENGTH_ARRAY(My3Darray[1][1]) // Len = 4
INTEGER Len
INTEGER My3DArray[5][3][4] =
{
{
{1,2,3,4},
{5,6,7,8},
{9,10,11}
},
{
{13,14}
}
}
Len = LENGTH_ARRAY(My3Darray) (* Len = 2, number of tables *)
Len = LENGTH_ARRAY(My3Darray[2]) (* Len = 1, number of rows in table 2 *)
Len = LENGTH_ARRAY(My3Darray[1][3]) (* Len = 3, number of columns in table
1, row 3 *)
54
NetLinx Programming Language Reference Guide
Page 71

Language Elements
Structures
A structure provides the ability to create a new data type composed of other data types arranged in a
specified order.
A structure is declared in the DEFINE_TYPE section of the program.
Here's an example:
DEFINE_TYPE
STRUCTURE NEWSTRUCT
{
INTEGER Number
CHAR Text[20]
}
In the example above, a structure named NEWSTRUCT is declared to contain two data types, a 16-bit
number and a 20-character array. Once declared, a structure may be used in the same way as any other
data type. Here is a syntax sample:
DEFINE_VARIABLE
NEWSTRUCT MyNewStruct
NEWSTRUCT MyNewStructArray[3]
Structures can be initialized using set notation as in the two examples below. Notice that the members of
each structure, as well as, the entire array are enclosed in braces.
MyNewStruct.Number = 0
MyNewStruct.Text= 'Copyright by Company X'
MyNewStructArray[1].Number = 1
MyNewStructArray[1].Text = 'Line 1'
MyNewStructArray[2].Number = 2
MyNewStructArray[2].Text = 'Line 2'
MyNewStructArray[3].Number = 3
MyNewStructArray[3].Text = 'Line 3'
Structure members are referenced using dot-operator syntax as shown below:
MyNewStruct.Number = 0
MyNewStructArray[1].Number = 20
SET_LENGTH_STRING (MyNewStruct.Text, 16)
A syntax sample for a structure definition is shown below:
STRUCTURE <name>
{
[<type>] <Data1>
[<type>] <Data2>
[<type>] <DataN>
}
The attributes VOLATILE, PERSISTENT, and CONSTANT do not apply to the individual members of a
structure.
NetLinx Programming Language Reference Guide
55
Page 72

Language Elements
Subroutines
A subroutine is a section of code that stands alone, and can be called from anywhere else in the program.
DEFINE_CALL subroutines
The DEFINE_CALL is the standard method provided by NetLinx for defining subroutines.
DEFINE_CALL '<subroutine name>' [(Param1,Param2,...)]
{
(* statements *)
}
where (Param1, Param2, ...) refers to a comma-separated list of <datatype><variable>
pairs. For example,
DEFINE_CALL names must not conflict with previously defined constants, variables, buffers, or wait
names. Unlike identifiers,
A subroutine may accept parameters. To do this, each parameter and its type must be listed within the set
of parentheses to the right of the subroutine name, as shown below:
DEFINE_CALL 'Read Input' (CHAR Buffer)[ ]
{
}
"INTEGER Size" would be one pair.
DEFINE_CALL names are case sensitive.
To invoke a user-defined subroutine, use the CALL keyword plus the name of subroutine and any
required calling parameters.
CALL 'Read Input' (Buf1)
In NetLinx, DEFINE_CALL supports the RETURN statement (as shown in the following example),
although return values are not supported.
DEFINE_CALL 'Read Input' (CHAR Buffer)
{
if (nChars = 0)
{
RETURN // exit subroutine
}
(* read input *)
}
SYSTEM_CALL subroutines
A SYSTEM_CALL subroutine is a special type of DEFINE_CALL subroutine defined in a separate
program file called a LIB file with a
PROGRAM_NAME = 'COSX'
DEFINE_CALL 'COSX' (FLOAT X)
{
(* body of subroutine *)
}
PROGRAM_NAME entry matching the subroutine name.
56
To invoke a system call, use the SYSTEM_CALL keyword followed by the name in single quotes and any
calling parameters, as shown below:
SYSTEM_CALL 'COSX' (45)
System calls are resolved automatically at compile time, without requiring an INCLUDE instruction to
include the system call source file.
NetLinx Programming Language Reference Guide
Page 73

Language Elements
For special cases where multiple copies of a system call are needed, an instance number can be specified
in the call. The compiler will compile a separate copy of the subroutine for each system call instance
number. For example, the following commands force the compiler to include two separate copies of
COSX:
SYSTEM_CALL[1] 'COSX' (45)
SYSTEM_CALL[2] 'COSX' (60)
This technique could be useful in cases where a system call contains a wait instruction that conflicts
when multiple calls to the same subroutine were made during a single wait period.
Function Subroutines
A function is similar to a DEFINE_CALL, but is intended for use either standalone or in-line as an
expression. Instead of requiring a string literal for its name, it requires a name that follows the rules for
naming constants and variables. This eliminates the need for using the
subroutine.
returned using the
DEFINE_FUNCTION subroutines also differ from DEFINE_CALL by allowing values to be
RETURN statement (see below).
CALL keyword to invoke the
The return type may only be one of the 8 intrinsic types. Strings, arrays, structures,
classes and other user-defined types may not be returned.
Syntax:
DEFINE_FUNCTION [<return type>] FnName[(Param1,Param2,...)]
{
(* statements *)
}
You cannot declare and initialize variables in the same line.
You must group the declarations first, followed by the initialization.
Example:
DEFINE_FUNCTION INTEGER myFunction (INTEGER Var0)
{
INTEGER nBytes
STACK_VAR RESULT
nBytes = 0
RETURN = Var0 + nBytes
RETURN RESULT
}
When it is a NetLinx function, a syntax where there appears a ([ ]), the ( ) are NOT
OPTIONAL but the [ ] are optional.
The DEFINE_FUNCTION subroutine can be called as a single programming statement. For example,
the following syntax:
NetLinx Programming Language Reference Guide
57
Page 74

Language Elements
ReadBuffer(Buffer,BufSize)
Can be used in an assignment statement such as:
Count = ReadBuffer(Buffer,BufSize)
or as part of an expression such as:
IF (ReadBuffer(Buffer,BufSize) > 0)
{
(* statements *)
}
The rules pertaining to calling parameters are the same for DEFINE_FUNCTION as they are for
DEFINE_CALL subroutines. The parameter list must appear in parentheses to the right of the function
name. If the function has no calling parameters a set of parentheses must still be included. For example,
MyFunc() // calling a function with no parameters
The return type may be omitted, as an alternate way of defining a subroutine. In this case the function
cannot be used as part of an expression or in an assignment statement.
DEFINE_FUNCTION also allows the use of the RETURN keyword that serves two purposes:
To return prematurely from a function.
To return a value from a function.
The format of the return statement is:
RETURN [<return value>]
If a return statement is encountered anywhere in the function, execution of the function is terminated
immediately and the value (if any) specified as the <return value> is returned to the caller.
A function that returns a value through the RETURN keyword must be declared with a return type.
Conversely, a function that is declared without a return type cannot return a value.
In the example below, GetBufferSize returns an unsigned 16-bit integer, BufSize.
The return type is indicated before the DEFINE_FUNCTION keyword.
DEFINE_FUNCTION INTEGER GetBufferSize()
LOCAL_VAR INTEGER BufSize = 0;
{
.
.
.
RETURN BufSize;
}
To call this function and to retrieve the RETURN value, use the following syntax:
BufSize = GetBufferSize()
where BufSize is declared to be of type INTEGER.
Even if a function returns a value, it is not necessary to assign the return value to a variable. Both forms
of the following call are valid. In the second case, the return value is simply thrown away.
Count = ReadBuffer(Buffer,BufSize)
ReadBuffer(Buffer,BufSize) // return value is ignored
58
The return type may only be one of the 8 intrinsic types (see Data Types). Strings,
arrays, structures, classes and other user-defined types may not be returned.
NetLinx Programming Language Reference Guide
Page 75

Language Elements
Calling parameters
Parameters may be passed to any NetLinx function or subroutine. Calling parameters are simply
variables or constants that originate from the caller and are received by the function or subroutine being
invoked.
The NetLinx compiler passes all variables by reference. This means that the variable the subroutine
operates on is the same variable the caller passed. Any change made to a variable passed as a calling
parameter updates the value of the variable from the perspective of the caller. You can take advantage of
this pass by reference feature to return an updated value through a calling parameter rather than as the
return value.
Constants, on the other hand, are passed by value. When this happens, a copy of the parameter is
delivered to the subroutine. Any change made to the variable representing the constant is lost once the
function or subroutine finishes.
Function and subroutine declarations must include the type and name of each parameter expected. If the
type is omitted, the default type is assumed; arrays are
INTEGER.
CHAR type and non-array parameters are
To specify an array as a function or subroutine parameter, one set of brackets for each array dimension
must follow the variable name, as shown in the following example:
DEFINE_CALL 'Process Array' (CHAR Array[ ][ ])
{
(* body of subroutine *)
}
The parameter Array is declared to be a 2-dimensional array, by including two sets of brackets after the
name. For compatibility with existing programs, the array dimensions may be specified inside the
brackets. These dimensions are not required and are ignored by the compiler. The NetLinx interpreter
will do bounds checking on the array and generate a run-time error if the array bounds are exceeded.
When calling a subroutine that takes an array as one of its parameters, pass only the name of the array as
the calling parameter, as shown below:
CHAR Buffer[10][20]
CALL 'Process Array' (Array)
If dimensions are specified in the call statement, the compiler will interpret that as specifying a subset of
the array. For example, suppose
dimensional array could be passed to
CHAR Buffer[5][5][10]
CALL 'Process Array' (Array [3])
Array were defined as a 3-dimensional array. The third table of that
'Process Array' as follows:
NetLinx Programming Language Reference Guide
59
Page 76

Language Elements
60
NetLinx Programming Language Reference Guide
Page 77

Event Handlers
The NetLinx language provides a special program section called DEFINE_EVENT to define handlers for
incoming events/notifications. These handlers are stored in an event table providing quick access to code
that must be executed when an event is received. There are handlers to support five types of events:
Button events include pushes, releases, and holds, which are associated with a push or release
on a particular device-channel.
Channel events occur when an output change (On/Off) is detected on a device-channel.
Data events include commands, strings, status, and error messages.
Level events are received as a result of a level change on a particular device.
Timeline events trigger events based on a sequence of times.
The processing of an event associated with a given member of a device, channel,
device-channel, level, or device-level array must be completed before processing can
begin on another event associated with the same array.
All incoming events are stored in a queue pending processing. Messages are processed in the order they
are received. The steps to processing an event are:
1. Check all events for a handler matching the specified event. If a handler is found, run it.
2. If there is no event handler, run MAINLINE.
Event Handlers
Event
Start
FIG. 1 Steps involved in processing an event
handler
available?
Run event
handler
YES
NO
Run Mainline
Stop
More than one handler can be defined for the same event. In this case, the handlers
are executed in the order in which they are defined in the program.
The event handler descriptions are:
DEVICE refers to a device specification:
DEVICE A single device number constant
D:P:S A constant device specification such as 128:1:0
DEV[ ] A device array
NetLinx Programming Language Reference Guide
61
Page 78

Event Handlers
CHANNEL refers to:
CHANNEL A single channel number constant
CHAN[ ] An integer array of channel numbers
DEVCHAN[ ] A device-channel array
LEVEL refers to:
LEVEL A single level number constant
LEV[ ] An integer array of level numbers
DEVLEV[ ] A device-level array
The processing of an event associated with a given member of a device, channel,
device-channel, level, or device-array must be completed before processing can
begin on another event associated with the same array.
Button events
Button events include pushes, releases, and holds. These events are associated with a push or release on
a particular device-channel. A sample button event is shown below:
BUTTON_EVENT[DEVICE,CHANNEL] or BUTTON_EVENT[(DEVCHAN[ ])]
{
PUSH:
{
// PUSH event handler
}
RELEASE:
{
// RELEASE event handler
}
HOLD[TIME]: or HOLD[TIME, REPEAT]:
{
// HOLD event handler
}
}
62
A HOLD event handler specifies the actions that should be performed when a button is pressed and held
for a minimum length of time indicated by the
increments). The
REPEAT keyword specifies that the event notification should be repeated in TIME
TIME parameter (TIME is specified in .10 second
increments as long as the button is held.
BUTTON object is available to the button event handler as a local variable. The following table lists
The
the information contained in Button Objects.
NetLinx Programming Language Reference Guide
Page 79

Event Handlers
Button Objects
Property Name Type Description
Button.Input DEVCHAN Device + Channel
Button.Input.Channel INTEGER Channel
Button.Input.Device DEV Device
Button.Input.Device.Number INTEGER Device number
Button.Input.Device.Port INTEGER Device port
Button.Input.Device.System INTEGER System number
Button.Holdtime LONG Current hold time in .10 second increments
Button.SourceDev DEV Source device of button event
Button.SourceDev.Number INTEGER Source device number
Button.SourceDev.Port INTEGER Source device port
Button.SourceDev.System INTEGER Source device system.
If the event handler is specified using an array for DEV,CHANNEL, or a DEVCHAN array, GET_LAST
can determine which index in the array caused the event to run.
Channel events
A channel event is generated when PULSE, TO, MIN_TO, ON or OFF is called. An example channel event
is shown below:
Channel_Event[DEVICE,CHANNEL] or Channel_Event[(DEVCHAN[ ])]
{
ON:
{
// Channel ON event handler
}
OFF:
{
// Channel OFF event handler
}
}
The Channel object is available to the channel event handler as a local variable.
The following table lists the information contained in Channel events:
NetLinx Programming Language Reference Guide
63
Page 80

Event Handlers
Channel Objects
Property Name Type Description
Channel.Device DEV Device
Channel.Device.Number INTEGER Device number
Channel.Device.Port INTEGER Device port
Channel.Device.System INTEGER System number
Channel.Channel INTEGER Device channel
Channel.SourceDev DEV Source Device of Channel Event
Channel.SourceDev.Number INTEGER Source Device Number
Channel.SourceDev.Port INTEGER Source Device Port
Channel.SourceDev.System INTEGER Source Device System.
If the event handler is specified using an array for DEV, CHANNEL, or a DEVCHAN array, GET_LAST
can be used to determine which index in the array caused the event to run.
Data events
The data object is available to the data event handler as a local variable. An example data event is:
DATA_EVENT[DEVICE] or DATA_EVENT[DEV[ ]]
{
COMMAND:
{
// COMMAND event handler
}
STRING:
{
// STRING event handler
}
ONLINE:
{
// ONLINE event handler
}
OFFLINE:
{
// OFFLINE event handler
}
ONERROR:
{
// ONERROR event handler
}
}
64
NetLinx Programming Language Reference Guide
Page 81

Event Handlers
The following table lists the information contained in data objects:
Data Objects
Property Name Type Description
Data.Device DEV Device
Data.Device.Number INTEGER Device number
Data.Device.Port INTEGER Device port
Data.Device.System INTEGER System number
Data.Number LONG Event number
Data.SourceDev DEV Source Device of Data Event
Data.SourceDev.Number INTEGER Source Device Number
Data.SourceDev.Port INTEGER Source Device Port
Data.SourceDev.System INTEGER Source Device System
Data.Text CHAR Array Text associated with the event
The event number is a number associated with a command, error condition or the device ID
associated with an online/offline event. The numeric value is stored as either a floating-point
number or integer, as appropriate; the value can be assigned to a variable of any numeric type.
This field could be a value associated with a command event or error condition.
Text associated with the event is associated with a command, string, or error notification. It
can also be the device ID string in the case of an online/offline event.
The following table shows the fields that contain relevant information for data or notifications received
via Internet protocol (IP):
Data Objects Received Via the Internet Protocol (IP)
Property Name Type Description
Data.SourceIP CHAR Array IP address of the client/source application
Data.SourcePort LONG Server/source port number
Not all fields in the
DATA object apply to all types of events. The following table lists the fields and the
corresponding events. An 'X' indicates that the field applies (or could apply) to the given event.
Data Object Fields
Property Name Command String OnLine OffLine OnError
Data.Device X X X X X
Data.Number X X X
Data.Text X X X X X
Data.SourceIP X X X X X
Data.ServerIP X X X X X
Data.SourcePort X X X X X
Level events
The level object is available to the level event handler as a local variable. Level events are triggered by a
level change on a particular device. This eliminates having to constantly evaluate a level against a
previous value. In Axcess, a level needs to be created in the
DEVICE_START section and then a
conditional statement appears in the mainline to evaluate and update the level. The format of the
LEVEL_EVENT is:
NetLinx Programming Language Reference Guide
65
Page 82
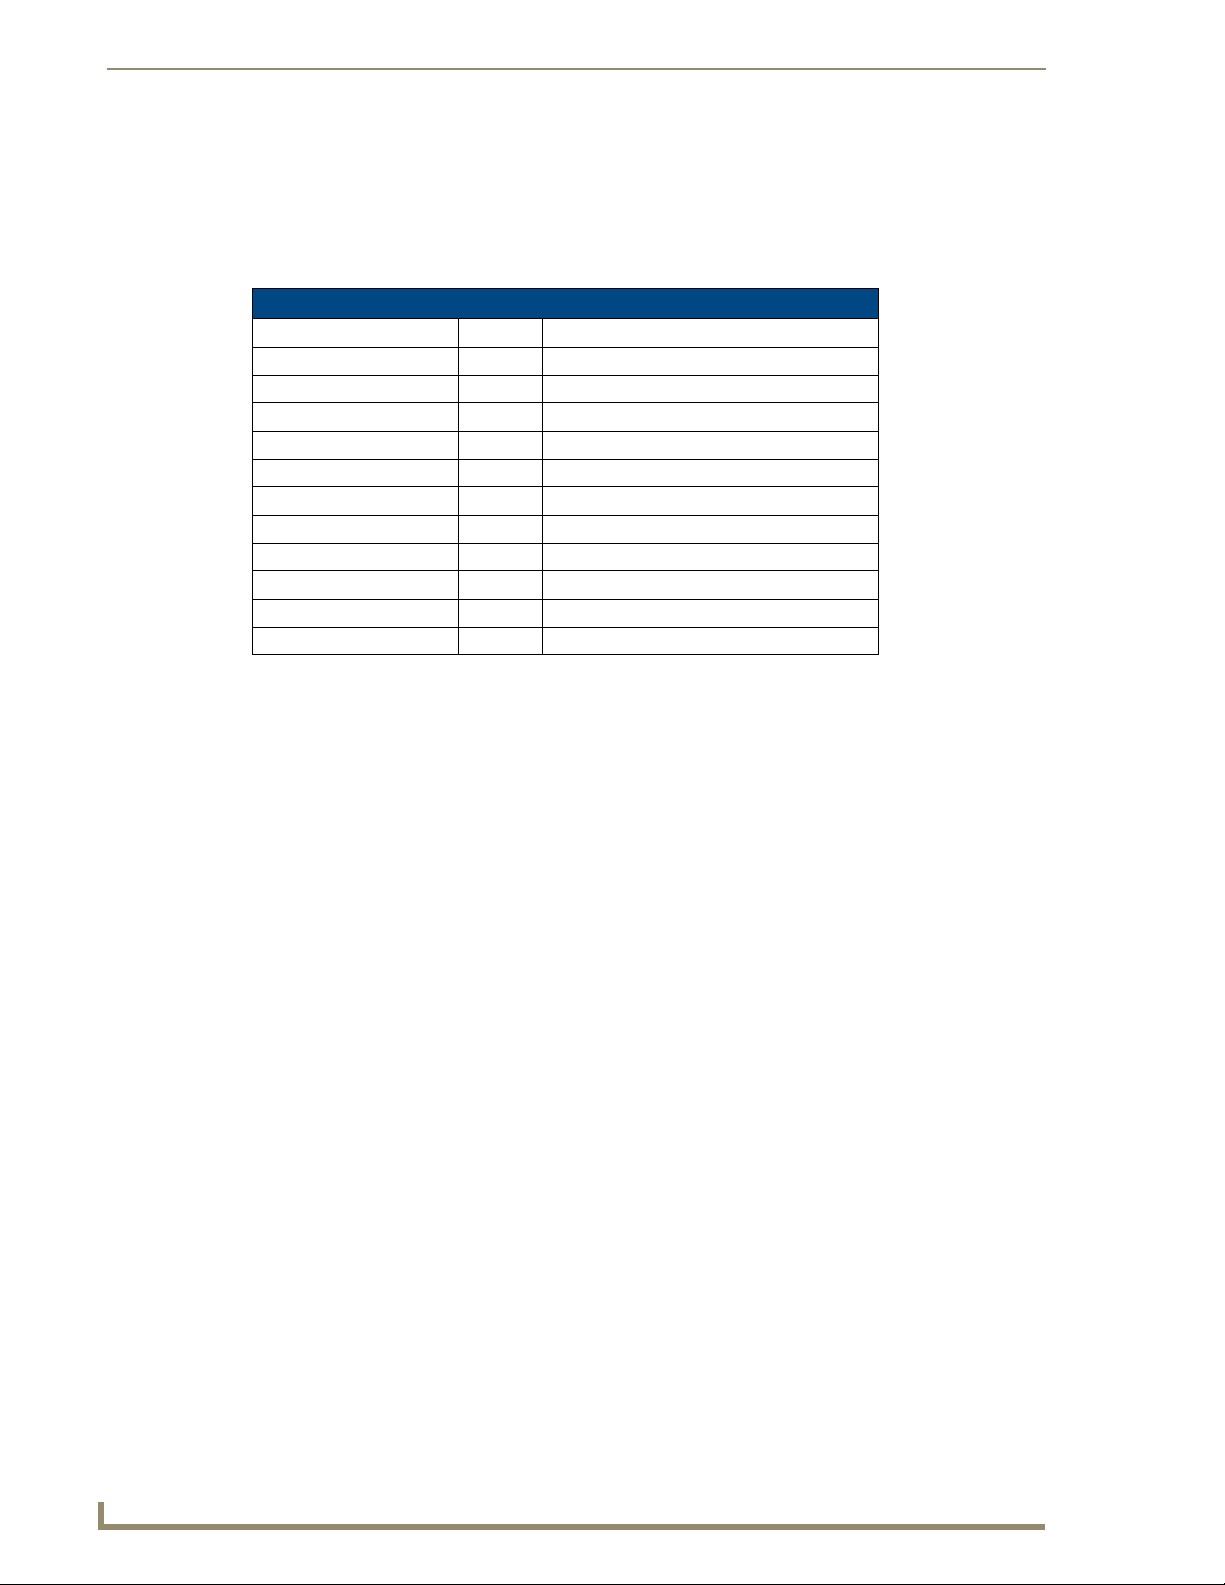
Event Handlers
LEVEL_EVENT[DEVICE,LEVEL] or LEVEL_EVENT[([DEVLEV[ ])]
{
// level event handler
}
It contains the information shown in the table below.
Level Objects
Property Name Type Description
Level.Input DEVLEV Device + Level that caused the event to occur
Level.Input.Device DEV Device
Level.Input.Device.Number INTEGER Device number
Level.Input.Device.Port INTEGER Device port
Level.Input.Device.System INTEGER System number
Level.Input.Level INTEGER Level number
Level.SourceDev DEV Source Device of Level Event
Level.SourceDev.Number INTEGER Source Device Number
Level.SourceDev.Port INTEGER Source Device Port
Level.SourceDev.System INTEGER Source Device System
Level.Value Numeric Level value
The numeric value is stored either as a floating-point number or integer, as appropriate; but the value can
be assigned to a variable of any numeric type.
Existing Axcess code:
DEFINE_START
.
.
CREATE_LEVEL TEMP, 1, TEMP_LEVEL
.
.
DEFINE_PROGRAM
.
.
IF (TEMP_LEVEL >= COOL_POINT)
{
ON[RELAY,FAN]
}
ELSE IF (TEMP_LEVEL <= HEAT_POINT)
{
OFF[RELAY,FAN]
}
.
.
66
NetLinx Programming Language Reference Guide
Page 83

Event Handlers
NetLinx Button Event:
LEVEL_EVENT [TEMP, 1]
{
IF (LEVEL.VALUE>= COOL_POINT)
{
ON[RELAY,FAN]
}
ELSE IF (LEVEL.VALUE <= HEAT_POINT)
{
OFF[RELAY,FAN]
}
}
LEVEL_VALUE is an embedded object value in the LEVEL_EVENT statement. If the event handler is
specified using an array for
DEV, CHANNEL, or a DEVCHAN array, GET_LAST can be used to determine
which index in the array caused the event to run.
Custom events
A custom event is generated by certain devices in response to query commands or unique device events.
For instance, G4 touch panels generate custom events in response to button query commands or mouse
clicks. An example channel event is shown below:
CUSTOM_EVENT[DEVICE,ADDRESS,EVENTID] or CUSTOM_EVENT[DEVCHAN,EVENTID]
{
}
The EVENTID is specific to each device. For instance, the EVENTID sent in response to a button text
query command for G4 touch panels is 1001. For more information on
of the custom event for each
EVENTID, see the programming section of the device manual with which
EVENTID values and the values
you are working.
The following table lists the information contained in Custom events:
Channel Objects
Property Name Type Description
Custom.Device DEV Device
Custom.Device.Number INTEGER Device number
Custom.Device.Port INTEGER Device port
Custom.Device.System INTEGER System number
Custom.ID INTEGER The address that generated the event
Custom.Type INTEGER The EVENTID of the event
Custom.Flag INTEGER A flag associated with the event
Custom.Value1 SLONG The first value associated with the event
Custom.Value2 SLONG The second value associated with the event
Custom.Value3 SLONG The third value associated with the event
Custom.Text CHAR[] Text associated with the event
Custom.Encode CHAR[] A string encoded with VARIABLE_TO_STRING encoding for
complex data types.
Custom.SourceDev DEV Source device of custom event
Custom.SourceDev.Number INTEGER Source device number
Custom.SourceDev.Port INTEGER Source device port
Custom.SourceDev.System INTEGER Source device system.
NetLinx Programming Language Reference Guide
67
Page 84

Event Handlers
If the event handler is specified using an array for DEV, INTEGER, or a DEVCHAN array, GET_LAST
can determine which index in the array caused the event to run.
Event Parameters
It has already been stated that DEFINE_EVENT handlers are stored in an event table providing quick
access to code that must be executed when an event is received. The event table keeps a list of all events
in a sorted order to more quickly determine which code needs to be accessed for a giving incoming
event. The event table is built before
result, there are certain rules that must be applied to the parameters used in
Since the event table is built before
information prior to
DEFINE_START. This requires that all EVENT parameters must be defined at
DEFINE_START runs and it not changed anytime after that. As a
DEFINE_EVENTs.
DEFINE_START, all event parameters must contain the correct
compile time. In addition, many parameter "shortcuts" to help fulfill this requirement.
BUTTON_EVENT as an example, the simplest version of event parameters is a device and channel
Using
reference. In the following example:
Example 1:
DEFINE_DEVICE
dvTp = 128:1:0
DEFINE_EVENT
BUTTON_EVENT[dvTp,1]
{
PUSH:
Send_String 0,'Button 1 of dvTp was pushed'
}
The device, dvTp, was defined in the DEFINE_DEVICE section, which has the effect of making it an
initialized variable of type
DEV, and the channel number was a hard-coded value of 1. Since both of
these value were defined at compile time, the event is entered into the event table correctly. Let's take
another example:
Example 2:
DEFINE_DEVICE
dvTp = 128:1:0
DEFINE_VARIABLE
Integer nMyChannel
DEFINE_START
nMyChannel = 1
DEFINE_EVENT
BUTTON_EVENT[dvTp,nMyChannel]
{
PUSH:
Send_String 0,"'Button ',ITOA(nMyChannel),' of dvTp was pushed'"
}
68
NetLinx Programming Language Reference Guide
Page 85

Event Handlers
In this example, the event will not perform as the previous one did. When the code is compiled, the
event parameters are dvTp, which is already assigned, and nMyChannel, which has a value of 0.
nMyChannel does not get assigned a value of 1 until DEFINE_START, at which time the event has
already been added to the event table. If you were to run this code, you would discover that it did in fact
run when button 1 was pushed, leading us to one of the "shortcuts":
<bold>
A value of 0 for a Channel or Level Number in a BUTTON_EVENT, CHANNEL_EVENT or LEVEL_EVENT
will be interpreted as an event handler for all events of that type from the given device number(s).
</bold>
So, the reason the above example runs when button 1 was pushed is that the above example runs when
any button on
buttons, channel or levels of a device without having to define a
dvTp is pushed. This "shortcut" was added so you could define an event handler for all
DEVCHAN of DEVLEV containing every
value you may want to handle.
To make the example 2 behave like the example 1, we simply need to make sure the value of
nMyChannel contains a value of 1 at compile time. This is simply done by initializing nMyChannel a
value of 1 in the
DEFINE_VARIABLE section. The new example reads:
Example 3:
DEFINE_DEVICE
dvTp = 128:1:0
DEFINE_VARIABLE
Integer nMyChannel = 1
DEFINE_EVENT
BUTTON_EVENT[dvTp,nMyChannel]
{
PUSH:
Send_String 0,"'Button ',ITOA(nMyChannel),' of dvTp was pushed'"
}
You may be tempted to use a more traditional variable as the channel number, mainly PUSH_CHANNEL
RELEASE_CHANNEL. It is important to realize that the identifiers are nothing more than global
or
(system) variable. At compile time, the values are defined and contain a value of 0. So the following
code:
Example 4:
DEFINE_EVENT
BUTTON_EVENT[dvTp,PUSH_CHANNEL]
{
PUSH:
Send_String 0,"'Button ',ITOA(BUTTON.INPUT.CHANNEL),' of dvTp was pushed'"
RELEASE:
Send_String 0,"'Button ',ITOA(BUTTON.INPUT.CHANNEL),' of dvTp was released'"
}
NetLinx Programming Language Reference Guide
69
Page 86

Event Handlers
Will have the effect you expect button probably for a different reason than you expect. Although the
event will run for both the push and release of all buttons for dvTp, you may also be tempted to think that
you need to make sure the event runs for RELEASE_CHANNEL by adding the following:
Example 5:
DEFINE_EVENT
BUTTON_EVENT[dvTp,PUSH_CHANNEL]
BUTTON_EVENT[dvTp,RELEASE_CHANNEL]
{
PUSH:
Send_String 0,"'Button ',ITOA(BUTTON.INPUT.CHANNEL),' of dvTp was pushed'"
RELEASE:
Send_String 0,"'Button ',ITOA(BUTTON.INPUT.CHANNEL),' of dvTp was released'"
}
However, since both PUSH_CHANNEL and RELEASE_CHANNEL have a value of 0 at compile time, you
are in effect stacking two events that are interpreted as running for any button pushed on the panel and as
a result, the event is run twice every time a button is pushed or released. This may not seem like a big
problem until you try to toggle a variable in the event: since the event runs twice for every button push,
the variable toggles on then toggles off again.
There are some additional parameter "shortcuts" available. In all cases, the following rules apply:
When a DEV can be used, a DEV array can also be used.
When a DEVCHAN can be used, a DEVCHAN array can be used.
When a DEVLEV can be used, a DEVLEV array can be used.
When a Char, Integer or Long can be used, a Char, Integer or Long array can also be
used.
You can apply more then 1 of the above rules at a time in a given event handler.
GET_LAST() can be used to determine which index of an array (any type) caused the event to
fire.
The above rules can let you write some interesting event handler. Let's say you wanted to handle 4
buttons from 6 panels all with one button event. You could write:
Example 6:
DEFINE_DEVICE
dvPanel1 = 128:1:0
dvPanel2 = 129:1:0
dvPanel3 = 130:1:0
dvPanel4 = 131:1:0
dvPanel5 = 132:1:0
dvPanel6 = 133:1:0
Continued
70
DEFINE_VARIABLE
DEV dvMyPanels[] = { dvPanel1, dvPanel2, dvPanel3, dvPanel4, dvPanel5, dvPanel6
}
INTEGER nMyButtons[] = { 4, 3, 2, 1 }
INTEGER nPanelIndex
INTEGER nButtonIndex
DEFINE_EVENT
NetLinx Programming Language Reference Guide
Page 87

Event Handlers
BUTTON_EVENT[dvMyPanels,nMyButtons]
{
PUSH:
{
nPanelIndex = GET_LAST(dvMyPanels)
nButtonIndex = GET_LAST(nMyButtons)
Send_String 0,"'Button Index=',ITOA(nButtonIndex),' was pushed on Panel
Index=',ITOA(nPanelIndex)"
}
}
This event will be run for all combinations of dvMyPanel and nMyButtons, 24 buttons in all. The
GET_LAST() function is very useful when running event using array as parameters. GET_LAST()
returns an index value, starting at 1, for the element that triggered the event. In the case of
nButtonIndex, it will contain a value of 1 when button 4 was pressed, a value of 2 when button 3 was
pressed, ... This can be very useful in the case of transmitters and wired panels where the channel
number may not reflect a numerical sequence you would like, such as with Numeric Keypads.
Timeline Functions
The NetLinx timeline functions provide a mechanism for triggering events based upon a sequence of
times. The sequence of times is passed into the timeline functions as an array of
value representing a time period (in milliseconds) that is either relative to the start time of the timeline or
to the previously triggered event.
LONG values, with each
Continued
Timelines introduce the capability to dynamically set up a timed sequence, provide
the user with a mechanism to modify the sequence, and allow the user to create,
delete, and modify sequences.
The old way of programming timed sequences was to cascade or nest
WAITs. Using nested WAITs hard-
coded the timed sequence; so, the only way to modify the timing was to modify the NetLinx program,
recompile, and download.
Timelines make adding, deleting and editing the sequence much simpler for the programmer. Timeline
functions and debugging allow the timings to be modified without the modify/ compile/ download cycle
because the array of times may be modified via NetLinx debugging. Once the timings have been
tweaked, the changes can be incorporated in the NetLinx program.
Creating a timeline
Timelines are represented by the illustration in (FIG. 2). When the TIMELINE_CREATE function is
executed, the timeline starts at zero and begins counting. When the timer value equals a value in the
TIMES array, a TIMELINE_EVENT is triggered. Within the timeline event, a TIMELINE structure is
available to get information about the specific time from the
TIMES array that generated the event. When
a relative timeline is created, the NetLinx Master converts the provided relative times into absolute times
that are stored internally.
TIMELINE structure contains the following members:
The
STRUCTURE TIMELINE
{
INTEGER ID //user supplied ID
INTEGER SEQUENCE //index in Times array
LONG TIME //time since start of timeline
INTEGER RELATIVE //0=absolute 1=relative
LONG REPETITION //# of loops for repeating timeline
NetLinx Programming Language Reference Guide
71
Page 88
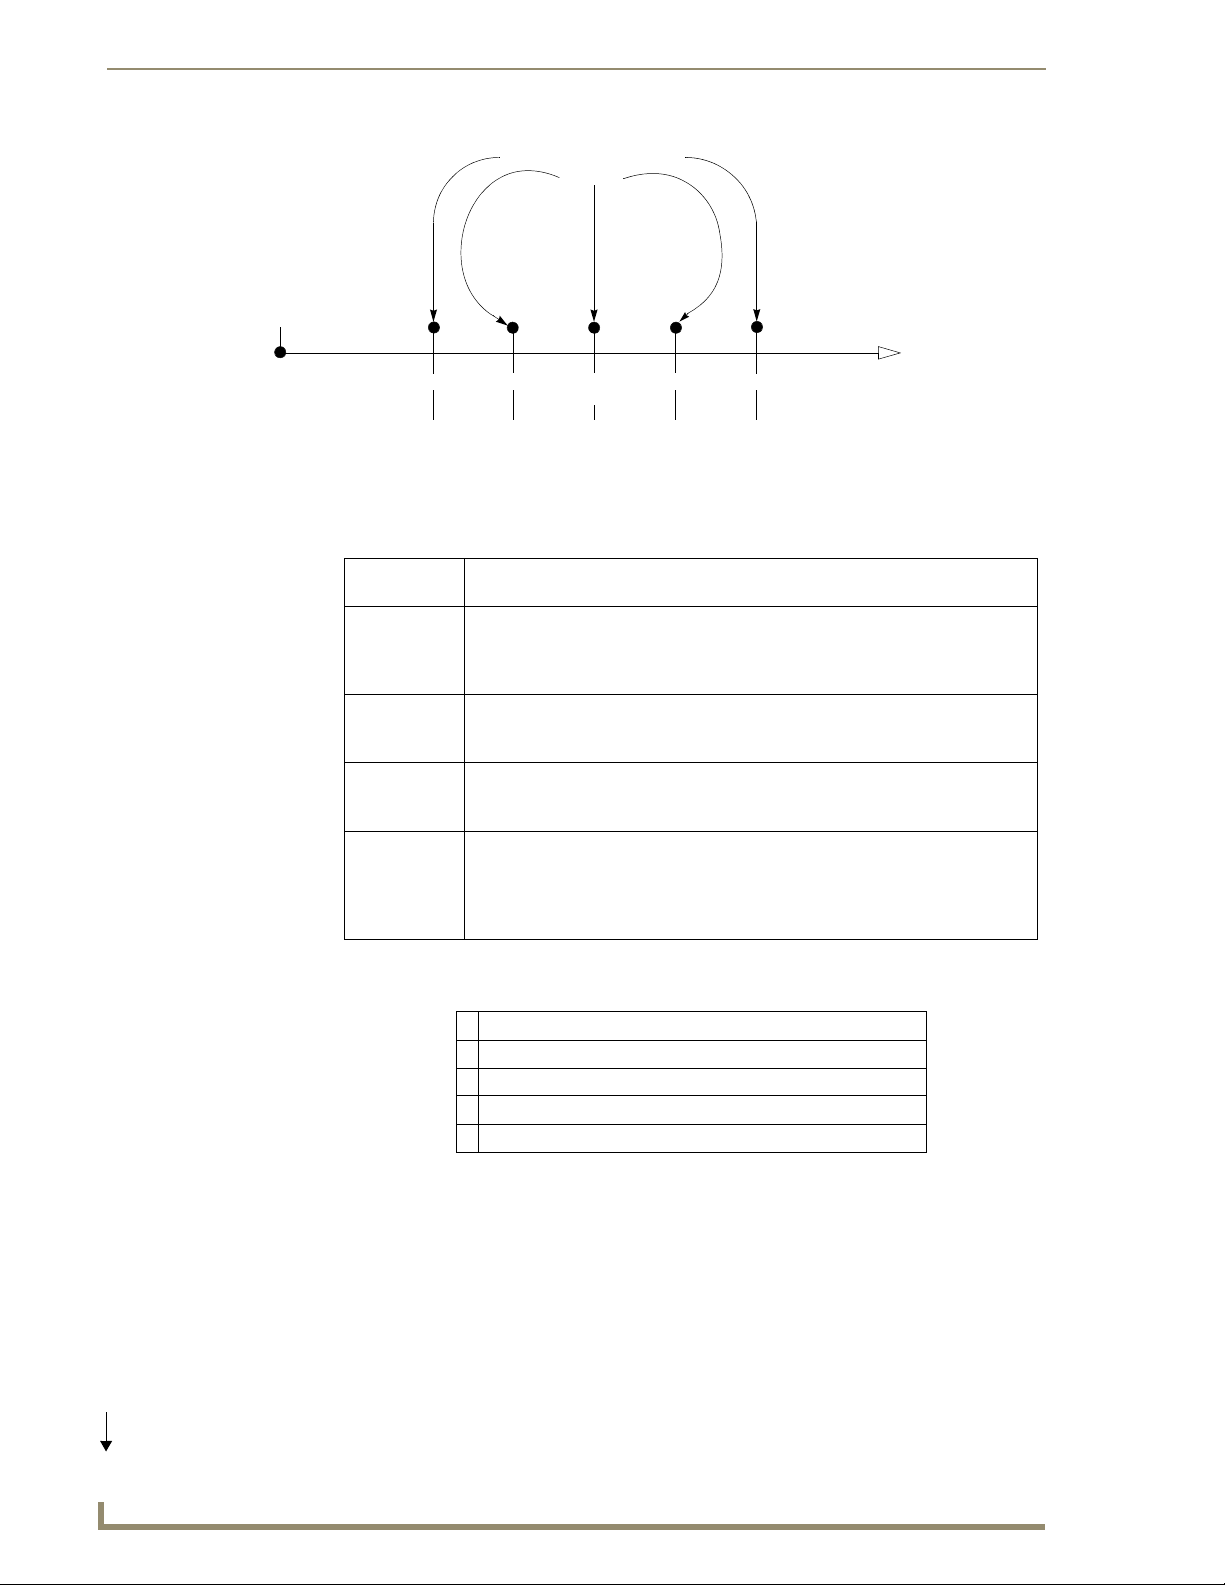
Event Handlers
TIMELINE_EVENT[TL1]
Triggered
TIMELINE_CREATE
Time 0
Timeline.Sequence =
FIG. 2
Timeline representation
1000 2000 3000
1
Time (1mS resolution)
23
}
Each TIMELINE data member is defined as follows:
ID The ID that the user assigned to the timeline in the TIMELINE_CREATE func-
tion.
SEQUENCE The index of the time in the Times array that was passed to the
TIMELINE_CREATE function. The SEQUENCE data member is used to deter-
mine what action to take for the event and is normally decoded with a SWITCH/
CASE structure (as shown in the example).
TIME The amount of time that has elapsed since the timeline started. For repeating
timelines, the TIME and REPETITION data members can be used to calculate
the total amount of time it has been running.
RELATIVE If the timeline is operating in relative mode, this data member is equal to
TIMELINE_RELATIVE. If the timeline is absolute, it is equal to
TIMELINE_ABSOLUTE.
REPETITION If the timeline was created with TIMELINE_REPEAT, this data member holds
the number of times the timeline has been executed. REPETITION contains
zero for the first pass through the timeline. Thus, the calculation to determine
the total amount of time the timeline has been running is simply:
TIMELINE.TIME * TIMELINE.REPETITION.
4000
4
5000
5
Continued
72
Return Valuess:
0 Successful
1 Timeline ID already in use
2 Specified array is not an array of LONGs
3 Specified length is greater than the length of the passed array
4 Out of memory
Example:
DEFINE_VARIABLE
LONG TimeArray[100]
DEFINE_CONSTANT
TL1 = 1
TL2 = 2
DEFINE_EVENT
NetLinx Programming Language Reference Guide
Page 89

TIMELINE_EVENT[TL1] // capture all events for Timeline 1
{
switch(Timeline.Sequence) // which time was it?
{
case 1: { SEND_COMMAND dvPanel,"'TEXT1-1 1'" }
case 2: { SEND_COMMAND dvPanel,"'TEXT1-1 2'" }
case 3: { SEND_COMMAND dvPanel,"'TEXT1-1 3'" }
case 4: { SEND_COMMAND dvPanel,"'TEXT1-1 4'" }
case 5: { SEND_COMMAND dvPanel,"'TEXT1-1 5'" }
}
}
TIMELINE_EVENT[TL2]
{
switch(Timeline.Sequence)
{
case 1: { SEND_COMMAND dvPanel,"'TEXT2-2 1'" }
case 2: { SEND_COMMAND dvPanel,"'TEXT2-2 2'" }
case 3: { SEND_COMMAND dvPanel,"'TEXT2-2 3'" }
case 4: { SEND_COMMAND dvPanel,"'TEXT2-2 4'" }
case 5: { SEND_COMMAND dvPanel,"'TEXT2-2 5'" }
}
}
Event Handlers
DEFINE_PROGRAM
PUSH[dvPanel,1]
{
TimeArray[1] = 1000
TimeArray[2] = 2000
TimeArray[3] = 3000
TimeArray[4] = 4000
TimeArray[5] = 5000
TIMELINE_CREATE(TL1, TimeArray, 5, TIMELINE_ABSOLUTE,
TIMELINE_REPEAT)
}
PUSH[dvPanel,2]
{
TimeArray[1] = 1000
TimeArray[2] = 1000
TimeArray[3] = 1000
TimeArray[4] = 1000
TimeArray[5] = 1000
TIMELINE_CREATE(TL2, TimeArray, 5, TIMELINE_RELATIVE, TIMELINE_ONCE)
}
The example above creates two timelines (TL1 and TL2) that trigger events at the same rate (once per
second).
NetLinx Programming Language Reference Guide
73
Page 90

Event Handlers
TL1 uses TIMELINE_ABSOLUTE to specify that the times in TimeArray are absolute with
respect to the start of the timeline. Since
repeating and will generate a
TIMELINE_EVENT every second iterating through all five times
TL1 specifies the TIMELINE_REPEAT, it is also
in a round-robin fashion: 1,2,3,4,5,1,2,3,4,5,1,2,3, and so on.
TL2 uses TIMELINE_RELATIVE to specify that the times in TimeArray are relative to each
other (i.e. each events occurs 1000 milliseconds after the previous). Since
TL2 specifies the
TIMELINE_ONCE parameter, it will execute the entire timeline once, then stop: 1,2,3,4,5.
TIMELINE example
The following code is an example of how to use TIMELINE functions.
PROGRAM_NAME='TimelineExample'
(*{{PS_SOURCE_INFO(PROGRAM STATS) *)
(***********************************************************)
(* FILE CREATED ON: 05/22/2001 AT: 12:05:56 *)
(***********************************************************)
(* FILE_LAST_MODIFIED_ON: 05/22/2001 AT: 12:15:56 *)
(***********************************************************)
(* ORPHAN_FILE_PLATFORM: 1 *)
(***********************************************************)
(*!!FILE REVISION: *)
(* REVISION DATE: 05/22/2001 *)
(* *)
(* COMMENTS: *)
(* *)
(***********************************************************)
(*}}PS_SOURCE_INFO *)
(***********************************************************)
(***********************************************************)
(* DEVICE NUMBER DEFINITIONS GO BELOW *)
(***********************************************************)
DEFINE_DEVICE
Continued
74
dvPanel = 128:1:0
dvDebug = 0:0:0
(***********************************************************)
(* CONSTANT DEFINITIONS GO BELOW *)
(***********************************************************)
DEFINE_CONSTANT
MY_LINE_1 = 1
MY_LINE_2 = 2
(***********************************************************)
(* VARIABLE DEFINITIONS GO BELOW *)
(***********************************************************)
DEFINE_VARIABLE
NetLinx Programming Language Reference Guide
Page 91

LONG TimeArray[100]
INTEGER iLoop
(***********************************************************)
(* STARTUP CODE GOES BELOW *)
(***********************************************************)
DEFINE_START
(***********************************************************)
(* THE EVENTS GOES BELOW *)
(***********************************************************)
DEFINE_EVENT
TIMELINE_EVENT[MY_LINE_1]
{
switch(Timeline.Sequence)
{
case 1: { SEND_COMMAND dvPanel,"'TEXT1-1 1'" }
case 2: { SEND_COMMAND dvPanel,"'TEXT1-1 2'" }
case 3: { SEND_COMMAND dvPanel,"'TEXT1-1 3'" }
case 4: { SEND_COMMAND dvPanel,"'TEXT1-1 4'" }
case 5: { SEND_COMMAND dvPanel,"'TEXT1-1 5'" }
}
SEND_STRING dvDebug,"'Timer ',ITOA(Timeline.ID),' Event
',ITOA(Timeline.Sequence), ' Time= ',ITOA(Timeline.Time),
'Repetition = ',ITOA(Timeline.Repetition),' Relative =
',ITOA(Timeline.Relative)"
}
Event Handlers
TIMELINE_EVENT[MY_LINE_2]
{
switch(Timeline.Sequence)
{
case 1: { SEND_COMMAND dvPanel,"'TEXT2-2 1'" }
case 2: { SEND_COMMAND dvPanel,"'TEXT2-2 2'" }
case 3: { SEND_COMMAND dvPanel,"'TEXT2-2 3'" }
case 4: { SEND_COMMAND dvPanel,"'TEXT2-2 4'" }
case 5: { SEND_COMMAND dvPanel,"'TEXT2-2 5'" }
}
SEND_STRING dvDebug,"'Timer ',ITOA(Timeline.ID),' Event
',ITOA(Timeline.Sequence), ' Time = ',ITOA(Timeline.Time),
' Repetition = ',ITOA(Timeline.Repetition),' Relative =
',ITOA(Timeline.Relative)"
}
(***********************************************************)
(* THE ACTUAL PROGRAM GOES BELOW *)
(***********************************************************)
Continued
NetLinx Programming Language Reference Guide
75
Page 92

Event Handlers
DEFINE_PROGRAM
(***********************************************************)
(* create will sort the order of the times but index stays *)
(* with the time. This example will execute 1 2 4 3 5 *)
(* sequence numbers *)
(***********************************************************)
PUSH[dvPanel,1]
{
TimeArray[1] = 1000
TimeArray[2] = 2000
TimeArray[4] = 3000
TimeArray[3] = 4000
TimeArray[5] = 5000
TIMELINE_CREATE(MY_LINE_1,TimeArray,5,TIMELINE_ABSOLUTE,TIMELINE_ONCE)
}
PUSH[dvPanel,2]
{
TimeArray[1] = 1000
TimeArray[2] = 2000
TimeArray[3] = 3000
TimeArray[4] = 4000
TimeArray[5] = 5000
TIMELINE_CREATE(MY_LINE_2,TimeArray,5,TIMELINE_ABSOLUTE,TIMELINE_REPEAT)
}
Continued
(***********************************************************)
(* Modify the timeline my kill, pause and restarting *)
(***********************************************************)
PUSH[dvPanel,3]
{
IF(TIMELINE_ACTIVE(MY_LINE_1))TIMELINE_KILL(MY_LINE_1)
IF(TIMELINE_ACTIVE(MY_LINE_2))TIMELINE_KILL(MY_LINE_2)
}
PUSH[dvPanel,4]
{
IF(TIMELINE_ACTIVE(MY_LINE_1))TIMELINE_PAUSE(MY_LINE_1)
IF(TIMELINE_ACTIVE(MY_LINE_2))TIMELINE_PAUSE(MY_LINE_2)
}
PUSH[dvPanel,5]
{
IF(TIMELINE_ACTIVE(MY_LINE_1))TIMELINE_RESTART(MY_LINE_1)
IF(TIMELINE_ACTIVE(MY_LINE_2))TIMELINE_RESTART(MY_LINE_2)
76
NetLinx Programming Language Reference Guide
Page 93

}
(***********************************************************)
(* Force time to a different value *)
(***********************************************************)
PUSH[dvPanel,6]
{
IF (TIMELINE_ACTIVE(MY_LINE_1))
TIMELINE_SET(MY_LINE_1,2000)
}
(***********************************************************)
(* Get the current time from create *)
(***********************************************************)
PUSH[dvPanel,7]
{
SEND_COMMAND dvPanel,"'TEXT3-','Timer 1 Time is
',ITOA(TIMELINE_GET(MY_LINE_1))"
SEND_COMMAND dvPanel,"'TEXT4-','Timer 2 Time is
',ITOA(TIMELINE_GET(MY_LINE_2))"
}
Event Handlers
(***********************************************************)
(* Pause and restart the timeline at new locations *)
(***********************************************************)
PUSH[dvPanel,8]
{
TIMELINE_PAUSE(MY_LINE_1)
TIMELINE_PAUSE(MY_LINE_2)
TIMELINE_SET(MY_LINE_1,0)
TIMELINE_SET(MY_LINE_2,0)
TIMELINE_RESTART(MY_LINE_1)
TIMELINE_RESTART(MY_LINE_2)
}
(***********************************************************)
(* END OF PROGRAM *)
(* DO NOT PUT ANY CODE BELOW THIS COMMENT *)
(***********************************************************)
NetLinx Programming Language Reference Guide
77
Page 94

Event Handlers
TIMELINE IDs
When creating a TIMELINE_EVENT, the timeline ID must be a user defined long constant. The NetLinx
compiler will not semantic check the type of the timeline ID, and the NetLinx runtime system will
attempt to cast the contents of the timeline ID constant, to a long constant. A runtime error will occur if
the cast is unsuccessful.
Here's an example of
DEFINE_VARIABLE
CONSTANT LONG TimelineID_1 = 1
CONSTANT LONG TimelineID_2 = 2
CONSTANT LONG TimelineID_3 = 3
CONSTANT LONG TimelineID_4 = 4
LONG TimeArray[4] =
{
1000, // 1 second
2000, // 2 seconds
3000, // 3 seconds
4000 // 4 seconds
}
DEFINE_START
TIMELINE_CREATE
(TimelineID_1,TimeArray,LENGTH_ARRAY(TimeArray),TIMELINE_RELATIVE,TIMELINE_REP
EAT)
TIMELINE_CREATE
(TimelineID_2,TimeArray,LENGTH_ARRAY(TimeArray),TIMELINE_RELATIVE,TIMELINE_REP
EAT)
TIMELINE_CREATE
(TimelineID_3,TimeArray,LENGTH_ARRAY(TimeArray),TIMELINE_RELATIVE,TIMELINE_REP
EAT)
TIMELINE_CREATE
(TimelineID_4,TimeArray,LENGTH_ARRAY(TimeArray),TIMELINE_RELATIVE,TIMELINE_REP
EAT)
DEFINE_EVENT
// typical TIMELINE_EVENT statement
TIMELINE_EVENT[TimelineID_1] // capture all events for Timeline 1
{
SEND_STRING 0,"'TL ID = ', itoa(timeline.id),', sequence =
',itoa(timeline.sequence)"
}
// example of "stacked" TIMELINE_EVENT statements
TIMELINE_EVENT[TimelineID_2] // capture all events for Timeline 2
TIMELINE_EVENT[TimelineID_3] // capture all events for Timeline 3
TIMELINE_EVENT[TimelineID_4] // capture all events for Timeline 4
{
SEND_STRING 0,"'TL ID = ', itoa(timeline.id),', sequence =
',itoa(timeline.sequence)"
}
// end
TIMELINE code:
78
NetLinx Programming Language Reference Guide
Page 95

Combining Devices, Levels, and Channels
Combining Devices, Levels, and Channels
The Axcess language supports the concept of combining several panels to make them behave as if they
were one panel, in order to simplify code. This feature allows the combination of functionally identical
devices, such as identically programmed Touch Panels and Softwire Panels. When the program
references one of these devices, all other combined device arrays are also referenced.
In Axcess, device combine operations are done in the
produce mixed results (any time one or more panels are dropped off-line).
The NetLinx language further addresses the issues surrounding combining panels (and their associated
channels and levels), and allows you to combine and un-combine panels on the fly. The primary
difference between the way that the Axcess and NetLinx languages handles combine operations is that
NetLinx utilizes the concept of the virtual device. A virtual device is a device that does not physically
exist but merely represents one or more devices.
If you have combined Devices, Levels and/or Channels, they must be un-combined
before they can be added as part of a new COMBINE function.
DEFINE_COMBINE section of the code, and can
Combining and Un-Combining Devices
To approach setting up combine and un-combine operations in NetLinx, let's first look at the way that
combine operations are done in the Axcess language.
Combining devices
The example below illustrates how an Axcess program combines three touch panels to act as one.
DEFINE_DEVICE
TP1 = 128
TP2 = 129
TP3 = 130
DEFINE_COMBINE
(TP1, TP2, TP3)
DEFINE_PROGRAM
RELEASE[TP1,1]
{
(*Do Something*)
}
The code shown in the Axcess example will not work in NetLinx, due to
incompatibilities between the languages (i.e. Axcess does not allow virtual devices,
which are required for Combine/Uncombine operations in NetLinx).
This combines a common level to each of three devices TP1 , TP2 , and TP3 . If an input change occurs
on any of the three devices, Axcess sees the input as coming only from the first device in the list (
If button
[TP2,12] is pressed, Axcess will see the input coming from [TP1,12] due to the
combination. Likewise, any output change sent to any device in the list will automatically be sent to all
NetLinx Programming Language Reference Guide
TP1).
79
Page 96

Combining Devices, Levels, and Channels
devices in the list. This includes level changes. For example, the statement ON [TP1,5Ø] will turn on
channel 50 for all three devices in the list.
Now let's see how the code example shown above would translate into NetLinx.
DEFINE_COMBINE
DEFINE_DEVICE
VIRTUAL1 = 33000
TP1 = 128
TP2 = 129
TP3 = 130
DEFINE_COMBINE
(VIRTUAL1, TP1, TP2, TP3)
DEFINE_PROGRAM
RELEASE[VIRTUAL1,1]
{
(*Do Something*)
}
Note the use of the virtual device (VIRTUAL1) in the above example. Combine operations in NetLinx
require that the first device in the list (the primary device) must be a virtual device. By specifying a
virtual device as the primary device in a
DEFINE_COMBINE statement, NetLinx code can be written
targeting the virtual device, but effectively operating on each physical device. Furthermore, since a
virtual device is not an actual physical device, the primary device cannot be taken off-line or removed
from the system (which avoids the potential problems that occurred in Axcess).
The virtual device's address number must be in the range of 32768 to 36863.
The example above combines the three touch panel devices:
change occurs on any of the three devices, NetLinx detects the input as coming only from
For example, if button
[TP3, 5] is pressed, NetLinx sees input coming from [VIRTUAL1, 5] as a
TP1, TP2 and TP3. Whenever an input
VIRTUAL1.
result of the combination.
Output changes (including level changes) sent to any device in the list will automatically be sent to all
devices in the list. For instance, the statement:
panels and
OFF [VIRTUAL1, 10] turns off channel 10 on all three panels.
The example below illustrates the use of a device array (
devices (
TP1, TP2, and TP3). Device arrays can further simplify your code and allow you to
ON [VIRTUAL1, 50] turns on channel 50 on all three
Dev[ ]), instead of specifying the individual
dynamically combine/un-combine devices. Any input events for any device in the array will appear to
the program as coming from the virtual device. Output changes, directed to the virtual device or any
device in the array, are sent to all devices in the array. Here's a syntax example:
COMBINE_DEVICES (VIRTUAL1, TP1, TP2, TP3)
In addition to virtual devices and device arrays, the NetLinx language contains several new keywords for
combine and un-combine operations:
COMBINE_DEVICES, UNCOMBINE_DEVICES
COMBINE_LEVELS, UNCOMBINE_LEVELS
COMBINE_CHANNELS, UNCOMBINE_CHANNELS
80
NetLinx Programming Language Reference Guide
Page 97

Combining Devices, Levels, and Channels
Refer to the Combining and Un-Combining Levels section on page 82 for more
information.
Un-combining devices
UNCOMBINE_DEVICES reverses the effect of COMBINE_DEVICES. All combines related to the
specified virtual device are disabled. A syntax example is:
UNCOMBINE_DEVICES (VDC)
Parameters:
VDC The virtual device-channel passed to COMBINE_DEVICES.
COMBINE_DEVICES (VDC, DCSet)
.
.
UNCOMBINE_DEVICES (VDC)
The following NetLinx code example illustrates combining and un-combining the panels from the
previous example:
Input and output changes occurring on non-combined panels will not affect combined
panels, and vice versa.
DEFINE_DEVICE
VIRTUAL1 = 33000
TP1 = 128
TP2 = 129
TP3 = 130
TP4 = 131
DEFINE_PROGRAM
(* Activate dynamic device combine*)
RELEASE[TP4,1]
{
COMBINE_DEVICES(VIRTUAL1, TP1, TP2, TP3)
}
(*Remove dynamic device combine*)
RELEASE[TP4,1]
{
UNCOMBINE_DEVICES(VIRTUAL1)
}
(*Pushes come here when a combine is active*)
NetLinx Programming Language Reference Guide
Continued
81
Page 98

Combining Devices, Levels, and Channels
RELEASE[VIRTUAL1,1]
{
(*Do Something*)
}
(*This will only see pushes when combine is NOT active*)
RELEASE[TP1,1]
{
(*Do Something*)
}
Combining and Un-Combining Levels
To approach setting up level combine and un-combine operations in NetLinx, let's first look at the way
that level combine operations are done in the Axcess language. The example below illustrates how an
Axcess program would combine three Touch Panel levels to act as one.
The code shown in the Axcess example will not work in NetLinx, due to
incompatibilities between the languages (i.e. Axcess does not allow virtual devices,
which are required for Combine/Uncombine operations in NetLinx).
DEFINE_DEVICE
TP1 = 128
TP2 = 129
TP3 = 130
DEFINE_CONNECT_LEVEL
(TP1,1, TP2,1, TP3,1)
TP1, TP2, and TP3 are devices; this example combines Level 1 on each device. If a level change occurs
on any of the three devices, Axcess sees the level coming only from the first device in the list (
TP1).
Likewise, any level change sent to any device in the list will automatically be sent to all devices in the
list.
Now let's see how the code example shown above would translate into NetLinx. This is code that would
function correctly within a NetLinx system, but still uses the Axcess-based.
DEFINE_CONNECT_LEVEL
DEFINE_DEVICE
VIRTUAL1 = 33000
TP1 = 128
TP2 = 129
TP3 = 130
DEFINE_CONNECT_LEVEL
(VIRTUAL1, 1, TP1,1, TP2,1, TP3,1)
82
The example above combines the levels for the three touch panels: TP1, TP2 and TP3. Whenever a level
change occurs on any of the three devices, NetLinx detects the level as coming only from
The example below illustrates the use of a device array (
devices (
TP1, TP2, and TP3). Device arrays further simplify code and allow you to dynamically
Dev[ ]), instead of specifying the individual
VIRTUAL1.
combine/un-combine levels. Any input events for any device in the array will appear to the program as
NetLinx Programming Language Reference Guide
Page 99

Combining Devices, Levels, and Channels
coming from the virtual device. Output changes, directed to the virtual device or any device in the array,
are sent to all devices in the array. The syntax must follow one of these two forms:
DEFINE_CONNECT_LEVEL
(Vdevice1, 1, DEVLEV [ ])
- or -
DEFINE_CONNECT_LEVEL
(VDEVLEV, DEVLEV [ ])
Combining levels
COMBINE_LEVELS connects a single device-level array (DEVLEV[ ]) to a DEVLEV array.
Any element in a
and output to any element in a
DEVLEV array appears to come from the virtual device-level representing the group,
DEVLEV array is directed to all elements in the group. Here's a syntax
example:
COMBINE_LEVELS (DEVLEV VDLSET, DEVLEV[ ] DLSETS)
Parameters:
VDLSET Virtual device-level. Each element will represent one device-level combine group.
DLSETS Device-level sets containing the device-level pairs to combine. Corresponding ele-
ments in each set are combined with the corresponding element in the virtual devicelevel array.
Un-combining levels
UNCOMBINE_LEVELS undoes the effect of COMBINE_LEVELS. All combines related to the specified
virtual device-level are disabled.
UNCOMBINE_LEVELS (DEVLEV)
Parameters:
VDL The virtual device-level passed to COMBINE_LEVELS.
DEVLEV The device-level passed to COMBINE_LEVELS.
COMBINE_LEVELS(VDL, DLSet)
.
.
UNCOMBINE_LEVELS(VDL)
The NetLinx code example below illustrates how to dynamically combine and un-combine levels.
Input and output changes occurring on non-combined panels will not affect combined
panels, and vice versa.
DEFINE_DEVICE
VIRTUAL1 = 33000
TP1 = 128
TP2 = 129
TP3 = 130
NetLinx Programming Language Reference Guide
Continued
83
Page 100

Combining Devices, Levels, and Channels
TP4 = 131
DEFINE_PROGRAM
(*Activate dynamic level combine*)
RELEASE[TP4,1]
{
COMBINE_LEVELS(VIRTUAL1,1,TP1,1,TP2,1,TP3,1)
}
(*Remove dynamic level combine*)
RELEASE[TP4,1]
{
UNCOMBINE_LEVELS(VIRTUAL1,1)
}
Combining and Un-combining Channels
Combining channels
COMBINE_CHANNELS connects a single virtual device-channel to one or more channels on another
device (or devices).
Stated another way,
one or more
Any element in a
representing the group, and output to the virtual device-channel is directed to all elements in the
DEVCHAN[] set.
COMBINE_CHANNELS (DEVCHAN VDC, DEVCHAN[ ] DCSets)
Parameters:
When using COMBINE_XXXX and UNCOMBINE_XXXX functions dynamically
based upon a button event, the combining and combining must be done on the
release of the button (the active event must be complete before a COMBINE_XXXX
or UNCOMBINE_XXXX function is invoked).
DEVCHANs or [DEV,CHAN] pairs.
DEVCHAN[ ] set combined appears to come from the virtual device-channel
COMBINE_CHANNELS combines a single virtual DEVCHAN or [DEV,CHAN] pair to
84
VDC Virtual device-channel that represents one device-channel combine group.
DCSets Device-channel array containing the device-channel pairs to combine. The VDC is
combined with each element in the device-channel array.
Un-combining channels
UNCOMBINE_CHANNELS reverses the effect of COMBINE_CHANNELS. All combines related to the
specified virtual device-channel are disabled.
UNCOMBINE_CHANNELS (DEVCHAN VDC)
Parameters:
VDC The virtual device-channel passed to COMBINE_CHANNELS.
.
UNCOMBINE_CHANNELS (VDC)
NetLinx Programming Language Reference Guide
 Loading...