

Amtrol EXTROL 400 LBC, EXTROL 200 LBC, EXTROL 300 LBC, EXTROL 600 LBC, EXTROL 130 LBC User Manual
...Page 1
INSTALLATION, OPERATION & SERVICE INSTRUCTIONS
EXTROL® LBC SERIES
1400 Division Road, West Warwick, RI 02893 T: 401.884.6300 F: 401.885.2567 www.amtrol.com
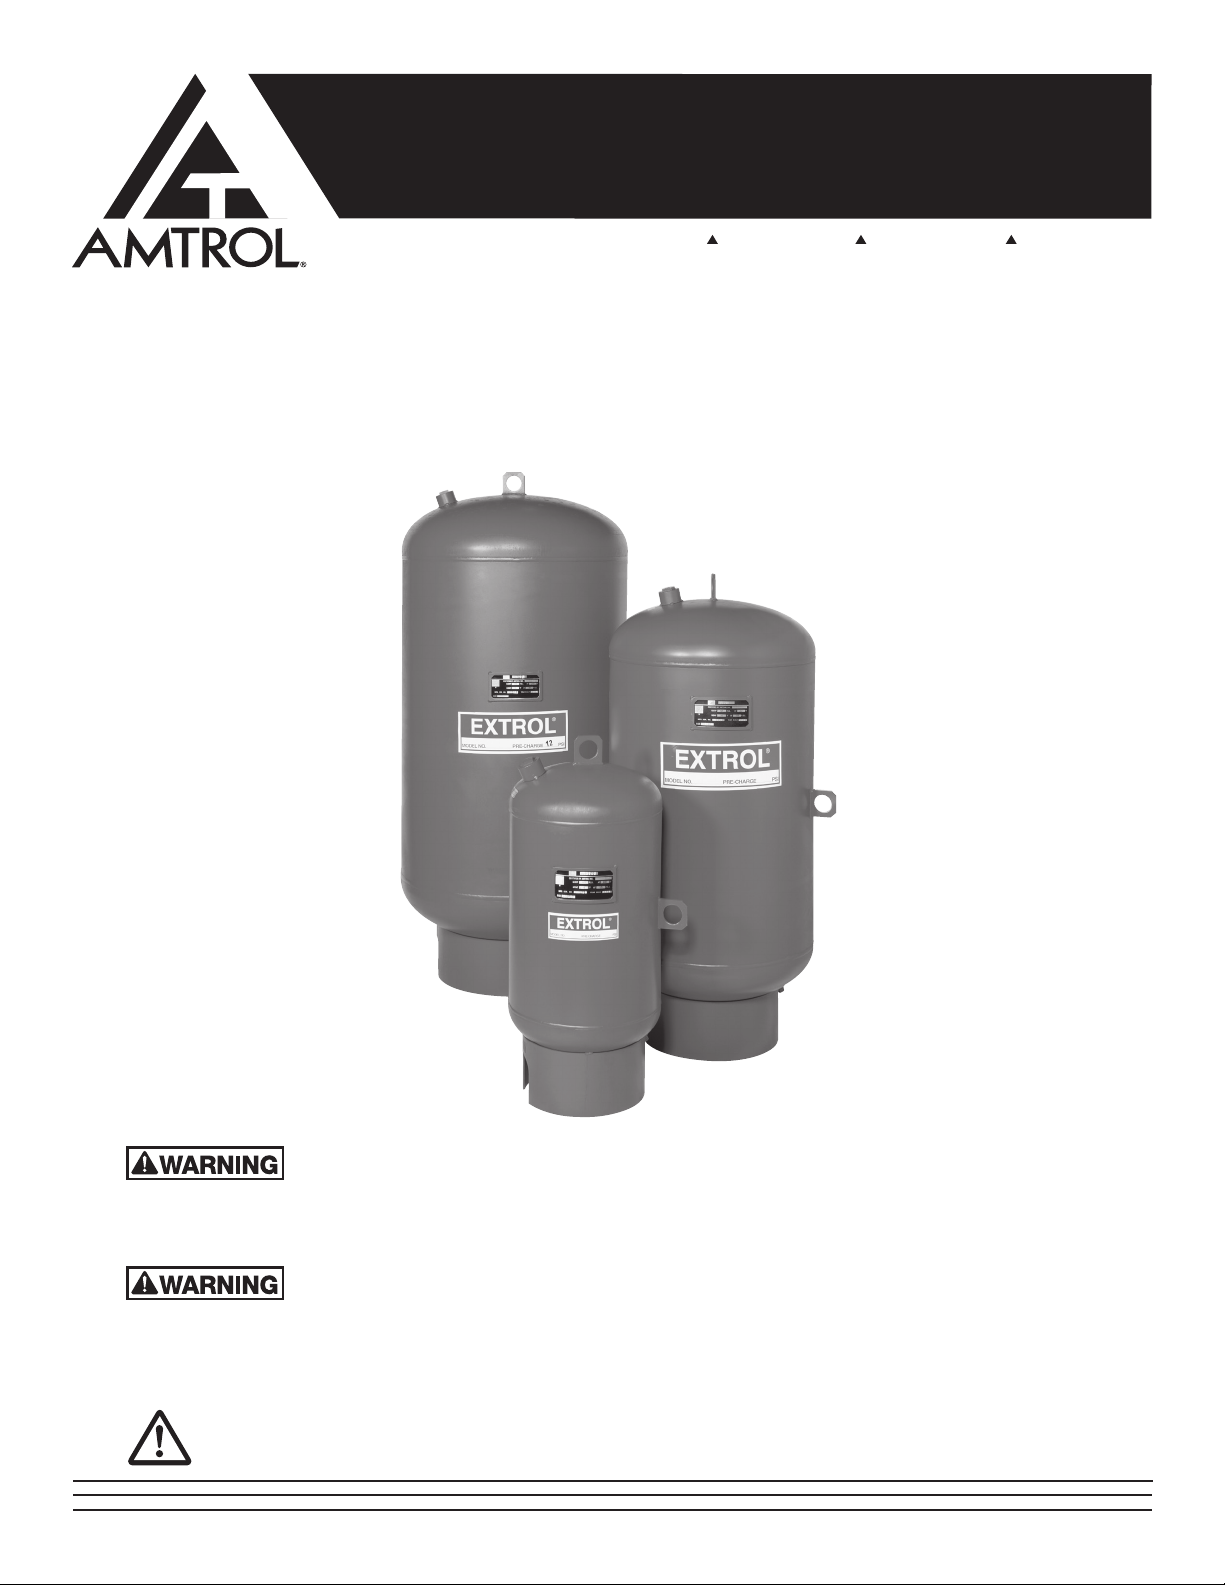
LBC Series Bottom Connection Bladder Series
Pressurized Expansion Tanks (ASME)
FOR MODELS:
35 LBC
50 LBC
85 LBC
100 LBC
130 LBC
165 LBC
200 LBC
300 LBC
400 LBC
500 LBC
600 LBC
READ CAREFULLY THE PRODUCT INSTALLATION, OPERATING AND MAINTENANCE MANUAL. FAILURE TO
FOLLOW THE INSTRUCTIONS AND WARNINGS IN THE MANUAL MAY RESULT IN SERIOUS OR FATAL INJURY
AND/OR PROPERTY DAMAGE, AND WILL VOID THE PRODUCT WARRANTY. THIS PRODUCT MUST BE INSTALLED BY A QUALIFIED
PROFESSIONAL. FOLLOW ALL APPLICABLE LOCAL AND STATE CODES AND REGULATIONS, IN THE ABSENCE OF SUCH CODES,
FOLLOW THE CURRENT EDITIONS OF THE NATIONAL PLUMBING CODE AND NATIONAL ELECTRIC CODE, AS APPLICABLE.
EXPLOSION OR RUPTURE HAZARD A relief valve must be installed to prevent pressure in excess of local code
requirement or maximum working pressure designated in the Product Manual, whichever is less. Do not expose
Product to freezing temperatures or temperatures in excess of 240° F. Do not adjust the pre-charge or re-pressure this Product except
for any adjustments required at the time of initial installation, especially if Product corroded, damaged or with diminished integrity.
Adjustments to pre-charge must be done at ambient temperature only. Failure to properly size the Product or follow these instructions
may result in excessive strain on the system lead to Product failure, serious or fatal personal injury, leakage and/or property damage.
THIS IS THE SAFETY ALERT SYMBOL. IT IS USED TO ALERT YOU TO POTENTIAL PERSONAL INJURY AND OTHER
HAZARDS. OBEY ALL SAFETY MESSAGES THAT FOLLOW THIS SYMBOL TO REDUCE THE RISK OF PERSONAL INJURY
AS WELL AS PROPERTY DAMAGE.
Part #9017-095 (04/11)
Page 2
PLEASE READ THE FOLLOWING INSTRUCTIONS CAREFULLY
POTABLE WATER AND RADIANT HEATING
WARNING. THIS PRODUCT MUST NOT BE
USED IN RADIANT HEATING, POTABLE WATER OR OPEN SYSTEMS
OF ANY KIND. THESE SYSTEMS CONTAIN OXYGENATED WATER
WHICH WILL CAUSE INTERNAL CORROSION AND PREMATURE
PRODUCT FAILURE. USE A THERM-X-TROL® FOR POTABLE
WATER SYSTEMS AND A RADIANT EXTROL™ FOR RADIANT
HEATING SYSTEMS. MOUNT VERTICALLY ONLY. DO NOT INSTALL
ON DEAD-END PIPE.
NOTE: INSPECT FOR SHIPPING DAMAGE AND NOTIFY FREIGHT
CARRIER OR STORE WHERE PURCHASED IMMEDIATELY IF
DAMAGE IS PRESENT. TO AVOID RISK OF PERSONAL INJURY
AND PROPERTY DAMAGE, IF THE PRODUCT APPEARS TO BE
MALFUNCTIONING OR SHOWS SIGNS OF CORROSION, CALL A
QUALIFIED PROFESSIONAL IMMEDIATELY. CURRENT COPIES OF
THE PRODUCT MANUAL CAN BE VIEWED AT WWW.AMTROL.COM.
USE PROPER SAFETY EQUIPMENT WHEN INSTALLING.
FAILURE TO PROPERLY SEAL WILL RESULT
IN LOSS OF PRECHARGE CAUSING PRODUCT
TO FAIL.
GENERAL SAFETY INFORMATION -
ADDITIONAL SPECIFIC SAFETY ALERTS
APPEAR IN THE FOLLOWING INSTRUCTIONS.
CALIFORNIA PROPOSITION 65 WARNING:
THIS PRODUCT CONTAINS A CHEMICAL
KNOWN BY THE STATE OF CALIFORNIA TO CAUSE CANCER AND
TO CAUSE BIRTH DEFECTS OR OTHER REPRODUCTIVE HARM.
(CALIFORNIA INSTALLER/CONTRACTOR - CALIFORNIA LAW
REQUIRES THAT THIS NOTICE BE GIVEN TO CONSUMER/END USER
OF THIS PRODUCT.) FOR MORE INFORMATION: WWW.AMTROL.
COM/PROP65/HTM.
Location of EXTROL® Expansion Tanks
DO NOT LOCATE THIS PRODUCT WHERE
LEAKING OR FLOODING COULD CAUSE
DAMAGE TO THE SURROUNDING PROPERTY.
The AMTROL® expansion tank may be placed in any convenient position
within the mechanical room (or building). If multiple tanks are installed,
they should all be on the same level.
6. The EXTROL® may now be piped to the system (use the suggested
EXTROL® piping diagrams on the next page).
7. Using the table below, select appropriate pipe size. Connection to
each EXTROL® must have a lock shield gate valve and union to allow
isolation and removal if required. Make up and fill valves, whether
manual or automatic, should be tied into the connecting line. This will
ensure that pump operation will not affect valve operation.
Operational Limits
Maximum Operating Pressure: As stamped on nameplate
Maximum Operating Temperature: 240 °F
Minimum Operating Temperature: 35°F (non-glycol application)
If unit is being installed in a glycol system where minimum temperatures
fall below 35°F, contact the AMTROL technical service department at
(401) 535-1216.
Operating Instructions
1. Check the expansion tank pre-charge before the system is filled with
water. The charge is 12 psig unless noted otherwise on the tank label.
Check to make sure this is the correct pre-charge pressure specified
for the system.
2. If the tank pre-charge pressure needs to be changed on a dry system
follow the following procedure:
a. Check the expansion tank air pressures at the pre-charge
connection with an accurate tire type pressure gauge. The
pre-charge connection is the same kind of connection found on
automobile tires.
b. If the pressure is low, charge the tank with nitrogen gas or with
oil free compressed air. Check the pressure frequently during this
process as you would when filling a tire with air.
DANGER: Excessive pressure can cause tank to explode.
Exercise care when filling a tank with air so the pressure
does not exceed that required or does not exceed the
working pressure of the tank as stamped on the nameplate.
Failure to follow these instructions will result in serious personal
injury or death and property damage.
Point of Connection
Unlike a conventional tank, the EXTROL® sealed air cushion does not
require replenishment so DO NOT connect to an air separator or other air
collection device.
As with any expansion tank, it is recommended that the EXTROL® be
connected to the suction side of the pump. This will prevent the pump
head from becoming subtractive which may result in entry of air and vapor
formation at high points in the system.
By connecting the EXTROL® on the boiler return, displacement of coolest
system water into tank is ensured reducing energy waste.
Low pressure drop components such as air separators and boilers may be
placed between point of connection and pump suction if desired. System
design will dictate the feasibility of this.
Natural convection losses and the entry of air into tanks are eliminated by
connection to the side or underside of main pipe. The piping should be pitched
up and away from the EXTROL® to eliminate any potential air traps.
Installation
THIS PRODUCT MUST BE INSTALLED BY A
QUALIFIED PROFESSIONAL.
1. Note location of system connection, air charge valve and drain
connection on tank.
2. Remove the plug or pipe cap from the system connection.
3. Remove the 1 1/2” NPT plug covering the air charge valve.
4. Before making any connection to the tank, check the tank and air charge
(use an accurate pressure gauge). The air pressure must be equal to
the minimum system pressure at the tank location.
5. After making sure the air charge is correct, replace the 1 1/2” plug over
the air valve.
3. If, after the system has been filled with water and operating, it is
found that the expansion tank pre-charge must be changed use the
following procedure:
a. Turn off the heat source and allow the system water to cool to
ambient temperature.
IMPORTANT: Expansion tank cannot be properly
air charged other than at ambient temperature.
b. Close the lock-shield valve in the tank-to-system piping.
c. Open the drain valve to empty the water from the tank.
d. Check the tank air pressure at the pre-charge connection with an
accurate tire type air gauge.
e. Refer to 2b above.
f. Close the drain valve, open the lock-shield valve and turn on the
heat source.
g. Relock the lock-shield valve.
Firing Rate Length of Pipe Connecting
of Boiler Tank to System:
MBTU/H Below 11’ 11’ – 30’ 31’ – 100’
2,000 1/2” 3/4” 1”
4,000 3/4” 1” 1 1/4”
8,000 1” 1 1/4” 1 1/2”
12,000 1 1/4” 1 1/2” 2”
16,000 1 1/4” 2” 2 1/2”
20,000 1 1/2” 2” 2 1/2”
Page 3

SUGGESTED PIPING DIAGRAMS
ALTERNATE PIPING DIAGRAMS
Page 4

AMTROL INC. LIMITED PRODUCT WARRANTY
Products covered: all Products manufactured by AMTROL Inc. (“AMTROL”) .
This warranty cannot be transferred – it is extended only to the original Purchaser or First User of the Product. By accepting and keeping this Product
you agree to all of the warranty terms and limitations of liability described below.
IMPORTANT WARNING – READ CAREFULLY THE INSTALLATION, OPERATING AND MAINTENANCE INSTRUCTIONS MANUAL (“MANUAL”) to
avoid serious personal injury and/or property damage and to ensure safe use and proper care of this product
Who Receives AMTROL’s Product Warranty
All purchasers or first users of the new Product. The Warranty is non-transferable.
What is covered by this Warranty
AMTROL warrants to the purchaser or first user of the new Product that at the time of manufacture, the Product is free from defects in material and
workmanship. Any warranty claim must be made within one (1) year unless another time period is set forth in the Manual, measured from the
time the Product was purchased.
What AMTROL Will Do If You Have a Covered Warranty Claim
In the event of a breach of the foregoing warranty, AMTROL will at its option either make repairs to correct any defect in material or workmanship or
supply and ship either new or used replacement parts or products. AMTROL will not accept any claims for labor or other costs.
What This Warranty Does Not Cover - Exclusions and Limitations
This Warranty does not cover any failure or problem unless it was caused by a defect in material or workmanship. In addition, this Warranty shall not
apply:
• if the Product is not correctly installed, operated, repaired or maintained as described in the Manual provided with the Product;
• to any failure or malfunction resulting from abuse (including freezing); improper or negligent: handling, shipping (by anyone other than AMTROL),
storage, use, operation, accident; or alteration, lightning, flood or any other environmental condition;
• to any failure or problem resulting from the use of the Product for any purpose other than those specified in the accompanying Manual or alteration
of any part of the product;
• this Warranty does not cover labor costs, shipping charges, service charges, delivery expenses, administrative fees or any costs incurred in removing
or reinstalling the Product;
• this Warranty does not cover any claims submitted to AMTROL or an AMTROL-authorized distributor or retailer more than 30 days after expiration
of the applicable warranty time period described in this Warranty;
• this Warranty also does not cover repair or replacement costs not authorized in advance by AMTROL.
Additional Warranty Limitations
ALL IMPLIED WARRANTIES, INCLUDING THE IMPLIED WARRANTIES OF MERCHANTABILITY AND FITNESS FOR A PARTICULAR
PURPOSE ARE SPECIFICALLY DISCLAIMED.
Limitations of Remedies
THE REMEDIES CONTAINED IN THIS WARRANTY ARE THE PURCHASER’S OR FIRST USER’S EXCLUSIVE REMEDIES. IN NO CIRCUMSTANCES
WILL AMTROL BE LIABLE FOR MORE THAN, AND PURCHASER-FIRST USER’S REMEDIES SHALL NOT EXCEED, THE PRICE PAID FOR THE
PRODUCT. IN NO CASE SHALL AMTROL BE LIABLE FOR ANY SPECIAL, INDIRECT, INCIDENTAL OR CONSEQUENTIAL DAMAGES, WHETHER
RESULTING FROM NON-DELIVERY OR FROM THE USE, MISUSE, OR INABILITY TO USE THE PRODUCT OR FROM DEFECTS IN THE PRODUCT
OR FROM AMTROL’S OWN NEGLIGENCE OR OTHER TORT. This exclusion applies regardless of whether such damages are sought for breach of
warranty, breach of contract, negligence, strict liability, in tort or under any other legal theory. Such damages include, but are not limited to, inconvenience,
loss or damage to property, mold, loss of profits, loss of savings or revenue, loss of use of the Products or any associated equipment, facilities, buildings
or services, downtime, and the claims of third parties including customers.
What To Do If You Have a Problem Covered By This Warranty
Any covered Warranty service must be authorized by AMTROL. Contact the person from whom you purchased the Product, who must
receive authorization from an AMTROL distributor or AMTROL. If you do not receive a prompt response, call AMTROL directly at
877-517-9673. Notice of a Warranty claim should be submitted by the authorized distributor to AMTROL at the following address:
AMTROL Inc., Warranty Claim Dept.
1400 Division Road, West Warwick, RI 02893
Before AMTROL determines to provide any replacement part or Product, it may as a pre-condition to making such a determination require that the
warranty claimant ship the Product, postage prepaid to an authorized AMTROL distributor, or to AMTROL and provide proof of purchase evidenced by
the original sales receipt or Product registration.
Replacement Product Warranty
In case of replacement of a Product or any component part, AMTROL reserves the right to make changes in the design, construction, or material of the
substitute components or products, which shall be subject to all of the terms and limitations of this Warranty, except that the applicable warranty periods
shall be reduced by the amount of time the warranty claimant owned the product prior to submitting notification of the warranty claim.
Revised 01/11
1400 Division Road, West Warwick, RI 02893 T: 401.884.6300 F: 401.885.2567 www.amtrol.com
AMTROL, AMTROL logo and EXTROL are registered trademarks of AMTROL Inc. and afliates
in the U.S. and elsewhere. All rights reserved.
Part #: 9017-095 (04/11)
 Loading...