

Page 1

AMS Machinery Manager
Version 5.7 Software Installation Guide
User Guide
MHM-97402, Rev 24
April 2017
Page 2

Copyright
©
2017 by Emerson. All rights reserved.
No part of this publication may be reproduced, transmitted, transcribed, stored in a retrieval system, or translated into any
language in any form by any means without the written permission of Emerson.
Disclaimer
This manual is provided for informational purposes. EMERSON MAKES NO WARRANTY OF ANY KIND WITH REGARD TO THIS
MATERIAL, INCLUDING, BUT NOT LIMITED TO, THE IMPLIED WARRANTIES OF MERCHANTABILITY AND FITNESS FOR A PARTICULAR
PURPOSE. Emerson shall not be liable for errors, omissions, or inconsistencies that may be contained herein or for incidental or
consequential damages in connection with the furnishing, performance, or use of this material. Information in this document is
subject to change without notice and does not represent a commitment on the part of Emerson. The information in this manual is
not all-inclusive and cannot cover all unique situations.
Trademarks and Servicemarks
See http://www2.emersonprocess.com/siteadmincenter/PM Central Web Documents/marks.pdf
All other marks are property of their respective owners.
Patents
The product(s) described in this manual are covered under existing and pending patents.
Page 3

Contents
Contents
Chapter 1 Getting started ...............................................................................................................1
1.1 Customized installation media .....................................................................................................1
1.2 Where to get help ........................................................................................................................1
1.3 Installation Types .........................................................................................................................2
1.4 Operating Requirements ............................................................................................................. 7
Chapter 2 Standalone installation .................................................................................................. 9
2.1 Install AMS Machinery Manager ................................................................................................... 9
2.2 Launch AMS Machinery Manager ............................................................................................... 12
2.3 Update or repair the installation ................................................................................................ 12
Chapter 3 Network installation .................................................................................................... 15
3.1 Network installation overview ....................................................................................................15
3.2 Install the Network Server ..........................................................................................................16
3.3 Install the AMS Machinery Manager Client ................................................................................. 19
3.4 Launch AMS Machinery Manager Client ..................................................................................... 20
3.5 Install a Secondary Database Server ...........................................................................................21
3.6 Install an Online Server .............................................................................................................. 22
3.7 Install Data Import Server and Data Import Client ...................................................................... 23
3.8 Install Collaboration Tool ........................................................................................................... 25
3.9 Update or install new features on the Network Server ................................................................26
Chapter 4 Additional installations ................................................................................................ 29
4.1 Install Machine History Viewer ................................................................................................... 29
4.2 Install AMS Standalone Data Transfer .........................................................................................33
4.3 Install AMS Machinery Manager ODBC Driver .............................................................................33
4.4 Install AMS Machinery Manager CSI Data Provider ..................................................................... 34
4.5 Install CSI USB drivers .................................................................................................................40
Chapter 5 AMS Machinery Manager services ................................................................................ 41
5.1 Primary server features and services .......................................................................................... 41
5.2 Secondary server features and services ...................................................................................... 41
5.3 Client installation features ......................................................................................................... 42
Chapter 6 Configure network computer communication ..............................................................43
6.1 Configure firewall settings ......................................................................................................... 43
6.2 Service accounts ........................................................................................................................48
Appendices and reference
Appendix A File locations ................................................................................................................ 51
Appendix B Register AMS Machinery Manager ................................................................................ 55
B.1 Register AMS Machinery Manager - Standalone system ............................................................. 55
B.2 Register AMS Machinery Manager - Network system ................................................................. 56
Appendix C Update CSI Machinery Health Monitor firmware ...........................................................59
C.1 Install the firmware on the FTP server ........................................................................................ 59
C.2 Reboot the CSI Machinery Health Monitor ................................................................................. 60
C.3 Check the firmware version in AMS Machinery Manager ............................................................ 60
MHM-97402, Rev 24 i
Page 4

Contents
ii MHM-97402, Rev 24
Page 5

1 Getting started
Topics covered in this chapter:
• Customized installation media
• Where to get help
• Installation Types
• Operating Requirements
Thank you for choosing AMS Machinery Manager. Let's get started!
Your AMS Machinery Manager package includes:
Quick Start Guide
□
Software Installation DVD
□
Manuals DVD
□
Getting started
1.1 Customized installation media
Based on your order, the Software Installation DVD contains the following:
• Standalone (Single User) or Network installation
• AMS Machinery Manager technologies
• Number of licensed users
To add a technology or more licensed users, contact your Emerson Sales Representative.
1.2 Where to get help
AMS Machinery Manager Help
Launch AMS Machinery Manager and select Help from the main menu.
AMS Machinery Manager Manuals DVD
Your AMS Machinery Manager package includes a disc with user manuals in PDF format.
Software Registration
Phone: Toll free 888.367.3774, option 2 (U.S. and Canada)
+63.2.702.1111 (Rest of world)
Email: [email protected]
Web: http://www.emersonprocess.com/machineryhealthreg
MHM-97402, Rev 24 1
Page 6

Getting started
Product Support
Emerson provides a variety of ways to reach your Product Support team to get the answers
you need when you need them:
Phone Toll free 800.833.8314 (U.S. and Canada)
+65.6770.8711 (Europe and Middle East)
+63.2.702.1111 (Asia Pacific)
Email [email protected]
Web http://www.emerson.com/en-us/contact-us and select CSI TECHNOLOGIES from the
Automation Solutions drop-down menu.
To search for documentation, visit http://www.emerson.com and select Documents &
Drawings.
To view toll free numbers for specific countries, visit
http://www.emersonprocess.com/technicalsupport.
1.3 Installation Types
There are two main types of AMS Machinery Manager installations:
• Standalone (or Single-user standalone)
• Network (or Single-user network and Multiple-user network).
1.3.1 Standalone installation
A Standalone system allows you to use periodic technology with one computer and CSI
Machinery Health Analyzers. A standalone installation indicates you have a single copy of
AMS Machinery Manager with a single serial number on one computer.
You can install these components:
• AMS Machinery Manager
• AMS Standalone Data Transfer (on a different computer)
• AMS Machinery Manager ODBC Driver
2 MHM-97402, Rev 24
Page 7

Standalone system exampleFigure 1-1:
This example does not attempt to show all supported hardware options.
Getting started
1.3.2 Network installations
A network system allows you to use online technology and periodic technology. AMS
Machinery Manager communicates with a CSI Machinery Health Monitor using a network
connection. A network system is deployed on a local area network (LAN) or a wide area
network (WAN).
You can install these components:
• AMS Machinery Manager
• Online Server
• Secondary Database Server
• Data Import Server
• AMS Machinery Manager Data Import Client
• AMS Standalone Data Transfer (on a different computer)
• AMS Machinery Manager ODBC Driver
• Machine History Viewer
• Collaboration Tool
• CSI Data Provider
MHM-97402, Rev 24 3
Page 8

Getting started
Single-user and multiple-user LAN
A Single-user network indicates you have a Network Server and a Client installed on one
computer and have one serial number. Single-user network allows the Client to be
installed on other computers in the network. However, only one user can log in at a time.
This installation is used for single user customers with an online system.
A Multiple-user network indicates you have a Network Server and a Client installed on a
server-class computer, and the Client installed on other computers in the network.
Multiple users can log in at the same time.
4 MHM-97402, Rev 24
Page 9

Local area network system exampleFigure 1-2:
This example does not attempt to show all supported hardware or configuration options.
Getting started
Note
The CSI 2125-IS Analyzer can only be connected to the network through serial or serial-to-USB connection.
Multiple-user WAN
The WAN system is designed to allow remote AMS Machinery Manager users to load,
dump, and view data over wide area networks, such as private networks, virtual private
networks
(1) Use AMS Standalone Data Transfer
(1)
, or the Internet.
MHM-97402, Rev 24 5
Page 10

Getting started
Wide area network system exampleFigure 1-3:
This example does not attempt to show all supported hardware or configuration options.
Note
The CSI 2125-IS Analyzer can only be connected to the network through serial or serial-to-USB connection.
6 MHM-97402, Rev 24
Page 11

1.4 Operating Requirements
1.4.1 Servers
Minimum requirements
Supported Operating
Systems
Processor/
Memory
Network Ethernet (TCP/IP protocol)
Browser Internet Explorer 7 or later
Screen Resolution XGA (1024 x 768) or better
Requirements for laptops used with CSI 2600 systems
Supported Operating
Systems
Processor/Memory 1.5 GHz or better, 2 GB of RAM or more
Hard drive capacity 250 GB or greater
RS232 One available RS232 interface
Network Ethernet (TCP/IP protocol)
Browser Internet Explorer 7 or later
Screen Resolution XGA (1024 x 768) or better
Portable
Systems
Online
Systems
Windows Server 2016
Server 2012 R2 Datacenter
1.83 GHz Dual Core or better, 2 GB of RAM or more
Server-class 2.33 GHz Dual Core or better, 2 GB of RAM or more
Windows 10 Professional
Windows 7 Enterprise
(1)
, Windows Server 2012 R2 Standard Edition
(1)
(1)
, Windows 7 Professional SP1, Windows 7 Ultimate, and
(1)
, and Windows
Getting started
Additional recommendations
Media DVD drive required for installation
Virtualization System • Citrix XenApp 7.9 (Windows Server 2016)
• Remote Desktop Services (Windows Server 2016 and Windows Server 2012)
• VMSphere 5.5 (Windows Server 2016 and Windows Server 2012)
• VMware ESXi 5.5 (Windows Server 2012)
• Hyper-V (Microsoft System Center 2012 R2 Virtual Machine Manager)
Antivirus • McAfee™ Endpoint Security 10.1
• Norton Security Version 22.7 — Refer to Knowledge Base Article (KBA) NK-1600-0412
for antivirus configuration.
• Symantec™ Endpoint Protection 12.1.6 — Refer to KBA NK-1600-0411 for antivirus
configuration.
(1) Requires Microsoft .NET Framework 3.5 SP1, available from the Microsoft web site. Because AMS Machinery Manager does not require
an Internet connection for installation, Emerson recommends installing .NET Framework 3.5 SP1 before AMS Machinery Manager.
MHM-97402, Rev 24 7
Page 12

Getting started
Important
If you intend to install Machine History Viewer or CSI Data Provider, you must install Internet
Information Services before installing AMS Machinery Manager. The AMS Machinery Manager
installation makes important changes to the IIS setup that you would otherwise have to configure
manually with the assistance of Product Support.
1.4.2 Workstations
Minimum requirements
Supported Operating
Systems
Processor/Memory 1.5 GHz or better, 2 GB of RAM or more
Network Ethernet (TCP/IP protocol)
Browser Internet Explorer 7 or later
Screen Resolution XGA (1024 x 768) or better
Communication requirements
RS232 For communication with the Spectro 5200 Trivector™ Analyzer, a PC must have an RS232
USB A USB 2.0 port is required for communications with a CSI 2140 Machinery Health Analyzer.
Windows 10 Professional
Windows 7 Enterprise
serial port, or use a serial-to-USB cable.
A USB 2.0 port is required for communications with a WDA Image Capture Kit.
(1)
, Windows 7 Professional SP1, Windows 7 Ultimate, and
Additional recommendations
Media DVD drive required for installation
Antivirus • McAfee™ Endpoint Security 10.1
• Norton Security Version 22.7 — Refer to Knowledge Base Article (KBA) NK-1600-0412
for antivirus configuration.
• Symantec™ Endpoint Protection 12.1.6 — Refer to KBA NK-1600-0411 for antivirus
configuration.
(1) Requires Microsoft .NET Framework 3.5 SP1, available from the Microsoft web site. Because AMS Machinery Manager does not require
an Internet connection for installation, Emerson recommends installing .NET Framework 3.5 SP1 before AMS Machinery Manager.
8 MHM-97402, Rev 24
Page 13

2 Standalone installation
Topics covered in this chapter:
• Install AMS Machinery Manager
• Launch AMS Machinery Manager
• Update or repair the installation
2.1 Install AMS Machinery Manager
Prerequisites
Verify the client computer meets the operating requirements for a workstation.
If you are upgrading your software, back up your database before completing the software
update. Your databases require reindexing to work with the new software. If you need to
reinstall the previous version of software, be aware that any database you open with the
new software will be reindexed and will no longer work with any previous version.
Standalone installation
Procedure
1. Log on to the computer as a user with administrator rights.
2. Insert the AMS Machinery Manager Software Installation DVD and open it in
Windows Explorer.
3. Run RBMsetup.exe.
Important
On Windows 7, right-click RBMsetup.exe and select Run as administrator. Click Cancel if the
installation launches automatically when you insert the DVD. You must run the installation
manually.
4. If a prompt to install Microsoft .NET Framework 4.0 appears, choose to install this
software and allow the system to reboot, (if required).
The AMS Machinery Manager installation begins automatically after reboot.
5. Accept the license agreement and click Next.
6. At the ATTENTION!! dialog, click Yes if you are installing the software for the first
time. If you are upgrading your software, this is a reminder to stop the installation
and back up your database first. Click No to stop the installation.
7. The setup program verifies that your system meets the minimum requirements. If
they are met, the Options page dialog appears. If they are not met, a message
displays more information. Update the computer to meet the requirements or
contact Product Support.
8. (Optional) At the Select Features to Install pane, you can change defaults for your
installation.
MHM-97402, Rev 24 9
Page 14

Standalone installation
Notes
• Use the default settings and directory names unless there is a particular reason to change
them. Using the defaults results in a trouble-free installation and streamlined interaction
with Emerson Product Support, should a problem ever arise.
• If you are updating the software, this screen also displays the message, “The following file
has been found in your Data Directory” followed by file names. You can check the box by
the file to overwrite the file.
• If you are updating your software, some fields may be disabled. If you want to update your
software and move to a different computer, contact Emerson Product Support.
9. Click Install to start the installation.
The Installing Components screen displays and shows the status of the installation.
Note
Once the install is underway, there will be a point where the Cancel button is disabled. Do not
try to end the install if the Cancel button is disabled. If the install aborts after this point, you
may need to contact Emerson Product Support.
10. If you are using Windows Firewall, grant access to programs published by Emerson
Process Management when prompted.
11. Continue through the installation steps and follow prompts.
12. When the Serial dialog appears, click Register Product to register the software now, or
click Close to skip registration.
10 MHM-97402, Rev 24
Page 15

Standalone installation
Note
To register later, open Windows Explorer, go to C:\RBMsuite\sys and double-click
Serial.exe.
a. In the Serial dialog, click Register Product.
The Register Product dialog appears. You need the Serial No. and Request No.
during registration.
b. Contact Product Support to register.
Phone: Toll free 888.367.3774, option 2 (U.S. and Canada)
+63.2.702.1111 (Rest of world)
Email: [email protected]
Web: http://www.emersonprocess.com/machineryhealthreg
c. Enter the Response code given to you by a Product Support representative.
d. Click OK.
e. In the Serial dialog, verify the Status is "Registered."
f. Click Close.
Your software is registered.
The installation automatically continues.
13. Click Finish to complete the installation.
If the computer requires a reboot, Restart Now is selected on the Finish page. Allow
the system to reboot before attempting to run the software.
MHM-97402, Rev 24 11
Page 16

Standalone installation
2.2 Launch AMS Machinery Manager
Now that you have installed and registered AMS Machinery Manager, you are ready to
launch AMS Machinery Manager.
Procedure
1. Go to Start > Programs (All Programs) > AMS Machinery Manager.
2. Select AMS Machinery Manager.
3. Log in when prompted.
a. Initially, Administrator is the default user. Leave the password blank and click OK.
b. If you use a different user, enter the username and password and click OK.
See the Administration topics in AMS Machinery Manager Help to set the
Administrator password and create a new user.
2.3 Update or repair the installation
Note
You must register the software when you update the software.
Prerequisites
Close all AMS Machinery Manager programs.
Stop AMS Machinery Manager services.
Procedure
1. Insert the AMS Machinery Manager Software Installation DVD and open it in
Windows Explorer.
2. Run RBMsetup.exe.
Important
On Windows 7, right-click RBMsetup.exe and select Run as administrator. Click Cancel if the
installation launches automatically when you insert the DVD. You must run the installation
manually.
3. At the startup screen choose Add/Update or Repair and click Next.
4. At the Options pane, choose the features to install or leave the defaults selected for
an update.
5. In the list labeled The following files have been found in your Data Directory, check the box
by a file to replace the file on your computer with the file from the installation.
6. Click Install to start the installation.
12 MHM-97402, Rev 24
Page 17

Standalone installation
The Installing Components screen displays the status of the installation.
Note
Once the install is underway, there will be a point where the Cancel button is disabled. Do not
try to end the install if the Cancel button is disabled. If the install aborts after this point, you
may need to contact Emerson Product Support.
7. Continue through the installation steps and follow prompts.
8. Click Finish to complete the installation.
If the computer requires a reboot, Restart Now is selected on the Finish page. Allow
the system to reboot before attempting to run the software.
MHM-97402, Rev 24 13
Page 18

Standalone installation
14 MHM-97402, Rev 24
Page 19

3 Network installation
Topics covered in this chapter:
• Network installation overview
• Install the Network Server
• Install the AMS Machinery Manager Client
• Launch AMS Machinery Manager Client
• Install a Secondary Database Server
• Install an Online Server
• Install Data Import Server and Data Import Client
• Install Collaboration Tool
• Update or install new features on the Network Server
Network installation
3.1 Network installation overview
Important
• If you intend to install Machine History Viewer or CSI Data Provider, you must install Internet
Information Services before installing AMS Machinery Manager. The AMS Machinery Manager
installation makes important changes to the IIS setup that you would otherwise have to
configure manually with the assistance of Product Support.
• If you are upgrading your software, back up your database before completing the software
update. Your databases require reindexing to work with the new software. If you need to
reinstall the previous version of software, be aware that any database you open with the new
software will be reindexed and will no longer work with any previous version.
Prerequisites
Ensure each computer meets the minimum system operating requirements.
Procedure
1. Install the Network Server on the server first.
2. Install the AMS Machinery Manager Client on a workstation.
3. Install secondary servers and clients on other computers on the network.
You can install Online Server, Secondary Database Server, Data Import Server, Data
Import Client, and AMS Machinery Manager Client on other computers in the
network.
Postrequisites
• Configure service accounts and firewall settings for each computer, if necessary.
Refer to Chapter 6 for more information.
MHM-97402, Rev 24 15
Page 20

Network installation
• Network installations require further configuration for each CSI Machinery Health
Monitor.
For more information, open Help in AMS Machinery Manager and choose
Administration > Online Server.
3.2 Install the Network Server
The Network Server installation procedure installs and configures the programs and
services required for the primary server. You can choose to install additional features.
The installation creates a shared folder from which you install the Client or other licensed
components on other machines on this network. By default, the folder is C:\RBMnet\ and is
shared as \\Servername\RBMnet where Servername is the network computer name.
Prerequisites
Ensure the computer meets the minimum system operating requirements.
If you are upgrading your software, back up your database before completing the software
update. Your databases require reindexing to work with the new software. If you need to
reinstall the previous version of software, be aware that any database you open with the
new software will be reindexed and will no longer work with any previous version.
To install AMS Machinery Manager on a drive other than C, create a shared folder named
RBMnet on the drive where you want to install the software, prior to starting the
installation. After installation is complete, an administrator may need to modify the shared
folder's security permissions to allow access from other computers.
Important
If you intend to install Machine History Viewer or CSI Data Provider, you must install Internet
Information Services before installing AMS Machinery Manager. The AMS Machinery Manager
installation makes important changes to the IIS setup that you would otherwise have to configure
manually with the assistance of Product Support.
Procedure
1. Log on to the computer as a user with administrator rights.
2. Insert the AMS Machinery Manager Software Installation DVD and open it in
Windows Explorer.
3. Run RBMsetup.exe.
Important
On Windows 7, right-click RBMsetup.exe and select Run as administrator. Click Cancel if the
installation launches automatically when you insert the DVD. You must run the installation
manually.
4. Accept the license agreement and click Next.
16 MHM-97402, Rev 24
Page 21

Network installation
5. If a prompt to install Microsoft .NET Framework 4.0 appears, choose to install this
software and allow the system to reboot, (if required).
The AMS Machinery Manager installation begins automatically after reboot.
6. At the ATTENTION!! dialog, click Yes if you are installing the software for the first
time. If you are upgrading your software, this is a reminder to stop the installation
and back up your database first. Click No to stop the installation.
7. The setup program verifies that your system meets the minimum requirements. If
they are met, the Options page dialog appears. If they are not met, a message
displays more information. Update the computer to meet the requirements or
contact Product Support.
8. At the Options page dialog, make changes to the Select Features to Install list, if
desired.
Network Server and Client are checked as the preferred defaults. You can select
other features, if available. Refer to corresponding sections for more information
about additional features.
• Database Server, Section 3.5
• Online Server, Section 3.6
• Data Import Server, Section 3.7
• Data Import Client, Section 3.7
Notes
• Use the default settings and directory names unless there is a particular reason to change
them. Using the defaults results in a trouble-free installation and streamlined interaction
with Emerson Product Support, should a problem ever arise.
• If you are updating the software, this screen also displays the message, “The following file
has been found in your Data Directory” followed by file names. You can check the box by
the file to overwrite the file.
MHM-97402, Rev 24 17
Page 22
Network installation
• If you are updating your software, some fields may be disabled. If you want to update your
software and move to a different computer, contact Emerson Product Support.
Follow these steps if you need to change the default locations:
a. If you need to change the installation directory, select Network Server in the
features list and open the Destination Location tab.
Browse to the location. The Destination Folder is in Universal Naming Convention
(UNC) format. A red error icon flashes if the path is invalid.
b. If you need to change where your data is stored, select Network Server in the
features list and open the Data Location tab.
Browse to the location. The path is in Universal Naming Convention (UNC)
format. A red error icon flashes if the path is invalid.
9. Click Install to start the installation.
The Installing Components screen displays the status of the installation.
Note
Once the install is underway, there will be a point where the Cancel button is disabled. Do not
try to end the install if the Cancel button is disabled. If the install aborts after this point, you
may need to contact Emerson Product Support.
10. If you are using Windows Firewall, grant access to programs published by Emerson
Process Management when prompted.
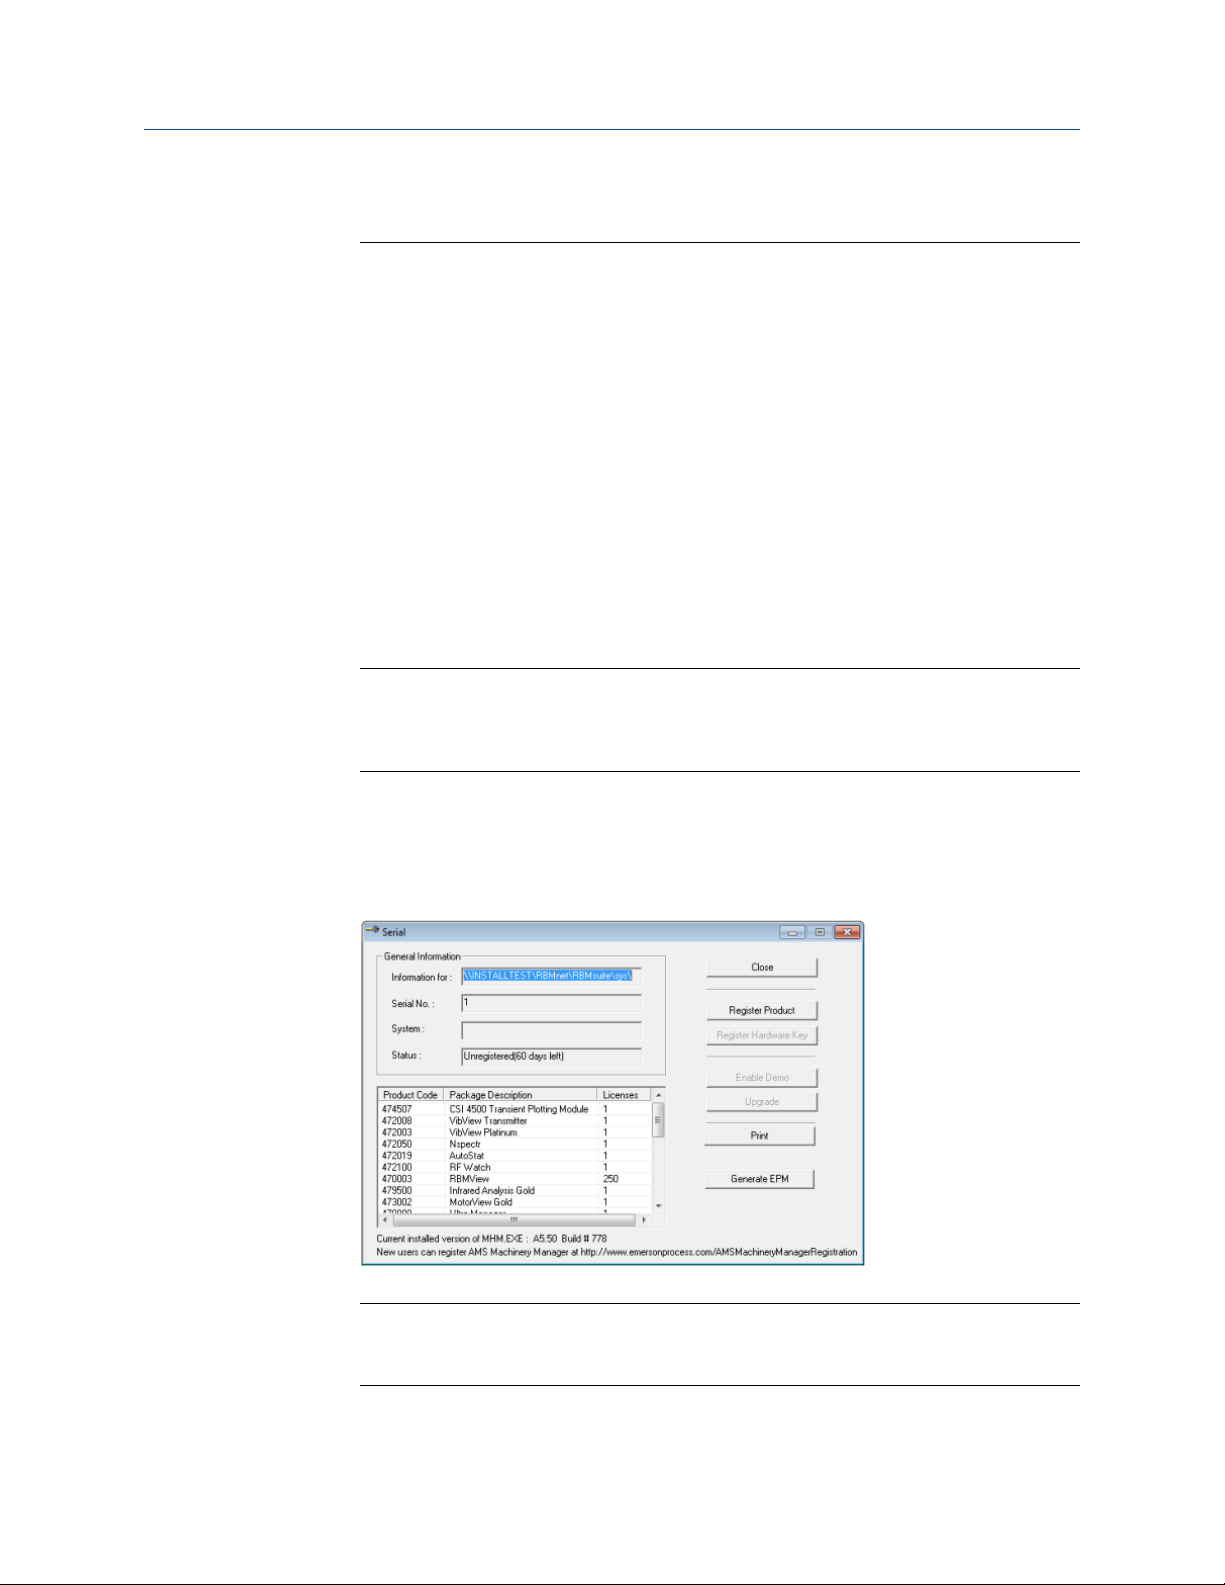
11. When the Serial dialog appears, click Register Product to register the software now, or
click Close to skip registration.
Note
To register later, on the Network Server, go to C:\RBMnet\RBMsuite\sys and double-click
Serial.exe.
a. In the Serial dialog, click Register Product.
18 MHM-97402, Rev 24
Page 23

Network installation
The Register Product dialog appears. You need the Serial No. and Request No.
during registration.
b. Contact Product Support to register.
Phone: Toll free 888.367.3774, option 2 (U.S. and Canada)
+63.2.702.1111 (Rest of world)
Email: [email protected]
Web: http://www.emersonprocess.com/machineryhealthreg
c. Enter the Response code given to you by a Product Support representative.
The code is only valid for your computer.
d. Click OK.
e. In the Serial dialog, verify the Status is "Registered."
f. Click Close.
Your software is registered.
The installation automatically continues, installing the Client and any other selected
features.
12. Continue through the installation steps and follow prompts.
13. Click Finish to complete the installation.
If the computer requires a reboot, Restart Now is selected on the Finish page. Allow
the system to reboot before attempting to run the software.
Postrequisites
Install AMS Machinery Manager Client on a workstation.
3.3 Install the AMS Machinery Manager Client
Run the AMS Machinery Manager installation program (RBMsetup.exe) on a computer in
the AMS Machinery Manager network. Choose the Client option.
Prerequisites
• Install the AMS Machinery Manager Network Server on the server first.
• Verify the client computer meets the operating requirements for a workstation.
• Verify the workgroup or domain settings match on the Network Server computer
and Database Server computer.
Procedure
1. Log on to the computer as a user with administrator rights.
2. Browse to the shared folder on the Network Server. For example, \\Servername
\RBMnet, where Servername is the computer's name.
MHM-97402, Rev 24 19
Page 24

Network installation
Important
Do NOT use a mapped drive path.
3. Run RBMsetup.exe.
Important
On Windows 7, right-click RBMsetup.exe and select Run as administrator. Click Cancel if the
installation launches automatically when you insert the DVD. You must run the installation
manually.
4. At the Options page dialog, make changes to the Select Features to Install list, if
desired.
You can install certain additional features on other computers in the AMS Machinery
Manager network. The Network Server option is disabled here since only one
network server is allowed on an AMS Machinery Manager network.
The Client is selected and default locations are set. If desired, select the Shortcuts tab
and select Add shortcuts to desktop
5. Click Install to start the installation.
The Installing Components screen displays the status of the installation.
Note
Once the install is underway, there will be a point where the Cancel button is disabled. Do not
try to end the install if the Cancel button is disabled. If the install aborts after this point, you
may need to contact Emerson Product Support.
6. Continue through the installation steps and follow prompts.
7. Click Finish to complete the installation.
If the computer requires a reboot, Restart Now is selected on the Finish page. Allow
the system to reboot before attempting to run the software.
3.4 Launch AMS Machinery Manager Client
Now that you have installed and registered AMS Machinery Manager, you are ready to
launch the AMS Machinery Manager Client.
Procedure
1. Go to Start > Programs (All Programs) > AMS Machinery Manager.
2. Select AMS Machinery Manager Client.
3. Log in when prompted.
a. Initially, Administrator is the default user. Leave the password blank and click OK.
b. If you use a different user, type in the username and password and click OK.
20 MHM-97402, Rev 24
Page 25

See the Administration topics in AMS Machinery Manager Help to set the
Administrator password and create a new user.
3.5 Install a Secondary Database Server
Prerequisites
• Install the AMS Machinery Manager Network Server on the server first.
• Verify the workgroup or domain settings match on the Network Server computer
and Database Server computer.
Procedure
1. Log on to the computer as a user with administrator rights.
2. Browse to the shared folder on the Network Server. For example, \\Servername
\RBMnet, where Servername is the computer's name.
Important
Do NOT use a mapped drive path.
Network installation
3. Run RBMsetup.exe.
Important
On Windows 7, right-click RBMsetup.exe and select Run as administrator. Click Cancel if the
installation launches automatically when you insert the DVD. You must run the installation
manually.
4. Follow instructions presented by the installation program.
5. Accept the license agreement and click Next.
6. At the ATTENTION!! dialog, click Yes if you are installing the software for the first
time. If you are upgrading your software, this is a reminder to stop the installation
and back up your database first. Click No to stop the installation.
7. At the Options page dialog, make changes to the Select Features to Install list, if
desired.
You can install certain additional features on other computers in the AMS Machinery
Manager network. The Network Server option is disabled here since only one
network server is allowed on an AMS Machinery Manager network.
• To install a Secondary Database server, select Database Server.
• (Optional) To install the Client, select Client.
• Uncheck features you do not want to install on this computer.
You can change the default destination location and configuration location on your
database server. These tabs are disabled for updates.
8. Click Install to start the installation.
MHM-97402, Rev 24 21
Page 26

Network installation
The Installing Components screen displays the status of the installation.
Note
Once the install is underway, there will be a point where the Cancel button is disabled. Do not
try to end the install if the Cancel button is disabled. If the install aborts after this point, you
may need to contact Emerson Product Support.
9. Continue through the installation steps and follow prompts.
10. Click Finish to complete the installation.
If the computer requires a reboot, Restart Now is selected on the Finish page. Allow
the system to reboot before attempting to run the software.
The secondary database server can be accessed through the Network Server. The files are
installed in C:\RBMDBSRV by default.
Postrequisites
• In Windows Explorer, browse to C:\RBMDBSRV and create new folder named CustData.
Share the CustData folder so it is available on the AMS Machinery Manager network.
• Add the database server in RBM Network Administration. Refer to the Administration
topics in AMS Machinery Manager Help for more information.
3.6 Install an Online Server
Note
Unless otherwise specified, a CSI Machinery Health Monitor is pre-configured with a database
created according to customer specifications. The Online Server has been set up during
commissioning.
You can install additional Online Servers and commission additional CSI Machinery Health
Monitors on your AMS Machinery Manager network. If you install an additional Online
Server, select Database Server as well.
Prerequisites
• Install the AMS Machinery Manager Network Server on the server first.
• Verify the workgroup or domain settings match on the Network Server computer
and Database Server computer.
Procedure
1. Log on to the computer as a user with administrator rights.
2. Browse to the shared folder on the Network Server. For example, \\Servername
\RBMnet, where Servername is the computer's name.
Important
Do NOT use a mapped drive path.
22 MHM-97402, Rev 24
Page 27

Network installation
3. Run RBMsetup.exe.
Important
On Windows 7, right-click RBMsetup.exe and select Run as administrator. Click Cancel if the
installation launches automatically when you insert the DVD. You must run the installation
manually.
4. Follow instructions presented by the installation program.
5. At the AMS Machinery Manager Setup - Options page, select Online Server and
Database Server.
• (Optional) To install the Client, select Client.
• Uncheck features you do not want to install on this computer.
6. Continue through the installation steps and follow prompts.
7. In Windows Services, verify the following services are started.
• CsiO_Server
• CsiMtdbMgr
• CSI_MhmRemote
Postrequisites
• In Windows Explorer, browse to C:\RBMDBSRV and create new folder named CustData.
Share the CustData folder so it is available on the AMS Machinery Manager network.
• Set up the Online Server in RBM Network Administration. Refer to the Administration
topics in AMS Machinery Manager Help for more information.
3.7 Install Data Import Server and Data Import Client
The Data Import Server and Data Import Client are only available if you license the Data
Import functionality (included with network systems). You can install Data Import Server
and Data Import Client together or separately on the Network Server or on other
computers in the AMS Machinery Manager network.
3.7.1 Install Data Import Server or Client on an existing Network Server
Follow instructions to update or install new features on the Network Server. See
Section 3.9. At the Options pane, choose the Data Import Server and/or Data Import Client.
If you choose Data Import Client, AMS Machinery Manager Client is automatically selected.
Data Import Client is required to be installed in the same directory as the AMS Machinery
Manager Client.
MHM-97402, Rev 24 23
Page 28

Network installation
3.7.2 Install Data Import or Client on a Secondary Server or Workstation
Prerequisites
• Ensure the computer meets the minimum system operating requirements.
• Verify the workgroup or domain settings match on the Network Server computer
and Database Server computer.
Procedure
1. Log on to the computer as a user with administrator rights.
2. Browse to the shared folder on the Network Server. For example, \\Servername
\RBMnet, where Servername is the computer's name.
Important
Do NOT use a mapped drive path.
3. Run RBMsetup.exe.
Important
On Windows 7, right-click RBMsetup.exe and select Run as administrator. Click Cancel if the
installation launches automatically when you insert the DVD. You must run the installation
manually.
4. Accept the license agreement and click Next.
5. At the Options pane, choose the Data Import Server and/or Data Import Client.
If you choose Data Import Client, AMS Machinery Manager Client is automatically
selected. Data Import Client is required to be installed in the same directory as the
AMS Machinery Manager Client.
6. Click Install to start the installation.
The Installing Components screen displays the status of the installation.
Note
Once the install is underway, there will be a point where the Cancel button is disabled. Do not
try to end the install if the Cancel button is disabled. If the install aborts after this point, you
may need to contact Emerson Product Support.
7. Click Finish to complete the installation.
If the computer requires a reboot, Restart Now is selected on the Finish page. Allow
the system to reboot before attempting to run the software.
24 MHM-97402, Rev 24
Page 29

Network installation
3.8 Install Collaboration Tool
When Collaboration Tool is installed with AMS Machinery Manager Network Server and
Clients, users logged into the Clients using the same Network Server can communicate
with one another and share multiple types of information with other Collaboration Tool
users.
3.8.1 Install Collaboration Tool on the Network Server
When you install Collaboration Tool on the Network Server the MHM Peer Resolver Service
(MHMPeerResolverService.exe) is installed.
Prerequisites
• Install the AMS Machinery Manager Network Server on the server first.
• Install AMS Machinery Manager Client on the Client computer.
Procedure
1. On the Network Server, use Windows Explorer to browse to the RBMnet folder. For
example, C:\RBMnet.
2. Browse to Install\CollaborationTool.
3. Double-click setup.exe and continue through the installation.
Important
On Windows 7, right click setup.exe and select Run as administrator.
4. Accept the license agreement and click Next.
5. Click Install to start the installation.
The Installing Components screen displays the status of the installation.
Note
Once the install is underway, there will be a point where the Cancel button is disabled. Do not
try to end the install if the Cancel button is disabled. If the install aborts after this point, you
may need to contact Emerson Product Support.
6. Click Finish to complete the installation.
3.8.2 Install Collaboration Tool on the Client
Prerequisites
• Install the AMS Machinery Manager Network Server on the server first.
• Install AMS Machinery Manager Client on the Client computer.
Procedure
1. Log on to the computer as a user with administrator rights.
MHM-97402, Rev 24 25
Page 30

Network installation
2. Browse to the shared folder on the Network Server. For example, \\Servername
\RBMnet, where Servername is the computer's name.
Important
Do NOT use a mapped drive path.
3. Browse to Install\CollaborationTool.
4. Double-click setup.exe and continue through the installation.
Important
On Windows 7, right click setup.exe and select Run as administrator.
5. Accept the license agreement and click Next.
6. Follow instructions presented by the installation program.
3.8.3 Launch Collaboration Tool
1. Launch AMS Machinery Manager Client.
2. From the main menu, select View > Collaboration Tool.
Initially, Collaboration Tool opens on the right side of the AMS Machinery Manager Client
screen.
Refer to Collaboration Tool topics in AMS Machinery Manager Help for more information.
3.9 Update or install new features on the Network Server
When you install the Network Server, you can choose which features to install. You can
install the additional features on the Network Server later, by running the installation
program on the server where you have AMS Machinery Manager installed.
Note
You must register the software when you update the software.
Prerequisites
• Close all AMS Machinery Manager programs.
• Stop AMS Machinery Manager services.
Procedure
1. Log onto the Network Server as a user with administrator rights.
2. Close AMS Machinery Manager and stop any AMS Machinery Manager services.
26 MHM-97402, Rev 24
Page 31

Network installation
3. Browse to the Network Server's installation folder, for example C:\RBMnet.
4. Run RBMsetup.exe.
Important
On Windows 7, right-click RBMsetup.exe and select Run as administrator. Click Cancel if the
installation launches automatically when you insert the DVD. You must run the installation
manually.
5. At the maintenance screen, select Add/Update and click Next.
6. At the Options pane, choose the features to install or leave the defaults selected for
an update.
7. Click Install to start the installation.
The Installing Components screen displays the status of the installation.
Note
Once the install is underway, there will be a point where the Cancel button is disabled. Do not
try to end the install if the Cancel button is disabled. If the install aborts after this point, you
may need to contact Emerson Product Support.
8. Click Finish to complete the installation.
If the computer requires a reboot, Restart Now is selected on the Finish page. Allow
the system to reboot before attempting to run the software.
MHM-97402, Rev 24 27
Page 32

Network installation
28 MHM-97402, Rev 24
Page 33

4 Additional installations
Topics covered in this chapter:
• Install Machine History Viewer
• Install AMS Standalone Data Transfer
• Install AMS Machinery Manager ODBC Driver
• Install AMS Machinery Manager CSI Data Provider
• Install CSI USB drivers
4.1 Install Machine History Viewer
Machine History Viewer works in conjunction with AMS Machinery Manager and other AMS
Suite software programs to allow you to view and analyze the operating history of a
facility’s rotating machinery. Machine History Viewer is a browser-based application that
can be accessed from any network computer.
Additional installations
4.1.1 Install Internet Information Services (IIS)
Install Internet Information Services (IIS) with the following features:
• IIS Management Console
• IIS Application Development Features (World-wide Web Services)
- .NET Extensibility
- ASP
- ASP.NET
- ISAPI Extensions
- ISAPI Filters
- Server-side Includes
Tip
On Windows 7, open Control Panel, select Turn Windows Features On or Off and select the features from
Internet Information Services and World Wide Web Services.
4.1.2 Install Machine History Viewer on the Network Server
Machine History Viewer installation includes the following components:
• Machine History Viewer Web Service
• Machine History Viewer Client User Interface
• Microsoft SQL Server 2014 Express
MHM-97402, Rev 24 29
Page 34

Additional installations
Machine History Viewer can be installed in three configurations:
1. Compact configuration: Install Machine History Viewer on the same server-class
computer as AMS Machinery Manager Network Server and Microsoft SQL Server
2014 Express for a compact configuration.
2. Recommended configuration: Install Network Server on one server-class machine
and install Machine History Viewer and Microsoft SQL Server 2014 Express on a
separate server-class computer.
3. Distributed configuration: Install each required component of Machine History
Viewer on separate server-class computers.
The instructions describe how to install either the compact configuration and
recommended configuration.
Prerequisites
• Install the AMS Machinery Manager Network Server on the server first.
• The Machine History Viewer version must match Network Server.
• Install IIS 5.2 or newer first. (Install IIS before the .NET Framework, available during
installation).
Note
• Microsoft SQL Server 2014 Express is required by and installed with Machine History Viewer.
• Microsoft .NET Framework 4.0 is required by and installed with Machine History Viewer Web
Service, Microsoft SQL Server 2014 Express, and the Machine History Viewer Client User
Interface.
Procedure
1. Insert the AMS Machinery Manager Software Installation DVD and open it in
Windows Explorer.
2. Browse to the Install\MachineHistoryViewer folder.
3. Double-click setup.exe and continue through the installation.
Important
On Windows 7, right click setup.exe and select Run as administrator.
4. Accept the license agreement.
5. The Configuration window displays. Choose the components to install on this
computer and click Next.
• For the compact configuration and the recommended configuration, check both
Web Service and Client UI.
• For the distributed configuration, launch the installation on each computer;
choose only the Web Service feature on one computer, and only the Client UI
feature on the other computer.
6. Click Yes if prompted to install the Microsoft .NET Framework.
30 MHM-97402, Rev 24
Page 35

Additional installations
It may take several minutes to complete the installation. This step applies if
Microsoft .NET Framework is not already installed.
A dialog may display the process of the Microsoft Report Viewer redistributable files
installation.
7. In the Select Computer for SQL Server 2014 Express dialog, choose where to install
the SQL server and click Next.
• For a compact configuration and the recommended configuration, select This
computer (maximizes performance).
• For the distributed configuration, select A separate computer (may degrade
performance). A dialog displays additional instructions for this setup.
Note
If Microsoft SQL Server 2014 Express is already installed, this installation process creates new
instance named “EmersonCSIMM”. If you run the installer again, the Microsoft SQL Server
2014 Express does not need to install additional instances.
8. When prompted, type a password to be used as part of the SQL connection string
and click Next. The SQL server installs automatically.
A summary of the SQL configuration displays. Make a note of this information for
future reference.
Computer Name:
SQL Server Instance Name: EmersonCSIMM
Strong Password:
9. (Distributed configuration only.) If you chose to install the SQL server on a separate
computer, the Database Server Login dialog appears. Provide the information to
connect to the SQL server on the separate computer.
10. Review the Disk Space Requirements for Local and Mapped Drives dialog to
determine where you want to install the selected Machine History Viewer
components. Click OK.
11. In the Choose Destination Location dialog, click Next to accept the default location
(recommended), or click Browse and select a different location for the selected
Machine History Viewer components.
12. When prompted, enter the network name of the computer where the Network
Server is installed.
You must specify the computer name if the installation is not on the same computer
as the Network Server.
13. (Distributed configuration only.) When prompted, enter the network name of the
computer hosting the Machine History Viewer Web Service.
MHM-97402, Rev 24 31
Page 36

Additional installations
Note
You must specify the computer name where the Machine History Viewer Web Service is
installed, if you are installing only the Machine History Viewer Client User Interface.
14. On the Start Copying Files screen, click Next to install the software components
listed.
The Setup Status screen displays a progress bar.
15. When the URL displays, make a note of the address so you can access Machine
History Viewer.
Example: http://Servername/MachineHistory where Servername is the name of the
computer where Machine History Viewer is installed.
Machine History Viewer URL:
Note
If you are unable to log in, follow the instructions in Internet Explorer Help to enable cookies
for this URL.
16. Click Finish to complete the installation.
4.1.3 Launch Machine History Viewer
Prerequisites
• Verify the client computer meets the operating requirements for a workstation.
• Use Internet Explorer 7.0 or newer with cookies enabled for the URL displayed
during installation.
• In RBM Network Administration, create an AMS Machinery Manager username and
password to use with Machine History Viewer.
• In RBM Network Administration, add a database to the user's database list, or allow
the user to access the master database list. If the user does not have a database, no
data will be visible to this user through Machine History Viewer.
Procedure
1. Launch Internet Explorer and enter the URL address you recorded during installation.
2. Log in with a user name and password.
More information about using Machine History Viewer is provided in Online Help available
after you log in.
32 MHM-97402, Rev 24
Page 37

4.2 Install AMS Standalone Data Transfer
AMS Standalone Data Transfer allows you to transfer route files between an analyzer and a
folder on the computer or network. You do not need direct access to an AMS Machinery
Manager client or database. When you receive a route definition file, load it to your
analyzer with AMS Standalone Data Transfer. After you collect data, dump the route using
AMS Standalone Data Transfer and return the route data file.
Note
Only install AMS Standalone Data Transfer on a computer where AMS Machinery Manager is NOT
installed.
Procedure
1. Insert the AMS Machinery Manager Software Installation DVD and open it in
Windows Explorer.
2. Browse to Install/StandaloneDataTransfer.
3. Double-click setup.exe and continue through the installation.
Additional installations
Important
On Windows 7, right click setup.exe and select Run as administrator.
4. Accept the license agreement.
5. Follow instructions presented by the installation program.
Windows Device Driver Installation Wizard prompts you to install the CSI USB
Drivers.
6. Install the CSI USB Drivers.
7. Follow instructions presented by the installation program.
8. At the Windows Security prompt, click Install to install the drivers.
9. Click Finish.
The CSI USB Drivers installation wizard closes.
10. Click Finish.
4.3 Install AMS Machinery Manager ODBC Driver
You can install the AMS Machinery Manager ODBC driver in order to access your
information from third party software such as Microsoft Access™, Crystal Reports™, or
ORACLE®.
Note
This installation is optional and not required by AMS Machinery Manager.
MHM-97402, Rev 24 33
Page 38

Additional installations
Procedure
1. Go to the computer where you want the driver installed.
You can install the driver on any computer where the AMS Machinery Manager
Client is installed.
2. Insert the AMS Machinery Manager Software Installation DVD and open it in
Windows Explorer.
3. Browse to the Install\csiODBC folder.
4. Double-click setup.exe and continue through the installation.
Important
On Windows 7, right click setup.exe and select Run as administrator.
5. Accept the license agreement.
6. When the Choose Destination Location screen appears, use the default location, and
click Next.
7. In the Ready to Install Program screen, click Next to begin the installation.
The Setup Status screen displays the status of the installation.
8. When the Installation Complete screen appears, click Finish.
If the screen displays a message to restart the computer, you must restart the
computer before attempting to use the software.
4.4 Install AMS Machinery Manager CSI Data Provider
The AMS Machinery Manager CSI Data Provider works with AMS Machinery Manager
Network Server to supply information to applications such as AMS Asset Portal and AMS
Suite: Asset Performance Management. AMS Machinery Manager sends Assets, Active
Alerts and Event History. The Alert details are generated from alarms that are set in the
databases, such as the Vibration alarms for Export. Event details are generated from
RBMview when a new problem is created.
Verify you have a version of AMS Machinery Manager that supports your application:
• AMS Machinery Manager version 4.81 or later is required to support AMS Asset
Portal 1.0 or newer.
• AMS Machinery Manager 5.5 or later is required to support AMS Suite: Asset
Performance Management.
4.4.1 Install Internet Information Services (IIS)
Install Internet Information Services (IIS) with the following features:
34 MHM-97402, Rev 24
Page 39

• IIS Management Console
• IIS Application Development Features (World-wide Web Services)
- .NET Extensibility
- ASP
- ASP.NET
- ISAPI Extensions
- ISAPI Filters
- Server-side Includes
Tip
On Windows 7, open Control Panel, select Turn Windows Features On or Off and select the features from
Internet Information Services and World Wide Web Services.
4.4.2 Install CSI Data Provider
Install the CSI Data Provider on the same computer as the AMS Machinery Manager
Network Server or on a different computer with network access to the Network Server.
Additional installations
Prerequisites
An AMS Machinery Manager Client must be installed on the Network Server computer.
The CSI Data Provider version must match the Network Server.
CSI Data Provider requires the Microsoft .NET Framework 4.0, available during the
installation. IIS must be installed before Microsoft .NET Framework 4.0.
Procedure
1. Go to the computer where the AMS Machinery Manager Network Server is installed,
or a computer with network access to the Network Server.
2. Insert the AMS Machinery Manager Software Installation DVD and open it in
Windows Explorer.
3. Browse to Install\CSIDataProvider.
4. Double-click setup.exe and continue through the installation.
Important
On Windows 7, right click setup.exe and select Run as administrator.
5. Accept the license agreement and click Next.
6. Continue through the installation steps and follow prompts.
The installation program checks the minimum system requirements for the
software. If the computer is missing any required software, you will be prompted to
install the necessary software.
7. On the Disk Space Requirements screen, review this information and click OK.
MHM-97402, Rev 24 35
Page 40

Additional installations
8. On the Choose Destination Location page, use the default location and click Next.
9. When prompted, enter the name of the computer running Network Server and click
Next.
The Data Provider must be able to locate the Network Server to function properly.
10. When prompted, install and start the CsiRVWmgr service on the Network Server.
Complete the following steps on the Network Server.
a. On the Network Server, launch the Windows Command Prompt as
Administrator.
Tip
On Windows 7, click Start > Accessories > Command Prompt, right-click Command Prompt and
select Run as Administrator.
b. In the Command Prompt window, type C:\RBMnet\RBMsuite\sys\RVWmgr.exe -i and
press Enter.
Example:
Microsoft Windows [Version 6.1.7601]
Copyright (c) 2009 Microsoft Corporation. All rights
reserved.
C:\Windows\system32>C:\RBMnet\RBMsuite\sys\RVwMgr.exe -i
C:\Windows\system32>
The CsiRVWmgr service is installed as a Windows Service.
c. On the Network Server, launch Windows Services.
d. Right-click the service named CsiRVWmgr and select Properties.
e. In the Properties dialog, choose Automatic from the Startup type menu.
This setting ensures the service restarts automatically if it is ever stopped, such
as after a reboot.
f. Click Start to start the CsiRVWmgr service.
The CsiRVWmgr service is installed and started.
11. Click OK to continue the installation.
12. When the URL displays, make a note of the address.
Example: http://Servername/CSIDataProvider/CSIDataProvider.asmx, where Servername is
the name of the computer where CSI Data Provider is installed.
You will need to use the URL to access the CSIDataProvider web service and register
the AMS Machinery Manager user.
36 MHM-97402, Rev 24
Page 41

CSI Data Provider URLTable 4-1:
CSI Data Provider URL:
13. Click Finish.
4.4.3 Create a user for CSI Data Provider
See Create a new user in AMS Machinery Manager Help for details.
Procedure
1. In RBM Network Administration, create a new user with guest access mode.
Important
Only use this username and password with CSI Data Provider. If these credentials are used by
some other user or application, the CSI Data Provider cannot access the system.
2. In RBM Network Administration, right-click the new user and select Edit User.
3. Click User Database List.
Additional installations
The Database List dialog appears.
4. To add a database, select the database from the System Databases pane and click
Add.
5. Click OK.
4.4.4 Register the user for CSI Data Provider
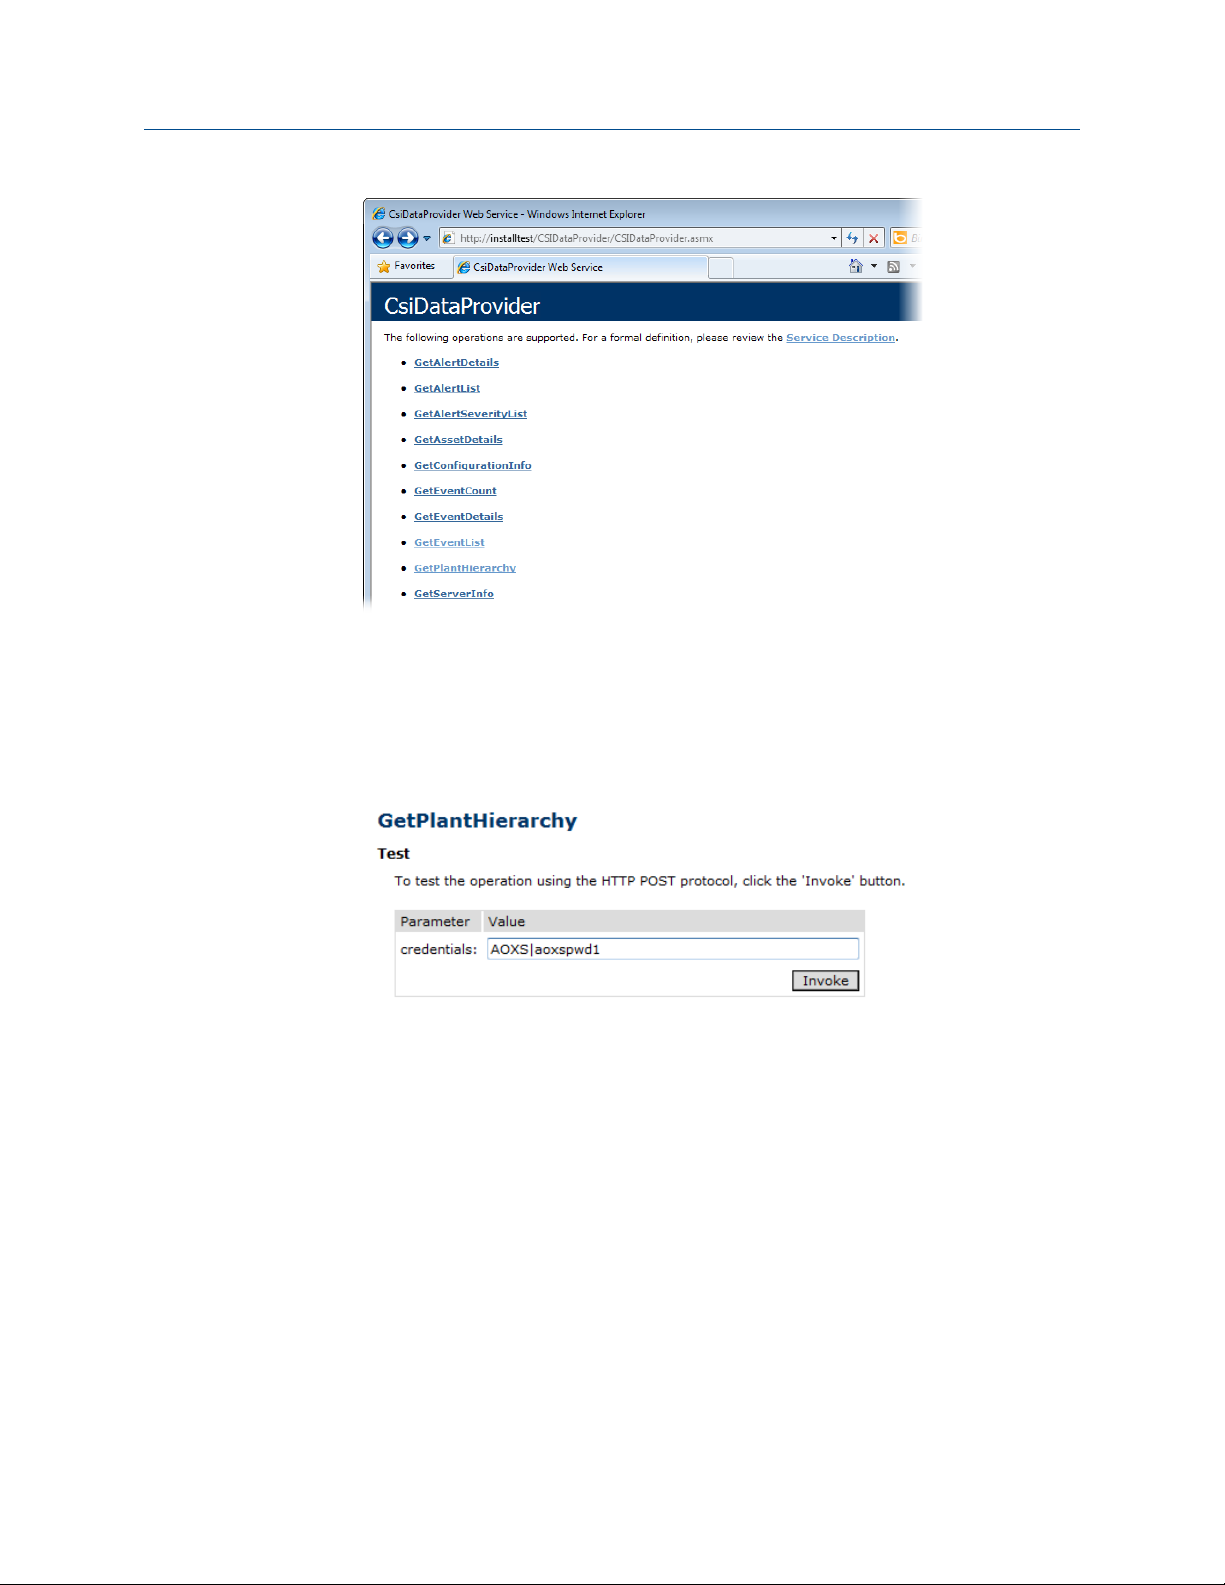
1. Launch Internet Explorer and type the web address displayed during installation.
Example: http://Servername/CSIDataProvider/CSIDataProvider.asmx, where Servername is
the name of the computer where CSI Data Provider is installed.
The CSI Data Provider web interface appears.
MHM-97402, Rev 24 37
Page 42
Additional installations
2. Click the GetPlantHierarchy link.
3. On the GetPlantHiearchy page, enter the AMS Machinery Manager user name and
password in the format: username|password
For example, if “AOXS” is the user name and “aoxspwd1” is the password, enter:
AOXS|aoxspwd1.
4. Click Invoke.
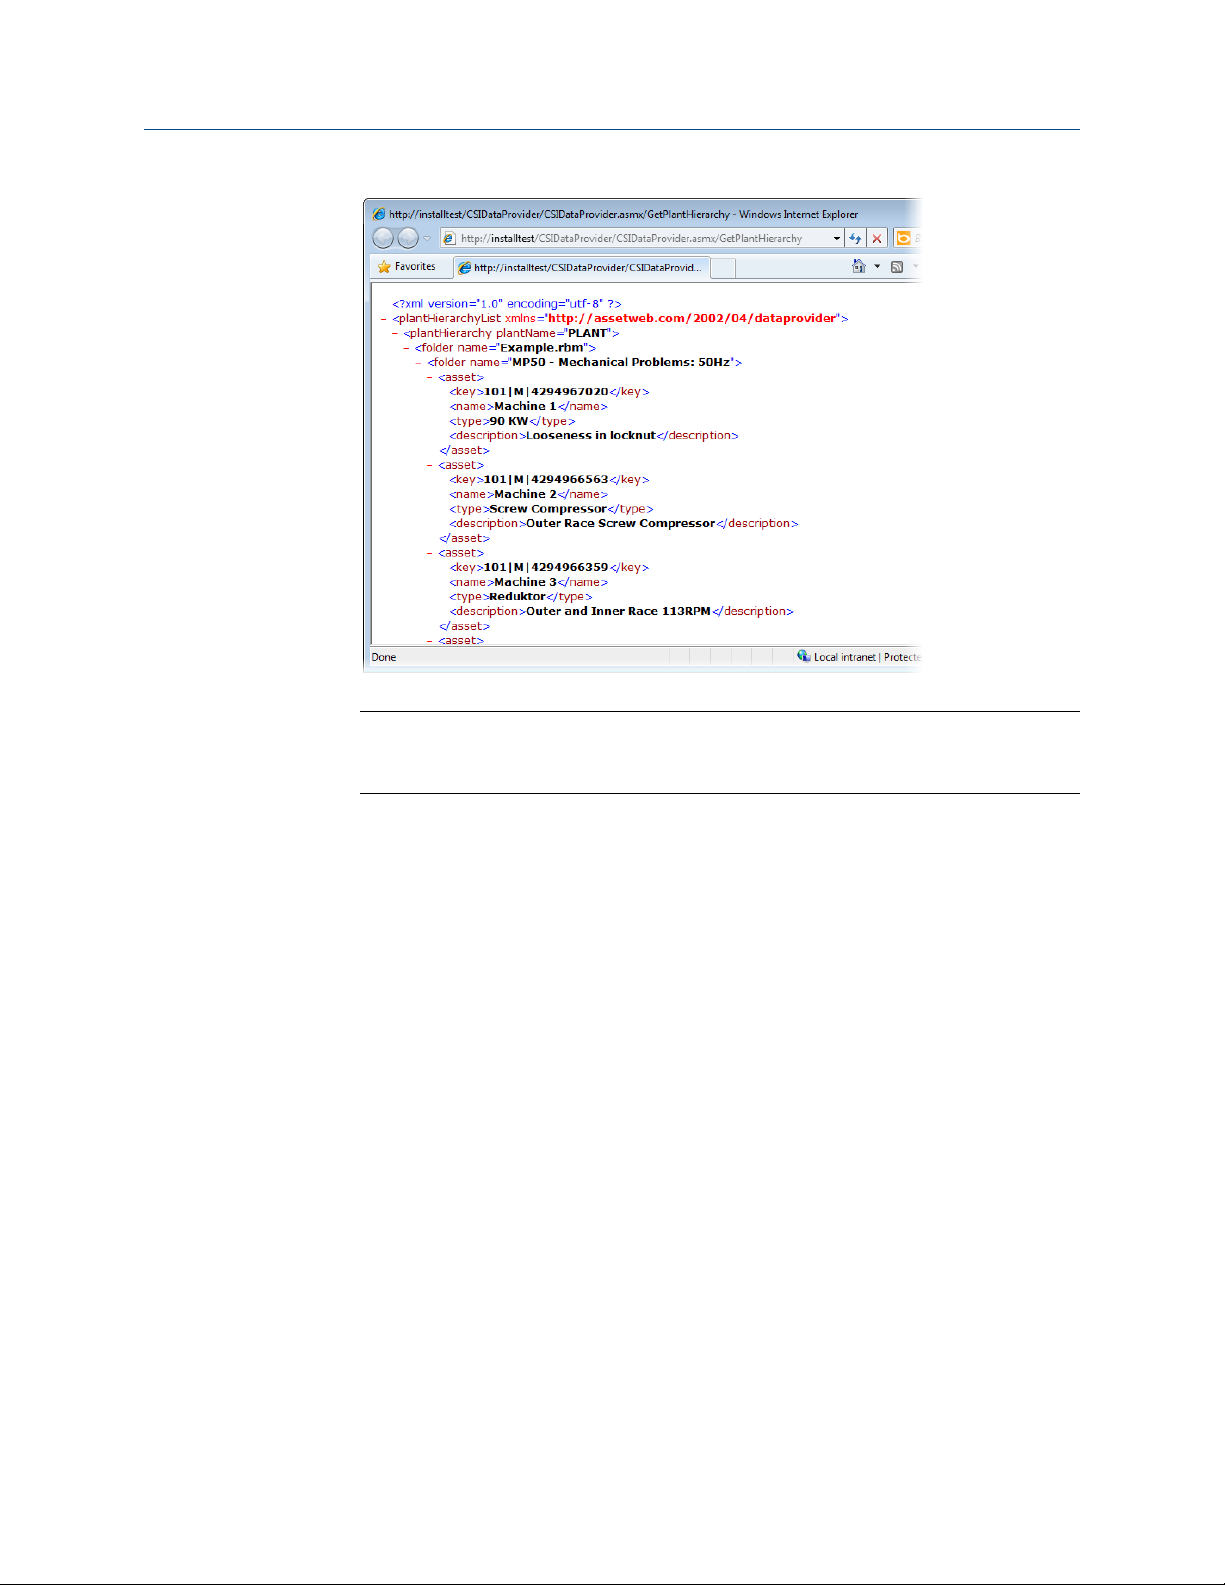
A window displays a stream of XML statements. This is proof that you successfully
registered the user and CSI Data Provider is functioning properly.
38 MHM-97402, Rev 24
Page 43
Additional installations
Note
If you get an error message, ensure that the CsiRVWmgr service is started and the user name
has been created with the password you entered.
4.4.5 Create a data source
Use the AMS Suite: Asset Performance Management (or Asset Portal Manager for use with
AMS Asset Portal) to create a data source. Refer to the respective product documentation
for more information.
4.4.6 Configure Web Server settings
In order for the CSI Data Provider to work correctly, the World Wide Web Publishing
service must be configured correctly.
Procedure
1. Open Windows Services and start the service named World Wide Web Publishing
Service.
When you install the World Wide Web Publishing Service with Windows Server, it
may not be started by default. You must start the service in order to run a web
service.
2. Enable ASP.NET to execute.
By default, the Web Service Extension status for ASP.NET is Prohibited. In IIS Manager,
change the status to Allowed.
MHM-97402, Rev 24 39
Page 44

Additional installations
Follow instructions for your version of IIS to enable ASP.NET. For example, follow
these instructions in IIS 7.0.
a. Launch IIS Manager.
b. Select the computer name node in the Connections pane.
c. In the Features view, select ISAPI and CGI Restrictions.
d. Select the ASP.NET service and change the status to Allowed.
3. Add CSIDataProvider to the Trusted Sites.
The first time the CSIDataProvider service runs, a security warning may appear. Add
this website to the computer’s trusted sites.
From this point, the CSIDataProvider will be granted access to this site.
4.5 Install CSI USB drivers
The USB drivers for the CSI 2140 analyzer are installed automatically with AMS Machinery
Manager or AMS Standalone Data Transfer. You can install the USB drivers on any
computer where you need to connect a CSI 2140 analyzer.
Procedure
1. Insert the AMS Machinery Manager Software Installation DVD and open it in
Windows Explorer.
2. Browse to Install\CSI USB Drivers.
3. Double-click setup.exe and continue through the installation.
Important
On Windows 7, right click setup.exe and select Run as administrator.
4. Accept the license agreement.
5. Follow instructions presented by the installation program.
6. At the Windows Security prompt, click Install to install the drivers.
7. Click Finish.
40 MHM-97402, Rev 24
Page 45

AMS Machinery Manager services
5 AMS Machinery Manager services
Topics covered in this chapter:
• Primary server features and services
• Secondary server features and services
• Client installation features
5.1 Primary server features and services
The Primary server is the computer hosting the Network Server.
Feature installed Service installed Description Purpose
Standalone or Network
Server
AMS Machinery
Manager Client
Collaboration Tool
(optional)
CsiNetAdmin Network Server Licensing
CSI_MhmRemote AMS Remote
Machinery Health
Manager
CSI Data Transfer
Service
CSIMtDbMgr Service Database Server Database read/write/indexing
n/a AMS Machinery Manager user interface.
MHM Peer Resolver
Service
Data Transfer Service Enables CSI Machinery Health Analyzer to
Collaboration Tool
communication
management
Manages connections between AMS
Machinery Manager Clients and the
Network Server.
connect and transfer data to AMS
Machinery Manager over an Ethernet
connection.
When installed on the Network Server, this
service enables communication between
AMS Machinery Manager users with
Collaboration Tool installed on their
workstation.
5.2 Secondary server features and services
One or more of these features can be installed on a computer in the AMS Machinery
Manager network after a Network Server has been installed.
Feature installed Service installed Purpose
Database Server CSIMtDbMgr Service Database read/write/indexing
Data Import Server CSI Data Import Service Enables AMS Machinery Manager to read MODBUS data
from other systems.
MHM-97402, Rev 24 41
Page 46

AMS Machinery Manager services
Feature installed Service installed Purpose
Online Server CsiO_Server Enables AMS Machinery Manager to manage and collect
data from CSI Machinery Health Monitors.
AMS Machinery Manager
Client
n/a AMS Machinery Manager user interface.
5.3 Client installation features
One or more of these features can be installed after the Primary server has been installed.
Additional installation Service installed Purpose
Collaboration Tool n/a Available with network client installations to allow AMS
Machinery Manager users to communicate.
Online Watch n/a A client application provides a read-only view of online
system status. Can also be configured to allow a user to
acknowledge or modify alarms and request data
acquisitions.
Machine History Viewer n/a Provides a read-only view of periodic data and
equipment case history through a web browser.
AMS Standalone Data
Transfer
n/a Allows users of a CSI Machinery Health Analyzer at a
location without access to a database to load and dump
routes and route data as files.
42 MHM-97402, Rev 24
Page 47

Configure network computer communication
6 Configure network computer
communication
Topics covered in this chapter:
• Configure firewall settings
• Service accounts
If services running on secondary servers have trouble establishing a connection with the
primary server, you can change firewall settings to allow the services to communicate with
one another. You can also create service accounts to assign to each AMS Machinery
Manager program and service.
6.1 Configure firewall settings
AMS Machinery Manager programs communicate with each other using communication
ports. If you have a firewall, the ports used by the AMS Machinery Manager programs are
often blocked (or disallowed) by default. During installation, Windows may prompt you to
allow access for certain AMS Machinery Manager programs on the server. If you choose to
allow access, Windows creates firewall exceptions. You may need to configure other
firewall rules manually. Configure your firewall program to allow communication between
AMS Machinery Manager programs and the ports they use on each computer in the AMS
Machinery Manager network.
Note
Each AMS Machinery Manager program needs a firewall exception to access the primary server, even
if all the programs are installed on the primary server.
6.1.1 Primary server ports
These services make up the core programs installed as a Standalone or Network
installation.
Primary server portsTable 6-1:
Port name Port Type Service Executable Connection Purpose
CSIDB_SERVER 10045 TCP CsiMtdbMgr mtdbmgr.exe server services,
client programs
CSIDB_ADMIN 10046 TCP CsiMtdbMgr mtdbmgr.exe server services,
client programs
CSINA_SERVER 10047 TCP CsiNetAdmin NetAdmin.exe server services,
client programs
Database read/
write/indexing
CsiMtdbMgr
Licensing
MHM-97402, Rev 24 43
Page 48

Configure network computer communication
Primary server ports (continued)Table 6-1:
Port name Port Type Service Executable Connection Purpose
CSINA_ADMIN 10048 TCP CsiNetAdmin NetAdmin.exe server services,
client programs
CSINA_PEER 10049 TCP CsiNetAdmin NetAdmin.exe server services,
client programs
CSIMHMREMOTE 10052 TCP CSI_MhmRemote MhmRemote.exe server services,
client programs
CSIRBMCOMSR 10077 TCP CSI Data Transfer
Service
DeviceServer.exe CSI analyzers
using Ethernet
Licensing
Licensing
Manage AMS
Machinery Manager
Client connections.
Enable data
transfer over
Ethernet.
6.1.2 Ports for Data Import server
Ports for Data Import serverTable 6-2:
Port name Port Type Service Executable Connection Purpose
CSIDISERVER 10060 TCP CSI Data Import
Service
DataImport.exe Provides Machinery
Health Manager
MODBUS Data
Import.
6.1.3 Database Server ports
Firewall ports required for additional database servers installed on the AMS Machinery
Manager network.
Database Server portsTable 6-3:
Port name Port Type Service Executable Connection Purpose
CSIDB_SERVER 10045 TCP CsiMtdbMgr mtdbmgr.exe server services,
client programs
CSIDB_ADMIN 10046 TCP CsiMtdbMgr mtdbmgr.exe server services,
client programs
CSIMHMREMOTE 10053 TCP CSI_MhmRemote MhmRemote.exe server services,
client programs
Database read/
write/indexing
Database read/
write/indexing
Manage AMS
Machinery Manager
Client connections.
44 MHM-97402, Rev 24
Page 49

Configure network computer communication
6.1.4 Ports for Collaboration Tool server
Ports for Collaboration Tool serverTable 6-4:
Port name Port Type Service Executable Connection Purpose
HTTP 8090 TCP MHM Peer
Resolver Service
MHMPeerResolver
Service.exe
client programs Handles
registration of
Collaboration Tool
clients to
communicate with
one another.
6.1.5 CSI Data Provider ports
CSI Data Provider portsTable 6-5:
Port name Port Type Service Executable Connection Purpose
CSIVW_SERVER 10050 TCP CsiRVWmgr RVWmgr.exe Asset Portal,
external
programs
CSIVW_ADMIN 10051 TCP CsiRVWmgr RVWmgr.exe Asset Portal,
external
programs
HTTP 80 TCP IIS inetinfo.exe Asset Portal,
external
programs
Provides alert
information.
Provides alert
information.
Provides alert
information.
6.1.6 Ports for Machine History Viewer server
Ports for Machine History Viewer serverTable 6-6:
Port name Port Type Service Executable Connection Purpose
HTTP 80 TCP IIS inetinfo.exe external
programs
MHM-97402, Rev 24 45
Provides web
access to case
histories.
Page 50

Configure network computer communication
6.1.7 Ports required for servers hosting a shared Custdata
folder
Ports required for servers hosting a shared Custdata folder Table 6-7:
Port name Port Type Service Executable Connection Purpose
epmap 135 TCP DCE endpoint
resolution
epmap 135 UDP DCE endpoint
resolution
netbios-ns 137 TCP NETBIOS Name
Service
netbios-ns 137 UDP NETBIOS Name
Service
netbios-dgm 138 UDP NETBIOS
Datagram Service
netbios-ssn 139 TCP NETBIOS Session
Service
microsoft-ds 445 TCP Microsoft
Directory Service
microsoft-ds 445 UDP Microsoft
Directory Service
SYSTEM external
programs
SYSTEM external
programs
SYSTEM external
programs
SYSTEM external
programs
SYSTEM external
programs
SYSTEM external
programs
SYSTEM external
programs
SYSTEM external
programs
Windows File
Sharing
Windows File
Sharing
Windows File
Sharing
Windows File
Sharing
Windows File
Sharing
Windows File
Sharing
Windows File
Sharing
Windows File
Sharing
6.1.8 Ports required for AMS Machinery Manager Clients and
Data Import Clients
Ports required for AMS Machinery Manager Clients and Data Import ClientsTable 6-8:
Port
name Port Type Service Executable Connection Purpose
*.exe varies TCP MHM client
programs
C:\RBMclient\sys\*.exe
C:\RBMsuite\sys\*.exe
server services,
online systems
Each AMS Machinery
Manager program.
6.1.9 Online Server ports
Online Server portsTable 6-9:
Port name Port Type Service Executable Connection Purpose
odh_4500T 19788 TCP CsiO_Server O_Server.exe online systems Online system
communication.
46 MHM-97402, Rev 24
Page 51

Configure network computer communication
Online Server ports (continued)Table 6-9:
Port name Port Type Service Executable Connection Purpose
odh_4500su 19798 TCP CsiO_Server O_Server.exe online systems Online system
communication
odh_4500_tcp 19799 TCP CsiO_Server O_Server.exe online systems Online system
communication
odh_4500_udp 19799 UDP CsiO_Server O_Server.exe online systems Online system
communication
odh_admin-tcp 19800 TCP CsiO_Server O_Server.exe online systems Online system
communication
odh_config-tcp 19801 TCP CsiO_Server O_Server.exe online systems Online system
communication
odh_status-tcp 19802 TCP CsiO_Server O_Server.exe online systems Online system
communication
odh_status-udp 19802 UDP CsiO_Server O_Server.exe online systems Gross Scan
broadcast
odh_fallback-tcp 19803 TCP CsiO_Server O_Server.exe Fallback server Fallback server
(legacy, no longer
used)
6.1.10 Ports for OPC data
Online Systems can be configured to provide data to control systems using OPC (Object
Linking and Embedding for Process Control). The ports used by the Online Server to
provide OPC data are assigned dynamically from the range of DCOM ports Windows is
configured to use. These ports are not required to be open if tunneling software is used.
Ports for OPC dataTable 6-10:
Port name Port Type Service Executable Connection Purpose
epmap 135 TCP DCE endpoint
resolution
epmap 135 UDP DCE endpoint
resolution
- varies TCP CsiO_Server O_Server.exe external
SYSTEM external
programs
SYSTEM external
programs
programs
Windows File
Sharing
Windows File
Sharing
Provides OPC
information
6.1.11 FTP ports
Servers set up to provide firmware updates to online systems use FTP ports.
MHM-97402, Rev 24 47
Page 52

Configure network computer communication
FTP portsTable 6-11:
Port name Port Type Service Executable Connection Purpose
FTPDATA 20 TCP FTP data
connection
FTP 21 TCP FTP control
connection
inetinfo.exe external
programs, online
systems
inetinfo.exe external
programs, online
systems
FTP data transfer
FTP data transfer
6.1.12 Optional ports for troubleshooting
Optional ports for troubleshootingTable 6-12:
Port name Port Type Service Executable Connection Purpose
Telnet 23 TCP Telnet client varies external systems Telnet
ICMP - - Ping SYSTEM external systems Ping
6.2 Service accounts
Service accounts are not required, but can be useful on a network system if services
running on secondary servers have trouble establishing a connection with the primary
server. Try updating the firewall settings first. If changing the firewall settings does not
resolve the issue, you can create service accounts to assign to each AMS Machinery
Manager program and service.
After you install AMS Machinery Manager on the server, create a service account on the
server and assign it to each AMS Machinery Manager service. Then create an identical
account on each computer where AMS Machinery Manager services are installed. This
includes any computer where you install any AMS Machinery Manager features, but not
computers where you install only the AMS Machinery Manager Client. The Client does not
have a service.
6.2.1 Create a service account
Create a service account after installing AMS Machinery Manager.
Prerequisites
Verify you can launch the AMS Machinery Manager Client.
Procedure
1. Follow your operating system's instructions to create a new user account with the
following information:
48 MHM-97402, Rev 24
Page 53

Configure network computer communication
• User name: MHMSERVICE
• Password: *********
• Clear the check box User must change password at next logon.
• Select User cannot change password.
2. Add the MHMSERVICE user as a member of the computer's Administrators group.
Postrequisites
Assign this services account to all AMS Machinery Manager services on the computer.
6.2.2 Assign the services account to each AMS Machinery Manager service
Assign the services account to each AMS Machinery Manager service on the computer.
Procedure
1. Launch Windows Services on a computer where AMS Machinery Manager programs
are installed.
2. Identify the AMS Machinery Manager services to be updated.
3. Right-click the service and select Properties.
4. In the Properties dialog, select the Log On tab, and update the log on information so
the service operates using the services account.
• This account: .\MHMSERVICE (The dot and backslash are required before the
username.)
• Password: *********
Note
The password you enter must match the password assigned to the account.
5. Restart the service.
6. Repeat this procedure for each AMS Machinery Manager service.
Postrequisites
You can test the services account by launching the AMS Machinery Manager Client. If the
Client launches, the accounts have been created and assigned correctly. If it does not
launch, there may be a problem with one of the users. If you do not have a Client installed,
test the specific service by verifying its functionality works.
MHM-97402, Rev 24 49
Page 54

Configure network computer communication
50 MHM-97402, Rev 24
Page 55

Appendix A
File locations
File locations depend on the type of installation.
• Standalone systems use absolute paths (for example, C:\RBMsuite), because all the
AMS Machinery Manager applications that use this path are installed on the same
computer.
• Network systems use network paths (UNC format) (for example \\ServerName\RBMnet
\RBMsuite), so applications on all AMS Machinery Manager Client workstations can
access the files.
Standalone installation
All of the AMS Machinery Manager files are located in the installation directory, C:\RBMsuite,
by default.
File locations
Standalone installation file types and locationsTable A-1:
Category Type Location
Installation
Directory
AMS Machinery
Manager System
Files
Drivers Drivers C:\RBMSuite\Sys\Drivers
System Data Files System Data Files C:\RBMSuite\SysData
Customer Data
Files
User Data Files User Data Files C:\RBMSuite\Users
Network installations
Folder C:\RBMsuite
Executable C:\RBMSuite\Sys
Dynamic Linked
Library
Error Messages C:\RBMSuite\Sys\HelpMsg
Help Files C:\RBMSuite\Sys\HelpMsg
Template Files C:\RBMSuite\SysData\Template
Oil Instrument Files C:\RBMSuite\SysData\Instrmnt
Report Templates C:\RBMSuite\SysData\Report
Shared Data Files C:\RBMSuite\CustData
C:\RBMSuite\Sys\Plugins
Table A-2 and Table A-3 show where to find files on each installation. The Network Server
files are located in C:\RBMnet. The Network Server shared files are listed by UNC path (for
example, \\Servername\RBMnet\RBMsuite\ where Servername is the network name of the
Network Server computer). Each Client workstation has some files stored locally in C:
\RBMclient\.
MHM-97402, Rev 24 51
Page 56

File locations
Network Single- or Multiple-License Server file types and locationsTable A-2:
Category Type Location
Installation
Directory
Network Server
Shared Folder
AMS Machinery
Manager System
Files
Drivers Drivers \\Servername\RBMnet\RBMSuite\Sys\Drivers
System Data Files System Data Files \\Servername\RBMnet\RBMSuite\SysData
Customer Data
Files
User Data Files User Data Files \\Servername\RBMnet\RBMSuite\Users
CMMS Data Files CMMS Shared Files \\Servername\RBMnet\CMMSData
Folder C:\RBMnet
UNC Path \\Servername\RBMnet
Executables \\Servername\RBMnet\RBMSuite\Sys
Dynamic Link
Library
Error Messages \\Servername\RBMnet\RBMSuite\Sys\HelpMsg
Help Files \\Servername\RBMnet\RBMSuite\Sys\HelpMsg
Template Files \\Servername\RBMnet\RBMSuite\SysData\Template
Oil Instrument Files \\Servername\RBMnet\RBMSuite\SysData\Instrmnt
Report Templates \\Servername\RBMnet\RBMSuite\SysData\Report
Databases \\Servername\RBMnet\RBMSuite\CustData
User Preferences \\Servername\RBMnet\RBMSuite\Sys\AMS_Preferences\AMS_
\\Servername\RBMnet\RBMSuite\Sys\Plugins
UserPreferences
Network Client file types and locationsTable A-3:
Category Type Location
Installation
Directory
AMS Machinery
Manager System
Files
Drivers Drivers C:\RBMclient\Sys\Drivers
System Data Files System Data Files C:\RBMclient\Sys\SysData
Customer Data
Files
User Data Files User Data Files \\Servername\RBMnet\RBMSuite\Users
Folder C:\RBMclient\
Executable C:\RBMclient\Sys
Dynamic Link Library C:\RBMclient\Sys\Plugins
Error Messages C:\RBMclient\Sys\HelpMsg
Help Files C:\RBMclient\Sys\HelpMsg
Template Files C:\RBMclient\Sys\SysData\Template
Oil Instrument Files C:\RBMclient\Sys\SysData\Instmnt
Report Templates C:\RBMclient\Sys\SysData\Report
Databases \\Servername\RBMnet\RBMSuite\CustData
52 MHM-97402, Rev 24
Page 57

Network Client file types and locations (continued)Table A-3:
Category Type Location
User Preferences C:\RBMclient\Sys\AMS_Preferences\AMS_UserPreferences
CMMS Data Files CMMS Shared Files \\Servername\RBMnet\CMMSData
File Descriptions
File category and type descriptionsTable A-4:
Category Type Description
System Files Executables (*.exe) AMS Machinery Manager applications.
System Data
Files
User Data
Files
CMMS Data
Files
Customer
Data Files
Dynamic Link Libraries
(*.dll)
OCX files (*.ocx) Shared AMS Machinery Manager object libraries.
Compressed help files
(*.chm)
CSI Component Files
(*.wh)
Report Templates
(*.rpt)
Program Configuration
Files (*.def, *.ini)
CMMSLink Files (*.mdb) Define the interface to CMMS systems and facilitate the
AMS Machinery
Manager 4.xx and 5.xx
Databases (*.rbm)
Writable DbLookup Files These provide global reference information such as fault
NetAdmin Files These files are used for user access administration.
RBMwizard Answers
Files/Equipment
Configuration Files
(*.dbz)
Oil Reference Files
(*.ref)
Database Files (*.mdb) AMS Machinery Manager database files.
External Envelope Files
(*.env)
Shared AMS Machinery Manager run-time libraries.
The help files and manuals.
Warehouse files store reusable components and
equipment configurations.
Report templates for RBMview.
Configuration files that store user options and
preferences for the applications.
exchange of information to and from CMMS systems.
AMS Machinery Manager databases.
codes and severity descriptions. If used in a Network
Multiple-License installation, these files are located on
the Enterprise data directory.
RBMwizard databases that store database setup and
equipment configuration information.
Oil reference information.
Generated by Autostat and contain mainly statistical
envelope alarms created by Autostat. Plotdata, Export,
and Nspectr retrieve the alarms from the file during
analysis.
File locations
MHM-97402, Rev 24 53
Page 58

File locations
File category and type descriptions (continued)Table A-4:
Category Type Description
Additional
Files
User Component Files
(*.wh)
Images (*.bmp, *.pcx,
*.tga, *.ann, *.eif,
*.jpg, *.tiff)
Diagrams (*.bmp) Images used for equipment diagrams.
Log Files (*.log) Log files store information about applications and
Database Archives
(*.zip)
Online Database
Template (*.cvb)
Online Transient Archive
(*.bin)
Portable Transient
Archive (*.wfv *.ttt)
csi.ini Configuration file for AMS Machinery Manager
csiports.ini Defines the TCP/IP port numbers on which the database
DBLookup.mdb Quick reference file that stores the fault framework,
enable.tbl Determines the number of users allowed and other
mhm.exe Launches the AMS Machinery Manager Client.
mhm.exe.config Main configuration file for AMS Machinery Manager
rbm.exe Main menu application for AMS Machinery Manager.
RBMadmin.exe AMS Machinery Manager Network Administration.
User-defined warehouse files that store reusable
components and equipment configurations.
Images used for plot captures, IR thermography images,
etc.
operations helpful for troubleshooting.
Databases archived using the AutoZip utility.
Template of a database for Online technology for use
with Online Configuration.
Archive files for transient data collected with a CSI
Machinery Health Monitor.These files are saved in a
database's Archive folder.
Archive files for transient data collected with a CSI
Machinery Health Analyzer. These files are saved in a
database's TransWF folder.
applications in the Tools tab.
server and network administration server communicate.
component types, and other lists used by the
applications.
factors that are license-dependent.
applications and settings.
54 MHM-97402, Rev 24
Page 59

Appendix B
Register AMS Machinery Manager
Topics covered in this appendix:
• Register AMS Machinery Manager - Standalone system
• Register AMS Machinery Manager - Network system
You can register the software when prompted during installation. Or, you can cancel the
registration process, continue the installation, and register later.
Note
You must also register the software during a software update or repair.
Register AMS Machinery Manager
B.1 Register AMS Machinery Manager - Standalone
system
Prerequisites
Log on as a Windows administrator user on the computer where you installed AMS
Machinery Manager.
Close AMS Machinery Manager Client.
In Windows Services, stop AMS Machinery Manager services, CsiNetAdmin and
CSIMtDbMgr Service.
Procedure
1. In Windows Explorer, go to C:\RBMsuite\sys and double-click Serial.exe.
2. In the Serial dialog, click Register Product.
The Register Product dialog appears. You need the Serial No. and Request No. during
registration.
3. Contact Product Support to register.
Phone: Toll free 888.367.3774, option 2 (U.S. and Canada)
+63.2.702.1111 (Rest of world)
Email: [email protected]
Web: http://www.emersonprocess.com/machineryhealthreg
4. Enter the Response code given to you by a Product Support representative.
The code is only valid for your computer.
MHM-97402, Rev 24 55
Page 60

Register AMS Machinery Manager
5. Click OK.
6. In the Serial dialog, verify the Status is "Registered."
7. Click Close.
Your software is registered.
Postrequisites
Launch AMS Machinery Manager.
B.2 Register AMS Machinery Manager - Network
system
Prerequisites
Log on as a Windows administrator user on the computer where you installed AMS
Machinery Manager Network Server.
Close AMS Machinery Manager Client.
In Windows Services, stop AMS Machinery Manager services, CsiNetAdmin and
CSIMtDbMgr Service.
Procedure
1. In Windows Explorer, go to C:\RBMnet\RBMsuite\sys and double click Serial.exe.
2. In the Serial dialog, click Register Product.
The Register Product dialog appears. You need the Serial No. and Request No. during
registration.
3. Contact Product Support to register.
Phone: Toll free 888.367.3774, option 2 (U.S. and Canada)
+63.2.702.1111 (Rest of world)
Email: [email protected]
Web: http://www.emersonprocess.com/machineryhealthreg
4. Enter the Response code given to you by a Product Support representative.
The code is only valid for your computer.
5. Click OK.
6. In the Serial dialog, verify the Status is "Registered."
7. Click Close.
Your software is registered.
56 MHM-97402, Rev 24
Page 61

Postrequisites
Restart the services and launch AMS Machinery Manager.
Register AMS Machinery Manager
MHM-97402, Rev 24 57
Page 62

Register AMS Machinery Manager
58 MHM-97402, Rev 24
Page 63

Update CSI Machinery Health Monitor firmware
Appendix C
Update CSI Machinery Health Monitor
firmware
Topics covered in this appendix:
• Install the firmware on the FTP server
• Reboot the CSI Machinery Health Monitor
• Check the firmware version in AMS Machinery Manager
Emerson Process Management periodically releases updates to firmware. When you
update your AMS Machinery Manager software, it is a good practice to update the
firmware if a new version is available. Refer to the Readme file (Readme.rtf) on the
Software Installation DVD for information about the current firmware version. These
instructions apply to the following CSI Machinery Health Monitor systems:
• CSI 6500 Machinery Health Monitor
• CSI 2600 Machinery Health Expert
• CSI 4500 Machinery Health Monitor
C.1 Install the firmware on the FTP server
Prerequisites
You need the AMS Machinery Manager Software Installation DVD.
Procedure
1. Log on to the computer that hosts the FTP Server for your CSI Machinery Health
Monitor.
2. Insert the AMS Machinery Manager Software Installation DVD.
3. Open the DVD in Windows Explorer and browse to Install/Online Firmware.
4. Double-click setup.exe and continue through the installation.
Important
On Windows 7, right click setup.exe and select Run as administrator.
5. Accept the license agreement.
6. Select the type of installation.
• Select Typical to install the firmware and tools.
• Select Custom to choose to install either the firmware or the tools.
MHM-97402, Rev 24 59
Page 64

Update CSI Machinery Health Monitor firmware
7. Follow instructions presented by the installation program.
The online firmware is installed in C:\Inetpub\ftproot\bin\.
Postrequisites
Cycle the power on each CSI Machinery Health Monitor that uses this FTP server.
C.2 Reboot the CSI Machinery Health Monitor
Cycle power on the CSI Machinery Health Monitor and verify the system is in good status
after it boots.
Procedure
1. Cycle the power on each CSI Machinery Health Monitor that needs to get the new
firmware update from the FTP server.
2. Wait approximately 5 minutes for the system to complete the boot process.
3. Verify the system is powered on and in good status.
Refer to the Installation Manual for your specific hardware model for more
information.
C.3 Check the firmware version in AMS Machinery
Manager
1. Log on to AMS Machinery Manager Client with the Administrator user account or a
user that has permission to use online technology.
2. Go to Tools > Setup/Communications > Online Configuration.
The Online Config window appears.
3. Go to File > Online Server > Open.
The Select Online Server Host Computer dialog appears.
4. Choose a server name from the menu and click OK.
The Online Server opens and a tree structure appears in the left pane of the Online
Config window.
5. In the tree structure, expand Units folder, and right-click the icon next to the CSI
Machinery Health Monitor you want to check and select Properties.
The Unit Properties screen appears in the right pane and displays the State,
Firmware Revision, DSP Revision, Total RAM, and Unit Type.
60 MHM-97402, Rev 24
Page 65
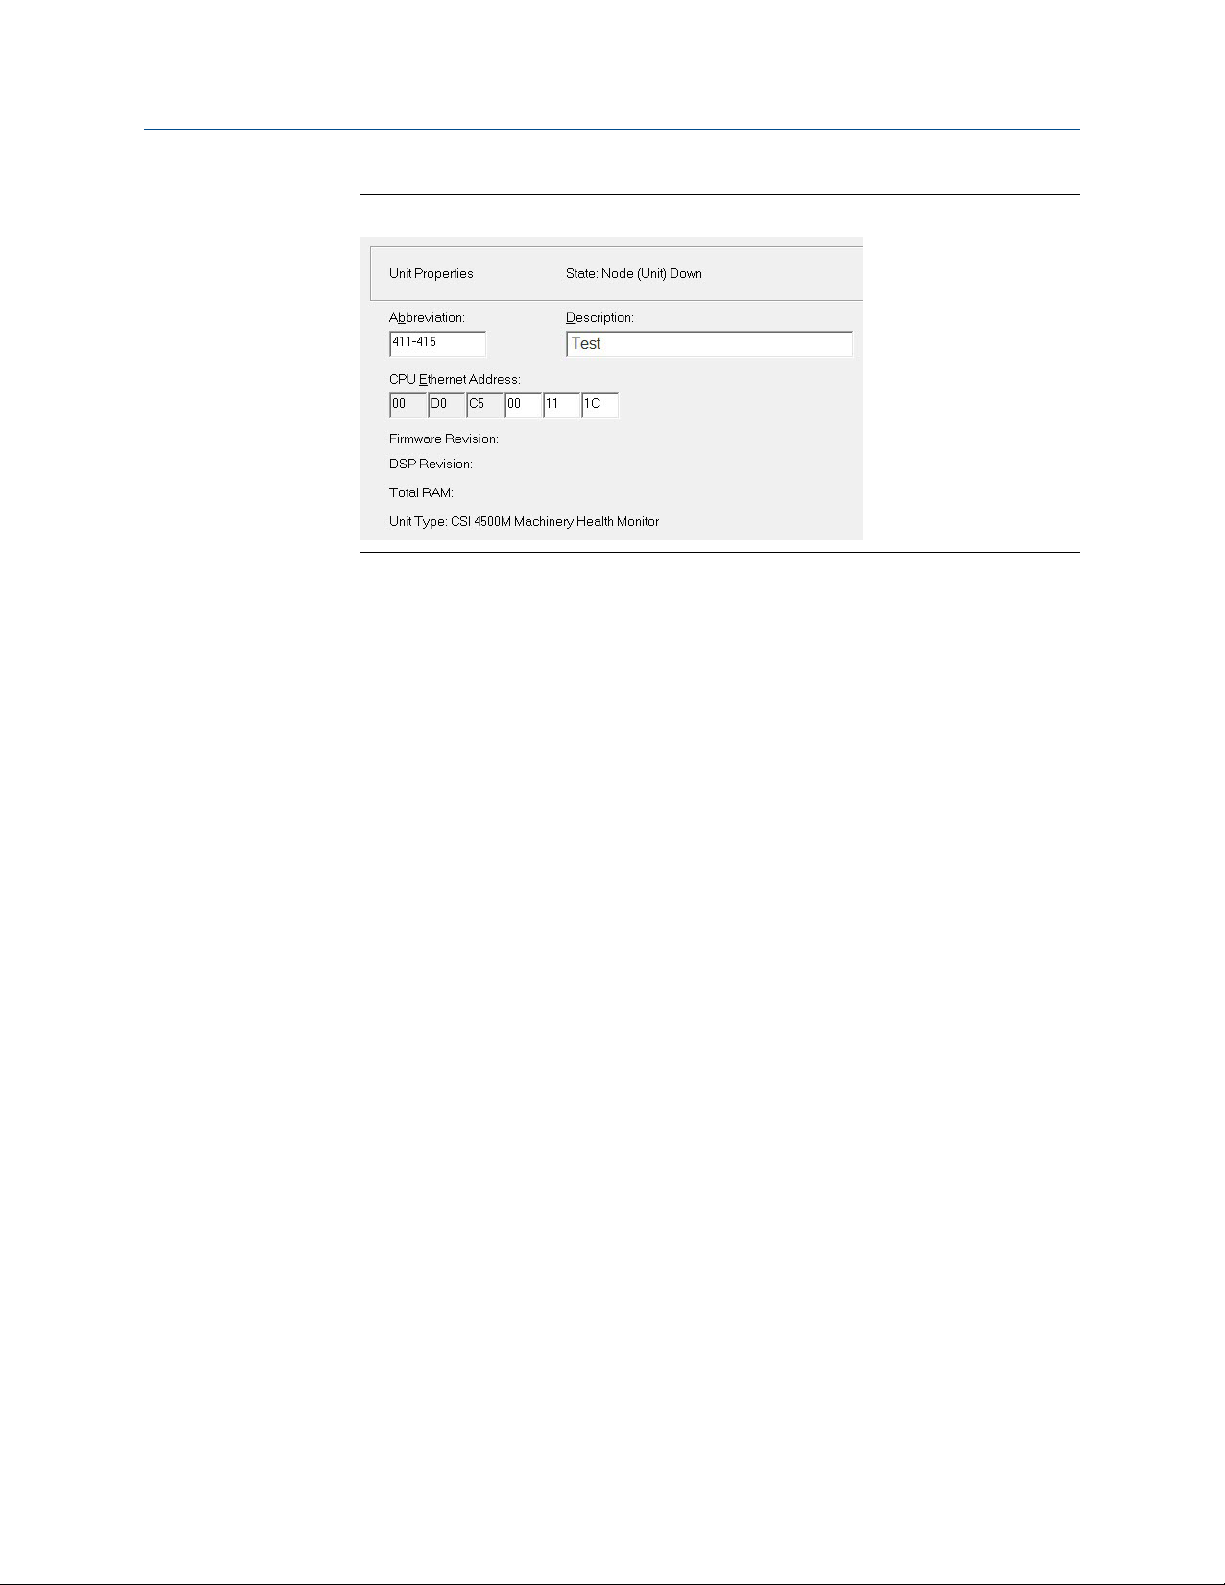
Update CSI Machinery Health Monitor firmware
Unit propertiesFigure C-1:
6. In the Unit Properties pane, verify State is Node(Unit)UP and Firmware Revision
matches the version you installed.
Contact Product Support for help if the firmware version does NOT match.
MHM-97402, Rev 24 61
Page 66

Update CSI Machinery Health Monitor firmware
62 MHM-97402, Rev 24
Page 67

Update CSI Machinery Health Monitor firmware
MHM-97402, Rev 24 63
Page 68

MHM-97402
Rev 24
2017
Emerson
835 Innovation Drive
Knoxville, TN 37932 USA
T +1 865-675-2400
F +1 865-218-1401
www.Emerson.com
©
2017, Emerson.
The contents of this publication are presented for informational
purposes only, and while every effort has been made to ensure
their accuracy, they are not to be construed as warranties or
guarantees, express or implied, regarding the products or services
described herein or their use or applicability. All sales are governed
by our terms and conditions, which are available on request. We
reserve the right to modify or improve the designs or specifications
of our products at any time without notice.
All rights reserved. The Emerson logo is a trademark and service
mark of Emerson Electric Co. All other marks are property of their
respective owners.
 Loading...