

Page 1
PowerTel
PowerTel
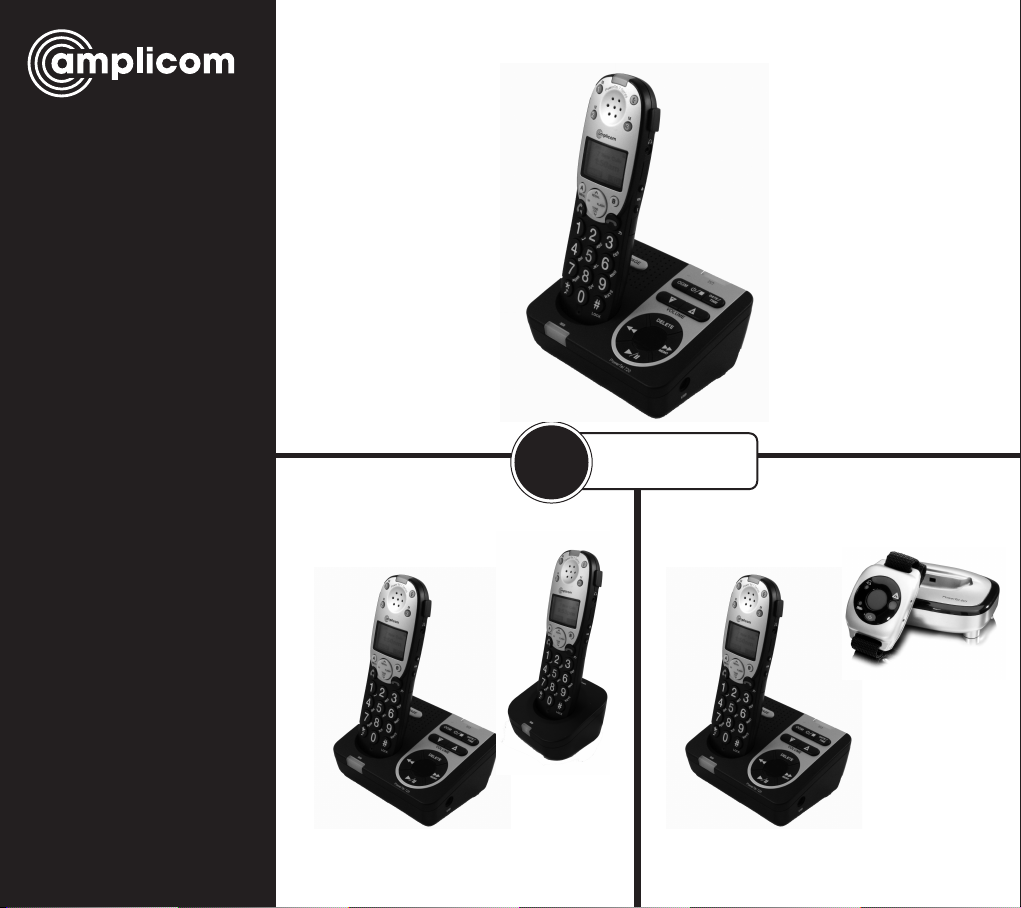
PowerTel 720 Assure +
User Guide
7
PowerTel 720 Assure + Twin PowerTel 725 Reli
SERIES
ant +
Page 2

Contents
Important Safety Instructions ........................................4
Getting Started .................................................................6
Base Phone Guide..............................................................7
Cordless Handset and Charger Base ................................8
Cordless Phone Handset Display Icons ...........................9
Set Up...............................................................................10
Phone Menu and Display Guide .....................................11
Using the Answering Machine ........................................12
Use on a Private Branch Exchange .................................21
g Functions ........................................................... 24
Callin
Adding a Handset ...........................................................29
Index.........................................................................58
Making Calls from a Handset .............................................31
Menu Options – Cordless Phone .......................................34
Phone Book – Cordless Phone ............................................39
Caller List – Cordless Phone ................................................43
Wrist Shaker ........................................................................45
Using the Wrist Shaker ......................................................50
Help and Support ...............................................................51
T
roubleshooting Guide .....................................................51
Technical Details ................................................................54
Default Settings .................................................................55
aintenance And Warranty .............................................56
M
2
Instructions available in other languages at www.amplicomusa.com.
Page 3

FCC ComplianCe
FCC Compliance
The FC C requir es that y ou will be a dvise d of cer tain re quire ments in volvin g the use of t his tele phone .
1. This eq uipmen t compli es with P art 68 o f the FCC r ules. A l abel on t he base un it of this e quipme nt cont ains, a mong oth er infor mation , the ACTA Reg istra tion Num ber
(US:A AAE Q##T XXXX) a nd the Rin ger Equi valenc e Number ( REN) for thi s equipm ent. You mu st, upo n reque st, pro vide thi s inform ation to y our tele phone c ompany.
2. An app licab le cer tica tion jac ks Universa l Serv ice Ord er Code s (USOC) fo r the equi pment i s provid ed (i.e., R J11C) in the packa ging wit h each pi ece of ap proved
termi nal equip ment .
3. A plug a nd jack u sed to co nnect t his equi pment t o the pre mises w iring and t eleph one net work mu st comp ly with t he appl icable F CC Par t 68 rule s and req uirem ents
adopt ed by the AC TA. A com pliant t elepho ne cord a nd modul ar plug is p rovide d with th is produ ct. I t is desig ned to be c onnec ted to a compa tible mo dular jac k that is
also compliant. See installation instruc tions for details.
4. The R EN is usef ul to det ermine t he quant ity of d evice s you may c onnec t to your te lephon e line and s till have a ll of thos e devic es ring w hen your n umber is c alled.
In mos t, but no t all area s, the sum o f the REN of a ll devic es shou ld not exc eed ve (5 .0). To be cer tain of t he numbe r of devi ces you ma y conne ct to you r line, as
dete rmined b y the REN, yo u should c all your lo cal te lephon e compa ny to dete rmine th e maximu m REN for you r callin g area.
NOTIC E: If your h ome has sp ecial ly wire d alarm eq uipmen t conne cted t o the tele phone li ne, ensu re the ins tallation of t his equi pment d oes not d isable y our alarm
equip ment. I f you have qu estio ns abou t what wi ll disab le alarm e quipme nt, con sult you r telep hone com pany or a qu alied i nstal ler.
5. If you r teleph one cau ses har m to the tel ephon e netw ork, th e teleph one com pany may di scon tinue you r serv ice tem porari ly. If poss ible, th ey will no tify y ou in
advan ce. But i f advan ce noti ce is not pr acti cal, you w ill be not ied as s oon as po ssibl e. You will be a dvise d of your ri ght to le a c omplain t with th e FCC.
6. Your tele phone c ompany m ay make ch anges to i ts fac ilitie s, equip ment, o perat ions or pr oced ures tha t could a ffe ct the pr oper op erati on of your eq uipmen t. If the y
do, you wi ll be give n advanc e notic e so as to gi ve you an op port unity t o mainta in uninte rrupt ed ser vice.
7. If you expe rienc e troubl e with th e telep hone, pl ease co ntac t the Amp licom S ervic e Center at 1- 866 -AMPL ICOM (26 7-542 6) for rep air/wa rrant y informatio n. The
telep hone co mpany may a sk you to d iscon nect th is equip ment fr om the ne twor k until the p roble m have bee n corre cted o r you are su re that th e equip ment is no t
malfunctioning.
8. Thi s equipm ent may no t be used o n coin se rvic e provid ed by the t eleph one comp any. Conn ectio n to part y lines is subj ect to s tate t arif fs. (Con tact y our sta te publ ic
utility commission or corporation commission for information.)
This de vice c omplie s with Par t 15 of the FCC Rule s. Oper ation is s ubjec t to the followi ng two c onditi ons: (1) This de vice ma y not cau se harmf ul inter ference, a nd (2) this
devic e must a ccep t any inter ference r eceiv ed, inc luding in terf erenc e that ma y cause un desir ed oper ation . Privac y of comm unica tions may n ot be en sured w hen usin g
this ph one. Cha nges or mo dica tions n ot expre ssly a pprove d in writi ng by Amp licom ma y void the us er’s aut horit y to operate th is equip ment.
Some c ordles s phone s opera te at fr equen cies tha t may cau se inte rfer ence to n earby T Vs and VCRs; to minim ize or pre vent suc h inter ference, t he base o f the cord less
phone s hould no t be plac ed near o r on top of a T V or VCR; an d, if inte rfer ence is e xperi enced , moving t he cordl ess te lephon e fart her away f rom the T V or VCR will
often reduce or eliminate the interference.
9.This pro duct i s equip ped wi th a cord less handse t, it is he aring aid compatible.
10. Conn ecti on to par ty lin e ser vice is s ubjec t to st ate tariff s. Contac t the st ate pub lic utility c ommission, pu blic se rvic e commission or corp orati on
commission for information.
FCC RF Radiati on Exposure S tatement:
This equipme nt comp lies with FCC RF radiation exp osure limits s et for th for an uncontrolle d environment. for Handset unit it ha s been tested and mee ts
the FCC RF exposure Gui delines,
For base unit it s hould b e inst alled an d operated wi th a minim um dist ance o f 20 centimeters be twee n the rad iator and your bo dy.
3
Page 4

saFety
Important Safety Instructions
Whe
n using your telephone equipment, basic safety precautions should always
be followed to reduce the risk of re, electric shock and injury to persons,
including the following:
1.
Do not use this product near water, for example, near a bath tub, wash bowl,
kitchen sink or laundry tub, in a wet basement or near a swimming pool.
Do not use the telephone to report a gas leak in the vicinity of the leak.
2.
3. Use only the power cord and batteries indicated in this manual. Do not
dispose of batteries in a re. They may explode. Check with local codes for
possible special disposal instructions. Save these instructions for future use.
SAVE THESE INSTRUCTIONS
Avoid using a Telephone(other than a cordless type) during an electrical storm.
There may be a remote risk of electrical shock from lightning.
Intended use
This phone is suitable for use on a public telephone network. Any other use is
considered unintended use. Unauthorized modication or reconstruction is not
permitted. Do not open the device and attempt any repair work yourself.
Phone location
Locate the base, corded phone, and wrist-shaker base:
• On a dry, at and stable surface
• Where the power cable will not be a trip hazard
4
Service Center
Page 5
saFety
• Where it is not obstructed by furniture
• At least three feet from other electrical appliances
Away from smoke, dust, vibration, chemicals, moisture, heat or direct sunlight.
•
Power failure – What to do
Power failure can affect your phone and equipment. Only the corded phone will work if there is
a power failure.
Medical eq
Do not use the phone near emergency or intensive care medical equipment, or during an
electrical storm. If you have a pacemaker check with a medical expert before using this
product.
uipment
Hearing aid compatibility
This phone works with most popular hearing aids. However, given the wide range of
hearing aids available, the phone may not function fully with every hearing aid.
Telephones identified with this logo have reduced noise and interference when used with
most T-coil equipped hearing aids and cochlear implants. The TIA-1083 Compliant Logo is
a trademark of the Telecommunications Industry Association. Used under license.
The charger unit is charging only for handset PowerTel 700 Assure, PowerTel 701 Extender,
PowerTel 711 Extender Voice, PowerTel 720 Assure +, PowerTel 730 Assure Voice +, PowerTel
780 Assure, PowerTel 785 Assure Responder, and so on.
Handset unit: Use only the supplied adapter.
Caution: The phone will produce high volume when Boost is switched on.
1-866-AMPLICOM (267-5426)
1-866-AMPLICOM (267-5426)
5
Page 6

Service Center
GettinG started
Getting Started — Included Equipment
PowerTel 720 Assure + - Amplified Cordless Phone with Answering Machine
•
1 base unit with integrated Answering Machine)
1 cordless handset
•
•
1 rechargeable battery pack 3AAA 3.6V NiMH
• 1 power adapter
• 1 telephone cable
PowerTel 725 Reliant + - Amplified Cordless Phone with Answering Machine and Wrist Shaker
As PowerTel 720 Assure + and includes:
• 1 Wrist Shaker with Strap
• 1 Charger unit for Wrist Shaker (with Power Adapter Plug attached)
PowerTel 720 Assure + Twin - Amplified Cordless Phone with Answering Machine, and
Additional Cordless Accessory Handset
•
1 base unit with integrated Answering Machine
• 2 cordless Handsets
• 2 Rechargable Battery Packs & 3 AAA 3.6V NiMH
•
1 charger base for cordless handset( with Power Adapter Plug Attached)
• 1 power adapter
• 1 telephone cable
6
Page 7
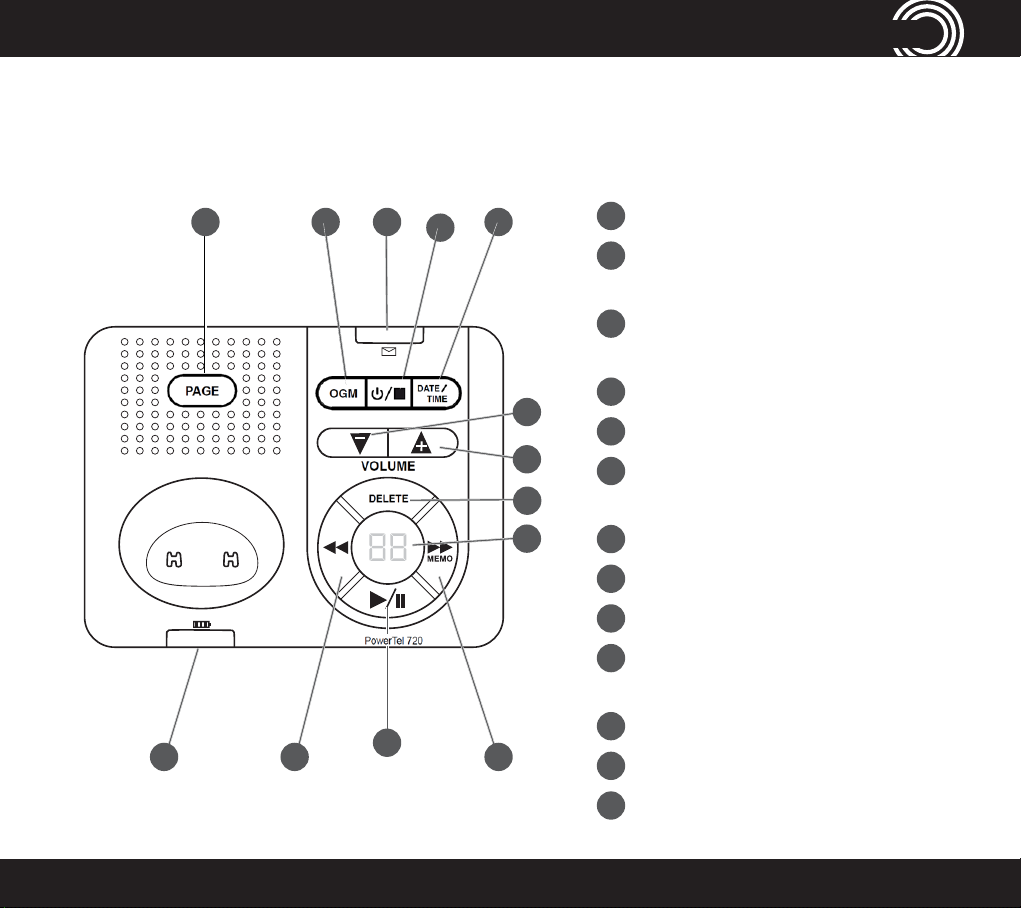
PowerTel 720 Assure + Phone Base
1
4
35
1
2
13
12
11
Date/Time
2
Answer on/off/Stop/
3
Indicator light for new answer
4
Outgoing message
5
Find handset/Registration
6
Incoming call/Charging/
PHONE GUIDE
Answer mode
machine messages received
Line in use
6
7 9
1-866-AMPLICOM (267-5426)
10
7
Rewind/Set language
8
Play/Pause/OK
9
Fast forward/Memo
10
Answer machine message
counter/Status display
11
8
Delete
12
Volume up
13
Volume down
7
Page 8
handset and CharGer Base
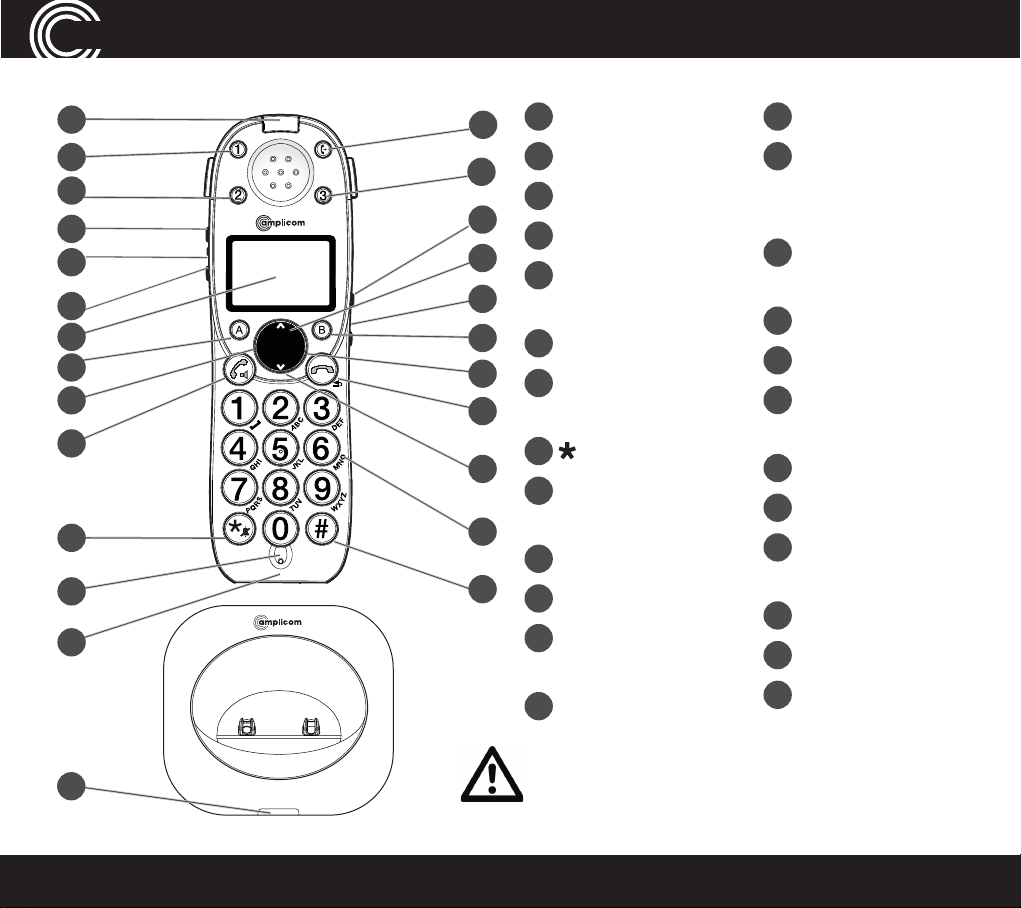
PowerTel 701 Extender Handset and Charger Base
1
M
2
13
M M
3
22
23
4
MENU
5
6
7
8
9
10
24
O
ptional (May not be included)
l
e
T
r
e
w
o
P
REDIAL
INT FLASH
TONE
CID
1
7
S
e
r
i
e
s
25
11
Incoming call
2
Memory 1
3
Boost
12
4
Display
14
5
Enter Menu/Mute/
15
16
17
18
Delete
6
Internal call
7
External call/
Handsfree
8
/Ringer on/off
19
9
Pause
(long press 0)
10
Microphone
11
Memory 3
12
Volume
up/down
13
Memory 2
Warning: This Handset has been specially designed for
individuals who are hard of hearing and has a normal
volume which is louder than a standard phone. Use
of the Boost feature can cause hearing damage to
individuals who are not experiencing hearing loss.
LOCK
20
21
14
Up/Redial
15
Headset socket
(Headset not
included)
16
Phone book/Save/
OK
17
Recall
18
End call
19
Down/Calls list/
Equalizer
20
Keypad
21
#/Keylock
22
Red Light Boost
Indicator
23
Select Profile (P)
24
Charging
25
Transfer call
8
Service Center
Page 9
handset display iCons
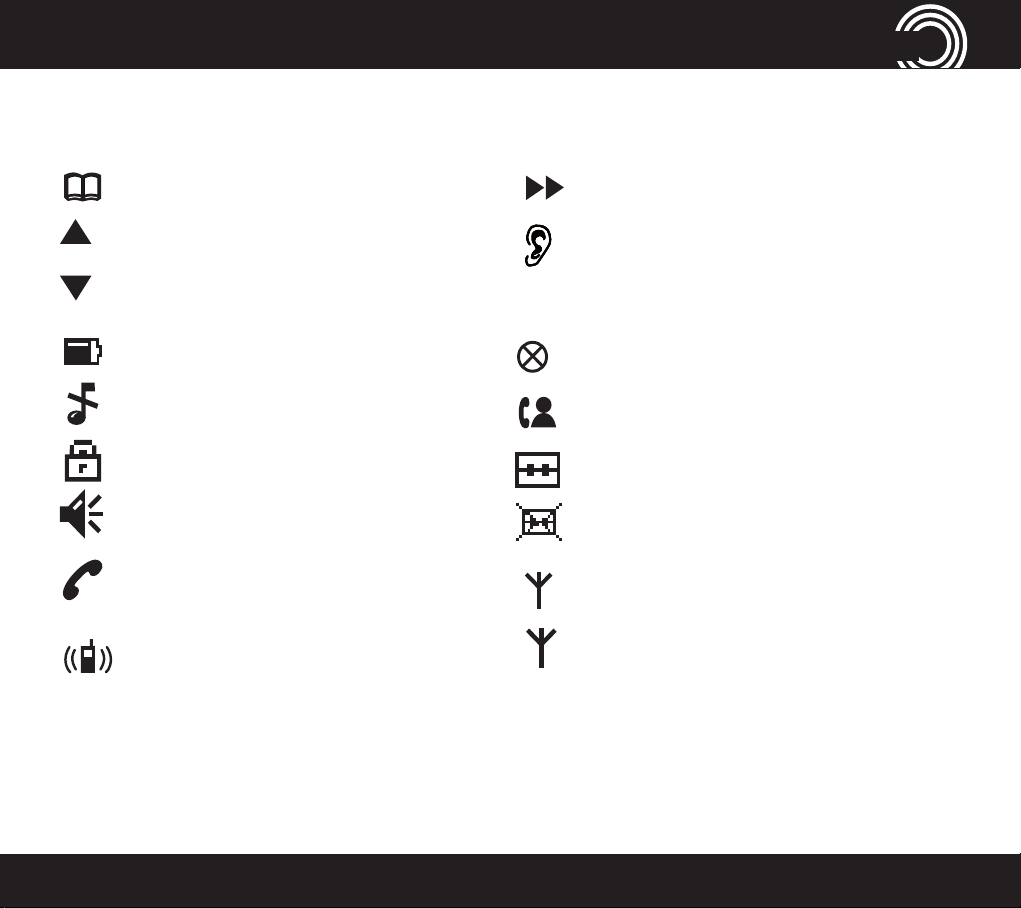
Cordless Phone Handset Display Icons
The following icons can appear in the LCD display:
Phone book mode
More information to view up
More information to view down
Battery status
Ringer off
Keylock is on
Handsfree mode
Call in progress
Internal call in progress (if
additional handsets are
installed)
Play messages fast forward
Boost receiver volume is on
(Icon will ash)
Mute handset microphone
New calls
Answering machine is on
Answering machine is off
When steady— handset is in range
When ashing — handset out of
range
1-866-AMPLICOM (267-5426)
9
Page 10
Set UP
Set Up
Note: The Amplicom customer service toll free number has been pre-installed in
the phone book of every telephone and cannot be edited or removed.
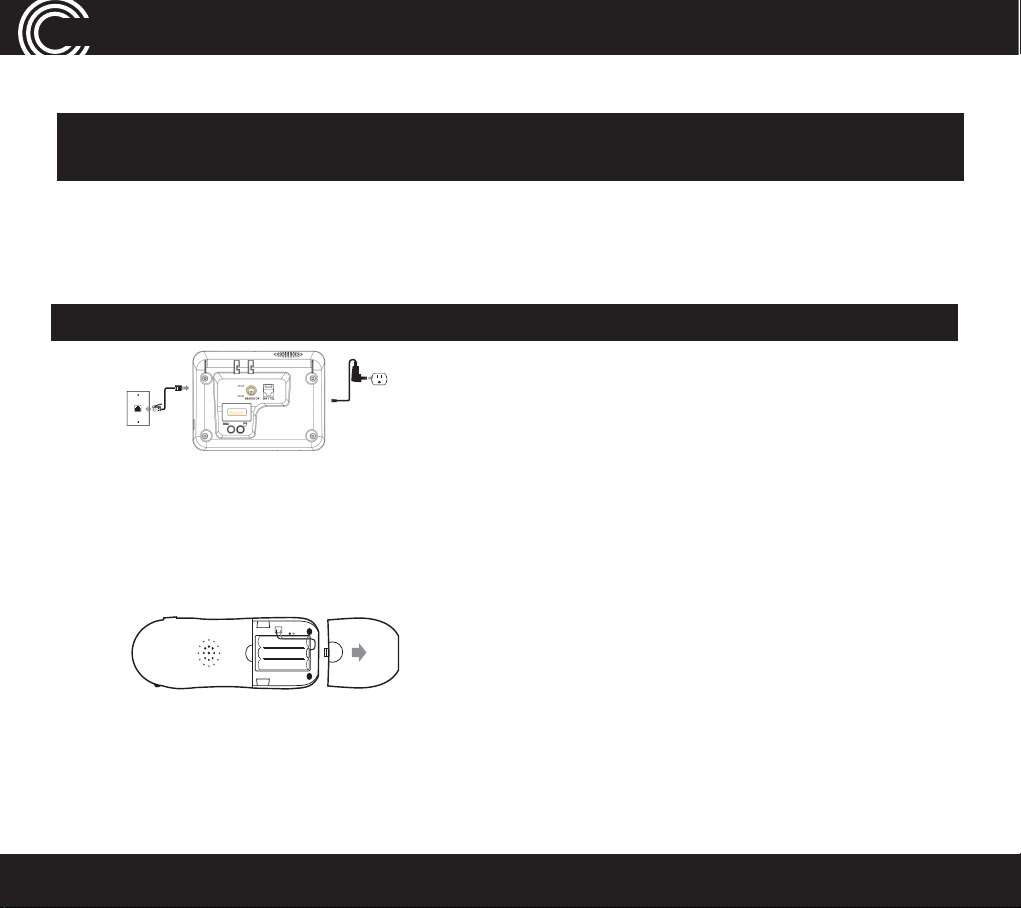
1.
Connect the base
Plug the power adapter into the base unit and the other end into a
i.
wall socket. The unit should power on and the display will light up.
ii.
Plug the telephone cable into the base unit
WARNING: Do not connect phone line to the phone socket yet.
2. Connect the cordless phone charger base
Plug the other power adapter that is already attached to charger base into the wall
socket and switch the power on.
(Optional if included)
3. Install the battery pack
Insert the rechargeable battery pack into the handset as shown.
Dispose of battery pack properly. Do not allow battery pack to come into contact with re or
water.
4. Charge the handset
Place the handset on its base to charge for a minimum of 16 hours before use.
5. Connect telephone cable
After initial charge, plug the telephone cable into the telephone wall socket.
YOUR POWERTEL PHONE IS NOW READY TO USE!
10
Service Center
Page 11

Set UP
Phone Menu and Display Guide
The phone menu display allows access to the full phone functionality.
Open main menu: Press .
TONE
Browse sub menu: Open the main menu and then press
TONE
Select sub menu item: Scroll using is
REDIAL
CID
or until the menu item desired
REDIAL
or .
CID
REDIAL
OK
OK
TONE
REDIAL
TONE
CID
or until the required function is
CID
or .
highlighted and press or .
Browse a function: Open the sub menu and press
Select a function: Scroll using
highlighted and press or .
Enter digits or letters: Use the keypad.
Confi
rm or save an entry or action: Press or
Cancel and return to standby: press
SAVE
.
.
Note: After 20 seconds, the phone will go into standby mode unless a
button is pressed.
1-866-AMPLICOM (267-5426)
11
Page 12
ANSWERING MACHINE
Using the answering machine
After setting up the phone system, use the following steps to set up and use the
answering machine.
Switch answering machine on or off
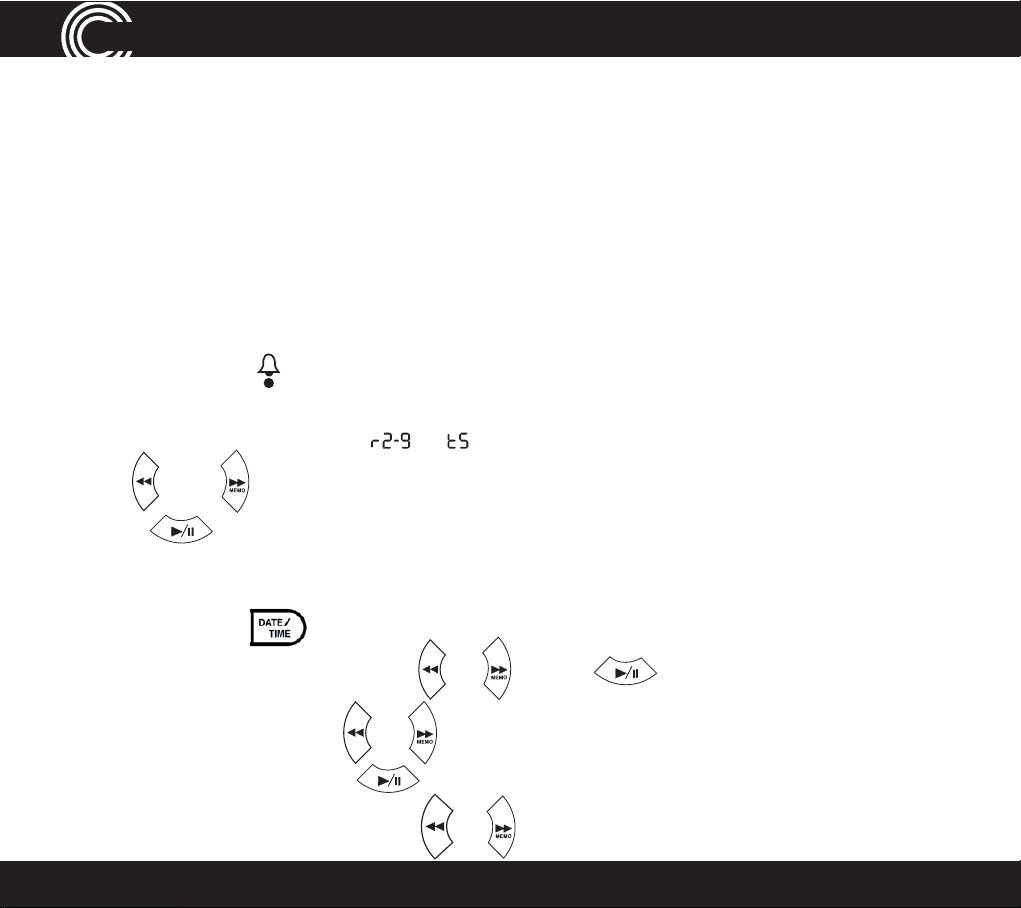
Press to turn the answering machine off and on.
The current answer mode will be announced.
When new messages are received, the message counter on the base and the
base indicator light ash. The message counter also indicates the number of
messages.
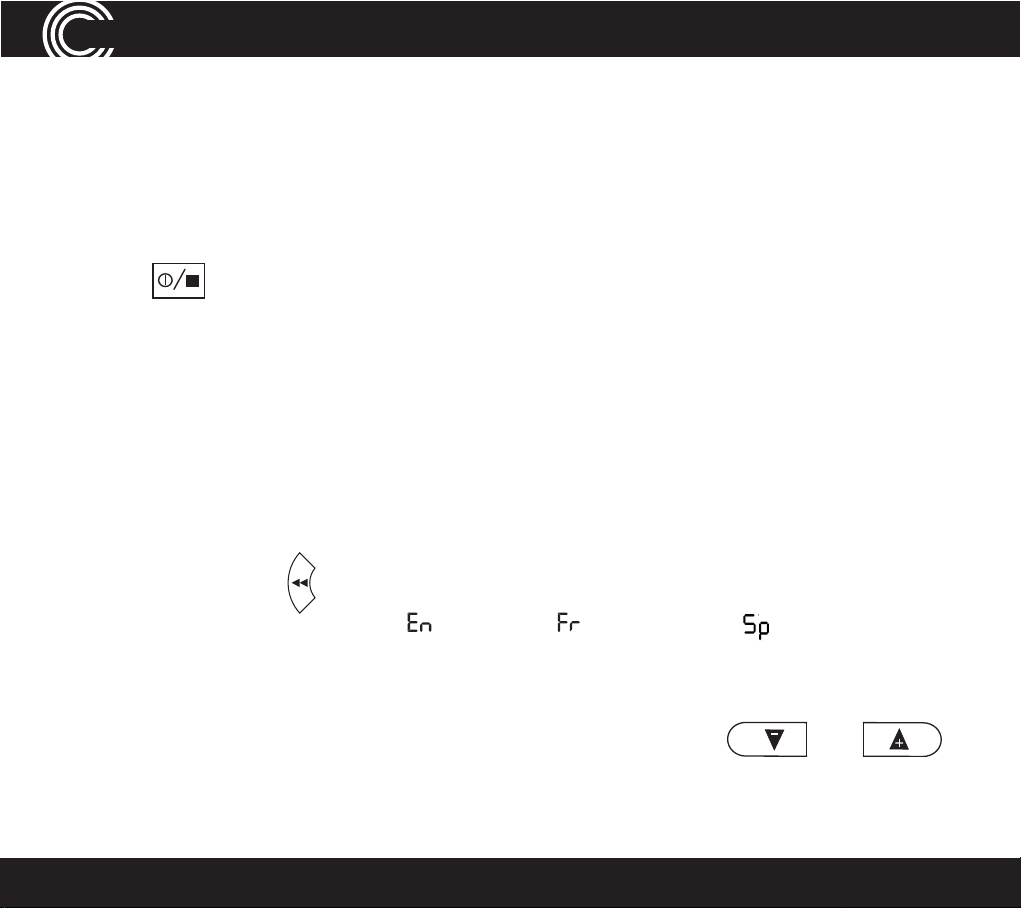
Set the language
Choose the answering mach
French.
1. Press and hold
me
ssage counter display: = English,
2. Repeat the above procedure until the desired language code is displayed.
on the base for 10 seconds until two letters appear in the
ine voice prompt language: English, Spanish or
= French and = Spanish.
Adjust the base loudspeaker volume
Increase or decrease the base loudspeaker volume using and
The volume level is displayed on the base message counter, e.g.
12
LI-5.
Service Center
.
Page 13
REDIAL/P
REDIAL
ANSWERING MACHINE
Set the answer mode
Choose the answer mode: Answer & Record, Answer only or Answer off. With
the machine in Answer only mode callers will not be able to leave a message.
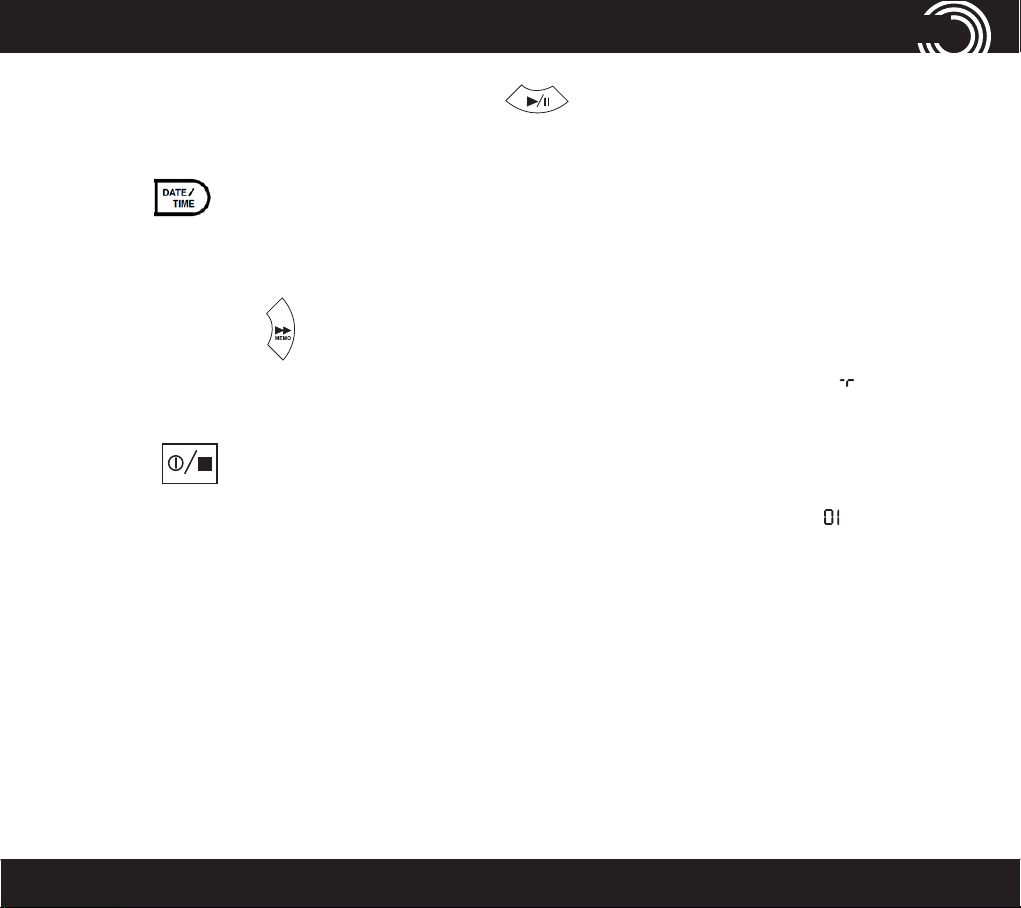
1. Press
2. To change the mode between Answer & Record, Answer Only or
Answer Off, press and hold
to switch the answering machine on.
for two seconds.
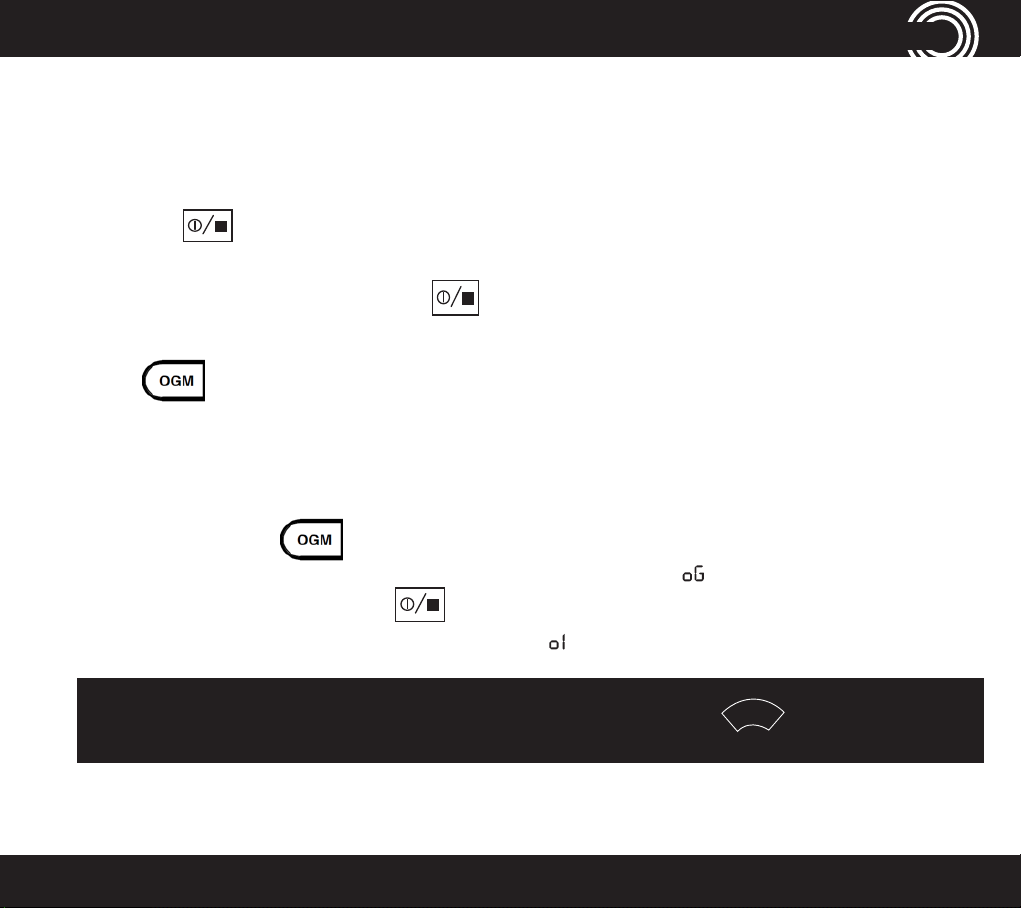
Check the outgoing message
Press to hear the current outgoing message.
Record an outgoing message
The outgoing message must be less than two minutes long. To change the
default answering message:
1. Press and hold
after the beep. The base message counter will display during recording.
2. To stop recording, press
the base message counter will display .
outgoing message is playing.
on the base for two seconds. Record the new message
. The new message will be played back, and
DELETE
while the Note: to return to the default message, press and hold
1-866-AMPLICOM (267-5426)
13
Page 14
REDIAL/P
REDIAL/P
REDIAL/P
REDIAL/P
ANSWERING MACHINE
Set the answer delay
Choose the number of times the phone will ring before the answering machine
answers an incoming call. Or, choose Time Saver, if no one will be available
to answer the phone. Time Saver is useful if someone will be calling in from
a different phone to listen to messages: if the machine answers after 2 rings,
there are new messages to listen to. If it answers after 5 rings, there are no new
messages. This feature gives the option of hanging up after 3 rings (because
there are no new messages) to save time and avoid being charged for the call.
1. Press and hold
(located underneath the base) for two seconds. The
current ring delay setting will be announced and will also be displayed on
the message counter e.g.
2. Use
Press
and
to select either the number of rings (2 - 9) or Time Saver.
to con rm.
or (for Time Saver).
Set the day and time
1. Press and hold
2. Choose a day of the week using or . Press
Choose the hour using
3.
message counter. Press
4. Choose the minutes using the
14
for two seconds.
or . The digits will also appear on the base
to con rm.
or buttons, the digits will also be shown
to con rm.
Service Center
Page 15
REDIAL/P
REDIAL/P
ANSWERING MACHINE
on the base message counter. Press
to con rm.
Check the day and time
1. Press
. The current day and time are announced.
Record a memo
Memo messages can be played back like normal messages.
1. Press and hold
After the beep, record the memo. The message counter will show
2.
while recording.
3. Press
counter will ash, and the counter will increase by one digit, e.g. .
to stop recording. The base indicator light and the message
for two seconds.
1-866-AMPLICOM (267-5426)
15
Page 16

REDIAL/P
REDIAL/P
ANSWERING MACHINE
Listen to messages or memos using the base buttons
Messages and memos are played in reverse order, with newer messages
played rst. The time and date of each message or memo is announced before
playback.
Use the following buttons to control message playback:
• To play or pause, press
• To stop, press
• To rewind, press
• To fast forward, press
Delete a single message or memo
1. Press to play a message or memo.
2. To delete it, press and hold
memo is playing. The message counter will display while deletion is taking
place.
for two seconds while the message or
Delete all messages and memos
1. Press and hold for two seconds when no messages are being played.
2. Press
16
to indicate that deletion is taking place.
again, to con rm the deletions. The message counter will show
Service Center
Page 17

REDIAL/P
ANSWERING MACHINE
Memory full
When the memory is full, the answering machine announces that fact,
automatically stops taking more messages, and switches to Answer Only
mode. Some existing messages or memos must be deleted before any new
messages can be recorded.
Access the answering machine from a remote location
Messages on the answering machine can be listened to from other phones,
including mobile phones.
A PIN (Personal Identication Number) code is required to access the answering
machine. The default code is 000. Change the PIN code to keep messages
secure.
1-866-AMPLICOM (267-5426)
17
Page 18
SWERING MACHINE
AN
Change PIN
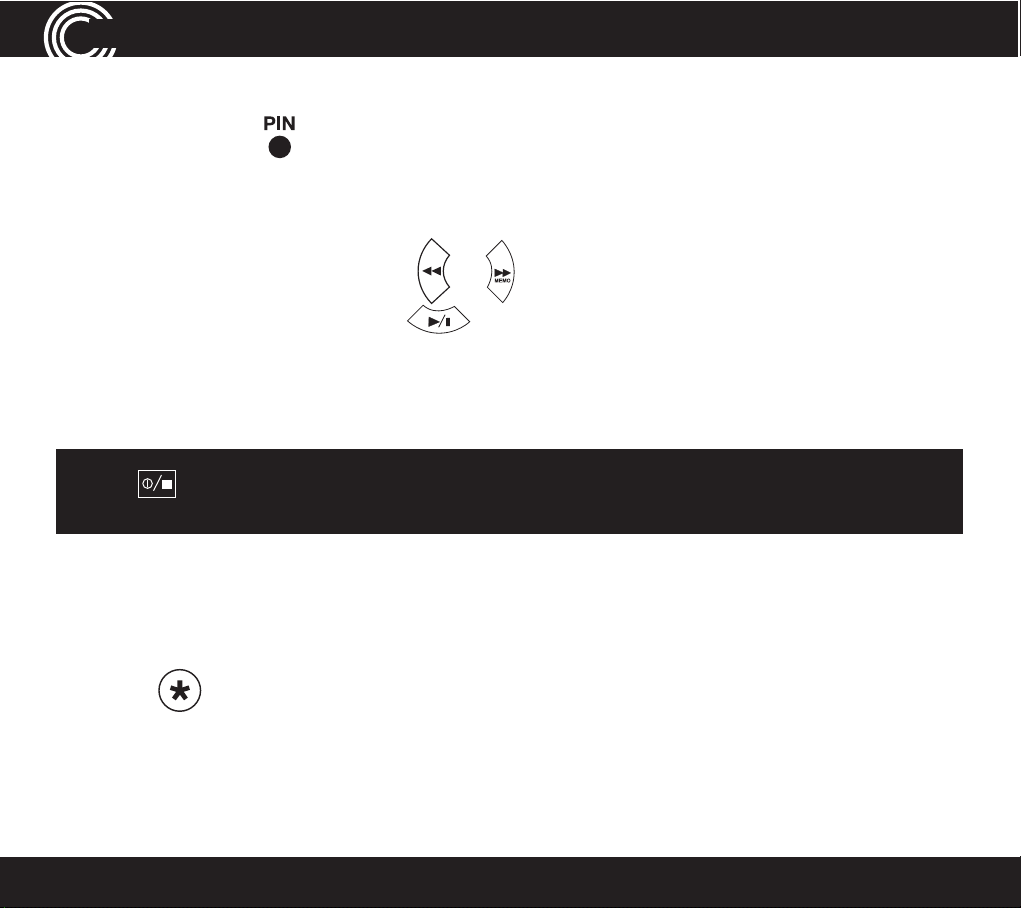
1. Press and hold (located underneath the base) for two seconds. The
current 3 digit PIN will be announced and the rst new digit requested. Enter
a digit between 0 and 9.
2.
base message counter. Press
3. Repeat the above procedure for the 2nd and 3rd new digits.
4. After the 3rd digit has been con rmed, the new PIN will be announced.
Press at any time to exit the Change PIN code mode and return to standby. The PIN code will remain unchanged.
or , the digits will also be shown on theSelect the new rst digit using
to con rm.
Call in to check messages
1. Dial the system’s phone number from a remote phone and wait until the
answering machine picks up the call.
2. Press
3. Refer to the next section, “Manage messages from another phone” for
additional instructions.
twice, then enter the 3 digit PIN after the voice prompt.
18
Service Center
Page 19

MENU
TONE
ANSWERING MACHINE
Manage messages using another phone
Use these numbers to manage messages from a remote location.
Press…
1 to Rewind
2 to Play or Pause your messages
3 to Fast Forward through your messages
4 to Hear the outgoing message
5 to Record outgoing message (6 to stop recording)
6 to Stop messages
7 to Delete current message 8 to Turn OFF answering machine
8 to Turn O F F answering machine
9 to Turn ON answering machine
# to Record a memo (6 to stop recording)
Use the cordless handset
1. Open the answering machine menu by pressing A or
.
2. When Ans Machine is displayed, press B or OK.
3. Scroll using
or
CID
to display desired function
Play Msgs, Ans On/Off, Record Memo, Outgoing Msg, Ans Settings, then press
B or OK.
1-866-AMPLICOM (267-5426)
19
Page 20

REDIAL
TONE
ANSWERING MACHINE
If Play msg you will be given further choice to Play New Msgs or Play All Msgs.
Ans On/Off turns Answering Machine ON or OFF. Outgoing Msg will give you
the option to either Record Message or Play Message. Ans Settings will give
you the option to setup your Answering Machine. AnswerMode - Answer Only
or Answer and record, Answer Delay - (2-15 rings) or Time Saver, Security
Code - option to set a new pin code is for remote access Language - English
French or Spanish.
4. Press to return to standby.3. The display will conrm action.
5. Using the keypad, enter a name for this stored number and press .
6. Edit the number for this name, if needed, and press .
7. Scroll using
20
or
CID
to choose the ringer for this entry and press .
Service Center
Page 21

FLASH
REDIAL/P
REDIAL/P
REDIAL/P
use on a private BranCh exChanGe
Use on a Private Branch Exchange
If the phone is on an exchange (e.g. dial 9 to get an outside line), calls can be
transfered or called back by using the
button. Check with the system
administrator for system set-up and instructions. Private exchanges are
normally used in a business-setting.
Set the recall time using the cordless handset
or
FLASH
until Base
1. Open the menu by pressing A or
MENU
, then scroll using
REDIAL
settings is highlighted and press B or OK.
2. Scroll using
REDIAL
or
FLASH
until Recall is highlighted and press B or OK.
3. The current recall timing setting (e.g. Short) will be displayed.
1-866-AMPLICOM (267-5426)
21
Page 22

uussee oonn aa pprriivvaattee BBrraannCChh eexxCChhaannGGee
4. Choose the desired recall timing setting (Short or Long) using
REDIAL
or
FLASH
and press B or SAVE.
Insert a dialing pause
Insert a pause before the dial tone if the system requires an outside line which
takes awhile to connect.
To insert a dialling pause using your cordless handset, enter the number to
reach the outside line and then press
for two seconds. A P on the display
will show dialing pause is active.
Note: A dialing pause can be used with a phone number in the phone book.
Set the dial mode
There is a choice of two dialing modes: tone and pulse. The default setting is
TONE and this is the correct setting for use within the United States.
22
Service Center
Page 23

REDIAL/P
REDIAL/P
REDIAL/P
use on a private BranCh exChanGe
Change the dial mode using the cordless handset
TONE
1. Open the menu by pressing A or
MENU
, scroll using
REDIAL
or
CID
until Base
settings is highlighted and press B or OK.
TONE
2. Scroll using
REDIAL
or
CID
until Dial Mode is highlighted and press B or OK.
3. The current dial mode setting (e.g. Tone) is displayed.
4. Choose the dial mode setting required (Tone or Pulse) using
REDIAL
press B or Save.
Reset to default settings
Important: Resetting to default will NOT delete phone book entries.
Reset to default settings on the cordless handset
or
TONE
CID
and
TF
1. Press
LASH
for 10 seconds.
2. Conrm or cancel the reset to default settings by pressing B or OK or A or
NO.
1-866-AMPLICOM (267-5426)
23
Page 24

CallinG
FunCtions
Calling Functions
Make a call using the cordless phone
1. Enter the phone number.
2. Press A or DEL to delete a mistaken entry.
3. Dial the number by pressing .
End a call
press
on the cordless handset.
Answer a call
For the cordless handset, press
and then speak into the phone.
Redial a number using the cordless handset
The phone stores the last 10 numbers dialed.
Note: Each phone number will be announced from the redial list provided
the Read Number feature is enabled.
1.
Open the redial list by pressing
Scroll through the redial list using
2.
highlighted and then press to dial the number.
24
REDIAL
REDIAL
.
TO
NE
CID
or
until the desired number is
Service Center
Page 25

REDIAL/P
REDIAL/P
Call back a previous caller
The phone stores the last 30 incoming phone numbers.
CallinG FunCtions
or
.
, to dial press
1. Open the incoming calls list by pressing
Scroll to find the desired number using
2.
on the cordless handset.
Dial a number in the phone book
1. Open the phone book by pressing .
2.
Scroll to find the desired number using
press
on the cordless handset.
or
Dial a number using the speed dial buttons
1. Choose a speed dial number by pressing
on the cordless handset.
number.
2.
or
on the cordless handset to dial the
Adjust the handset earpiece volume
Note: The handset earpiece volume is louder than a standard phone.
VOL
.
To adjust the volume during a call, push the button on the side of the handset
1-866-AMPLICOM (267-5426)
25
Page 26

REDIAL/P
REDIAL/P
REDIAL/P
CallinG
FunCtions
Boost the handset earpiece volume
To boost the handset earpiece volume during a call, press
BOOST
P
and boost
button will light red (cordless phone). An image of an ear will flash in the
display the red boost indicator will light on the left side of the handset will be lit
to show that boost is on.
Handsfree feature
Use the handsfree feature to talk to the caller without holding the handset or to
let other people in the room listen to the conversation.
Cordless Phone:
1.
time.
2. Exit handsfree mode by pressing
.
3. To adjust the handsfree volume, use the
VOL
on right side of handset.
key a second Switch on handsfree mode during a call by pressing the
Note: Boost volume using
26
BOOST
is not available during handsfree calling.
Service Center
Page 27

CallinG FunCtions
Use a headset (not included) with the cordless phone
Plug your headset into the headset socket marked on the right side of the
handset.
Mute the phone
Muting the phone during a call will silence the mouthpiece on the phone so it
does not transmit any noise to parties on the other end of the line.
Cordless Phone:
To switch off the mouthpiece, press A or MUTE. Mute On will be displayed.
To switch it on again, press A or MUTE . The display will show Off.
Switch the cordless handset ringer on and off
To switch the ringer on and off, press and hold for ve seconds.
1-866-AMPLICOM (267-5426)
27
Page 28

REDIAL/P
REDIAL/P
REDIAL/P
CallinG FunCtions
Lock and unlock the cordless handset keypad
Calls can still be answered as usual when the keypad is locked.
T
1. o lock the keypad, press and hold
for 2 seconds. The icon will
be displayed.
MENU
2. To unlock, press and release A or
then immediately, press and hold
until unlock conrmed.
Find a handset
A missing handset can be located from the base.
PAGE
1. Press
on the base. The handset(s) will beep.
2. Press any button on the handset to stop the handset(s) beeping.
Answer call waiting on cordless handsets
1. When incoming call beep is heard, another call is incoming.
2. To answer call waiting Press FLASH.
3. To go back simply repeat step 1 and 2.
28
Service Center
Page 29

REDIAL
addinG a handset
PowerTel 701 Cordless handset and charger base
Adding a Handset – Cordless Phone
Register a handset
Only register a handset if it has become de-registered from the base or if it was
purchased separately.
Important: make sure any handset is fully charged before registering.
At the handset:
1. Press and hold
hold Page key.
MENU
for approx 10 seconds until the display shows Press and
At the base:
2. Press and hold
PAGE
for at least 10 seconds until the display shows Register.
De-register a handset
De-register a handset if too many are currently registered on the phone system.
TONE
1. Open the menu by pressing
is highlighted and press B or OK.
1-866-AMPLICOM (267-5426)
MENU
, then scroll using
REDIAL
or
CID
until Handset
29
Page 30

2. Scroll using
REDIAL
MENU
REDIAL
REDIAL
REDIAL
TFLASH
REDIAL/P
OGM MEMO
a handset
TONE
or
TONE
CID
REDIAL
until Registration is highlighted and press B.
Then scroll
3. Enter the PIN code (default PIN 0000) and press B
REDIAL
to highlight De-register and press B
.
.
4. Enter the handset’s internal number (e.g. 1) and press B to conrm.
Change a handset name
or
TONE
CID
until Handset
1. Open the menu by pressing
is highlighted and press B
2. Scroll using
REDIAL
or
TONE
.
CID
until Handset name is highlighted and press B.
, then scroll using
REDIAL
3. Edit or delete current name by pressing A to Delete or pressing INT or Flash
to move cursor then press B or OK to save.
Transfer an external call internally
1. During an external call, press and hold
then enter the internal call number of the name and number (1, 2, 3, or 4) to
transfer the call to.
2. To accept the call on the receiving handset, press
handset off the base of the unit or press the Talk button on the handset.
IN
until a short beep is heard,
or simply lift the
Note: If no one picks up the call being transferred, re-answer the call at the
current phone by pressing
30
.
Service Center
Page 31

T
T
T
makinG Calls From a handset
Making Calls from a Handset
Note: One external line conference call can be made with multiple handsets
internally by pressing
twice or simply lifting the base handset.
Make an internal call
If two or more handsets are registered to the base internal calls between
handsets can be made. Each handset will have been allocated a handset
number when registered, e.g. HS1, HS2 etc. These calls are free of charge.
1. Press and hold
number of the handset desired. The corded base unit is always 0
2. To accept the call on the receiving handset, press .
3. End the call by pressing .
IN
. The display will show Handset? Enter the internal call
Make a conference call
IN
1. During an external call, press and hold
enter the internal call number of the handset to transfer to.
2. To accept the call on the receiving handset, press .
3. Once the call has been received on the other handset , activate the conference call
by pressing and releasing the B or Conf. button.
4. Place the external call on hold by pressing
until a short beep is heard, then
IN
(if necessary).
5. The conference call will end when is pressed.
1-866-AMPLICOM (267-5426)
31
Page 32

REDIAL
REDIAL
REDIAL
INTFLASH
makinG Calls From a handset C
C
opy phone book entries to another registered handset
Note: Phone books can only be copied to another handset if that handset is
registered on the same phone system.
• A single entry (Copy entry)
• Entries not already on the handset being copying to (Copy append)
• All entries (Copy all)
Important: When “copy all” is selected, all existing entries on the handset being
copied to will be deleted. To prevent this from happening use “Copy append.”
1. Open the phone book by pressing B.
TONE
2. Scroll using
TONE
3. Scroll
CID
to either Copy entry, Copy append, or Copy all and press B.
REDIAL
or
CID
to nd the entry or entries to copy and press B.
4. Scroll
or
to highlight the handset number and or base to copy to
and press B.
5. Pick up the handset where copying entries to and press B or PB . The display
will conrm Phone book entry received..
32
Service Center
Page 33

Copy a profile
MENU
REDIAL
REDIAL
REDIAL
FLASH
MENU
MENU
REDIAL
REDIAL
makinG Calls From a handset
1. Open the menu by pressing
, then scroll using
REDIAL
or
TONE
CID
until Prole is
highlighted and press B.
TONE
or
or
or
CID
until Prole 1, 2, or 3 is highlighted and press B.
TONE
CID
until Copy is highlighted and press B.
until the handset (e.g. 2, 3 or 4) to copy the prole to
2. Scroll using
3. Scroll using
4. Scroll using
REDIAL
REDIAL
INT
is highlighted, and press B.
5. On the copy-to handset, press B to conrm or
to cancel.
Setting or changing the System PIN code
TONE
or
CID
until Base
1. Open the menu by pressing
, then scroll using
REDIAL
settings is highlighted and press B.
TONE
2. Scroll using
REDIAL
or
CID
until System PIN is highlighted and press B.
3. Enter the old PIN code (default PIN is 0000) and press B.
4. The phone will prompt for a new 4 digit PIN code (entered twice), press B.
Important: Do not change or reset the PIN code unless instructed by customer
service.
1-866-AMPLICOM (267-5426)
33
Page 34

MENU
REDIAL
TONE
CID
REDIAL
TONE
CID
REDIAL
TONE
CID
MENU
menu options - Cordless phone
Menu Options – Cordless Phone
Priority/Default setting
Any changed settings in the menu will be saved as default. The phone also
allows for 2 separate user proles.
User proles
The phone can store 2 different user proles with different settings for the
Volume, Boost, and Equalizer features. Each Prole can be given a personalized
name.
Add or edit a prole name
1. Open the menu by pressing A or
, scroll using
Prole is highlighted and press B or OK.
2. Scroll using
or
until Prole 1 or 2 is highlighted andpress B or
OK.
3. Scroll using
or
until Name is highlighted and press B or OK.
4. Delete the current name by pressing A or
5. Enter a new name (up to ten letters) and press B or OK.
34
or
until
.
Service Center
Page 35

menu options - Cordless phone
Change a prole’s handset volume or equalizer
1. Open the menu by pressing
highlight Prole and press B or OK.
MENU
, then scroll using
REDIAL
or
TONE
CID
until you
Scroll using
2.
Scroll using
3.
REDIAL
EDIA
LR
or
or
Prountil le 1 or 2 is highlighted, press B or OK.
-
TONE
CID
until the desired setting is highlighted, press B or
OK.
4. The current setting will be displayed.
TONE
Change the appropriate setting using
5.
Note: Press
to exit the menu and return the handset to standby.
REDIAL
or
CID
and press B or OK.
Choose a prole to use
Note: Handset must be used to choose a prole for a call – a prole cannot
be chosen using handsfree.
1. Before or after answering an incoming call, press the PROFILE button on
the left side of the handset to select either prole M1 or M2 or Prole OFF.
2. The display will conrm your choice.
1-866-AMPLICOM (267-5426)
35
Page 36

REDIAL
TONE
CID
REDIAL/P
mmeennuu ooppttiioonnss - C - Coorrddlleessss pphhoonnee
Note: Once a prole has been selected to use when making a call, the phone
will return to the default settings after 30 seconds.
Changing Menu Settings
Handset ringer melody — There are ten ringer melodies. Default setting is 7.
Handset ringer volume — There are ve volume levels plus OFF.
Tone (“Equalizer”) setting — There are three tone settings, LOW/MID/
HIGH. Default is MID.
Note: To adjust tone while making a call, press the
access the equalizer setting, press the
setting. One can also use + VOL or - VOL on right side of handset to reach
preferred equalizer / TONE setting.
or
button to
button to adjust the
Switch keypad beep on or off — Turns on or off the keypad beep.
Change contrast — There are ve normal (BLACK ON AMBER) screen
contrast levels and ve negative (AMBER ON BLACK).
Switch “auto talk” on or off — The phone will automatically answer
a call when the handset is removed from its base when Auto Talk is ON. This is
the default setting. If Auto talk is OFF, press the
Change backlight timer — Choose between 10, 20, 30 or 40 seconds
until the backlight timer switches off.
36
button to answer any calls.
Service Center
Page 37

MENU
REDIAL
TONE
REDIAL
menu options - Cordless phone
Switch conrmation beep on or off — There is a beep conrma-
tion when a setting is changed. This can be switched on or off.
Change language — There are three display languages available on the
handset: English, French, and Spanish.
1. Open the menu by pressing
highlighted and press B or OK.
, then scroll
REDIAL
or
TONE
CID
until Handset is
2. Scroll
CID
until the desired menu setting (see options above) is highlighted
and press B or OK.
3. The current setting will be displayed.
4. Change the setting using
REDIAL
or
TONE
CID
and press B or OK.
Changing Clock Settings
Change date/time — Enter the Date and Time settings.
Change clock to 12- or 24-hour format — Choose between a
standard 12-hour format clock or a 24-hour format (military time). The default
setting is 12 hour clock.
1-866-AMPLICOM (267-5426)
37
Page 38

MENU
REDIAL
TONE
MENU
REDIAL
mmeennuu ooppttiioonnss - C - Coorrddlleessss pphhoonnee
Set alarm — Set an alarm date, time, melody, and reoccurance or off.
1. Open the menu by pressing
, then scroll
REDIAL
or
TONE
CID
until TIME, Select
SET ALARM by pressing B AGAIN is highlighted and press B or OK.
2. Scroll
CID
to set reoccurance (Once, Every Day, Mon to Fri, or OFF) and B or
OK.
3. The current setting will be displayed.
4. Enter the desired date and/or time setting required (the handset has a 24-
hour clock) B or OK.
5. Select the desired alarm melody and conrm by pressing B. The display will
show the alarm has been set.
Changing Base Settings
Change base ringer melody — There are ten base ringer melodies.
1. Open the menu by pressing
, then scroll
REDIAL
or
TONE
CID
until Base settings
is highlighted and B or OK.
2. Ring tone is highlighted, B or OK.
3. The ringer melody setting (e.g. 8) will be displayed.
38
Service Center
Page 39

REDIAL
MENU
REDIAL
TONE
REDIAL
phone Book - Cordless phone
4. Change the ringer melody using
REDIAL
or
TONE
CID
and B or OK.
Change base ringer volume — There are ve volume levels plus Off.
or
TONE
CID
until Base
1. Open the menu by pressing
, then scroll using
REDIAL
settings is highlighted and B or OK.
2. Scroll
CID
until Ringer volume is highlighted and B or OK.
3. The current base ringer volume level (e.g. 5) will be displayed.
4. Change the base ringer volume using
REDIAL
or
TONE
CID
and B or OK.
Phone Book – Cordless Phone
Up to 200 names with phone numbers can be alphabetically stored in the phone
book. To quickly nd a phone book entry, simply enter the rst letter of the
stored name.
Note: The Amplicom customer service toll free number has been pre-installed
in the phone book of every telephone and cannot be edited or removed.
Note: Each phone book entry allows for up to 16 letters for any name and up
to 24 digits for any phone number.
Important: Enter the area code for each phone number stored.
1-866-AMPLICOM (267-5426)
39
Page 40

MENU
REDIAL
REDIAL
phone Book - Cordless phone
Keypad use for phone book
The keypad contains alpha-numeric keys. Pressing one key multiple times will
scroll through the available letters and numbers which that key represents.
Other useful keys:
• press for a space
• press
to delete a number or letter entered
• press to change from upper case (e.g. ABC) to lower case (e.g. abc)
Note: To enter the same letter twice, enter the letter and then pause until
the cursor moves to the next space before entering it again.
Enter a new name and number in the phone book
1. Open the phone book by pressing B.
2. Press B. The display will offer you the choice to edit entry, or you can scroll
TONE
or
CID
to choose new entry, press B again.
TONE
or
CID
to choose a ringer for this entry and press B.
REDIAL
REDIAL
3. Enter the name to store and press B.
4. Enter the phone number to store and press B.
5. Scroll using
40
Service Center
Page 41

REDIAL
REDIAL
REDIAL
REDIAL
REDIAL
phone Book - Cordless phone
Show details, copy entry, copy append, or copy all for a
phone book entry
1. Open the phone book by pressing B.
TONE
or
or
CID
to nd the entry to show details, copy entry, copy
TONE
CID
to choose a ringer for this entry and press B.
Scroll using
2.
REDIAL
append, or copy all and press B.
TONE
CID
3. Scroll
to display Show details, copy entry, copy append, or copy all and
press B.
MENU
4. Press
5. Press
Scroll using
6.
to delete characters, use the keypad to enter new ones, press B.
MENU
to delete digits, use the keypad to enter new ones, press B.
REDIAL
Delete a pho
T
ne book entry or all entries
1. Open your phone book by pressing B.
TONE
Scroll using
2.
REDIAL
or
CID
to nd the entry to delete or highlight any entry to
delete all entries.
TONE
CID
3. Press
4. Press B to conrm or
to display either Delete entry or Delete all and press B.
MENU
to
1-866-AMPLICOM (267-5426)
cancel.
41
Page 42

phone Book - Cordless phone
Using speed dial memory buttons
One name (max. 16 characters) and one telephone number (max. 24 digits) can
be stored under each of the quick dial memory buttons:
, ,
and .
1.
Press the
or speed dial button.
, ,
2. Press B. The display will show New entry, press B again.
3. Enter the name to store using the keypad and press B.
4. Enter the phone number to store and press B. Saved will be displayed.
Edit a speed dial entry
1. Choose the speed dial entry to edit by pressing either
2. Press B. The display will show Edit entry, press B again.
MENU
3. Press
4. Press
to delete characters, use the keypad to enter new ones, press B.
MENU
to delete digits, use the keypad to enter new ones, then
press B. The display will show Saved.
, ,
or .
Delete a speed dial entry
1. Choose the speed dial entry to delete by pressing either
TONE
CID
2. Press B. Scroll
3. Display will show Delete entry? Press B to conrm or
to Delete entry and press B.
MENU
or .
, ,
to cancel.
42
Service Center
Page 43

REDIAL
REDIAL
REDIAL
REDIAL
Caller list
- Cordless phone
Incoming Calls - Cordless Phone
Note: You must subscribe to your phone service provider’s Caller Display/
Caller ID service for this feature to work.
Incoming call telephone numbers will appear in the calls list. If the caller’s
number is stored in the phone book, the name will be displayed instead. A
total of 30 incoming calls can be stored in the calls list (16 letters per name
and 24 digits per number). The number of new calls received will be shown in
the display with the ashing
icon. If the number does not appear, this is
because the caller’s identication (Call Line ID) has been withheld by the caller.
TONE
Open the calls list by pressing the
TONE
or
CID
. To display more information including the date and time
FLASH
. Other displayed information:
pressing
REDIAL
of the call, p
ress
CID
button. Scroll through the calls list by
• WITHHELD NUMBER – withheld number, or ID information isn’t available
• INTERNATIONAL – call is from another country or using an internet service
• PAYPHONE – caller is calling from a public payphone
Store numbers from the calls list to the phone book
TONE
1. Press
the desires number you wish to add then press B or Options.
Scroll using
2.
1-866-AMPLICOM (267-5426)
CID
to open the calls list at the most recent entry. Scroll until you reach
TONE
or
CID
to save a number, save to M1, save to M2, or save to
REDIAL
43
Page 44

REDIAL
REDIAL
REDIAL
REDIAL
REDIAL
Caller list - Cordless phone
M3. You must confirm to store by pressing B or OK.
3. The display will conrm action.
4. Using the keypad, enter a name for this stored number and press B.
5. Edit the number for this name, if needed, and press B.
TONE
Scroll using
6.
REDIAL
or
CID
to choose the ringer for this entry and press B.
Delete a single entry
TONE
1. Press
CID
to open the calls list at the most recent entry. Scroll until you
reach the desires number you wish to add then press B or Options.
TONE
Scroll using
2.
3. Scroll
REDIAL
ETON
CID
until Delete is highlighted and press B.
or
CID
to nd the listed to Delete and press B.
Delete all call list entries
TONE
1. Press
2. Scroll
CID
to open the calls list and at the most recent entry press B.
TONE
CID
until Delete all is highlighted and press B.
3. The display will show Delete all Calls? Press B.to conrm or
44
MENU
to cancel.
Service Center
Page 45

Wrist Shaker
3
3
3
4
4
4
5
5
5
12 8
12 8
12 8
6 7
6 7
6 7
wrist shaker
1
Stop Vibration / Page
2
2
2
Battery charging red light
Battery charging red light
Battery charging red light
3
3
3
Power on/off
Power on/off
Power on/off
4
4
4
Wrist strap
Wrist strap
Wrist strap
5
5
5
Registration mode/
Registration mode/
Registration mode/
Out of range/Low battery
Out of range/Low battery
Out of range/Low battery
2 color green or red light
2 color green or red light
2 color green or red light
6
6
6
Charging contacts
Charging contacts
Charging contacts
7
7
7
Charging unit
Charging unit
Charging unit
8
8
8
Incoming call green light
Incoming call green light
Incoming call green light
1-866-AMPLICOM (267-5426)
45
Page 46

wrist shaker
Connect and charge wrist shaker
Important: Use only the power adapter supplied, otherwise wrist shaker
may not work.
(Optional and may be included)
1. Plug in the charger unit
Plug the charger unit into the wall socket.
2. Place the wrist shaker in the
charger unit
Place wrist shaker on its charger unit, with
the two connection points facing down. A red light on the wrist shaker indicates
it is charging properly. Charge the wrist shaker for 10 hours before use.
Note: When fully charged, the wrist shaker’s battery will last ve days. The
larger red light will ash slowly when the battery is low and needs to charge
for 10 hours.
3. Switch wrist shaker on/off
Press and hold for ve seconds, until the green light with the warning
triangle comes on.
46
Service Center
Page 47

MENU
MENU
REDIAL/P
REDIAL/P
MENU
wrist shaker
Note: The light
ashes green then red if the wrist shaker is not registered or
is out of range. Bring it closer to the PowerTel telephone to ensure it is within range. If the light still flashes, see page 49 for registration instructions.
Power on/off button
Off: Press and hold for about ve seconds, until the green light goes off.
4. Turn on SOS Motor feature
The SOS Motor feature causes the wrist shaker to vibrate when a call comes in.
i. At the corded phone base: Press
(under the display).
ii. Use
iii. Use
1-866-AMPLICOM (267-5426)
to scroll to SOS Motor. Press
or
to scroll to On. Press
again.
again. Saved is displayed.
4
7
Page 48

wrist shaker
Attach the wrist strap
The wrist strap allows the wrist shaker to be worn like a watch. To attach or
adjust the wrist strap:
1. Thread it from the back through one of the slots.
2. Slide the strap across the back of the wrist shaker.
3. Thread it back to front through the other slot.
4. Place the strap around the wrist and connect the velcro fasteners.
The telephones and wrist shaker are now ready for use!
48
Service Center
Page 49

PAGE
PAGE
wrist shaker
Register the wrist shaker
Important: It is necessary to register the wrist shaker if it has become
de-registered from the telephone or if a new wrist shaker needs to be
registered.
At the wrist shaker:
1. Turn on the wrist shaker by pressing and holding for about ve seconds.
2. After the wrist shaker is On, press and hold again for about 12 seconds,
until the registration light ashes green. The wrist shaker will be in
registration for about 1 minute.
At the corded phone base:
3. Press and hold
for at least 10 seconds, until Register
is displayed (for about 10 seconds).
Note: To located the registration key
, see the At a Glance section for the
corded phone base at the beginning of this guide.
4. The registration light unit glows a steady green when the wrist shaker is
registered (i.e. it isn’t ashing).
Note: The registration light will ash green and red if the wrist shaker
either isn’t registered or is out of range.
1-866-AMPLICOM (267-5426)
49
Page 50

wrist shaker
Using the Wrist Shaker
Switch on
Press and hold for ve seconds. The green light with the warning triangle
will come on.
Switch off
Press and hold for ve seconds, until the green light goes off.
Incoming calls
When you receive an incoming call, the green light will ash and the wrist
shaker will vibrate.
Paging
You are able to page the wearer of the wrist strap by pressing . To stop the alert
p
ress the (red center button).
PAGE
50
Service Center
Page 51

help and support
Help and Support
Some issues may simply be resolved by disconnecting the power to the unit.
In such instances the power to the main base station should be switched off
and battery pack in the handset should also be removed for about 20 minutes. After 20 minutes, replace the battery pack and reconnect everything to
determine if this has resolved the issue.
Troubleshooting Guide
I can’t make phone calls
1. Make sure the phone cable is connected properly. Make sure you are using
the phone cable that came with your phone.
2. Make sure the base is plugged in, switched on and working.
3. If you’re using the cordless handset, make sure you are not located too far
from the base (the phone should work up to 325 yards outdoors and up to 53
yards indoors).
4. Test the phone line and socket by using another phone.
I keep losing my connection on the cordless handset
1. Make sure you aren’t too far from the base (in ideal conditions, it should
work up to 325 yards outdoors and up to 53 yards indoors).
2. The base may not be in an ideal location – see Safety Information.
1-866-AMPLICOM (267-5426)
51
Page 52

help and support
My handset keeps switching off
1. It may need recharging. So it can charge fully, place your handset on its charger
base for at least 15 hours with the charger base plugged in and working.
2. Replace the rechargeable battery pack. Any replacement battery packs
should be the same type as those provided.
The phone system isn’t responding
You may need to reset to default settings. Please see page 39.
Answering machine won’t record messages or memos
1. Check that the answering machine is connected and switched on.
2. Answering memory may be full. See page 32.
Caller’s identication (Call Line ID) isn’t working
1. Check you have this service on your phone line. Please call your
network provider.
2. The caller may have withheld their phone number.
My handset or base doesn’t ring
Check that the ringer is on.
I’ve got a buzzing noise on my radio, TV, or computer
We suggest you use your cordless handset at least 3 feet away from electrical
equipment and mobile phones.
There is interference in the earpiece and/or the internet
connection is very slow when using the phone
You must plug the phone into the wall socket via an ADSL lter if you have
broadband internet on your phone line.
52
Service Center
Page 53

help and support
The white light on the base is constantly ashing
You have new answering machine message(s). Press to listen to them and
the ashing will stop. My answering machine won’t record messages or memos
1. Check that your answering machine is connected and switched on.
2.
Answering memory may be full. See page 17
.
My remote access isn’t working
1.
Check you’re using the correct PIN. See page 17 and 18.
2. Make sure you’re using a touchtone phone.
1-866-AMPLICOM (267-5426)
53
Page 54

General inFormation
Energy efcient power adapter
The included power adapter meets the eco-design requirements
of the European Union (Directive 2005/32/EG).
Disposal
The symbol on this product indicates that electrical and electronic apparatus
and battery pack must be disposed of separately from domestic waste at
suitable collection points provided by the public waste authorities.
Technical Details
Standard DECT¹ GAP²
Power supply (base station) Input: 100-240V ~50/60Hz 0.15A
Output: 6VDC 800mA
Range Outdoors Approx 325 yards/300m
Indoors Approx 53 yards/50m
Standby Up to 100hrs
Maximum Talk Time Up to 10hrs
Rechargeable battery pack AAA 3.6V 750mAh NiMH in handset unit.
Dialling mode Tone (DTMF)
Pulse
Optimum ambient temperature 32˚F to 113˚F (0˚C to 45˚C)
Optimum relative humidity 20% to 80%
Recall 300, 600 ms
¹ DECT: Digital Enhanced Cordless Telecommunication
² GAP: Generic Access Prole = standard for the operation of handsets and base stations
from different manufacturers.
54
Service Center
Page 55

Default Settings
Cordless handset
Language English
Handset name PowerTel
Handset ringing melody (external) 7
Handset ringing melody (internal) 9
Handset ringing volume 5
Base ringing melody 8
Base ringing volume 5
Keypad beep On
Auto talk On
Contrast 3
Backlight time 10s
Boost memory Off
Recall time 600ms
Dialing mode Tone
PIN code 0000
General inFormation
Telephone answering machine
Language English
Answer mode Answer and record
PIN code for remote access 000
Answer delay 3
Time format 12 hour
1-866-AMPLICOM (267-5426)
55
Page 56

General inFormation
Maintenance and Warranty
Maintenance
• Please clean your equipment’s surfaces with a soft, lint-free cloth.
• Never use cleaning agents or solvents.
Warranty
AMPLICOM equipment is produced and tested according to the latest
production methods. The implementation of carefully chosen materials and
highly developed technologies ensure trouble free functioning and a long
service life. The terms of the warranty do not apply where the cause of the
equipment malfunction is the fault of the telephone network operator or any
interposed private branch extension system. The terms of the warranty do not
apply to the rechargeable battery pack or power packs used in the products.
The period of warranty is 24 months from the date of purchase.
All deciencies resulting from material of production faults which occur during
the period of warranty will be eliminated free of charge. Rights to claims under
the terms of warranty are annulled following intervention by the purchaser or
third parties. Damage caused as a result of improper handling or operation,
incorrect positioning or storing, improper connection or installation, Acts of
God or other external inuence are not covered by the terms of warranty.
In the case of complaints, we reserve the right to repair or replace defect
parts or provide a replacement device. Replacement parts or devices become
56
Service Center
Page 57

General inFormation
our property.
Rights to compensation in the case of damage are excluded where there is no
evidence of intent or gross negligence by the manufacturer.
If your equipment shows signs of defect during the period of warranty, please
return to the sales outlet in which you purchased the AMPLICOM equipment
together with the purchase receipt. All rights to claims under the terms of
warranty in accordance with this agreement must be asserted exclusively with
regard to your sales outlet.
Two years after the purchase of our products, claims under the terms of
warranty can no longer be asserted.
Declaration of conformity
The ETL Listed Mark is an alternative to the CSA and UL marks. ETL
Testing Laboratories owned by Intertek Testing Services (ITS) is
recognized by OSHA as a Nationally Recognized Testing Laboratory
(NRTL). ITS tests products according to nearly 200 safety and performance
standards. The ETL Listed Mark is accepted throughout the United States when
denoting compliance with nationally recognized standards such as ANSI, IEC,
UL, and CSA.
This certication mark indicates that the product has been tested to and has
met the minimum requirements of a widely recognized (consensus) U.S.
product safety standard, that the manufacturing site has been audited, and that
the applicant has agreed to a program of periodic factory follow-up inspections
to verify continued conformance.
1-866-AMPLICOM (267-5426)
57
Page 58

index
A
Adjusting the handsfree volume 26
Adjusting the earpiece volume 25
Alarm 38
Answering machine 12
Auto talk 36
B
Backlight timer 36
Base ringer melody 38
Base ringer volume 39
Base settings 38
Boosting the earpiece volume 26
C
Changing the system’s PIN code 33
Change case 40
Charging the battery pack 10
Checking messages 13, 16
Conference calls 31
Connecting the base and charger 10
Contrast 36
D
Date/time 14, 37
Default settings 55
De-register a handset 29
Dial mode 22
Dialing pause 22
Dialing from the phone book 25
Dialing from a speed dial button 25
Display icons 9
E
Earpiece volume 24
End a call 24
Entering names in the phone book 40
alizer 36
Equ
F
Find a handset 28
58
Service Center
Page 59

I
NDEX
H
Handset name 30
Handset ringer melody 36
Handset ringer on/off 27
Handset ringer volume 36
ndsfree 26
Ha
Headset use 27
I
Internal calls 31
K
Keypad lock 28
Keypad beep on/off 36
L
Language 12,37
M
Making a call 24
Making internal calls 31
Memory full 17
Mute 27
P
Phone book 39,43
R
Record outgoing message 13,19
Redial 24
Register a handset 29
Remotely checking messages 18
Reset to default settings 23
S
Speed dial 25
T
Tone control 35,36
U
Using a headset 27
Using the menu 11
Page 60

This page intentionally left blank.
 Loading...