

Page 1
INSTALLATION INSTRUCTIONS
UNDERCOUNTER SINKS
Rectangular/Square Models: 0426, 0610, 0614, 0615, & 0618
Introduction: Thank you for selecting our products...products which have been the benchmarks of fine quality for years. To help
ensure that the installation process will proceed smoothly, please read these instructions carefully before you begin. Also, review
the recommended tools and materials list; carefully unpack and examine your new plumbing fixture.
Observe Local Plumbing and Building Codes.
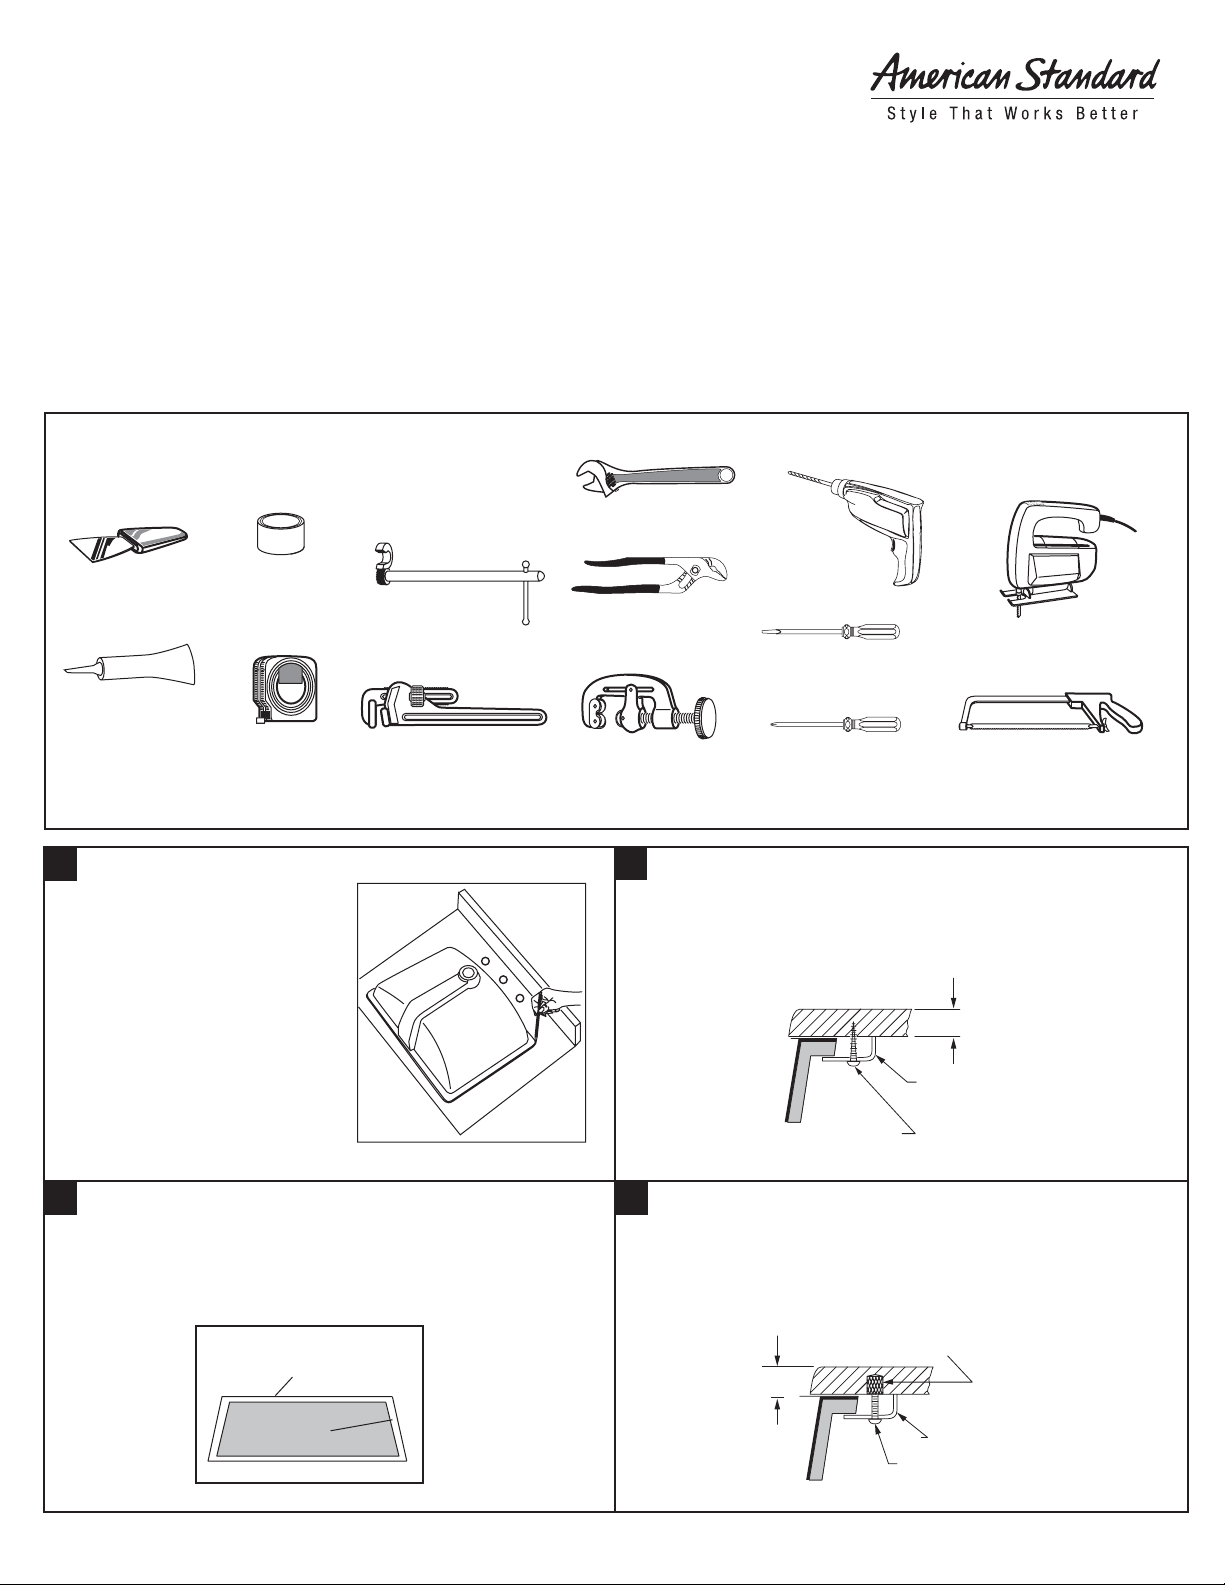
Recommended Tools & Materials
Adjustable Wrench
Putty Knife
Silicone Adhesive
NOTE: More specialized tools may be necessary to install this sink to countertop materials other than wood or wood composites.
1
NOTE: To avoid damage to
countertop, install sink such that
future removal from underneath the
countertop is possible.
First, make sure the clearance
between the backsplash, faucet,
fixtures and cabinets are
acceptable for the new sink.
For Model 0426 to be ADA
compliant the sink must be installed
with the overflow in the rear.
Plumbers' Putty
10'
Tape
Measure
Basin Wrench
Pipe Wrench
Channel Lock Pliers
Tubing Cutter
3
FOR WOOD COUNTERTOP
Mark and pre-drill the wood screw holes as located on the
enclosed template. Waterproof any exposed areas of wood.
Regular Screwdriver
Phillips Screwdriver
Drill 1/8 dia. X 3/8 deep
#10 Wood Screw
Drill
Saber Saw
Hacksaw
3/4 MIN.
Clip
2
Carefully cut out the enclosed template, then position and trace the
template on the countertop as shown on the template. Make a mark of
the faucet hole centerline on the countertop. Drill a 1/2" pilot hole on
the inside of the cut line. Use a saber saw or a keyhole saw to cut out
the countertop opening.
Perimeter of Sink
Cutout
Product names listed herein are trademarks of AS America, Inc. unless otherwise noted.
© AS America, Inc. 2009
4
FOR MARBLE OR SOLID SURFACE COUNTERTOP
To protect countertop, place it on a foam padding and drill
3/8 Dia. X 1/2 deep hole as per location shown on template.
Brass insert, epoxy in place
with threaded end exposed.
(Epoxy not supplied.)
3/4 MIN.
Clip
#10-24
Machine screw
730555-100 Rev. C
Page 2
5
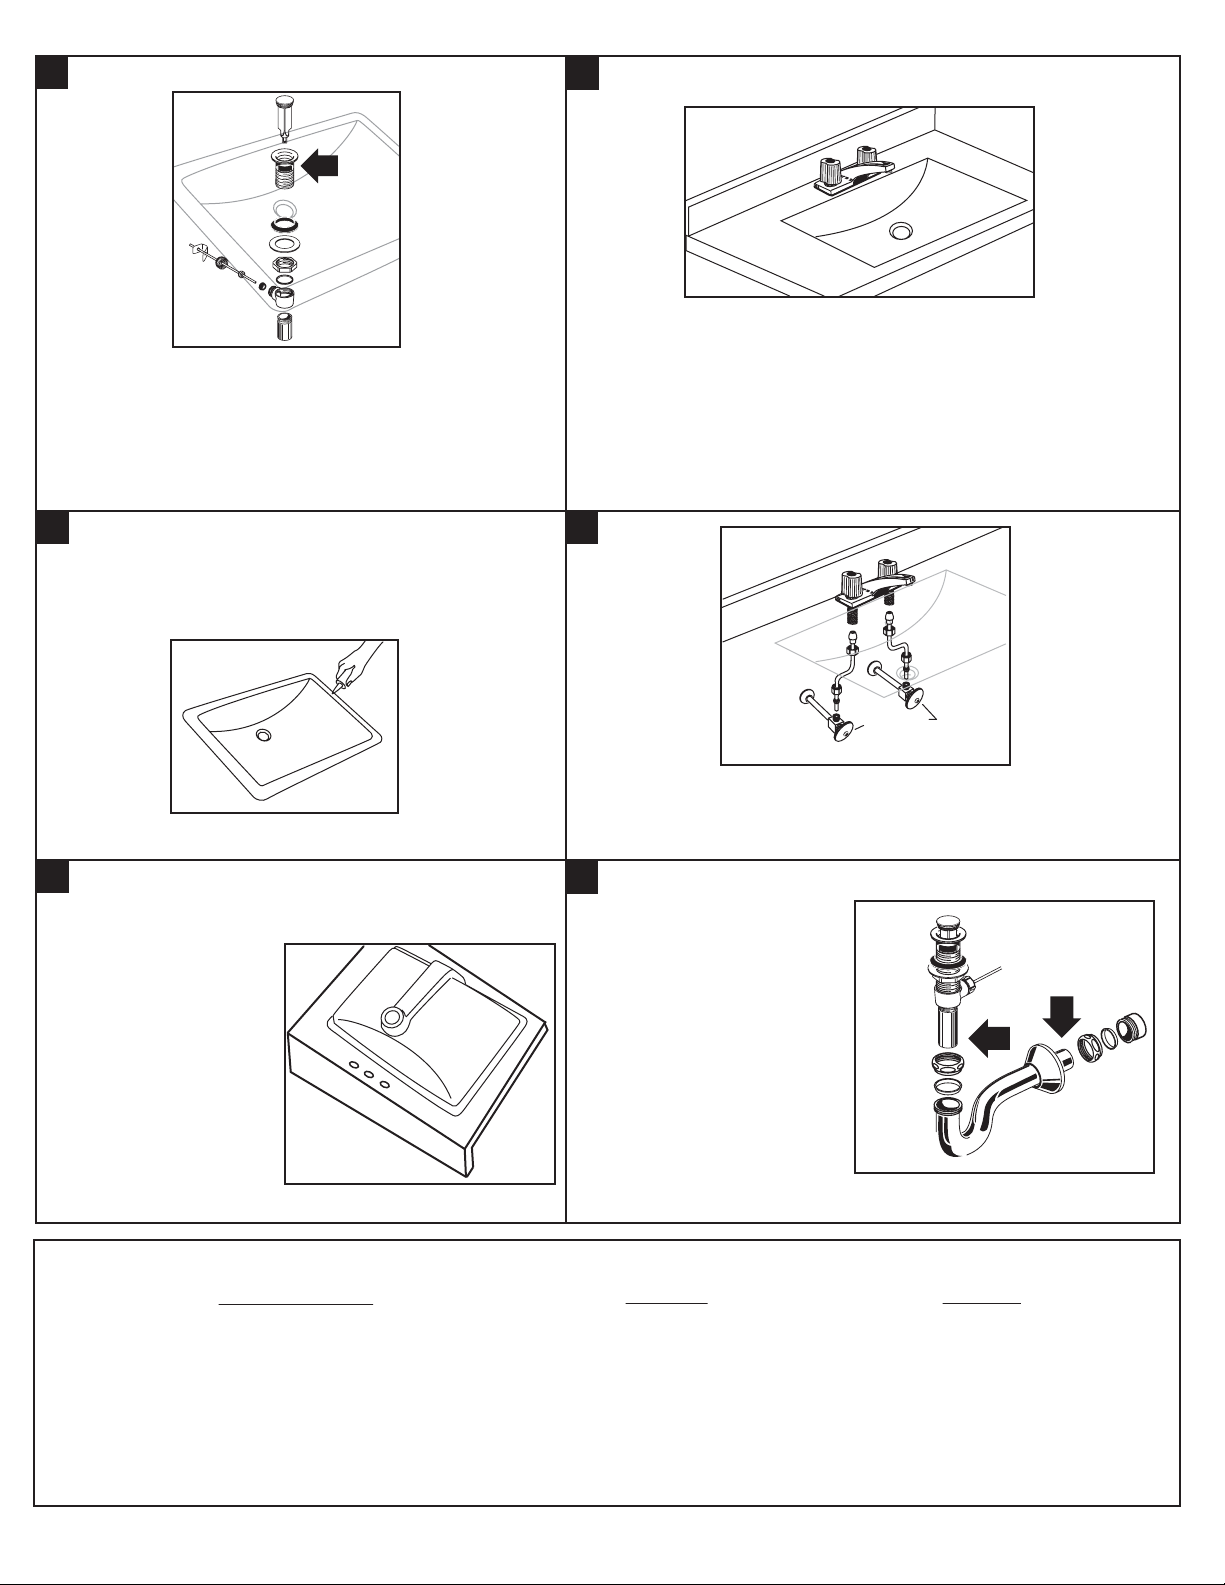
A
Mount the drain assembly (not included) on the sink,
following faucet manufacturer's instructions. Be
certain to apply a bead of sealing putty on the
underside of the drain (Part "A") in order to ensure a
watertight seal between the sink and drain. Remove
excess putty after installing drain on sink.
8
Install faucet (not included) and countertop (not
included) following manufacturers instructions.
6
NOTE: Do not use adhesives or adhesive sealants.
After checking fit and alignment of sink to cut out,
apply a bead of silicone adhesive to rim of sink.
7
Center bowl over cutout
and tighten screws (see 3
or 4) to secure bowl to
countertop. Remove
excess sealant from
inside lip.
NOTE: The screws
provided should be used
on countertops with a
minimum 1" thickness.
For thinner countertops,
use appropriate anchors
and fasteners.
9
Connect supply line to faucet (finger tight) and carefully bend
tubes to engage with the supply shut-off valves. Tighten
connections at faucet and shut-off valves for water tight seal.
10
Connect trap to drain
assembly hand tight to check
alignment. It may be
necessary to cut off part of
the tailpiece (area "B") or part
of the horizontal leg of the
trap (area "C"). Secure joints
for watertight assembly.
Shut-Off
Valves
C
B
In the United States:
American Standard Brands
P.O. Box 6820
Piscataway, New Jersey 08855
Attention: Director of Consumer Affairs
For residents of the United States, warranty
information may also be obtained by calling the
following toll free number: (800) 442-1902
www.americanstandard-us.com
In Canada:
AS Canada ULC
2480 Stanfield Rd.
Mississauga, Ontario
Canada L4Y 1S2
Toll Free: (800) 387-0369
www.americanstandard.ca
Customer Service Manager
In Mexico:
AS Maquila, S.A. de C.V.
Via Morelos #330
Col. Santa Clara
Ecatepec 55540 Edo. Mexico
www.americanstandard.com.mx
730555-100 Rev. C
 Loading...