

American Energy Systems RT080 User Manual

Vacuum Pressure Switch
Part #RT080
for Models BabyC, Winchester, Essex, T40
RT080 World
Magnetics Vacuum
Pressure Switch
• Both vacuum pressures switch use the same part number, RT080.
o Photo 1 is the Clark Controls vacuum pressure switch (bracket installed on switch).
o Photo 2 is the World Magnetics vacuum pressure switch.
We recommend that every 2-3 years check the vacuum pressure switch and if it is not
operating properly replace it. If the appliance is in a high humidity environment, in the
basement, etc. the contacts will rust sitting over the summer and then they might not
work properly.
RT080 Clark Controls
Vacuum Pressure Switch
Photo 1
Photo 2
RT080 Clark Controls
Vacuum Pressure Switch
RT080 World
Magnetics Vacuum
Pressure Switch
• The RT080 Clark Controls Vacuum Pressure Switch has a bracket attached. It must be installed
horizontally to the base of the stove, with 2 screws (#8 x 1/2 tek, ZP 1/4" hex head).
F:\AESBusinessSystems\AES Technical\Piece part instructions\RT080 Vaccum Pressure Switch.doc
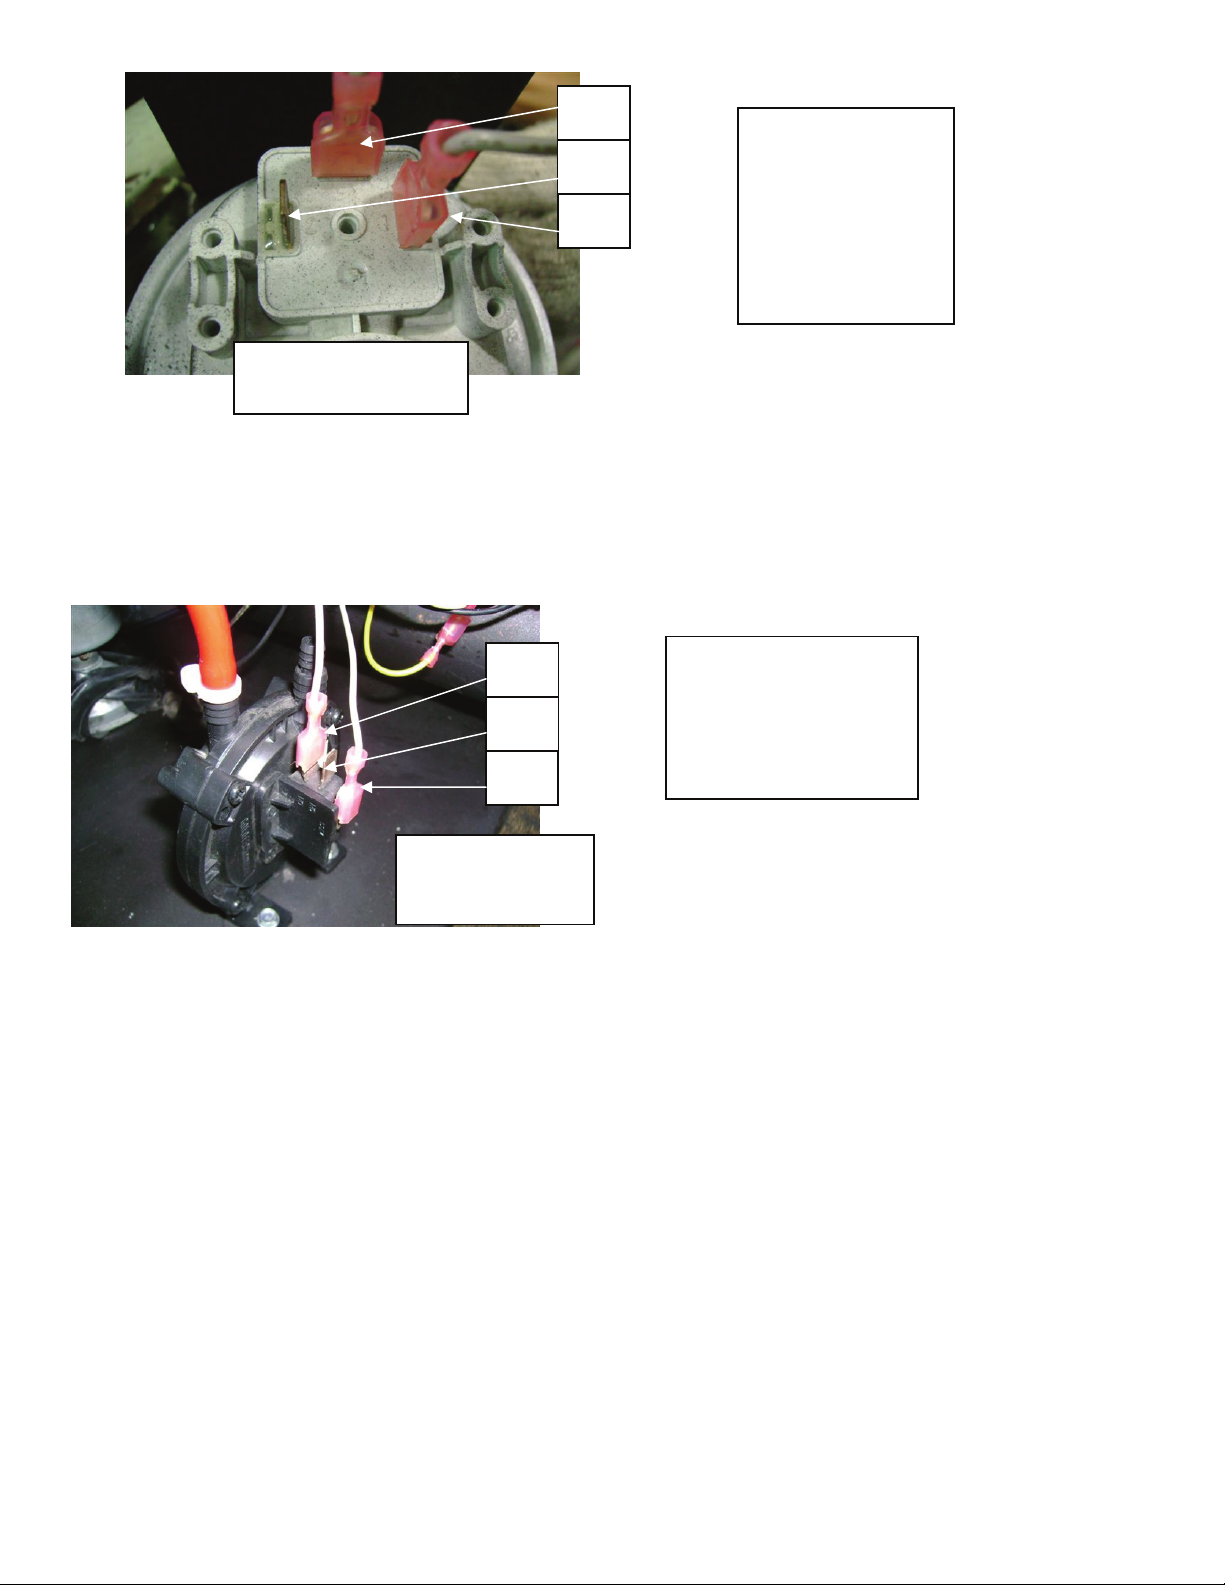
N.O.
3
N.C.
2
COM
1
Attach one grey
wire to ‘Com 1’
and one grey wire
to ‘NO 3’.
Attached hose to
bottom connection
‘P2’.
RT080 Clark Controls
Vacuum Pressure Switch
• The RT080 World Magnetics Vacuum Pressure Switch is installed vertically to the base of the stove,
with 2 screws (#8 x 1/2 tek, ZP 1/4" hex head).
o When mounting this vacuum pressure switch verify it has been positioned correctly .03” from
the top approximately 1 to 1 ½ exposed threads should be shown above the Allen head screw.
Add a small amount of thread loc to the Allen head screw after proper positioning.
N.O.
3
N.C.
2
COM
1
RT080 World
Magnetics Vacuum
Pressure Switch
Attach one grey wire
to ‘Com 1’ and one
grey wire to ‘NO 3’.
Attached hose to back
connection ‘H’.
SWITCH BYPASS mode – Gray wires connected to COM and N.C. terminals
• Make sure that the unit is unplugged from power.
• Unplug the two gray wires going to the vacuum pressure switch.
• Remove Vacuum hose from port.
• Remove bad vacuum switch.
• Mount new vacuum switch as identified above.
• Place grey leads accordingly.
• Place vacuum hose.
• Plug unit in.
• Start unit.
F:\AESBusinessSystems\AES Technical\Piece part instructions\RT080 Vaccum Pressure Switch.doc
 Loading...