

American Energy Systems BC7000 Auger Housing User Manual
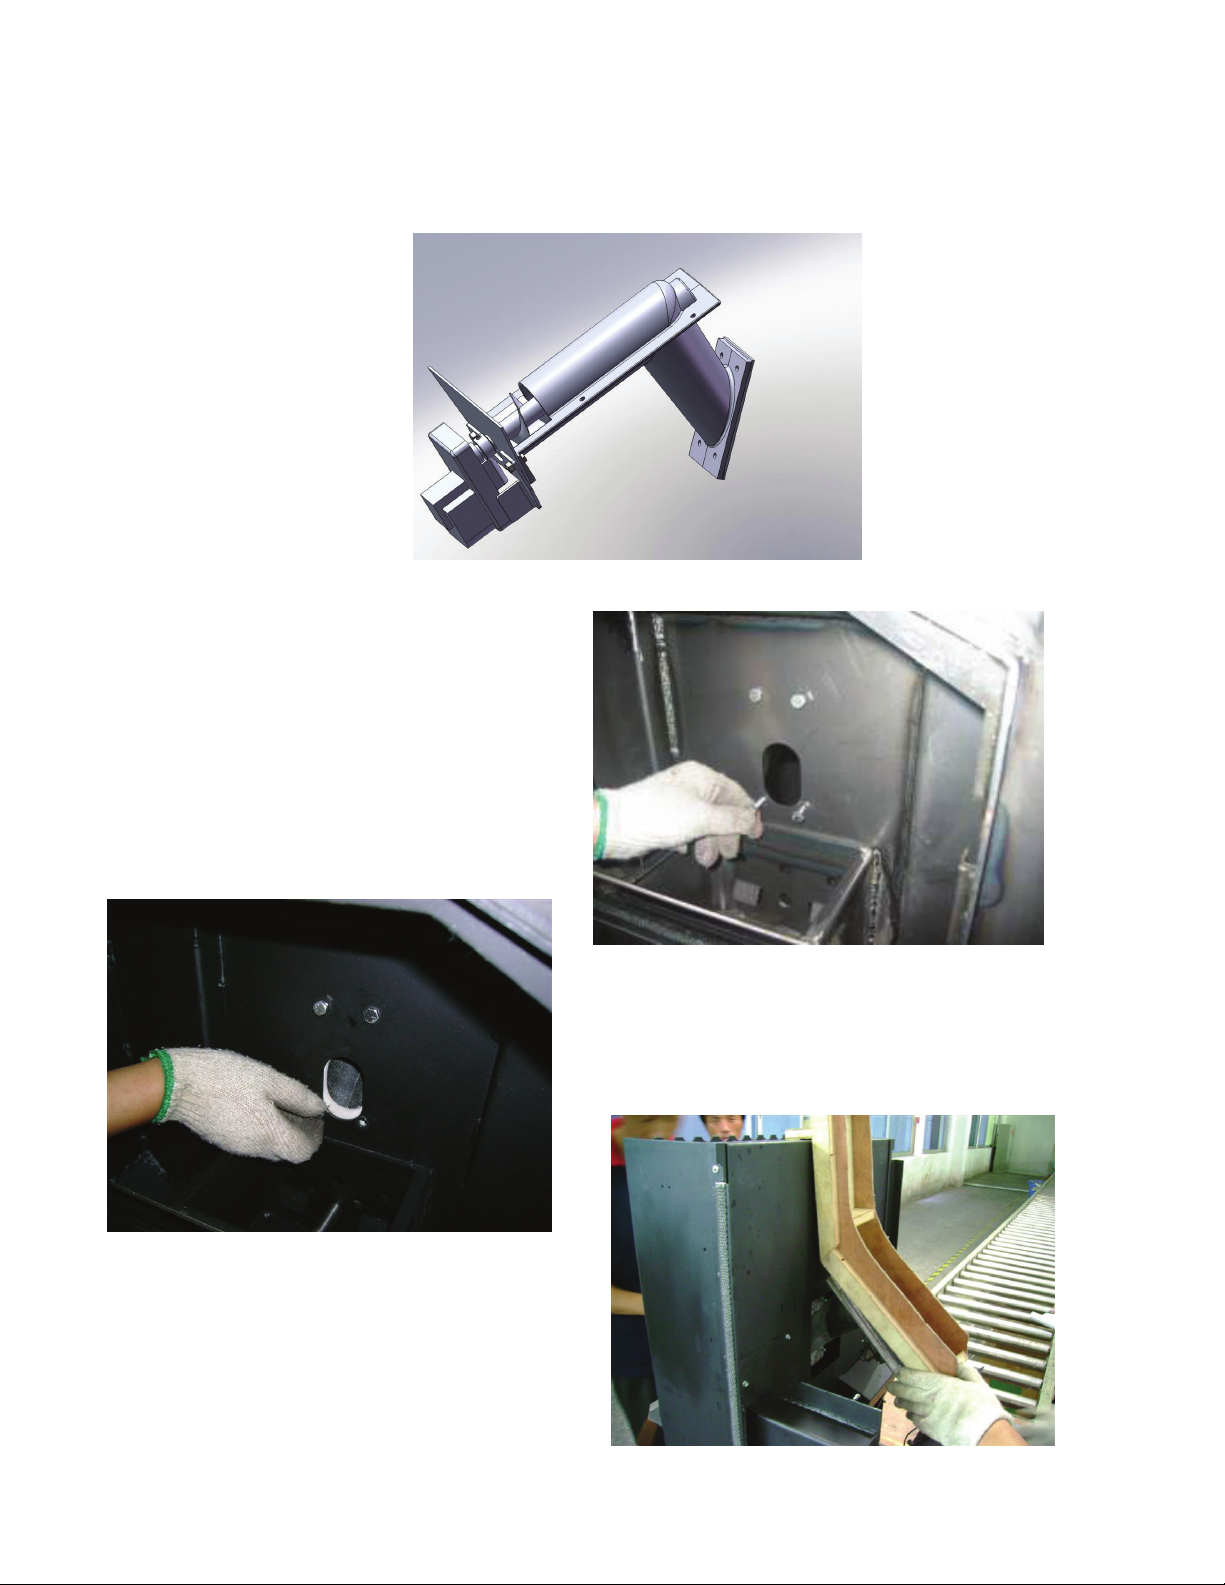
BC7000 Auger Housing Assemble
All BabyC & Winchester Pedestal
• Turn off power on control panel and unplug from the power supply.
• Insert the (4) bolts P1175 from the
front side of the firebox.
• Carefully align the fuel feed system with the
bolts and gasket.
• Start all bolts by hand and tighten to finger
tight.
• Using a 45 deg square line the auger housing
up to the back air shell.
F:\AESBusinessSystems\AES Technical\Piece part instructions\BC7000 Auger Housing
Assembly.doc
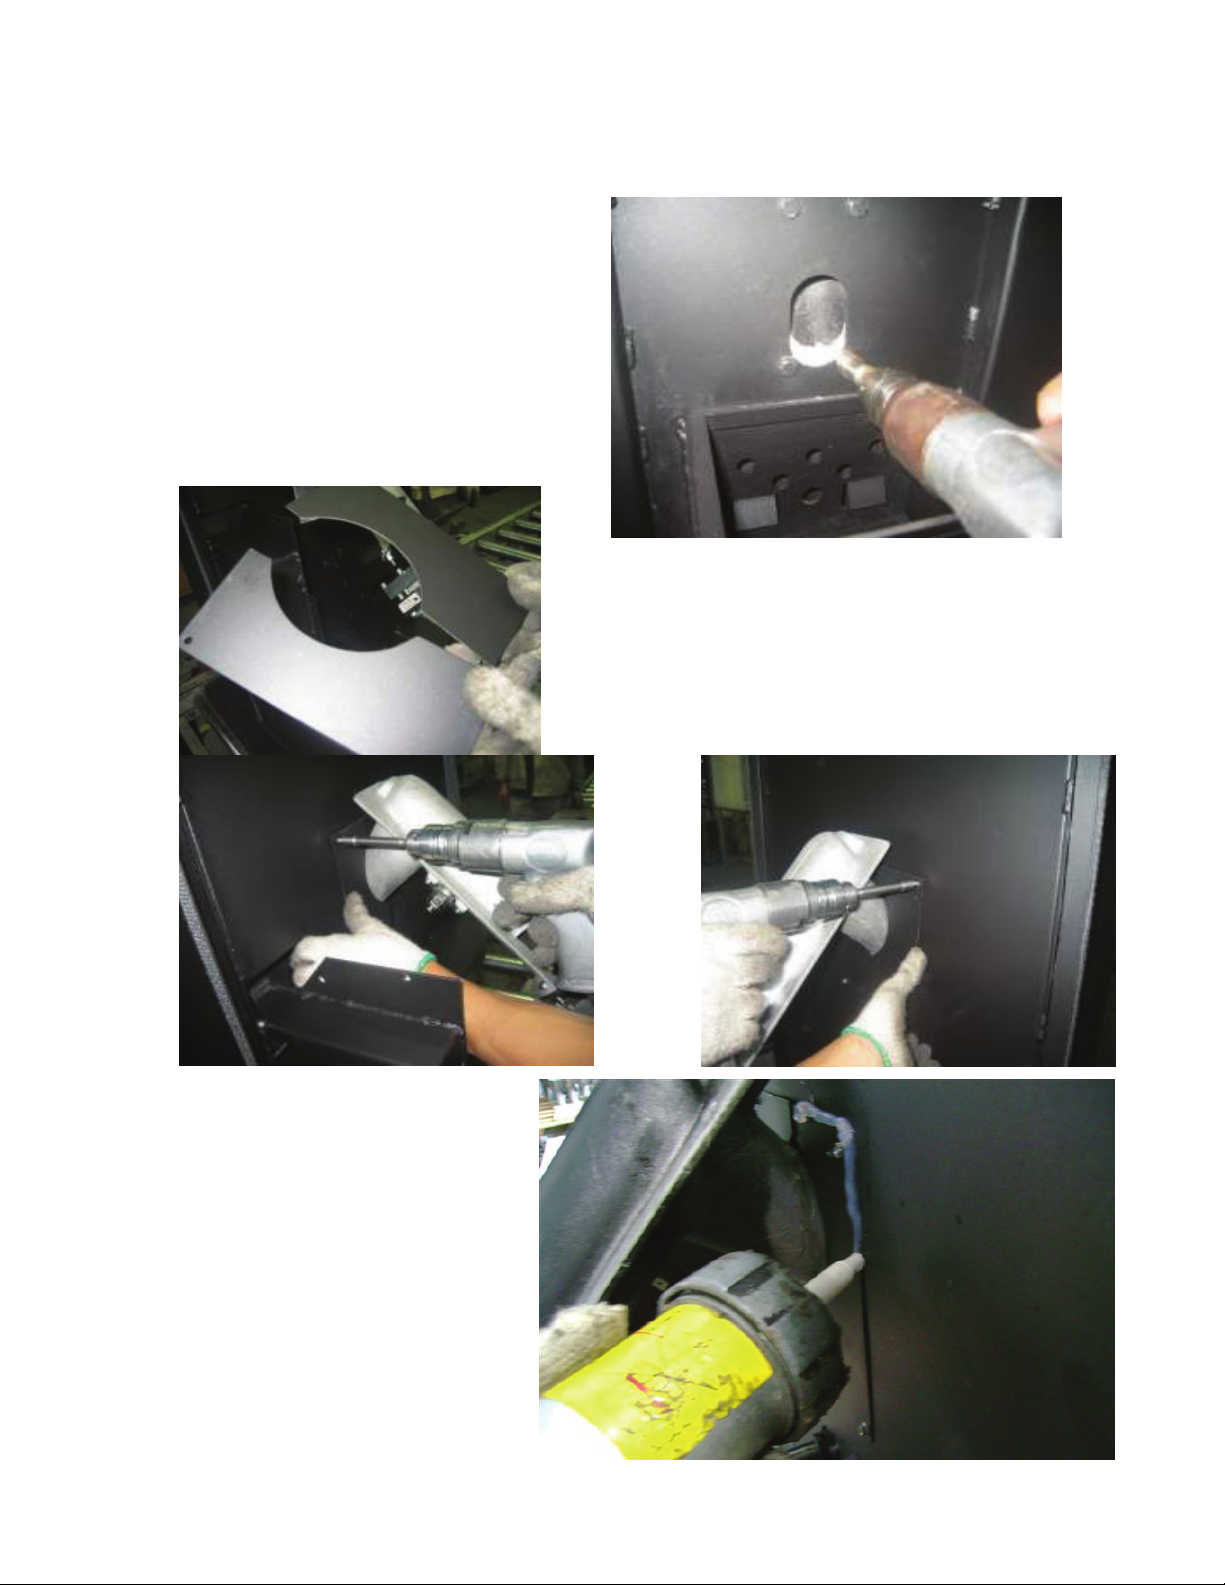
• Tighten the auger housing bolts using a wrench.
o Tighten the top two bolts in the
order shown.
o Tighten the lower two bolts in
the order shown.
Always tighten the
bolts in this order to
insure consistent
alignment of the fuel
feed system
• Install the split collars removed earlier around
the auger housing using the 4 tek screws.
• Apply silicon around the edges
of the air shell, igniter collar,
air inlet pipe, and room air
blower bracket. Smooth all
seams with your finger.
• Apply silicon around the auger
housing and around the edges
of the split collars this holds
QC must inspect
the seams now!
They cannot be
inspected later
because they will
be covered by
insulation
the insulation tight around the
housing and the seals any air
gaps around the collars.
F:\AESBusinessSystems\AES Technical\Piece part instructions\BC7000 Auger Housing
Assembly.doc
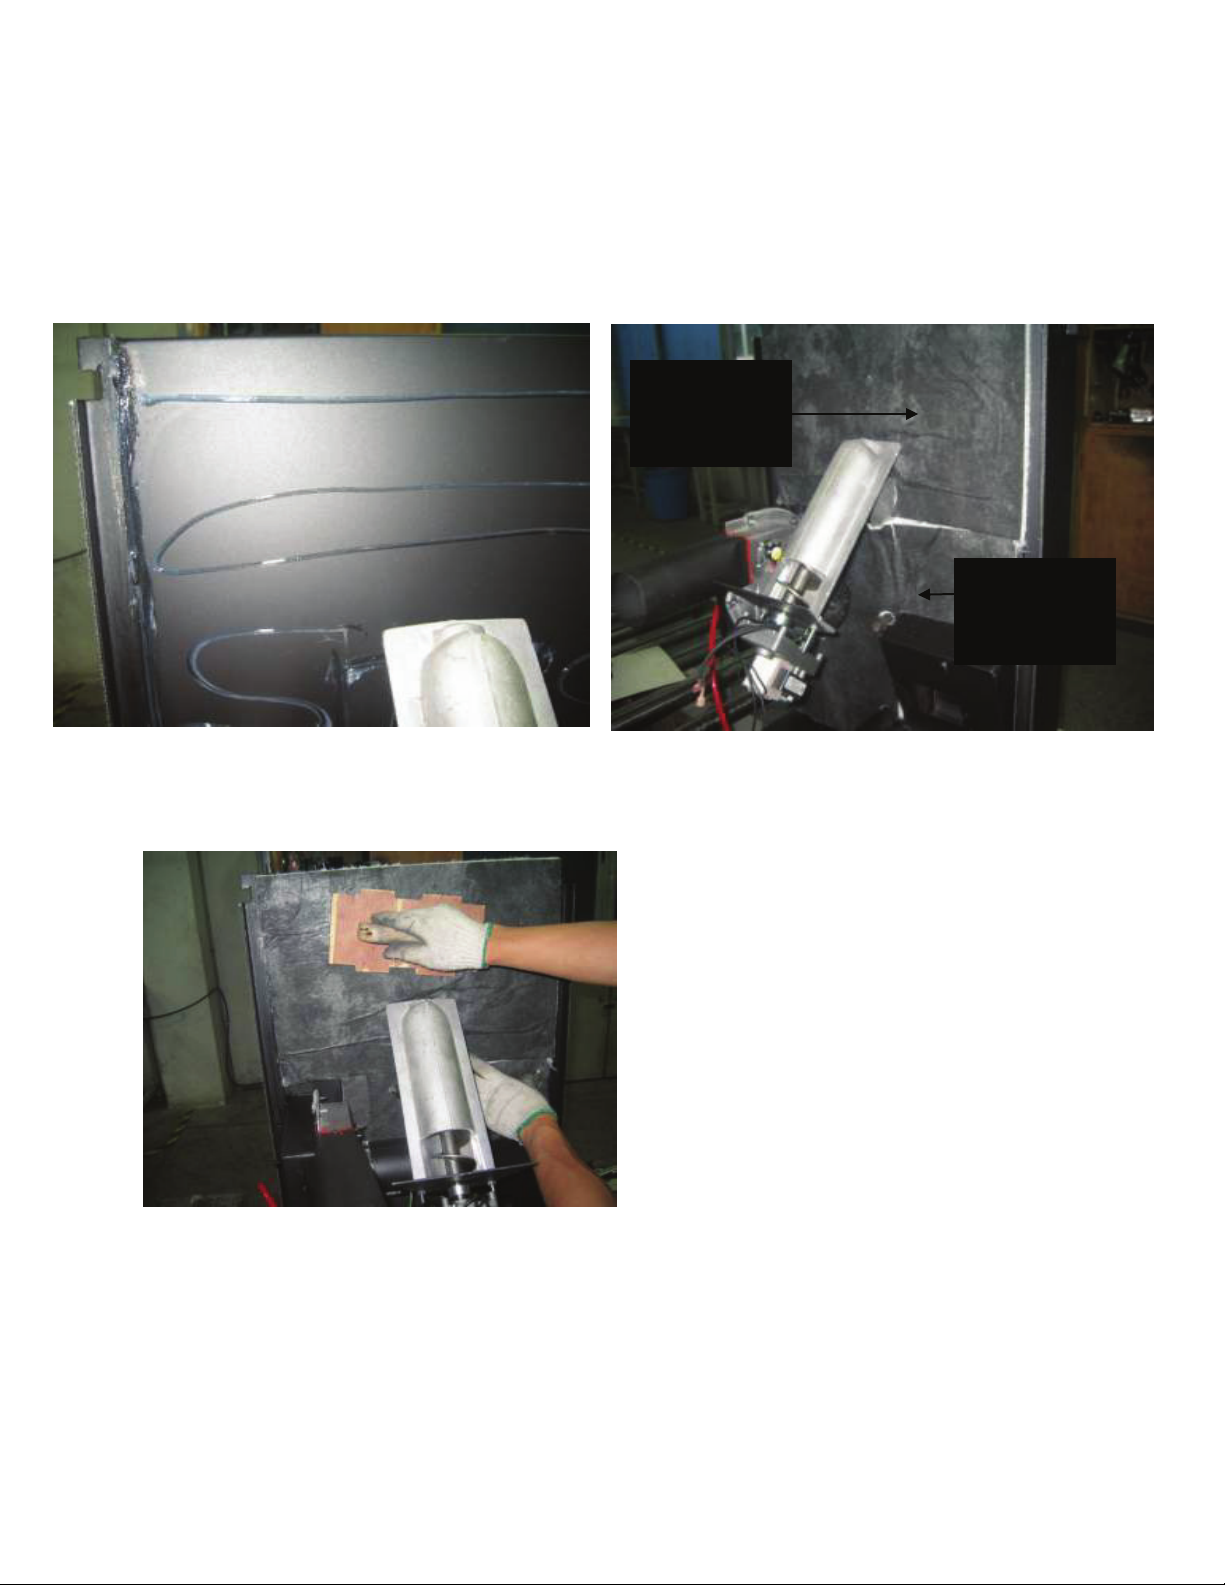
• Apply RTV to the back of removable air shell in an S Pattern.
• First attach the larger insulation piece across the top of the rear air shell.
• Second, attach the lower insulation piece
• Align the seams with no overlap or gaps
Large piece
across the
top
Smaller
piece across
the bottom
• Use flat plate to apply even pressure across insulation. This makes the RTV flow into the
fiberglass and promotes good adhesion
• Inspect the housing area where the hopper attaches for residual RTV or other material
that will interfere with the how the hopper sits on the auger housing. Remove as required
F:\AESBusinessSystems\AES Technical\Piece part instructions\BC7000 Auger Housing
Assembly.doc
 Loading...