

Amana MCS10TS General Manual
Quick Start Reference Guide
Refer to Product Safety Manual for Safety Statements
Complete Owner’s Manual available online
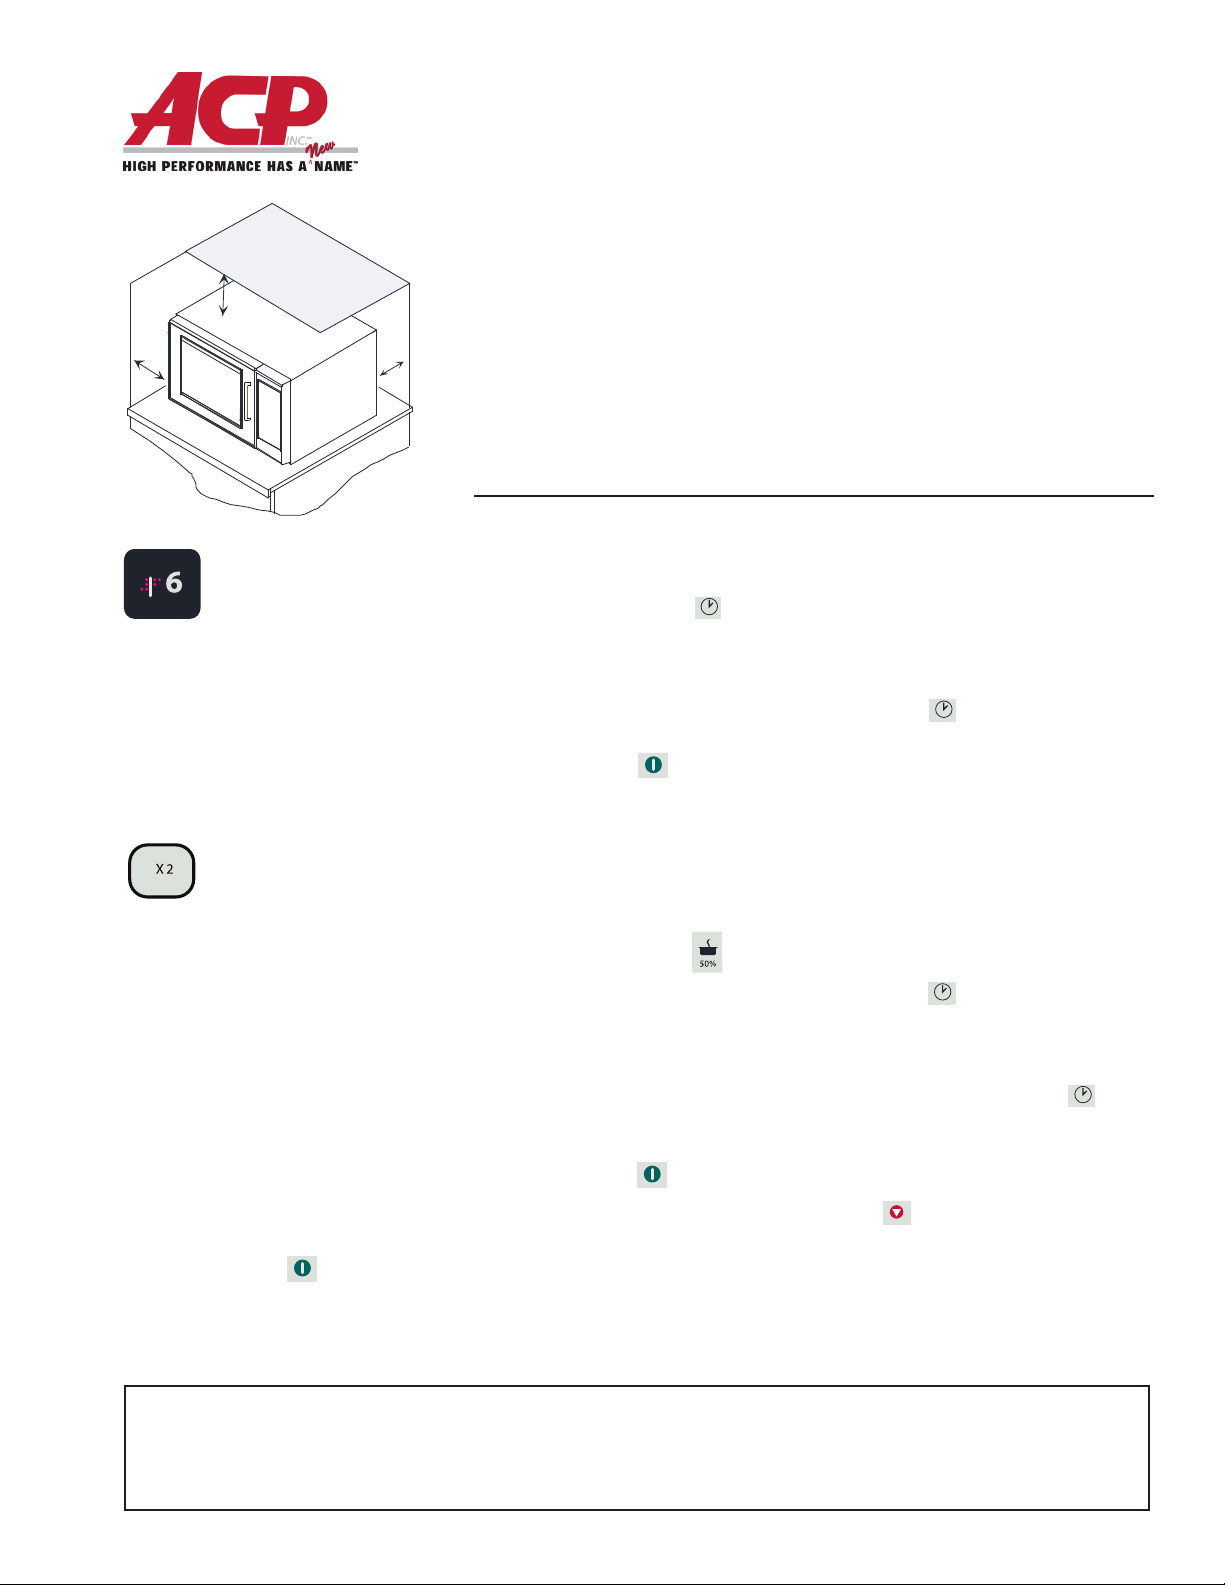
Oven Wall Clearances
A—For North American (UL/CSA) models, allow at least
2” (5.1 cm) of clearance around top of oven. For
A
B
C
So...how do I use it? (Electronic Control)
Manual Operation
To cook food using a specic entered time and power level:
Preprogrammed
Pads
To cook food using
preprogrammed cooking
sequences:
1. Open oven door and place food
in oven. Close door.
2. Press desired pad.
3. Oven begins to cook.
4. At end of cooking cycle oven
beeps and shuts off.
X2 Programming
To change the cooking factor:
1. Open oven door.
2. Press and hold pad 1 for
approximately 5 seconds.
3. Press pad to be reprogrammed.
4. Press the X2 pad.
5. Press a numbered pad to
change the cooking factor.
• Cooking factor can be set from
10% to 100%.
• Default is 80%.
• Pad 5 would change the
cooking factor to 50%.
6. Press START
changes.
The switching operation of this microwave oven can cause voltage uctuations on the supply line. The operation of this oven under
unfavorable voltage supply conditions can have adverse effects. This device is intended for the connection to a power supply system
with a maximum permissible system impedance Zmax of 0.2 Ohms at the interface point of the user’s supply. The user has to
ensure that this device is connected only to a power supply system which fullls the requirement above. If necessary, the user
can ask the public power supply company for the system impedance at the interface point.
pad to save
1. Open oven door and place food in oven. Close door.
2. Press TIME ENTRY
3. Press a power level pad to change power level if desired (some
4. If stage cooking is desired, press TIME ENTRY
5. Press START
6. At end of cooking cycle oven beeps and shuts off.
Programming Items
1. Open oven door.
2. Press and hold pad 1 for approximately 5 seconds.
3. Press pad to be reprogrammed.
4. Enter cooking time by using the number pads.
5. Press a power level
6. If stage cooking is desired, press TIME ENTRY
7. Enter cook time and power level as in steps 4 and 5 (some models).
8. Press START
NOTE: T
X2 Pad
1. Open oven door and place food in oven. Close door.
2. Press X2 pad.
3. Press desired preprogrammed pad or pad sequence.
4. Oven begins cooking. Displayed cooking time is the total of original
International (50 Hz) models, allow at least 12” (30
cm) of clearance around top of oven. Proper air
ow around oven cools electrical components. With
restricted air ow, oven may not operate properly and
life of electrical parts is reduced.
B—Allow at least 2” (5.1 cm) between air discharge on
back of oven and back wall.
C—Allow at least 2” (5.1 cm) of clearance around sides
of oven.
pad and enter cooking time.
models).
• COOK LEVEL displays with the power setting.
pad and repeat steps
2 through 4.
pad.
pad to change power level if desired.
pad.
• Display briey shows the stage number.
• Display changes to cook time and power level for the next stage.
• To enter another cooking stage for that pad, press TIME ENTRY
again.
• Up to four different stages can be programmed (some models).
pad to set new programming changes to the pad.
o discard changes, press STOP/RESET pad or close oven door.
cooking time and added X2 time.
pad
Quick Start Reference Guide
Refer to Product Safety Manual for Safety Statements
Complete Owner’s Manual available online
Can I change an option?
Options such as single or double pad programming, beep volume, and
maximum cooking time can be changed to suit individual preferences.
To change options:
1. Open oven door.
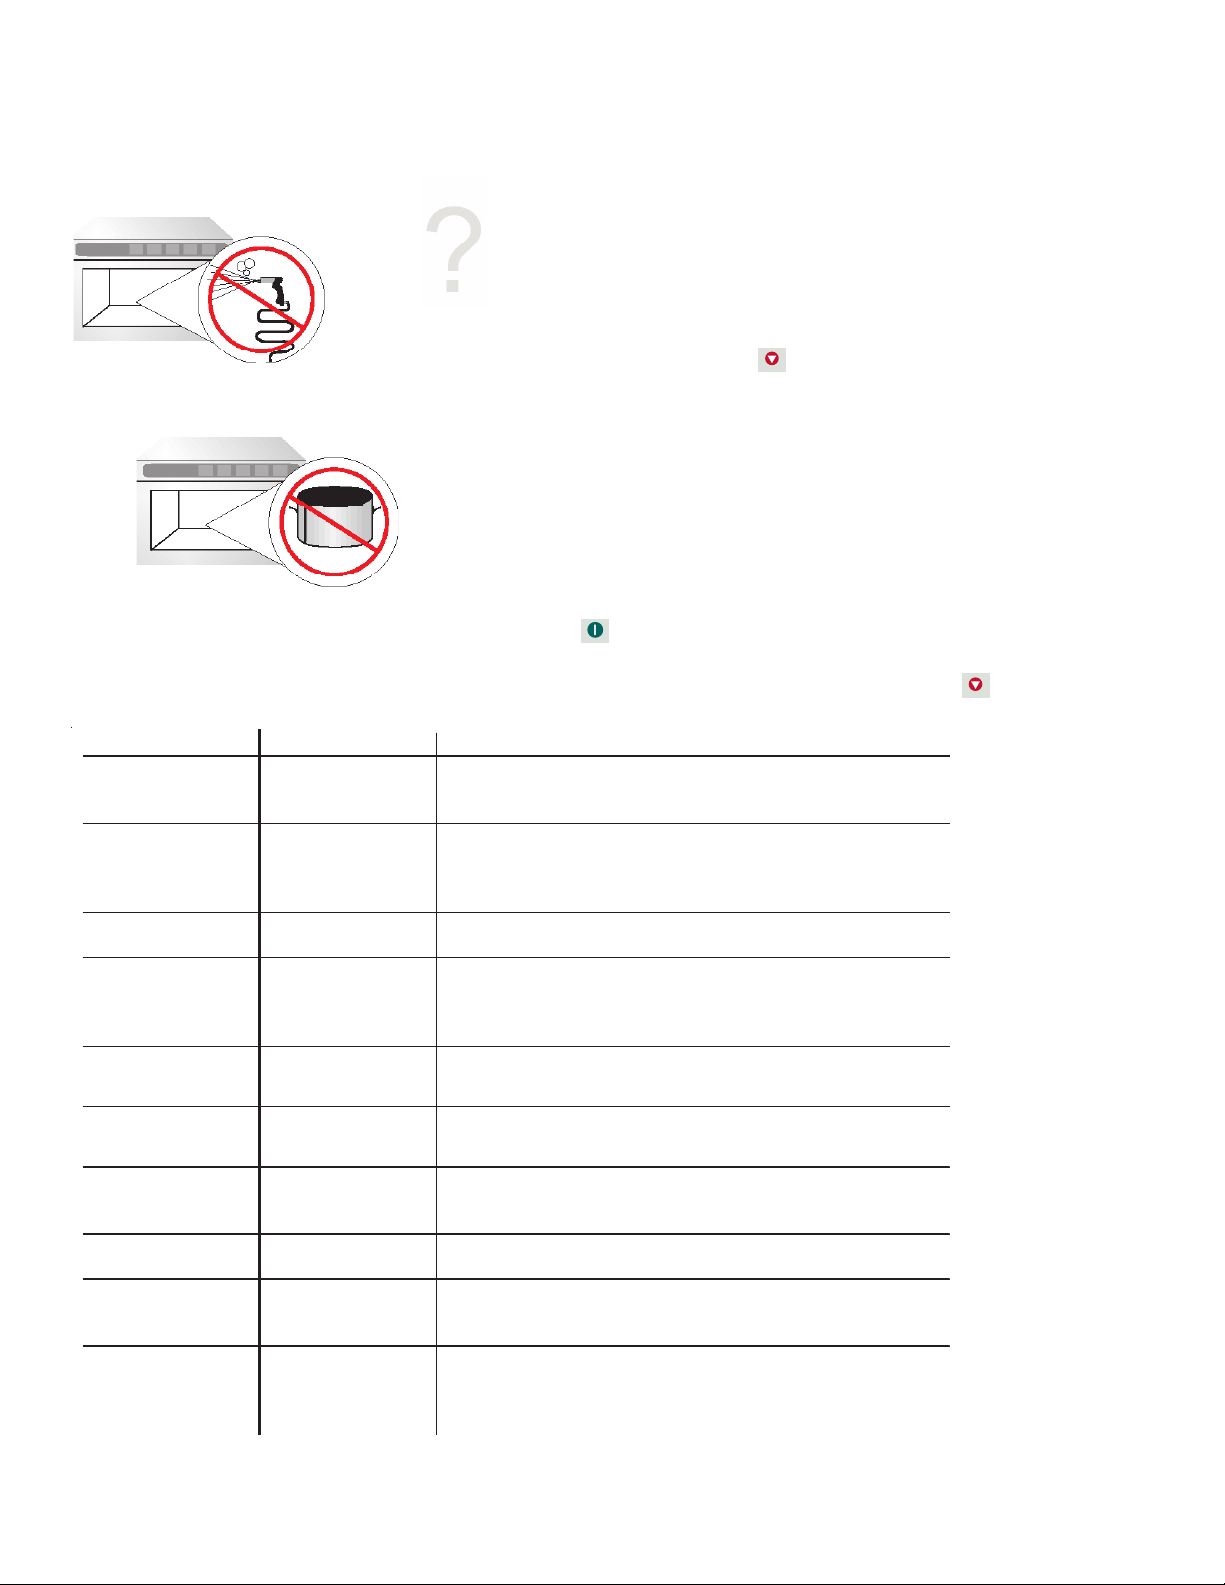
DO NOT power spray
No metal pans
Numbered Pads Display Options (Factory Settings in Bold)
1
End of Cycle Beep
2
Key Beep Volume
3
Key Beep
4
Active Display
5
On-the Fly Cooking
OP:10
OP:11
OP:12
OP:20
OP:21
OP:22
OP:23
OP:30
OP:31
OP:40
OP:41
OP:42
OP:43
OP:50
OP:51
• If door is closed or STOP/RESET
complete, changes are discarded and microwave exits programming mode.
2. Press and hold pad 2 for approximately 5 seconds.
• This begins options mode.
• Microwave will beep and 0P: displays.
3. Press number pad that controls option to be changed.
• See table below for options.
• Current option will display.
4. Press number pad again to change the option.
• Each time pad is pressed, option will change.
• Match code displayed with code for desired option.
5. Press START
pad to save changes.
• To change additional options, repeat steps 3 and 4.
• Changes appear after door is closed or STOP/RESET
pressed.
3 second beep.
Continuous beep until door is opened.
5 beep bursts until door is opened.
Eliminates beep.
Sets volume to low.
Sets volume to medium.
Sets volum e to hig h.
Prevents beep when pad is pressed.
Allows beep when pad is pressed.
15 seconds after oven door is opened, keyboard disabled.
30 seconds after oven door is opened, keyboard disabled.
1 minute after oven door is opened, keyboard disabled.
2 minutes after oven door is opened, keyboard disabl ed.
Prevents dierent pre-programmed pads to be activated during cooking.
Allows different pre-programmed pads to be activated during cooking.
pad is pressed before programming is
pad is
6
Reset to Ready Mode
7
(some mo dels)
Maximum Heating Time
8
Manual Operation
9
(some mo dels)
Double Digit Operation
0
Clean Filter M essage
Part No.20037202
Revised 10/10
OP:60
OP:61
OP:70
OP:71
OP:80
OP:81
OP:90
OP:91
OP:00
OP:01
OP:02
OP:03
Opening oven door does not reset oven back to ready mode.
Opening oven door resets oven back to ready mode.
Allows 60 minutes of heating time (some models).
Allows 10 minutes of heating time.
Allows use of preprogrammed pads only.
Allows use of m anual time entry and preprog rammed pad s.
Allows 10 (0-9) preprogramm ed pads.
Allows 100 (00-99) preprogrammed pads.
Do not display m essage.
Display message for 24 hours ever y 7 days.
Display message for 24 hours every 30 days.
Display message for 24 hours every 90 days.
For full product documentation visit:
www.acpsolutions.com
Cedar Rapids, Iowa 52404
2010 ACP , Inc.
 Loading...