

Page 1
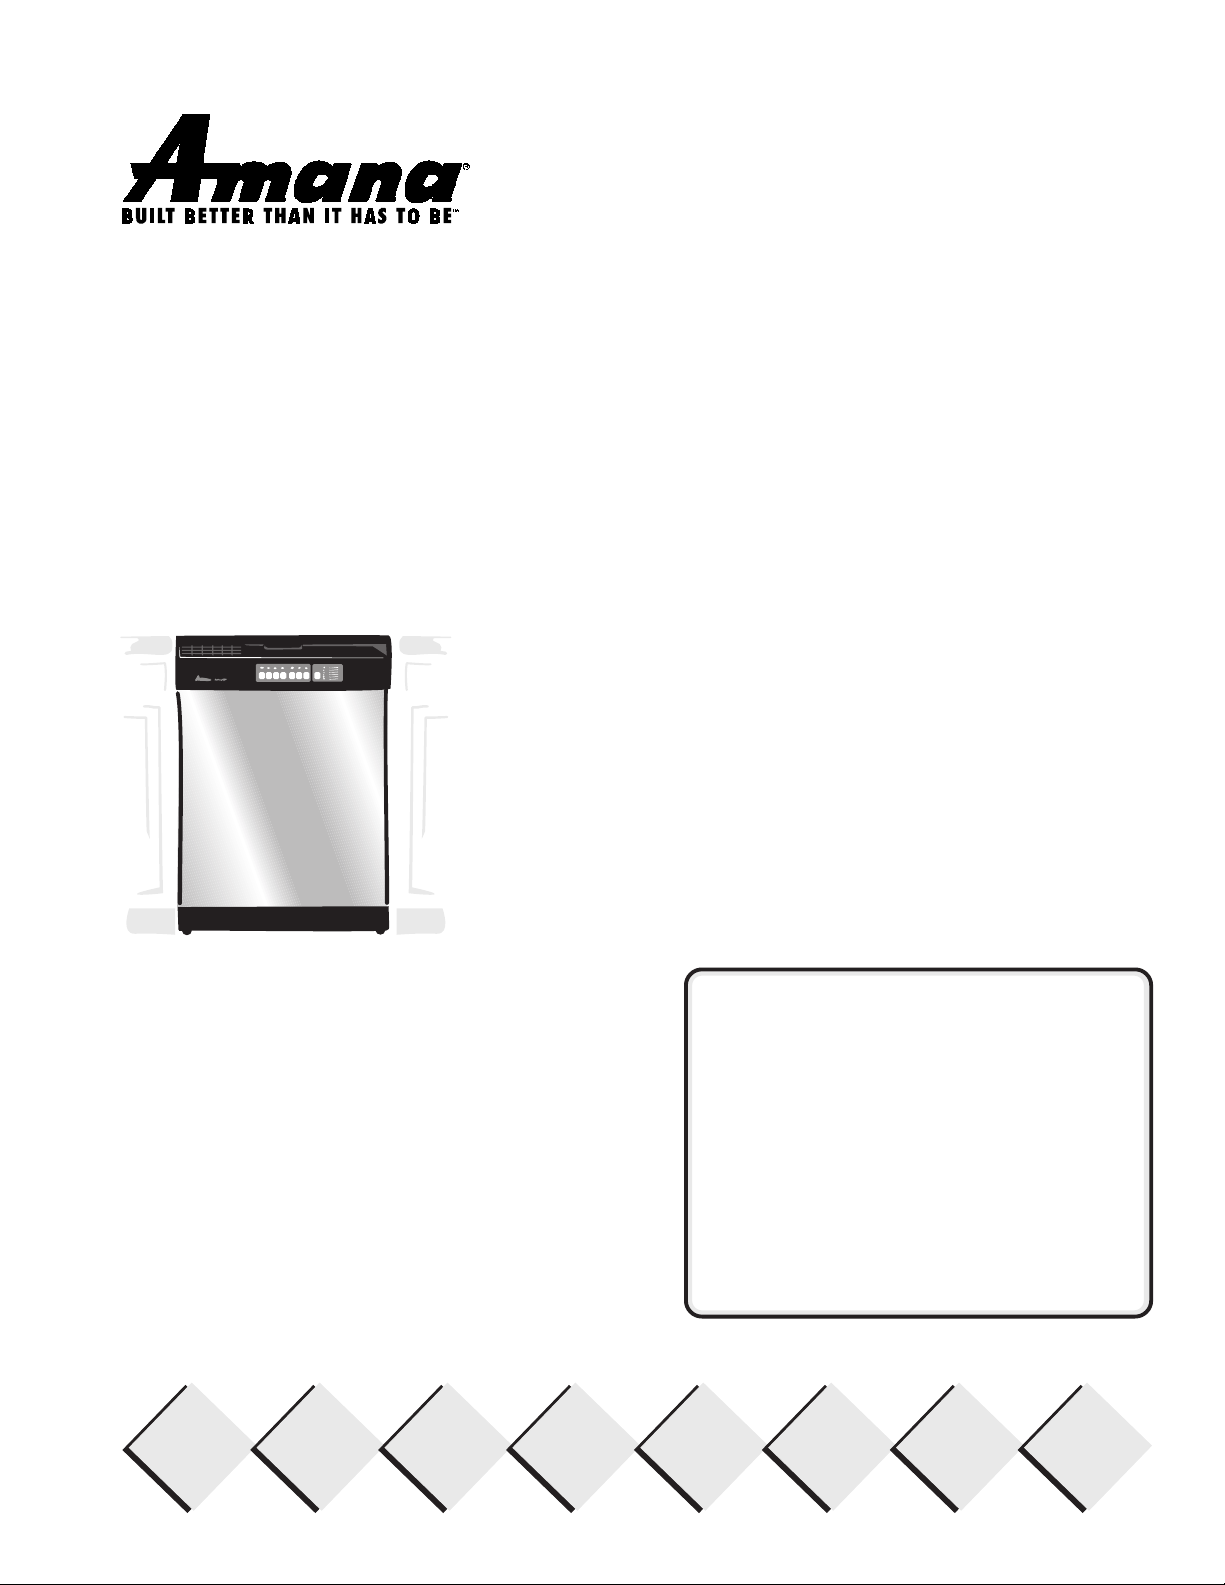
Owner's Manual
Dishwasher
Keep instructions for future reference.
Be sure manual stays with dishwasher.
Contents
Important Safety Information ...................... 3
Washing the Dishes ................................... 4
Custom Features ........................................ 6
Detergents and Rinse Aids ......................... 7
Stains and Films ......................................... 8
Dishwasher Safe Recommendations ......... 9
Care and Cleaning ................................... 10
User Maintenance .................................... 11
Troubleshooting ........................................ 14
Warranty................................................... 16
Page 2
Thank you for buying an Amana® dishwasher!
Please take the time to complete the registration card and return promptly.
If registration card is missing, call Amana Consumer Affairs Department.
When contacting Amana, provide product information from serial plate
found on the inside right edge of the dishwasher:
Model Number __________________________________
Manufacturing (P) Number _________________________
Serial Number (S/N) ______________________________
Purchase Date __________________________________
Dealer Name ___________________________________
Dealer Address _________________________________
Dealer Phone ___________________________________
Keep this manual and your sales receipt together in a safe place for
future reference or if warranty service is required.
For answers to questions or to locate an authorized servicer, call
1-800-NAT-LSVC (1-800-628-5782). Warranty service must be performed
by an authorized servicer. Amana Appliances also recommends
contacting an authorized servicer if service is required after warranty
expires.
For more information on this and other Amana
products, visit our Web site
www.amana.com
or
call Consumer Affairs Department at
Asure Extended
Service Plan
Amana Appliances offers long-term
service protection for this new
dishwasher . Asure™ Extended Service
Plan, covering functional parts, labor,
and travel charges, is specially designed
to supplement a strong warranty.
Call 1-800-528-2682 for information.
Parts and Accessories
Purchase replacement parts and
additional accessories by phone.
To order accessories for your Amana
product, call 1-800-843-0304.
Save Time and Money
If something seems unusual, please
check “Troubleshooting” section,
which is designed to help you solve
problems before calling service. If you
have a question, write or call us
(include model number and phone
number) at:
Consumer Affairs Department
Amana Appliances
2800 - 220th Trail
Amana, Iowa 52204
Ph# 1-800-843-0304
1-800-843-0304
What You Need to Know
about Safety Instructions
Warning and Important Safety
Instructions appearing in this manual
are not meant to cover all possible
conditions and situations that may occur.
Common sense, caution, and care must
be exercised when installing,
maintaining, or operating dishwasher.
Always contact your dealer, distributor,
service agent, or manufacturer about
problems or conditions you do not
understand.
Recognize Safety Symbols, Words, Labels
DANGER
!
DANGERImmediate hazards which WILL result in severe personal
injury or death
WARNING
!
WARNINGHazards or unsafe practices which COULD result in severe
personal injury or death.
CAUTION
!
CAUTIONHazards or unsafe practices which COULD result in minor
personal injury or product or property damage.
2
Page 3
IMPORTANT SAFETY INFORMATION
WARNING
!
To avoid risk of fire, electric shock, serious injury, or death when using your dishwasher, follow these basic
precautions:
1. Read all instructions before using the dishwasher.
2. Use the dishwasher only for its intended function.
3. Use only detergents or wetting agents recommended for use in a dishwasher and keep them out of the
reach of children.
4. When loading items to be washed:
Locate sharp items so that they are not likely to damage the door seal.
Load sharp knives with the handles up to reduce the risk of cut-type injuries.
5. Do not wash plastic items unless they are marked 'dishwasher safe' or the equivalent. For plastic items
not so marked, check the manufacturer's recommendations.
6. Do not touch the heating element during or immediately after use.
7. Do not operate your dishwasher unless all enclosure panels are properly in place.
8. Do not tamper with controls.
9. Do not abuse, sit on or stand on the door or dish rack of the dishwasher.
10. To reduce the risk of injury, do not allow children to play in or on a dishwasher.
11. Under certain conditions, hydrogen gas may be produced in a hot-water system that has not been used
for two weeks or more. HYDROGEN GAS IS EXPLOSIVE. If the hot-water system has not been used for
such a period, before using the dishwasher turn on all hot-water faucets and let the water flow from each
for several minutes. This will release any accumulated hydrogen gas. As the gas is flammable, do not
smoke or use an open flame during this time.
12. Remove the door to the washing compartment when removing an old dishwasher from service or
discarding it.
Proper disposal of your appliance:
Important: Child entrapment and suffocation are not problems of the past.
Junked or abandoned appliances are still dangerouseven if they sit "just
for a few days". If you are getting rid of your old appliance:
Remove dishwasher door completely from unit.
Keep shelves or racks in place so that children may not easily climb
inside.
SAVE THESE INSTRUCTIONS
3
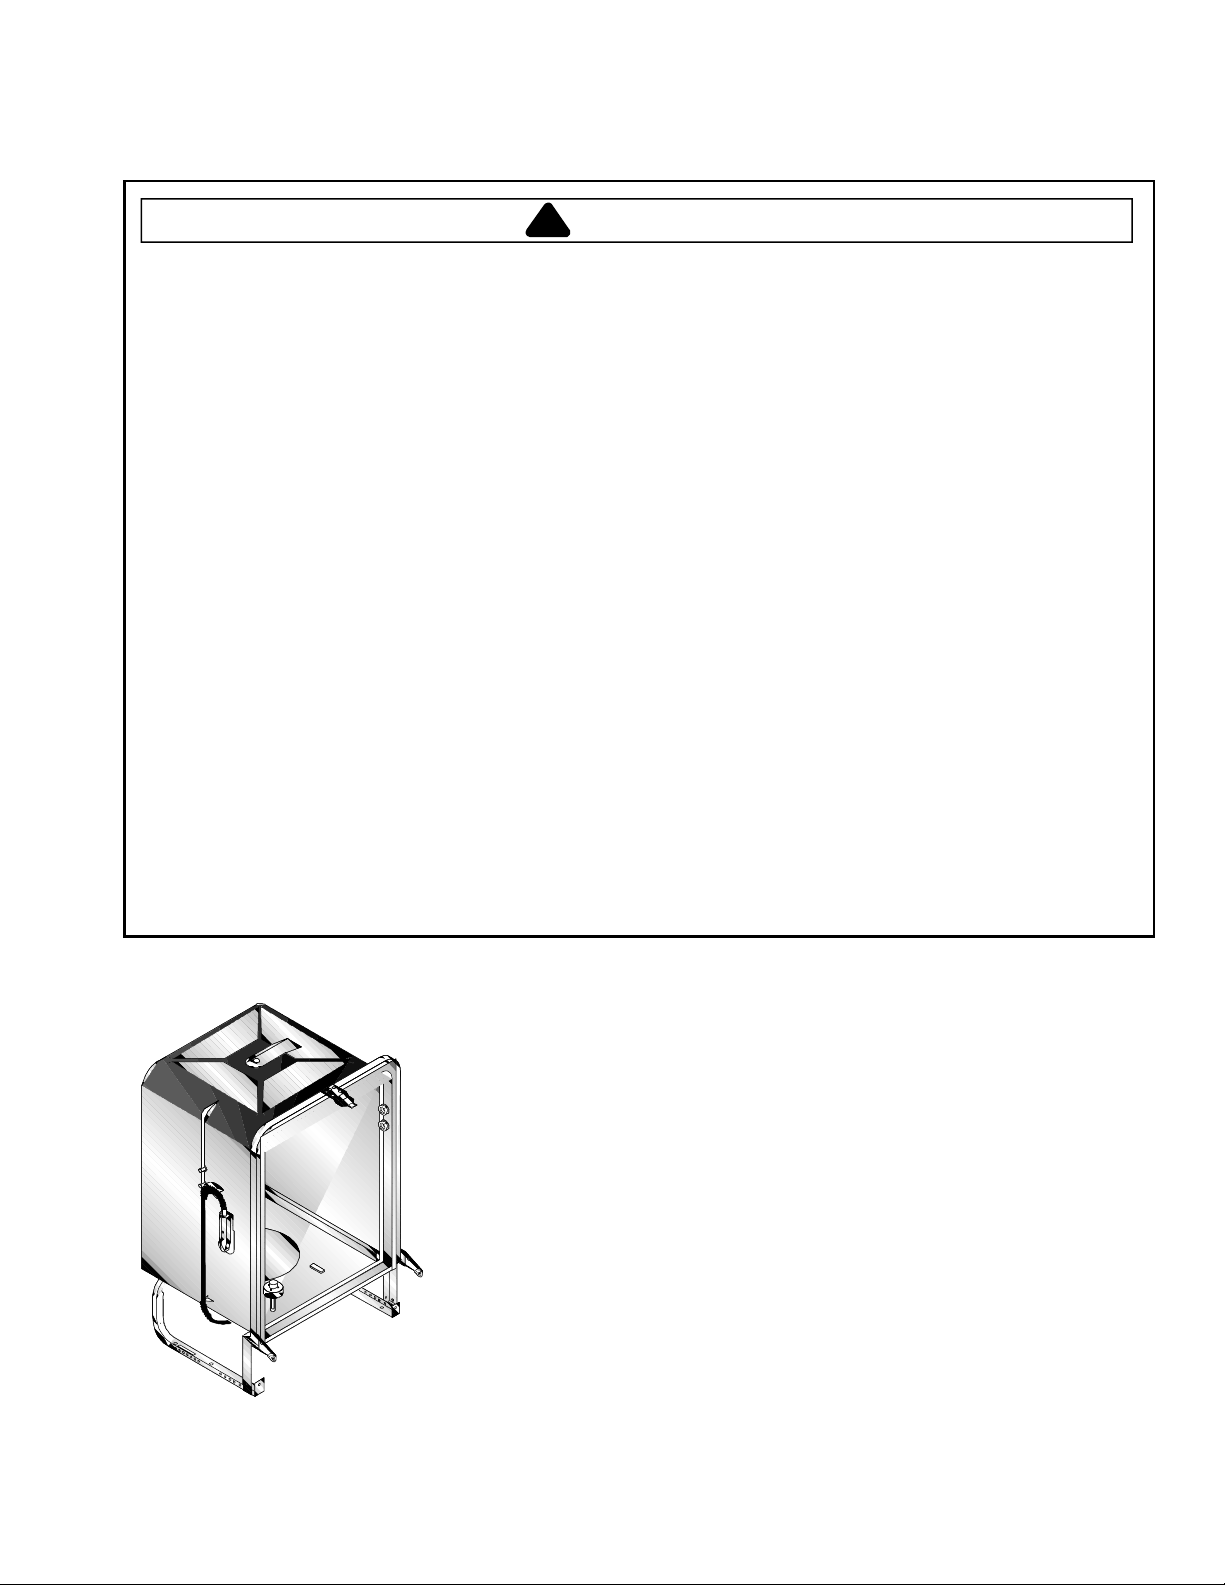
Page 4
Washing the Dishes
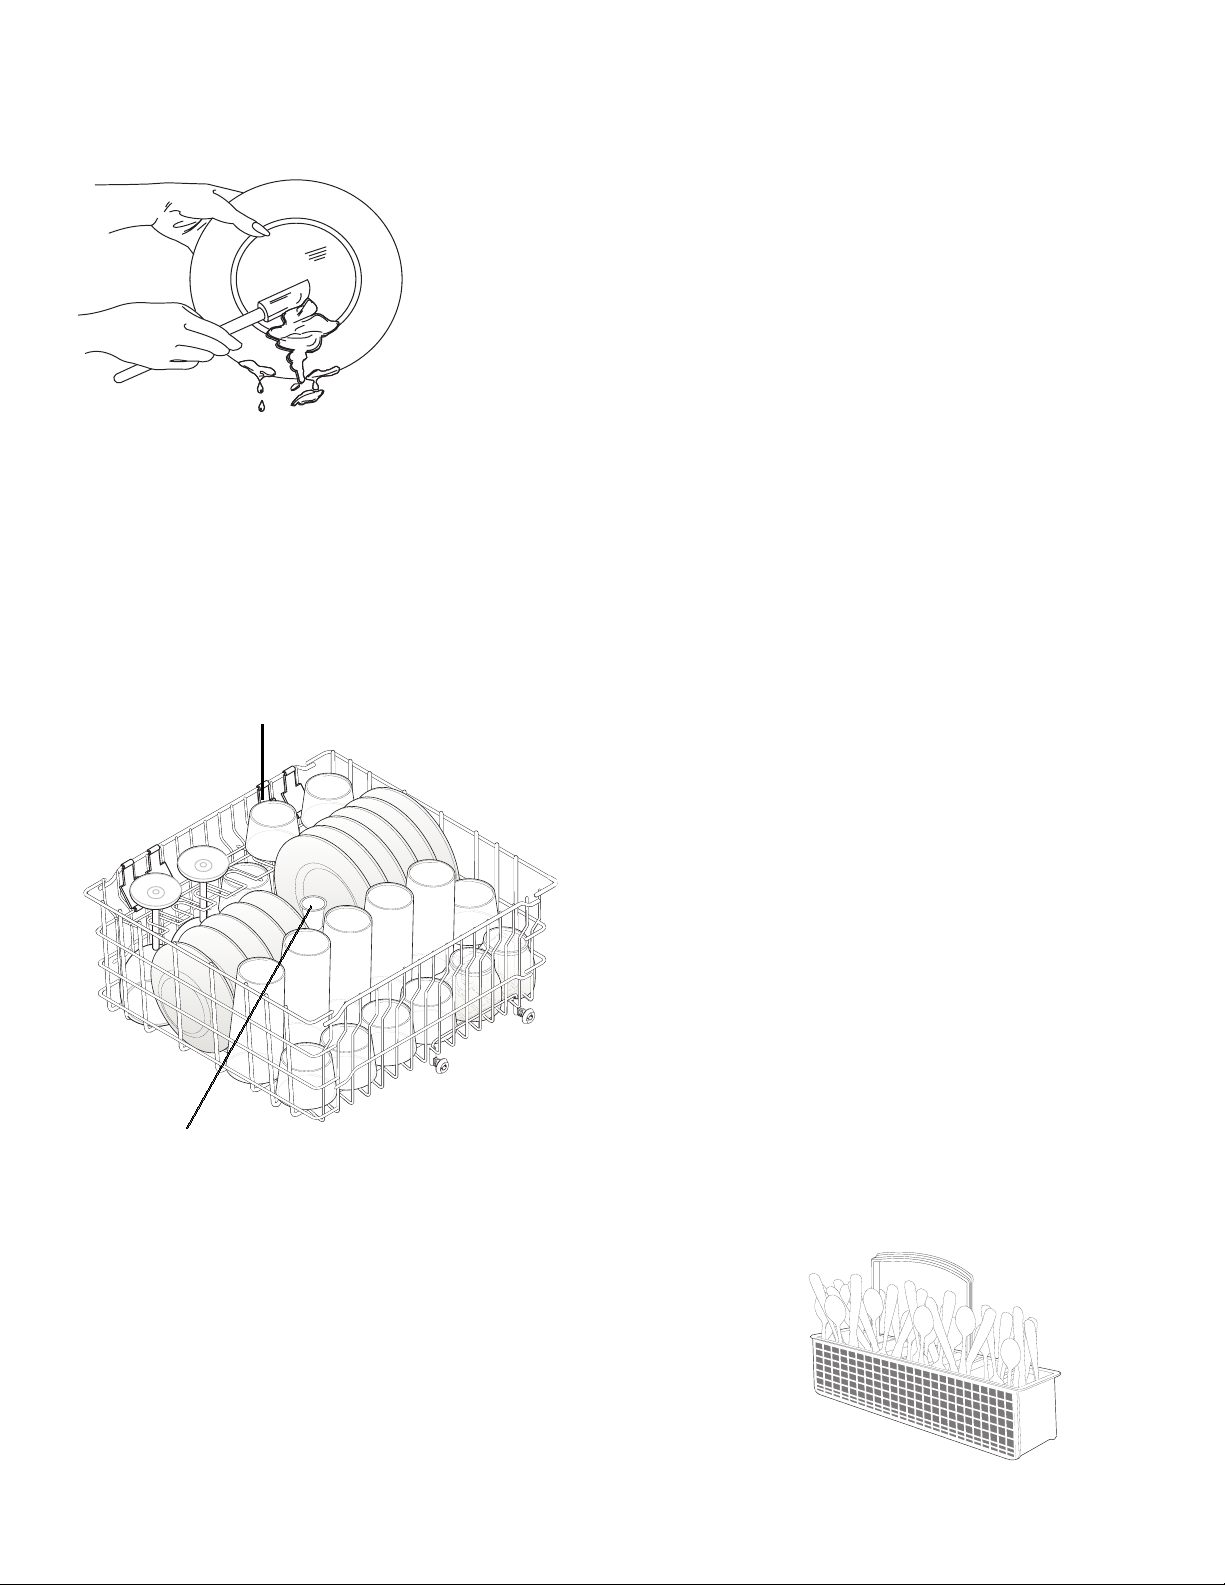
1. Prepare dishes for washing
2. Load bottom rack
Cup Shelf
(some models)
For best results:
Scrape away large pieces of food, bones, pits, toothpicks, etc.
Burned-on foods should be loosened before loading.
Empty liquids from glasses and cups.
Foods such as mustard, mayonnaise, vinegar, lemon juice and
tomato based products may cause discoloration over time. It is best to
rinse off these soils if not operating the dishwasher right away.
Check manufacturer's recommendations before washing items in
question.
To ensure best cleaning:
Make sure tall items do not block spray arm rotation.
Place plates and platters so they do not touch.
Do not load glasses in bottom rack. Damage may occur.
Do not place plastic items in bottom rack. They may melt.
Place bowls, casseroles and saucepans with the soiled surface facing
down. Tilt slightly for better drainage.
Be sure pan handles do not protrude through the bottom of rack and
block spray arm rotation.
Top Rack
3. Load top rack
Important: Do not cover funnel when loading.
Load glasses, cups, small plates, saucers and
Load plastic items in top rack.
Load items with open ends facing down for better
Do not allow items to touch. Damage may occur.
Long handled knives and utensils can be placed in
Be sure nothing protrudes through the bottom of
When using cup shelf alternate items in top level
Do not cover funnel
4. Load Silverware Basket
Remember to load knives and forks with handles up.
Mix spoons, forks and knives to prevent nesting. Mixing items gives
better cleaning and drying.
Small plastic dishware such as measuring spoons and lids are not
recommended for automatic dishwashing.
Be sure nothing protrudes through bottom of basket or rack to block
spray arm.
To avoid damaging silver finish, do not mix silver and stainless items.
If basket is positioned on side of rack, orient utensils towards center of
dishwasher. This prevents items from damaging dishwasher tub.
4
bowls in top rack.
cleaning and draining.
top rack.
rack to block rotation of spray arm.
of cup holder with the bottom level of holder so
water can reach all items.
Page 5
Washing the Dishes (cont'd)
5. Check rinse aid dispenser
Rinse aids reduce water spots and hard water film, especially where low
water temperature or pressure are problems.
Hints
To increase the amount of rinse aid dispensed, rotate the dial to a
higher number.
The indicator will be dark when the rinse aid dispenser is full, clear
when more needs to be added.
To add more rinse aid, see Detergents and Rinse Aids.
6. Add dishwashing detergent
Use detergent manufactured for automatic dishwashers only.
Other types will cause oversudsing. For information about how much
detergent to use see Detergents and Rinse Aids.
Fill uncovered detergent cup if using a prewash cycle.
Fill covered detergent cup for main wash cycle.
Check racks so large items do not prevent covered detergent cup
from opening during main wash cycle.
Use only fresh automatic dishwashing detergent. Moist or caked
detergent will not dissolve properly.
7. Close door - Electronic Models
For models with electronic cycle selection, close dishwasher door and
latch securely.
8. Select energy options/drying options
Wash temperature, energy and drying options vary by model. For
specific option information, refer to the model's Quick Start sheet.
9. Run hot water & check food disposer
Using a paper towel, apply rinse aid to
the inside top and inside walls of
dishwasher. This aids in drying
effectiveness. Water will not cling to the
top or sides, preventing it from falling
onto the dishes as the dishwasher is
opened or emptied. This should be done
before the dishwasher's first use.
Water must be hot for effective cleaning. Run water from the faucet
nearest the dishwasher until hot (120°F) (49°C). If dishwasher drains
into a food disposer, be sure disposer is empty. Turn faucet off once
water is hot.
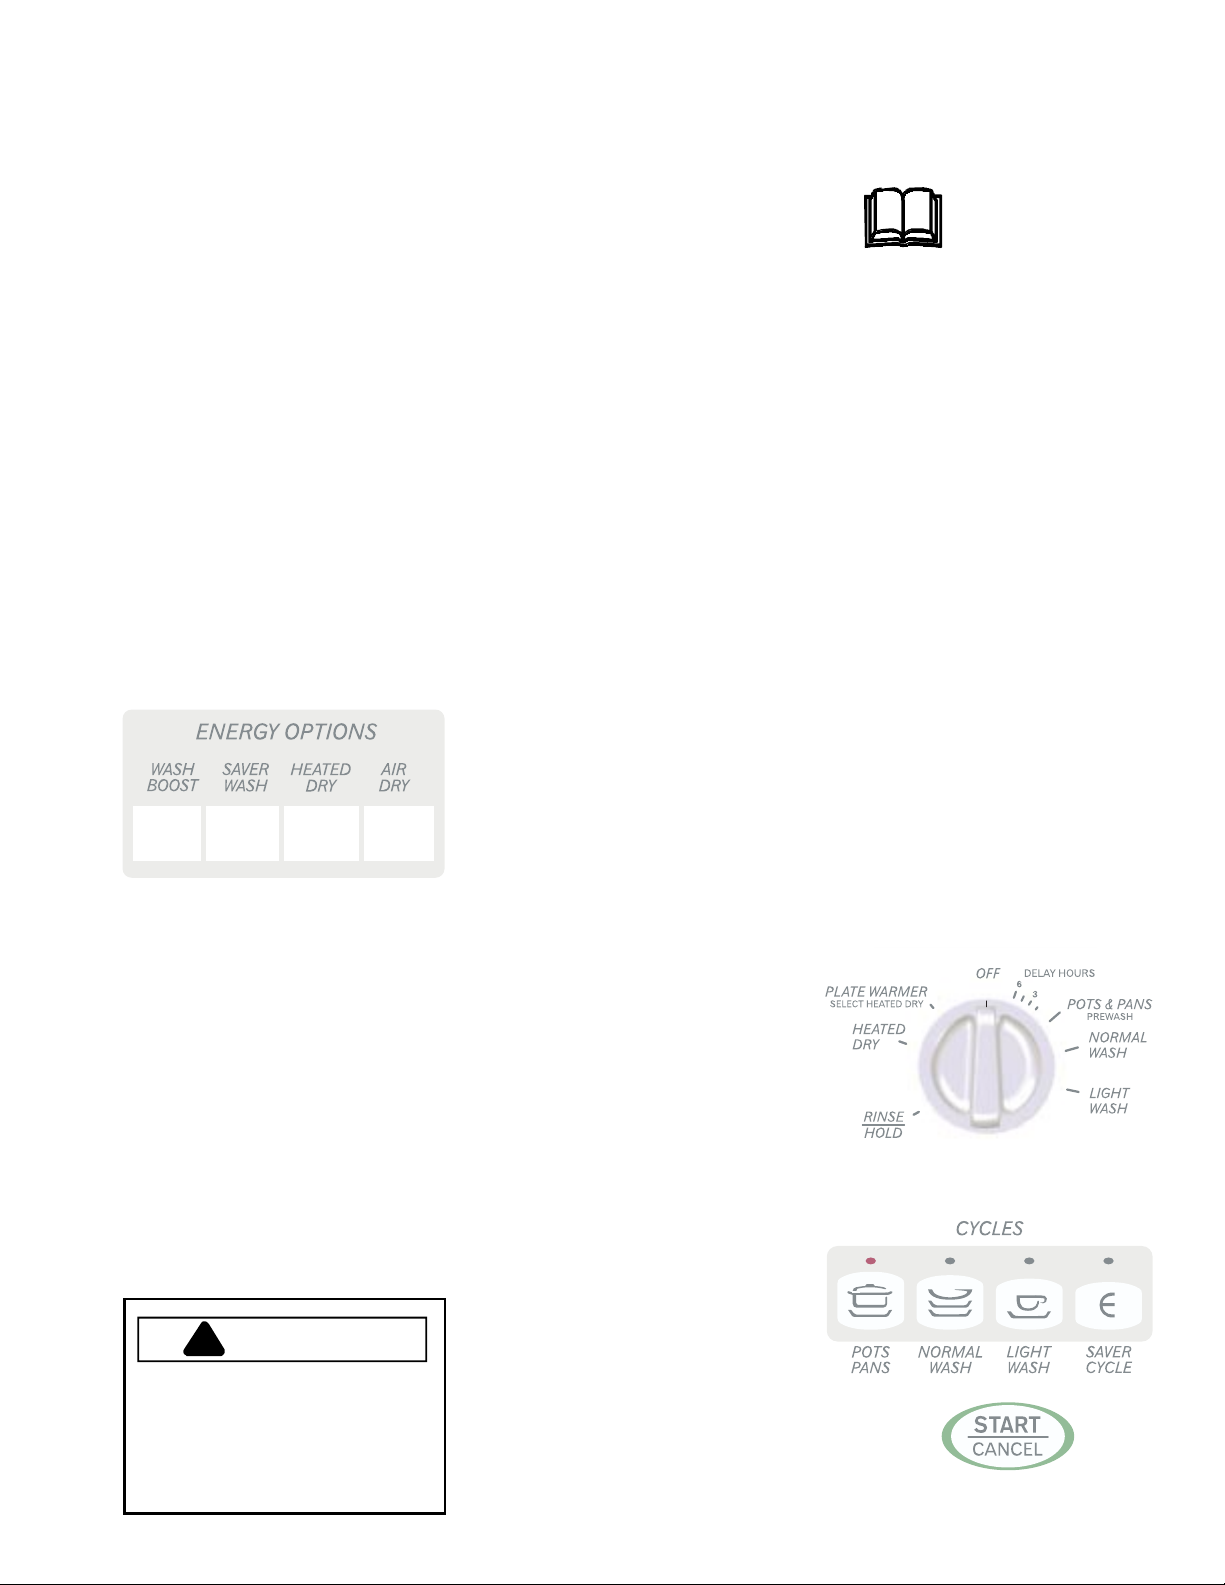
10. Select wash cycle
Select the proper wash cycle based upon the type of dishware and the
soils that need to be removed. To select cycle:
with door open, turn knob clockwise until the line on the knob is
aligned with the line on the desired cycle. Close dishwasher door
and latch securely.
for electronic controls select cycle by pressing the correct pad.
Press START pad to begin dishwashing cycle.
CAUTION
!
To avoid risk of personal injury
when opening dishwasher door
during a cycle, wait a few
seconds to allow cold air to
slowly expand inside dishwasher.
Dishwasher may be hot.
To add or remove items after cycle
starts, unlatch door and wait a few
seconds until wash action has
stopped. Open door and add item.
Close door firmly to latch and cycle
will resume.
5
Page 6

Custom Features
B
If These Features are
Different from Your
Dishwashers
These features are intended to
show the variety that is available in the
product line. If your dishwasher does
not have all the options that are shown,
it is not a mistake. The information
provided applies to several of the
models in the product line.
Power Venting
To speed the drying process, a fan circulates the air inside the dishwasher.
The fan operates whether or not heated dry is selected. If heated dry is
not selected, the dishwasher door may be opened slightly to speed
the drying process after the dry cycle.
Clean Sensor
This feature senses the amount of soil on the dishes during the Pots and
Pans, Normal, and Light Wash cycles. Depending on how soiled the dishes
are water fills will be added or deleted to the cleaning cycle, allowing the
most efficient use of water.
SANITIZE
This feature raises the final rinse temperature to 150°F (66°C). This high
temperature is maintained for 10 minutes while rinsing the dishes. Cycle time
may increase depending on incoming water temperature. For best results,
incoming water temperature must be at least 120°F (49°C). This option can
be selected in Pots & Pans, Normal Wash, and Light Wash cycles.
Child Lock
The child lock prevents a child or other person from changing dishwasher
cycle settings. To activate the child lock, press the NO HEAT DRY pad once,
then press and hold the NO HEAT DRY pad again for approximately 5
seconds. The child lock light will glow while child lock is active. To
discontinue the child lock, press and hold NO HEAT DRY pad for 5 seconds.
Delay Start
Starting time for a wash cycle, depending on the model, can be delayed as
long as nine hours. This enables you to set the options and desired wash
¸
Dishwasher Wash Cycles (without heat delay)
NOTE
Wash Cycle Pot/Soil Type
Pots & Pans
Normal Wash Regularly soiled dishes and silverware. 75 to 95 4.9 to 9.7 gallons
Light Wash
Saver Cycle For lightly soiled china and crystal. 65 3.7 gallons
Rinse/Hold For rinsing dishes that will be washed later. 6-18 1.2 to 2.5 gallons 1 to 2 rinses
Pots, pans, casseroles and dinnerware with
dried or baked on soils.
For lightly soiled or pre-rinsed dishes and
silverware.
cycle and select the starting time. The dishwasher can be set to begin the
washing cycle once the area is less congested or after hot water
consumption has stopped.
: Not all cycles available on all models
Cycle
Time
(minutes)
84 to 115 7.2 to 9.7 gallons
75 to 105 4.8 to 8.5 gallons
Water
Used
(approx.)
Washes/
Rinses
2 washes
4 to 6 rinses
2 washes
2 to 6 rinses
1 wash
3 to 6 rinses
1 wash
2 rinse
6
Page 7

Detergents and Rinse Aids
How Much Detergent to Use
The amount of detergent to use depends on water hardness, the type of
detergent (regular or ultra) and the phosphorus content in the detergent.
Water hardness is measured in grains per gallon. The higher the number of
grains, the harder the water. The harder the water, the more detergent needed.
Using too little detergent in hard water results in dirty dishes and hard water
filming or spotting. Using too much detergent in soft water results in permanent
etching in the dishes. Your local water company, water softener company or
county extension agent can tell you the water hardness in your area.
More detergent may be needed if the phosphorus content is 8.7% or less.
The phosphorus content is shown on the detergent label. Due to
environmental concerns, phosphorus use has been reduced, and detergents
containing phosphates are not available in some areas.
Detergent Chart
Water Hardness Grains Amount per Cup
Soft 0 3 grains 2 Teaspoons
Medium 4 8 grains 5 Teaspoons
Hard 9 + 10 Teaspoons (fill level to top)
12 grains and higher is extremely hard water. Detergent alone may not be
enough. A water softener is recommended to improve water quality and
dishwashing performance.
Detergent Cup
Dispenser Cap
Rinse Aid Indicator
Is It Fresh?
The type and quality of detergent used
will make a difference on effectiveness
of the dishwasher. A detergent that is
too old, clumpy, or damp will not be as
effective as one that is fresh. Active
ingredients in the detergent degrade
over time so the detergent no longer
works properly.
Rinse Aids
Rinse aids are extremely
beneficial where low
water temperature or
poor water pressure are
problems. Rinse aid also helps
reduce water spots and marks from
large water droplets clinging to dishes
as they dry.
The dispenser, located next to the
detergent cup, automatically releases
a preset amount of rinse aid during
the last rinse cycle. To adjust the
amount of rinse aid dispensed, rotate
the dial to a higher number. The
dispenser holds enough rinse aid for
35 to 140 washes, depending on
setting. The indicator will be dark
when the rinse aid dispenser is full,
and will be clear when more needs to
be added.
Detergent Cup Cover
Rinse Aid Dispenser
7
To add liquid rinse aid:
1. Turn dispenser cap 1/4 turn
counterclockwise and lift out.
2. Pour in rinse aid until liquid
touches the indicated fill level.
Do not overfill. Spilling can
lead to foaming, causing
overflow.
3. Replace cap.
4. Wipe up any spills with damp
cloth to avoid oversudsing.
Page 8

Stains and Films
Removal
Solution
To remove buildup, rust
stains from the
dishwasher interior,
spots and film from both
the dishwasher interior and dishes, clean
using the following instructions.
1. Load clean dishes and glasses in
normal manner. Do not load any
metal utensils or silverware.
2. DO NOT add detergent.
3. Select the NORMAL WASH
cycle. Close and latch door to start.
4. Allow dishwasher to run for 25
minutes to reach the main wash
portion of wash cycle.
5. Unlatch and open door and pour 2
cups of white vinegar into the
bottom of dishwasher.
6. Close and latch door and allow the
cycle to finish.
7. If condition persists repeat above
procedure using 1/4 cup of citric
acid crystals instead of vinegar in
step 5. Contact Consumer Affairs
to order citric acid crystals (part
number R0910039)
8. When using citric acid crystals,
DO NOT load dishwasher with
dishes.
9. Run an empty load on a normal
cycle before placing dishes in the
dishwasher.
Stop stains before they get started
Prevention is the best method for ending stain or film problems. Stains and
films can be caused by one or multiple problems. Some common steps to
prevent films or stains:
1. Rinse all dishes immediately after use. Foods such as coffee and tea,
tomato or citric based products can cause stains when left on dishware
or utensils.
2. Test your water hardness. Depending on water hardness, it may be
necessary to use more or less detergent to get your dishes clean.
Using too much detergent in soft water will lead to etching, making the
dishes appear filmed.
3. Use the removal solution with a normal wash cycle on a regular basis.
This will avoid a lime build up that is difficult to remove with one washing.
4. Do not allow aluminum flatware or dishes to come in contact with other
dishware. Aluminum can mark porcelain and other dishware, leaving
distinctive aluminum marks.
STAINS AND FILMS
Stain Cause Removal
Hand wash in solution of ½
Tea or coffee
Iron deposits
(yellow or brown
film)
Aluminum marks
(gray or black marks)
Discoloration of
plastics
or stainless steel
Pitting of stainless
steel
Lime deposits/scale
Left in cups too long
Unfiltered water
Aluminum utensils
improperly loaded
Certain high acid foods
left in contact for a long
time
Mixing stainless steel
and silver utensils in
silverware basket
Hard water deposits
cup (120 ml) bleach and one
quart (1 L) of warm water.
Rinse thoroughly.
Use citric acid crystals
available from Amana
Consumer Affairs.
A special filter installed in the
water supply line will correct
this problem.
Load properly, see
Solution.
Use Rinse & Hold cycle or
rinse by hand if not operating
dishwasher at once.
No treatment. Avoid mixing
stainless steel and silver
utensils.
See
Removal Solution.
Removal
8
Page 9

Dishwasher Safe Recommendations
To get best results from your new dishwasher, do not attempt to wash anything not designed to be washed by an
automatic dishwasher. In general, do not try to wash dishware that may be heat-sensitive, that should not be jostled
around by the water action of the spray arms, or that has sentimental value.
Dishwasher Safe Items
Usually
Material
Safe Special Instructions
Aluminum
China
Stoneware
Crystal
Glass
Iron
Non-dishware
(filters, etc.)
Non-stick
coatings
Pewter
Plastics
Stainless Steel
Sterling silver
Silver plate
Yes Some darkening or spotting possible. Remove by scouring with soap-filled steel
wool pads. Some colored anodized aluminum can fade.
Yes Load securely to prevent movement. Check china manufacturers instructions. Do
not wash antique, gold leaf, metal trimmed, hand painted or over the glaze
patterns.
Yes Load securely to prevent movement.
option, if available. Check crystal manufacturers instructions. Wash cycle should
be a low temperature wash or the crystal may crack. Antique, metal trimmed, gold
leaf, hand painted or over the glaze patterns should not be washed.
Yes Milk glass may yellow.
No Not considered dishwasher safe.
No Damage, discoloration or staining of dishwasher may result.
Yes After washing, wipe non-stick coating with vegetable oil to keep coating from
losing non-stick quality.
No Not considered dishwasher safe.
Yes If plastic does not say dishwasher-safe, test one piece before washing entire set
(top rack reduces heat).
Yes Rinse if not washing immediately. Salty or acid foods can stain if left on.
Yes Rinse if not washing immediately. Salty or acid foods can stain if left on. Powder
detergent can cause black spots. Avoid placing near detergent dispenser. Do not
wash with stainless steel or copper.
Do not
use the SaniSure or any heat boost
Tin
Wood
No Not considered dishwasher safe.
No Wooden carving boards and cooking utensils can be washed to sanitize, but will
warp and separate at seams over time.
9
Page 10

Care and Cleaning
General Dishwasher Care:
WARNING
!
To avoid risk of burns, allow
heating element to cool before
cleaning the interior.
Cleaning Stainless Steel
Stainless steel appliances have been factory finished for high shine and
luster. To maintain this quality appearance:
Do not use abrasive, harsh cleaners, solvents, concentrated detergents
or metal scouring pads to clean the inside of dishwasher.
Occasionally wipe the outside panel with a mild nonabrasive cleaner
and water. Rinse and dry.
Inside of tub is self cleaning with normal use. If needed, clean around
the tub gasket with a damp cloth.
To remove lime deposit buildup on interior of dishwasher see
Stains and Films section in this manual.
The filter is self-cleaning.
Citric Acid
DO USE:
Warm soapy water for routine
cleaning.
Dry with soft, clean cloth.
For heavy soil, ONLY a stainless
steel cleaner designed for
kitchen appliance use.
Damage to stainless steel finish due to improper use of cleaning products, or using non-recommended
cleaning products, is not covered under warranty. For stainless steel cleaner, call our Consumer Affairs division
at (800) 843-0304 and request part number 31960801.
DO NOT USE:
Abrasive powders or liquids
Citrus based cleaners
Ammonia
Steel wool pads
Abrasive cloths
Oven cleansers
Acidic or vinegar based cleaners
steel appliance, do not allow mustard,
tomato juice, marinara sauce, or
other citrus based sauces or products
to remain on stainless steel surface.
Citric acid permanently discolors
stainless steel.
To prevent damage to the
finish of your stainless
Glass Trap
A glass trap is located in the bottom of the dishwasher next to the filter. This
trap is designed to collect pieces of small bone, pits, or larger pieces of food.
It will need to be emptied. To remove items from the glass trap, grasp the
handle and lift the glass trap out. Empty and clean, and then replace the
glass trap before the next use.
Overfill Protector
The overfill protector keeps the dishwasher from overfilling during a wash or
rinse cycle. It is located in the lower left front corner of the dishwasher
bottom. The overfill protector should move up and down freely about one
inch.
Clean the protector occasionally with household cleaner containing
vinegar or bleach to dissolve any buildup.
To ensure easy movement, clean underneath the protector.
10
Page 11

User Maintenance
Water Temperature
Important: Before starting dishwasher, run water until hot.
Hot water is needed for best dishwashing and drying results.
Water entering dishwasher should be at least 120°F (49°C)
to give satisfactory results. Having cooler water may result in
longer wash times, if the dishwasher needs to heat the water before running
a wash cycle, or reduced performance.
To check water temperature entering dishwasher:
Turn on hot water faucet nearest dishwasher for several minutes to
clear cool water from pipes.
Hold a candy or meat thermometer in stream of water to check the
temperature.
If temperature is below 120°F (49°C) have a qualified person raise the
thermostat setting on household water heater.
Powder detergent may not completely dissolve or be effective if water
temperature is below 120°F (49°C).
Water Pressure
Water line to the dishwasher must provide water pressure between 20 and
120 psi. Without proper pressure, food residue may not be removed
effectively. Normal water pressure may be reduced by running laundry or
showers at the same time as the dishwasher. For best results, wait until water
use is reduced before operating the dishwasher. The dishwasher can be
prepared for a wash cycle and be set for a delay start when water use is
reduced.
Caring for a Drain Air Gap
If a drain air gap was installed for your
built-in dishwasher, check to make sure
it is clean so the dishwasher will drain
properly. A drain air gap is usually
mounted on the countertop and can be
inspected by removing the cover. This is
not part of your dishwasher and is not
covered under warranty.
Winterizing
A dishwasher left in an unheated place should be protected
from freezing.
To Disconnect Service:
1. Turn off electrical power to the dishwasher at the supply source by
removing fuses or tripping circuit breaker.
2. Shut off water supply.
3. Place a pan under the inlet valve. Disconnect water line from inlet valve
and drain into pan.
4. Disconnect drain line from pump and drain water into pan.
To Restore Service:
1. Reconnect the water, drain, and electrical power supply.
2. Turn on water and electrical power supply.
3. Fill both detergent dispensers and run dishwasher through a NORMAL
cycle.
4. Check connections to make sure they do not leak.
11
CAUTION
!
To avoid property damage all
supply lines to and circulating
within dishwasher must be
protected. Freezing
temperatures may cause water
lines to rupture.
Page 12

User Maintenance (cont'd)
Removing and replacing the outer dishwasher door
DIshwasher door needs to be removed during custom installation of specialty panels. This procedure is to
add custom panels only, and should not be considered a part of routine user maintenance. To order custom
panels, call Amana Customer Service at (800) 843-0304.
To remove:
1. Unlatch and open door. Using a Phillips head screwdriver,
remove two (2) screws from inner door. Save screws to
reassemble door.
2. Close and latch door while holding both sides.
3. Place one hand on each side of door and pull down at
top approximately 1/4". Pull entire door assembly toward
you to remove.
4. Place door where it will not get scratched or damaged while
completing installation or other maintenance.
To replace:
1. Fit the slots on each side of top door edge over
the tabs on the metal liner. Push on sides to
insure the door is flat. Push up from bottom until
there is no gap between door and console.
2. Unlatch door and open while supporting outer
door on both sides and at bottom to keep in
place. Align screw holes and replace screws.
Adjusting Spring Tension
A correct spring setting allows the dishwasher door to remain horizontal in an
opened position, but should close easily with a slight push upwards.
To adjust spring tension:
To increase tension, move spring to a hole near the rear of the
dishwasher.
To decrease tension, move spring to a hole near the front of the
dishwasher.
metal
liner
door
side view
12
Page 13

13
Page 14

Troubleshooting
You may save time and money by checking items below before calling for service. List includes common concerns
that are not the result of defective workmanship or materials. If your question is not explained below, contact Amana
Consumer Affairs Department at 800-843-0304.
TOPIC POSSIBLE CAUSE SOLUTION
NOISE
Dishwasher pauses (no noise)
OPERATION
Dishwasher wont run
CLEAN light continues to glow after a
wash cycle
Food soil left on dishes or
Glassware/Flatware spotted or cloudy
Dishes not dry
Dishware chipped
Wash action is switching between arms. Normal
Circuit breaker/fuse blown
Cycle set incorrectly
Door ajar Shut door securely and latch.
Inadequate water supply
CLEAN light is a feature on some models to
indicate the dishes in the washer are clean.
Light can remain on until dishwasher is
unloaded. To shut off light, turn knob to OFF
position.
Wrong cycle selected Try a longer cycle.
Dishes stacked incorrectly
Low water pressure
Low water temperature
Hard water
Blocked funnel Remove blockage (upper rack)
Blocked spray arms (not rotating)
No rinse ai d Fill rinse aid container.
Poor detergent
No rinse ai d
Rinse aid l evel too low
Low water temperature
Heated dry option is off. Select heated dry.
Cups with concave bottom Normal.
Poor loading
Replace household fuse or reset circuit
breaker
See Operating Instructions.
Make sure
Make sure water supply is turned on, water
pressure is between 20 and 120 psi.
Normal
Avoid nesting items. Allow enough space for
water to reach all areas.
Make sure the water pressure is between 20
and 120 psi.
Check water temperature. Water temperature
needs to be at least 120 °F (49 °C).
Increase detergent depending upon water
hardness. Install water softener.
Make sure there are no utensils protruding
from utensil basket.
Make sure detergent is fresh. Increase
phosphate level if possible.
Fill rinse aid container or increase amount
dispensed.
Check water temperature. Water temperature
needs to be at least 120 °F (49 °C).
Load with care. Do not overload. Avoid
nesting. Place glasses securely against pins.
Delicate items should go in t op rack. Make
sure tall glasses and stemware will clear top
of tub when rack is pushed in. Fine antique
china and crystal should be hand washed.
delay start
option is not selected.
14
Page 15

OPERATION (contd)
Oversudsing
Etching
Detergent left in cups
Dishwasher has an odor
Stains
Troubleshooting
Use detergent designed for automatic
Hand washing dish soap or detergent.
Too much detergent
Temperature of water too hot Lower the water temperature.
Drying too harsh Use the air dry option.
Old detergent Discard detergent and use fresh.
Blocked water action
Cycle incomplete Allow cycle to complete.
Soiled dishes Wash dishes more frequently.
New scent Normal
Improper draining
Incomplete cycle Allow cycle to complete.
Tomato based foods
dishwashers.
Add 1/4 cup vegetable oil to dishwasher when
it fills with water. The oil will help reduce the
amount of sudsing.
Reduce amount of detergent used per wash
cycle.
Be sure water action can reach dispenser.
Ensure items do not prevent the detergent
dispenser f rom opening.
Dishwasher does not drain properly
See
Trouble Shooting, under WATER.
Large amounts of dishware with tomato based
residue can cause a pink/orange appearance.
This does not affect performance and will
gradually fade. Pre-rinsing or using the Rinse
& Hold cycle will reduce the chance of
staining. Using the Air Dry option will reduce
staining.
in
WATER
Dishwasher leaks
Dishwasher does not drain properly
(Water in tub bottom)
Dishwasher wont fill
Old detergent around seal or gasket
Rinse aid
Cracked tub Damage. Contact place of purchase.
Not level
Clogged food waste disposal
Knockout plug
Drain hose removed from side of unit. Verify that drain hose has not been removed.
Drain hose higher than antisiphon loop
Kinked drain hose Make sure drain hose is straight.
Water supply Verify that water supply is turned on.
Water pressure
Blocked overfill protector
Check to make sure detergent residue is not
caked around door seal or gasket.
Spillage can cause foam and lead to
overflowing. Wipe up any spills with damp
cloth
Check to see that dishwasher is level. See
Installat ion Instructions.
Make sure disposal is empty prior to runni ng
dishwasher.
Check to see if the knockout plug has been
removed from inside the food waste disposal
inlet. See Installation Instructions.
Verify that the extra drain hose does not travel
higher than the mandatory loop.
remove loop from dishwasher.
Water pressure should be between 20 and
120 psi.
Overfill protector should move up and down
freely.
DO NOT
15
Page 16

Amana Warranty
Full ONE Year Warranty
Amana Appliances will repair or replace, including related labor and travel, any part (f.o.b. Amana Iowa) which
has proved to fail due to workmanship or materials.
Full TWENTY Year Warranty
Amana Appliances will repair or replace, including related labor and travel, any defective tub or inner door liner,
(f.o.b. Amana Iowa) which has proved to fail due to workmanship or materials.
Limited Warranty
Second Year
During the second year from the date of original retail purchase Amana will provide a replacement part, part only, for
any failed water distribution system component (circulation pump/motor, drain pump/motor, lower spray arm system,
middle spray arm system, delivery tube system and filtration system), which has proved to fail due to workmanship or
materials. The owner will be responsible for paying all other costs including labor, mileage and transportation.
Second through Fifth Year
During the second through fifth year from the date of original retail purchase, Amana will provide a replacement
rack, rack only, which has proved to fail due to workmanship or materials. The owner will be responsible for
paying all other costs including labor, mileage and transportation.
What is not covered by these
warranties
Replacement of household fuses, resetting of
circuit breakers, or correction to household wiring
or plumbing.
Normal product maintenance and cleaning.
Products with original serial numbers removed,
altered, or not readily determined.
Products purchased for commercial, industrial,
rental, or leased use.
Products located outside of the United States.
Premium service charges, if the servicer is
requested to perform service in addition to normal
service or outside normal service hours or area.
Adjustments after the first year.
Repairs resulting from the following:
Improper installation or maintenance.
Any modification, alteration, or adjustment not
authorized by Amana.
Accident, misuse, abuse, fire, flood, or
acts of nature.
Connections to improper electrical current,
voltage supply or water supply.
Use of improper pans, containers, or accessories
that cause damage to the product.
To Receive Warranty Service
Service must be performed by an authorized Amana
service representative. To schedule service, contact the
Amana dealer where you purchased your appliance or
contact Amana Appliances Factory Service.
Amana Appliances Factory Service
1-800-628-5782
For more information,
Amana Appliances Consumer Services
Amana Appliances
2800 220th Trail
Amana, Iowa 52204
1-800-843-0304
When contacting Amana Appliances please
include the following information:
Your name, address, and telephone number.
Model number and serial number of your
appliance.
The name and address of your dealer and the date
of purchase.
A clear description of the problem.
Proof of purchase (sales receipt).
IN NO EVENT SHALL AMANA BE LIABLE FOR INCIDENTAL OR CONSEQUENTIAL DAMAGES.
This warranty gives you specific legal rights, and you may have others which vary from state to state. For example, some states
do not allow the exclusion or limitation of incidental or consequential damages, so this exclusion may not apply to you.
Owner's Manual Number154397401
Part No.12422605
Printed in U.S.A.01/01
Amana Appliances Online http://www.amana.com
2001 Amana Appliances
Amana, Iowa 52204
 Loading...