

Page 1

MODEL
User's guide
Guida per l'utente
XA3 051
Mode d'emploi
Gebrauchsanleitung
Page 2
The lightning flash with arrowhead, within an
equilateral triangle, is intended to alert the user to the
presence of uninsulated “dangerous voltage” within the
product’s enclosure that may be of sufficient magnitude
to constitute a risk of electric shock to persons.
Safety Instructions
CAUTION
To prevent electric shock do not use this (polarized) plug with an
extension cord, receptacle or other outlet unless the blades can
be fully inserted to prevent blade exposure.
WARNING
TO REDUCE THE RISK OF FIRE OR ELECTRIC SHOCK, DO NOT
EXPOSE THIS APPLIANCE TO RAIN OR MOISTURE.
Caution: To prevent the risk of electric shock, do not
remove cover (or back). No user- serviceable parts
inside. Refer servicing to qualified service personnel.
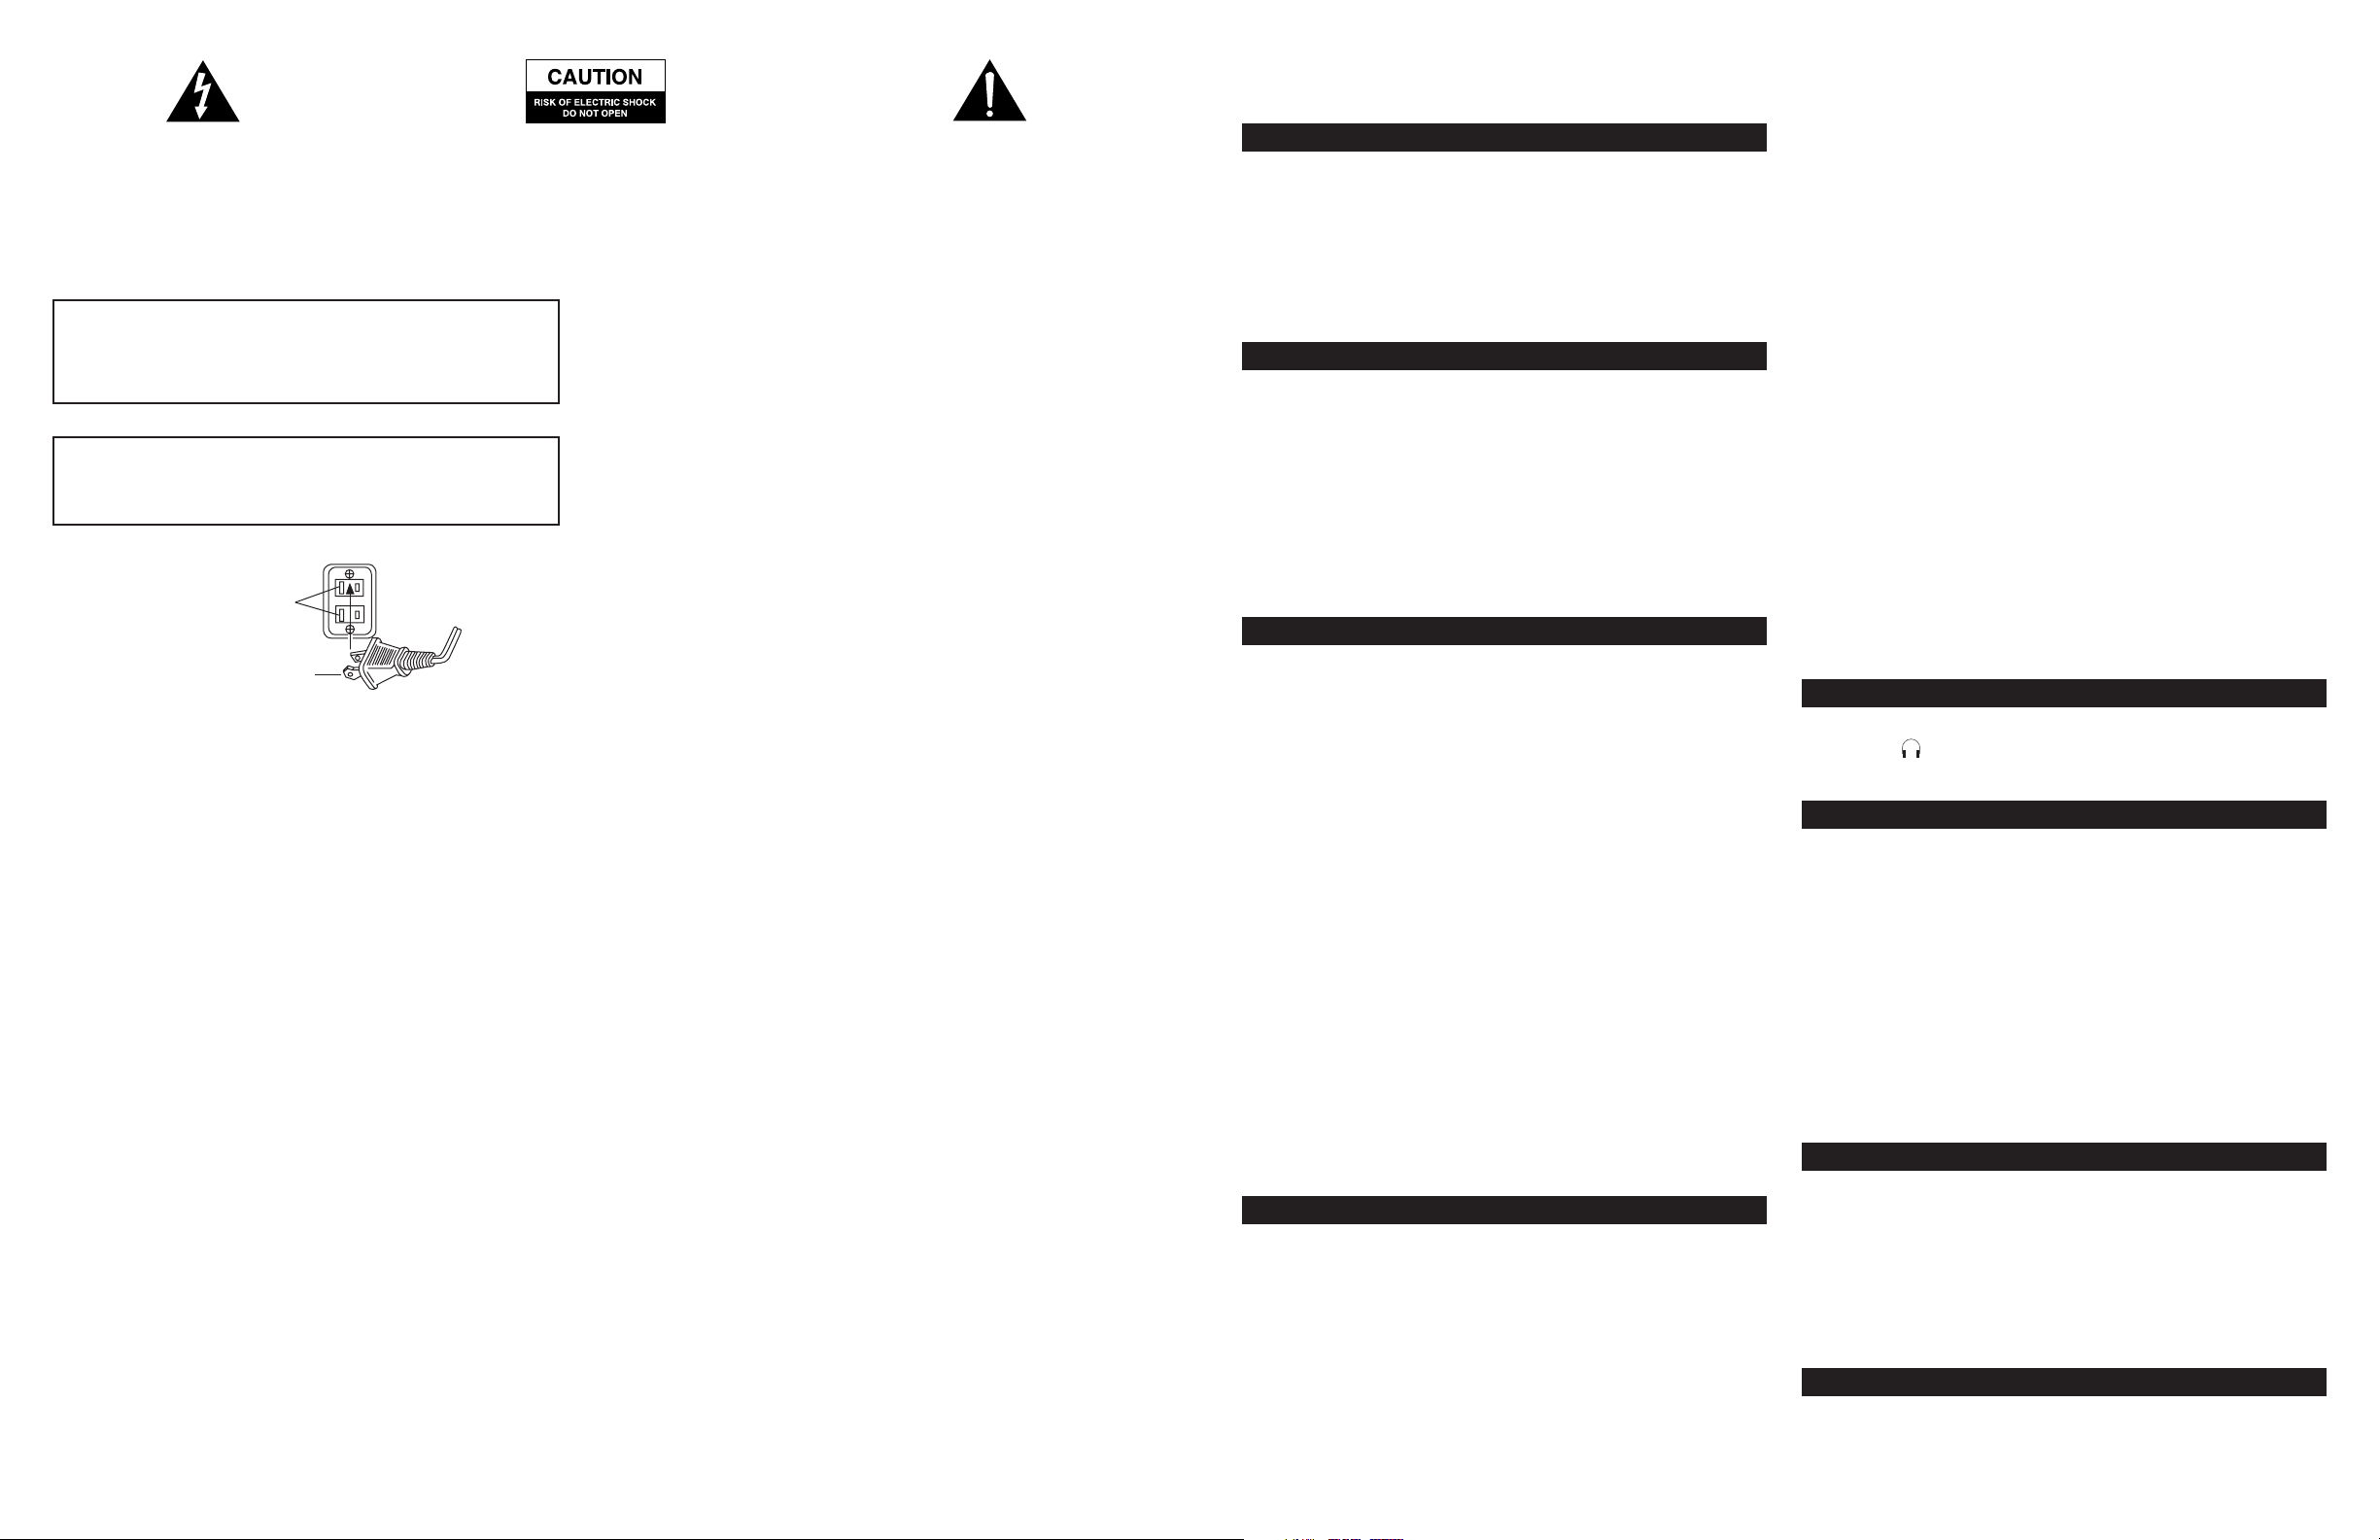
Connecting the Power Cord (AC Wall Socket)
Long slot is neutral
(ground) side.
Insert the wide blade
into the ground side slot.
Read Instructions — All the safety and operating instructions
should be read before the appliance is operated.
Retain Instructions — The operating instructions should be
retained for future reference.
Heed Warning — All warnings on the appliance and in the
operating instructions should be adhered to.
Follow Instructions — All operating and use instructions
should be followed.
Water and Moisture — The appliance should not be used near
water – for example, near a bathtub, washbowl, kitchen sink, laundry
tub, in a wet basement, or near a swimming pool, etc.
Outdoor Use — Warning: To reduce the risk of fire or electric
shock, do not expose this appliance to rain or moisture.
Location — The appliance should be installed in a stable location.
Ventilation — The appliance should be situated so that its
location or position does not interfere with its proper ventilation. For
example, the appliance should not be situated on a bed, sofa, rug, or
similar surface that may block the ventilation openings; or placed in a
built-in installation, such as a closed bookcase or cabinet that may
impede the flow of air through the ventilation openings.
Heat — The appliance should be situated away from heat sources
such as radiators, heat registers, stoves, or other appliances (including
amplifiers) that produce heat.
Power Sources — The appliance should be connected to a power
supply only of the type described in the operating instructions or as
marked on the appliance.
Power-Cord Protection — Power-supply cords should be
routed so that they are not likely to be walked on or pinched by items
placed upon or against them. Pay particular attention to cords at
plugs, convenience receptacles, and the point where they exit from the
appliance.
Grounding or Polarization — The precautions that should
be taken so that the grounding or polarization means of an appliance
is not defeated.
The exclamation point within an equilateral triangle is
intended to alert the user to the presence of important
operating and maintenance (servicing) instructions in
the literature accompanying the appliance.
Cleaning — The appliance should be cleaned only with a polishing
cloth or a soft dry cloth. Never clean with furniture wax, benzene,
insecticides or other volatile liquids since they may corrode the cabinet.
Non-Use Periods — The power cord of the appliance should be
unplugged from the outlet when left unused for a long period of time.
Lightning Storms — Unplug the appliance during lightning
storms.
Object and Liquid Entry — Care should be taken so that
objects do not fall and liquids are not spilled into the enclosure
through openings.
Accessories — Only use attachments/accessories specified by the
mfg.
Damage Requiring Service — The appliance should be
serviced by qualified service personnel when:
• The power-supply cord or the plug has been damaged.
• Objects have fallen, or liquid has been spilled into the appliance.
• The appliance has been exposed to rain.
• The appliance does not appear to operate normally or exhibits
a marked change in performance.
• The appliance has been dropped or the enclosure damaged.
Servicing — The user should not attempt to service the appliance.
Servicing should be referred to qualified service personnel or returned
to the dealer or call the Altec Lansing service line for assistance.
two Year Limited Warranty
Altec Lansing Technologies, Inc. warrants to the end user that all of its
PC audio, TV or gaming speaker systems are free from defects in
material and workmanship in the course of normal and reasonable use
for a term of two years from the date of purchase.
This warranty is the exclusive and only warranty in effect relative to
Altec Lansing PC audio, TV or gaming speaker systems and any other
warranties, either expressed or implied, are invalid. Neither Altec
Lansing Technologies, Inc. nor any authorized Altec Lansing
Technologies, Inc. reseller is responsible for any incidental damages
incurred in the use of the speakers. (This limitation of incidental or
consequential damage is not applicable where prohibited.)
Altec Lansing Technologies, Inc.’s obligation under this warranty does
not apply to any defect, malfunction or failure as a result of misuse,
abuse, improper installation, use with faulty or improper equipment or
the use of the speaker systems with any equipment for which they
were not intended.
The terms of this warranty apply only to PC audio, TV or gaming
speaker systems when such speakers are returned to the respective
authorized Altec Lansing Technologies, Inc. reseller where they were
purchased.
Under the terms of this warranty, the original consumer purchaser has
certain legal rights and may have other rights, which vary worldwide.
Video Gaming & TV
XA3051
Welcome
Welcome to the extraordinary world of Altec Lansing high-fidelity
sound. The XA3051 is a 6-speaker Dolby Surround Pro Logic system
that pulls you into the game. You’ll be able to hear every detail and
feel the intensity of the action that surrounds you!
Great television sound isn’t all you’ll experience with the XA3051
system. With 100 watts of total system power, it delivers thrilling
performance from video gaming systems, DVD players, MP3 players,
CD players and other audio sources.
Box Contents
• 4 Satellite Speakers
• 1 Center Speaker
• Subwoofer
• Wired Controller
• 3-Meter Stereo Audio RCA Cable, Male-to-Male
• 3-Meter Composite Video RCA Extender Cable, Female-to-Male
• AC Power Adapter
• Manual
• Quick Connect Card (QCC)
Placing Speakers
Subwoofer
All stereo information is heard through the satellite speakers. Because
low frequency sound is non-directional, you can place the subwoofer
anywhere you choose. However, placing the subwoofer on the floor
close to a wall or in a corner provides better bass efficiency and
optimum sound.
WARNING: The subwoofer is not magnetically shielded. Therefore, it
SHOULD always be placed at least 2 feet (0.6m) from TVs, computer
monitors, computer hard drives or any other magnetic media (e.g.
floppy disks, Zip disks, VHS or cassette tapes, etc.).
Satellite Speakers
Arrange the two front satellites to suit your listening tastes – from
directly next to the TV to as far apart as the speaker cords allow.
Arrange the two rear satellites behind and to either side of your
listening position.
NOTE: The satellite speakers ARE magnetically shielded and can be
placed close to video displays such as TVs and computer monitors
without distorting the image.
Center Speaker
Position the center speaker directly in front of you as close to the TV
as possible.
NOTE: The center speaker IS magnetically shielded and can be placed
close to video displays such as TVs and computer monitors without
distorting the image.
Making Connections
WARNING: Do not insert the speaker system’s power adapter plug into
an AC outlet until all connections are made. Also, turn off your audio
source (i.e., TV, video gaming system, DVD player or VCR) before
connecting its outputs to the XA3051’s inputs.
To ensure first-time operation as expected, please carefully follow the
connection sequence described below.
Satellite and Center Speakers
To set-up the XA3051 system, plug the right satellite’s orange
connector into the “RIGHT” output on the rear of the subwoofer and
the left satellite’s brown connector into the “LEFT” output on the rear
of the subwoofer. Plug the right rear satellite’s purple connector into
the "RIGHT REAR" output on the rear of the subwoofer and the left
Audio Speaker System
rear satellite’s gold connector into the "LEFT REAR" output on the rear
of the subwoofer. Plug the center speaker’s blue connector into the
“CENTER” output on the rear of the subwoofer.
Wired Controller
Connect the grey-colored DIN connector from the wired controller into
the grey “CONTROLLER” jack on the rear of the subwoofer.
For easy insertion of the DIN connector, the arrow on the connector
must face up.
Primary Inputs
The primary input jacks are located on the subwoofer. Using the
supplied RCA cable, connect any audio source that has red (right) and
white (left) RCA output jacks to the XA3051’s red (right) and white
(left) RCA input jacks.
In some setup configurations, you may want to use the supplied
composite video (yellow) RCA extender cable to allow greater
separation between the TV and subwoofer.
NOTE: For the clearest sound, try muting your TV’s speakers when
using the TV as an audio source.
Auxiliary Input
The auxiliary or secondary input is located on the subwoofer. Connect
any audio source that has a stereo 3.5mm plug (i.e. headphone style
jack), including portable CD or MP3 players.
CAUTION: Make sure the audio source features a line-out jack. This will
ensure that the output is not amplified. Check the owner’s manual for
your audio device for more information.
NOTE: You may need a cable that has RCA plugs on one end and a 3.5
mm stereo male plug on the other or 3.5 mm stereo plugs on both
ends. This plug may be purchased at most electronics stores.
Headphones
To use one or two headphones with the system, plug them into the
labeled jacks on the end of the wired controller. When headphones
are connected, the satellites and the subwoofer are muted.
Powering On
NOTE: You must first remove the protective plastic sleeves on both
ends of the power adapter before you plug in the system.
1. After all other connections are made, plug the power adapter into the
back of the subwoofer and into an AC wall socket.
NOTE: To ensure a secure connection, the power adapter uses a locking
connector. To unlock the power adapter, don’t simply pull on the cable.
Gently pull back the connector sleeve until it releases.
2. Turn on the audio source (TV, video gaming system, DVD player
or VCR).
3. Turn on the Altec Lansing XA3051 speaker system by pressing the
power button on the wired controller (see below.) A green LED on the
wired controller will illuminate.
NOTE: To avoid hearing a popping sound when you turn on your Altec
Lansing speaker system, always turn on your audio source first.
Using the Wired Controller
For your convenience, the wired controller lets you do the following:
• Power the system on or off.
• Control master, left, right, center and rear volumes.
• Adjust bass and treble levels.
• Select listening mode.
• Reset volumes, bass and treble to default levels.
• Test all five satellitte speakers to verify their operation.
Power
Press the “Power” button on the wired controller to turn on the
speaker system. A green LED on the wired controller will illuminate,
indicating power is on. Push the “Power” button again to turn off
the system.
21
Page 3

MASTER VOLUME
TEST
System Specifications
By default, the dial on the wired controller is the master volume
control for the speaker system. Turn the dial clockwise to increase the
volume and counter-clockwise to decrease the volume. If the
bass/center, treble/rear or test LED is lit, wait a few seconds for it to
turn off, then adjust the master volume.
NOTE: Three buttons on the wired controller have multiple functions.
The primary function is written in white text. The secondary function is
written in grey text.
1. Press and release a button to access its white-text feature. The LED
associated with that white-text feature will light solidly for a few
seconds while you use that feature and will then turn off.
2. As explained on the back of the wired controller, press and hold a
button for a few seconds to access its grey-text feature. The LED
associated with that grey-text feature will flash on and off for a few
seconds while you use that feature and will then turn off.
Bass
To adjust the bass level, press the bass/center button on the wired
controller. The bass/center LED will light solidly. Turn the dial on the
wired controller clockwise to increase the bass level and counterclockwise to decrease the bass level. After a few seconds of inactivity,
the bass LED will turn off.
Treble
To adjust the treble level, press the treble/rear button on the wired
controller. The treble/rear LED will light solidly. Turn the dial on the
wired controller clockwise to increase the treble level and counterclockwise to decrease the treble level. After a few seconds of inactivity,
the treble LED will turn off.
Center
To adjust the center speaker volume, press and hold the bass/center
button on the wired controller for a few seconds. Center volume is
represented by the bass LED. As a result, the bass/center LED will flash
on and off when you are adjusting the volume of the center speaker.
Turn the dial on the wired controller clockwise to increase the center
speaker volume and counterclockwise to decrease the center speaker
volume. After a few seconds of inactivity, the bass LED will turn off.
Rear
To adjust the rear speaker volume, press and hold the treble/rear
button on the wired controller for a few seconds. Rear volume is
represented by the treble LED. As a result, the treble/rear LED will flash
on and off when you are adjusting the volume of the rear speakers.
Turn the dial on the wired controller clockwise to increase the rear
speaker volume and counterclockwise to decrease the rear speaker
volume. After a few seconds of inactivity, the treble LED will turn off.
To verify that all speakers are correctly connected and to reset volumes,
press and hold the mode/test button on the wired controller for a few
seconds. The test LED will flash on and off for a few seconds while an
audio signal is sent to the front left speaker. This is repeated for the
center, front right and rear speakers (the two rear speakers receive the
signal simultaneously). While a speaker is being tested, you may turn
the dial on the wired controller to adjust its relative volume. Turn
clockwise to increase the speaker’s volume and counterclockwise to
decrease the speaker’s volume.
RESET MASTER VOLUME AND
ADJUST RELATIVE VOLUMES
To reset the master volume and each speaker’s relative volume to
default levels, press and hold the mode/test button on the wired
controller for a few seconds.
NOTE: The XA3051 will remember your settings even if you turn if off
or unplug it from the wall.
Total System Power: 100 Watts (50 Watts RMS)
Frequency Response: 32 Hz – 18 kHz
Signal to Noise Ratio @ 1 kHz input: > 76 dB
Crossover Frequency: 150Hz
System THD (distortion): < 0.2 % THD @ -10 dB full-
scale input voltage
Input Impedance: 10k ohms
SATELLITE AMPLIFIED SPEAKERS
Drivers (per satellite): One 3" full-range driver
Driver (per Center Speaker): One 3" full-range driver
Troubleshooting Tips
The answers to most setup and performance questions can be found in
the Troubleshooting guide. You can also consult the FAQs in the
customer support section of our Web site at www.alteclansing.com. If
you still can’t find the information you need, please call our customer
service team for assistance before returning the speakers to your
retailer under their return policy.
Customer service is available 7 days a week for your convenience. Our
business hours are:
Monday to Friday: 8:00 a.m. to 12:00 midnight EST
Saturday & Sunday: 9:00 a.m. to 5:00 p.m. EST
1-800-ALTEC-88 (1-800-258-3288)
Email: csupport@alteclansing.com
For the most up-to-date information, be sure to check our Web site at
www.alteclansing.com.
© 2002 Altec Lansing Technologies, Inc.
Designed and engineered in the USA and manufactured in our ISO9002
certified factory. United States Patents 4429181 and 4625328 plus other
patents pending.
SUBWOOFER
Speaker Drivers: One 6.5" long-throw woofer
POWER REQUIREMENTS
USA/Canada/and applicable 120 V AC @ 60 Hz
Latin American countries:
Europe/United Kingdom; 230 V AC @ 50 Hz
applicable Asian countries;
Argentina, Chile and Uruguay:
ETL / cETL / CE / NOM / IRAM Approved
RESET BASS, TREBLE, CENTER AND REAR
To reset the bass, treble, center and rear controls to default levels,
press and hold both the bass and treble buttons down at the same
time for a few seconds.
NOTE: The XA3051 will remember your settings even if you turn if off
or unplug it from the wall.
MODE
In the stereo mode, only the subwoofer, left-front and right-front
speakers receive an audio signal.
In the surround mode, the Dolby Surround Pro Logic circuitry sends an
audio signal to all six speakers.
By default, the XA3051 starts up in the surround listening mode.
Pressing and releasing the mode/test button enables you to toggle
between the stereo and surround listening modes.
43
Page 4
TROUBLESHOOTING TIPS
Symptom Possible Problem Solution
Can’t insert
the wired
controller’s DIN
connector into
the subwoofer.
No LEDs are lit.
Controller
doesn’t work.
No sound from
one or more
speakers.
Some of the pins are bent.
Power isn’t turned on.
Power adapter isn’t connected to the wall outlet
and subwoofer.
Surge protector (if used) isn’t powered on.
Wired controller isn’t connected to the subwoofer.
Wall outlet not functioning.
DIN connector not inserted in subwoofer jack.
Power isn’t turned on.
Try to gently straighten the pins with tweezers or very small pliers. If this
does not work, contact the Altec Lansing Consumer Support Department
for further instructions.
Press the Power button on the wired controller.
Disconnect and then reconnect the power adapter to both the wall outlet
and the subwoofer.
If the power adapter is plugged into a surge protector, make sure the
surge protector is switched on.
Connect the wired controller to the subwoofer.
Plug another device into the same jack on the wall outlet to ensure the
outlet is working.
Verify that the grey-colored DIN connector is firmly inserted into the DIN
connector jack on the subwoofer.
Ensure the pins are aligned between the plug and jack.
Remember, the arrow should be facing up.
Verify that the subwoofer’s AC power cord is plugged into both the wall
outlet and subwoofer.
Verify that the Power button has been pressed and that an EQ LED
is illuminated.
Symptom Possible Problem Solution
No sound from
subwoofer.
Low hum from
subwoofer.
Loud hum from
subwoofer.
Not enough bass
from subwoofer.
Too much bass
from subwoofer.
Distorted
monitor/TV.
Subwoofer volume set too low.
Sound source has little low-frequency content.
The AC in your house is at 60 cycles per
second, which is within the audio frequency
of the subwoofer.
Bad connection.
Volume on your audio source device set too high.
Bass setting is too low.
Bad connection.
Bass setting is too high.
Subwoofer too close to monitor/TV.
Adjust the bass level on the wired digital controller or subwoofer.
Try a game, movie or song — anything with more prominent bass levels.
Some low hum may be detected when your speaker system is powered on
without an audio source playing, or when the volume is set at an
extremely low level.
If you are using a surge protector with your XA3051 speaker system,
disconnect and plug the power adapter directly into an AC wall outlet.
Move your cables. Check to ensure they are making a clear connection.
Disconnect your stereo cable from the audio source. If the loud hum goes
away, lower the volume on the audio source.
Adjust the bass level on the wired digital controller or subwoofer.
Verify that all cables are connected properly and are making a
clear connection.
Decrease the bass level on the wired digital controller or subwoofer.
Because the subwoofer IS NOT magnetically shielded, it may cause
distortion if it is placed too close to your monitor/TV. Move the subwoofer
so it’s at least 2 feet from your monitor/TV.
Crackling sound
from speakers.
Sound is
distorted.
Radio
interference.
Volume is set too low.
Audio cable isn’t connected to audio source.
Audio cable is connected to wrong output on
audio source.
Problem with audio source device.
Bad connection.
Problem with your audio source device.
Volume level set too high.
Sound source is distorted.
Too close to a radio tower.
Turn the rotary knob to the right to raise the system master volume.
Check volume level on the video gaming system or alternate audio source
device, and set at mid-level.
Connect audio cable from the audio source. Check plug connections on
both the subwoofer and audio source. Make sure these signal cables are
inserted firmly into the correct jacks.
Make sure that a cable connects the output jacks on the audio source to
the input jacks on the XA3051’s subwoofer.
Test the speakers with another audio source.
Check all cables. Make sure they are connected to the “line-out” or
“audio-out” jacks on your audio source device.
Test the speakers using another audio source (e.g., VCR, DVD, portable CD
player, cassette player or FM radio).
Decrease the volume level on your XA3051’s wired controller or the
volume level on your audio source (if possible).
Try a different sound source like a music CD.
Move your speakers to see if the interference goes away. If not, you
may be able to purchase a shielded stereo cable from your local
electronics shop.
65
Page 5
Le symbole figurant un éclair dans un triangle
équilatéral est destiné à attirer l’attention de l’utilisateur
sur la présence d’une “tension dangereuse” non isolée
pouvant être d’amplitude suffisante pour constituer un
risque d’électrocution.
Attention: Pour prévenir tout risque d’électrocution,
ne retirez pas le couvercle (ou le dos) de l’appareil. Il
ne se trouve à l’intérieur aucune pièce pouvant être
réparée par l’utilisateur. Confiez la réparation et
l’entretien à un personnel qualifié.
CONSIGNES DE SÉCURITÉ
ATTENTION
Pour éviter tout risque d’électrocution, n’utilisez pas cette fiche
(polarisée) avec une rallonge électrique, une prise de courant ou
une autre sortie, si les lames ne peuvent pas être insérées
complètement, afin d’éviter qu’elles ne soient exposées.
AVERTISSEMENT
AFIN DE LIMITER LE RISQUE D’INCENDIE OU D’ÉLECTROCUTION,
N’EXPOSEZ PAS CET APPAREIL À LA PLUIE OU À L’HUMIDITÉ.
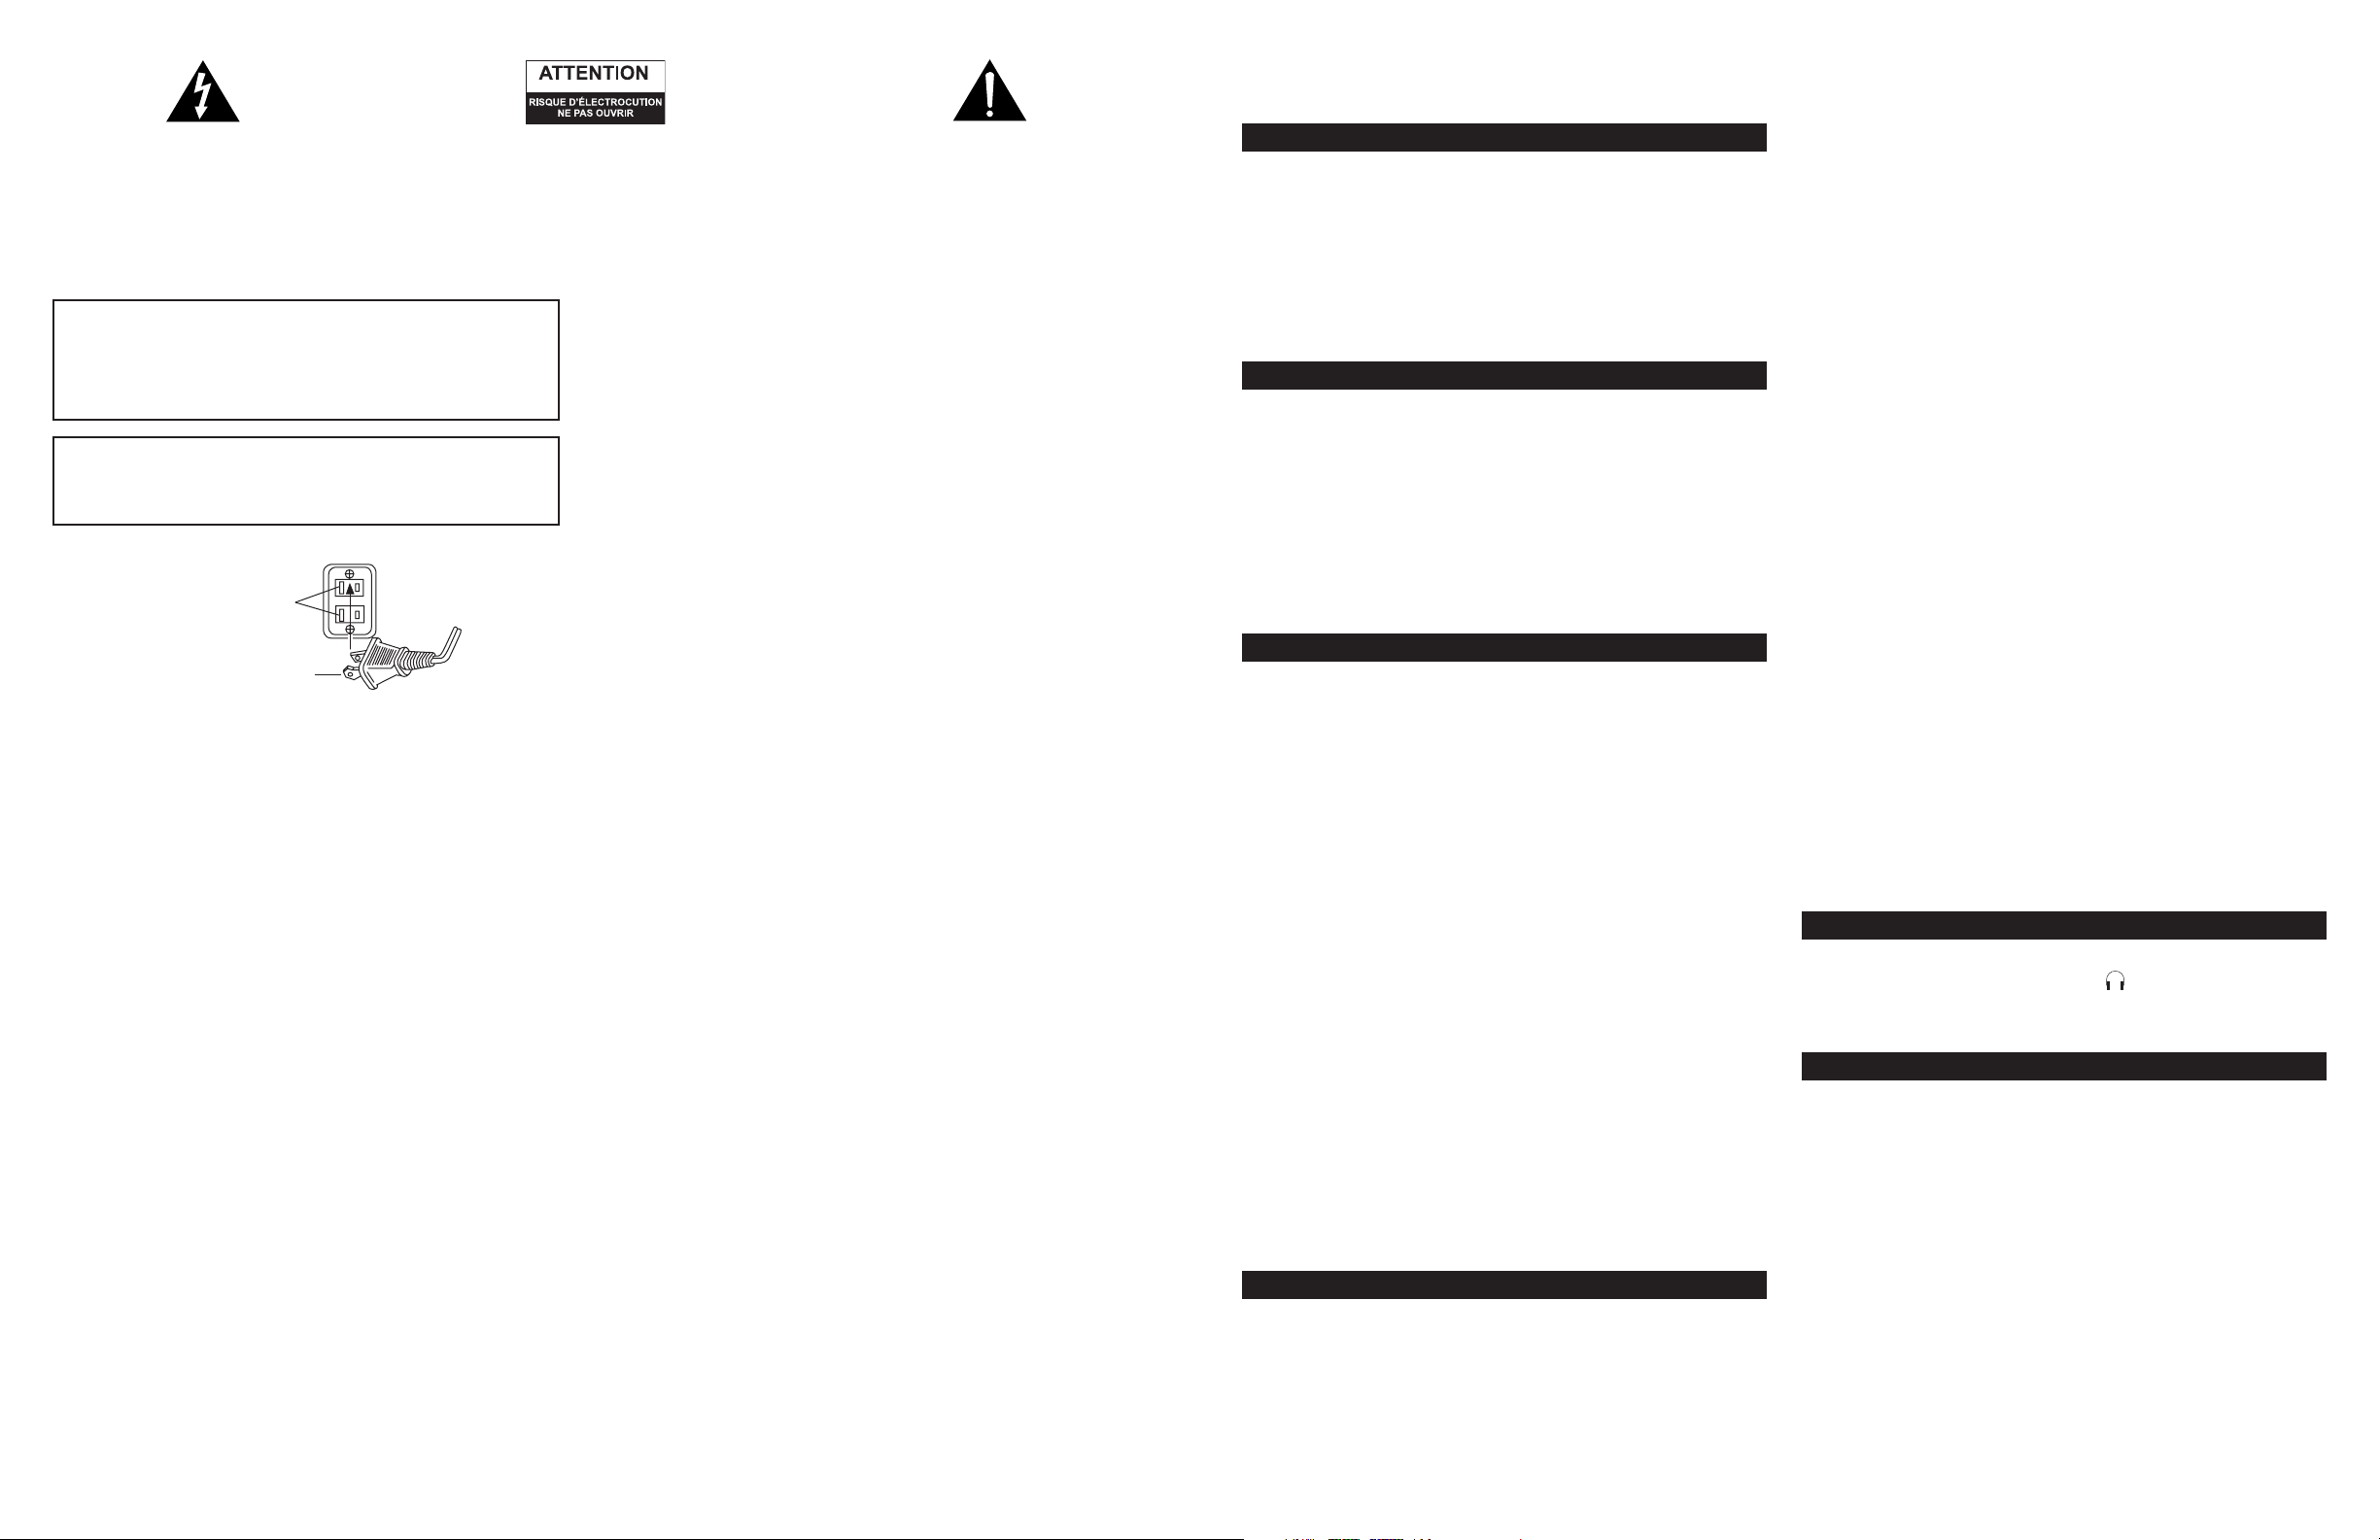
Connecting the Power Cord (AC Wall Socket)
La fente longue
correspond au côté
neutre (terre)
Insérez la lame la plus
large dans la borne
côté terre.
Lisez les Instructions — Vous devez lire toutes les consignes de
sécurité et le manuel d’utilisation avant de faire fonctionner l’appareil.
Conservez les Instructions — Conservez le manuel
d’utilisation pour pouvoir vous y référer ultérieurement.
Tenez compte des Avertissements — Tous les avertissements
figurant sur l’appareil et dans les consignes d’utilisation doivent être
respectés.
Suivez les Instructions — Le manuel d’utilisation et toutes les
consignes d’utilisation doivent être suivis.
Eau et Humidité — N’utilisez pas l’appareil près d’une source
d’eau - par exemple, près d’une baignoire, d’un lavabo, d’un évier,
d’un bac à laver, dans un sous—sol humide ou près d’une piscine, etc.
Utilisation à l’extérieur — Avertissement : Afin de limiter le
risque d’incendie ou d’électrocution, n’exposez pas cet appareil à la
pluie ou à l’humidité.
Emplacement — L’appareil doit être installé sur une surface stable.
Aération — L’appareil doit être placé de manière à ce que son
emplacement ou sa position n’entravent pas son aération correcte. Par
exemple, l’appareil ne doit pas être placé sur un lit, un canapé, un
tapis ni sur une surface de type similaire, qui pourrait bloquer les
orifices d’aération; ou placé dans une installation encastrée,
notamment dans une bibliothèque fermée ou une armoire pouvant
empêcher la circulation de l’air à travers les orifices d’aération.
Chaleur — L’appareil doit être tenu éloigné de toute source de chaleur
et notamment des radiateurs, des bouches d’air chaud, des réchauds ou
des autres appareils (y compris les amplificateurs) produisant de la chaleur.
Source d’Alimentation — Brancher l’appareil uniquement à
une source d’alimentation du type mentionné dans le manuel
d’utilisation ou indiqué sur l’appareil lui-même.
Protection des Câbles d’alimentation — Veillez à ce que
les câbles d’alimentation ne se trouvent pas dans un lieu de passage ou
bloqués par d’autres objets. Veuillez prêter une attention toute
particulière aux câbles au niveau des fiches, des prises de courants et
de l’endroit duquel ils sortent de l’appareil.
Le point d’exclamation à l’intérieur d’un triangle
équilatéral est destiné à prévenir l’utilisateur qu’il
trouvera d’importantes instructions concernant
l’utilisation et la maintenance (entretien) dans la
documentation jointe à l’appareil.
Mise à la terre ou polarisation — Les précautions à
prendre pour que les moyens de mise à la terre ou de polarisation
d’un appareil fonctionnent.
Nettoyage — L’appareil ne doit être nettoyé qu’à l’aide d’un
chiffon à lustrer ou d’un chiffon doux et sec. Ne le nettoyez jamais
avec de la cire pour meubles, du benzène, des insecticides ou d’autres
liquides volatiles qui pourraient attaquer le boîtier.
Périodes de non-utilisation — Le cordon d’alimentation de
l’appareil doit être débranché de la prise lorsque celui-ci n’est pas
utilisé pendant une longue période.
Orages — Débranchez l’appareil en cas d’orage.
Chutes d’objets et de liquide — Vous devez prendre garde à
ne pas faire tomber d’objets ou verser de liquide dans l’enveloppe de
protection par les ouvertures.
Accessoires — N’utilisez que les équipements/accessoires indiqués
dans le n° cat. fab.
Dommages nécessitant réparation — L’appareil doit être
réparé par le personnel qualifié lorsque :
• Le cordon d’alimentation ou la prise ont été endommagés.
• Des objets sont tombés ou du liquide a été renversé dans l’appareil.
•L’appareil a été exposé à la pluie.
•L’appareil ne semble pas fonctionner normalement ou donne des
signes de modification notoire de ses performances.
•L’appareil est tombé ou son boîtier a été endommagé.
Réparation — L’utilisateur ne doit pas tenter de réparer l’appareil.
Les réparations doivent être effectuées par le personnel qualifié,
l’appareil doit être retourné au distributeur ou vous devez appeler la
ligne téléphonique d’assistance Altec Lansing pour obtenir de l’aide.
Garantie limitée à deux ans
Altec Lansing Technologies, Inc. garantit à l’utilisateur final que tous
ses systèmes d’enceintes audio sont exempts de défauts matériels et de
fabrication dans le cadre d’une utilisation normale et raisonnable, et
cela pour une durée de deux ans à compter de la date d’achat.
Cette garantie est exclusive et tient lieu de seule garantie en vigueur
sur les systèmes d’enceintes audio Altec Lansing pour PC, TV ou jeux.
Aucune autre garantie, explicite ou implicite, n’est valide. Ni Altec
Lansing Technologies, Inc. ni aucun revendeur Altec Lansing
Technologies, Inc. agréé ne pourra être tenu responsable de dommages
accidentels provoqués par l’utilisation des enceintes. (Cette limitation
des dommages accidentels ou consécutifs n’est pas applicable là où la
loi l’interdit.)
Les obligations de Altec Lansing Technologies, Inc. liées à cette garantie
ne s’appliquent pas aux défauts, dysfonctionnements ou pannes
résultant d’une mauvaise utilisation, d’une utilisation abusive, d’une
installation incorrecte, d’une utilisation avec du matériel défectueux ou
inapproprié ou d’une utilisation des systèmes d’enceintes avec des
équipements pour lesquels elles ne sont pas prévues.
Les conditions de la présente garantie s’appliquent uniquement si les
systèmes d’enceintes audio pour ordinateur, TV ou jeux sont retournés
aux revendeurs Altec Lansing Technologies, Inc. agréés auprès desquels
ils ont été achetés.
Conformément aux dispositions de cette garantie, le client acheteur
initial dispose de certains droits légaux pouvant s’ajouter à d’autres
droits variant selon les juridictions.
---
XA3051
Système d’enceintes
audio pour Jeux video & tv
BIENVENUE
Bienvenue dans le monde extraordinaire du son haute-fidélité Altec
Lansing. Le XA3051 est un système Dolby Surround Pro Logic à 6
enceintes qui vous plonge au coeur du jeu. Vous entendrez chaque
détail et ressentirez toute l’intensité de l’action qui se déroule autour
de vous !
Avec le système XA3051, votre expérience ne s’arrêtera pas à un
fantastique son TV. Grâce à sa puissance totale de 100 watts, les
consoles de jeux vidéo, les lecteurs DVD, MP3 ou CD audio, et autres
sources obtiennent une performance époustouflante.
CONTENU DE L’EMBALLAGE
• 4 Enceintes satellites
• 1 Enceinte centrale
• Caisson de basses
• Télécommande filaire
• Câble audio stéréo RCA 3 mètres, Mâle – Mâle
• Rallonge de câble vidéo RCA composite 3 mètres, Femelle – Mâle
• Adaptateur CA
• Le manuel
• Programme QCC
INSTALLATION DES ENCEINTES
CAISSON DE BASSES
Toutes les informations en stéréo sont diffusées par les enceintes
satellites. Étant donné que le son basse fréquence est
omnidirectionnel, vous pouvez placer le caisson de basses où bon vous
semble. Cependant, si vous le placez sur le sol, près d’un mur ou dans
un coin, vous obtiendrez un effet maximum des basses et un son
optimal.
AVERTISSEMENT : le caisson de basses ne possède pas de blindage antimagnétique. Pour cette raison, il DOIT toujours être placé à au moins
60 cm des TV, moniteurs, disques durs d’ordinateurs ou de toute autre
source magnétique (et notamment des disquettes, des disques Zip, des
bandes VHS ou audio, etc.).
ENCEINTES SATELLITES
Disposez les deux satellites avant en fonction de vos préférences
d’écoute : directement à côté de la TV ou aussi loin que les cordons des
enceintes le permettent. Placez les deux satellites arrière de chaque
côté et en retrait par rapport à votre position d’écoute.
REMARQUE : les enceintes satellites SONT dotées d’un blindage
magnétique et peuvent être placées à proximité d’affichages vidéo et
notamment de télévisions et d’écrans d’ordinateurs sans déformer
l’image.
ENCEINTE CENTRALE
Placez l’enceinte centrale directement en face de vous, aussi près que
possible de la télévision.
REMARQUE : l’enceinte centrale EST dotée d’un blindage magnétique
et peut être placée à proximité d’affichages vidéo et notamment
d’écrans de télévision et d’ordinateur sans déformer l’image.
BRANCHEMENTS
AVERTISSEMENT : n’insérez pas la prise électrique du système
d’enceintes dans une sortie CA avant d’avoir effectué tous les
branchements. De plus, éteignez votre source audio (par ex. votre TV,
votre système de jeux vidéo, votre lecteur DVD ou votre magnétoscope)
avant de connecter les sorties aux entrées du système XA3051.
Pour assurer un fonctionnement satisfaisant dès la première utilisation,
suivez attentivement les différentes étapes de connexion décrites
ci-dessous.
ENCEINTES SATELLITES ET CENTRALES
Pour installer le système XA3051, insérez le connecteur orange
raccordé au satellite de droite dans la sortie marquée RIGHT (droite),
située à l’arrière du caisson de basses et le connecteur marron du
satellite de gauche dans la sortie marquée LEFT (gauche), située à
l’arrière du caisson de basses. Branchez le connecteur violet du satellite
arrière droit à la sortie « RIGHT REAR » (Arrière droite) située à
l’arrière du caisson de basses et le connecteur doré du satellite arrière
gauche à la sortie « LEFT REAR » (Arrière gauche). Insérez le
connecteur bleu de l’enceinte centrale dans la sortie portant
l’inscription CENTER (central), à l’arrière du caisson de basses.
TÉLÉCOMMANDE FILAIRE
Insérez le connecteur DIN gris de la télécommande filaire dans la prise
jack marquée CONTROLLER, située à l’arrière du caisson de basses.
Pour pouvoir insérer facilement le connecteur DIN, la flèche du
connecteur doit être tournée vers le haut.
ENTRÉES PRIMAIRES
Les entrées jack primaires sont situées sur le caisson de basses. À l’aide
du câble RCA fourni, connectez n’importe quelle source audio dotée de
sorties jack RCA rouge (droite) et blanche (gauche) aux entrées jack
RCA rouge (droite) et blanche (gauche) du XA3051.
Selon votre configuration, vous pouvez utiliser la rallonge du câble
RCA composite vidéo (jaune), pour augmenter la distance entre votre
téléviseur et le caisson de basses.
REMARQUE : pour obtenir un son encore plus clair, mettez les hautparleurs de votre téléviseur en mode muet lorsque vous utilisez votre
TV comme source audio.
ENTRÉE AUXILIAIRE
Cette entrée auxiliaire ou secondaire est située sur le caisson de basses.
Connectez n’importe quelle source audio dotée d’une prise stéréo 3,5
mm (par ex., un casque d’écoute avec jack), y compris un balladeur CD
ou MP3.
ATTENTION : vérifiez que la source audio dispose d’une sortie ligne
(line-out) jack. De cette façon, la sortie ne sera pas amplifiée. Consultez
le mode d’emploi de votre appareil audio pour obtenir de plus amples
informations.
REMARQUE : vous aurez certainement besoin d’un câble doté de prises
RCA d’un côté et d’une prise stéréo mâle 3,5 mm de l’autre ou de
prises stéréo 3,5 mm aux deux extrémités. Vous trouverez ce type de
prise dans la plupart des magasins d’électronique.
CASQUE D’ÉCOUTE
Pour utiliser un ou deux casque(s) d’écoute avec le système, branchezle(s) dans les prises jack correspondantes , situées à l’extrêmité de
la télécommande filaire. Lorsque le casque d’écoute est connecté, les
satellites et le caisson de basses deviennent silencieux.
MISE SOUS TENSION
REMARQUE : avant de brancher le système, vous devez ôter les
enveloppes de protection en plastique aux deux extrémités de
l’adaptateur secteur.
1. Une fois que toutes les connexions ont été effectuées, branchez
l’adaptateur secteur au dos du caisson de basses et dans une prise
murale CA.
REMARQUE : pour garantir une connexion sûre, l’adaptateur secteur
utilise un connecteur de verrouillage. Pour déverrouiller l’adaptateur
secteur, il ne suffit pas de tirer sur le câble. Tirez doucement
l’enveloppe du connecteur jusqu’à ce qu’il se relâche.
2. Allumez la source audio (TV, système de jeux vidéo, lecteur DVD ou
magnétoscope).
3. Allumez le système d’enceintes Altec Lansing XA3051 en appuyant sur
le bouton d’alimentation situé sur la télécommande filaire (voir cidessous). Le voyant lumineux vert de la télécommande filaire
s’allumera.
REMARQUE : pour éviter d’entendre un son saturé lorsque vous
allumez votre système d’enceintes Altec Lansing, commencez toujours
par allumer votre source audio.
87
Page 6

UTILISATION DE LA TÉLÉCOMMANDE FILAIRE
ARRIÈRE
CARACTÉRISTIQUES TECHNIQUES
Pour votre confort, la télécommande filaire vous permet d’effectuer les
opérations suivantes :
• Allumer ou éteindre le système
• Contrôle du volume général, gauche, droite, central et arrière.
• Réglage du niveau des basses et des aigus
• Sélection des modes d’écoute
• Remise des volumes, des basses et des aigus sur leur position par défaut
•Testez les cinq enceintes satellites pour vous assurer de leur bon
fonctionnement.
MISE EN MARCHE
Appuyez sur le bouton “Power” (mise sous tension) de la
télécommande filaire pour allumer le système d’enceintes. Un voyant
lumineux vert s’allumera sur la télécommande filaire, pour indiquer
que l’appareil est en marche. Appuyez à nouveau sur le bouton
“Power” pour éteindre le système.
VOLUME GÉNÉRAL
Par défaut, le bouton circulaire situé sur la télécommande filaire
correspond au réglage du volume général du système d’enceintes.
Tournez-le dans le sens des aiguilles d’une montre pour augmenter le
volume et dans le sens inverse pour le baisser. Si le voyant lumineux
basses/centre, aigus/arrière ou le voyant de test est allumé, attendez
quelques secondes qu’il s’éteigne, puis réglez le volume général.
REMARQUE : trois boutons de la télécommande filaire ont plusieurs
fonctions. La fonction principale est inscrite en blanc. La fonction
secondaire est inscrite en gris.
1. Pour accéder à sa fonction inscrite en blanc, appuyez sur le bouton puis
relâchez-le. Le voyant lumineux associé à cette fonction en blanc
s’allumera en continu pendant quelques secondes, pendant l’utilisation
de cette fonction, puis s’éteindra.
2. Comme indiqué au dos de la télécommande filaire, appuyez sur un
bouton puis maintenez-le enfoncé pendant quelques secondes pour
accéder à sa fonction inscrite en gris. Le voyant lumineux associé à
cette fonction en gris clignotera pendant quelques secondes lorsque
vous utiliserez cette fonction, puis s’éteindra.
BASSES
Pour régler le niveau de basses, appuyez sur le bouton basses/centre de
la télécommande filaire. Le voyant lumineux basses/centre s’allumera
en continu. Tournez le bouton circulaire de la télécommande filaire
dans le sens des aiguilles d’une montre pour augmenter le niveau de
basses et dans le sens inverse pour le baisser. Au bout de quelques
secondes d’inactivité, le voyant des basses s’éteindra.
AIGUS
Pour régler le niveau des aigus, appuyez sur le bouton aigus/arrière de
la télécommande filaire. Le voyant lumineux basses/centre s’allumera
en continu. Tournez le bouton circulaire de la télécommande filaire
dans le sens des aiguilles d’une montre pour augmenter le niveau des
aigus et dans le sens inverse pour le baisser. Au bout de quelques
secondes d’inactivité, le voyant des aigus s’éteindra.
Pour régler le volume des enceintes arrière, appuyez sur le bouton
aigus/arrière de la télécommande filaire et maintenez-le enfoncé
pendant quelques secondes. Le volume arrière est représenté par le
voyant lumineux des aigus. Ainsi, le voyant lumineux aigus/arrière
clignotera pendant le réglage du volume des enceintes arrière. Tournez
le bouton circulaire de la télécommande filaire dans le sens des
aiguilles d’une montre pour augmenter le volume des enceintes arrière
et dans le sens inverse pour le baisser. Au bout de quelques secondes
d’inactivité, le voyant des aigus s’éteindra.
RÉINITIALISATION DES BASSES, DES AIGUS, DU CENTRE
ET DE L’ARRIÈRE
Pour remettre les contrôles des basses, des aigus, du centre et de
l’arrière sur leurs réglages par défaut, appuyez sur les boutons des
basses et des aigus en même temps et maintenez-les enfoncés pendant
quelques secondes.
REMARQUE : le système XA3051 gardera vos réglages en mémoire
même si vous l’éteignez ou si vous le débranchez.
MODE
En mode stéréo, seuls le caisson de basse, les enceintes avant gauche et
avant droite reçoivent un signal audio.
En mode surround, les circuits du système Dolby Surround Pro Logic
envoient un signal audio aux six enceintes.
Par défaut, le système XA3051 démarre en mode d’écoute surround.
Pour basculer entre les modes stéréo et surround, appuyez et relâchez
le bouton test/mode.
TEST
Pour vérifier que toutes les enceintes sont connectées correctement et
pour réinitialiser les volumes, appuyez sur le bouton mode/test de la
télécommande filaire et maintenez-le enfoncé pendant quelques
secondes. Le voyant lumineux de test clignotera pendant quelques
instants, au cours de l’envoi du signal audio à l’enceinte avant gauche.
La même chose se produit pour les enceintes centrale, avant droite et
arrières (les deux enceintes arrière reçoivent le signal simultanément).
Pendant le déroulement des tests, vous devez tourner le bouton
circulaire de la télécommande filaire pour régler le volume relatif de
l’enceinte. Tournez-le dans le sens des aiguilles d’une montre pour
augmenter le volume de l’enceinte, et en sens inverse pour le baisser.
RÉINITILALISATION DU VOLUME GÉNÉRAL ET
RÉGLAGE DES VOLUMES RELATIFS
Pour remettre le volume général et le volume relatif de chaque
enceinte sur leur réglage par défaut, appuyez sur le bouton mode/test
de la télécommande filaire et maintenez-le enfoncé pendant quelques
secondes.
REMARQUE : le système XA3051 gardera vos réglages en mémoire
même si vous l’éteignez ou si vous le débranchez.
Puissance totale du système : 100 Watts (50 Watts RMS)
Réponse en fréquence : 32 Hz à 18 kHz
Rapport signal sur bruit
à l’entrée de 1 kHz : > 76 dB
Fréquence de transition : 150Hz
Taux d’harmonique (distortion) : 0,2 % taux d’harmonique à -10 dB
tension d’entrée pleine échelle
Impédance d’entrée : 10k ohms
ENCEINTES SATELLITES AMPLIFIÉES
Amplificateurs (par satellite) : deux amplificateurs à gamme
étendue de 3 "
Amplificateur (par enceinte centrale) :un amplificateur à gamme
étendue de 3 "
CONSEILS DE DEPANNAGE
Vous trouverez les réponses à la plupart des questions concernant
l’installation et les performances dans le guide des Conseils de
dépannage. Vous pouvez également consulter les FAQ dans la section
assistance clientèle de notre site Internet à l’adresse suivante :
www.alteclansing.com. Si vous ne trouvez toujours pas les informations
dont vous avez besoin, veuillez appeler par téléphone notre équipe
d’assistance clientèle pour obtenir de l’aide avant de retourner les
enceintes à votre détaillant, conformément aux conditions de retour.
Le service clientèle est joignable 7 jours sur 7 pour mieux vous servir.
Nous sommes ouverts :
Du lundi au vendredi : de 8:00 à 24:00 minuit EST
Samedi et dimanche : de 9:00 à 17:00
1-800-ALTEC-88 (1-800-258-3288)
Email: csupport@alteclansing.com
Pour obtenir les informations les plus récentes, veuillez consulter notre
site Internet à l’adresse suivante : www.alteclansing.com
© 2002 Altec Lansing Technologies, Inc.
Cet appareil a été conçu et ses plans réalisés aux États-Unis et a été
fabriqué dans notre usine agréee ISO9002. Brevet des États-Unis
4429181 et 4625328 et d’autres brevets en cours.
CAISSON DE BASSES
Amplificateurs d’enceintes : un caisson de basses longue
portée de 6,5"
PUISSANCE REQUISE
États-Unis, Canada et où applicable 120 V CA à 60 Hz
dans les pays d’Amérique latine :
Europe, Royaume-Uni, 230 V CA à 50 Hz
Pays d’Asie où applicable,
Argentine, Chili et Uruguay :
Homologué ETL / cETL / CE / NOM / IRAM
CENTRE
Pour régler le volume de l’enceinte centrale, appuyez sur le bouton
basses/centre de la télécommande filaire et maintenez-le enfoncé
pendant quelques secondes. Le volume central est représenté par le
voyant lumineux des basses. Ainsi, le voyant lumineux basses/centre
clignotera pendant le réglage du volume de l’enceinte centrale.
Tournez le bouton circulaire de la télécommande filaire dans le sens
des aiguilles d’une montre pour augmenter le volume de l’enceinte
centrale et dans le sens inverse pour le baisser. Au bout de quelques
secondes d’inactivité, le voyant des basses s’éteindra.
109
Page 7

CONSEILS DE DEPANNAGE
Symptôme Problème Possible Solution
Impossible
d’insérer le
connecteur
DIN de la
télécommande
filaire dans le
caisson de basses.
Tous les voyants
lumineux sont
éteints.
La
télécommande
ne fonctionne
pas.
Aucun son ne
sort de l’une ou
de plusieurs
enceintes.
Des broches sont tordues.
L’appareil n’a pas été mis en marche.
L’adaptateur secteur n’est pas branché à la prise
murale ni au caisson de basses.
Le parasustenteur (si utilisé) n’est pas allumé.
La télécommande filaire n’est pas connectée au
caisson de basses.
La prise murale ne fonctionne pas.
Le connecteur DIN n’est pas inséré dans la prise jack
du caisson de basses.
L’appareil n’a pas été mis en marche.
Le réglage du volume est trop bas.
Essayez de redresser les broches doucement à l’aide de brucelles ou de très
petites pinces. Si cela ne fonctionne pas, contactez le Département
d’assistance clientèle Altec Lansing afin d’obtenir de plus amples
instructions.
Appuyez sur le bouton de mise sous tension de la télécommande filaire.
Débranchez puis rebranchez l’adaptateur secteur à la prise murale et au
caisson de basses.
Si l’adaptateur secteur du caisson de basses est branché à un
parasustenteur, assurez-vous que celui-ci est bien allumé.
Branchez la télécommande filaire sur le caisson de basses.
Branchez un autre appareil sur la prise murale (même jack) pour vérifier
que cette sortie fonctionne.
Vérifiez que le connecteur DIN gris est fermement inséré dans la prise jack
du connecteur DIN sur le caisson de basses.
Assurez-vous que les broches sont alignées entre la prise et le jack.
Rappelez-vous que la flèche doit être tournée vers le haut.
Vérifiez que le cordon d’alimentation CA du caisson de basses est bien
branché à la prise murale et au caisson de basses.
Vérifiez que vous avez bien appuyé sur le bouton de mise sous tension et
que le voyant lumineux EQ est allumé.
Tournez le bouton du volume vers la droite pour augmenter le volume
général du système.
Symptôme Problème Possible Solution
Interférence
radio.
Le caisson de
basses n’émet
aucun son.
Le caisson de
basses émet
un faible
bourdonnement.
Le caisson de
basses émet un
bourdonnement
fort.
Le caisson de
basses n’émet
pas assez de
basses.
Le caisson de
basses émet
trop de basses.
Moniteur /
téléviseur
déformé.
Trop près d’un pylône radio.
Le volume du caisson de basses est trop bas.
La source sonore a un faible contenu basse
fréquence.
Le CA de votre installation électrique est à 60 cycles
par seconde, ce qui correspond à la plage de
fréquence audio de votre caisson de basses.
Mauvaise connexion.
Le volume de votre dispositif audio est trop haut.
Le réglage des basses est trop bas.
Mauvaise connexion.
Le réglage des basses est trop haut.
Le caisson de basses est trop près du moniteur /
téléviseur.
Déplacez vos enceintes pour voir si les interférences disparaissent. Si cela
n’est pas le cas, vous pourrez certainement acheter un câble blindé au
magasin d’électronique proche de chez vous.
Réglez le niveau des basses sur la télécommande filaire numérique.
Essayez un jeu, un film, une chanson, etc. avec un niveau de basses plus
important.
Vous pouvez entendre un faible bourdonnement lorsque votre système
d’enceintes est allumé alors qu’aucune source audio ne fonctionne, ou
lorsque le volume est extrêmement bas.
Si vous utilisez un parasustenteur avec votre système d’enceintes XA3051,
débranchez le câble d’alimentation et branchez le directement sur une
prise murale CA.
Déplacez vos câbles. Vérifiez qu’ils établissent une bonne connexion.
Débranchez le câble stéréo de la source audio. Si le bourdonnement
disparaît, baissez le volume de la source audio.
Réglez le niveau des basses sur la télécommande filaire numérique ou le
caisson de basses.
Vérifiez que tous les câbles sont branchés correctement et établissent une
bonne connexion.
Baissez le niveau des basses sur la télécommande filaire numérique ou le
caisson de basses.
Étant donné que le caisson de basses NE dispose PAS de blindage antimagnétique, il peut provoquer des déformations lorsqu’il est placé trop
près de votre moniteur / téléviseur. Déplacez le caisson de basses de
manière à le placer à au moins 60 cm de votre moniteur / téléviseur.
Les enceintes
grésillent.
Le son est
déformé.
Le câble audio n’est pas connecté à la source audio.
Le câble audio est connecté à la mauvaise sortie de
la source audio.
Problème au niveau de la source audio.
Mauvaise connexion.
Problème au niveau de votre source audio.
Le niveau du volume est trop haut.
Le son de la source est déformé.
Vérifiez le niveau du volume sur le système de jeu vidéo ou changez de
source audio et mettez-la à mi-niveau.
Branchez le câble de la source audio. Vérifiez les connexions au niveau du
caisson de basses et de la source. Assurez-vous que les câbles d’interface
sont fermement insérés dans les prises jack appropriées.
Assurez-vous qu’un câble connecte les prises jack de sortie de la source
audio aux prises jack d’entrée du caisson de basses du système XA3051.
Testez les enceintes à l’aide d’une autre source audio.
Contrôlez tous les câbles. Assurez-vous qu’ils sont connectés à la prise jack
“line-out” ou “audio-out” de votre source audio.
Testez les enceintes à l’aide d’une autre source audio (par ex., un
magnétoscope, un lecteur DVD, un lecteur CD portable, un lecteur de
cassettes ou une radio FM).
Baissez le niveau du volume sur la télécommande filaire du système
XA3051 ou le niveau du volume sur votre source audio (si possible.)
Essayez une autre source, comme un CD audio.
1211
Page 8

Il simbolo del fulmine con testa a freccia in un triangolo
equilatero servirebbe per avvertire l’utente della
presenza di “tensione elevata”, non isolata nel corpo del
prodotto, che potrebbe essere di valore sufficiente per
costituire rischio di scossa elettrica alle persone.
ISTRUZIONI SULLA SICUREZZA
ATTENZIONE
Per evitare le scosse elettriche, non utilizzare questa spina
(polarizzata) con cavo di prolunga, innesto o altra uscita, salvo
che gli spinotti possano inserirsi completamente per prevenirle
l’esposizione diretta.
AVVERTENZA
PER RIDURRE IL RISCHIO D’INCENDIO O DI SCOSSE ELETTRICHE, NON
ESPORRE QUEST’APPARECCHIO ALLA PIOGGIA O ALL’UMIDITÀ.
Lo slot più lungo è
quello neutro
(a terra).
Inserire lo spinotto più
largo nello slot a terra.
Leggere le istruzioni — Prima di utilizzare l’apparecchio,
leggere tutte le istruzioni per la sicurezza e per il maneggio.
Conservare le istruzioni — Conservare le istruzioni per l’uso
per eventuali riferimenti futuri.
Avvertenze — Rispettare tutte le avvertenze presenti
sull’apparecchio e nelle istruzioni per l’uso.
Seguire le istruzioni — Devono essere seguite tutte le
istruzioni per l’uso e per la manutenzione.
Acqua e umidità — Non utilizzare l’apparecchio vicino all’acqua —
per esempio, vicino ad una vasca da bagno, un lavandino, un lavabo,
lavatoi, su pavimento bagnato o vicino ad una piscina, ecc.
Uso esterno — Avvertenza: Per ridurre il rischio d’incendio o di scosse
elettriche, non esporre quest’apparecchio alla pioggia o all’umidità.
Posizione — L’apparecchio dovrà essere installato in una
posizione stabile.
Ventilazione — L’apparecchio dovrà essere ubicato di modo che la
sua locazione o posizione permetta una ventilazione adeguata. Per
esempio, l’apparecchio non si deve sistemare su un letto, un divano, un
tappeto o su altra superficie del genere che può bloccare le aperture di
ventilazione; oppure ubicare in un’installazione integrata nei mobili,
come una libreria chiusa o un armadio che potrebbero ostruirne il
flusso dell’aria attraverso le aperture di ventilazione.
Calore — L’apparecchio dovrà essere posto lontano da sorgenti di
calore, tali come radiatori, diffusori d’aria calda, stufe, o altre
attrezzature (compresi gli amplificatori) che producono calore.
Sorgenti d’alimentazione — L’apparecchio dovrà ricevere
esclusivamente il tipo d’alimentazione descritto nelle istruzioni per
l’uso o indicato sulla targhetta dell’apparecchio stesso.
Protezione dei cavi d’alimentazione — I cavi
d’alimentazione dovranno scorrere in modo che non saranno pestati o
schiacciati da oggetti appoggiati sopra o contro di essi. Prestare
particolare attenzione ai cavi vicino alle spine, alle prese a muro e nei
punti dove salgono dall’apparecchio.
Terra o polarizzazione — Prendere le precauzioni per non
eliminare il collegamento a terra o la polarizzazione dell’apparecchio.
Attenzione: Per prevenire il rischio di scossa elettrica,
non rimuovere il coperchio (o il dorso). All’interno non
vi sono parti sulle quali può intervenire l’utente. Per la
manutenzione richiedere l’intervento di personale
qualificato.
Il simbolo del punto esclamativo inscritto in un
triangolo equilatero avvisa l’utente della presenza
d’istruzioni operative e di manutenzione importanti
all’interno della letteratura allegata all’apparecchio.
Pulizia — L’apparecchio deve essere pulito esclusivamente con un
panno morbido o un panno asciutto a pelle fina. Non pulire mai con
cera per mobili, benzolo, insetticidi o altri liquidi volatili, siccome essi
possono corrodere la scatola.
Periodi di non utilizzo — Il cavo d’alimentazione
dell’apparecchio deve essere scollegato dalla presa quando esso rimane
non usato per un periodo prolungato.
Temporali e fulmini —Scollegare l’apparecchio durante i
temporali con fulmini.
Penetrazione d’oggetti estranei o liquidi — Prestare
attenzione a non far cadere oggetti estranei o spillare liquidi
all’interno della scatola attraverso le aperture.
Accessori —Utilizzare esclusivamente gli accessori specificati
dall’Altec Lansing Technologies, Inc.
Guasti che richiedono assistenza tecnica — La
riparazione dell’apparecchio dovrà essere affidata al personale
qualificato d’assistenza tecnica quando:
• Il cavo d’alimentazione o la spina sono stati danneggiati.
•All’interno dell’apparecchio sono caduti oggetti estranei o si è
spillato liquido.
•L’apparecchio è stato esposto alla pioggia.
•L’apparecchio non funziona correttamente o ha dimostrato un
peggioramento marcato della performance.
•L’apparecchio è caduto a terra o la scatola è stata danneggiata.
Assistenza tecnica — L’utente non deve tentare di riparare
l’apparecchio. L’assistenza tecnica deve essere affidata a personale
qualificato di servizio, o l’apparecchio deve essere consegnato al dealer,
o si deve chiamare la linea d’assistenza tecnica dell’Altec Lansing.
GARANZIA LIMITATA DI DUE ANNI
L’Altec Lansing Technologies, Inc. garantisce all’utente finale che tutti i
suoi sistemi d’altoparlanti audio, TV o giochi per computer sono privi
di difetti di materiali e di fabbricazione che si manifestino durante il
normale e ragionevole uso di tali prodotti per la durata di due anni a
partire dalla data d’acquisto.
Questa è la sola ed esclusiva garanzia in vigore relativa ai sistemi
d’altoparlanti audio, TV o giochi per computer dell’Altec Lansing e
qualsiasi altra garanzia, espressa o implicita, non è valida. Né l’Altec
Lansing Technologies, Inc. né qualsiasi rivenditore autorizzato della
stessa è responsabile di qualsiasi danno accidentale sostenuto durante
l’uso degli altoparlanti. (La presente limitazione relativa a danni
accidentali o conseguenti non si applica laddove sia proibita per legge.)
La responsabilità dell’Altec Lansing Technologies, Inc. ai sensi della
presente garanzia non si applica ad alcun difetto, cattivo
funzionamento o guasto risultanti da uso improprio, abuso,
installazione errata, uso con strumenti non appropriati o guasto
risultante dall’uso errato, dall’abuso o da installazione non corretta,
ovvero dall’uso con apparecchiature guaste o non adatte, o dall’uso dei
sistemi d’altoparlanti con qualsiasi apparecchio non adatto a tale scopo.
I termini della presente garanzia sono applicabili soltanto a quei
sistemi d’altoparlanti audio, TV o giochi per computer che sono stati
riconsegnati ai rispettivi rivenditori autorizzati dell’Altec Lansing
Technologies, Inc. presso i quali sono stati acquistati.
Ai sensi della presente garanzia all’acquirente utente vengono concessi
specifici diritti legali e questi potrà far valere altri diritti che variano
secondo la legislazione locale.
SISTEMA D’ALTOPARLANTI
PER GIOCHI VIDEO ED
XA3051
BENVENUTO
Benvenuto al mondo straordinario del suono ad alta fedeltà dell’Altec
Lansing. XA3051 è un sistema Dolby Surround Pro Logic con sei
altoparlanti che spinge ad immergersi nel gioco. Lei potrà sentire ogni
particolare e percepire l’intensità dell’azione attorno a sé!
Ma quello che il sistema XA3051 permette di sperimentare non è
unicamente un suono TV straordinario. Con la sua potenza totale del
sistema di 100 watt, esso fornisce una prestazione eccitante dai sistemi
di giochi video, dai lettori DVD ed MP3, dai lettori CD e da altre
sorgenti audio.
CONTENUTO DELLA SCATOLA
• Quattro Altoparlanti Satelliti
• Altoparlante centrale
• Subwoofer
• Regolatore a cavo
• Cavo RCA audio stereo di 3 m, raccordi maschio a maschio
• Cavo d’estensione video composito RCA di 3 m, femmina al maschio
• Adattatore di rete CA
• Manuale
• Scheda di collegamento rapido (QCC)
POSIZIONAMENTO DEGLI ALTOPARLANTI
IL SUBWOOFER
Tutta l’informazione codificata in stereo viene sentita attraverso gli
altoparlanti satelliti. Poiché il suono a bassa frequenza è non
direzionale, il subwoofer può essere sistemato a sua libera scelta.
Tuttavia, se sistemato sul pavimento vicino ad una parete o in un
angolo, il subwoofer fornisce un’efficienza dei bassi migliore ed un
suono ottimo.
AVVERTENZA: Il subwoofer non è schermato magneticamente. Di
conseguenza, esso DOVREBBE essere sistemato sempre almeno a due
piedi (0,6 m) dalle TV, dai monitor di computer, dalle unità disco fisso
dei computer o da tutti gli altri media magnetici (per es. dischetti
floppy, dischi Zip, nastri VHS o di cassette, ecc.).
ALTOPARLANTI SATELLITI
Posizionare i due satelliti anteriori secondo i propri gusti d’ascolto —
dal più vicino alla TV fino alla distanza consentita dai cavi degli
altoparlanti. Posizionare i due satelliti posteriori dietro e su ogni lato
dalla sua posizione d’ascolto.
NOTA: Gli altoparlanti satelliti SONO schermati magneticamente e
possono essere affiancati vicino agli schermi video, tali come le TV e i
monitor dei computer, senza deformare l’immagine.
L’ALTOPARLANTE CENTRALE
Posizionare l’altoparlante centrale direttamente davanti ed il più vicino
possibile alla TV.
NOTA: L’altoparlante centrale È schermato magneticamente e può
essere collocato vicino agli schermi video, tali come le TV e i monitor
dei computer, senza deformare l’immagine.
EFFETTUARE IL COLLEGAMENTO
AVVERTENZA: Non inserire la spina dell’adattatore di rete del sistema
d’altoparlanti nella presa di corrente CA fino a che i collegamenti non
sono stati tutti ultimati. Inoltre, spegnere la sua sorgente audio (per
es., la TV, il sistema di giochi video, il lettore DVD o VCR) prima di
collegare le sue uscite agli input dell’XA3051.
Per garantire la prima messa in funzione come previsto, si prega di
osservare attentamente la sequenza del collegamento descritta qui sotto.
AUDIO TV
ALTOPARLANTI SATELLITI E CENTRALE
Per installare il sistema XA3051, inserire il connettore arancione del
satellite destro nell’uscita “RIGHT” sulla parte posteriore del subwoofer
ed il connettore marrone del satellite sinistro nell’uscita “LEFT” sulla
parte posteriore del subwoofer. Enchufe el conector púrpura del
parlante satélite derecho en el conector de salida "RIGHT REAR"
(DERECHO POSTERIOR) que se encuentra en la parte posterior del
parlante secundario para graves y el conector dorado del parlante
satélite izquierdo posterior en el conector de salida “LEFT REAR”
(IZQUIERDO POSTERIOR) que se encuentra en la parte posterior del
parlante secundario para graves. Inserire il connettore blu
dell’altoparlante centrale nell’uscita “CENTER” sulla parte posteriore
del subwoofer.
REGOLATORE A CAVO
Collegare il connettore DIN colorato in grigio dal regolatore a cavo alla
presa grigia “CONTROLLER” sulla parte posteriore del subwoofer.
Per l’inserzione facile del connettore DIN, prestare attenzione che la
freccia sul connettore deve essere rivolta verso l’alto.
ENTRATE PRIMARIE
Le prese jack d’entrata primaria sono situate sul subwoofer. Usando il
cavo RCA fornito, collegare ogni sorgente audio, dotata di jack d’uscita
RCA rosso (di destra) e bianco (di sinistra), ai jack d’entrata RCA rosso
(a destra) e bianco (a sinistra) dell’XA3051.
In alcune configurazioni di messa a punto, si può usare il cavo
d’estensione video composito RCA (giallo) per permettere d’aumentare
la distanza di separazione tra la TV ed il subwoofer.
NOTA: Per ottenere un suono più limpido, mentre la TV si usa come
una sorgente audio, provare a spegnere il suono dagli altoparlanti
della sua TV.
INGRESSO AUSILIARE
L’ingresso ausiliare o secondario è situato sul subwoofer. Collegare
qualsiasi sorgente audio che ha una spina stereo di 3.5 mm (cioè tipo
jack per cuffie), compresi i lettori portatili CD o MP3.
ATTENZIONE: Accertarsi che la sorgente audio sia dotata di un jack
d’uscita (line-out). Questo garantisce che l’uscita non è amplificata.
Consultare il manuale per l’utente del suo dispositivo audio per
ulteriori informazioni.
NOTA: Eventualmente sarebbe indispensabile un cavo con spine RCA
dall’una estremità ed una spina stereo tipo “maschio” di 3,5 mm
dall’altra, oppure spine stereo di 3,5 mm su entrambe le estremità.
Questo tipo di spine può essere comprato alla maggior parte dei
negozi d’elettronica.
CUFFIE
Per utilizzare un paio di cuffie o due cuffie con il sistema, collegarle
alla prese contrassegnate sull’estremità del regolatore a cavo.
Quando le cuffie sono collegate, i satelliti ed il subwoofer sono muti.
ALIMENTAZIONE
NOTA: Prima d’inserire il sistema, innanzi tutto si devono rimuovere i
manicotti di plastica protettivi da entrambe le estremità dell’adattatore
di rete.
1. Dopo d’aver fatto tutti gli altri collegamenti, inserire l’adattatore di
rete nella parte posteriore del subwoofer e in una presa a muro CA.
NOTA: Per garantire un collegamento sicuro, l’adattatore di rete
utilizza un connettore di bloccaggio. Per sbloccare l’adattatore di rete,
non basta tirare semplicemente il cavo. Tirare delicatamente indietro il
manicotto del connettore fino a che non si liberi.
2. Accendere la sorgente audio (una TV, un sistema di giochi video,
lettore DVD o VCR).
3. Accendere il sistema d’altoparlanti Altec Lansing XA3051, azionando il
pulsante Power sul regolatore a cavo (vedere qui sotto). Sul regolatore
a cavo si accende un LED verde.
NOTA: Per evitare il rumore tipo popping quando viene acceso il suo
sistema d’altoparlanti Altec Lansing, accendere sempre prima la sua
sorgente audio.
1413
Page 9

UTILIZZO DEL REGOLATORE A CAVO
REAR (POSTERIORE)
CARATTERISTICHE TECNICHE DEL SISTEMA
Per la sua convenienza, il regolatore a cavo permette di:
• Accendere o spegnere il sistema.
• Controllare i volumi master, sinistro, destro, centrale, e posteriore.
• Regolare il livello dei bassi e degli alti.
• Selezionare la modalità d’ascolto.
• Ripristinare i livelli di default del volume, dei bassi, e degli alti.
• Probar los cinco parlantes satélite para verificar su operación.
ALIMENTAZIONE (POWER)
Azionare il pulsante “Power” (alimentazione) sul regolatore a cavo per
attivare il sistema d’altoparlanti. Sul regolatore a cavo si accende un
LED verde per indicare che il sistema è alimentato. Premere di nuovo il
pulsante “Power” per spegnere il sistema.
CONTROLLO GENERALE DEL VOLUME (MASTER)
Come default, il quadrante sul regolatore a cavo serve per il controllo
generale del volume del sistema d’altoparlanti. Ruotare il quadrante
nel senso orario per aumentare il volume e nel senso inverso per
diminuire il volume. Se è acceso il LED dei bassi/centrale, degli
alti/posteriore, o quello per la prova, aspettare qualche secondo fino a
quando si spegne, ed aggiustare il volume generale (master).
NOTA: Tre pulsanti sul regolatore a cavo sono dotati di funzioni
multiple. La funzione primaria è indicata con testo in bianco. La
funzione secondaria è indicata con testo in grigio.
1. Azionare e rilasciare il pulsante per accedere alla sua funzione in testo
bianco. Il LED associato alla funzione in testo bianco si accenderà fisso
per alcuni secondi, mentre viene usata la rispettiva funzione, e fra poco
si spegnerà di nuovo.
2. Come esplicato sulla parte posteriore del regolatore a cavo, azionare e
tener premuto il pulsante per alcuni secondi per accedere alla sua
funzione in testo grigio. Il LED associato alla funzione in testo grigio si
accenderà lampeggiando per alcuni secondi, mentre viene usata la
rispettiva funzione, e fra poco si spegnerà di nuovo.
BASS (I BASSI)
Per regolare il livello dei bassi, premere il pulsante”bass/center” sul
regolatore a cavo. Il LED per i bassi/centrale si accenderà fisso. Ruotare
il quadrante sul regolatore a cavo nel senso orario per aumentare il
livello dei bassi e nel senso inverso per diminuire il livello dei bassi.
Dopo alcuni secondi d’inattività, Il LED dei bassi si spegnerà.
TREBLE (GLI ALTI)
Per regolare il livello degli alti, premere il pulsante “treble/rear”
(alti/posteriore) sul regolatore a cavo. Il LED per gli alti/posteriore si
accenderà fisso. Ruotare il quadrante sul regolatore a cavo nel senso
orario per aumentare il livello degli alti e nel senso inverso per
diminuire il livello degli alti. Dopo alcuni secondi d’inattività, Il LED
degli alti si spegnerà.
Per regolare il volume degli altoparlanti posteriori, premere e tener
premuto il pulsante”treble/rear” sul regolatore a cavo per alcuni
secondi. Il volume posteriore è indicato tramite Il LED degli alti. Di
conseguenza, il LED per gli alti/posteriore sta lampeggiando durante la
regolazione del volume degli altoparlanti posteriori. Ruotare il
quadrante sul regolatore a cavo nel senso orario per aumentare il
volume degli altoparlanti posteriori, e nel senso inverso per diminuire il
volume. Dopo alcuni secondi d’inattività, Il LED degli alti si spegnerà.
RIPRISTINARE I VALORI DI DEFAULT DEI BASSI, DEGLI
ALTI, E DEGLI ALTOPARLANTI CENTRALE E POSTERIORI
Per ripristinare i livelli di default dei controlli per i bassi, gli alti, e gli
altoparlanti centrale e posteriori, premere allo stesso tempo e tener
premuti per alcuni secondi entrambi i pulsanti per i bassi e gli alti.
NOTA: Le impostazioni resteranno memorizzate nel sistema XA3051
anche quando questo viene spento o scollegato dalla presa a muro.
MODALITÀ (MODE)
Nella modalità stereo un segnale audio viene ricevuto unicamente dal
subwoofer e dagli altoparlanti anteriori sinistro e destro.
Nella modalità Surround, i circuiti Dolby Surround Pro Logic
trasmettono un segnale audio a tutti i sei altoparlanti.
XA3051 si avvia per default nella modalità d’ascolto Surround.
Premendo e rilasciando il pulsante modalità/prova, la modalità
d’ascolto viene selezionata a turno fra Stereo e Surround.
TEST (PROVA)
Per accertarsi che tutti gli altoparlanti siano collegati correttamente e
per ripristinare i volumi di default, premere e tener premuto il
pulsante modalità/prova sul regolatore a cavo per alcuni secondi. Il LED
di prova si accenderà lampeggiando per alcuni secondi, mentre
all’altoparlante sinistro anteriore viene inviato un segnale audio, e fra
poco si spegnerà di nuovo. Questa procedura si ripete per gli
altoparlanti centrale, destro anteriore, e per gli altoparlanti posteriori
(i due altoparlanti posteriori ricevono il segnale simultaneamente).
Mentre si effettua la prova di un altoparlante, il suo volume può essere
regolato, ruotando il quadrante sul regolatore a cavo. Ruotare nel
senso orario per aumentare il volume dell’altoparlante e nel senso
antiorario per abbassare il volume dell’altoparlante.
RIPRISTINO DEL DEFAULT DEL CONTROLLO GENERALE
DEL VOLUME E REGOLAZIONE DEI RISPETTIVI VOLUMI
Per ripristinare i livelli di default del volume generale (master) e dei
rispettivi volumi per ogni altoparlante, premere e tener premuto per
alcuni secondi il pulsante modalità/prova sul regolatore a cavo.
NOTA: Le impostazioni resteranno memorizzate nel sistema XA3051
anche quando questo viene spento o scollegato dalla presa a muro.
Potenza totale del sistema: 100 watt (50 watt RMS)
Risposta in frequenza: 32 Hz – 18 kHz
Rapporto Segnale-Rumore
@ 1 kHz input: > 76 dB
Frequenza d’incrocio: 150Hz
Distorsione armonica totale (THD) < 0.2 % THD @ -10 dB
del sistema: voltaggio input totale
Impedenza d’ingresso: 10k ohm
ALTOPARLANTI SATELLITI AMPLIFICATI
Driver (per satellite): Un driver 3" full-range
Driver (per l’altoparlante centrale): Un driver 3" full-range
CONSIGLI PER LA RICERCA GUASTI
Le risposte alla maggioranza delle domande d’impostazione e
prestazioni possono essere trovate nella Guida per la ricerca guasti. Lei
può consultare anche le FAQ nella sezione Customer Support del
nostro sito Web a www.alteclansing.com. Se non è riuscito a trovare
l’informazione desiderata, si prega di chiamare il nostro customer
service team per assistenza prima di riconsegnare gli altoparlanti al suo
rivenditore sotto la sua garanzia.
Il customer service (supporto tecnico) è disponibile 7 giorni la
settimana per la sua convenienza. Il nostro orario d’apertura è:
Lunedì a venerdì: da 8.00 a 24.00 EST
Sabato e domenica: da 9.00 a 17.00 EST
1-800-ALTEC-88 (1-800-258-3288)
Email: csupport@alteclansing.com
Per le ultime informazioni consultare il nostro sito Web a
www.alteclansing.com
© 2002 Altec Lansing Technologies, Inc.
Disegnato e progettato negli USA e fabbricato nella nostra fabbrica
omologata ISO9002. Brevetti USA 4429181 e 4625328 ed altri
brevetti pendenti.
IL SUBWOOFER
Driver per gli altoparlanti: Un woofer long-throw 6,5”
REQUISITI D’ALIMENTAZIONE
Per gli USA, Canada e dove applicabile 120 V CA @ 60 Hz
per i paesi dell’America Latina:
Europa, Regno Unito; 230 V CA @ 50 Hz
per i paesi asiatici dove applicabile;
Argentina, Cile ed Uruguay:
Omologato da: ETL / cETL / CE / NOM / IRAM
CENTER (CENTRALE)
Per regolare il volume dell’altoparlante centrale, premere e tener
premuto il pulsante”bass/center” sul regolatore a cavo per alcuni
secondi. Il volume centrale è indicato tramite il LED dei bassi. Di
conseguenza, il LED per i bassi/centrale sta lampeggiando durante la
regolazione del volume dell’altoparlante centrale. Ruotare il quadrante
sul regolatore a cavo nel senso orario per aumentare il volume
dell’altoparlante centrale, e nel senso inverso per diminuire il suo
volume.Dopo alcuni secondi d’inattività, Il LED dei bassi si spegnerà.
1615
Page 10

ELIMINAZIONE DEI GUASTI
Sintomo Possibile problema Soluzione
Il connettore DIN
del regolatore a
cavo non può
essere inserito
nel subwoofer.
Nessun LED
acceso.
Il regolatore
non funziona.
Manca il suono
da uno o più
altoparlanti.
Alcuni dei perni sono piegati.
L’alimentazione non è collegata.
L’adattatore di rete non è collegato alla presa al
muro ed al subwoofer.
Il protettore contro sovratensioni (se usato) non è
collegato alla rete d’alimentazione.
Il regolatore a cavo non è collegato al subwoofer.
La presa a muro non funziona.
Il connettore DIN non è inserito nel jack del
subwoofer.
L’alimentazione non è collegata.
L’impostazione del volume è troppo bassa.
Provare a raddrizzare delicatamente i perni con pinzette o pinze molto
piccole. Se questo non funziona, rivolgersi al reparto Consumer Support
(servizio postvendita) dell’Altec Lansing per ulteriori istruzioni.
Azionare il pulsante Power (alimentazione) sul regolatore a cavo.
Staccare e collegare di nuovo l’adattatore di rete sia alla presa a muro, sia
al subwoofer.
Se l’adattatore di rete è inserito in un protettore contro sovratensioni,
verificare se il protettore è stato acceso.
Collegare il regolatore a cavo al subwoofer.
Collegare un altro dispositivo allo stesso jack della presa a muro per
verificare se la presa funziona.
Accertarsi che il connettore DIN colorato in grigio sia inserito saldamente
nella presa del connettore DIN sul subwoofer.
Accertarsi che i perni siano allineati tra la spina e la presa.
Non dimenticare che la freccia deve essere in alto.
Accertarsi che il cavo d’alimentazione CA del subwoofer sia inserito sia nel
subwoofer sia nella presa a muro.
Accertarsi che il pulsante Power sia premuto e che il LED per
l’equalizzazione (EQ) sia acceso.
Girare la manopola rotante a destra per aumentare il volume generale
del sistema.
Sintomo Possibile problema Soluzione
Manca il suono
dal subwoofer.
Un ronzio basso
dal subwoofer.
Un ronzio forte
dal subwoofer.
Emissione
insufficiente dei
bassi dal
subwoofer.
Bassi troppo
forti dal
subwoofer.
Immagine
distorta nel
monitor/
nella TV.
L’impostazione del volume del subwoofer è troppo
bassa.
La sorgente del suono ha un contenuto minimo di
basse frequenze.
La corrente elettrica alternata nella sua casa è di 60
cicli il secondo, cioè nei limiti della frequenza audio
del suo subwoofer.
Collegamento malfunzionante.
Impostazione troppo alta del volume del suo
dispositivo sorgente audio.
Impostazione delle frequenze basse troppo bassa.
Collegamento malfunzionante.
Impostazione delle frequenze basse troppo alta.
Il subwoofer è troppo vicino al monitor/alla TV.
Regolare il livello dei bassi al regolatore digitale a cavo.
Provare con un gioco, un film o una canzone — qualsiasi con i toni bassi
più articolati.
Un certo ronzio basso può essere percepito anche quando il suo sistema
d’altoparlanti è collegato alla rete senza una sorgente audio che funziona,
o quando il volume è regolato ad un livello estremamente basso.
Se con il suo sistema d’altoparlanti XA3051 viene usato anche un
protettore contro sovratensioni, scollegare l’adattatore di rete e collegarlo
direttamente ad una presa a muro CA.
Tirare un po’ i cavi. Accertarsi che essi siano collegati in modo stabile.
Scollegare il suo cavo stereo dalla sorgente audio. Se il forte ronzio
sparisce, abbassare il volume della sorgente audio.
Regolare il livello dei bassi al regolatore digitale a cavo o al subwoofer.
Accertarsi che tutti i cavi siano collegati correttamente e stiano facendo
un collegamento stabile.
Abbassare il livello dei bassi al regolatore digitale a cavo o al subwoofer.
Poiché il subwoofer NON è schermato magneticamente, se situato troppo
vicino al suo monitor/alla sua TV, può causare una distorsione
dell’immagine. Spostare il subwoofer al minimo a due piedi (0,6 m) dal
suo monitor/dalla sua TV.
Suono di
scroscio dagli
altoparlanti.
Suono distorto.
Interferenze
radiofoniche.
Il cavo audio non è collegato alla sorgente audio.
Il cavo audio è collegato ad un’uscita sbagliata della
sorgente audio.
Problema con il dispositivo sorgente audio.
Collegamento malfunzionante.
Problema con il suo dispositivo sorgente audio.
Livello del volume impostato troppo alto.
Sorgente sonora distorta.
Troppo vicino ad una radio torre.
Controllare il livello del volume del sistema di giochi video o della
sorgente sonora alternativa ed impostarlo ad un livello medio.
Collegare il cavo audio della sorgente audio. Controllare i collegamenti
delle spine sia al subwoofer sia alla sorgente audio. Accertarsi che i cavi di
segnale siano inseriti fissamente e correttamente nei suoi rispettivi jack.
Assicurarsi che le prese d’uscita della sorgente audio siano collegate alle
prese d’entrata sul subwoofer dell’XA3051 per mezzo dello stesso cavo.
Effettuare una prova degli altoparlanti con un’altra sorgente audio.
Controllare tutti i cavi. Accertarsi che essi siano collegati al jack “line-out”
o “audio-out” del suo dispositivo sorgente audio.
Effettuare una prova degli altoparlanti, utilizzando un’altra sorgente
audio (per es. VCR, DVD, CD portatile, lettore di cassette o una radio FM).
Abbassare il volume del regolatore a cavo del suo XA3051, oppure il
livello del volume della sua sorgente audio (se possibile).
Provare una sorgente sonora diversa, come un CD di musica.
Cambiare il posto degli altoparlanti per vedere se l’interferenza sparisce.
Se no, provare a acquistare un cavo stereo schermato dal suo negozio
d’elettronica locale.
1817
Page 11

Der Blitz mit einer Pfeilspitze innerhalb eines
gleichseitigen Dreiecks zeigt dem Benutzer das
Vorhandensein einer nicht abgeschirmten Spannung im
Gehäuse an, die so hoch sein kann, dass Personen einen
elektrischen Schock erleiden können.
Achtung: Nehmen Sie nicht den Gehäusedeckel (oder
Gehäuserückseite) ab, es besteht Gefahr eines
elektrischen Schocks. Es befinden sich keine vom
Benutzer zu reparierende/wartende Teile innerhalb
des Geräts. Bitte wenden Sie sich im Servicefall an
qualifiziertes Fachpersonal.
SICHERHEITSHINWEISE
ACHTUNG
Verwenden Sie zu Ihrer eigenen Sicherheit diesen (nur in einer
Position steckbaren) Stecker nicht mit einem Verlängerungskabel,
Buchse oder einem anderen Anschluss, falls sich dessen
Steckkontakte nicht vollständig in das Gegenstück einführen lassen.
WARNUNG
BITTE SETZEN SIE DAS GERÄT NICHT REGEN ODER FEUCHTIGKEIT AUS,
UM DIE GEFAHR EINES ELEKTRISCHEN SCHOCKS ZU VERMINDERN.
Die längliche Buchse
ist Erde.
Stecken Sie den breiten
Steckkontakt in die
Erdungsbuchse.
Lesen Sie die Anleitungen — Alle Sicherheitshinweise und
Bedienungsanleitungen sollten vor Inbetriebnahme des Geräts
sorgfältig durchgelesen werden.
Bewahren Sie die Anleitungen auf — Die Bedienungsanleitungen sollten zur späteren Verwendung aufbewahrt werden.
Beachten Sie die Warnhinweise — Bitte beachten Sie die
Warnhinweise auf dem Gerät und in der Bedienungsanleitung.
Befolgen Sie die Anweisungen — Alle Betriebs- und
Benutzungsanweisungen sind zu befolgen.
Wasser und Feuchtigkeit — Das Gerät sollte nicht in unmittelbarer
Nähe von Wasser benutzt werden, d.h. die Inbetriebnahme in der Nähe einer
Badewanne, Waschbecken, Küchenspüle, Waschbehälter, in einem feuchten
Keller, in der Nähe eines Schwimmbads o.ä. ist nicht gestattet.
Betrieb im Freien — Warnung: Bitte setzen Sie das Gerät nicht Regen
oder Feuchtigkeit aus, um die Gefahr eines elektrischen Schocks zu vermeiden.
Standort — Das Gerät muss auf einem stabilen Untergrund stehen.
Lüftung — Das Gerät ist so aufzustellen, dass die geräteeigene
Lüftung nicht beeinträchtigt wird. Beispielsweise sollte das Gerät nicht auf
einem Sofa, Teppich oder einem ähnlichen Untergrund betrieben werden,
der die Lüftungsöffnungen verschließen könnte, weiterhin darf das Gerät
nicht in Einbauorten betrieben werden, an denen eine Durchlüftung der
Lüftungsöffnungen beeinträchtigt wäre, wie beispielsweise in einem
geschlossenen Bücherregal oder in einem Schrank.
Wärme — Das Gerät muss einen angemessenen Abstand zu anderen
Wärmequellen wie Heizkörper, Ofen oder anderen wärmeerzeugenden
Geräten (auch Verstärker) haben.
Stromversorgung — Das Gerät darf nur mit solchen
Spannungsquellen betrieben werden, die in der Bedienungsanleitung
beschrieben oder auf dem Gerät ausgewiesen sind.
Schutz der Spannungsversorgungsleitungen —
Leitungen der Spannungsversorgung sind so zu verlegen, dass Personen
möglichst nicht auf sie treten können und dass ein Einklemmen durch
Gegenstände, die auf den Leitungen stehen oder daran angelehnt sind,
ausgeschlossen ist. Achten Sie insbesondere auf Leitungen in unmittelbarer
Nähe von Steckern, Steckverbindern und bei den Anschlüssen des Geräts.
Das Ausrufezeichen innerhalb eines gleichseitigen
Dreiecks weist den Benutzer auf wichtige Bedienungsund Wartungshinweise in der mitgelieferten
Gerätedokumentation hin.
Erdung und Polarität — Es sind entsprechende
Vorsichtsmaßnahmen zu ergreifen, um sicherzustellen, dass eine
ordnungsgemäße Erdung und die richtige Polarität sichergestellt ist.
Reinigung — Das Gerät darf nur mit einem Poliertuch oder einem
weichen trockenen Tuch gereinigt werden. Benutzen Sie niemals
Möbelwachs, Benzin, Insektizide oder andere sich verflüchtigende
Flüssigkeiten, da dies zu Korrosion führt.
Längere Nichtbenutzung — Die Spannungsversorgung des
Geräts sollte abgezogen werden, wenn es längere Zeit nicht benutzt wird.
Gewitter —Die Spannungsversorgung des Geräts sollte bei
Gewitter abgezogen werden.
Eindringen von Flüssigkeiten oder Fremdkörpern —
Es ist darauf zu achten, dass keine Flüssigkeiten oder Fremdkörper
durch die Lüftungsöffnungen in das Gerät eindringen können.
Zubehör — Benutzen Sie nur von Altec Lansing Technologies, Inc.
spezifiziertes Zubehör.
Schäden, die vom technischen Service zu beheben
sind — Das Gerät muss von qualifiziertem Servicepersonal gewartet
werden, falls :
•die Kabel oder Stecker der Spannungsversorgung beschädigt sind.
•Fremdkörper oder Flüssigkeit in das Gerät eingedrungen ist.
• das Gerät Regen ausgesetzt war
• das Gerät augenscheinlich nicht richtig funktioniert oder ein
erheblicher Unterschied in der Performance festzustellen ist.
• das Gerät heruntergefallen und das Gehäuse beschädigt ist.
Wartung/Reparatur — Der Benutzer sollte nicht versuchen, das
Gerät selbst zu warten oder zu reparieren. Im Servicefall muss das
Gerät von qualifiziertem Servicepersonal untersucht oder an den
Händler zurückgegeben werden. Sie können auch die Altec Lansing
Service Hotline anrufen und um Hilfe bitten.
ZWEIJÄHRIGE GARANTIE
Altec Lansing Technologies, Inc. garantiert dem Endbenutzer, dass alle
seine Computer-Lautsprecher-System frei von Material- und
Verarbeitungsfehlern sind. Die Garantie gilt zwei Jahre ab Kauf und
bezieht sich auf normalen, vernünftigen Gebrauch.
Diese Garantie ist die einzige und ausschließliche Gewährleistung in
Bezug auf Altec Lansing Computer-Lautsprechersystemen, jegliche
andere Garantie, ausdrücklich oder impliziert, ist null und nichtig.
Weder Altec Lansing Technologies, Inc. noch irgendein autorisierter
Wiederverkäufer/Händler von Altec Lansing Technologies, Inc. ist
verantwortlich für jegliche Art von beiläufigen Schäden, die beim
Gebrauch der Lautsprecher entstehen (Diese Begrenzung auf beiläufige
oder Folgeschäden findet keine Anwendung dort, wo sie unzulässig ist.)
Die Verpflichtungen von Altec Lansing Technologies, Inc. im Rahmen
dieser Garantie beziehen sich nicht auf Defekte, Fehlfunktionen oder
Ausfälle, die auf unsachgemäßem Gebrauch, Missbrauch oder
fehlerhaften Anschluss beruhen, weiterhin entfällt die Gewährleistung
bei zweckentfremdeter Verwendung.
Die Garantiebedingungen gelten nur für Computer-Lautsprechersystemen,
wenn diese Lautsprecher an den autorisierten Wiederverkäufer/Händler
von Altec Lansing Technologies, Inc. zurückgegeben werden, bei dem sie
gekauft wurden.
Innerhalb dieser Garantiebedingungen hat der Käufer bestimmte Rechte
und kann weitere Rechte besitzen, die weltweit unterschiedlich sind.
Lautsprechersystem für
Videospiele & TV-Audio-
XA3051
Anwendungen
WILLKOMMEN
Willkommen in der außergewöhnlichen Welt des Altec Lansing HiFiSounds. Das Altec-Lansing-System XA3051 ist ein 6 Lautsprecher Dolby
Surround Pro Logic System, mit dem Sie sich wie inmitten des
Geschehens fühlen werden. Sie werden jedes auch noch so kleine
Detail hören können und die Intensität der Sie umgebenden Action
hautnah erleben !
Hervorragender TV-Sound ist nicht alles, was Ihnen das XA3051-System
zu bieten hat, mit seiner Leistung von 100 Watt können Sie Ihrer
Spielkonsole, Ihrem DVD-, MP3-, CD-Player oder einer anderen
Tonquelle eine umwerfende Performance entlocken.
LIEFERUMFANG
• 4 Satellitenlautsprecher
• 1 Centerlautsprecher
• Subwoofer
• Controller
• 3-Meter Stereo Audio RCA-Kabel, Stecker auf Stecker
• 3-Meter Composite Video RCA Verlängerungskabel, Buchse auf Stecker
• Wechselspannungsadapter
• Handbuch
• QCC
Aufstellen der Lautsprecher
Subwoofer
Sämtliche Stereo-codierte Informationen werden über die SatellitenLautsprecher wiedergegeben. Da tieffrequent abgestrahlter Klang
keine Vorzugsrichtung hat, können Sie den Subwoofer nach Belieben
aufstellen. Sie sollten jedoch den Subwoofer möglichst auf dem Boden
nahe einer Wand aufstellen, um eine bessere Effizienz bei Bässen und
so ein optimales Klangbild zu erhalten.
WARNHINWEIS: Der Subwoofer ist nicht magnetisch abgeschirmt und
sollte aus diesem Grund immer mindestens 2 Fuß (0.6m) Abstand
haben von Fernsehern, Computermonitoren, Festplatten oder anderen
Magnetdatenträgern (Disketten, ZIP-Disks, VHS-Kassetten,
Audiobänder, etc).
Satellitenlautsprecher
Stellen Sie die Satellitenlautsprecher so auf, wie es Ihrem
Hörempfinden nach am besten ist — direkt neben Ihrem Fernseher
oder soweit weg, wie es die Zuleitungen erlauben. Positionieren Sie die
beiden hinteren Satelliten beidseitig hinter sich bzw. hinter Ihre
gewünschte Hörposition.
ANMERKUNG: Die Satelliten-Lautsprecher sind magnetisch abgeschirmt
und können somit nahe bei Bildschirmen wie Fernseher oder
Computermonitore platziert werden ohne die Bildqualität zu
beeinträchtigen.
CENTER-LAUTSPRECHER
Positionieren Sie den Center-Lautsprecher so nahe wie möglich am
TV-Gerät direkt vor sich.
ANMERKUNG: Der Center-Lautsprecher ist magnetisch abgeschirmt und
kann somit nahe bei Bildschirmen wie Fernseher oder
Computermonitore platziert werden ohne die Bildqualität zu
beeinträchtigen.
Herstellen der Verbindungen
Warnung: Stecken Sie den Netzstecker des Lautsprechersystems nicht
ein, bevor alle Verbindungen gemacht wurden. Stellen Sie auch die
entsprechenden Audioquellen (z.B. Fernseher, DVD-Player,
Videorekorder oder Spielkonsole) ab, bevor Sie deren Ausgänge mit
den Eingängen des XA3051 verbinden.
Damit die erste Inbetriebnahme wie geplant verläuft, führen Sie bitte
sorgfältig in der angegebenen Reihenfolge Schritt für Schritt die
nachstehend beschriebene Verkabelung durch.
SATELLITEN UND CENTER-LAUTSPRECHER
Um das Lautsprechersystem XA3051 betriebsfertig zu machen, stecken
Sie den orangefarbenen Stecker des rechten Satelliten in den mit
„RIGHT” bezeichneten Eingang auf der Rückseite des Subwoofers.
Stecken Sie anschliessend den braunen Stecker des linken Satelliten in
den mit „LEFT” bezeichneten Eingang auf der Rückseite des
Subwoofers. Stecken Sie den lilafarbenen Stecker des rechten
Satellitenlautsprechers in den mit "RIGHT REAR" bezeichneten
Ausgang auf der Rückseite des Subwoofers und den and goldenen
Stecker des linken Satellitenlautsprechers in den mit "LEFT REAR"
bezeichneten Ausgang auf der Rückseite des Subwoofers.
Abschliessend kommt der blaue Stecker des Center-Lautsprechers in
den mit “CENTER” bezeichneten Ausgang an der Rückseite des
Subwoofers.
CONTROLLER-EINHEIT
Verbinden Sie den grauen DIN-Steckverbinder des Controllers in den
mit “Controller” bezeichneten Eingang an der Rückseite des
Subwoofers.
Beachten Sie bitte beim Einstecken des DIN-Steckers darauf, dass der
Pfeil auf dem Stecker nach oben zeigt.
Haupteingänge
Die Haupteingänge befinden sich beim Subwoofer. Mit Hilfe des
mitgelieferten RCA-Kabels können Sie alle Tonquellen anschliessen, die
über einen roten (rechts) und einen weissen (links) RCA-Ausgang
verfügen. Der Anschluss erfolgt an die farblich entsprechenden
Buchsen des XA3051.
Bei einigen Konfigurationen können Sie auch das mitgelieferte (gelbe)
Composite-Video-RCA Verlängerungskabel benutzen, um den
Fernseher und Subwoofer weiter auseinanderstellen zu können.
ANMERKUNG : Um einen möglichst klaren Klang zu erhalten,
versuchen Sie beim Betrieb mit Ihrem Fernseher, die TV-Lautsprecher
abzuschalten.
Nebeneingang
Der zweite Eingang oder Nebeneingang befindet sich am Subwoofer.
Sie können hier eine beliebige Tonquelle mit 3.5mm-Stereostecker (z.B.
ein Kopfhörer-Stecker) anschliessen, u.a. tragbare CD- oder MP3-Player.
ACHTUNG : Stellen Sie sicher, dass Ihre Tonquelle einen Line-OutAusgang hat. Somit ist sichergestellt, dass das Ausgangssignal nicht
verstärkt ist. Konsultieren Sie das Benutzerhandbuch Ihres Audiogeräts,
um weitere Informationen diesbezüglich zu erhalten.
ANMERKUNG : Möglicherweise benötigen Sie ein Kabel mit RCASteckverbindern und einen 3.5mm-Stereoklinkenstecker oder ein Kabel
mit 3.5mm-Stereoklinkensteckern an beiden Enden. Diese
Adapterkabel können Sie in fast jedem Elektronikladen erwerben.
KOPFHÖRER
Wenn Sie Kopfhörer benutzen wollen, schließen Sie sie an die Buchse
mit der entsprechenden Bezeichnung am Controller an. Sobald der
Kopfhörer angeschlossen ist, sind beide Satellitenlautsprecher und der
Subwoofer abgeschaltet.
EINSCHALTEN
HINWEIS: Sie müssen zunächst die Kunststoff-Schutzhülsen an beiden
Enden des Spannungsadapters entfernen, bevor Sie den Stecker
einstecken.
1. Wenn Sie alle Verbindungen fertiggestellt haben, stecken Sie den
Spannungsadapter in die Rückseite des Subwoofers und in eine
Steckdose.
ANMERKUNG : Um eine sichere Verbindung zu gewährleisten, ist der
Spannungsadapter mit einem Verschlussmechanismus ausgestattet. Um
den Spannungsadapter zu entriegeln, ziehen Sie bitte nicht einfach am
Kabel, sondern ziehen vorsichtig die Steckerhülse bis zum Ausklinken
zurück.
2. Schalten Sie die Tonquelle (TV-Gerät, Video-Spielkonsole, DVD-Player
oder Videorekorder) an.
2019
Page 12

3. Schalten Sie das Altec Lansing XA3051-System ein, indem Sie den
Einschaltknopf des Controllers (siehe unten) drücken. Eine grüne LED
auf dem Controller wird dann aufleuchten.
ANMERKUNG: Damit Sie kein Einschaltknacken hören, wenn Sie Ihr
Altec Lansing Lautsprechersystem anschalten, sollten Sie Ihr Audiogerät
immer zuerst einschalten.
Benutzung des Controllers
Mit Hilfe des Controllers können Sie die folgenden Einstellungen
ändern :
• Betriebszustand An/Aus
• Lautstärke gesamt und getrennt für links, rechts, Center und hinten
• Bässe und Höhen
• Wahl des Audio-Modus
• Zurücksetzen von Lautstärke, Bässen und Höhen auf Standardwerte
(Reset).
• Testen Sie alle fünf Satellitenlautsprecher auf Ihre Funktion.
Einschalten
Drücken Sie auf den Knopf “Power” des Controllers, um das
Lautsprechersystem einzuschalten. Eine grüne LED auf dem Controller
wird als Bereitschaftsanzeige aufleuchten. Drücken Sie nochmals auf
“POWER”, um das System auszuschalten.
Lautstärkeregelung
Der Drehknopf auf dem Controller dient standardmässig zur
Lautstärkeregelung für das Lautsprechersystem. Erhöhen Sie die
Lautstärke, indem Sie den Knopf im Uhrzeigersinn drehen und
vermindern Sie die Laufstärke, indem Sie den Knopf im
Gegenuhrzeigersinn drehen. Wenn die LED für Bass/Center ,
Höhen/hintere Lautsprecher (treble/read) oder die Test-LED
aufleuchtet, warten Sie einige Sekunden bis zum Erlöschen dieser LED
und verändern Sie dann die Lautstärke nach Ihren Wünschen.
ANMERKUNG : Die Knöpfe auf dem Controller sind mehrfachbelegt.
Die Grundfunktion ist in weissem Text beschrieben. Die erweiterten
Funktionen sind in grauem Text beschrieben.
1. Drücken Sie kurz einen Knopf, um zu den “weissen Funktionen” zu
gelangen. Die zugehörige LED wird für einige Sekunden, in denen Sie auf
diese Funktion Zugriff haben, aufleuchten und sich dann wieder
abschalten.
2. Drücken Sie wie es auch auf der Rückseite des Controllers erläutert ist,
einen Knopf und halten ihn gedrückt, um zu den “grauen Funktionen”
zu gelangen. Die zugehörige LED wird für einige Sekunden, in denen Sie
auf diese Funktion Zugriff haben, blinken und sich dann wieder
abschalten.
Bass
Wenn der Bass-Knopf auf dem Controller gedrückt wird, leuchtet die
Bass/Center-LED und man kann mit dem Drehknopf den Bass einstellen.
Drehen Sie den Drehknopf des Controllers im Uhrzeigersinn, um die
Bässe anzuheben und im Gegenuhrzeigersinn, um die Bässe zu senken.
Nach einigen Sekunden ohne Änderungen schaltet sich die Bass-LED
wieder ab.
HÖHEN
Wenn der Knopf für die Höhen (treble) auf dem Controller gedrückt
wird, leuchtet die entsprechende LED (treble/rear) und man kann mit
dem Drehknopf die Höhen einstellen. Drehen Sie den Drehknopf des
Controllers im Uhrzeigersinn, um die Höhen anzuheben und im
Gegenuhrzeigersinn, um die Höhen zu senken. Nach einigen Sekunden
ohne Änderungen schaltet sich die Höhen-LED (treble) wieder ab.
Bass-Center-LED und man kann mit dem Drehknopf die Lautstärke des
Center-Lautsprechers einstellen. Drehen Sie den Drehknopf des
Controllers im Uhrzeigersinn, um die Lautstärke des CenterLautsprechers zu erhöhen und im Gegenuhrzeigersinn, um sie zu
vermindern. Nach einigen Sekunden ohne Änderungen schaltet sich die
Bass-LED wieder ab.
HINTERE LAUTSPRECHER
Wenn der Knopf zur Lautstärkeregelung der hinteren Lautsprecher
(treble/rear) auf dem Controller gedrückt und für einige Sekunden
gehalten wird, blinkt die Höhen-LED (treble) und man kann mit dem
Drehknopf die Lautstärke der hinteren Lautsprecher einstellen. Drehen
Sie den Drehknopf des Controllers im Uhrzeigersinn, um die Lautstärke
der hinteren Lautsprecher zu erhöhen und im Gegenuhrzeigersinn, um
sie zu vermindern. Nach einigen Sekunden ohne Änderungen schaltet
sich die Höhen-LED (treble) wieder ab.
ZURÜCKSETZEN VON BASS, HÖHEN, CENTER UND
LAUTSTÄRKE DER HINTEREN LAUTSPRECHER (RESET)
Um das Gerät wieder auf die Standardeinstellungen zu setzen, halten
Sie gleichzeitig die Knöpfe Bass und Treble (Bass und Höhen) für eine
Dauer von mehreren Sekunden gedrückt.
ANMERKUNG: Der XA3051 wird Ihre persönlichen Einstellungen
beibehalten, auch dann, wenn Sie das Gerät ausschalten oder den
Netzstecker abziehen.
MODUS
Im Modus Stereo X2 werden Audiosignale nur über den Subwoofer
und den linken bzw. rechten Frontlautsprecher wiedergegeben.
Im Surround-Modus erzeugt Dolby Surround Pro Logic Audiosignale für
alle 6 Lautsprecher.
Standardmässig beginnt das XA3051-System seinen Betrieb im
Surround-Modus. Wenn Sie den Knopf “mode/test” jeweils kurz
drücken, können Sie zwischen Stereo und Surround-Modus hin- und
herschalten.
TEST
Um die korrekte Verkabelung zu testen und um die Lautstärken auf
die Standardwerte zurückzusetzen, halten Sie den Knopf “mode/test”
für einige Sekunden gedrückt. Die LED “test” wird einige Sekunden
blinken, während dieser Zeit wird ein Audio-Testsignal auf den linken
Frontlautsprecher gegeben. Dies wird für die anderen Lautsprecher
Center, vorne links/rechts und die hinteren Lautsprecher wiederholt
(die beiden hinteren erhalten das Testsignal gleichzeitig) Wenn das
Testsignal auf die einzelnen Lautsprecher gegeben wird, können Sie
die entsprechenden Lautstärken relativ zueinander verstellen. Drehen
Sie den Drehknopf des Controllers im Uhrzeigersinn, um die Lautstärke
zu erhöhen und im Gegenuhrzeigersinn, um sie zu vermindern.
ZURÜCKSETZEN (RESET) DER GESAMTLAUtSTÄRKE UND
EINSTELLUNG DER RELATIVEN LAUTSTÄRKEN
Um die Gesamtlautstärke und die relativen Lautstärken der
Einzellautsprecher untereinander wieder auf die Standardeinstellungen
zu setzen, halten Sie den Knopf test/mode für eine Dauer von
mehreren Sekunden gedrückt.
ANMERKUNG: Der XA3051 wird Ihre persönlichen Einstellungen
beibehalten, auch dann, wenn Sie das Gerät ausschalten oder den
Netzstecker abziehen.
SYSTEMDATEN
Gesamtleistung: 100 Watt (50 Watt RMS)
Frequenzbereich : 32 Hz – 18 kHz
Signal zu Rauschverhältnis bei
1 kHz Eingangssignal: > 76 dB
Crossover-Frequenz: 150Hz
Klirrfaktor (THD): < 0.2 % THD bei -10 dB
Fullscale Eingangsspannung
Eingangsimpedanz : 10k Ohm
SATELLITENLAUTSPRECHER/VERSTÄRKER
Treiber (pro Satellit) : Ein 3” Full-Range-Treiber
Treiber (pro Center-Lautsprecher) : Ein 3” Full-Range-Treiber
Fehlersuche
Antworten auf die meisten Fragen hinsichtlich Einrichtung und
Performance können Sie der Fehlersuch-Tabelle entnehmen. Sie
können auch den Abschnitt FAQ (Häufig gestellte Fragen) im
Supportteil unserer Website www.alteclansing.com ansehen Falls Sie
immer noch nicht die gewünschte Information finden, rufen Sie bitte
unser Serviceteam an und fragen um Rat, bevor Sie die Lautsprecher
als Garantiefall an Ihren Händler weiterleiten.
Unser Kundendienst ist 7 Tage in der Woche für Sie erreichbar. Unsere
Geschäftszeiten sind wie folgt :
Montag bis Freitag: 8:00 bis 24:00 EST
Samstag & Sonntag: 9:00 to 17:00 EST
1-800-ALTEC-88 (1-800-258-3288)
Email: csupport@alteclansing.com
Bitte schauen Sie für die jeweils aktuellsten Informationen auf unsere
Website www.alteclansing.com.
© 2002 Altec Lansing Technologies, Inc.
Design und Entwicklung in den USA, Herstellung in unserem ISO9002 /
SA8000 zertifizierten Betrieb. US-Patente 4429181 und 4625328 ,
andere Patente sind angemeldet.
SUBWOOFER
Lautsprecher-Treiber : Ein 6.5” Long-Throw-Woofer
STROMVERSORGUNG
USA, Kanada und entsprechende 120 V AC , 60 Hz
lateinamerikanische Länder:
Europa, Vereinigtes Königreich, 230 V AC , 50 Hz
entsprechende asiatische Länder,
Argentinien, Chile und Uruguay:
ETL / cETL / CE / NOM / IRAM geprüft
Center
Wenn der Knopf für den Center-Lautsprecher (treble) auf dem
Controller gedrückt und für einige Sekunden gehalten wird, blinkt die
2221
Page 13

FEHLERSUCHE
Symptom Mögliches Problem Lösung
Der DIN-Stecker
der Controllers
lässt sich nicht in
den Subwoofer
einstecken.
Keine LEDs an.
Controller
funktioniert
nicht.
Kein Ton aus
einem oder
mehreren
Lautsprechern.
Einige Steckkontakte sind verbogen.
Gerät ist ausgeschaltet.
Netzstecker steckt nicht in der Steckdose bzw. im
Subwoofer.
Überspannungsschutz (falls verwendet) ist aus.
Controller ist nicht an den Subwoofer
angeschlossen.
Steckdose funktioniert nicht.
DIN-Stecker steckt nicht im Subwoofer.
Gerät ist ausgeschaltet.
Versuchen Sie, die Kontakte vorsichtig mit einer Pinzette oder mit einer
kleinen Zange geradezubiegen. Wenn dies nicht funktionieren sollte,
kontaktieren Sie den Altec Lansing Kunden-Support für weitere
Hilfestellung.
Drücken Sie den Einschaltknopf am Controller.
Ziehen Sie den Spannungsadapter vom Subwoofer und aus der
Netzsteckdose ab und schliessen Sie das Gerät dann erneut an.
Falls das Satellitenlautsprechersystem über ein Überspannungsschutzgerät
angeschlossen ist, stellen Sie sicher, dass der Überspannungsschutz
angeschaltet ist.
Schliessen Sie den Controller an den Subwoofer an.
Stecken Sie ein anderes Gerät in dieselbe Steckdose, um deren Funktion
zu prüfen.
Stellen Sie sicher, dass der graue DIN-Stecker fest in der Buchse des
Subwoofers steckt.
Überprüfen Sie, ob die Steckkontakte nicht verbogen sind.
Der Pfeil muss nach oben zeigen.
Prüfen Sie, ob das Netzkabel in eine Steckdose und in den Subwoofer
eingesteckt ist.
Prüfen Sie, ob die EQ-LED am Controller leuchtet und ob der
Einschaltknopf gedrückt ist.
Symptom Mögliches Problem Lösung
Kein Ton aus
dem Subwoofer.
Leiser
Brummton aus
Subwoofer.
Lauter
Brummton aus
Subwoofer.
Nicht genug
Bass vom
Subwoofer.
Zu viel Bass vom
Subwoofer.
Verzerrter
Monitor/TV.
Subwoofer-Lautstärke zu gering eingestellt.
Tonquelle hat wenig niederfrequente Anteile.
Die Wechelspannung des Versorgungsstromnetzes
beträgt 50 bzw. 60 Hz, was im Frequenzbereich des
Subwoofers liegt.
Schlechte Verbindungen.
Lautstärke Ihrer Audioquelle ist zu hoch eingestellt.
Basseinstellung zu niedrig.
Schlechte Verbindung.
Basseinstellung zu hoch.
Subwoofer steht zu nah am Monitor/TV-Gerät.
Stellen Sie die Basslautstärke am digitalen Controller ein.
Probieren Sie ein anderes Spiel, Film oder Lied — irgendetwas mit
deutlicheren Basstönen.
Es ist normal, dass ein leises Brummen zu hören ist, wenn das
Lautsprechersystem ohne Tonquelle betrieben wird oder wenn deren
Lautstärke extrem niedrig eingestellt ist.
Falls das Satellitenlautsprechersystem über ein Überspannungsschutzgerät
angeschlossen ist, ziehen Sie die Stecker aus der Überspannungsdose ab
und probieren den XA3051 direkt an einer Steckdose.
Wackeln Sie an den Kabeln und stellen Sie sicher, dass alles
ordnungsgemäß verbunden ist.
Ziehen Sie das Stereokabel aus der Tonquelle heraus. Wenn das Brummen
verschwindet, verringern Sie bitte die Lautstärke Ihrer Tonquelle.
Stellen Sie die Basslautstärke am Controller ein.
Kontrollieren Sie alle Kabel und stellen Sie sicher, dass alles
ordnungsgemäß verbunden ist.
Stellen Sie die Basslautstärke am Digital-Controller ein.
Da der Subwoofer nicht magnetisch abgeschirmt ist, kann er Verzerrungen
bei Ihrem Monitor/TV-Gerät verursachen, falls er zu nahe bei dem Gerät
positioniert ist. Platzieren Sie den Subwoofer in einem Abstand von
mindestens 2 Fuß (0.6m) zu Ihrem Monitor.
Knackgeräusche
von den
Lautsprechern.
Klang ist
verzerrt.
EMV-Störungen.
Lautstärke ist zu gering.
Audiokabel ist nicht an die Tonquelle
angeschlossen.
Audiokabel ist an die falsche Buchse der Tonquelle
angeschlossen.
Problem mit Tonquelle.
Schlechte Verbindungen.
Problem bei Ihrem Audiogerät.
Lautstärkepegel zu hoch.
Tonquelle ist verzerrt.
Zu nahe an einem Funksender.
Drehen Sie den Knopf im Uhrzeigersinn, um die Lautstärke zu erhöhen.
Überprüfen Sie die Lautstärkeeinstellung Ihrer Spielekonsole oder des
angeschlossenen Audiogeräts und setzen Sie sie ggf. auf Mittelstellung.
Schließen Sie das Audiokabel an die Tonquelle an. Überprüfen Sie die
Verbindungen am Subwoofer und der Tonquelle. Stellen Sie sicher, dass
diese Kabel an den richtigen Buchsen angeschlossen sind.
Stellen Sie sicher, dass sich zwischen den Ausgangsbuchsen der Tonquelle
und den Eingangsbuchsen am Subwoofer des XA3051 ein entsprechendes
Kabel befindet.
Probieren Sie die Lautsprecher an einem anderen Audiogerät aus.
Kontrollieren Sie alle Audiokabel. Stellen Sie sicher, dass sie in der Line-out
oder Audio-out-Buchse Ihres Audiogeräts stecken.
Probieren Sie die Lautsprecher an einem anderen Audiogerät aus (z.B. mit
Videorekorder, DVD-Player, tragbarer CD-Player oder UKW-Radio).
Verringern Sie die Lautstärke über den Controller des XA3051 oder (falls
möglich) direkt an Ihrer Tonquelle.
Probieren Sie eine andere Tonquelle aus (z.B. Musik-CD).
Verändern Sie die Position Ihrer Lautsprecher, um zu sehen, ob die
Störungen verschwinden. Falls dies nicht der Fall ist, können Sie evtl.
abgeschirmte Kabel bei Ihrem Elektrohändler vor Ort kaufen.
2423
Page 14

Corporate Headquarters
Rte. 6 & 209, Milford, PA 18337-0277, USA
800-ALTEC-88 • 570-296-4434 • Fax 570-296-6887
Asia/Pacific
25 Canton Road, Tsim Sha Tsui, Kowloon, Hong Kong
(852) 2735-7331 • Fax (852) 2317-7937
A8126 REV02
 Loading...