

Page 1
KTX-WXE-CA8
Car Model Model Year
INSTALLATION KIT
CAMRY
2012
Owner’s Manual
This owner’s manual will give you clearly understanding about installation.
For making installation correctly, please read this manual carefully before operating installation.
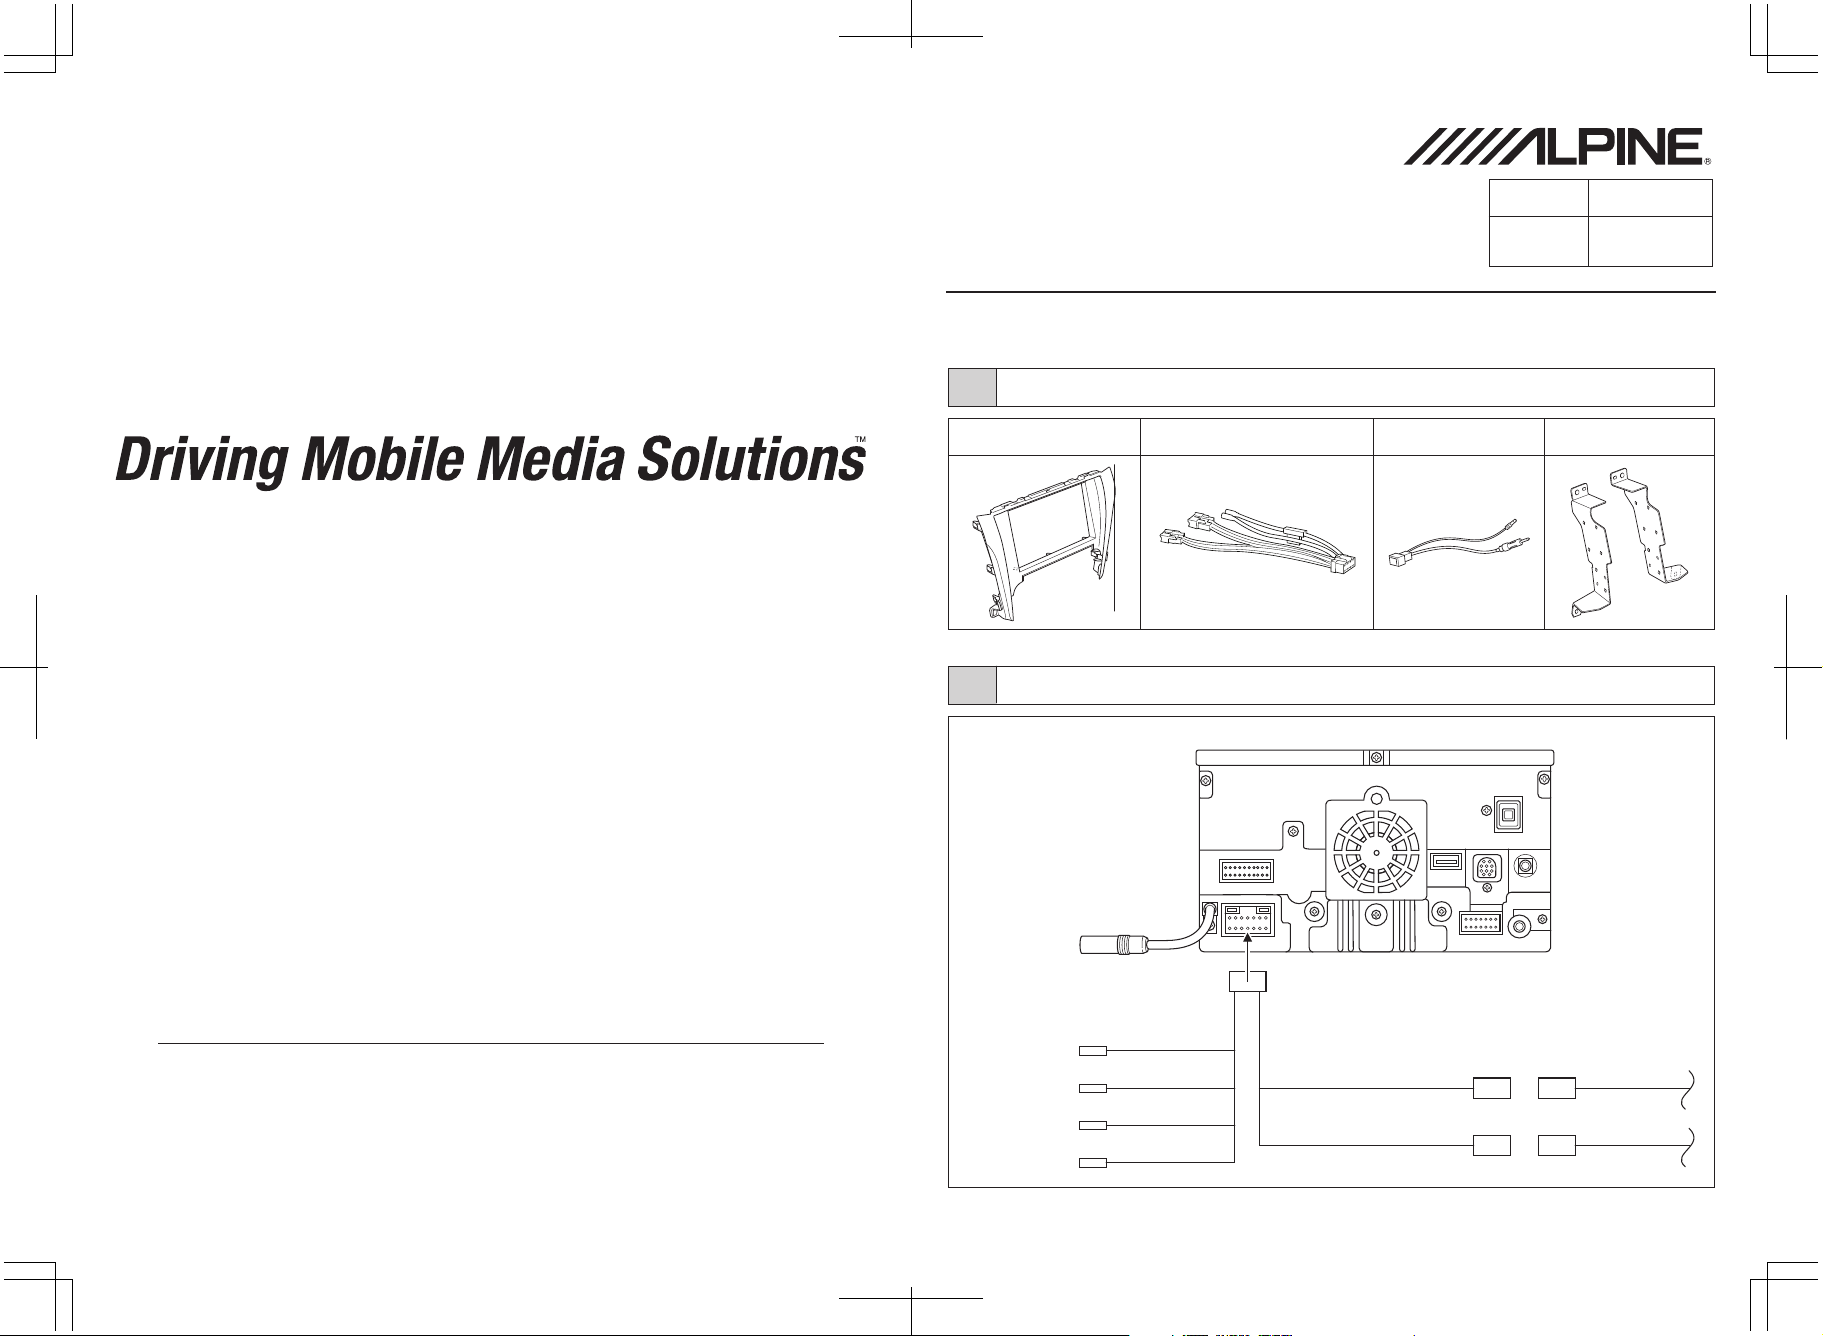
1 Component Parts
Audio Panel Alpine-Toyota power cord Bracket
2 Connecting Diagram
For other Audio connectivity
please refer to the head unit
Owner’s manual.
Alpine-Toyota
Antenna cable
ALPINE ELECTRONICS OF ASIA PACIFIC CO., LTD.
555 Rasa Tower 1, Unit 2601-2602, 26th Floor, Phaholyothin Rd.,
Chatuchak, Bangkok, Thailand 10900
Tel : +662-937-0505 Fax : +662-937-0569
http://www.alpine-asia.com
4 1
IN INT (Pink/Black)
P.ANT (Blue/White)
REMO (Blue)
P.BRK (Yellow/Blue)
Connect the connector
tightly into the port.
Alpine-Toyota
Power cord
10P 10P
Toyota audio
connector
6P 6P
Page 2
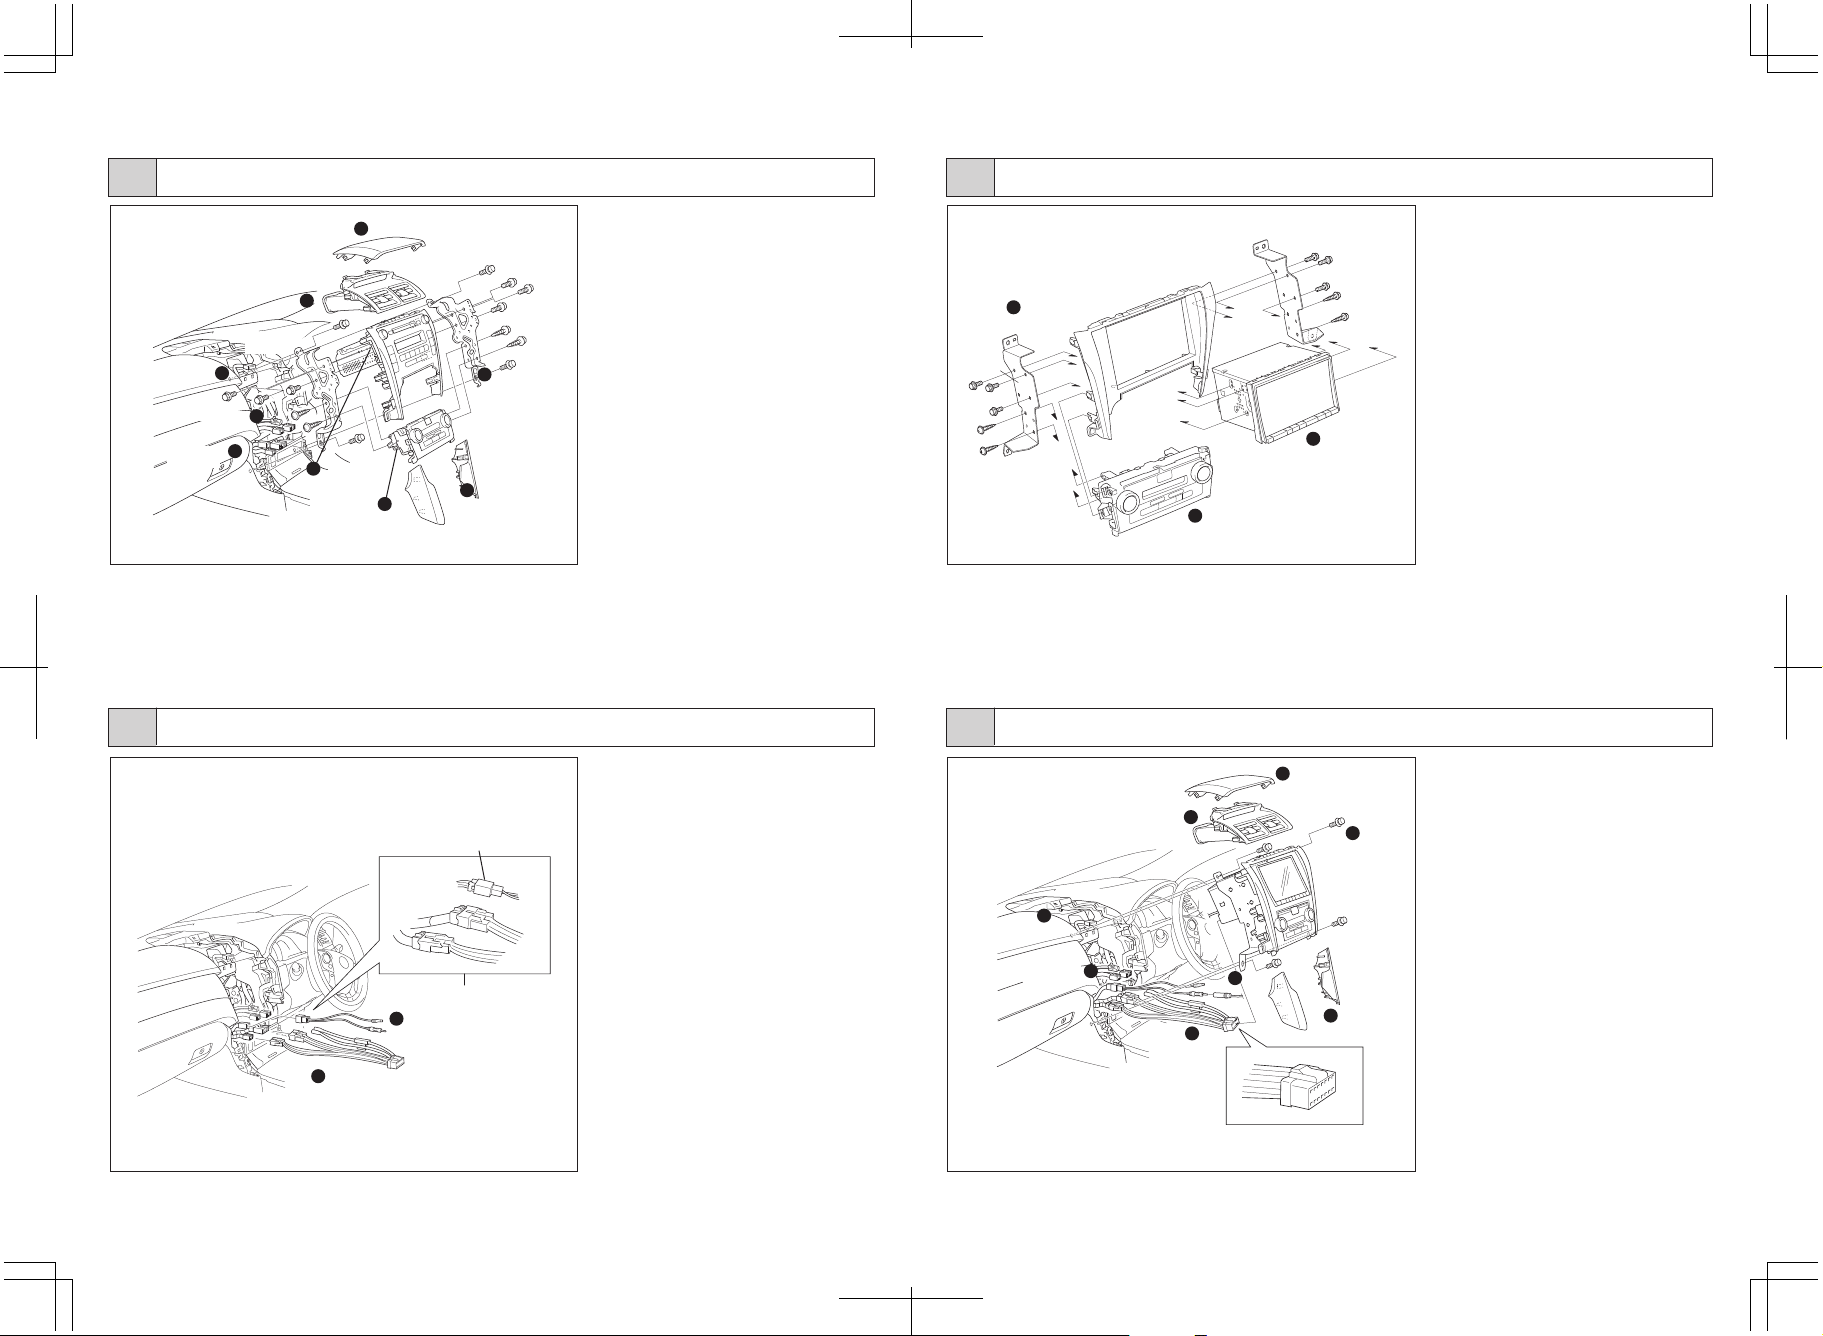
3 Removing Vehicle Parts 5 Bracket Assembly
1. Remove part no. 1 by
removing all clips off.
2. Remove plastic cover
2 by
removing all clips off.
3. Remove A/C console
3 by
removing all clips off.
4. Remove A/C connector
4 from
A/C console.
5. Remove audio panel
5 by
removing all 4 screws.
6. Remove all connectors
6 from
the head unit.
7. Remove all A/C control
connectors
controller
7 from A/C
9
8. Remove bracket 8 both left
and right sides of audio panel
by removing all 10 screws (5
screws each side).
9. Remove A/C controller
9 from
Bracket
Screw
3 Pcs.
Screw 2 Pcs.
2
1
A/C Controller
A/C Connector
Audio Connector
A/C Control
Connector
4
7
A/C Console
6
3
5
Audio panel
Plastic Cover
2
9
A/C Controller
Screws 4 Pcs.
8
Bracket
1
audio panel by removing all
clips off.
!!! Caution !!!
Make sure that all the accessories are
off so that you do not cause a spark
4 Harness Connection 6 Retracing Vehicle Parts
Screw 3 Pcs.
3
The head unit
Screw 2 Pcs.
1. Connect A/C controller 1 with
audio panel by pressing all clips
tightly.
2. Install bracket 2 with audio panel
both left and right sides by using 4
black screws (2 screws each side).
3. Install the head unit 3 from rear
side into audio panel by using
6 screws (3 screws each side).
Connect these connectors firmly
2
Alpine-Toyota antenna cable
1
Alpine-Toyota power cord
10P
6P
1. Connect the Alpine-Toyota
power cord 1 into the car
6
Antenna cable
connectors both 10P and 6P.
2. Connect the Alpine-Toyota
A/C Console
antenna cable 2 into the car
connectors.
!!! Caution !!!
Make connection between connectors
tightly (until you hear “Click”)
A/C Connector
A/C Control
Connector
5
3
1
Alpine-Toyota
power cord
2 3
7
Plastic cover
2
Connect Alpine-Toyota
power cord into unit
4
Screw 4 Pcs.
8
1. Connect the Alpine-Toyota
connector 1 and the Alpinetoyota antenna cable 2 into
the head unit tightly until you
hear “Click”.
2. Connect A/C Control connec-
tor 3 into A/C control tightly
until you hear “Click”.
3. Drive 4 screws 4 to make it
tight between the head unit
and console.
4. Connect A/C connector 5
with A/C console.
5. Connect A/C console 6 into
car console by pressing all
clips to dash panel until you
hear “click”.
6. Install plastic cover 7 by
pressing all clips tightly into
console.
7. Install part no. 8 by pressing
all clips tightly into console.
Remark
Perform full function checks for the
head unit. If no problem found
assemble back all the parts to their
original position.
 Loading...