

Page 1

User Manual
Navigation software for the
Stick
UK English
October 2023, ver. 1.0
Alpine Navigation
Page 2

Table of contents
1 Warnings and safety information ............................................................................5
2 Getting started ................................................................................................................6
2.1 Initial set-up ................................................................................................................................................... 6
2.2 Screen controls ............................................................................................................................................. 8
ʹǤʹǤͳǤǤǤǤǤǤǤǤǤǤǤǤǤǤǤǤǤǤǤǤǤǤǤǤǤǤǤǤǤǤǤǤǤǤǤǤǤǤǤǤǤǤǤǤǤǤǤǤǤǤǤǤǤǤǤǤǤǤǤǤǤǤǤǤǤǤǤǤǤǤǤǤǤǤǤǤǤǤǤǤǤǤǤǤǤǤǤǤǤǤǤǤǤǤǤǤǤǤͺ
ʹǤʹǤʹǤǤǤǤǤǤǤǤǤǤǤǤǤǤǤǤǤǤǤǤǤǤǤǤǤǤǤǤǤǤǤǤǤǤǤǤǤǤǤǤǤǤǤǤǤǤǤǤǤǤǤǤǤǤǤǤǤǤǤǤǤǤǤǤǤǤǤǤǤǤǤǤǤǤǤǤǤǤǤǤǤǤǤǤǤǤǤǤǤǤǤǤǤǤǤǤǤǤǤǤǤǤǤǤǤǤǤǤǤǤǤǤǤǤǤǤǤǤǤǤǤǤǤǤǤǤǤǤǤǤǤǤǤǤǤǤǤǤǤǤͺ
ʹǤʹǤ͵ǤǤǤǤǤǤǤǤǤǤǤǤǤǤǤǤǤǤǤǤǤǤǤǤǤǤǤǤǤǤǤǤǤǤǤǤǤǤǤǤǤǤǤǤǤǤǤǤǤǤǤǤǤǤǤǤǤǤǤǤǤǤǤǤǤǤǤǤǤǤǤǤǤǤǤǤǤǤǤǤǤǤǤǤǤǤǤǤǤǤǤǤǤǤǤǤǤǤǤǤǤǤǤǤǤǤǤǤǤǤǤǤǤǤǤǤǤǤǤǤǤǤǤǤǤǤǤǤǤǤǤǤǤǤͺ
ʹǤʹǤͶǤǤǤǤǤǤǤǤǤǤǤǤǤǤǤǤǤǤǤǤǤǤǤǤǤǤǤǤǤǤǤǤǤǤǤǤǤǤǤǤǤǤǤǤǤǤǤǤǤǤǤǤǤǤǤǤǤǤǤǤǤǤǤǤǤǤǤǤǤǤǤǤǤǤǤǤǤǤǤǤǤǤǤǤǤǤǤǤǤǤǤǤǤǤǤǤǤǤǤǤǤǤǤǤǤǤǤǤǤǤǤǤǤǤǤǤǤǤǤǤǤǤǤǤǤǤǤǤǤͳͲ
ʹǤʹǤͷǤǤǤǤǤǤǤǤǤǤǤǤǤǤǤǤǤǤǤǤǤǤǤǤǤǤǤǤǤǤǤǤǤǤǤǤǤǤǤǤǤǤǤǤǤǤǤǤǤǤǤǤǤǤǤǤǤǤǤǤǤǤǤǤǤǤǤǤǤǤǤǤǤǤǤǤǤǤǤǤǤǤǤǤǤǤǤǤǤǤǤǤǤǤǤǤǤǤǤǤǤǤǤǤǤǤǤǤǤǤǤǤǤǤǤǤǤǤǤǤǤǤǤǤǤǤͳͲ
2.3 Navigation view ........................................................................................................................................ 12
ʹǤ͵ǤͳǤǤǤǤǤǤǤǤǤǤǤǤǤǤǤǤǤǤǤǤǤǤǤǤǤǤǤǤǤǤǤǤǤǤǤǤǤǤǤǤǤǤǤǤǤǤǤǤǤǤǤǤǤǤǤǤǤǤǤǤǤǤǤǤǤǤǤǤǤǤǤǤǤǤǤǤǤǤǤǤǤǤǤǤǤǤǤǤǤǤǤǤǤǤǤǤǤǤǤǤǤǤǤǤǤǤǤǤǤǤǤǤǤǤǤǤǤǤǤǤǤǤǤǤǤǤǤǤǤǤǤǤǤǤǤǤͳͷ
ʹǤ͵ǤʹǤǤǤǤǤǤǤǤǤǤǤǤǤǤǤǤǤǤǤǤǤǤǤǤǤǤǤǤǤǤǤǤǤǤǤǤǤǤǤǤǤǤǤǤǤǤǤǤǤǤǤǤǤǤǤǤǤǤǤǤǤǤǤǤǤǤǤǤǤǤǤǤǤǤǤǤǤǤǤǤǤǤǤǤǤǤǤǤǤǤǤǤǤǤǤǤǤǤǤǤǤǤǤǤǤǤǤǤǤǤǤǤǤǤǤǤǤǤǤǤǤǤǤǤǤǤͳͷ
ʹǤ͵Ǥ͵ǤǤǤǤǤǤǤǤǤǤǤǤǤǤǤǤǤǤǤǤǤǤǤǤǤǤǤǤǤǤǤǤǤǤǤǤǤǤǤǤǤǤǤǤǤǤǤǤǤǤǤǤǤǤǤǤǤǤǤǤǤǤǤǤǤǤǤǤǤǤǤǤǤǤǤǤǤǤǤǤǤǤǤǤǤǤǤǤǤǤǤǤǤǤǤǤǤǤǤǤǤǤǤǤǤǤǤǤǤǤǤǤǤǤǤǤǤǤǤǤǤǤǤǤǤǤǤǤǤǤǤǤǤǤͳͷ
ʹǤ͵ǤͶǤǤǤǤǤǤǤǤǤǤǤǤǤǤǤǤǤǤǤǤǤǤǤǤǤǤǤǤǤǤǤǤǤǤǤǤǤǤǤǤǤǤǤǤǤǤǤǤǤǤǤǤǤǤǤǤǤǤǤǤǤǤǤǤǤǤǤǤǤǤǤǤǤǤǤǤǤǤǤǤǤǤǤǤǤǤǤǤǤǤǤǤǤǤǤǤǤǤǤǤǤǤǤǤǤǤǤǤǤǤͳ
ʹǤ͵ǤͷǤǤǤǤǤǤǤǤǤǤǤǤǤǤǤǤǤǤǤǤǤǤǤǤǤǤǤǤǤǤǤǤǤǤǤǤǤǤǤǤǤǤǤǤǤǤǤǤǤǤǤǤǤǤǤǤǤǤǤǤǤǤǤǤǤǤǤǤǤǤǤǤǤǤǤǤǤǤǤǤǤǤǤǤǤǤǤǤǤǤǤǤǤǤǤǤǤǤǤǤǤǤǤǤǤǤǤǤǤǤǤǤǤǤǤǤǤǤǤǤǤǤǤǤǤǤǤǤǤǤǤǤǤǤǤͳ
ʹǤ͵ǤǤǤǤǤǤǤǤǤǤǤǤǤǤǤǤǤǤǤǤǤǤǤǤǤǤǤǤǤǤǤǤǤǤǤǤǤǤǤǤǤǤǤǤǤǤǤǤǤǤǤǤǤǤǤǤǤǤǤǤǤǤǤǤǤǤǤǤǤǤǤǤǤǤǤǤǤǤǤǤǤǤǤǤǤǤǤǤǤǤǤǤǤǤǤǤǤǤǤǤǤǤǤǤǤǤͳ
ʹǤ͵ǤǤǤǤǤǤǤǤǤǤǤǤǤǤǤǤǤǤǤǤǤǤǤǤǤǤǤǤǤǤǤǤǤǤǤǤǤǤǤǤǤǤǤǤǤǤǤǤǤǤǤǤǤǤǤǤǤǤǤǤǤǤǤǤǤǤǤǤǤǤǤǤǤǤǤǤǤǤǤǤǤǤǤǤǤǤǤǤǤǤǤǤǤǤǤǤǤǤǤǤǤǤǤǤǤǤǤǤǤǤǤǤǤǤǤǤǤǤǤǤǤǤǤǤǤǤǤǤǤǤǤǤǤǤǤǤǤǤǤǤǤǤǤǤǤͳͺ
ʹǤ͵ǤͺǤǤǤǤǤǤǤǤǤǤǤǤǤǤǤǤǤǤǤǤǤǤǤǤǤǤǤǤǤǤǤǤǤǤǤǤǤǤǤǤǤǤǤǤǤǤǤǤǤǤǤǤǤǤǤǤǤǤǤǤǤǤǤǤǤǤǤǤǤǤǤǤǤǤǤǤǤǤǤǤǤǤǤǤǤǤǤǤǤǤǤǤǤǤǤǤǤǤǤǤǤǤǤǤǤǤǤǤǤǤǤǤǤǤǤǤǤǤǤǤǤǤǤǤǤǤǤǤǤǤǤǤǤǤǤǤǤǤǤǤǤǤǤǤǤǤͳͺ
ʹǤ͵ǤͻǤǤǤǤǤǤǤǤǤǤǤǤǤǤǤǤǤǤǤǤǤǤǤǤǤǤǤǤǤǤǤǤǤǤǤǤǤǤǤǤǤǤǤǤǤǤǤǤǤǤǤǤǤǤǤǤǤǤǤǤǤǤǤǤǤǤǤǤǤǤǤǤǤǤǤǤǤǤǤǤǤǤǤǤǤǤǤǤǤǤǤǤǤǤǤǤǤǤǤǤǤǤǤǤǤǤǤǤǤǤǤǤǤǤǤǤǤǤǤǤǤǤǤǤǤǤǤǤǤǤǤǤǤͳͺ
ʹǤ͵ǤͳͲ͵ǤǤǤǤǤǤǤǤǤǤǤǤǤǤǤǤǤǤǤǤǤǤǤǤǤǤǤǤǤǤǤǤǤǤǤǤǤǤǤǤǤǤǤǤǤǤǤǤǤǤǤǤǤǤǤǤǤǤǤǤǤǤǤǤǤǤǤǤǤǤǤǤǤǤǤǤǤǤǤǤǤǤǤǤǤǤǤǤǤǤǤǤǤǤǤǤǤǤǤǤǤǤǤǤǤǤǤǤǤǤǤǤǤǤǤǤǤǤǤǤǤǤǤǤǤǤǤǤǤǤǤǤǤǤǤǤǤͳͻ
ʹǤ͵ǤͳͳǤǤǤǤǤǤǤǤǤǤǤǤǤǤǤǤǤǤǤǤǤǤǤǤǤǤǤǤǤǤǤǤǤǤǤǤǤǤǤǤǤǤǤǤǤǤǤǤǤǤǤǤǤǤǤǤǤǤǤǤǤǤǤǤǤǤǤǤǤǤǤǤǤǤǤǤǤǤǤǤǤǤǤǤǤǤǤǤǤǤǤǤǤǤǤǤǤǤǤǤǤǤǤǤǤǤǤǤǤǤǤǤǤǤǤǤǤǤǤǤǤǤǤǤǤǤǤǤǤǤǤǤǤǤǤǤǤǤǤǤǤͳͻ
2.4 Navigation menu ...................................................................................................................................... 20
3 Using the navigation .................................................................................................. 22
3.1 Selecting a destination ........................................................................................................................... 2 2
͵ǤͳǤͳǤǤǤǤǤǤǤǤǤǤǤǤǤǤǤǤǤǤǤǤǤǤǤǤǤǤǤǤǤǤǤǤǤǤǤǤǤǤǤǤǤǤǤǤǤǤǤǤǤǤǤǤǤǤǤǤǤǤǤǤǤǤǤǤǤǤǤǤǤǤǤǤǤǤǤǤǤǤǤǤǤǤǤǤǤǤǤǤǤǤǤǤǤǤǤǤǤǤǤǤǤǤǤǤǤǤǤǤǤǤǤǤǤǤǤǤǤǤǤǤǤǤǤǤʹʹ
͵ǤͳǤʹǤǤǤǤǤǤǤǤǤǤǤǤǤǤǤǤǤǤǤǤǤǤǤǤǤǤǤǤǤǤǤǤǤǤǤǤǤǤǤǤǤǤǤǤǤǤǤǤǤǤǤǤǤǤǤǤǤǤǤǤǤǤǤǤǤǤǤǤǤǤǤǤǤǤǤǤǤǤǤǤǤǤǤǤǤǤǤǤǤǤǤǤǤǤǤǤǤǤǤǤǤǤǤǤǤǤǤǤǤǤǤǤǤǤǤǤǤǤǤǤǤǤǤǤǤǤǤǤǤǤʹͶ
3.1.2.1 Entering an address .................................................................................................................................................. 25
3.1.2.2 Selecting a town centre ........................................................................................................................................... 26
3.1.2.3 Selecting the midpoint of a street or an intersection ................................................................................. 27
3.1.2.4 Using the postcode to select a destination ...................................................................................................... 27
͵ǤͳǤ͵ǤǤǤǤǤǤǤǤǤǤǤǤǤǤǤǤǤǤǤǤǤǤǤǤǤǤǤǤǤǤǤǤǤǤǤǤǤǤǤǤǤǤǤǤǤǤǤǤǤǤǤǤǤǤǤǤǤǤǤǤǤǤǤǤǤǤǤǤǤǤǤǤǤǤǤǤǤǤǤǤǤǤǤǤǤǤǤǤǤǤǤǤǤǤǤǤǤǤǤǤǤǤǤǤǤǤǤǤǤǤǤǤǤǤǤʹͺ
3.1.3.1 Using Quick search categories ............................................................................................................................. 28
3.1.3.2 Searching by category ............................................................................................................................................. 30
3.1.3.3 Searching by name .................................................................................................................................................... 31
3.1.3.4 Park4Night Camping POIs ..................................................................................................................................... 33
3.1.3.5 Finding help nearby .................................................................................................................................................. 34
͵ǤͳǤͶǤǤǤǤǤǤǤǤǤǤǤǤǤǤǤǤǤǤǤǤǤǤǤǤǤǤǤǤǤǤǤǤǤǤǤǤǤǤǤǤǤǤǤǤǤǤǤǤǤǤǤǤǤǤǤǤǤǤǤǤǤǤǤǤǤǤǤǤǤǤǤǤǤǤǤǤǤǤǤǤǤǤǤǤǤǤǤǤǤǤǤǤǤǤǤǤǤǤǤǤǤǤǤǤǤǤǤǤǤǤǤǤǤǤǤǤǤ͵ͷ
͵ǤͳǤͷǤǤǤǤǤǤǤǤǤǤǤǤǤǤǤǤǤǤǤǤǤǤǤǤǤǤǤǤǤǤǤǤǤǤǤǤǤǤǤǤǤǤǤǤǤǤǤǤǤǤǤǤǤǤǤǤǤǤǤǤǤǤǤǤǤǤǤǤǤǤǤǤǤǤǤǤǤǤǤǤǤǤǤǤǤǤǤǤǤǤǤǤǤǤǤǤǤǤǤǤǤǤǤǤǤǤǤǤǤǤǤǤǤǤǤǤǤǤǤǤǤǤǤ͵
͵ǤͳǤǤǤǤǤǤǤǤǤǤǤǤǤǤǤǤǤǤǤǤǤǤǤǤǤǤǤǤǤǤǤǤǤǤǤǤǤǤǤǤǤǤǤǤǤǤǤǤǤǤǤǤǤǤǤǤǤǤǤǤǤǤǤǤǤǤǤǤǤǤǤǤǤǤǤǤǤǤǤǤǤǤǤǤǤǤǤǤǤǤǤǤǤǤǤǤǤǤǤǤǤǤǤǤǤǤǤǤǤǤǤǤǤǤǤǤǤǤǤǤǤǤǤǤǤ͵
2
Page 3

͵ǤͳǤǤǤǤǤǤǤǤǤǤǤǤǤǤǤǤǤǤǤǤǤǤǤǤǤǤǤǤǤǤǤǤǤǤǤǤǤǤǤǤǤǤǤǤǤǤǤǤǤǤǤǤǤǤǤǤǤǤǤǤǤǤǤǤǤǤǤǤǤǤǤǤǤǤǤǤǤǤǤǤǤǤǤǤǤǤǤǤǤǤǤǤǤǤǤǤǤǤǤǤǤǤǤǤǤǤǤǤǤǤǤǤǤǤǤǤǤǤǤǤǤǤǤǤǤǤǤǤǤ͵ͺ
͵ǤͳǤͺǤǤǤǤǤǤǤǤǤǤǤǤǤǤǤǤǤǤǤǤǤǤǤǤǤǤǤǤǤǤǤǤǤǤǤǤǤǤǤǤǤǤǤǤǤǤǤǤǤǤǤǤǤǤǤǤǤǤǤǤǤǤǤǤǤǤǤǤǤǤǤǤǤǤǤǤǤǤǤǤǤǤǤǤǤǤǤǤǤǤǤǤǤǤǤǤǤǤǤǤǤǤǤǤǤǤǤ͵ͻ
͵ǤͳǤͻǤǤǤǤǤǤǤǤǤǤǤǤǤǤǤǤǤǤǤǤǤǤǤǤǤǤǤǤǤǤǤǤǤǤǤǤǤǤǤǤǤǤǤǤǤǤǤǤǤǤǤǤǤǤǤǤǤǤǤǤǤǤǤǤǤǤǤǤǤǤǤǤǤǤǤǤǤǤǤǤǤǤǤǤǤǤǤǤǤǤǤǤǤǤǤǤǤǤǤǤǤǤǤǤǤǤǤǤǤǤǤǤǤͶͲ
3.2 Checking Route Information and Alternatives ........................................................................... 41
3.3 Checking Traffic Events ......................................................................................................................... 42
3.4 Editing the route ....................................................................................................................................... 44
͵ǤͶǤͳǤǤǤǤǤǤǤǤǤǤǤǤǤǤǤǤǤǤǤǤǤǤǤǤǤǤǤǤǤǤǤǤǤǤǤǤǤǤǤǤǤǤǤǤǤǤǤǤǤǤǤǤǤǤǤǤǤǤǤǤǤǤǤǤǤǤǤǤǤǤǤǤǤǤǤǤǤǤǤǤǤǤǤǤǤǤǤǤǤǤǤǤǤǤǤǤǤǤǤǤǤǤǤǤǤǤǤǤǤǤǤǤǤǤͶͶ
͵ǤͶǤʹǤǤǤǤǤǤǤǤǤǤǤǤǤǤǤǤǤǤǤǤǤǤǤǤǤǤǤǤǤǤǤǤǤǤǤǤǤǤǤǤǤǤǤǤǤǤǤǤǤǤǤǤǤǤǤǤǤǤǤǤǤǤǤǤǤǤǤǤǤǤǤǤǤǤǤǤǤǤǤǤǤǤǤǤǤǤǤǤǤǤǤǤǤǤǤǤǤǤǤǤǤǤǤǤͶͷ
͵ǤͶǤ͵ǤǤǤǤǤǤǤǤǤǤǤǤǤǤǤǤǤǤǤǤǤǤǤǤǤǤǤǤǤǤǤǤǤǤǤǤǤǤǤǤǤǤǤǤǤǤǤǤǤǤǤǤǤǤǤǤǤǤǤǤǤǤǤǤǤǤǤǤǤǤǤǤǤǤǤǤǤǤǤǤǤǤǤǤǤǤǤǤǤǤǤǤǤǤǤǤǤǤǤǤǤǤǤǤͶ
͵ǤͶǤͶǤǤǤǤǤǤǤǤǤǤǤǤǤǤǤǤǤǤǤǤǤǤǤǤǤǤǤǤǤǤǤǤǤǤǤǤǤǤǤǤǤǤǤǤǤǤǤǤǤǤǤǤǤǤǤǤǤǤǤǤǤǤǤǤǤǤǤǤǤǤǤǤǤǤǤǤǤǤǤǤǤǤǤǤǤǤǤǤǤǤǤǤǤǤǤǤǤǤǤǤǤǤǤǤǤǤǤǤǤǤǤǤǤǤǤǤǤǤǤǤͶ
͵ǤͶǤͷǤǤǤǤǤǤǤǤǤǤǤǤǤǤǤǤǤǤǤǤǤǤǤǤǤǤǤǤǤǤǤǤǤǤǤǤǤǤǤǤǤǤǤǤǤǤǤǤǤǤǤǤǤǤǤǤǤǤǤǤǤǤǤǤǤǤǤǤǤǤǤǤǤǤǤǤǤǤǤǤǤǤǤǤǤǤǤǤǤǤǤǤǤǤǤǤǤǤǤǤǤǤǤǤǤǤǤǤǤǤǤǤǤǤǤǤͶ
͵ǤͶǤǤǤǤǤǤǤǤǤǤǤǤǤǤǤǤǤǤǤǤǤǤǤǤǤǤǤǤǤǤǤǤǤǤǤǤǤǤǤǤǤǤǤǤǤǤǤǤǤǤǤǤǤǤǤǤǤǤǤǤǤǤͶ
͵ǤͶǤǤǤǤǤǤǤǤǤǤǤǤǤǤǤǤǤǤǤǤǤǤǤǤǤǤǤǤǤǤǤǤǤǤǤǤǤǤǤǤǤǤǤǤǤǤǤǤǤǤǤǤǤǤǤǤǤǤǤǤǤǤǤǤǤǤǤǤǤǤǤͶͺ
3.5 Saving a location ...................................................................................................................................... 49
͵ǤͷǤͳǤǤǤǤǤǤǤǤǤǤǤǤǤǤǤǤǤǤǤǤǤǤǤǤǤǤǤǤǤǤǤǤǤǤǤǤǤǤǤǤǤǤǤǤǤǤǤǤǤǤǤǤǤǤǤǤǤǤǤǤǤǤǤǤǤǤǤǤǤǤǤǤǤǤǤǤǤǤǤǤǤǤǤǤǤǤǤǤǤǤǤǤǤǤǤǤǤǤǤǤǤǤǤǤǤǤǤǤǤǤǤǤǤǤǤǤǤǤǤǤǤͷͲ
3.6 Adding an Alert Point ............................................................................................................................. 51
3.7 Running a Simulation ............................................................................................................................. 52
3.8 Off-road navigation ................................................................................................................................. 53
͵ǤͺǤͳǦǤǤǤǤǤǤǤǤǤǤǤǤǤǤǤǤǤǤǤǤǤǤǤǤǤǤǤǤǤǤǤǤǤǤǤǤǤǤǤǤǤǤǤǤǤǤǤǤǤǤǤǤǤǤǤǤǤǤǤǤǤǤǤǤǤǤǤǤǤǤǤǤǤǤǤǤǤǤǤǤǤǤǤǤǤǤǤǤǤǤǤǤǤǤǤǤǤǤǤǤǤǤǤǤǤͷ͵
͵ǤͺǤʹǦǤǤǤǤǤǤǤǤǤǤǤǤǤǤǤǤǤǤǤǤǤǤǤǤǤǤǤǤǤǤǤǤǤǤǤǤǤǤǤǤǤǤǤǤǤǤǤǤǤǤǤǤǤǤǤǤǤǤǤǤǤǤǤǤǤǤǤǤǤǤǤǤǤǤǤǤǤǤǤǤǤǤǤǤǤͷ͵
͵ǤͺǤ͵ǦǤǤǤǤǤǤǤǤǤǤǤǤǤǤǤǤǤǤǤǤǤǤǤǤǤǤǤǤǤǤǤǤǤǤǤǤǤǤǤǤǤǤǤǤǤǤǤǤǤǤǤǤǤǤǤǤǤǤǤǤǤǤǤǤǤǤǤǤǤǤǤǤǤǤǤǤǤǤǤǤǤǤǤǤǤǤǤǤǤǤǤǤǤǤǤǤǤǤǤǤǤǤǤǤǤǤǤǤǤǤǤǤǤǤͷ͵
3.9 Updating the navigation software and the maps ...................................................................... 54
4 Reference guide .......................................................................................................... 55
4.1 Concepts ........................................................................................................................................................ 55
ͶǤͳǤͳʹȀ͵ǤǤǤǤǤǤǤǤǤǤǤǤǤǤǤǤǤǤǤǤǤǤǤǤǤǤǤǤǤǤǤǤǤǤǤǤǤǤǤǤǤǤǤǤǤǤǤǤǤǤǤǤǤǤǤǤǤǤǤǤǤǤǤǤǤǤǤǤǤǤǤǤǤǤǤǤǤǤǤǤǤǤǤǤǤǤǤǤǤǤǤǤǤǤǤǤǤǤǤǤǤǤǤǤǤǤǤǤǤǤǤǤǤǤǤǤǤǤǤǤǤǤǤǤǤǤǤͷͷ
ͶǤͳǤʹǤǤǤǤǤǤǤǤǤǤǤǤǤǤǤǤǤǤǤǤǤǤǤǤǤǤǤǤǤǤǤǤǤǤǤǤǤǤǤǤǤǤǤǤǤǤǤǤǤǤǤǤǤǤǤǤǤǤǤǤǤǤǤǤǤǤǤǤǤǤǤǤǤǤǤǤǤǤǤǤǤǤǤǤǤǤǤǤǤǤǤǤǤǤǤǤǤǤǤǤǤǤǤǤǤǤǤǤǤǤǤǤǤǤǤǤǤǤǤǤǤǤǤǤͷͷ
ͶǤͳǤ͵ǤǤǤǤǤǤǤǤǤǤǤǤǤǤǤǤǤǤǤǤǤǤǤǤǤǤǤǤǤǤǤǤǤǤǤǤǤǤǤǤǤǤǤǤǤǤǤǤǤǤǤǤǤǤǤǤǤǤǤǤǤǤǤǤǤǤǤǤǤǤǤǤǤǤǤǤǤǤǤǤǤǤǤǤǤǤǤǤǤǤǤǤǤǤǤǤǤǤǤǤǤǤǤǤǤǤǤǤǤǤǤǤǤǤǤǤǤǤǤǤǤǤǤǤǤǤǤǤǤǤǤǤǤǤǤǤǤǤǤǤǤǤǤǤǤǤǤͷͷ
ͶǤͳǤͶǤǤǤǤǤǤǤǤǤǤǤǤǤǤǤǤǤǤǤǤǤǤǤǤǤǤǤǤǤǤǤǤǤǤǤǤǤǤǤǤǤǤǤǤǤǤǤǤǤǤǤǤǤǤǤǤǤǤǤǤǤǤǤǤǤǤǤǤǤǤǤǤǤǤǤǤǤǤǤǤǤǤǤǤǤǤǤǤǤǤǤǤǤǤǤǤǤǤǤͷ
ͶǤͳǤͷǤǤǤǤǤǤǤǤǤǤǤǤǤǤǤǤǤǤǤǤǤǤǤǤǤǤǤǤǤǤǤǤǤǤǤǤǤǤǤǤǤǤǤǤǤǤǤǤǤǤǤǤǤǤǤǤǤǤǤǤǤǤǤǤǤǤǤǤǤǤǤǤǤǤǤǤǤǤǤǤǤǤǤǤǤǤǤǤǤǤǤǤǤǤǤǤǤǤǤǤǤǤǤǤǤǤǤǤǤǤǤǤǤǤǤǤǤǤǤǤǤǤǤǤǤǤǤǤǤǤǤǤǤǤǤǤǤǤǤǤǤǤǤǤǤǤǤͷ
ͶǤͳǤǤǤǤǤǤǤǤǤǤǤǤǤǤǤǤǤǤǤǤǤǤǤǤǤǤǤǤǤǤǤǤǤǤǤǤǤǤǤǤǤǤǤǤǤǤǤǤǤǤǤǤǤǤǤǤǤǤǤǤǤǤǤǤǤǤǤǤǤǤǤǤǤǤǤǤǤǤǤǤǤǤǤǤǤǤǤǤǤǤǤǤǤǤǤǤǤǤǤǤǤǤǤǤǤǤǤǤǤǤǤǤǤǤǤǤǤǤǤǤǤǤǤǤǤǤǤǤǤǤǤͷ
ͶǤͳǤǤǤǤǤǤǤǤǤǤǤǤǤǤǤǤǤǤǤǤǤǤǤǤǤǤǤǤǤǤǤǤǤǤǤǤǤǤǤǤǤǤǤǤǤǤǤǤǤǤǤǤǤǤǤǤǤǤǤǤǤǤǤǤǤǤǤǤǤǤǤǤǤǤǤǤǤǤǤǤǤǤǤǤǤǤǤǤǤǤǤǤǤǤǤǤǤǤǤǤǤǤǤǤǤǤǤǤǤǤǤǤǤǤǤǤǤǤǤǤǤǤǤǤǤǤǤǤǤǤǤǤǤǤǤǤǤǤǤͷ
ͶǤͳǤͺǦǤǤǤǤǤǤǤǤǤǤǤǤǤǤǤǤǤǤǤǤǤǤǤǤǤǤǤǤǤǤǤǤǤǤǤǤǤǤǤǤǤǤǤǤǤǤǤǤǤǤǤǤǤǤǤǤǤǤǤǤǤǤǤǤǤǤǤǤǤǤǤǤǤǤǤǤǤǤǤǤǤǤǤǤǤǤǤǤǤǤǤǤǤǤǤǤǤǤǤǤǤǤǤǤǤǤǤǤǤǤǤǤǤǤǤǤǤǤǤǤǤǤǤǤǤǤǤǤǤǤǤǤǤǤǤǤǤǤͷ
ͶǤͳǤͻǤǤǤǤǤǤǤǤǤǤǤǤǤǤǤǤǤǤǤǤǤǤǤǤǤǤǤǤǤǤǤǤǤǤǤǤǤǤǤǤǤǤǤǤǤǤǤǤǤǤǤǤǤǤǤǤǤǤǤǤǤǤǤǤǤǤǤǤǤǤǤǤǤǤǤǤǤǤǤǤǤǤǤǤǤǤǤǤǤǤǤǤǤǤǤǤǤǤǤǤǤǤǤǤǤǤǤǤǤǤǤǤǤǤǤǤǤǤǤǤǤǤǤǤǤǤǤͷͺ
4.1.9.1 Congestion detour on highways .......................................................................................................................... 58
4.1.9.2 Real-time alternative routes ................................................................................................................................. 58
4.1.9.3 Parking around destination .................................................................................................................................. 59
4.1.9.4 Hints upon detour ...................................................................................................................................................... 59
4.2 Information menu .................................................................................................................................... 60
ͶǤʹǤͳǤǤǤǤǤǤǤǤǤǤǤǤǤǤǤǤǤǤǤǤǤǤǤǤǤǤǤǤǤǤǤǤǤǤǤǤǤǤǤǤǤǤǤǤǤǤǤǤǤǤǤǤǤǤǤǤǤǤǤǤǤǤǤǤǤǤǤǤǤǤǤǤǤǤǤǤǤǤǤǤǤǤǤǤǤǤǤǤǤǤǤǤǤǤǤǤǤǤǤǤǤǤǤǤǤǤǤǤǤǤǤǤǤǤǤǤǤǤǤǤǤǤǤǤǤǤǤǤǤǤǤǤǤǤǤǤǤǤǤǤǤǤǤǤǤǤǤͳ
ͶǤʹǤʹǤǤǤǤǤǤǤǤǤǤǤǤǤǤǤǤǤǤǤǤǤǤǤǤǤǤǤǤǤǤǤǤǤǤǤǤǤǤǤǤǤǤǤǤǤǤǤǤǤǤǤǤǤǤǤǤǤǤǤǤǤǤǤǤǤǤǤǤǤǤǤǤǤǤǤǤǤǤǤǤǤǤǤǤǤǤǤǤǤǤǤǤǤǤǤǤǤǤǤǤǤǤǤǤǤǤǤǤǤǤǤǤǤǤǤǤǤǤǤǤǤǤǤǤǤǤǤǤǤǤǤǤǤǤǤǤǤǤǤǤǤǤǤǤǤͳ
3
Page 4

4.3 Settings menu ............................................................................................................................................. 62
ͶǤ͵ǤͳǤǤǤǤǤǤǤǤǤǤǤǤǤǤǤǤǤǤǤǤǤǤǤǤǤǤǤǤǤǤǤǤǤǤǤǤǤǤǤǤǤǤǤǤǤǤǤǤǤǤǤǤǤǤǤǤǤǤǤǤǤǤǤǤǤǤǤǤǤǤǤǤǤǤǤǤǤǤǤǤǤǤǤǤǤǤǤǤǤǤǤǤǤǤǤǤǤǤǤǤǤǤǤǤǤǤǤǤǤǤǤǤǤǤǤǤǤǤǤǤǤǤǤǤǤǤǤǤǤǤǤǤǤǤͶ
4.3.1.1 Vehicle profile .............................................................................................................................................................. 64
4.3.1.2 Route Planning Method types ............................................................................................................................... 66
4.3.1.3 Navigation Mode ........................................................................................................................................................ 67
4.3.1.4 Road types ..................................................................................................................................................................... 67
ͶǤ͵ǤʹǤǤǤǤǤǤǤǤǤǤǤǤǤǤǤǤǤǤǤǤǤǤǤǤǤǤǤǤǤǤǤǤǤǤǤǤǤǤǤǤǤǤǤǤǤǤǤǤǤǤǤǤǤǤǤǤǤǤǤǤǤǤǤǤǤǤǤǤǤǤǤǤǤǤǤǤǤǤǤǤǤǤǤǤǤǤǤǤǤǤǤǤǤǤǤǤǤǤǤǤǤǤǤǤǤǤǤǤǤǤǤǤǤǤǤǤǤǤǤǤǤǤǤǤǤǤǤǤǤǤǤǤǤǤǤǤǤǤǤǤǤͺ
ͶǤ͵Ǥ͵ǤǤǤǤǤǤǤǤǤǤǤǤǤǤǤǤǤǤǤǤǤǤǤǤǤǤǤǤǤǤǤǤǤǤǤǤǤǤǤǤǤǤǤǤǤǤǤǤǤǤǤǤǤǤǤǤǤǤǤǤǤǤǤǤǤǤǤǤǤǤǤǤǤǤǤǤǤǤǤǤǤǤǤǤǤǤǤǤǤǤǤǤǤǤǤǤǤǤǤǤǤǤǤǤǤǤǤǤǤǤǤǤǤǤǤǤǤǤǤǤǤǤǤǤǤǤǤǤǤǤǤǤǤǤͻ
ͶǤ͵ǤͶǤǤǤǤǤǤǤǤǤǤǤǤǤǤǤǤǤǤǤǤǤǤǤǤǤǤǤǤǤǤǤǤǤǤǤǤǤǤǤǤǤǤǤǤǤǤǤǤǤǤǤǤǤǤǤǤǤǤǤǤǤǤǤǤǤǤǤǤǤǤǤǤǤǤǤǤǤǤǤǤǤǤǤǤǤǤǤǤǤǤǤǤǤǤǤǤǤǤǤǤǤǤǤǤǤǤǤǤǤǤǤǤǤǤǤǤǤǤǤǤǤǤǤǤǤǤǤǤǤǤǤǤǤǤǤǤǤǤͲ
ͶǤ͵ǤͷǤǤǤǤǤǤǤǤǤǤǤǤǤǤǤǤǤǤǤǤǤǤǤǤǤǤǤǤǤǤǤǤǤǤǤǤǤǤǤǤǤǤǤǤǤǤǤǤǤǤǤǤǤǤǤǤǤǤǤǤǤǤǤǤǤǤǤǤǤǤǤǤǤǤǤǤǤǤǤǤǤǤǤǤǤǤǤǤǤǤǤǤǤǤǤǤǤǤǤǤǤǤǤǤǤǤǤǤǤǤǤǤǤǤǤǤǤǤǤǤǤǤǤǤǤǤǤǤǤǤǤǤǤǤǤǤǤǤǤǤǤǤǤǤǤǤǤǤǤǤǤǤǤǤʹ
ͶǤ͵ǤǤǤǤǤǤǤǤǤǤǤǤǤǤǤǤǤǤǤǤǤǤǤǤǤǤǤǤǤǤǤǤǤǤǤǤǤǤǤǤǤǤǤǤǤǤǤǤǤǤǤǤǤǤǤǤǤǤǤǤǤǤǤǤǤǤǤǤǤǤǤǤǤǤǤǤǤǤǤǤǤǤǤǤǤǤǤǤǤǤǤǤǤǤǤǤǤǤǤǤǤǤǤǤǤǤǤǤǤǤǤǤǤǤǤǤǤǤǤǤǤǤǤǤǤǤǤǤǤǤǤǤǤǤǤǤǤǤǤǤǤǤǤǤǤǤǤǤǤǤǤǤǤǤǤǤǤǤǤ͵
ͶǤ͵ǤǤǤǤǤǤǤǤǤǤǤǤǤǤǤǤǤǤǤǤǤǤǤǤǤǤǤǤǤǤǤǤǤǤǤǤǤǤǤǤǤǤǤǤǤǤǤǤǤǤǤǤǤǤǤǤǤǤǤǤǤǤǤǤǤǤǤǤǤǤǤǤǤǤǤǤǤǤǤǤǤǤǤǤǤǤǤǤǤǤǤǤǤǤǤǤǤǤǤǤǤǤǤǤǤǤǤǤǤǤǤǤǤǤǤǤǤǤǤǤǤǤǤǤǤǤǤǤǤǤǤǤǤǤǤǤǤǤǤǤǤǤǤǤǤǤͶ
ͶǤ͵ǤͺǤǤǤǤǤǤǤǤǤǤǤǤǤǤǤǤǤǤǤǤǤǤǤǤǤǤǤǤǤǤǤǤǤǤǤǤǤǤǤǤǤǤǤǤǤǤǤǤǤǤǤǤǤǤǤǤǤǤǤǤǤǤǤǤǤǤǤǤǤǤǤǤǤǤǤǤǤǤǤǤǤǤǤǤǤǤǤǤǤǤǤǤǤǤǤǤǤǤǤǤǤǤǤǤǤǤǤǤǤǤǤǤǤǤǤǤǤǤǤǤǤǤǤǤǤǤǤǤǤǤǤǤǤǤǤǤǤǤǤǤǤǤǤǤǤͶ
5 Copyright note ............................................................................................................. 75
4
Page 5

1 Warnings and safety information
The navigation system helps you find your way to your destination with the built-in GPS
receiver. Alpine Navigation Stick does not transmit your GPS position; others cannot track
you.
It is important to look at the d isplay only when it is s afe to do so. If you are the driver of the
vehicle, we recommend that you pla n and review your route before you start your journey.
Plan the route before your departure and stop if you need to change the route.
You must follow the traffic rules. If you deviate from the planned route, Alpine Navigation Stick
changes the instructions accordingly.
5
Page 6

2 Getting started
Alpine Navigation Stick is optimised for in-car use. You can use it easily by tapping the screen
buttons and the map with your fingertips.
Easy map updates
Update your maps regularly as road netw orks are continuously evolving all over the world.
About 15% of the roads are changed each year, n ew ones are built, directions are altered,
new speed limits are set, and many other changes are made.
It is easy to keep the navigation system up-to-date. Go to alpine.naviextras.com to find map
updates and extra content for your navigation system. Use the Toolbox application with your
product connected, and download the new map data.
Latest Map Guarantee
When you start using the product, you have 30 days to download the latest available map free
of charge.
Free Map updates
When you start using the product, you can download new maps in the next 3 years.
2.1 Initial set-up
When using the navigation software for the first time, an initial set-up process starts
automatically.
1. Select your preferred language, then tap
selection. Later you can change it in Regional settings (page 72).
2. The Configuration Wizard starts. Tap
to confirm your
to continue.
6
Page 7

Note!
This warning pops up every time you start Alpine Navigation Stick.
3. Select the language and speaker used for voice guidance messages. Later you can
change it in Regional settings (page 68). Tap
4. If needed, modify the time format and unit settings. Later you can change them in
Regional settings (page 72). Tap
5. If needed, modify the default route planning options. Later you can change them in
Route Preferences (page 64). Tap
to continue.
to continue.
to continue.
6. The initial set-up is now complete, tap
7. A warning appears to draw your attention to the hazards of operating, entering data
into or obtaining data from the Alpine Navigation Stick during driving or transportation.
After reading it carefully, tap
7
to enter the navigation view.
.
Page 8

Action
Function
Switching to another
keyboard layout, for
example from an English
keyboard to a Greek
keyboard
Tap
and select the new keyboard layout from the list.
2.2 Screen controls
The following sections describe the functio nality and use of butt ons, sliders, and other screen
controls in Alpine Navigation Stick.
2.2.1 Using the buttons and other controls
To operate Alpine Navigation Stick, tap the buttons on the touch screen.
The Navigation menu may contain several menu items on one or more pages.
You need to confirm selec tions or changes only if the application needs to be r estarted, if it
needs to perform a major reconfiguration, or if you are about to lose some of your data or
settings. Otherwise, Alpine Navigation Stick saves your selections and applies the new
settings without confirmation as soon as you use the controls.
2.2.2 Using the cursor
You can select a map location by tapping the map during navigation.
When a map location is selected, the cursor (
map.
The location of the cursor can be used as the destination of t he route or a new Alert Point.
You can also search for Places around it or add this location to your saved locations.
You can also select some of the obj ects on the map. I f yo u tap the m ap at the ico n of a Place
or traffic event, the object is selected, and you can get informatio n about this object or use it
as a route point.
) appears at the selected point on the
2.2.3 Using the keyboard
You can type with your fingertips on the screen keyboards and you can switch between
various keyboard layouts, for example English, Greek or numerical. Only those keyboard
buttons are active that can be used to type a name that is availabl e on the map. The other
keys are greyed out.
8
Page 9
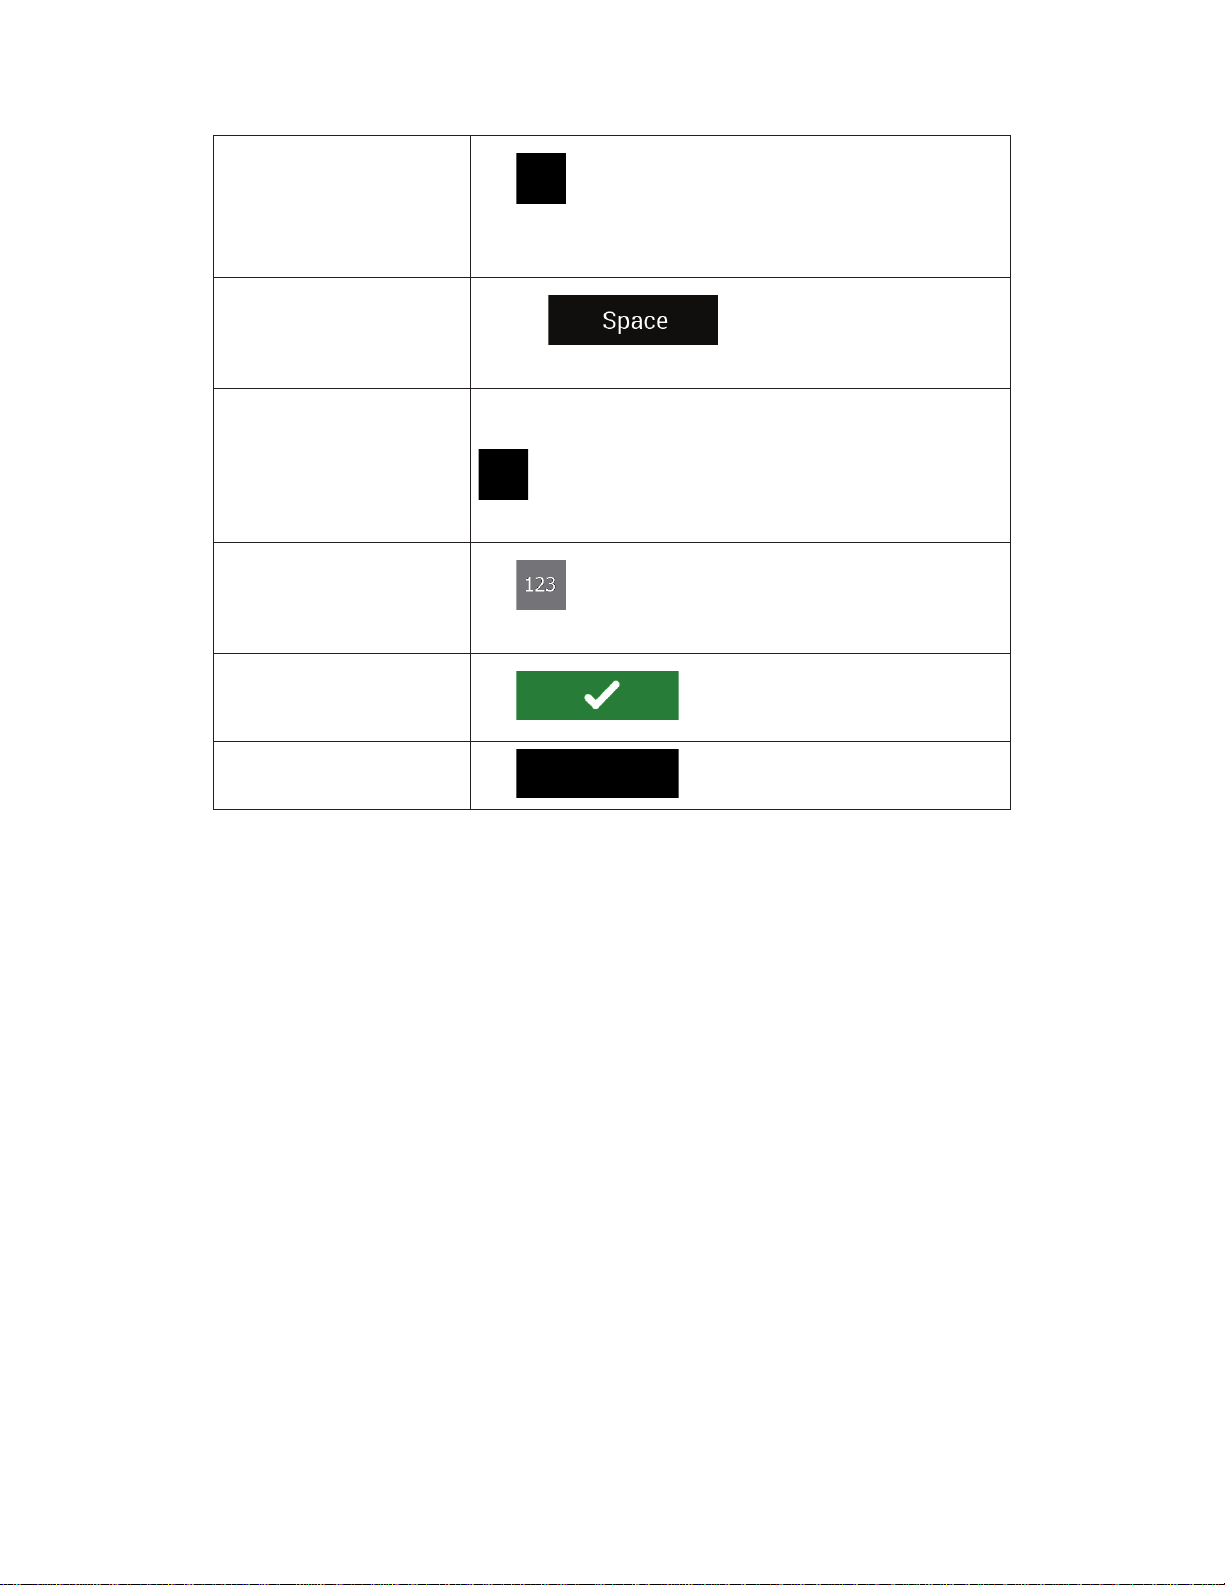
Correcting your entry on the
keyboard
Tap
Tap and hold the button to delete several characters or the
entire input string.
Entering a space, for
example between a first
name and a family nam e or
in multi
word street names
Tap the
button at the bottom centre of the
screen.
Entering upper and lower
case letters
By default, when entering a text, the first character appears in
upper case while the rest of the text is in lower case. Tap
to enter an upper case letter or tap it twice to turn on
Caps Lock. Tap again to use lower case letters.
Entering numbers and
symbols
Tap
symbols.
Finalising the keyboard entry
Tap
Hiding the keyboard
Tap .
-
to remove the unnecessary character(s).
to switch to a keyboard offering numbers and
.
9
Page 10
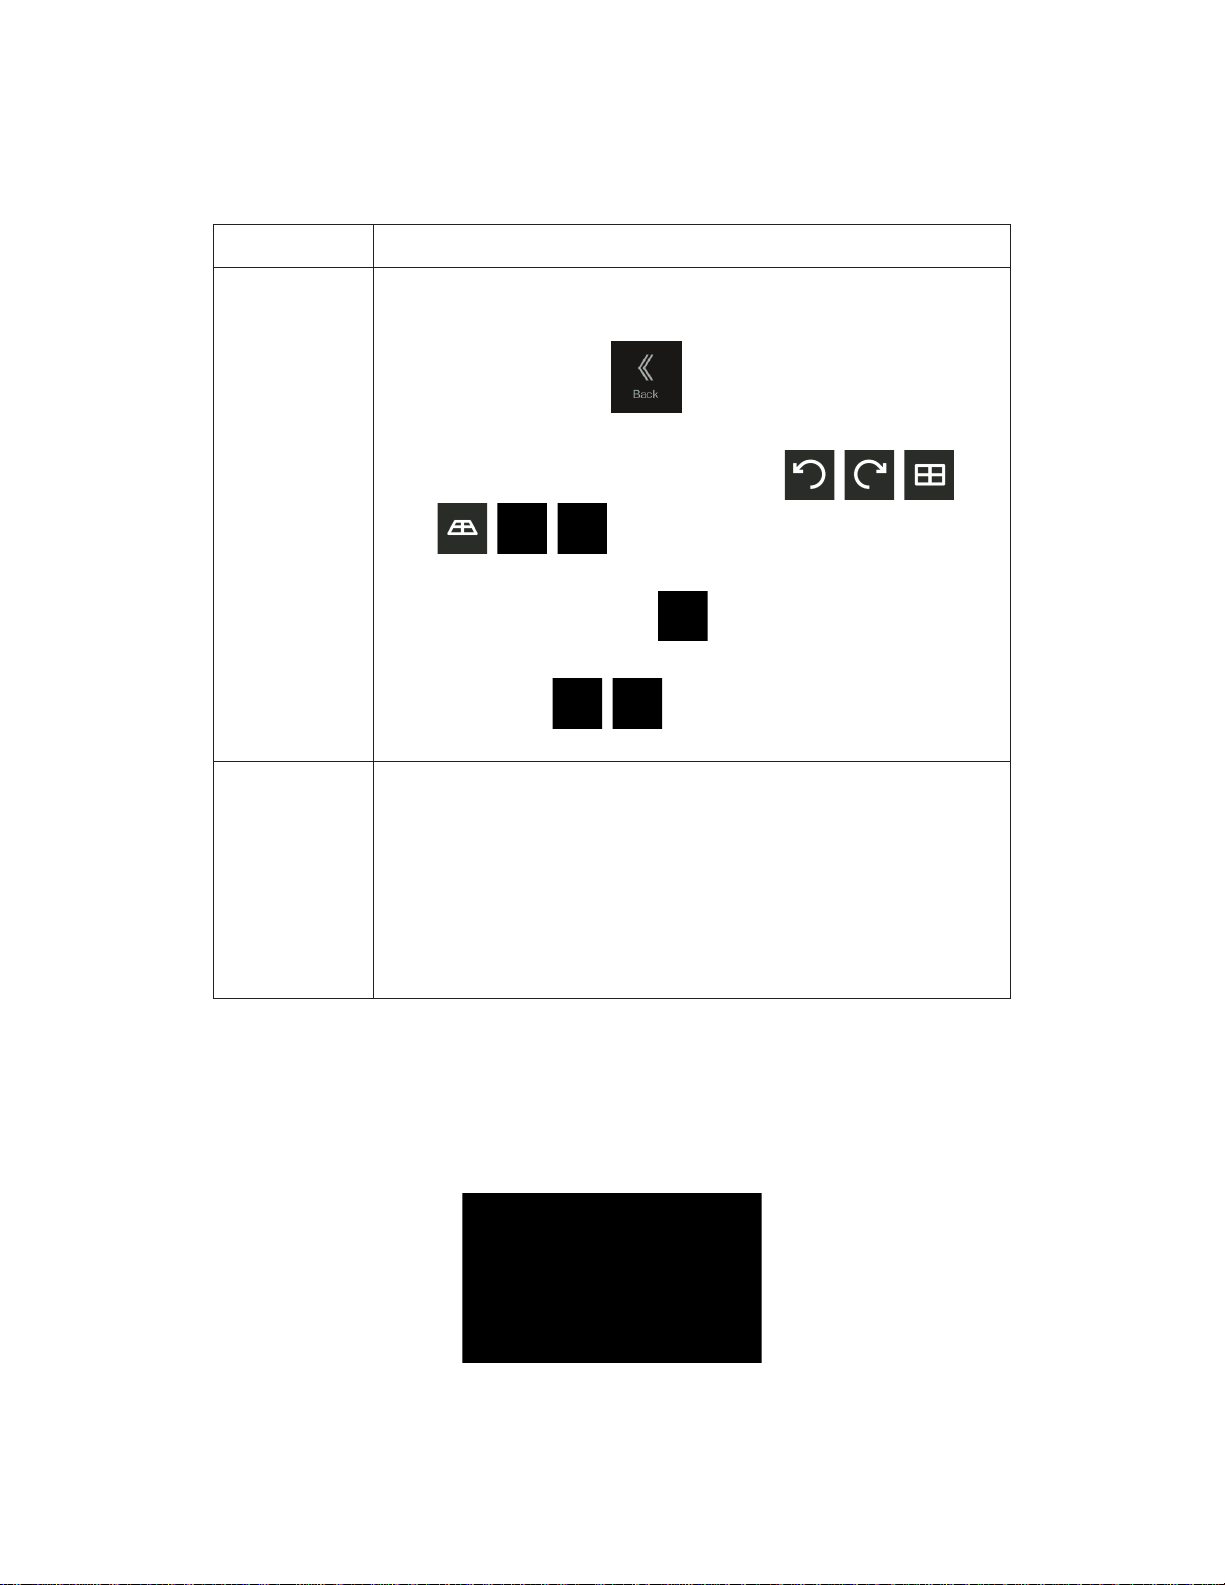
Action
Function
Tapping and
holding the
screen
Tap and keep pressing the following buttons to reach extra functions:
Tap and hold the following button on list and menu screens to show
Tap and hold any of the following buttons on the Navigation view to
Tap and hold the following button on keyboard screens to quickly
Dragging
Drag the screen in the following cases:
To scroll a list: grab the list anywhere and slide your finger up or
sliding, the list scrolls faster
To move the map in map browsing mode: grab the map, and move
2.2.4 Using touch gestures
You usually need to tap the screen only once. However, some useful features can be
accessed with other gestures. See the table below.
x
the Navigation view: .
x
rotate, tilt, or scale the map continuously: , , ,
, , .
x
delete several characters: .
x Tap and hold the following buttons in long lists to scroll pages
continuously:
x To move the handle on a slider.
x
down. Depending on the speed of the
or slower, only a bit or till the end.
x
it in the desired direction.
2.2.5 Manipulating the map
If you tap the map anywhere dur ing navigation, the map stops fo llowing the current position
(the blue arrow is not locked in a fix position on the screen anymore) and control buttons
appear to help you modify the map view.
, .
10
Page 11
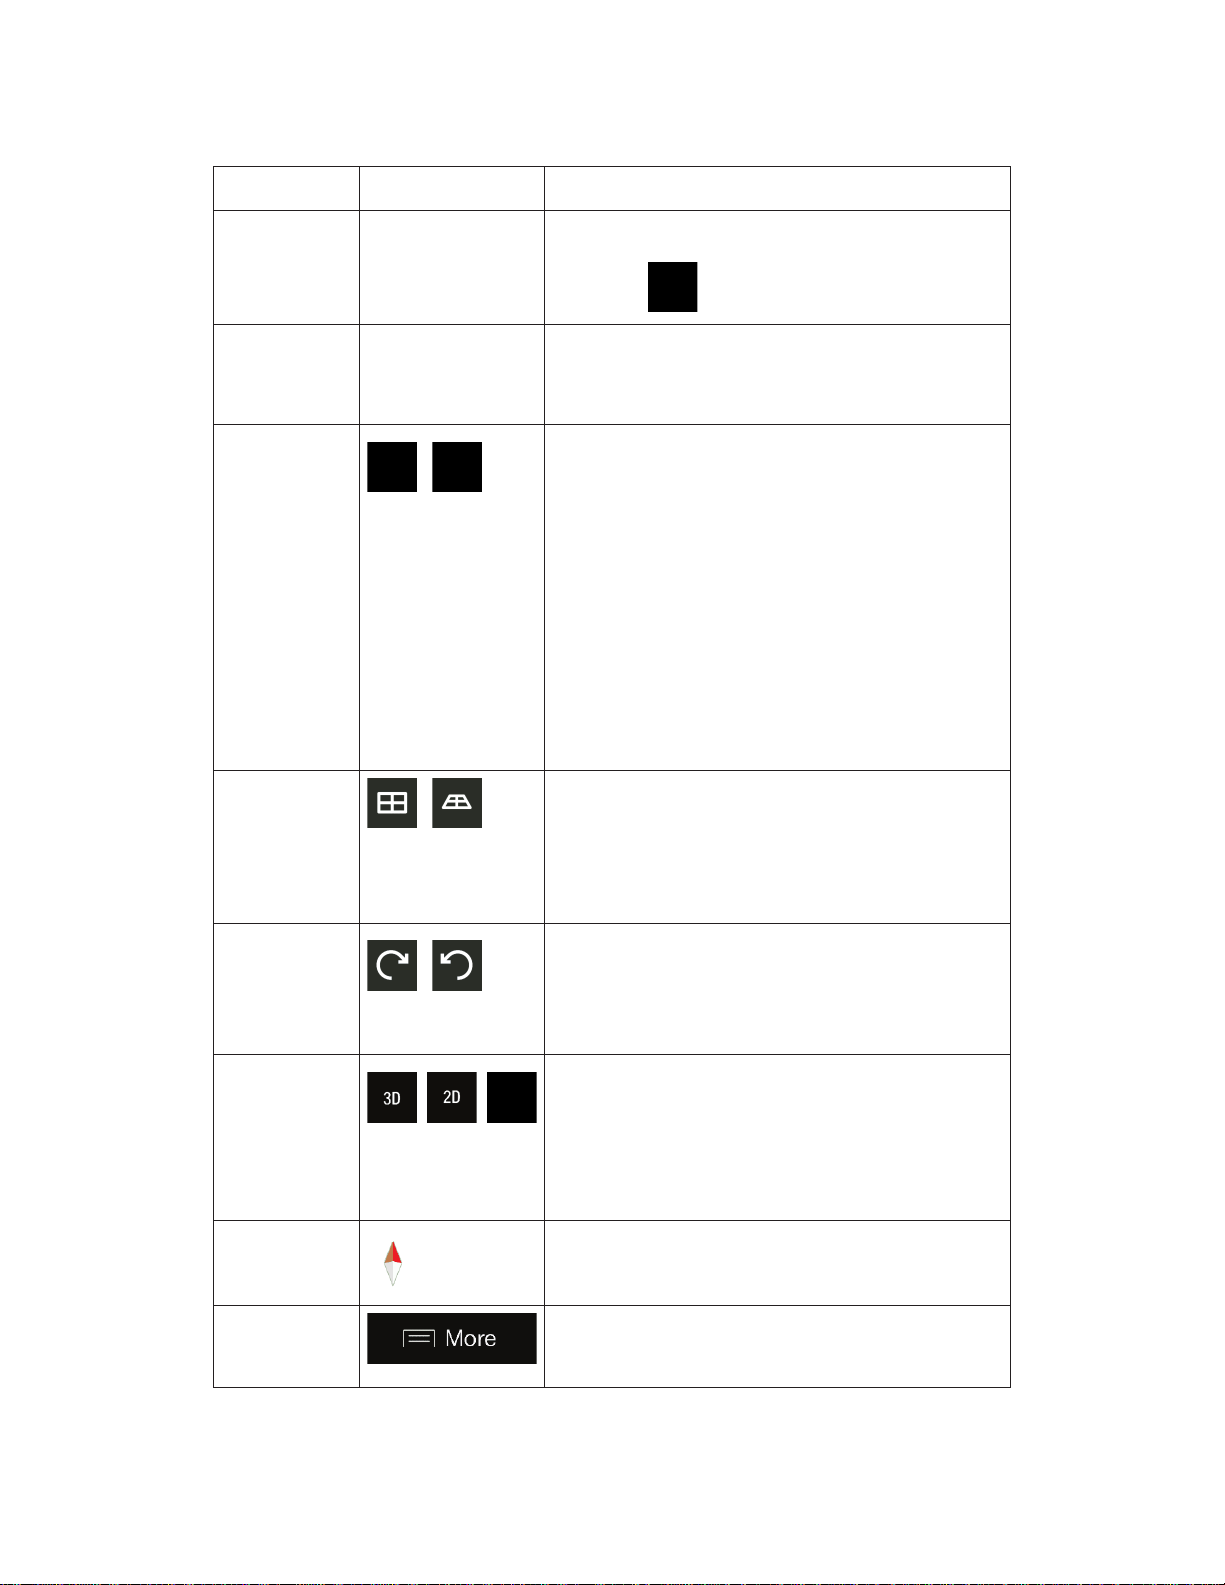
Action
Button(s)
Function
Checking
location
information
No buttons
The top section of the Navigation view shows
information about the
(the cursor ).
Moving the
map by
dragging
No buttons
Move the map in any direction: tap and hold the map
and move your finger towards the direction you want
to move the map.
Zooming in and
out
Change how much of the map is displayed on the
screen.
Alpine Navigation Stick uses maps that let you
examine the locations at various z oom levels, always
with optimised content. It always displays street
names and other text with the sam e font size, never
upside
down, and you only see the streets and
objects that you need.
Map scaling has a limit in 3D map view mode. If you
zoom out further, the map switches to 2D view mode.
Tap once to modify the view in a large step, or tap
and hold the button to modify it continuously and
smoothly.
Tilting up and
down
Change the vertical view angle of the map in 3D
mode.
Tap once to modify the view in a large step, or tap
and hold the button to modify it continuously and
smoothly.
Rotating left
and right
Changes the horizontal view angle of the
Tap once to modify the view in a large step, or tap
and hold the button to modify it continuously and
smoothly.
Changing 2D,
3D, or 2D
North up views
Switch between the 3D pers pective, 2D Heading up,
and 2D North up map view modes. In Heading up
mode the map is rotated so its top always points in
the current driving direction. This is the default
orientation in 3D map view mo de. In North up mode,
the map faces North.
Checking the
compass
The direction of the compass shows North.
Selecting
additional
options
Open a list of additional features like saving a
location, or searching for Places around the cursor.
You can perform the following act ions on the map:
selected point
,
,
,
-
map.
, ,
11
Page 12

Selecting a
destination
Select the cursor location as a new destination. The
route is automatically calculated.
Note!
Some buttons, fields, or icons may not be available in your product version.
2.3 Navigation view
The navigation view is the main screen of Alpine Navigation Stick that shows the planned
route on a map. Alpine Navigation Stick works with digital maps which are not simply the
computerised versions of traditional paper maps . Similarly to paper r oad maps, th e 2D mode
of digital maps shows you streets and roads. Elevation is also illustrated in colour.
The navigation view displays the following screen buttons, data fields, and route inf ormation
on the map during navigation:
12
Page 13

Number
Name
Description
1
Current
position
marker
The current position is displayed as a blue arrow by default.
When there is no GPS position, the current position marker is
transparent and it shows your last known position. See page 15.
2
GPS position
The dot near the arrow shows the GPS position as perceived by
the GPS receiver. See page 15.
3
Planned route
The planned route is displayed as an orange line.
4
Data fields
Three data fields show the following information:
By tapping and holding it, y ou can access add itional i nformation
about the current trip on a dashboard screen and in the Trip
Summary.
You can change the default values in Setup (
) or by
tapping the area where the data fields appear.
If you have not selected a destination, you can see your
heading instead of the three data fields.
5
Next turn
preview
It shows the type of the next manoeuvre and its distance. See
page 16.
6
Second next
turn preview
It shows the type of the second next manoeuvre if it is near the
first one. See page 16..
7
Next street
It displays the name of the next street. See
If you have not selected a route destination, you can see nearby
house numbers.
8
2D/2D North
up/3D views
You can switch between the 3D perspective, 2D Heading up,
and 2D North up map view modes. In Heading up mode the
map is rotated so its top always points in the current driving
direction. This is the default orientation in 3D map view mode. In
North up mode, the map faces North.
9
Traffic
It shows traffic-related information. See page 42.
10
Zoom
You can change how much of the map is displayed on the
screen. Alpine Navigation Stick uses maps that let you z oom in
and out on the map. See
11
Lane
information
On multi-lane roads, it shows the lanes ahead and their
directions. The highlighted arrows represent the lanes and
direction you need to take. See page 17.
12
Alert point
warning
It shows the type of the alert points when approaching Alert
Points like school zones or railroad crossings. You must make
sure that using this feature is legal in the country where you
intend to use it. See page 69.
x The estimated time of the arrival at the destination
x The remaining time of the trip
x The remaining distance to the destination.
page 70
page 16.
Page 10.
13
Page 14

13
Speed limit
warning
It shows the current speed limit of the road. See page 69.
14
Warning road
sign
It shows warning for the current road (for example, dangers,
sharp curves). See page 69.
15
Signpost
It shows the available destinations and the road numbers. See
page 17.
16
Motorway
services
By tapping it, you can check the details of the next few service
stations (petrol stations, restaurants) when travelling on a
motorway. See page 18.
17
Destination
menu
It appears near the destination. By tapping it, you can check the
trip summary, find Places around your final destination, save the
current location, or suspend the navigation.
18
Parking
around
destination
It appears near the destination. By tapping it, you can check the
available parking facilities around your destination. See page
59.
19
Additional
information
It shows the Motorway services, Parking around destination, or
the Destination menu button if they are available during
navigation.
20
Navigation
menu
By tapping it, you can open the Navigation menu, where you
can reach other parts of Alpine Navigation Stick.
21
Street name
It shows the current street name. By tapping it, you can open
the Where Am I screen. See page
22
3D objects
They display hills, mountains, roads, landmarks, and buildings
in 3D.
61.
By pressing the navigation hardkey button, you can open the Navigation menu, where you
can reach other parts of Alpine Navigation Stick.
If you are approaching a motorway exit or a complex intersection and the needed information
exists, the map is replaced with a 3D view of the junction. See page 18.
When entering a tunnel, the map is replaced with a generic tunnel image. See page 18.
14
Page 15
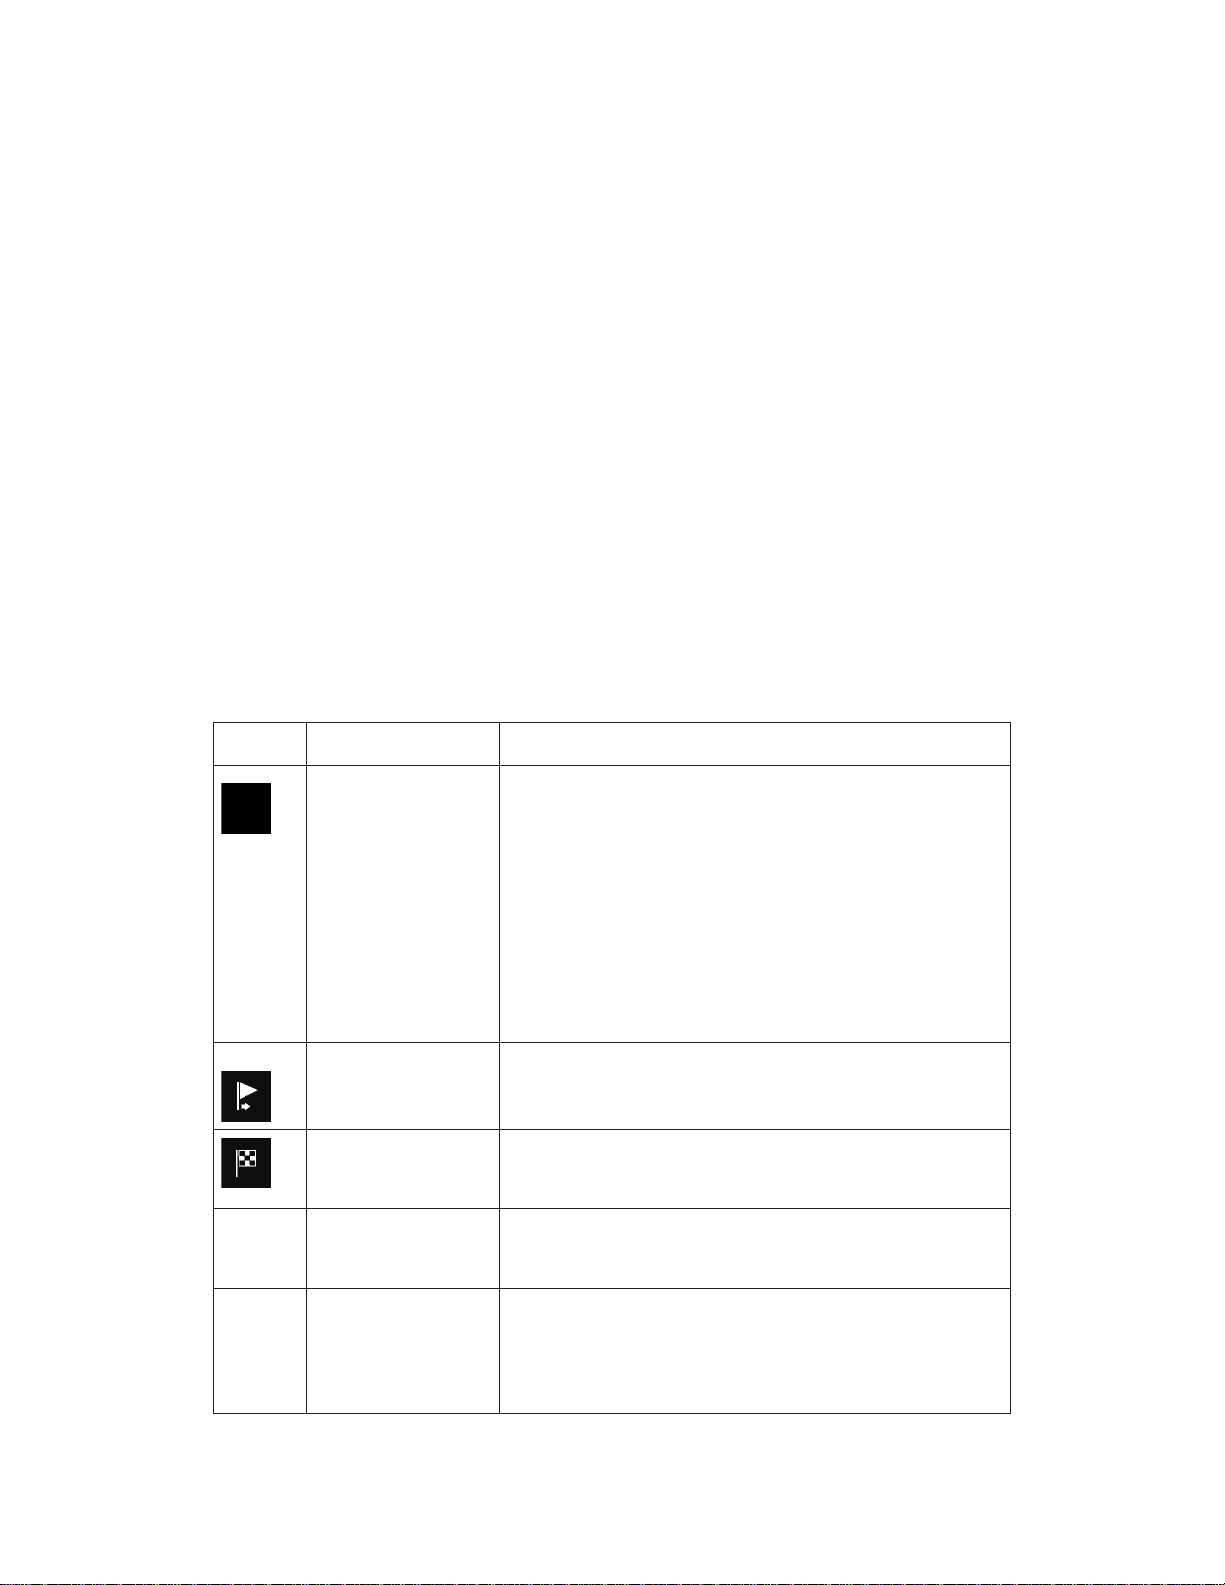
Symbol
Name
Description
Current GPS
position
and starting
point
It is your current position displayed on the map.
roads are near, the arrow jumps to the nearest road.
Normally, if GPS position is available, the rout e starts from
the current position. If there is no valid GPS position,
Alpine Navigation Stic k uses the l ast known position a s the
starting point.
Waypoint
(intermediate
destination)
It is an intermediate destination of the route before
reaching the final destination.
Destination (end
point)
It is the final destination of the route.
Route colour
The route always stands out with its colour on the map,
both in daytime and night colour modes.
Streets and roads
that are excluded
from the navigation
You can choose whether you want to use or avoid certain
road types (
Alpine Navigation
Stick cannot avoid such roads, the route includes them and
shows them in a colour that is different from the route
colour.
2.3.1 Streets and roads
Alpine Navigation Stick shows the streets similarly to paper road maps. Their width and
colours correspond to their importance; you can easily tell a motorway from a small street.
2.3.2 GPS position markers
When your GPS position is available, Alpine N avigation Stick marks your current position. By
default, this marker is a blue arrow. The dot near the arrow shows the GPS position as
perceived by the GPS receiver.
When on-road navigation is selected, the current position marker may not show y our exact
GPS position and heading. If roads are near, it is aligned to the nearest road to eliminate GPS
position errors, and the direction of the icon is aligned to the direction of the road.
If you select off-road navigation, the current position marker is at your exact GPS position.
The direction of the icon shows your current heading.
2.3.3 The planned route
The planned route is the currently navigate d route. W henever the destinat ion is set, the ro ute
is active until you delete it, reach your destination or suspend navigation. Alpine Navigation
Stick displays the route in the following ways:
x If a vehicle is selected for route calculation and
x The dot near the arrow shows the exact
GPS position.
page 64). However, when
15
Page 16

Streets and roads
that are affected by
traffic events
Road segments may be affected by traffic events. These
streets and roads are displayed in a different colour, and
small symbols displayed along the route show the type of
the traffic event.
Icon
Function
Turn left.
Turn right.
Turn back.
Bear right.
Turn sharp left.
Keep left.
Continue straight in the intersection.
2.3.4 Turn preview and next street
When navigating a route, the top s ection of the Navigatio n view shows informat ion about the
next route event (manoeuvre) and the next street or the next town.
There is a field in the top left corner displaying the next manoeuvre. Both the type of the
manoeuvre (turn, roundabout, ex iting motorway, and so on) and its distance from the current
position are displayed.
A smaller icon shows the type of the second next manoeuvre if it is near the first one.
Otherwise, only the next manoeuvre is displayed.
2.3.5 Manoeuvre icons
During navigation the next manoeuvre is displayed in the top left corner. Most of the
manoeuvre icons are intu itive. The following table lists some of th e frequently shown route
events:
16
Page 17

Enter the roundabout and take the first exit
(next manoeuvre).
Enter the roundabout (second next
manoeuvre).
Enter the motorway.
Exit the motorway.
Board the ferry.
Leave the ferry.
Approaching a waypoint on the right.
Approaching the destination.
2.3.6 Lane information and signposts
When navigating on multi -lane roads, it is important to take the appropriat e lane in order to
follow the planned route. If lane information is available in the map data, Alpine Navigation
Stick displays the lanes and their directions using small arrows at the bottom of the map.
Highlighted arrows represent the lanes and the direction you need to take.
Where additional information is available, arrows are replaced by signposts. Signposts are
displayed at the top of the map. The colour and style of t he signposts are similar to the real
ones you can see above roads or by roadsides. They show the av ailabl e dest inations and the
road numbers.
All signposts look sim ilar when cruising (when there is no planned route). During navigation
only the signpost that points to the lane(s) to be taken is highlighted; all the others are darker.
If you want to hide the currently displayed signposts, tap any of them and the normal
Navigation view returns until new signpost information is received.
You can modify the signpost settings in
. See page 70.
17
Page 18

2.3.7 Junction view
If you are approaching a motorway exit or a comp lex intersection and the n eeded information
exists, the map is replaced with a 3D v iew of the junction. The lanes you need to take are
displayed with arrows. At the top of the screen, road signs show you additional information.
If you want to hide the currently displayed juncti on and return to the Navigation view, tap the
picture.
Junction view can be turned off in
. See page 70.
2.3.8 Tunnel view
When entering a tunnel, the map is replaced with a generic tunnel image so that surface
roads and buildings cannot distract you.
The top-down overview of the tunnel displayed in a separate window helps you orientate
yourself. The remaining distance in the tunnel is also displayed.
After leaving the tunnel, the original map view returns.
Tunnel view can be turned off in
. See page 70.
2.3.9 Motorway services
When you are driving o n a motorway, th e button appears at the to p right corner of the
Navigation view. Tap it to open a pane l with th e det ails of the next few s ervice s tations (petro l
stations, restaurants).
18
Page 19

Type
Description
3D terrain
Alpine Navigation Stick dis plays 3D hills and mountains in the Navigation
view, and illustrates them by colouring and shading on the 2D map.
Elevated roads
Elevated roads are complex intersections and vertically isolated roads
(such as overpasses or bridges) displayed in 3D.
3D landmarks
Landmarks are 3D
3D buildings
3D buildings are block representations of full t own building dat a containing
actual building sizes and positions on the map.
Button
Description
It is displayed when traffic events are not received.
It is displayed when traffic events are received but they do not affect the planned
route.
It shows the type of the next traffic event w ith the expected delay.
It shows the type of the next traffic event if it d oes not cause any delay or the delay
is not known.
Tap any of them to display the exit area on the map. You can now easily add this service
station as a waypoint to your route if necessary.
If you want to display other types of Places at the next few service stations, you can change
the icons in
. See page 70.
2.3.10 3D object types
Alpine Navigation Stick supports the following 3D object types:
representations of prominent or well-known objects.
2.3.11 Traffic events
Road segments affected by traffic events are displayed in a different colour on the map.
The following icons may appear at the top right corner of the screen:
For more information, see page 42.
19
Page 20
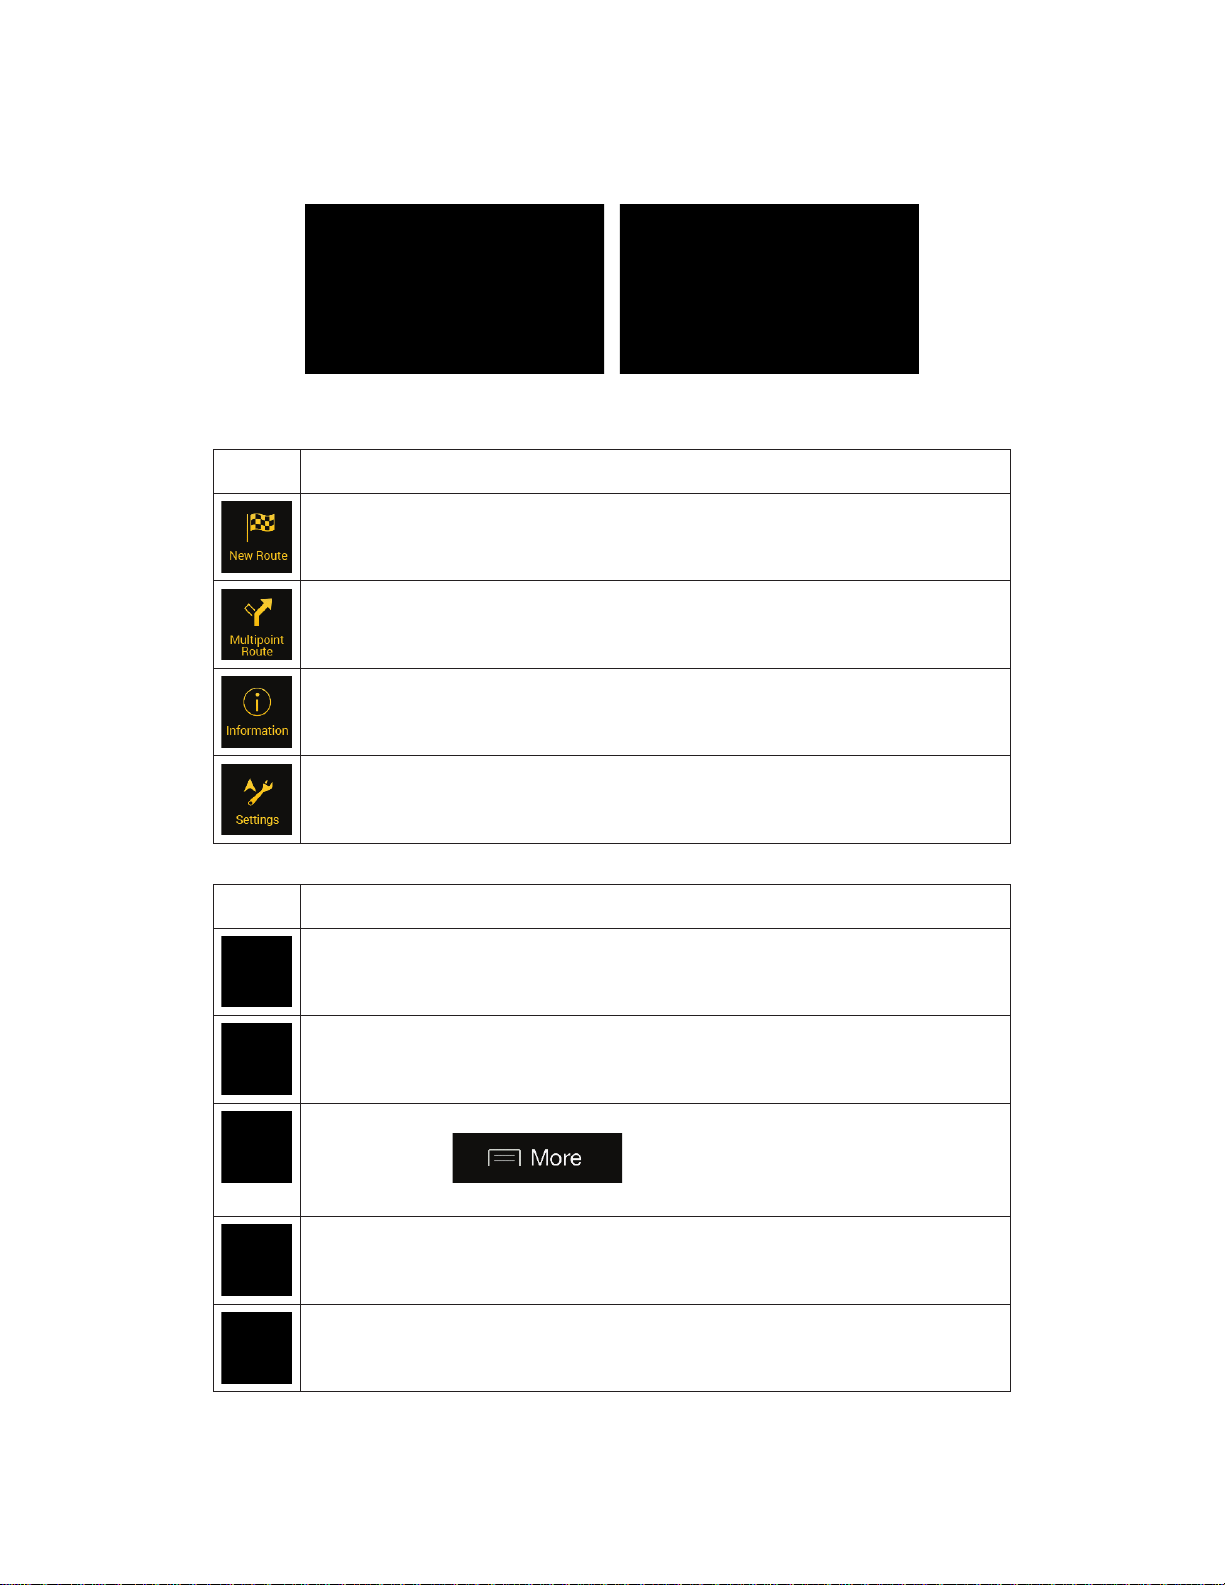
Button
Function
Select your destination by entering an address or its coordinate, or by selecting a
Place, a Saved Location, or a Saved Route. You can also look up your recent
destinations from the History.
Build your route from one or more route points. You can also plan a route
independently of your current GPS position by setting a new starting point.
Access additional options and check navigation-related information.
Customise the way the navigation software works.
Button
Function
Add an intermediate destination to your route.
See route alternatives to avoid parts of the route, or to avoid a specific road from
your planned route.
View the route in its full length on the map and check route parameters and route
alternatives. Tap
Simulation
or Route Preferences.
Delete your route.
Delete the next waypoint or the whole route.
2.4 Navigation menu
Press the navigation hardkey button to open the Navigation menu.
You can see the following menu options when you are navigating without a planned route:
With a planned route, the following menu options are also available:
to access additional options, like
20
Page 21

Button
Function
Tap the Menu button to return to the main menu.
The More button appears on the screen to display additional features.
Tap it to open the list of additional features on certain screens.
Tap the Back button to return to the previous screen. You can also
press and hold this button to quickly return to the Navigation view from
any other screen.
Stop the navigation and exit the software.
The following options are also available on many of the menu screens:
21
Page 22

3 Using the navigation
By default, Alpine Navigation Stick calculates routes using the road network of the maps
provided with the product.
You can select the destination an d start navigating to it right away (normal navigation) if you
need a route for immediate navigation.
You can also plan a route independently of your current GPS position even without GPS
reception. To achieve this, you need to set a new s tarting point in t he Multipoint Route m enu.
It also suspends guidance so that the route is not recalculated when a new position is
received. See Page 44.
You can plan routes with mult iple destinations by selecting a first a nd a second destination
and adding it to your route. You c an add as many des tinations to your route as y ou like. See
Page 40.
You can also use Alpine Navigation Stick for off-road navigation. See page 53.
3.1 Selecting a destination
You can choose your destination by selecting one of the following options:
x Using Freeform Search to search among different destination types at once, see page
22
x Entering a full address or a part of an address, for example a street name without a
house number, see page 24
x Selecting a Place as your destination, see page 28
x Selecting a Saved Location as your destination, see page 35
x Selecting a location from the History of previously used destinations, see page 36
x Selecting a previously saved route, see page 37
x Entering the coordinate of the destination, see page 38
x Selecting a location on the map, see page 39
x Planning a multipoint route, see page 40.
3.1.1 Using Freeform Search
There are several ways to select your destination. You can initiate a separate search for
addresses, Places, Saved Locations, or recent destinations, but the fastest way to search for
any of these is to use Freeform Search.
Perform the following steps to use Freeform Search:
1. Press the navigation hardkey button to access the Navigation menu.
22
Page 23

2. Tap
next to it you can see the search area, the town around which the search is carried out.
The default search area is the area where you are located. For a local search, skip the
next step.
3. (optional) To search in a different area, tap the input field with the search area, and
start entering the name of the new search area on the keyboard.
You only need to enter a few letters to get a result. The most likely result appears
below the input field as you enter new letters.
a. If the new search area is in a different country, start entering the country and the
town. It is usually enough to type the first few letters of the country or town and
conventional abbreviations can also be used.
b. Tap
4. With the proper search area displayed, start entering the name, address, or category of
the destination you are looking for.
. You can see the input field at the top of the screen. Right
to see the whole list of the matching results.
5. Tap
the list, regardless of their type. Addresses, Places, Place categories, Saved
Locations, and recent destinations are mixed in one list. You can immediately select
the result you want to use as your destination or narrow the list of results for only one
type (for example, Places).
6. If necessary, tap
narrow the list of search results by type (the number on the related icon shows the
number of the matching results):
x Tap
address.
to switch to the result screen. You can see all the results in
on the right side of the list and then tap the related button to
to see the list of recent destinations with a matching name or
23
Page 24
Tip!
To search for an intersection in the Freeform search, enter the names of the
streets connected by the '&' sign. You do not need to use spaces before and
after the separator character. For example you can find the intersection of
Collins Street and Douglas Avenue by entering strings, like "Collins St &
Douglas Ave", "Collins & Douglas", "Col&Doug", etc. The more precise the
input string is, the fewer false results are expected. If you enter "Collins St&",
you get all the intersections of Collins Street and you can select the
appropriate one from the result list.
x Tap
x Tap
x Tap
select one of the categories. You get the list of Places in that category ordered
by their distance from your current position.
x Tap
current location.
x (optional) If your product contains Places from different data providers, you can
further narrow the list by showing the results from one provider only. Look for
the provider logos. Tap one of them to see Places from that provider.
7. The route is calculated and the map appears showing the entire route, where you can
to see the list of your saved locations with a matching name.
to see the list of matching addresses.
to see the list of matching Place category names. Scroll the list and
to see the list of matching Places ordered by their distance from your
check route information and route alternatives. Tap
route parameters, or tap
to start your journey.
to modify the
3.1.2 Selecting an address
If you know at least a part of the address, this is the quickest way to select your destination.
Using the same screen, you can find an address by entering the following information:
x The exact address, including the house number, see page 25
x The centre of a town, see page 26
x The midpoint of a street, see page 27
x An intersection, see page 27
x Any of the above, starting the search with the postal code, see page 27.
24
Page 25

3.1.2.1 Entering an address
To enter an address as the destination, perform the following steps:
1. Press the navigation hardkey button to access the Navigation menu.
2. Tap
3. Select the country by performing the following steps:
a. By default, the Alpine Navigation Stick proposes the country where you are or in
b. Start entering the first few letters of the country. The names that match the
c. To open the list, tap
4. Select a new town or postcode by performing the following steps:
a. Tap
b. To open the list, tap
.
case there is no valid GPS position, the country of the last known position. If
needed, tap
string appear in a list.
and start entering the first few letters of the town or the
first few numbers of the postcode. The names that match the string appear in a
list.
.
, and select the country.
, and select the town or postcode.
5. Enter the street name and the house number or crossing street by performing the
following steps:
a. Start entering the street name on the keyboard. The names that match the
string appear in a list.
b. Tap
c. Enter the house number or crossing street on the keyboard. (To enter letters,
tap
.)
to open the list of results. Select the street from the list.
25
Page 26

d. Tap the selected address to finish the addres s search.
6. The route is calculated and the map appears showing the entire route, where you can
check route information and route alternatives. Tap
route parameters, or tap
to start your journey.
to modify the
3.1.2.2 Selecting a town centre
The town centre is not the geometric centre of the town but an arbitrary point the map
creators have chosen. In towns and vi llages, it is usually the most important intersection and
in larger towns, it is one of the important intersections.
1. Press the navigation hardkey button to access the Navigation menu.
2. Go to
3. Select a new town or postcode by performing the following steps:
and modify the country as described earlier (page 25), if necessary.
a. Tap
first few numbers of the postcode. The names that match the string appear in a
list.
b. To open the list, tap
and start entering the first few letters of the town or the
, and select the town or postcode.
26
Page 27

3.1.2.3 Selecting the midpoint of a street or an intersection
To navigate to the midpoint of a street without entering the house number, perform the
following steps:
1. Press the navigation hardkey button to access the Navigation menu.
2. Go to
3. Tap
names that match the string appear in a list.
4. Tap
5. Instead of entering the house number, do one of the following:
x to select the midpoint of a street, tap the line “Go to ... centre” (where “...” is the
name of the selected street).
x to select an intersection, tap the name of the other street from the list under the
title “Crossing Streets”.
, and select the street name field.
and start entering the street name on the keyboard. The
to open the list of results. Select the street from the list.
3.1.2.4 Using the postcode to select a destination
You can also select any kin d of d estin at ion by entering the postcode instead of th e city na me.
To select the postcode, perform the following steps:
1. Go to
2. Tap
3. Tap
and modify the country as described earlier (page 25), if necessary.
.
to open the numeric keypad and start entering the postcode.
27
Page 28

4. Tap
5. Continue the search as described previously (page 25).
to open the list of results. Select the postcode from the list.
3.1.3 Selecting a Place of Interest
You can search for Places of Interest (Places) in the menu.
Using the same screen, you can find a Place by selecting one of the following options:
x Finding frequently searched types of Places with the Quick search categories, see
page 28
x Searching for a Place by its name, see page 31
x Searching for a Place by its category, see page 30
In case of emergency, you can also find help nearby, see page 34
3.1.3.1 Using Quick search categories
The Quick search feature helps you quickly find the most frequently selected types of Places.
Perform the following steps:
1. Press the navigation hardkey button to access the Navigation menu.
2. Tap
The following Quick search categories appear:
.
x
around the destination. This includes Bordatlas POIs, iGO Camping POIs and
Park4Night POIs. For details, see page Page 33.
: If a planned route exists, campings are searched
28
Page 29
x
along the route
x
around the destination.
x
along the route.
x
around the destination.
If there is no planned route (destination is not selected), the search is carried out
around the current position. If the current position is not available either (no GPS
signal), places are searched around the last known position.
3. Tap any of the quick search buttons to get an instant list of Places.
: If a planned route exists, petrol stations are searched
: If a planned route exists, accommodation is searched
: If a planned route exists, restaurants are searched
: If a planned route exists, parking lots are searched
4. The Places in the list can be ordered by their distance from the current or last known
position, from the destination, or by the length of the necessary detour. If you need to
reorder the list, tap
5. (optional) If needed, tap
6. Browse the list and tap one of the list items.
7. The route is calculated and the map appears showing the entire route, where you can
check route information and route alternatives. Tap
route parameters, or tap
.
to further filter the list of results.
to modify the
to start your journey.
29
Page 30
3.1.3.2 Searching by category
To search for Places by their categories and subcategories, perform the following steps:
1. Press the navigation hardkey button to access the Navigation menu.
2. Tap
3. Select the area around which you would like to search for the Place by tapping
is not available, around the last known position). In this case, the following result list is
ordered by the distance from this position.
x Tap
x Tap
x Tap
and .
. By default, the search area is around the current position (or if it
to search along the planned route, and not around a
given point. This is useful when you search for a later stopover that results in a
minimal detour only, such as searching for upcoming petrol stations or
restaurants. (The result list is ordered by the length of the necessary detour.)
to search for a place around the destination of the
planned route. (The result list is ordered by the distance from the destination.)
to search for a place within a selected town. (The
result list is ordered by the distance from the centre of the selected town.)
4. (optional) If you have selected
5. Select one of the main Place categories (for example, Accommodation), then browse
the subcategories (for example, Hotel or Motel) to find your destination.
30
, select the town to search in.
Page 31
6. You can turn the Category View off at any level to list all Places around the selected
location or along the route.
7. (optional) The Places in the list can be ordered by the following criteria:
x Name
x Their distance from the current or last known position
x Their distance from the selected town
x Their distance from the destination
x The length of the necessary detour.
Tap
8. Browse the list and tap one of the list items. A full screen map appears with the
selected point in the middle.
9. The process continues the same way as in case of any other search for Places. See
page 28.
to reorder the list.
3.1.3.3 Searching by name
To search for a Place by name, browse the various Place categories, or use the mixture of
the two search types, perform the following steps:
1. Press the navigation hardkey button to access the Navigation menu.
2. Tap
window.
3. Select the area around which you would like to search for the Place. By default, the
search area is around the current position (or if it is not available, around the last
known position). In this case, the result list is ordered by the distance from this
position. Tap
and to open the Search By Name or Category
to select one of the following search areas:
x Tap
result list is ordered by the distance from the centre of the selected town.)
x Tap
planned route. (The result list is ordered by the distance from the destination.)
to search for a place within a selected town. (The
to search for a place around the destination of the
31
Page 32

x Tap
given position. This is useful when you search for a later stopover that results in
a minimal detour only, such as searching for upcoming petrol stations s or
restaurants. (The result list is ordered by the length of the necessary detour.)
4. (optional) If you have selected
You can search for the name of a Place in all categories by performing the following steps:
to search along the planned route, and not around a
, select the town to search in.
1. Tap
browse in the categories.
2. After entering a few letters, tap
categories with names containing the entered character sequence.
3. Browse the list, if necessary, and tap the desired list item. A full screen map appears
with the selected point in the middle. The process continues the same way as in case
of any other Places search. See page 28.
. Using the keyboard, start en tering the name of t he Place or
to open the list of Places or Place
32
Page 33

3.1.3.4 Park4Night Camping POIs
Your Alpine Navigat ion Stick is spec ially equipped with exten ded points of interest related to
camping. To find detailed information about camping POIs, perform the following steps:
1. Press the navigation hardkey button to access the Navigation menu.
2. Tap
3. In the Quick search categories, tap
Camping contains Bordatlas POIs, iGO Camping POIs and Park4Night POIs.
4. Tap
types of parking spaces and user r atings.
.
.
. POIs in this category offer you additional information such as
5. Tap the name of a POI in the list. Park4Night place information shows available
services and features of the selected location.
The full address information and, when available, the phone number are displayed.
33
Page 34

You can call the location directly by pressing the
On the Place Information screen, you have the following additional options:
a. Tap
which you can select with the arrow keys next to the country flag.
b. Tap
photos, these can be selected with the arrow keys.
to read multilingual user comments on the localities,
to get photos taken by users. If there are several
button.
3.1.3.5 Finding help nearby
To quickly search for nearby assistance, perform the following steps:
1. Press the navigation hardkey button to access the Navigation menu.
2. Tap
and .
34
Page 35

Places in the following pre-set search categories can be searched for around the
current position (or around the last known position if the current position is not
available):
x
x
x
x
3. Tap any of the quick search buttons to get an instant list of those types of Places.
4. (optional) The Places in the list can be ordered by the following criteria:
x By their distance from the current or last known position
x By name.
: Car repair and roadside assistance services
: Medical and emergency services
: Police stations
: Petrol stations
Tap
5. Browse the list and tap one of the list items. A full screen map appears with the
selected point in the middle.
6. The process continues the same way as in case of any other Places search. See page
28.
to reorder the list.
3.1.4 Selecting a Saved Location
To select a location that you have already saved (page 49), perform the following steps:
1. Press the navigation hardkey button to access the Navigation menu.
2. Tap
.
35
Page 36

3. The list of Saved Locations is displayed. It contains two pre-set categories: Home and
Work.
4. Tap the location that you want to set as your destination. If necessary, browse the list
to see more results.
5. (optional) If needed, tap
can rename the Saved Locations or delete any of them.
6. The route is calculated and the map appears showing the entire route, where you can
check route information and route alternatives. Tap
route parameters, or tap
to enable the editing option so that you
to modify the
to start your journey.
3.1.5 Selecting a History item
The destinations that you have use d earlier appear in the History list. Smart History offers
these locations from your previous destinatio ns, using param eters like the curren t time of d ay,
the day of week, and the current location. The more you use the navigation software, the
better it can guess your desired destination. To s elect a History item, perform the following
steps:
1. Press the navigation hardkey button to access the Navigation menu.
2. To open all the History items, tap
The list begins with the three most likely destinations that are selected based on your
previous routes (Smart History). The rest of the destinations are ordered by the time
they were last selected. If necessary, scroll the list to see earlier destinations.
3. Select a destination from the list.
. The list of recent destinations appears.
36
Page 37

4. The route is calculated and the map appears showing the entire route, where you can
check route information and route alternatives. Tap
route parameters, or tap
Three of the Smart History Items are displayed in the History sc reen for easy access.
You can select one of them as your destination.
to start your journey.
to modify the
3.1.6 Selecting a saved route
The routes that you have saved earlier appe ar in a list. To select a previous route, perform
the following steps:
1. Press the navigation hardkey button to access the Navigation menu.
2. Tap
3. The list of saved routes appears. If necessary, scroll the list to see earlier routes.
4. Select a route and the Multipoint Route screen appears. If necessary, modify the saved
route. Otherwise, tap
.
.
37
Page 38
Tip!
(optional) If necessary, tap
and enter the coordinate in UTM format.
5. The route is calculated and the map appears showing the entire route, where you can
check route information and route alternatives. Tap
route parameters, or tap
to start your journey.
to modify the
3.1.7 Entering coordinates
To select a destination by entering its coordinates, perform the following steps:
1. Press the navigation hardkey button to access the Navigation menu.
2. Tap
3. You can enter the latitude and longitude values in any of the following formats: decimal
degrees, degrees and decimal minutes, or degrees, minutes and decimal seconds.
.
Tap
.
then
38
Page 39
Tip!
If you already have a planned route, tap
4. The route is calculated and the map appears showing the entire route, where you can
check route information and route alternatives. Tap
route parameters, or tap
to start your journey.
3.1.8 Selecting a location on the map
To select a map location, perform the following steps:
1. Locate your destination on the map. Move and scale the map as necessary.
to modify the
2. Tap the location that you want to select as your destination. The cursor (
appears there.
3. (optional) If needed, tap
or to save this location.
to add the selected location to your route.
4. Tap to select the cursor as the destination.
to list the Places near the selected point
and
)
39
Page 40

5. The route is calculated and the map appears showing the entire route, where you can
check route information and route alternatives. Tap
route parameters, or tap
to start your journey.
3.1.9 Planning a Multipoint Route
To build your route destination-by-destination, perform the following steps:
1. Press the navigation hardkey button to access the Navigation menu.
2. Tap
.
to modify the
3. There is only one line in the list of route points, the starting point of the route, which is
normally the current GPS position.
4. Tap
5. The New Route to... screen appears, where you can select the destination of the route
the same way as described in the previous sections.
to select the destination.
40
Page 41
6. If needed, you can add further intermediate destinations.
7. To add more route points, tap
change the final destination. The Add to Route... menu appears again, where you can
select the new route point the same way as you have set the destination before.
8. (optional) Tap
waypoints. You can also delete all the destinations.
9. When you have added all the route points, tap
route is automatically calculated.
to optimise the whole route or the order of
or tap to
and the planned
3.2 Checking Route Information and Alternatives
To get a map overview of the planned route an d check different parameters of the planned
route, perform the following steps:
1. Press the navigation hardkey button to access the Navigation menu.
2. In the Navigation menu, tap
3. The planned route is displayed in its full length on the map with the following additional
information:
.
x The total length of route
x The total time of route.
41
Page 42

4. You have the following options on this screen:
x Tap
If you tap
the route information, for example to show only motorway sections or toll roads.
x Tap
route for you.
to receive detailed information about the route.
on the right side of the sc reen, you can narrow
to list route alternatives and select the most suitable
Tap
example edit your route preferences or display the itinerary.
on the Route Summary screen to carr y out additional actions, for
3.3 Checking Traffic Events
Offline statistical traffic information (historical speed information or traffic patterns) can be
taken into account in the route calculation base d on the time of day and the day of week if
suitable data can be found on the device. In addition, real-time traffic information can help you
avoid current traffic events like temporary road closure s or traffic jams ca used by an accident.
Both functions are subject to data availability.
For information on traffic icons, see page 19.
Road segments affected by traffic events are d isplayed in a different colour on the map, and
small symbols above the road show the nature of the event.
To check the traffic summary, perform the following steps:
42
Page 43

1. On the Navigation view, tap the traffic icon in the corner (for example,
the Traffic Summary screen.
2. If there is at least one significant event on the planned route, a description is displayed
about the next event. Tap
3. Tap any of the list items to see its details and to display the affected road segment in
its full length on the map.
to see the list of all events.
) to open
To display real-time traffic information on the map, perform the following steps:
1. On the Navigation view, tap the traffic icon (for example,
summary screen and t ap
2. Tap
with road segments coloured by the impact on the traffic flow.
to display real-time traffic information on the map. A 2D map is displayed
.
) to open the Traffic
43
Page 44

3. Tap
segments coloured by the likely density of the traffic in the given period. The
information relevant for the current period is shown when you open the screen. If
necessary, you can browse the map for a better view of certain road segments. Modify
the day of week and the time of day to see the desired period.
to display historical traffic information. A 2D map is displayed with road
3.4 Editing the route
When navigation has already started, there are several ways to modify the planned route.
You have the following options:
x Setting a new starting point, see page 44
x Adding an additional destination, see page 45
x Modifying the list of destinations, see page 46
x Saving the planned route, see page 46
x Deleting the planned route, see page 47
x Selecting a route alternative when planning the route, see page 47
x Selecting a route alternative for an ex isting route, see page 48
3.4.1 Setting a new starting point
For normal navigation, all routes are calculated from the current position. You can pause
navigation to check future routes, simulate them or see their length in time and distance. Then
you can set the starting point of the route to a location other than the current GPS position.
1. Press the navigation hardkey button to access the Navigation menu.
2. In the Navigation menu, tap
.
44
Page 45
3. The first line from the bottom is the start of the route, normally the current GPS
position. Tap
at the warning message.
4. The Change Start to... screen appears. Select the starting point of the route the same
way you select a destination.
5. The Multipoint Route screen appears where you can continue adding a destination to
your route.
6. Tap
marker (showing that there is no GPS reception). If a planned route already exists, it is
now recalculated starting from the selected location.
to continue. The map returns with a transparent position
, select , and confirm your action
7. To return to normal navigation, enter the main menu and tap
.
3.4.2 Adding an additional destination
If you already have a planned route and you select a new destination as desc ribed in the
above sections, the route to the previous destination is deleted and a new route is calculated.
To add a new intermediate destination to the planned route, perform one of the following
actions:
x Tap the map anywhere to browse it. After selecting the location on the map, tap
and to add the selected location to your
route as an intermediate destination. The other destinations of the route remain intact.
45
Page 46
x Press the navigation hardkey button and tap
as described on page 40.
. Add a destination to your route
3.4.3 Modifying the list of destinations
To edit your route, perform the following steps:
1. Press the navigation hardkey button to access the Navigation menu.
2. In the Navigation menu, tap
You have the following options on this screen:
x Tap
or the route.
.
to delete all the destinations, or optimise the waypoints
x Tap the name of the intermediate destinatio n to move it up or down in the list, to
save the location, or to delete it from the list.
x If you have a route with at least one intermediate destination, you can delete the
waypoint from the list by tapping on it or by going to the Navigation menu. Tap
in the Navigation menu, then confirm the deletion.
3.4.4 Saving the planned route
To save the planned route, perform the following steps:
1. Select a destination as described earlier and tap
.
2. Tap
and .
46
Page 47

3. Type in a name and tap
4. The route is saved and it is available in
By selecting a previously saved route, Alpine Navigation Stick recalculates the route using the
saved destination and/or the waypoints.
.
.
3.4.5 Deleting the planned route
You have the following two options to delete the navigated route:
x If you already have a planned route and you select a new destination as described in
the above sections, the route to the previous destination is automatically deleted and a
new route is calculated.
x In the Navigation menu, tap
planned route is deleted after a confirmation. If you have waypoints, you can choose to
delete the whole route, or only the next waypoint.
or . If there are no waypoints, the
3.4.6 Selecting a route alternative when planning the route
To select from different route alternatives or change th e route p lanni ng m eth od aft er y ou hav e
selected a new destination, perform the following steps:
1. Select a destination as explained earlier, and go to the route confirmation screen.
47
Page 48
2. Tap
3. You can see the basic details of route alternatives. Tap any of them to see it on the
map.
4. To view more suggestions, tap
alternative routes with different route planning methods.
5. Select one of the route alternatives and tap
previous screen. Alpine Navigation Stick recalculates the route. Tap
.
and scroll down for other
to return to the
to start your journey. The orange line now shows the new planned
route.
3.4.7 Selecting a route alternative for an existing route
To recalculate the planned route with a different route planning method and to compare
different route alternatives, perform the following steps:
1. Press the navigation hardkey button to access the Navigation menu.
2. You can access the list of route alternatives from the Navigation menu in one of the
following ways:
x Tap
x Tap
and .
and .
48
Page 49
3. You can see the basic details of a few route alternatives. Tap any of them to see it on
the map.
If there are suitable alternatives calculated with the route planning method that is
selected in Route preferences (page 64), they are sho wn o n t op of the list. Routes with
other route planning methods are shown at the bottom of the list.
4. If there are more than a few suggestions, you can tap
down for routes.
5. Select one of the route alternatives and tap
previous screen. Alpine Navigation Stick replaces the original route. Tap
to start your journey. The orange line now shows the new planned
route.
to return to the
and scroll
3.5 Saving a location
To add any location to the saved locations (the list of frequently used destinations), perform
the following steps:
1. Select a destination as described before. It can be an address, a Place, any location
on the map, a previously used destination from History, and so on.
2. When the map appears with the route, tap
3. Tap
.
49
.
Page 50
Note!
In Saved Locations, Home and Work cannot be renamed. To change your
home or work location, tap
, and
confirm the address change.
4. (optional) Using the keyboard, you can change the name offered for the Saved
Location.
5. Tap
To add your home and work address to the saved locations, perform the following steps:
1. Press the navigation hardkey button, and tap
2. Tap
your selection.
3. You can search for the address as described on page 22.
Planning a route to one of the saved locations is described on page 35.
to save the location.
on the Navigation view .
or . Tap to confirm
3.5.1 Editing a Saved Location
To edit a location that you have already added as a Saved Location, perform the f ollowing
steps:
1. Press the navigation hardkey button, and tap
2. The list of Saved Locations is displayed.
.
3. Tap
4. Tap the location you want to edit, tap
location on the keyboard, then tap
and .
50
and enter the name of the
.
or
Page 51
Note!
The warning for road safety cameras is disabled when you are in a country
where road safety camera warning is prohibited. However, you must make
sure that using this feature is legal in the country where you intend to use it.
5. Tap
Adding a location to the list of Saved Locations is described on page 49.
.
3.6 Adding an Alert Point
You can save any map location as an Alert Point, for example a speed camera or a school
zone.
1. If you would like to save an Alert Point for the first time, switch on the
. In the Navigation menu, tap , , then
. Switch on and confirm your selection.
2. Return to the Navigation view, and select the Alert Point. The red cursor ( )
appears there.
3. Tap
4. Scroll down the list and tap
5. Select the type of the Alert Point, the direction from which you expect the alert, and (if
applicable) the speed limit for this Alert Point.
.
.
6. Tap
to save the location as a new Alert Point.
51
Page 52

3.7 Running a Simulation
To run a simulated navigation that demonstrates the planned route, perform the following
steps:
1. Press the navigation hardkey button to access the Navigation menu.
2. In the Navigation menu, tap
3. Tap
4. Tap
leads you through the whole planned route using a realistic speed.
.
. The simulation starts from the starting point of the route and
.
(optional) You have the following controls during the simulation (the control buttons
disappear after a few seconds but you can open them again if you tap the map):
x
x
x
x
5. Tap
: Jump to the next route event (manoeuvre).
: Pause the simulation.
: Jump to the previous route event (manoeuvre).
: Tap to increase the speed of the simulation to 4, 8 or 16 times faster.
Tap again to return to normal speed.
to stop the simulation.
52
Page 53
Note!
If you do not want to use off
road navigation by
tapping
3.8 Off-road navigation
When first started, Alpine Navigation Stick calculates routes using the road network of the
maps provided with the product. If you want to disregard roads during navigation, you can
switch to off-road mode, for examp le when driv ing in a des ert.
3.8.1 Switching to off-road navigation
To switch to off-road navigation, perform the following steps:
1. Press the navigation hardkey button, and tap
2. Tap
Most of the procedures described for on-road navigation also apply to off-road navigation.
However, there are some that are not available in this navigation mode. For example:
x You cannot open the itinerary as you have no manoeuvres just route points and
straight lines between them.
x There are no route alternatives and route planning method.
x Vehicle settings are disabled.
and select .
, and .
3.8.2 Selecting the destination in off-road mode
Selecting a destination (waypoint or final destination) is the same as described in the previous
sections. The only difference is t hat route poin ts are linked to form a r oute with straight lines
regardless of the road network and traffic regulations.
3.8.3 Navigating in off-road mode
The real difference between on-roa d and off-road modes is the navigation itself . When you
are on the Navigation view with an off-road route:
x Your position and heading is not a ligned to the nearest road.
x There is no turn-by-turn navigation, just a recommended direction.
You can see an orange line drawn between your curr ent position and the next destination to
reach. The Turn Preview field in the top left corner shows a compass with your bearing and
the distance of the next destination.
When you reach the final destination, the navigation ends.
-road navigation, switch back to on-
and .
53
Page 54

3.9 Updating the navigation software and the maps
To update your navigation software and its maps, you need a PC equipped with the following:
• Microsoft Windows® operating system (Windows XP Service Pack 2 or later)
• Internet connection
• USB port
To perform the update, follow these steps:
1. Download and install the Toolbox PC tool on your PC.
a. Go to the alpine.naviextras.com website. If you do not have a user account
yet, create one.
b. Click Download Naviextras Toolbox on the right side of the pag e to access
the download page.
c. Follow the instructions on the site to download and install the Toolbox PC tool
on your PC.
2. Plug in your ALPINE Navi Stick to a USB port on your PC.
3. Download updates with Naviextras Toolbox.
a. Start Naviextras Toolbox on your PC and sign in with your Naviextras user
name and password.
b. Use the Naviextras Toolbox to download updates and to purchase add itional
extras at your convenience. For detailed instructions on using Naviextras
Toolbox, see the “How to update?” guide at alpine.naviextras.com.
4. Remove the ALPINE Navi Stick safely from your PC, and plug it back into your Alpine
infotainment system
54
Page 55

4 Reference guide
The following sections describe th e d ifferent c onc e pts and m enu s cr eens of A lp ine Navig ation
Stick.
4.1 Concepts
The following sections describe and explain navigation -related concepts.
4.1.1 2D/3D GPS reception
The GPS receiver uses satellite signals to calculate its (your) position and needs at least four
signals to give a three-dimensional position, includ ing elevation. Because the satellites are
moving and because objects can block the signa ls, your GPS device might not receive four
signals. If three satellites ar e ava ilable, t he receiv er can c alculate the h orizonta l GPS pos ition
but the accuracy is lower and the GPS device does not give you elevation data; only 2D
reception is possible.
Several factors have an impact on the devia tion bet ween yo ur real position a nd the one giv en
by the GPS device. For example, signal delay in the ionosphere or reflecting o bjects near the
GPS device have a different and varying impact on how accurately the GPS device can
calculate your position.
4.1.2 Natural and TTS voices
Natural voices are the traditional type of voice instructions. Every phrase t hat occur s in voice
guidance messages is recorded in a studio with a real person. The advantage of pre-recorded
voice is that it sounds rea lly natural, but the range of instructions that can be given this way is
limited. Location-specific information such as street names cannot be announced.
TTS technology provides a machine - generated way to give voic e instructions . The adv antage
of TTS is that it can announce street names, traffic events, route summary, and traffic rules.
4.1.3 Alert Points
There is a proximity warning for special location s such as schools or railroad crossings. You
can add your own Alert Points. See page 51.
The following warning types are available:
x Audio warning: beeps are played (if the voice guidance language that you selected is a
natural voice) or the type of the alert can be announced (TTS voice) while you are
approaching one of these points, and an extra alert warns you if you exceed the given
speed limit while approaching.
x Visual warning: the type of the Alert Point, its distance and the related speed limit
appear on the Navigation view while you are approaching one of these locations.
55
Page 56

For some of the Alert Points, either the enforced or expected speed limit is available. For
these points, the audio alert can be different if you are below or above the given speed limit.
x Only when speeding: The audio a lert is only played when you exceed the given speed
limit.
x When approaching: The audio alert is always played when approaching one of these
Alert Points. In order to draw your attention, the alert is different when you exceed the
speed limit.
4.1.4 Route calculation and recalculation
A route is a sequence of route events, that is, manoeuvres (for example, turns and
roundabouts) to reach the destination. The route c ontains one starting point and one or more
destinations. The starting point is the current (or last known) position by default. If you need to
see a future route, the starting point can be replaced with any other given point. See page 44.
Once the destination has been selected, Alpine Navigation Stick calculates the route based
on your preferences. These preferences are the route planning method, the veh icle type, and
the road types used or avoided when calculating th e route. F or detailed inf ormation on all the
preferences, see Route preferences settings, page 64.
Real-time traffic events are also taken into account, which sometimes greatly modify the
route. See page 57.
Alpine Navigation Stick automatically recalculates the route if you deviate from the proposed
itinerary.
If traffic services are enabled, Alpine Navigation Stick considers real-time dynamic traffic
information in route calculation and may also recalculate the route if the traffic situation
changes during navigation.
4.1.5 Smart Zoom
Smart Zoom provides the following features:
x While following a route: When approaching a turn, it zooms in and raises the view
angle to let you easily recognise your next manoeuvre. If the next turn is at a distance,
it zooms out and lowers the view angle to be flat so you can see the road in front of
you.
x While driving without a planned route: Smart Zoom zooms in if you drive slowly and
zooms out when you drive at a high speed.
4.1.6 Speed limit warning
Maps may contain information about th e spe ed limits of the road segments. Alpine Navigation
Stick is able to warn you if you exceed the current limit. This information may not be available
for your region, or may not be fully correct for all roads on the map.
The maximum speed set in the vehicle profile (page 64) is also used for this warning. Alpine
Navigation Stick alerts you if you exceed the pre-set value even if the legal speed limit is
higher.
Speed warning can be fine-tuned in Warnings. See page 69.
You can also set the relative speed tolerance above which the application initiates the
warning.
56
Page 57

Note!
If there are traffic events on the planned route that the application has not
bypassed, the
icon opens the list of significant traffic events to let you quickly
check them.
The following warning types are available:
x Audio warning: You receive a verbal warning when you exceed the speed limit with the
given percentage.
x Visual warning: The current speed limit is shown on the map when you exceed it (for
example
You can also choose to see the speed limit sign on the map all the time.
).
4.1.7 Historical traffic
If statistical traffic information is stored with the m ap data, Alpine Navigation Stick can take
them into account when planning a r oute. In normal cases, these statistics help you avoid
usual traffic jams on the given day of w eek in t he given hour b ut in some cases li ke on public
holidays that fall on normal weekdays , th ey can b e m isl ead ing. Yo u c an enable or disable this
feature in Traffic settings. See page 73.
4.1.8 Real-time traffic
Real-time traffic information can provide you with the current status of the traffic. Route
calculation can avoid road blocks or unexpected traffic jams caused by an accident.
The application automatically takes account of the traffic events received. You do not nee d to
set anything in Alpine Navigation Stick.
When Alpine Navigation St ick receives traffic in formation that may affect yo ur route, it warns
you that it is recalculating the route. The navigation continues with a new optimal route
considering the most up-to-date traffic conditions.
For information on traffic icons, see page 19.
To fine-tune this service, you have the following options in Traffic settings (page 73):
x Set the minimum amount of time that you think is worth saving at the cost of a detour.
x Instruct Alpine Navigation Stick to have you confirm the new planned route before it
takes effect.
57
Page 58
4.1.9 Intelligent navigation
With the help of intelligent navigation, the planned route can adapt to traffic and other
changes during navigation. The following sections describe these features.
4.1.9.1 Congestion detour on highways
Alpine Navigation Stick may offer a det our when yo u slow down on a h ighway due to a traffic
jam. The Potential congestion detour win dow appears and shows the le ngth and duration of
the detour.
You can ignore this message and keep the original route by tapping
you can check the suggested route by tapping
By tapping the plus/minus signs, you can increase or decrease the distance to avoid on the
highway.
You can accept the recommended detour by tapping
.
.
or
4.1.9.2 Real-time alternative routes
Alpine Navigation Stick may offer an alternative route on n orma l ro ads in case of a traffic jam.
The possible alternative route window appears and shows the length and duration of the
detour.
58
Page 59
You can ignore this message and keep the original route by tapping
you can check the suggested route by tapping
recommended detour by tapping
.
. You can accept the
or
4.1.9.3 Parking around destination
If you leave the planned route by exitin g a motorway, Alpine Navigation Stick tries to guess
the reason for making a detour. By tapping
recommended parking Places around the destination. By tapping the arrows on the sides, you
can switch between the recommended parking facilities.
, you can open a top-dow n map with the
By tapping
becomes your destination.
and , the selected parking place
4.1.9.4 Hints upon detour
If you leave the planned route by exitin g a motorway, Alpine Navigation Stick tries to guess
the reason for making a detour. T he Reaso n for detou r window ap pears and shows availabl e
petrol stations, restaurants or other Places around the current position. Also, if there are
avoidable parts of the original route ahead (like a t unnel, a toll road or a ferry), you can f ind
them in the list, in case you want to bypass them.
By tapping one of the Places, Al pine Navigation Stick c reates a waypoint and navigates y ou
to the selected place. You can ignore them by tapping
.
59
Page 60

Button
Description
Shows information on the current position ( lat itud e, lon gitude, nearest town, next
crossing street, and so on) or the last known position if GPS reception is not
available. See page 61.
Offers assistance near your current position. See
Offers a list of countries with useful driving information about the selected country
(for example speed limits, maximum blood alcohol level).
Shows statistical data of your trips, like the start time, end time and average speed,
see
. Track logs, the sequence of the pos itions given by t he GPS receive r,
can be saved together with the trip logs. They can later be displayed on the map.
Shows a world map with the sunlit and dark areas of the world. Tap
to check the exact sunrise and sunset times for all your route
points.
Shows the version of Alpine Navigation Stick, licenses, content, demo routes,
credits, statistics, and the SWID.
4.2 Information menu
The Information menu provides vari ous additional functions. I t can be fo und in the Naviga tion
menu. You need an Interne t connection via your mobil e phone to access online s ervices, like
parking and weather information.
page 34.
page 61
60
Page 61

4.2.1 Where Am I
This screen contains information about the curr ent p osition (or about the last known position if
GPS reception is not available). You can access it the following two ways:
x By going to the Navigation menu and tapping
x By tapping the current street name if it is displayed below the current position marker
on the map.
The following information is shown on the Where Am I screen:
x Address details (when available) of the current position
x Latitude and Longitude (coordinate of the current position in WGS84 format)
x The nearest town
and .
x Next crossing road/street
x Previous crossing road/street.
You can also perform some actions on this screen.
Tap
Locations and to check the country information.
You can also search for assistance near your current position. Tap
screen for quick search and select a category. For detailed information, see pag e 34.
and to add the current position to the Saved
to open a new
4.2.2 Trip Monitor
Trip Monitor logs information about your route.
You can record a new trip by tapping
.
and stop it by tapping
61
Page 62
Button
Function
By selecting a recorded trip, you can delete, rename, or change the
colour of the recorded route.
You can access the Trip Monitor Settings, where you can enable
saving the trip logs automatically or you can save the trip logs
manually. See
By tapping
options:
By tapping your recorded trip on the Trip Monitor screen, you can check information such as
time, speed, altitude and distance.
By tapping
map, export track logs, and check the elevation and speed profiles.
on the Trip Monitor screen, you can select the following
page 74.
on the Trip Data Details screen, you ca n view the trip on the
4.3 Settings menu
You can configure the navigation settings, and modify the behaviour of Alpine Navigation
Stick, by pressing the navigation hardkey button, and tapping .
Tap the arrows to view the content of other pages.
62
Page 63

Button
Function
Select the type of vehicle you are driving, the road types used in route planning,
and the route planning method.
Adjust the different sound volumes.
Enable and set up warnings for speed limit, Alert Points (such as speed cameras),
and road signs.
Fine-tune the appearance of t he Navigation v iew or adjust how the software helps
you navigate with different kinds of route
Navigation
view.
Change the voice guidance l anguage, set the time zone, the measurement units,
the time and date, and formats, and customise the application for your local
language.
Enable or disable traffic information and modify detour settings.
Turn the automatic trip log saving on or off and check the current size of the trip
database.
Enable or disable services that require an Internet connection.
Modify the basic software parameters set during the ini tia l set-up process. See
page
Create or use your own user profile for navigating, to be able to use your own
settings.
Start the Update, which makes it possible to update your maps. See page Page
54
Delete all saved data and reset all settings to their factory defaults.
The Settings menu provides the following options:
-related information on the
.
6.
63
Page 64
Button
Function
Set the type of vehicle you want to use to n avigate the route . Based o n
this setting, some of the r oad types can be excluded fr om the route, or
some of the restrictions may not be taken into account in route
calculation. See
Edit the parameters of the vehicle profile. See
Optimise the route calculation for differen t situations and v ehicle types
by changing the planning method. See
Select on
Select your preferred road types for the route. See page 67.
Button
Description
Manoeuvre restrictions and directional constraints are taken into
account when planning a route.
Roads are used only if access for cars is allowed.
Private roads and resident-only roads are used only if they are
inevitable to reach the destination.
Walkways are excluded from routes.
S < 3.5 t
Manoeuvre restrictions and one-way streets are taken into account
when planning a route.
Roads are used only if access for
Private roads,
only roads and walkways are excluded from
routes.
M 3.5 t
L < 7.5 t
Manoeuvre restrictions and one-way streets are taken into account
when planning a route.
Roads are
Private roads, resident-only roads and walkways are excluded from
routes.
U-turns are excluded from routes (turning back on a divided road is not
considered as a U
If the map contains data on dimens ion, weight and freight restrict ions,
they can also be taken into account when planning a route.
4.3.1 Route preferences
The following settings determine how routes are calculated:
page 64.
-road or off-road navigation. See page 53.
page 64.
page 66.
4.3.1.1 Vehicle profile
You can select the following vehicle types:
resident-
-7.5 t
used only if access for lorries is allowed.
caravans is allowed.
-turn).
64
Page 65
Button
Function
Rename the profile for something meaningful, for example John's car.
Set the maximum speed you travel at.
Enter the average consumption of your vehicle in
The
unit for consumption can be set in Regional settings.
Enter the average consumption of your vehicle on highways. The unit
for consumption can be set in Regional settings.
Editing a profile makes it possible to set up your actua l vehicl e para meters to b e used in ro ut e
planning.
To edit a vehicle profile, perform the following steps:
1. Tap
2. Select ‘Car’ or your motorhome category by weight, then tap
3. Set the parameters below. To change a value, press the corresponding information,
such as the length of the vehicle. For each setting, new window then opens in which
you can enter your value and confirm with the green button.
Depending on the vehicle type, some parameters may not be available in the list.
.
and
.
You can set the following parameters:
built-up areas.
65
Page 66
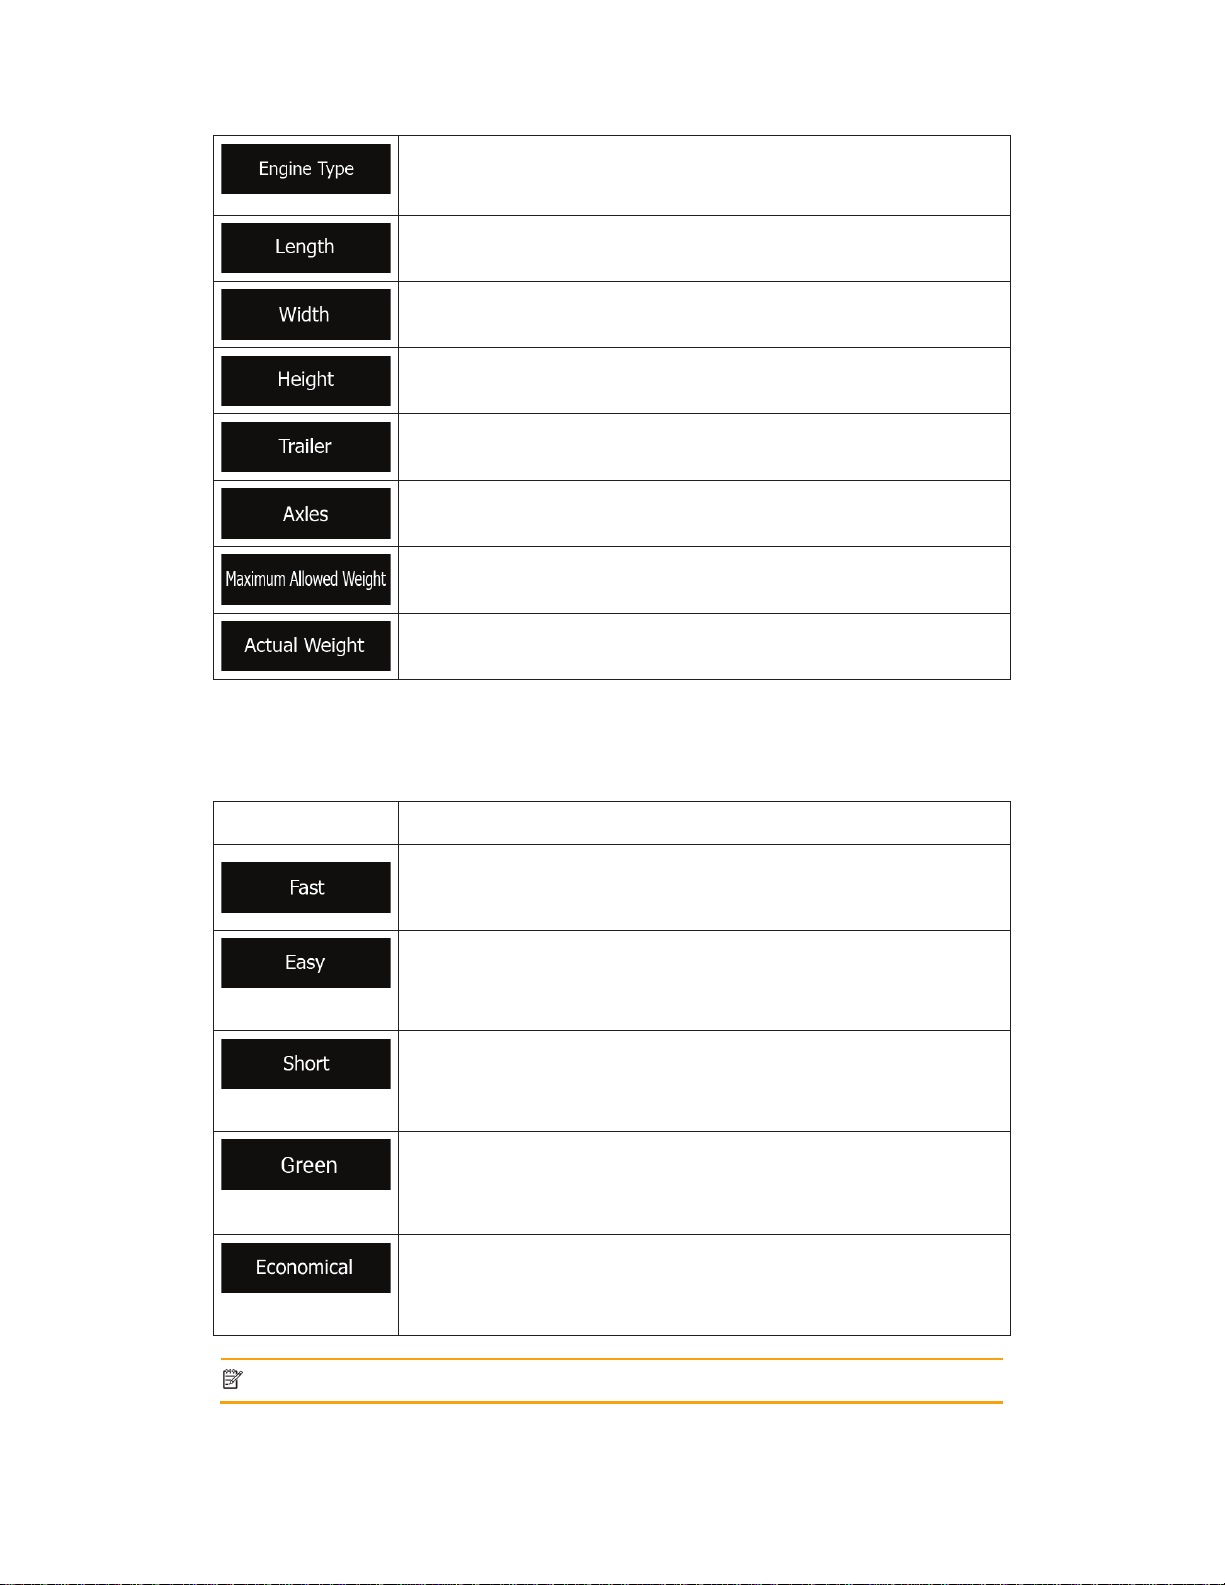
Select the engine and fuel type of your vehicle. It helps estimate the
CO
Set the total length of the vehicle.
Set the width of the vehicle.
Set the height of the vehicle.
Set if there is a trailer attached to the vehicle.
Set the number of axles.
Set the maximum allowed weight of the vehicle.
Set the actual weight of the vehicle.
Button
Description
Gives a quick route if you can travel at or near the speed limit on all
roads. Usually, the best selection for fast and normal cars.
Results in a route with fewer turns and no difficult mano euvres. With
this option, you can make Alpine Navigation Stick take, for example,
the motorway instead of a series of smaller roads or streets.
Gives a short route to minimise the travel distance. It can be opt imal f or
slow vehicles. Searching for a short route regardless of the speed, this
route type is
Gives a quick but fuel-efficient route based on the fuel consumption
data. Travel cost and CO
emission calculations are estimations only.
They cannot take elevations, curves and traffic conditions into
consideration.
Combines the benefits of Fast and Short. Alpine Navigation Stick
calculates as if it were calculating the Fast route, but it takes other
roads as well to save fuel.
Note!
Depending on the vehicle type, some methods may not be available.
emission.
2
4.3.1.2 Route Planning Method types
You can select from the following route planning method types:
rarely optimal for normal vehicles.
2
66
Page 67
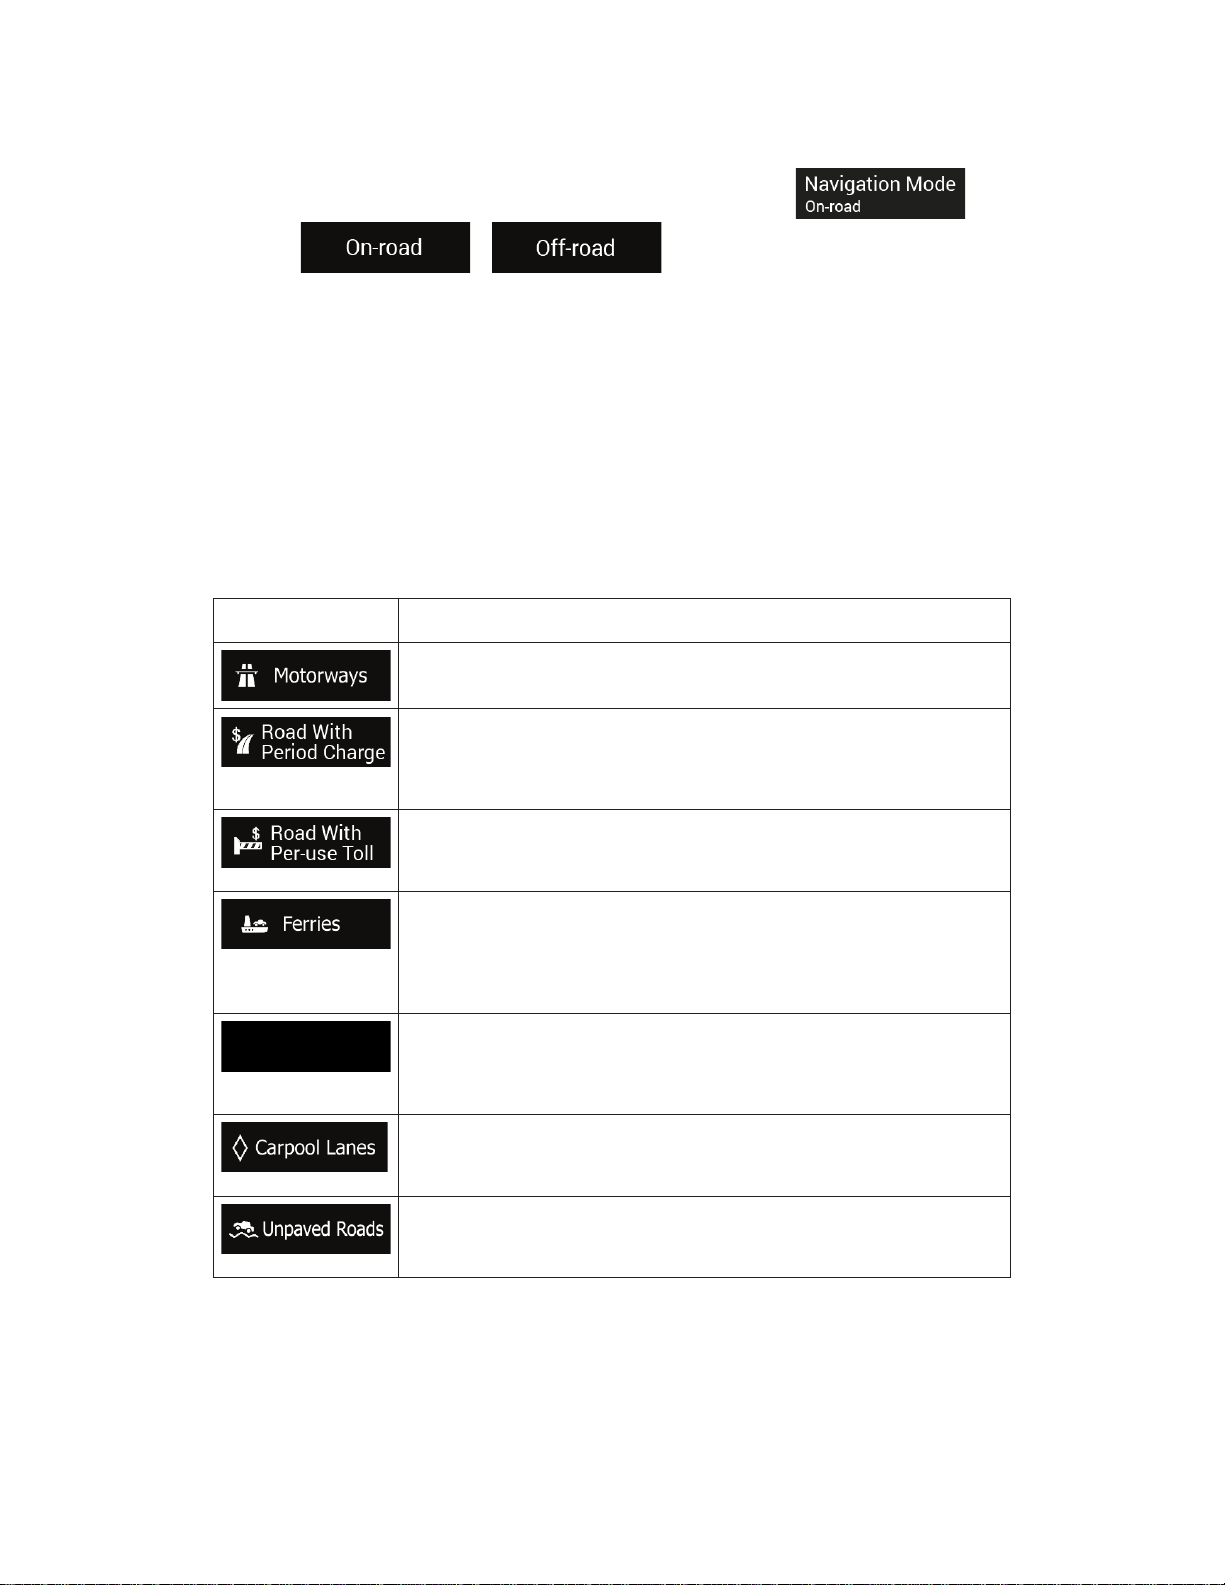
Button
Description
You might need to avoid motorways when you are driving a slow car or
you are towing another vehicle.
Charge roads are pay roads where you can purchase a pass or
vignette to use the road for a longer period of time. They can be
enabled or disabled separately from toll roads.
Per-use toll roads are pay roads where there is a per-use charge in the
routes by default. If you disable toll roads, Alpine Navigation Stick plans
the best toll-free route.
Alpine Navigation Stick includes ferr ies in a planned route by default.
However, a map does not necessarily contain information about the
accessibility of temporary ferries. You might also need to p ay a fare on
ferries.
Car shuttle trains are used to transport vehicles for a relatively short
distance and they usually connec t places that ar e not eas ily access ible
on a road, for example, in Switzerland.
Carpool or HOV lanes can be use d if a given number of passengers is
travelling in the vehicle. Check whether you are allow ed to use carpool
lanes before enabling this road type.
Alpine Navigation Stick excludes unpaved roads by default. Unpaved
roads can be in a bad condition and you usually cannot reach the
speed limit on them.
4.3.1.3 Navigation Mode
You can switch between on -road and off -road navigat ion by tapping and
selecting
or (page 53).
4.3.1.4 Road types
To let the route fit your needs, you can also set which road types are to be consi dered for or
to be excluded from the route.
Excluding a road type is a preference. It does not n ecessarily mean total prohibit ion. If your
destination can only be accessed usin g some of the e xcluded road types, th ey are used only
as much as necessary. In this case, a warning icon is shown on the Route information screen,
and the part of the route not matching your preference is displayed in a different colour on the
map.
Some road types are only available in certain regions.
The following road types are available:
67
Page 68
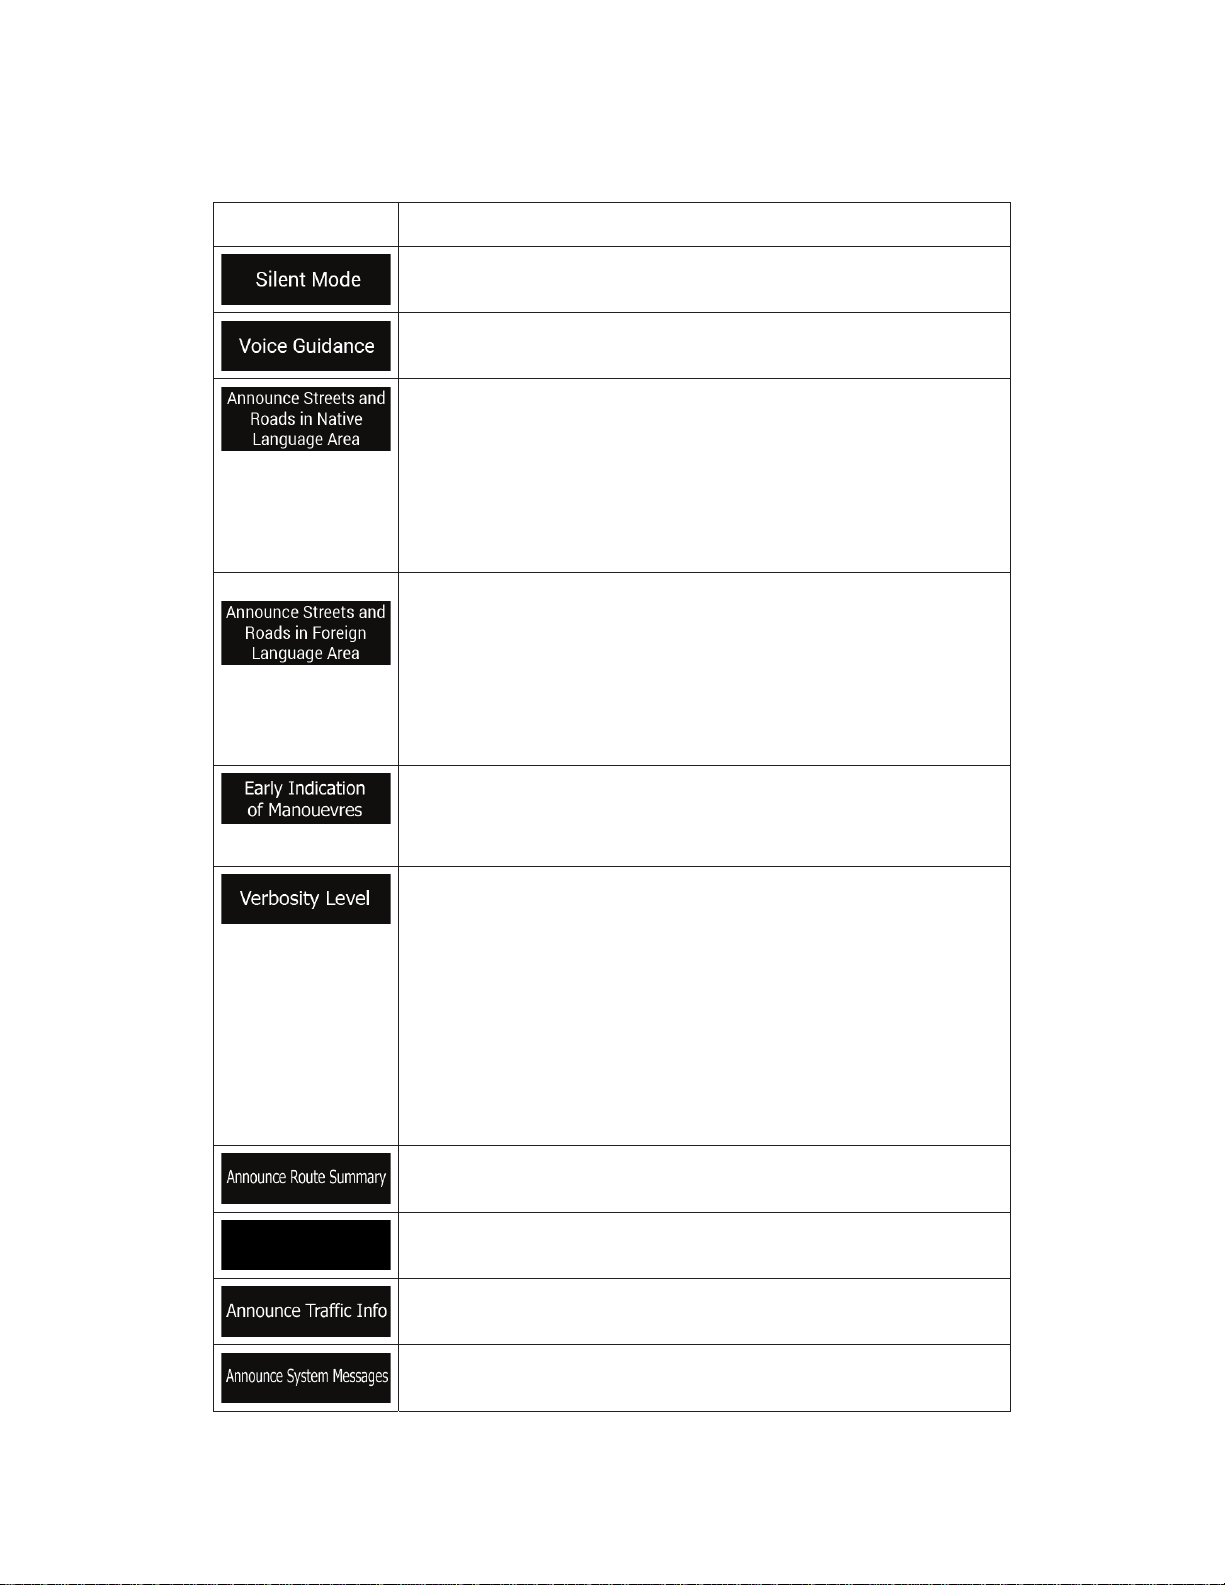
Button
Function
Mute all sounds, including verbal instructions and alert sounds.
Disable verbal instructions. This function is enabled by default.
Choose from the following options:
Announce the street names in the native language area of the
Street names sound correct only if you use a native voice profile for the
country. Choose from the following options:
Set whether you want an immediate announcement for the next
manoeuvre after each turn , or it is enough to receive the information
when the turn is near.
Set the verbosity of t he voice instructions, that is how m uch they tell
and how often they speak.
Minimal: the voice instruction is given once right before the next
Medium: the voice instruction is given when approaching the
next manoeuvre and it is repeated right before the manoeuvre.
Verbose: the voice instruction is given first relatively far from the
next manoeuvre, it is repeated when approaching the next turn,
Allow reading out a quick summary of the route whenever a route is
calculated.
Allow reading out information about the country you have entered,
when you cross country borders.
Allow reading out real-time traffic messages.
Allow announcing system messages.
4.3.2 Sound settings
You can modify the following settings:
x
selected voice guidance language.
x Announce the road numbers only.
x Announce the manoeuvres only.
x Try to read the street names in a foreign country.
x Announce the road numbers only.
x Announce the manoeuvre only.
x
manoeuvre.
x
x
and it is repeated again right before the actual manoeuvre.
68
Page 69

Button
Description
Alpine Navigation Stick is able to warn you if you exceed the current
speed limit. This information may not be available in your region, or
may not be fully correct for all roads on the map.
The maximum speed set in the vehicle profile is also used for this
warning. Alpine Navigation Stick alerts you if you exceed the pre -set
value even if the legal speed limit is higher.
This setting lets you decide wh ether you wish to r eceive visible and/or
audible warnings.
The following warning types are available:
Audio and Visual warning: besides the current speed limit being
shown on the map, you also receive a verbal warning when you
If you prefer to see the speed limit sign on the map all the time
(normally, it is shown only if you exceed the limit), you can set it here.
You can also set the relative speed above which the application
initiates the warning by adjusting a slider. The value can b e different
within and outside towns.
Tap it to receive a warning when approaching Alert P oints like school
zones or railroad crossings. You must make sure that using this feature
is legal in the country where you intend to use it.
You can set the warning type for the different Alert Point categories
(alert types) individually. The following warning types are available:
Visual warning: the type of the Alert Point, its distance, and the
related speed limit appear on the Navigation view while you are
Audio and Visual warning: besides the visual alert, beeps are
played (when using a natural voice) or the type of the alert is
announced (in case of a TTS voice) while you are approaching
one of these points, and an extra alert warns you if you exceed
For some of the Alert Points, the enforc ed or expected speed limit is
available. For these points, the audio alert can be different if you are
below or above the given speed limit.
Only when speeding: The audio warning is only played when
approaching: The audio warning is always played when
attention, the audio alert is different when you exceed the speed
4.3.3 Warnings settings
You can enable and modify the following settings:
x Visual warning: the current speed limit is shown on the map
when you exceed it.
x
exceed the speed limit with the set percentage.
x
approaching one of these locations.
x
the given speed limit while approaching.
x
you exceed the given speed limit.
x When
approaching one of these Alert Points. In order to draw your
limit.
69
Page 70
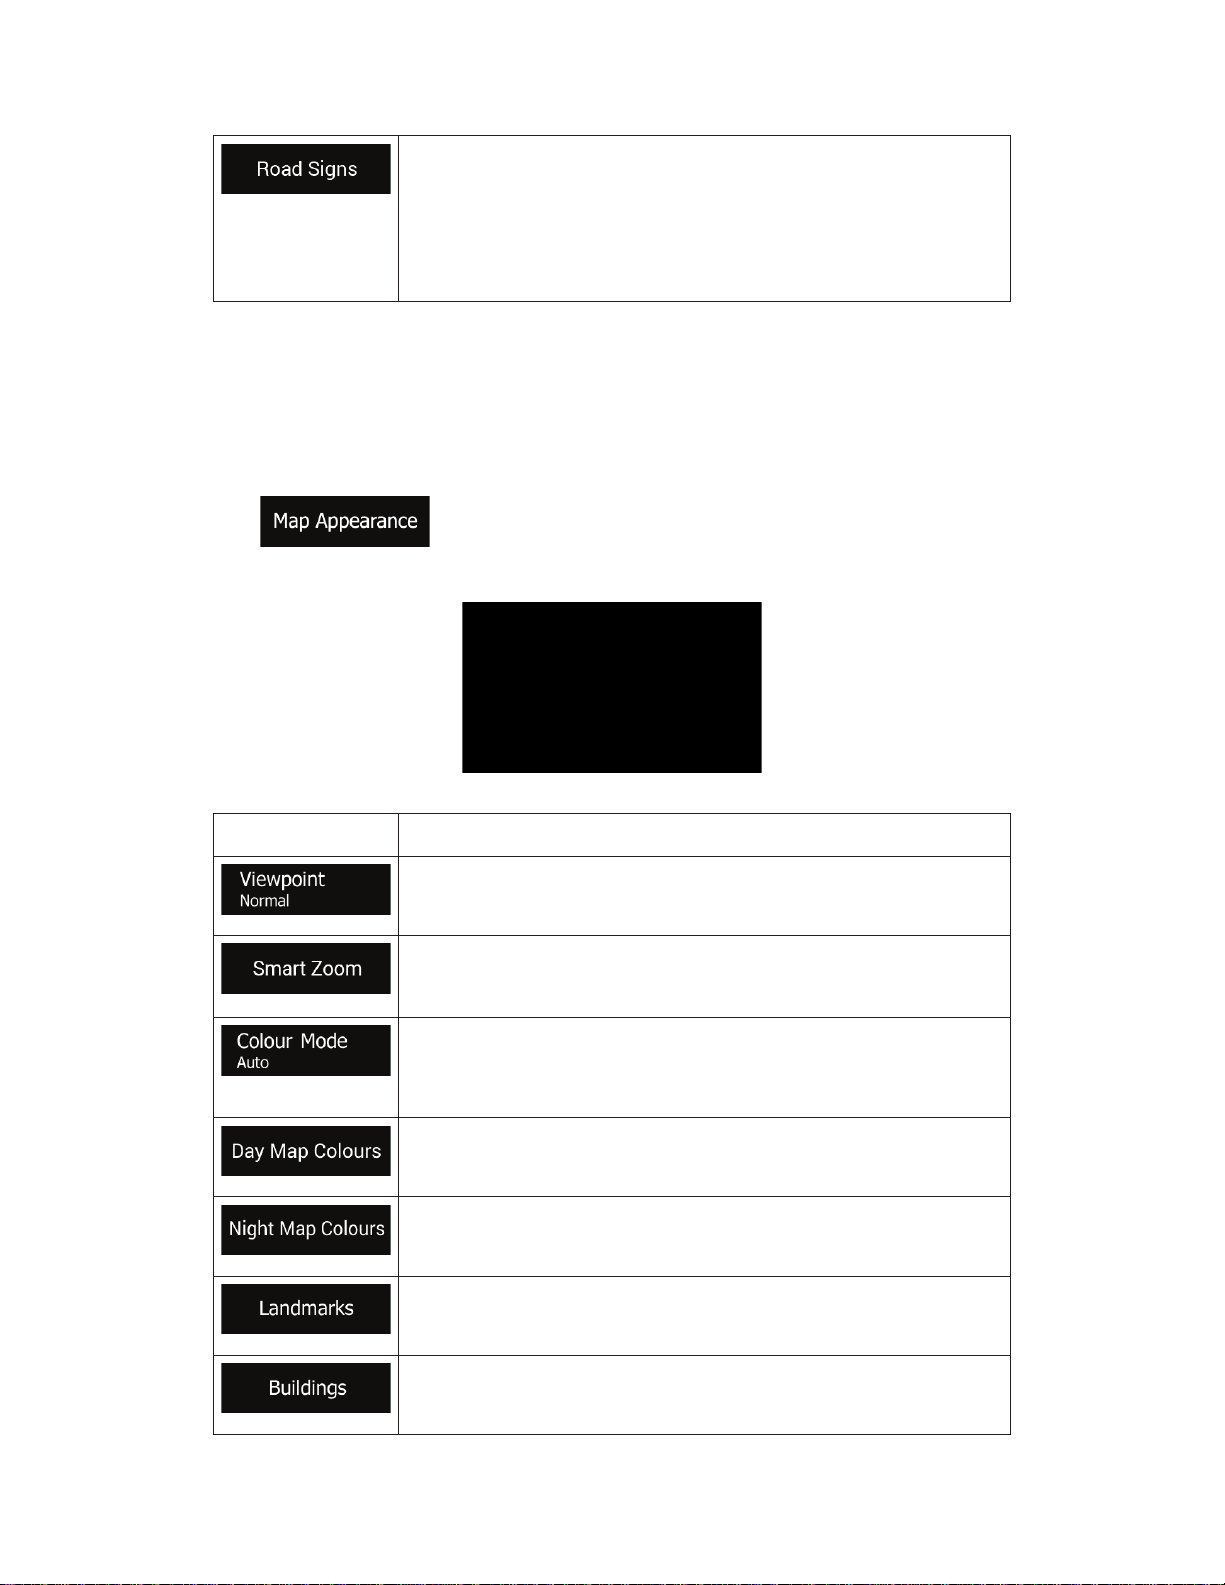
Maps may contain driver alert information that can be shown on the
Navigation view in a similar way as real
life road signs. Tap it t o enab le
or disable the warning for these road segments (for example, dangers
and sharp curves). For each category of warning signs, set the warn ing
type (visual or audio and v isual) and the distance from the hazard to
receive the warning at.
Button
Function
Adjust the basic zoom and tilt levels to your needs. Three levels are
available.
Turn Smart Zoom on or off. It enables the dynamic change of the zoom
level depending on the situation. For a detailed description of the
feature, see page 56.
Switch between daytime and night colour modes or let the software
switch between the two modes automatically a few minutes before
sunrise and a few minutes after sunset.
Select the colour scheme used in daytime mode. Daytime colours are
bright and similar to paper road maps.
Select the colour scheme used in night mo de. Night colours are darker
to keep the average brightness of the screen low.
Show or hide 3D landm arks (3D representations of prominent or wellknown objects).
Show or hide 3D city models (3D block representation of full city
building data containing actual building size and position on the map).
-
4.3.4 Navigation View
These settings allow you to fine -tune the appearance of the Navigation v iew. You can also
adjust how the software helps you n aviga te w ith different kinds of route-related information on
the Navigation view.
Tap
themes from the list for both daytime and nighttime use, show or hide 3D buildings,
landmarks, and manage your Place visibility sets (which Places to show on the map).
You can modify the following settings:
to adjust the navigation view to your n eeds, choose suitable colour
70
Page 71
Show or hide the 3D elevation of the terrain.
Turn on Track Logs to show them on the map or turn them off.
Select which Places to sh ow on the map while navigating. Too m any
Places make the map crowded so it is a good idea to keep as few of
them on the map as possible. Tap the name of the Place category to
show/hide it or to open the lis t of its subcategories.
If you are navigating with a planned route, you ca n set three dat a fields
to be displayed on the Navigat ion view. You can choo se from the time
of arrival at destination, distance to destination, time to destination,
time of arrival at waypoint, distance to waypoint, time to waypoint,
heading, or altitude. Without a planned route, there is only one data
field that can be set to show the heading or the altitude.
Turn the Route Progress Bar on or off. If turned on, an orange line is
displayed on the side of the screen, and a blue arrow on it shows your
progress.
Turn it on to get motorway service information (for example petrol
stations, restaurants) or turn it off if you do not need it.
Select the service types displayed for the motorway exits. Choose from
the Places categories.
Zoom out and show an overview of the surrounding area if the next
manoeuvre is far and you are driving on a motorway. When you get
close to the event, the normal map view returns.
Whenever adequate information is avai lable, la ne in for matio n s imilar to
the real ones on road signs above t he road is displayed at the top of
the map. Tap it to turn this feature on or off.
If you are approaching a motorway exit or a comp lex intersection and
the needed information exists, the map is replaced w ith a 3D view of
the junction. Tap it to turn this feature on or let the map be displayed
for the whole route.
When entering tunnels, the surface roads and buildings can be
disturbing. Tap it to show a generic picture of a tunnel instead of the
map. A top
down overview of the tunnel and the remaining distance are
also displayed.
In certain situations, Alpine Navigatio n Stick offers a detour when there
is a traffic jam on a highway. See
In certain situations, Alpine Navigation Stick offers an alternativ e route
when there is a traffic jam on the road. See
You can modify the following additional settings on the Navigation View screen:
-
page 58.
page 58.
71
Page 72
In certain situations, Alpine Navigation Stick offers parking Places
when you approach your destination. See
In certain situations, Alpine Navigation Stick offers different route
alternatives when you leave th e planned route and suddenly exit the
motorway. See
Button
Description
It displays the current written language of the user interface. Tap it to
select a new language from the list of available languages. The
application restarts after you change this setting and confirm it.
It shows the current voice guidance profile. Tap it to select a new
profile from the list of available languages and speakers. Tap any of
these to hear a sample voice prompt. J ust tap
when you have
selected the new spoken language.
Different voice profiles are capable of different levels of service:
recorded sounds can only tell you basic information about turns
TTS Voice (street names announced): These computed voices
You can set the measurement u nits and time/date format to be used.
Alpine Navigation Stick may not support all the listed units in some
voice guidance languages.
By default, the time zone is taken from the map information and
adjusted by your current location. Here you can manually set the time
zone and the daylight saving time.
4.3.5 Regional
You can modify the following settings:
page 59.
page 59.
x Natural Voice (street names not announced): These pre-
and distances.
x
can read out complex instructions, street names or system
messages.
x TTS Voice with a microphone icon: Besides the above-
mentioned profiles, it can also be used for voice recognition.
72
Page 73
Button
Function
Enable or disable the Traffic reception that can receive real-time traffic
information. The rest of the buttons below are all related to the Traff ic
function and are available only if the receiver is enabled.
Turn the access to online traffic data on or off. To download real-time
traffic information as you drive, mobile data transfer is necessary.
Tap it if you want to use online traffic information to avoid road blocks
or unexpected traffic jams.
If you want to see traffic events (for examp le closures, accidents, lane
restrictions) on the map, you can choose to show the events with a
different colour or to display an icon too. This feature can also be
disabled.
Enable or disable historical traffic data and traffic patterns. This locally
stored information can be very useful in normal circumstances b ut for
example on public holidays it may be bet ter to turn it off in order not to
take account of normal weekday traffic jams.
Set the minimum amount of time th at you think is worth saving at the
cost of making a detour.
For example, in the figure below, the ora nge rout e sho ws a traffic even t
that causes a 30
minute delay. The blue route is a detour that is 15
minutes longer than the original ro ute (not counting the traffic jam). If
you set the Offer detour feature to 10 minutes, Alpine Navi gation Stick
recalculates the route because it s aves 15 minutes , w hich is more th an
the 10 minutes you set. If you set it to 20 minutes, the original route is
kept because the detour would save you only 15 minutes.
Calculations are based on information received about traffic events.
Enable or disable the manual confirma tion of every rec alculation due t o
traffic events.
4.3.6 Traffic
You can modify the following settings:
-
73
Page 74
Button
Description
Trip monitor can record statistical data of your trips. If you need these
logs later, you can let the application save them automatically for you.
Track logs, the sequence of the positions given by the GPS receiver,
can be saved together with trip lo gs . Th ey c an l a ter be dis pl ay ed o n th e
map. You can let the application save track logs whenever it saves a
trip.
This is not a button. This line shows the current size of the trip
database, the sum of all trip and track logs saved.
4.3.7 Trip Monitor
Trip logs contain useful information about your recorded trips. You can enable and modify the
following settings:
4.3.8 User Profiles
If more drivers use Alpine Navigation Stickfor navigating, their settings can be reme mbered
by using one of the user profiles.
You can create a new profi le by tapping
model. If you select a new profile, the a pplication restarts so that the new settings c an take
effect.
By tapping
the car model and name of the profile, or delete the profile.
, , you can select your profile and change
enter a name, and select a car
74
Page 75

5 Copyright note
The product and the information contained herein are subject to change without prior
notification.
This manual may not, in whole or in part, be reproduced or transmitted in any form either
electronically or mechanically, including photocopying and recording, without the express
written consent of NNG.
© 2023 - NNG
Map data: © 1987 - 2023 HERE. All rights reserved. See
http://corporate.navteq.com/supplier_terms.html.
All rights reserved.
75
 Loading...