

Page 1
1
Allview Viva H7S
User manual……….…………3
Pъководство за употреба....34
Οδηγός Χρήστη……….……61
Betriebsanleitung................102
Használati utasítás..............131
Manual de utilizare……….159
Page 2
2
ENBGGR
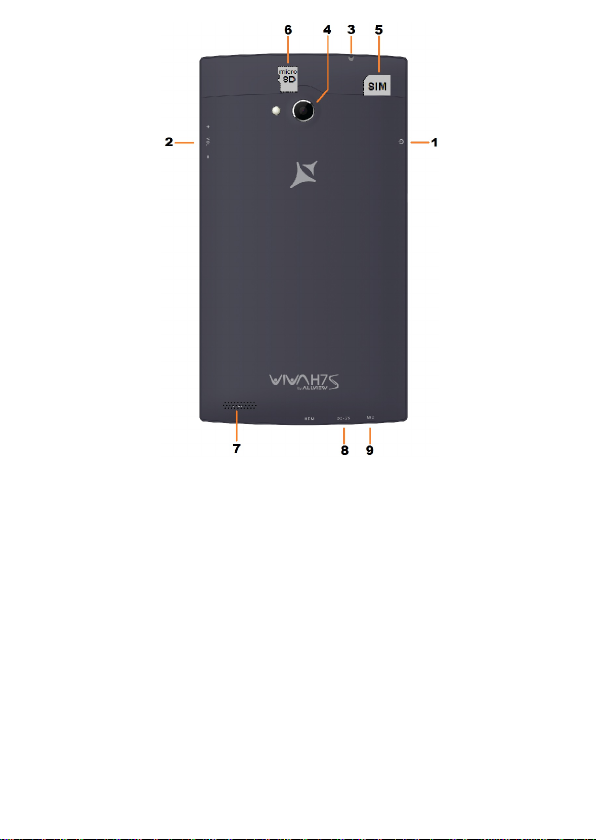
1
Power button
1
Включване
1
Πλήκτρο ενεργοποίησης
2
Volume buttons
2
Сила на звука
2
κουμπιά έντασης
3
Earphones jack
3
Гнездо за слушалки
3
Υποδοχή ακουστικών
4
Back camera
4
Задна Камера
4
πίσω κάμερα
5
SIM slot5Слот за SIM картата
5
υποδοχή της κάρτας SIM
6
MicroSD slot
6
Слот за MicroSD карта
6
Υποδοχή κάρτας MicroSD
7
Loud speaker
7
Високоговорител
7
μεγάφωνο
8
Micro USB
8
Micro USB
8
Micro USB
9
Microphone
9
Микрофон
9
Μικρόφωνο
DEHURO
1
Power-Taste
1
Bekapcsoló gomb
1
Buton pornire/oprire
2
Lautstärketasten
2
Hangerő gombok
2
Butoane volum
3
Ohrhörer Anschluss
3
fülhallgató jack
3
Mufa casti
4
Zurück Kamera
4
hátsó kamera
4
Camera spate
5
SIM-Slot5SIM slot5Slot SIM
6
MicroSD-Slot
6
MicroSD slot
6
Slot MicroSD
7
Lautsprecher
7
hangszóró
7
Difuzor
8
Micro USB
8
Micro USB
8
Micro USB
9
Mikrofon9mikrofon9Buton Inapoi
Page 3

3
User manual
Allview Viva H7S
Foreword
Thank you for purchasing our product.
These operational guidelines for the user, to ensure you a quick and convenient
to use, read the instructions carefully before use.
This player is a specialized top quality portable player product with a series of
remarkable functions. There will be no separate notice in the case of any change in
content of this text.
This company will continue to provide new functions for the development of the
product, and there will be no separate change in the case of any change in the
product’s performance and functions. While this unit is used as a mobile hard disk,
this company will not be held liable for the security of files saved in the disk.
If the actual setup and the application methods are not identical to those as set
forth in this manual, please access to the latest product information of this company's
website.
Page 4

4
Key Functions
Capacitive touch screen, support multi-touch;
Support WIFI, 3G wireless Network;
Integrates dual cameras, front 0,3MP, back 5MP AF
Network video conversation and support photography function;
Adopt android 4.2 system;
Support auto rotation the screen horizontally or vertically;
Support Web browsing, chat online, online video, online games and download
etc;
Support ten thousands games and programs download and install.
Supporting lyric synchronous display;
Supports maximum 1080P resolution video file putout
Supporting picture browsing, rotation and lantern slide playing in multiple
formats;
Support E-book function, playing in multiple formats;
USB2.0 high rate transmission;
Built-in microphone and long time recording;
Supporting firmware upgrade;
Supporting Micro SD Card; Support OTG function, can expand storage space
Page 5

5
Basic Operation
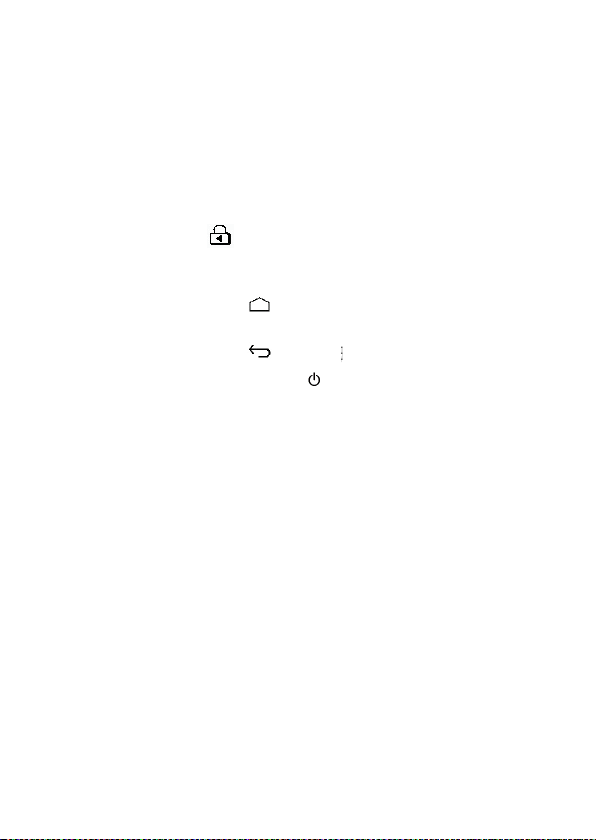
Power on
In the shutdown state, long press " " button boots
Power off
In the power on state, long press the " " key 3 seconds then pop-up device
options, select "Power off " for shut down.
Sleep
Under normal operating conditions, short press the power button to get tablet
into hibernation. Now, the screen will close. Short press the power button again to
resume the normal mode. You can set the device to enter sleep mode automatically
after a desired time of non-operation.
Power reset
If there is shutdown to the player in the process of operation, you can turn off
and restart the player by pressing "reset" key.
Screen time out
If you do not contact the player within the set time, and do not operate by the
button, the contact screen will be automatically turned off.
In any state, short press " " button and for activation; Then skid the lock
upwards to the green of spotted which will accomplish to access to the upper
interface.
If it is necessary to deactivate the contact screen time out function, you can set
the [Screen time out] option under [display] function into "Never ".
Using the Micro SD card
After this unit is connected with the computer, you will find two moving disks.
The first one is the built-in memory disk for this unit and the other is the disk for the
Micro SD card. If no card is inserted, the second disk can not be opened. This unit
supports the extension of the Micro SD card from 128MB to 32GB.
Inserting and Pulling out the Micro SD card
Inserting:
Page 6

6
Put the Micro SD card face up (side with words), and slightly force the card into
the socket of the card, i.e. connecting the unit. Under this state, you can play the
content in the Micro SD card.
Pulling:
Slightly push the Micro SD, and it will bounce by a section, and then you can
take it out.
Caution:
Please perform inserting and pulling operation when power is off! Otherwise, it
will lead to the loss or damage to the files within the unit! If no card is inserted, the
computer will be unable to perform read and write operation for the disk notes of the
later removable disk (Micro SD card).
Battery:
High capacity Polymer battery is used for this unit.
The duration available of the battery power depends on volume, types of playing
files and operation of batteries. The player can be set up by the user as "user define
power off time" or "display setup" to save batteries.
Charging:
This unit can be recharged by USB port, you can also use DC Charger:
Take out the DC charger, plug it into the wall outlet with AC 220V, then plug in
the DC jack into the device DC-in jack.
Warnings for charging:
1. A new battery may be empty and not charged before you get the device.
2. If the device is not used for long time, it is better to charge it to full capacity
every 2 or 3 months during storage.
Power adapter is a key component of the portable player, which play a crucial
role in keeping the portable player’s normal work and protecting your security when
using the player, a long-term customer surveys and after-sales service Practice shows
that the malfunction of the portable player In many cases were caused by using
inappropriate accessories, in particular the power adapter.
Use the substandard power adapter will shorten the life of the portable player by
Page 7
7
considerably, the voltage instability will seriously affected the normal work of the
portable player and bring permanent damage on the player’s performance and
reliability, Use the substandard power adapter will also reduced the vocal quality of
the players, shutdown the player when you using it, In addition, Use the substandard
power adapter will cause combustion and explosion which will disserve the safety of
the consumers.
Gravity induction and horizontal、vertical screen switch
Through the clicked " ", open/locking gravity induction and horizontal 、
vertical screen switch function.
Return to main interface
In any interface, touch icon " " to access to main interface.
Return to upper interface or menu
In any interface, touch icon " ", click the "" key to access to upper interface
or menu. You can also click short press the " " key to accomplish it.
Points for Attention
1. Do not use the player in exceptionally cold or hot, dusty, damp or dry
environments.
2. Do not allow the player to fall down while using it.
3. Please charge your battery when
A. Battery power icon shows an empty icon;
B. The system automatically shuts down and the power is soon off when you
switch on the unit once again;
C. There is no response if you operate on any key
4. Please do not disconnect power abruptly when the player is being formatted or
in the process of uploading or downloading. Otherwise it may lead to the error in the
program.
5. When this unit is used as a moving disk, the user shall store or export files in
the proper file management operation method. Any improper operation method may
lead to the loss of files, for which this Company will be held no liable.
6. Please do not dismantle this unit by yourself. If there is any inquiry, please
Page 8
8
contact the dealer.
7. There will be no separate notice in the case of any change in the functions and
performance of this product.
Warning: We take no responsibility for situations where the phone is used other
than as provided in the manual.
Our company reserves the right to make changes in the content of the manual without
making this fact public. These changes will be posted on the company website to the
product it amends.
The contents of this manual may be different from that in the product. In this last
case will be considered.
To avoid the problems that might occur with the service shops approved by
Visual Fan Ltd. (because Visual Fan reserves the right to stop the collaboration with
any service shop which was previously approved and mentioned in the waranty card
on the date on which the product batch was sold on the market), before taking a
product to the service shop, please check the updated list of approved service shops
on Allview website at the section: “Support&Service – Approved service”.
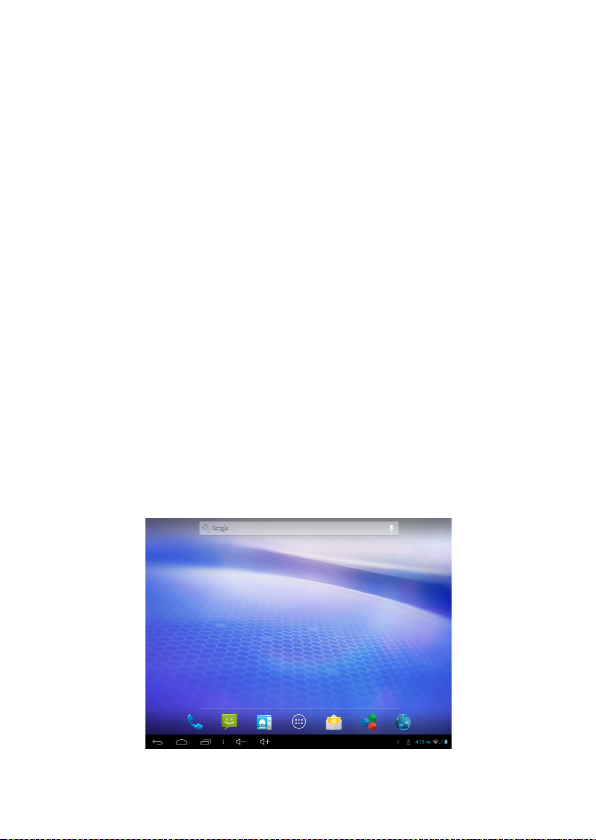
Main interface
The main interface is separated into 5 screens display.
Slide screen left or right which will accomplish to flip file.
Page 9
9
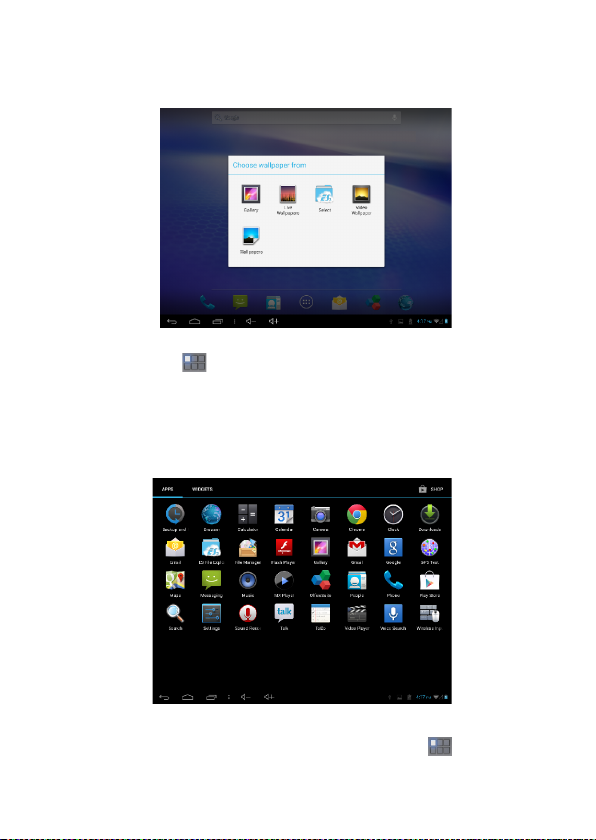
Change desktop wallpaper
Press on a blank space on the main interface, can pop up desktop wallpaper
Settings menu
Display all functional icon
Short press the icon will display the installed functions icon, click on
corresponding functional icon to be able to access the function menu. In the main
menu, the system can be set to run existing applications, install a new application,
start the touch calibration, music player, video player, web browsing, games and other
operations.
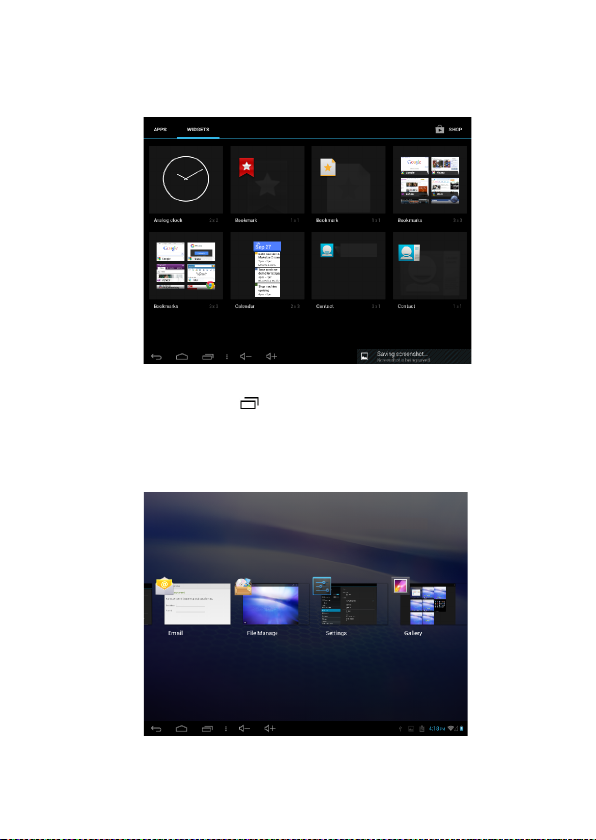
Add window small plugin
The main interface, touch the screen on the right side of the " " control icon,
Page 10
10
and then click above on the screen "WIDGETS" long according to select small plugin,
can add to desktop .
Display the background programs that are running
Any interface, click the " " icon to the left of the screen, pop up the
background is run the program list, click on the program icon, can switch over to the
background of the open programming interface. To right sliding program icon, can
close this program in the operation.
Shows notice information
The main interface, click on the lower right corner of the screen the clock
Page 11
11
display area, can open notice , notice can show the current USB state, networking
state and the battery power and other information
Delete the desktop icon
The main interface, long press on the application of the interface program icon,
stay icon amplification, will be selected to screen the icon of the mobile above a
garbage can, this icon region shows orange, let go can delete.
Move desktop icon
The main interface, long press the interface of the application program icon,
stay icon amplification, may to the selected icon of move.
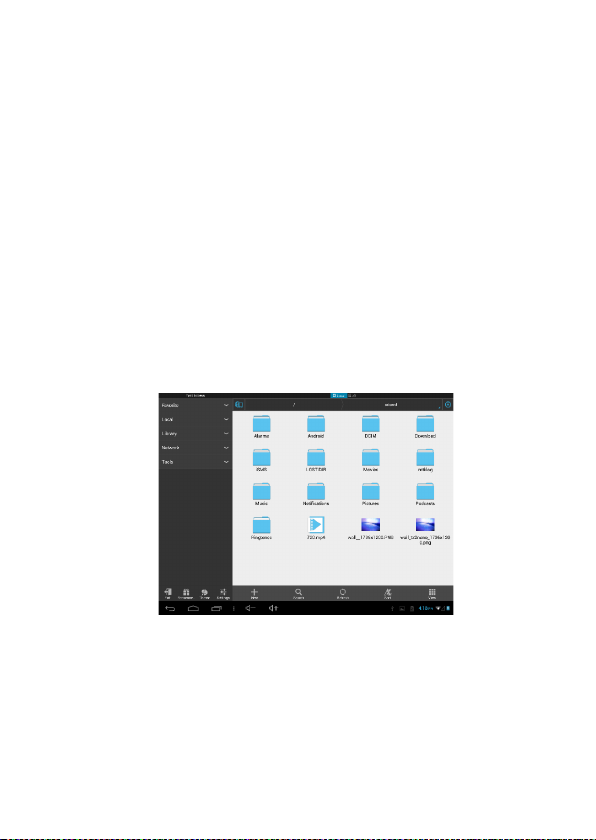
Installed APK
1. take the need to install the software of the APK format downloaded to the
player or TF card
2. Click "file manager" icon and select the need to install the APK application
3. Choose the path of the APK is application, click on the APK program to
install, to start the installation
Page 12
12
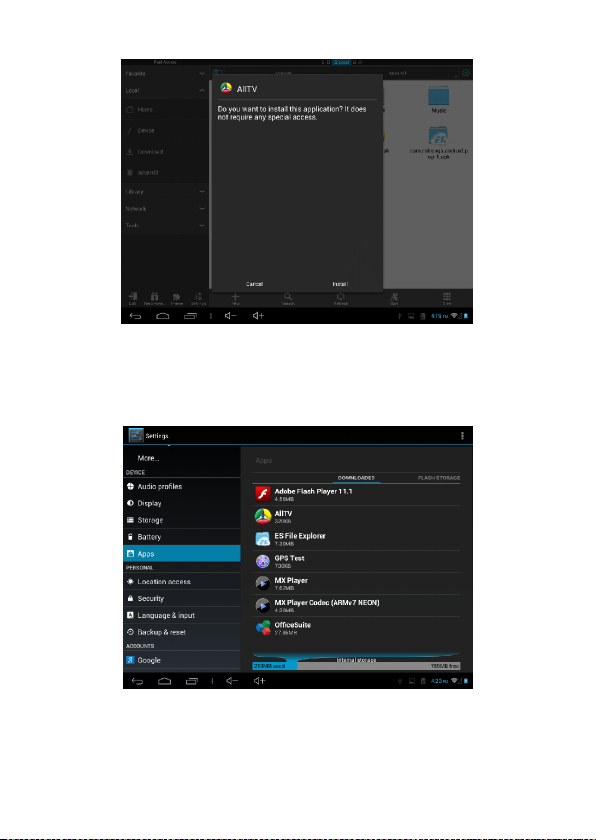
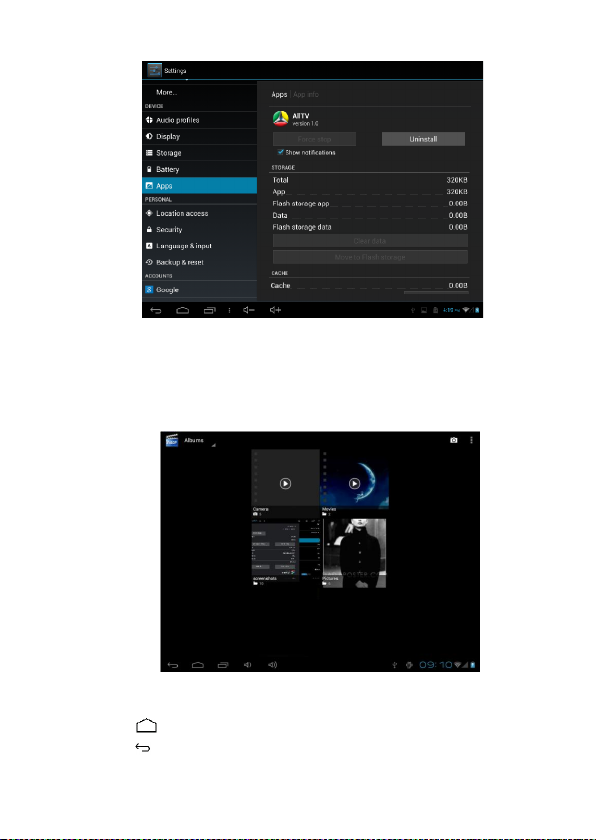
Uninstall APK application
1. Click on the desktop "Settings", into the "Settings"-" application ", select and
click on the need to uninstall program
2. Click on the "uninstall" icon to start program the unloading
Page 13
13
Video Player
In the main menu, select the option of "Gallery" to be able to access video
folder.
File list interface
Function of keys
" ":Shot press it to come back to the main interface
" ": Short press it to return to the upper interface
Touch & slide screen upward and downward which will accomplish to
Page 14
14
flip video folder.
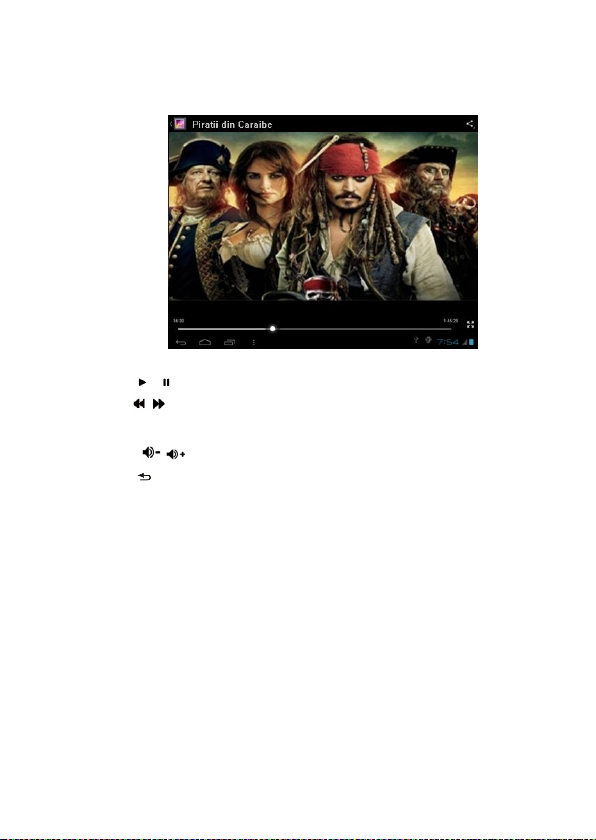
Video playing interface
Function of keys
'' / '': play or pause current movie
'' / ": shot press to play the last /next movie, long press for fast rewind
/ forward;
“ / ”: press it to volume up or down
" " key: short press it to return to the upper interface " M " key: short
press it to popup movie setting interface.
Tips:
1. This player support maximum 2160 resolution video files.
2. Subtitle display
This player supports "*.SRT" subtitle files (The user can download it from the
website) for the synchronous playing of subtitle and video.
When there is any subtitle file with the same name in the folder for playing video, the
player will be able to achieve synchronous subtitle display
3. It supports video playing in multiple formats, high-definition video etc.
As parameters such as formats, coding modes, definition and code flow rates of video
files provided by the internet differ, the player is unable to be compatible with all
video files (especially those video files with high definition or high code rates). If the
Page 15

15
downloaded video files are out of the range supported by the player, which renders it
impossible to play normally in the player, it is recommended that the video
conversion software from a third party be used, and file formats be converted via
computers into the ones within the range supported by the player before the same are
duplicated into the player for playing.
Player Progress, Drag the line to change the player progress.
Audio Player
In the main menu, select the option of "Music" to be able to access music folder.
Music folder interface
Function of keys
'' '': Return to main interface
'' '': Return to upper interface
Up/down to touch screen, can realize the file list to scroll function
Artist: according to the singer classification music files
Album: according to album classification music files
Song: display all music files
Playlist: to display the play music files in the list
Now playing: into the background music played interface
Page 16
16
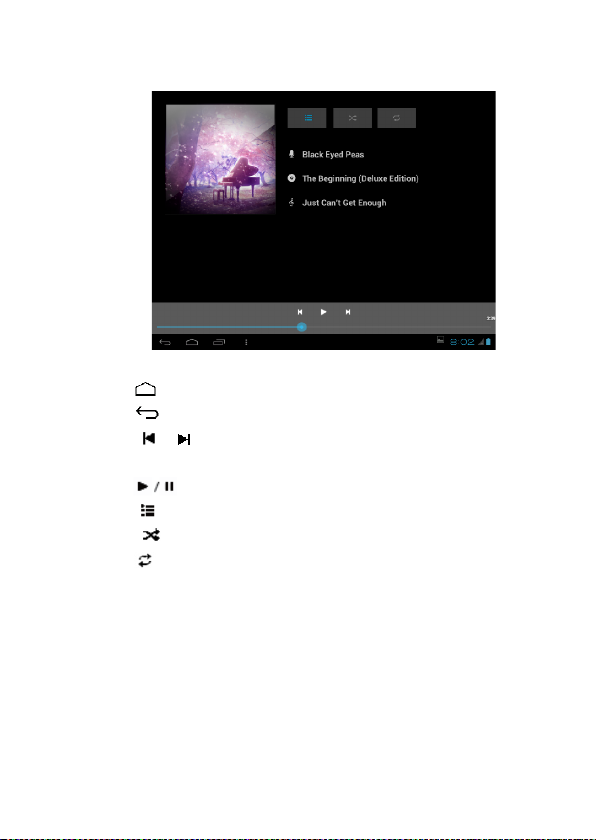
Music playing interface
Function of keys
'' '': Return to main interface
'' '': Return to upper interface
'' / ": shot press to play the last /next music, long press for fast
rewind / forward;
'' '': Click start/stop playing music
'' " : Click into play lists
" ": Click on open/close songs random play mode
" " key: short press it to return to the upper interface
Lyric Display
When there is any lyric file with the same name in the folder for playing music,
the player will directly access the lyric display interface.
This player supports "*.Lrc" lyric files (The user can download it from the
website of "http://www.51lrc.com", or search "LRC Lyric" to have the lyric file) for
the synchronous playing of lyrics and music.
Page 17

17
Pictures
In the main menu, select the option of "Gallery" to be able to access Photo
folder.
Picture viewing interface
Function of keys
'' '': In slide form browse all pictures
'' '': Pictures management: delete, Rotate left, Rotate right, you can also sort
according to the location, time, people and tags setting picture group
'' '': Delete picture
'' '': Through you can click on the icon to set and understand pictures
information, including: Slideshow, Edit, Rotate left, Rotate right, Crop,
Details, Set picture as
Page 18
18
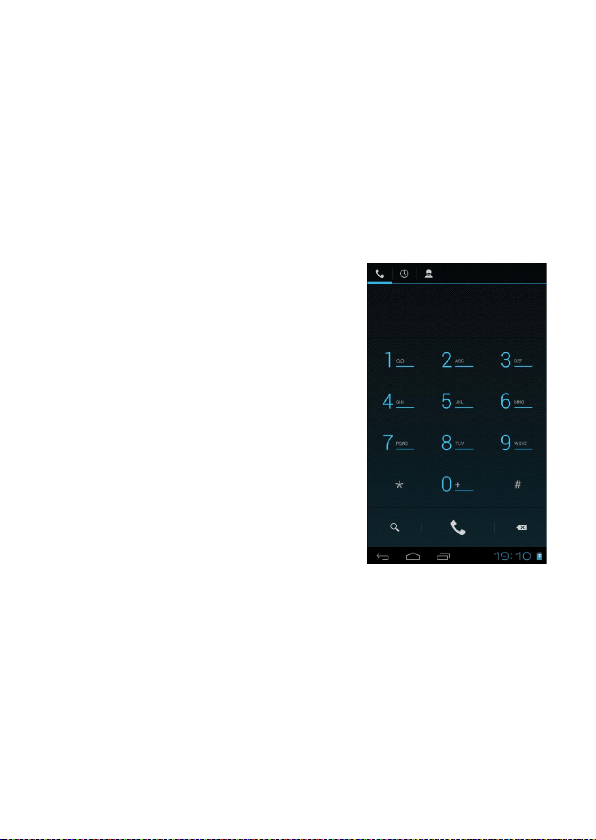
Call function
Make a call
Take one of the following to make a call:
1. In phone tab: Input the phone numbers and press the green Send key; ÿIn call log tab:
press the contact in the list and select the call item to call; ÿIn contacts tab: press the
contact in the list and select the call item to call; ÿIn favorites tab: press the contact in
the list and select the call item to call;
2. Smart Dialing: press the Smart Dialing, and direct input the phone numbers and
press the green send key;
Answer calls
To answer a call, press the green Send key.
Hang up the phone
Press hang up key to hang up the phone
Contacts
To view the contacts, touch Phone icon, and then touch the Contacts tab from the top of
the screen. In the contacts tab contacts is a specific group that can be stored by favorites
item.
TIP: To search a contact, press the Menu key, touch the search item in the popup menu.
Then touch the input box to open the keyboard, type the name to search, the contact
will list below if it exists.
Add contacts
1. Press the green Send key whenever;
Page 19

19
2. Touch the Contacts tab;
3. Press the Menu key;
4. Touch New contact;
5. Type the contact’s information;
6. Touch Done.
Messaging
All the received messages are classified by contact
name. The inbox includes SMS and MMS.
Read messages
1. In the Menu screen, touch the Messaging icon;
2. Touch the message to open.
Send text messages
1. In the Menu screen, touch the Messaging icon;
2. Touch new message;
3. Touch to select the To field, type the phone
number that will receive the message;
4. Touch to select the Type to compose field and
type the message that will send;
5. Touch Send.
MMS
MMS stands for Multi-media Message Service, it could transmit the message contains
Multi-media file, including text, picture, sound etc.
Send MMS
Photos taken by camera are stored on the memory card. Make sure the memory card
has been installed before using the camera.
1. Touch Attach symbol from top-right corner of the screen;
2. Select one of the following options:
Pictures
Touch to find and attach one of the existing pictures
Page 20

20
Camera picture
Touch to take a new picture to attach
Videos
Touch to find and attach one of the exiting videos files
Capture video
Touch to make a new video file to attach
Audio
Touch to find and attach one of the existing audio file
Record Audio
Touch to record an audio file to attach
Slideshow
Touch to attach one of existing slideshow.
1. Touch to select the To field and type the phone number;
2. Touch to select Type to compose field and type message;
3. Touch Send.
Page 21
21
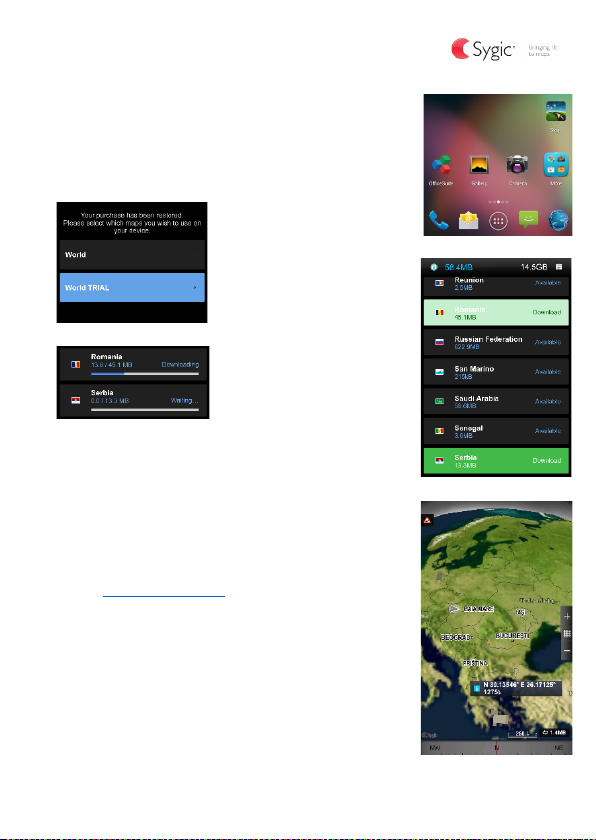
Activate your Sygic GPS Navigation
(optional)
The world’s most popular offline GPS navigation app
from Sygic is preinstalled on this device. Enjoy navigation in
90 countries around the globe for 30 days for free.
1. Click on Sygic icon and launch application.
free. Or purchase the full lifetime license of the navigation.
If you choose trial you can purchase full lifetime license later
in “My Sygic” menu.
7. Select the navigation voice.
8. You can join to Sygic community by entering your
email.
9. Enjoy all your journeys with Sygic GPS
navigation!
For more information and support, please visit our
website http://help.sygic.com/ .
2. The application will
download necessary files.
3. Select “World
TRIAL” button.
4. Choose one or more
maps and click “Proceed” to
download.
5. Please don’t close
the application and wait until
the end of the download.
6. Select “Continue
trial” to use Sygic GPS
navigation for 30 days for
Page 22
22
Settings
In the main menu, select the option of "Settings" to be able to access the
System Set fold. Directly click can assess picture set options interface.
Description of functions:
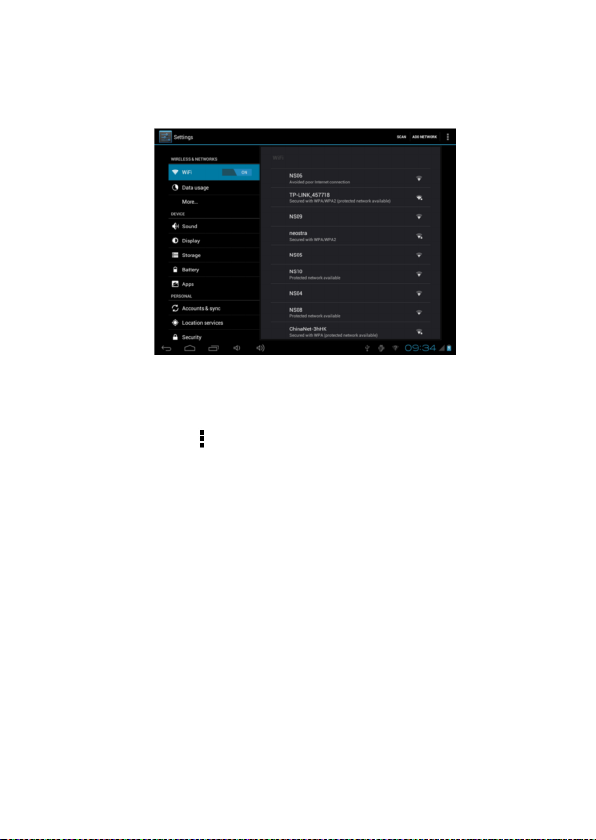
1. WiFi
Wi-Fi: Open/close the wireless connection
Wi-Fi setting: touch the " " icon, can enter WIFI senior set items
2. Date usage
Display Date usage
3. Sound setting
Volumes: set the Notice, the media and the alarm clock volume.
Default notification: Click to open notification bell menu, select the item is set to
default notification bell
Touch sounds: After checked, Touch screen will make sound
Screen lock sound: After checked, Touch screen will make sound
4. Display settings
Brightness: Set adjust brightness of the screen
Wallpaper: you can choose wallpaper from Super-HD player and wallpaper
Sleep: Set off the screen saver standby time. When the player in the standby screen
saver, WIFI function will be closed to save electricity;
Font size: Set shows the font size
Page 23

23
Accelerometer coordinate system: you can set Accelerometer coordinate system
Screen adaption: Used to adjust size of some games display screen
5. Storage
Check the PMP memory and available storage
6. Apps
Can display and management of the installation applications
7. Security
Screen lock: Settings screen lock way, slide, Pattern, PIN, and password and so on
many kinds of mechanisms.
Make password visible: After the check, in the password input box, can show the
input password.
Unknown source: allow installation of non- Google Market applications, the default
setting is open
8. Language & input
Set language and area, input method etc.
9. Backup & reset
Can backup, restore the machine Settings and data
10. Date & time
Set the date, time, time zone and time display format
11. About device
Check the machine software version and other information.
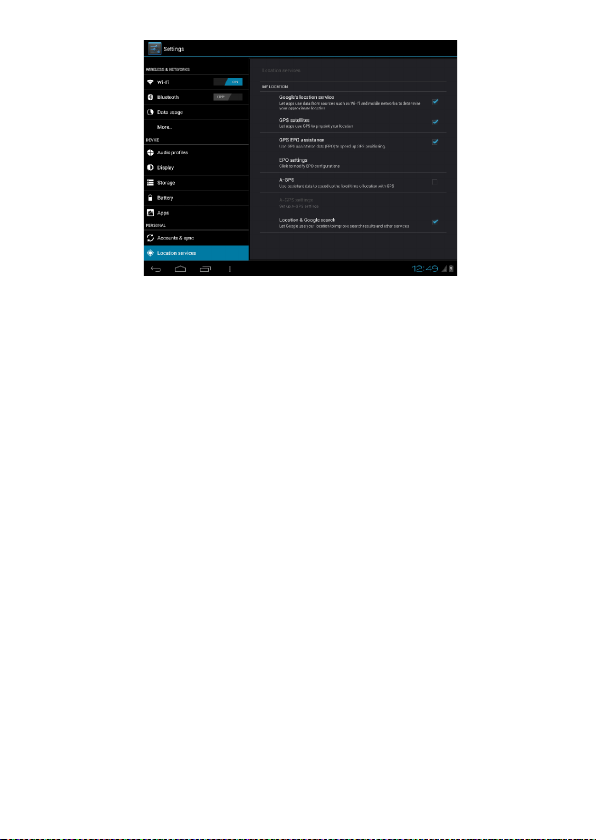
GPS localization
Now you can navigate anywhere in the world thanks to the incorporated GPS
receiver. If you want to use the GPS function with this device, open the main menu,
click the "Settings" icon, and go to the "Location services". Here, check the "GPS
Satellites" option. Go back to main menu and open "navi" application to start your
navigation.
Page 24
24
OTG
OTG is the On-The-Go abbreviation. It is a technology that realizes data
transmission between portable devices without a host. Specifically, computers are not
needed to act as a medium when share data with or transfer documents from other
portable devices to your player such as flash disk, audio player and portable hard
disk.
OTG Connection Steps:
1. Please check if devices connected to your machine have USB connection
activated.
2. In order to access external storage devices from main screen click on File
Manager application and then select “Mobile disk”.
Remarks:
1. Due to large varieties of portable devices, the player might not recognize some
of them.
2. Compatibility with more and more portable devices will be realized through
firmware improvement.
3. While using OTG connection, the other portable device relies on the player’s
power supply. Thus if your player maintains less than 1/3 battery or the other
device is a heavy electric consumer, OTG connection might not be proceeded
Page 25
25
successfully. As an alternative, please provide power supply to the other device
exclusively
4. Currently the OTG only supports one-way operation. That is, documents in
other devices can be read or copied to your player. But files in your player
can’t be pasted to the other device. Nor could you delete files in the other
device.
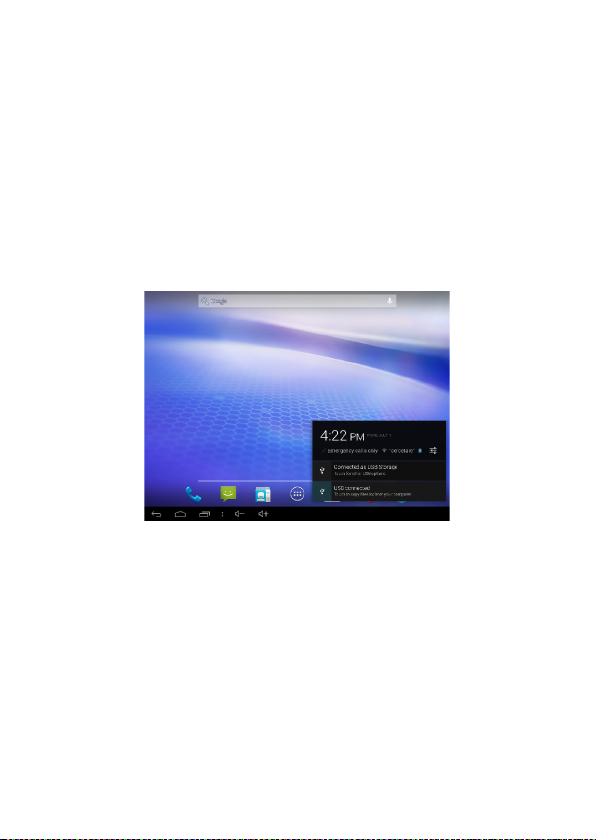
Connect the computer
This machine can be connected through the USB cable to to a personal computer
and the data is copied or delete. The specific procedure is as follows.
1. Connect the machine through the USB cable to the PC's USB port and you
will get notification "USB already connected".
2. Click "USB already connected" notice options, and choose the "open USB
storage devices", and then in the personal computer see mobile operators disk dish,
can as U disk the use of the machine disk data operation.
3G network Settings
1. Insert the SIM card into the dedicate slot.
2. Into the machine "Settings" under a "wireless and network", will be closed
Wifi option, Wifi and 3G are not used in the same time.
Page 26
26
Note
Make sure that you turn off the tablet before you insert a SIM card. Also, you
must turn off the tablet before you remove any SIM card.
Ethernet network Settings
1. Please deactivate Wi-Fi option from menu “Settings”;
2. Connect the Ethernet USB card to the USB port of the device by OTG.
The system will automatically identify the attached device.
3. From “Settings” menu, “Ethernet Settings” please choose “Ethernet” option.
4. If it is necessary to configure IP and Gateway they can be entered by
accessing option "Ethernet configuration".
Note
1. Due to the different communication systems Ethernet card more, this machine
Ethernet function can't ensure that is compatible with all equipment.
2. Due to external Ethernet card equipment from the machine to the USB
interface take electricity, so in Ethernet connection, please ensure that the battery
power in one case above.
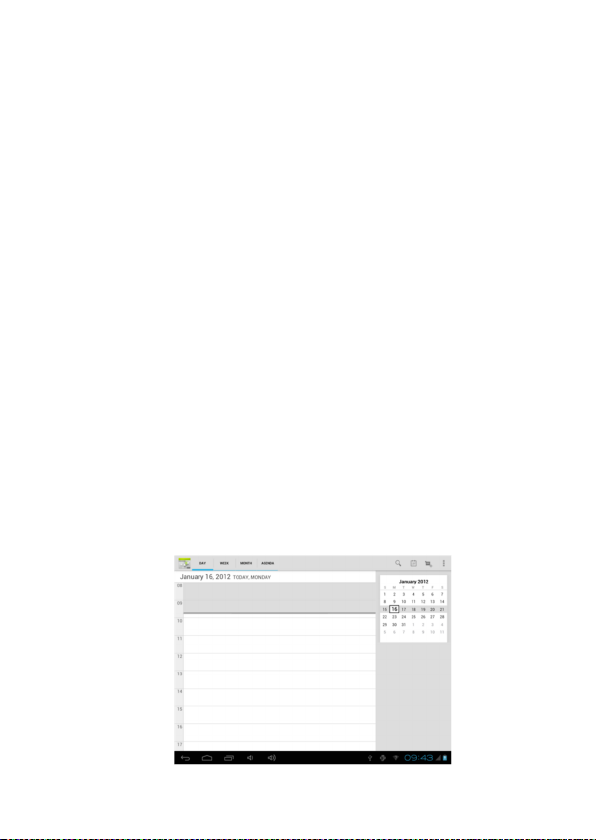
Calendar
In the main menu, touch "calendar" icon to be able to access the calendar
interface.
Under this menu, Touch & slide screen left and right which will accomplish to
flip increase or decrease month by month. Before you can add any event, you must
add at least one Calendar account to the device and make a calendar visible.
Page 27
27
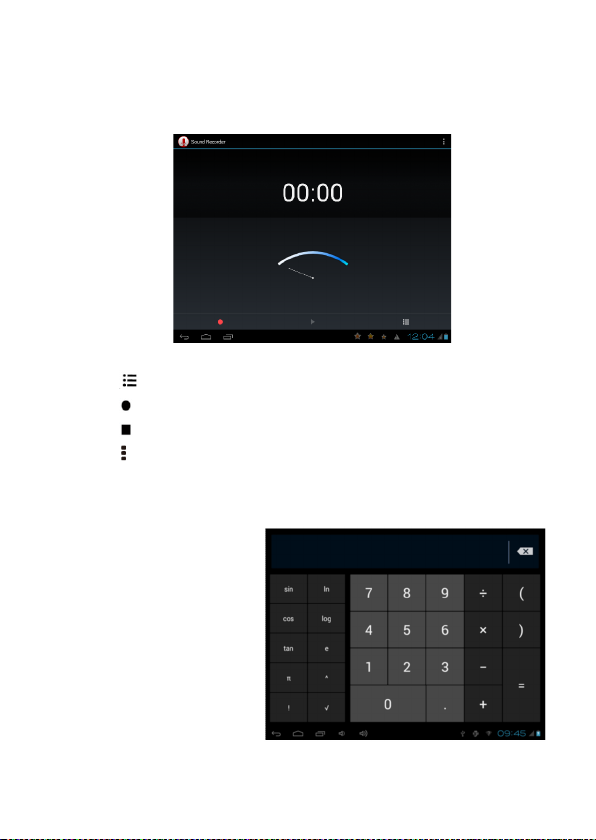
Sound Recorder
In the main menu, select the option of "Sound Recorder" to be able to access
recorder interface.
Keys of functions:
" ": Return to the recorder folder
" " : Start or pause record
" ": Stop current record and select save the current record.
" " : Record playing setting menu
Calculator
In the main menu, touch
"Calculator" icon to be able to
activate the function of Calculator.
The calculators can be used like
normal others. It’s a good
assistant for your work and study.
Page 28
28
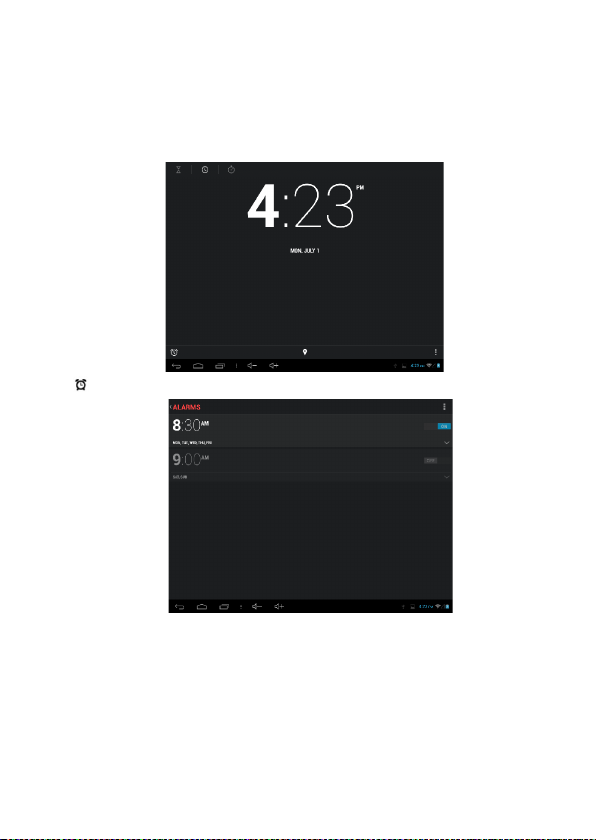
Clock
In the main menu, touch "Clock" icon to be able to activate the function. It’s a
good assistant for your everyday life.
1.Click "clock" appear as follows interface
2." ": Click on it you can set alarm
It will be automatically alarming when you set time.
You can set time, ring tone, repeat options for every alarm clock.
Factory data reset
If this machine is infected, or third party software installed to run this machine
is unusual, but through the recovery factory Settings, remove the third party software,
and restore the state out by default. Into this machine "Settings"-" privacy ", select
Page 29
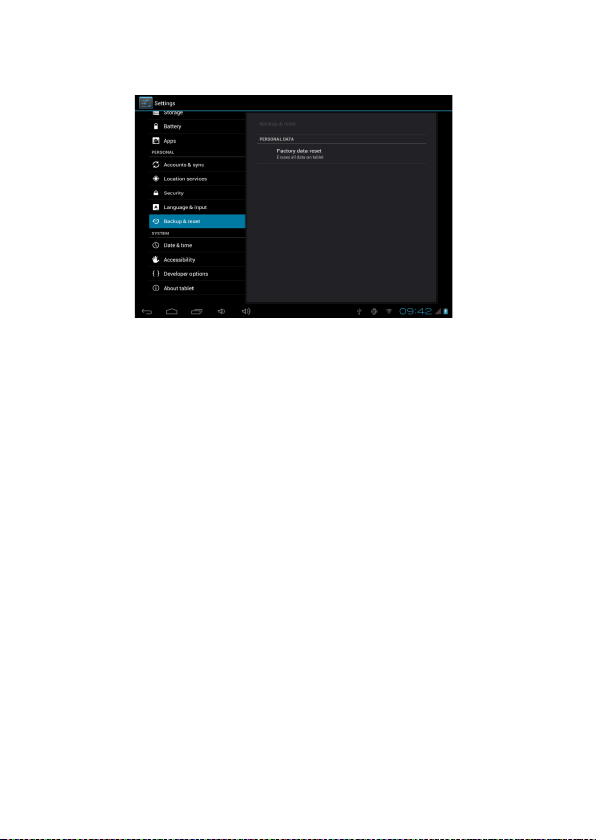
29
"Factory data reset" item, confirmed, will remove all of the data.
Upgrade Player Driver
The firmware is a built-in program, by which you can run various hardware
functions. By upgrading the firmware, you can improve or enhance the performance
and functions of the player. No upgrading the firmware will not affect the normal
operation of the player itself.
The upgrading of firmware may lead to the unit unable to work properly due to
error operation. Please read carefully the instructions for upgrading before upgrading.
Note. Please make sure that players have the upgrading at more than 60% of the
battery power. Avoid because the battery power leads to upgrade failure to boot.
2. The upgrade process do not reset or shutdown operation, avoid accident
interrupt upgrade can't boot.
3. Through our company provide formal or test versions of the firmware update,
but without notice in the premise of the function of the products and the menu
changes.
4. When the firmware upgrade stored in all the data in the player will be deleted.
So in the firmware upgrade will be stored in the user must be before the
important data within the player for backup.
5. The machine firmware does not apply to other types of products, resulting
Page 30

30
from the negative consecquences, our company does not undertake any related
responsibility.
Common troubleshooting
1. What is the APK file? It and Android PMP have what relation?
A: APK is the abbreviation of Android Package, that Android installation Package.
Through the APK files directly to Android system can be installed in execution PMP
players.
2. How to get the APK application
A: You can download via PC-side installation, you can also “Android market” online
to download and install.
3. Why WIFI connection will interrupt
A: If set "screen time", when the player overtime in standby screen saver, WIFI
function will be closed to save electricity purpose; When sensei player, WIFI function
will be in about 5 seconds to resume automatic connection.
4. Why some download APK program, not working properly
A: Download the APK software, mostly by the user to development, without the
platform compatibility testing, and part of the hardware and software for Android
system version has a special requirements, so there could be downloaded APK
documents not compatible, not the normal operation of the phenomenon, the player
itself quality problems
5. Why connected the charger not show charging state
A: When the battery is extremely low, need to use DC charger charging half an hour
or more to show charging status
6. Why can't realize the gravity induction function
A: This machine support gravity feeling function, can be through the shaking to
switch the screen machine did show, but some of the application does not support the
gravity induction function, it can't realize the screen of switching function, this is the
software support question, the functionality of the player.
7. Players can't boot
Page 31

31
1. Check the battery no electricity
General
Network
2G: 900/1800/1900 MHz;
3G: UMTS 900/2100 MHz HSPA+
Dimensions
Dimensions
191x107,3x8,75mm
Weight
277,6 g
Display
Type
IPS-LCD
Touchscreen
Capacitive touchscreen, Multitouch
Dimension
7"
Resolution
1280x800 px
Format
16:10
Characteristics
OS
Android 4.2 Jelly Bean
CPU
Cortex A7 - 1.3 GHz Quad Core
GPU
MALI400 MP
GPS
Yes
2. Connect the ac adapter after inspection again
3 .If after charging still unable to boot, please contact our customer service
8. Can’t Hear the voice in the headset
1) Please check the volume is set to 0
2) Please check whether the connection headphones
9. Player charging abnormalities
1) Please confirm that the use of the equipment complies with the charger of the
player charger requirements
2) Such as connection USB charging, please do not connect to computers lead USB
interface
10. Why some download video can't normally broadcast
This player can be compatible with the Internet video files of the play, but
because the Internet provide video format, coding method, the resolution, code flow
rate in the parameters are different, and may result in part of the video file cannot be
played or play anomaly, it is recommended to use a third party video conversion
software, in the computer support convert player within the scope of the file format
and then copied to the player to play.
Specification
Page 32

32
AGPS
Yes
Call function
Yes
Video call 3G
Yes
Languages
Romanian, English, German, Spanish,
French,Italian etc.
Flash memory
8GB
RAM memory
1GB DDR3
External
memory
Up to 32GB with microSD card
Widget
Yes
Multitasking
Yes
Design
Slim
Sound
3.5mm jack
Yes
Loudspeaker
Yes
Play audio files
Yes
Ringtone type
Vibrations, audio ringtones
Video
Render
HD video with resolution 1080p
Internet render
HD resolution 1080p
Camera
Main camera
resolution
5MP AF
Second camera
resolution
0,3MP
Data3GHSDPA+ 21 Mbps, HSUPA+ 5,76 Mbps
EDGE
Yes
GPRS
Yes
Bluetooth
Version 4.0
WLAN
WiFi 802.11 b/g/n, WiFi Direct
USB
Da 2.0, micro USB
Sensors
G-sensor
Yes
Orientation
sensor
Yes
Internet
Social
networking
Yes
E-mail
Yes
Applications
Yes
Hotspot
Tethering by Wi-Fi
Battery
Capacity
Li-Polymer 3000 mAh / 3,7v
Charger type
DC 5V, 2000mA
Package
content
Tablet, user manual, warranty card, charger, data cable, earphones
Page 33

33
DECLARATION OF CONFORMITY
Nr.1291
STR., registered at the Commerce Chamber Brasov no. J08/818/2002, CUI 14724950,
assures, guarantee and declare on our own responsibility, in accordance with art.4
from HG nr. 1.022/2002 regarding the statute of the products and services that can
jeopardize life, health, work security and environmental protection, that:
the accessories that came with the product: 220V charger, headphones and battery
don’t jeopardize life, health, work security and environmental protection and they are
according to:
- Directive. 2011/65/EU regarding the restriction of use of certain substances
in electrical and electronic equipment.
- The Stipulations of HG nr.982/2007 witch transpose the essential requirements
specified in Direction 2004/108/CE, regarding electromagnetically compatibility;
- The Direction regarding the low voltage equipment users assurance 73/32/CEE,
modified by Direction 93/68/CEE (HG 457/2003) and tests EN
55013:2001+A1:2003+A2:2006, EN 55020:2007, EN 610000-3-2:2006, EN
61000-3-3:1995+A1:2001+A2:2005;
- The Direction regarding the radio and telecommunication equipments R&TTE
1999/5/CE (HG 88/303).
- The safety requirements of the European Directive 2001/95/EC and of EN standards
EN62209-1(2006), EN62311(2008), 60065:2002/A12:2011 and EN
60950-1:2006/A12:2011, of the decibels level emitted by the sold devices.
The Product described upstairs in this Declaration and all the accessories are
according to the next standards:
- Health EN 50360, EN 50361;
- Safety EN 6095-1;
- EMC EN 301 489-1-7/17;
- Radio spectrum EN 301511 EN 300328;
After the performed tests emerge that the samples comply with the upstairs
specification, as the test results show. Documentation is stored on VISUAL FAN
LTD - Brasov, 61 Brazilor STR.
Also available on web: www.allviewmobile.com
We, SC VISUAL FAN SRL, importer located in Brasov, 61 Brazilor
The product ALLVIEW VIVA H7S tablet PC, ALLVIEW brand- and
CE: 0678 Director
SAR: 1,776W/KG Cotuna Gheorghe
Page 34

34
Allview Viva H7S
Ръководство за употреба
Благодарим Ви за покупката на този продукт.
Моля, прочетете внимателно инструкциите в това ръководство преди
да започнете да използвате таблета.
При необходимост, фирмата ще продължи да развива софтуера и
функциите на таблета, като не предвижда промени в това
ръководство. Реалната настройка и приложения може да не са
напълно идентични на тези, посочени в това ръководство.
При използването на таблета като мобилен твърд диск, фирмата не
носи отговорност за сигурността на файловете, записани в диска.
Page 35

35
Основни функции
инча капацитивен екран, поддържащ многоточков допир, резолюция на екрана
1280x800;
Поддържа WIFI и 3G безжични Мрежи;
Вградени фото-видео камери - предна с резолюция 0,3МP пиксела, задна
камера 5MP AF пиксела.
Поддържа мрежови видео разговори и фотографски функции
Операционна система Аndroid 4 или по - висока;
Автоматична ротация на дисплея при завъртане на таблета – хоризонтален или
вертикален изглед;
УЕБ сърфиране, онлайн видео и чат, онлайн игри и др.;
Възможност за сваляне на над 10 000 игри и приложения.
Поддържа множество аудио формати.
Поддържа видео възпроизвеждане в различни видео формати с максимална
резолюция 1080Р ;
Възможност за разглеждане и редакция на снимки в различни албуми;
Възможност за преглед на Е-книги в различни формати.
USB2.0 високоскоростна връзка;
Вграден микрофон;
Възможност за онлайн ъпгрейд на системата и приложенията;
Поддържа Micro SD карти – памет.
Page 36

36
Основни операции
Включване
Натиснете и задръжте бутона " "
Изключване
Когато таблета е включен, натиснете и задръжте бутона " " за 3 сек. Ще се
появи прозорец на екрана - изберете " Изключване " за да го изключите напълно.
„Спящ режим“
В нормален режим, при натискане за кратко бутона за Включване, дисплея
изгасва и таблета преминава в този режим. Натиснете отново за кратко бутона за
Включване и дисплея ще светне и ще мине в нормален режим.
Ако не използвате таблета, след определено време екрана изгасва и той
преминава автоматично в този режим. Вие може да укажете времето за изключване
или да забраните изключването в меню настройки на дисплея.
Използване на Микро SD карта
При свързване на таблета с кабел към компютър, на екрана на компютъра ще
се появят две нови прикачени сменяеми дискови устройства – първото е вградената
памет на таблета, а второто е Микро SD картата на таблета. Ако има инсталирана
такава, Вие ще може да разгледате нейното съдържание, ако не - второто дисково
устройство ще е недостъпно. Този таблет поддържа Микро SD карти - памет с размер
от 128MB до 32GB.
Вкарване и изваждане на Микро SD карта
Вкарване:
Поставете Микро SD картата с лицето нагоре и я плъзнете леко в гнездото.
Изваждане:
Натиснете леко навътре Микро SD картата и тя ще излезе малко, след това може
да я издърпате.
Внимание:
Моля, вкарвайте и изкарвайте Микро SD картата при изключен таблет! В
противен случай, може да повредите картата и да загубите съхранените файлове
на нея!
Батерия:
Page 37

37
В този модел таблет е използвана полимерна батерия с голям капацитет.
Продължителността на работа без зареждане зависи от зададения от настройките
режим и използваните приложения, но най - вече от активността и яркостта на
дисплея, който може да се регулира от меню настройки на дисплея.
Зареждане:
Устройството може да се зарежда през USB порта или DC Адаптера, включен в
комплекта.
Предупреждения при зареждане:
Новата батерия може да е напълно изтощена и да е необходимо нейното
зареждане, преди първоначалното използване на таблета. Ако не се използва дълго
време, моля зареждайте напълно устройството поне веднъж на 2-3 месеца.
Използването на оригиналния DC адаптор е задължително за оптималната
работа на устройството. Използването на други такива, много често води до дефекти,
които не могат да бъдат покрити от производствената гаранция. Моля, използвайте
само оригинални аксесоари.
Връщане към Основният екран
Във всяко отворено приложение, натиснете " " за да се върнете на основния
екран.
Връщане към предишно приложение или по-горно меню
Натиснете иконата " ", за да се върнете към предишно приложение или
по-горно меню. Това става и при натискане за кратко на бутона " " .
ВНИМАНИЕ
1 Не използвайте устройството при температури, които са прекалено високи или
прекалено ниски, при висока влага или запрашеност. Не го излагайте на пряка
слънчева светлина.
2 Внимавайте да не го изпуснете по време на работа с него.
3 Зареждайте батерията когато:
A. Иконата за състоянието на батерията показва, че е изтощена;
B. Системата се изключва сама, кратко време след включване;
C. Бутоните не са активни изобщо.
Page 38

38
4 Моля, не се опитвайте да разглобявате сами устройството – при необходимост
обърнете се към упълномощен сервиз.
5 Не се препоръчва да се използва таблета по време на шофиране. Ако трябва да
го използвате, винаги използвайте системата "свободни ръце" при шофиране. Първата
и основна грижа е безопасността на движение по пътищата при шофиране .
6 Изключете таблета, когато сте в самолет. Смущения причинени от него могат да
влияят на безопасността на въздухоплаването.
Производителя - Visual Fan Ltd., си запазва правото да спре работа със всеки
сервизен център, упоменат на гаранционната карта, към датата на закупуване на
продукта.
Внимание: Не носим отговорност ако телефона е използван по различен начин от
указанията в инсрукцията. Нашата компания си запазва правото да прави промени в
съдържанието на ръководството, без да оповестява това публично. Тези промени ще
бъдат оповестявани в сайта на компанията.
За да избегнете недоразумения, преди да занесете устройството за ремонт в някой
от сервизите, моля проверете на страницата www.allviewmobile.com дали избрания
сервиз фигурира в обновения списък с упълномощени сервизи.
Основен интерфейс
Основния интерфейс е разделен на 5 отделни дисплея. Плъзнете началния екран
който е в средата, на ляво или надясно от началния за да разгледате и останалите 4.
Page 39

39
Смяна на тапета
Натиснете и задръжте празно поле на основния екран, за да излезе долния
прозорец. От него може да изберете нов фон за основния дисплей.
Показване на всички приложения
Натиснете иконата , за да се покажат иконите на всички инсталирани
приложения. Изберете съответната икона за да стартирате приложението, което
търсите.
Добавяне на ПРИСПОСОБЛЕНИЯ на главният екран.
Натиснете иконата " " за да се покажат всички инсталирани приложения,
след това изберете " ПРИСПОСОБЛЕНИЯ". Натиснете и задръжте избраното
приспособление, за да се прехвърли на десктопа .
Page 40

40
Показване на отворените приложения
Във всеки момент натиснете иконата " " в долния ляв ъгъл на екрана, за да
се покаже списък с умален изглед на отворените приложения. Изберете кое да се
покаже на цял екран. Плъзнете с пръст надясно върху съответното приложение, за да
го спрете.
Показване на съобщения
В основният екран натиснете долния десен ъгъл (където е часовника), за да
видите: час; състояние на мрежата; ниво на заряд на батерията, както и различни
други съобщения.
Изтриване на икона от десктопа
От главният екран натиснете и задръжте върху иконата, която искате да
премахнете – показва се кошче – завлечете иконата до него и като се оцвети в
червено – пуснете. Иконата ще се изтрие от екрана, но приложението ще остане
Page 41

41
инсталирано. При продължително натискане на иконата – се оцветява в оранжево,
след което вие може да я преместите или изтриете.
От главният екран натиснете и задръжте върху иконата, която искате да
преместите и я завлечете с пръста до новото място на същия или друг от основните
екрани на десктопа.
Инсталиране на приложения .APK
4. Отворете ES File Explorer и изберете директорията в която е приложението,
което искате да инсталирате / трябва да е с разширение .apk /
5. Натиснете върху файла / ххххх.apk/ за да стартирате инсталацията.
Page 42

42
Деинсталиране на приложенияAPK
4. От главният екран изберете иконата „Настройки“ и след това подменюто
"Приложения" – „ВСИЧКИ“, изберете и кликнете върху приложението което искате
да деактивирате.
5. Изберете иконата "Деактивиране" / Uninstall за да премахнете приложението.
Видео Плейър
Изберете икона на приложение за отваряне на видео файлове, като "Super-HD
player" , „Галерия“ или друго за да влезете във видео папката.
Page 43

43
Изглед на списъка с файлове – видео или снимки
Функционални клавиши
" ": Натиснете, за да се върнете в главния екран
" ": Натиснете, за да се върнете в по горна директория.
Възпроизвеждане на видео
Функции на клавишите
'' / '': пускане или спиране на пауза
'' / ": кратко натискане за пускане на предишен / следващ филм, дълго
натискане за превъртане на текущия напред или назад;
“ / ”: Усилване или намаляване на звука
" " връщане в по горен интерфейс – меню с настройки.
Съвети:
1. Този MP4 плейър подържа максимална резолюция от 1280.
Page 44

44
2. Субтитри - Този плейър поддържа субтитри с формат"*.SRT" (Могат да бъдат
свалени от интернет). Ако има файл със субтитри с разширение .srt, със същото име,
като видео файла и в същата папка, плейърът ще може да синхронизира и покаже
субтитрите.
3. Плейърът може да възпроизвежда множество формати и кодировки, но поради
голямото им разнообразие не е възможно да бъде съвместим с всички. Вие може да
изтеглите друга програма за възпроизвеждане на съответния файл или да
конвертирате в подходящ формат, за да се използва инсталирания.
4. Ако искате да превъртите или върнете - моля плъзнете с пръст върху лентата с
прогреса най - отдолу.
Аудио Плейър
Изберете икона на приложение за отваряне на аудио файлове – „Музика“.
Функции на клавишите
'' '': Натиснете за да се върнете в главният екран .
'' '': Натиснете, за да се върнете в по- горна директория.
Разгледайте списъка с песни като плъзнете пръст нагоре / надолу.
Изпълнители: според зададеното инфо във всеки музикален файл.
Албуми: според зададеното инфо във всеки музикален файл.
Песни: показва всички музикални файлове.
Плейлисти: показва създадените плейлисти.
Възпроизвежда сега: интерфейс на възпроизвеждане във фонов режим
Page 45

45
Изглед на музикалния плейър
Функции на клавишите
'' '': Натиснете, за да се върнете в главният екран.
'' '': Натиснете, за да се върнете в по - горна директория.
'' / ": кратко натискане за пускане на предишна /следваща песен,
дълго натискане за превъртане на текущата песен напред или назад.
'' '': пускане или спиране на песен
'' " : Избиране на плейлиста.
" ": Избиране на песни на случаен принцип
" " връщане в горен интерфейс
Показване на текстове
Когато има файл съдържащ текста на песента, в същата папка и със същото име
като песента, плейърът показва текста докато песента се възпроизвежда.
Този плейър поддържа текстови файлове с формат "*.Lrc" (Могат да бъдат свалени от
интернет от "http://www.51lrc.com", или да се търсят с "LRC Lyric" в интернет)
плейърът ще може да синхронизира и покаже текста.
Снимки
В главния екран, изберете иконата "super-HD player", Галерия или друга
програма за да разгледате файловете с изображения.
Page 46

46
Интерфейс за преглед на снимки
Функции на клавишите
'' '': Възпроизвежда всички снимки от папката
'' '': Управление на снимките – изтриване, споделяне завъртане и други –
може да сортирате и групирате снимките по време, място, хора и други
характеристики.
'' '': Изтриване на снимки
Page 47

47
Функции Телефон
Повикване
За да направите изходящо повикване - изберете една от следните функции :
1. В прозореца Телефон : Въведете телефонен номер и натиснете Слушалка или
изберете контакт от списъка и натснете върху него
2. Смарт Набиране: чрез клавиатурата въведе името – колкото повече букви от името
въвеждате – толкова по малко имена ще се визуализират – например ако натиснете
ИВА – ще се покажат всички контакти в името на които има тази последователност от
букви – Ива, Иван, Иванов и тн. ;
Получаване на повикване
За да oтговорите – натиснете слушалка.
Прекратяване на разговор
За да прекратите – натиснете слушалка.
Контакти
За да разгледате контактите, изберете иконата Телефон
и след това изберете иконата Контакти в горния десен
ъгъл на екрана. В това подменю може да организирате
контактите в различни групи.
СЪВЕТ: За търсене на контакт - натиснете
Меню. Изберете Лупата за търсене и въведете
името – контактите които отговарят ще се
визуализират.
Добавяне на контакт
1. Натиснете иконата телефон;
2. Изберете Контакти;
3. Натиснете Меню;
4. И зб ер е те Н ов к он та кт ;
5. Въведете информация за новият контакт;
6. Изберете Готово.
Page 48

48
Съобщения
Всички получени съобщения са сортирани по име на Контакта – получател / изпращач.
Входната кутия включва SMS и MMS.
Четене на съобщения
1. Изберете иконата Съобщения;
2. Натиснете върху съобщението за да се отвори.
Изпращане на съобщение
1. Изберете иконата Съобщения;
2. Изберете ново съобщение / иконка горе вдясно/;
3. Изберетеo полето To / ДО и въведете контакт от списъка или директно телефонен
номер, на който да се изпрати съобщението;
4. Въведете съобщението и натиснете иконата Изпрати >
MMS
MMS озн ачава Multi-media Message Service /
Мулти Медиина Услуга и се използва ако искате да
изпратите съобщение съдържащо текст, снимка,
аудио файл и др.
Изпращане на MMS
Снимките, направени с камерата се съхраняват най
- често на картата памет. Уверете се, че сте
поставили картата, преди да използвате камерата.
За да прикачите снимка към съобщение:
1. Натиснете Символа – Кламер в горния десен
ъгъл на екрана;
2. Изберете една от следните опции:
Снимки
Изберете за да намерите и прикачите
съществуваща снимка от паметта.
Снимане
Page 49

49
Изберете, за да направите нова снимка с камерата и да прикачите.
Видеоклипове
Изберете, за да намерите съществуващ видео клип от памета и да прикачите.
Заснемане на видеоклип
Изберете, за да направите нов видеоклип с камерата и да прикачите.
Аудио
Изберете, за да намерите съществуващ аудио клип от памета и да прикачите.
Запис на звук
Изберете, за да направите нов аудио запис и да прикачите.
Слайдшоу
Изберете, за да прикачите слайдшоу файл.
Page 50

50
Aктивирайте навигационната
система Sygic GPS (по избор)
Най-популярното приложение за офлайн навигация
чрез GPS Sygic е предварително инсталирана на това
устройство. Насладете се на бразуване в 90 страни по целия
свят, безплатно, за период от 30 дни.
1. Щракнете върху иконата Sygic и апликацията
стартиране.
2. Aпликацията ще свали необходимите файлове.
безплатно, за 30 дни. Или закупите пълен лиценз за
навигация. Ако изберете пробна версия можете да закупите
пълен лиценз по-късно, в “My Sygic”.
7. Изберете гласа за навигация.
8. Можете да се присъедините към общността Sygic
чрез въвеждане на електронния адрес (е-мейл).
9. Насладете се на всички пътувания с GPS Sygiс
навигация!
За повече информация и помощ, моля посетете нашия
уеб сайт http://help.sygic.com/ .
3. Изберете копчето
“World TRIAL”.
4. Изберете една или
повече карти и щракнете върху
“Продължете /Proceed” за
свалене.
5. Моля, не затваряйте
апликацията и изчакайте, докато
сваленето е завършено.
6. Изберете "Продължи
опита / Continue trial", за да
използвате Sygic GPS
Page 51

51
Настройки
В главното меню изберете опция настройки, за да имате достъп до системните
настройки.
Описание на функциите
1. WiFi
Wi-Fi: включване/изключване на безжичната връзка.
За разширени Wi-Fi настройки натиснете иконата " "
2. Използване на данни
Показва използване на данните.
Настройки на звука – Audio profiles.
Звуци: Настройки на различни режими на системните звуци и звънене .
Звуци на докосване: след активиране дисплеят ще издава звук при докосвне
3. Дисплей
Яркост: Задайте регулиране на яркостта на дисплея.
Тапет: може да изберете вашият основен тапет от Галерия или Тапети.
Спящ режим: настройка на времето за преминаване в режим screensaver.
4. Хранилище
Page 52

52
Проверете паметта с която разполагате.
5. Батерия
Дава информация за количеството на заряда в батерията.
6. Приложения
Можете да покажете на дисплея и да управлявате инсталираните приложения.
7. Акаунти и синхронизация
Информация за инсталираните приложения и акаунти.
8. Сигурност
Заключване на екрана: Настройки и начини на заключване на екрана ,
Приплъзване, PIN , и пароли за всички механизми.
9. Език и въвеждане
Настройки на езика, метод на въвеждане , FunctionStorage и други.
10. Резервни копия и нулиране
Можете да архивирате и да възстановявате оригиналните настройки на
устройството си.
11. Дата и час
Настройки на дата,час,часови зони.
12. Schedule power on/off
Може да зададете час за Вкл./Изкл. на устройството за всеки ден от
седмицата.
13 Достъпност
Управление на функции, улесняващи употребата.
14 Опции на програмиста
Настройки и опции за OS Android .
15 Всичко за телефона
Проверете софтуерната версия на устройството и друга информация.
Page 53

53
OTG
OTG означава On-The-Go съкращение. Това е технология, която осъществява
предаване на данни между преносимите устройства без хост. Не е необходим
компютър, за да се споделят данни или трансферира документ между преносими
устройства като: флаш диск, mp3 плейър и преносим твърд диск.
OTG Стъпки за връзка:
1.За връзка с други мобилни устройства се използва USB порта на устройството
и не е необходимо данните да минават през компютър.
2.След като закачите външно USB устройство – отидете на работният плот и
кликнете на икона Файл Мениджър. Изберете"mobile disk", за да имате достъп до
файловете и съдържанието на мобилното устройство.
Забележки:
1.Поради наличието на много разновидности на външни мобилни устройства,
някои от тях може да не бъдат разпознати от таблета ви.
2 Съвместимост с повече нови мобилни устройства ще се реализира при
обновяване на версията на фирмуеара.
3. Когато използвате OTG връзка, закаченото устройство се захранва от таблета.
Ето защо е необходимо таблета да бъде захранен с достатъчно енергия – уверете
се, че вашият таблет има заряд на батерията над 1/3. При липса на захранване OTG връзката няма да бъде успешна.
4. В момента OTG поддържа само еднопосочна операция. При OTG връзка
можете да четете и копирате файлове от Външното устройство към таблета, но не
можете да прехвърляте файлове към него или да триете съществуващите такива.
Връзка с компютър
Устройството може да бъде свързано чрез USB кабела с вашият компютър и така
да прехвърляте информация между двете устройства. Това става по следният начин:
Page 54

54
1.Свържете таблета с USB порта на вашият компютър чрез USB кабела от
комплекта,след което на екрана на таблета ще се изпише "USB connected".
2.Натиснете "USB already connected" и изберете "open USB storage devices", след
което отворете директорията в която са дисковете на вашият компютър , където
устройството ще бъде разпознато като външен disc U.
3G и Ethernet Мрежови настройки
1. Поставете SIM карта с подходящ абонамент в съответното гнездо. Таблета
трябва да е изключен преди да поставите или да извадите СИМ карта.
2. В меню "НАСТРОЙКИ" подменю "Кабелни и безжични мрежи", изключете
Wifi. Wifi и 3G или Ethernet връзката не могат да се използват едновременно.
3. Aко имате прикачена към USB порта външна Ethernet карта чрез OTG,
системата автоматично ще го разпознае и закачи към мрежата. Ако се нуждаете от
специфична информация относно IP адрес и gateway, влезте в меню "Ethernet
configuration" / настройки.
Календар
В главният екран изберете иконата
"Календар", за да разгледате календара.
В това меню при плъзгане на екрана
в ляво или вдясно, може да прелиствате
месеците напред и назад.
Page 55

55
Може да създадете различни календари – акаунти / работен, личен и др./. Преди
да създадете ново събитие, трябва да имате поне един създаден календар на
устройството, в който да го впишете.
Калкулатор
В главният екран изберете иконата "Калкулатор", за да активирате функцията.
Появява се долният екран.
Часовник
В главното меню натиснете иконата "Часовник", за да активирате функцията –
едно добро ежедневно използвано приложение. При натискане се появява долният
екран:
Page 56

56
2." ": Настройка на алармата
Може да зададете време, звук на звънене, повтаряемост за всяка аларма.
Пълен рисет на таблета
Ако таблета е забил или се държи странно, работи бавно или изхабява бързо
батерията – най - вероятно това се дължи на качен допълнително несъвместим
софтуер. Преди да го занесете в сервиз – моля опитайте да върнете таблета в начално
състояние, като изчистите всички настройки през меню „Настройки“ – „Резервни
копия и нулиране“ – „Възстановяване на фабрични настройки“ Внимание: Това
ще изтрие всички приложения и данни, качени до момента.
Page 57

57
Ъпгрейд на фирмуера
Фирмуерът е основната програма, чрез която се контролират всички функции на
таблета. При наличие на проблеми, производителя публикува ъпдейти под формата
на нова версия на фирмуера. Чрез качването на нов фирмуер, обикновенно се
отстраняват проблеми и се добавят нови функции. Възможно е след ъпгрейд
устройството да не може да се стартира в следствие на погрешна инсталация. Моля,
спазвайте инструкциите за инсталиране на фирмуера, публикувани на сайта на
производителя.
Забележка
1. Преди да започнете трябва да заредите таблета до минимум 60 % - в
противен случай може да повредите таблета и да не може да се стартира ако
процеса по ъпгрейд не е завършил, поради липса на батерия .
2. По време на ъпгреида не рестартирайте и не изключвайте устройството,
защото процеса на ъпгреид не трябва да се прекъсва.
3.Чрез нашата компания можете да се сдобиете с формална или тестова
версия на фирмуерен ъпдейт, но без уведомление за промяна на функциите или
промяна в менюто на продукта.
4.Когато фирмуерният ъпгреид завърши, цялата информация която е била
преди това в устройството ще бъде изтрита . Обърнете особенно внимание –
препоръчваме преди ъпгреида важната за Вас информация да се съхрани на
друг носител и след това да се възстанови.
5.Софтуерът на този таблет не е съвместим с дуги продукти от този тип и
респективно резултатите са с негативни последствия.Нашата компания не носи
отговорност вследствие на възникнали проблеми при подобни действия.
Page 58

58
Спецификации
Общи
мрежа
2G: 900/1800/1900 MHz; 3G: UMTS
900/2100 MHz HSPA+
Езици
English, German, Spanish и др.
Размери
191x107,3x8,75мм
Тегло
277,6гр.
Дисплей
Тип
IPS-LCD
Размер
7”
Екран
Капацитивен тъчскрийн, мултитъч
Резолюция
1280x800 пиксела
Формат и цвят
16:10 16млн цвята
Характеристики
OS
Android 4.2 Jelly Bean
CPU
Cortex A7 - 1.3 GHz Quad Core
GPU
MALI400 MP
АGPС
Да
Flash memory
8GB
RAM
1GB DDR3
Външна памет
MicroSD, max 32GB
Цветове
Черен, бял
Компас
Да
G-sensor
Да
Свързаност
GPS
Да
3G
HSDPA+ 21 Mbps, HSUPA+ 5,76 Mbps
Bluetooth
Версия 4.0
WLAN
WiFi 802.11 b/g/n, WiFi Direct
Връзка с PC
Да, USB 2.0 micro USB
Мултимедия
Камера
Основна камера- 5MP AF
Фронтална камера -0,3МР
Звук
Вграден стерео говорител
Вибрация, аудио рингтонове
Вграден микрофон
Page 59

59
Видео
HD видео с резолюция 1080p
Internet render HD резолюция 1080p
Приложения
Да
Снимки
Да
Интернет
Социални мрежи
Да
E-Mail
Да
Приложения
Да
WiFi Direct
Да.
Hotspot
Tethering WiFI
портове
Аудио изход
3,5 mm жак
Видоeо изход
няма
Слот за карти
MicroSD
Usb
MicroUSB
Батерия
Зарядно тип
DC 5V, 2000mA
Батерия тип
3,7V Lithium-polymer
Капацитет
3000 mAh
Съдържание на пакета
Таблет, зарядно, дата кабел, гаранционна карта,
ръководство за употреба, слушалки
Page 60

60
ДЕКЛАРАЦИЯ ЗА СЪОТВЕТСТВИЕ
Ние, ЕсЦе ВИЗУАЛ ФЪН ЕсЕрЕл. , вн осител със седалище в Брашов, 61 Лилияцулуи Стрийт, дружеството
регистрирано в Търговска Камара Брашов под no. J08/818/2002, CUI 14724950, удостоверява, гарантира и
декларира на собствена отговорност, в съответствие с ч лен 4 от HG NR. 1.022/2002 по отношение на статута на
продукти и услуги, които могат да застрашат живота, здравето, охранителна дейност и опазването на околната
среда, че:
-Директива. 2011/65/ЕС относно ограничението на употребата на определени вещества в
електрическото и електронното оборудване.
-Европейската директива 2001/95/ЕО и изискванията за безопасност на EN 60065:2002 /
A12: 2011 и EN 60950-1:2006 / A12: 2011, EN62209-1 (2006 г.), EN62311 (2008) стандарти, по
отношение на пускането на пазара на устройства, издадени нива децибели.
- Продукт ALLVIEW VIVA H7S - устройството и аксесоарите, които са в комплект с продукта: 220V зарядно,
слушалки и батерия не застрашават живота, здравето, охранителна дейност и опазването на околната среда.
Уредът ведно с неговите аксесоари са в съответствие с:
- Постановленията на HG nr.982/2007 заедно с транспортните основни изисквания, посочени в Директива
2004/108/CE по отношение на електромагнитна съвместимост;
- Директива за оборудване с ниско напрежение от потреби телите 73/32/CEE, променена на Директива 93/68/CEE
(HG 457/2003) и тестове съгласно EN 55013:2001+A1:2003+A2:2006, EN 55020:2007, EN 610000 -3 -2:2006, EN
61000 -3 -3:1995+A1:2001+A2:2005;
- Европейска Директива за Радио и Телекомуникационно Оборудване R&TT E 1999/5/CE (HG 88/303).
Продуктът, описани по -горе в тази декларация и всички аксесоари са в съответствие следващите стандарти:
- Здравен EN 50360, EN 50361;
- Безопастност EN 6095 - 1;
- EMC EN 301 489 - 1- 7/17; - Радио спектър EN 301511 EN 300328;
След п роведените тестове и резулатите от тях, се стигна до заключението, че пробите са в съответствие с
горецитираните нормативни изисквания . Техническото досие на продукта се съхранява в ЕсЦе ВИЗУАЛ ФЪН
ЕсЕрЕл – гр. Брашов, 61 Бразилор Стрийт ..
Тази декла рация е налична и на web адрес: www.allviewmobile.com
Nr.1291
CE 0678 Директор
SAR 1,776W/KG Котуна Георге
Page 61

61
Οδηγός Χρήστη
Allview Viva H7S
Πρόλογος
Σας ευχαριστούμε για την αγορά σας.
Οι παρούσες οδηγίες εξασφαλίζουν τη γρήγορη και εύκολη χρήση. Παρακαλούμε,
διαβάστε τις οδηγίες προσεκτικά πριν την χρήση.
Η συσκευή αναπαραγωγής που κρατάτε στα χέρια σας είναι ένα φορητό προϊόν
αναπαραγωγής άριστης ποιότητας, με μια σειρά καταπληκτικών λειτουργιών. Τυχόν
αλλαγή στο περιεχόμενο του υφιστάμενου κειμένου πραγματοποιείται χωρίς ειδοποίηση.
Η εταιρία θα συνεχίσει να παρέχει νέες λειτουργίες για την ανάπτυξη του προϊόντος
και δεν θα πραγματοποιηθεί ξεχωριστή αλλαγή στο εγχειρίδιο σε περίπτωση αλλαγής στην
απόδοση και στις λειτουργίες του προϊόντος. Ενώ η υφιστάμενη μονάδα μπορεί να
χρησιμοποιηθεί ως φορητός σκληρός δίσκος, η εταιρία δεν αναλαμβάνει ουδεμία ευθύνη
για την ασφάλεια των αρχείων που αποθηκεύονται σε αυτήν.
Αν η τελική ρύθμιση και οι εφαρμογές δεν είναι πανομοιότυπες με αυτές που
παρουσιάζονται στο παρόν εγχειρίδιο, ανατρέξτε στα τελευταία στοιχεία προϊόντος που
περιέχονται στον ιστοτόπο της εταιρίας.
Page 62

62
Βασικές λειτουργίες
Οθόνη αφής διαμέτρου 8 ιντσών, capacitative, με υποστήριξη πολλαπλών σημείων αφής,
ανάλυση οθόνης 1280x800
Υποστήριξη WIFI, ασύρματου δικτύου 3G
Ενσωματωμένη φωτογραφική μηχανή / μηχανή καταγραφής βίντεο, κάμερα 0,3MP /
5MP AF, λειτουργία βιντεοδιάσκεψης και λήψης φωτογραφιών
Προσαρμοσμένο λειτουργικό σύστημα Android 4.2
Υποστήριξη αυτόματης περιστροφής της οθόνης οριζόντια ή κάθετα
Υποστήριξη περιήγησης στο διαδίκτυο, διαδικτυακών συζητήσεων, προβολής βίντεο
από το διαδίκτυο, αναπαραγωγής παιχνιδιών από το διαδίκτυο, λήψης αρχείων, κ.ο.κ.
Υποστήριξη δέκα χιλιάδων παιχνιδιών και προγραμμάτων για λήψη από το διαδίκτυο
και εγκατάσταση
Υποστήριξη πολλαπλών φορμά ήχου
Υποστήριξη ταυτόχρονης προβολής στίχων
Υποστήριξη αναπαραγωγής βίντεο πολλαπλών μορφών
Έξοδος βίντεο ανάλυσης μέχρι και 1080Ρ
Υποστήριξη πλοήγησης εικόνων, περιστροφής και αναπαραγωγής σε μορφή
παρουσίασης
Υποστήριξη λειτουργίας Ε-book, αναπαραγωγή πολλαπλών μορφών
Υψηλός ρυθμός μετάδοσης, USB 2.0
Ενσωματωμένο μικρόφωνο και καταγραφή μεγάλης διάρκειας
Υποστήριξη αναβάθμισης του firmware,
Υποστήριξη καρτών Micro SD, υποστήριξη λειτουργίας OTG, δυνατότητα επέκτασης
αποθηκευτικού χώρου
Page 63

63
Βασική Λειτουργία
Ενεργοποίηση
Ενώ η συσκευή είναι κλειστή, κρατήστε πατημένο το πλήκτρο " " για να
ενεργοποιηθεί
Απενεργοποίηση
Ενώ η συσκευή είναι ενεργοποιημένη, κρατήστε πατημένο το πλήκτρο " " για 3
δευτερόλεπτα, και αφού εμφανιστούν οι επιλογές συσκευής, επιλέξτε την
«Απενεργοποίηση».
Αναμονή
Ενώ η συσκευή βρίσκεται υπό φυσιολογικές συνθήκες λειτουργίας, κρατήστε
πατημένο το πλήκτρο ενεργοποίησης για μικρό χρονικό διάστημα, επιλέξτε τη λειτουργία
«Μετάβαση σε αναστολή», «Τώρα», και η οθόνη θα σβήσει. Κρατήστε και πάλι
πατημένο το πλήκτρο ενεργοποίησης για λίγο, και η συσκευή θα επιστρέψει στη
φυσιολογική λειτουργία. Μπορείτε να χρησιμοποιήσετε αυτή τη λειτουργία ώστε να
μειώσετε την κατανάλωση ενέργειας.
Επαναφορά ισχύος
Αν σβήσει η συσκευή κατά τη διάρκεια της λειτουργίας, μπορείτε να την
απενεργοποιήσετε και να την ενεργοποιήσετε εκ νέου πατώντας το πλήκτρο επαναφοράς.
Χρονοδιακόπτης οθόνης
Αν δεν αγγίξετε τη συσκευή εντός του καθορισμένου χρονικού ορίου και δεν
πατήσετε το πλήκτρο, η οθόνη αφής απενεργοποιείται αυτόματα.
Σε οποιαδήποτε κατάσταση λειτουργίας, κρατήστε πατημένο για λίγο το πλήκτρο
« » ώστε να ενεργοποιηθεί. Έπειτα σύρετε τη ράβδο κλειδώματος στο πράσινο τμήμα,
ώστε να επιτραπεί η πρόσβαση στο περιβάλλον χρήστη.
Αν χρειαστεί να απενεργοποιήσετε τον χρονοδιακόπτη της οθόνης αφής, μπορείτε να
θέσετε την επιλογή «Χρονοδιακόπτης οθόνης», που βρίσκεται στη λειτουργία [προβολή]
στο «Ποτέ».
Χρήση της κάρτας Micro SD
Αφού συνδέσετε τη μονάδα με τον υπολογιστή, θα εμφανιστούν δυο αφαιρούμενα
Page 64

64
μέσα αποθήκευσης. Το πρώτο είναι ο ενσωματωμένος δίσκος μνήμης για την μονάδα και
το άλλο είναι ο δίσκος για την κάρτα Micro SD. Αν δεν έχει εισαχθεί κάποια κάρτα, δεν
μπορείτε να ανοίξετε το δεύτερο δίσκο. Η συσκευή υποστηρίξει την επέκταση της κάρτας
Micro SD από 128MB ως 32GB.
Εισαγωγή και αφαίρεση της κάρτας Micro SD
Εισαγωγή:
Τοποθετήστε την κάρτα Micro SD με το επάνω μέρος προς τα πάνω (την πλευρά με
την επιγραφή), και ωθήστε απαλά την κάρτα μέσα στην υποδοχή - δηλ. συνδέστε την με τη
μονάδα. Ενώ βρίσκεται συνδεδεμένη, μπορείτε να αναπαράγετε το περιεχόμενο της
κάρτας Micro SD στη συσκευή.
Αφαίρεση:
Ωθήστε απαλά την κάρτα Micro SD και θα βγει προς τα έξω από μόνη της - τότε,
μπορείτε να την αφαιρέσετε.
Προσοχή:
Παρακαλούμε να βγάζετε και να βάζετε την κάρτα ενώ η συσκευή είναι
απενεργοποιημένη! Διαφορετικά, ενδεχομένως να χαθούν ή να αλλοιωθούν τα αρχεία της
μονάδας! Αν δεν εισαχθεί κάποια κάρτα, ο υπολογιστής δεν μπορεί να πραγματοποιήσει
λειτουργίες εγγραφής και ανάγνωσης στα αρχεία που είναι αποθηκευμένα στην κάρτα που
έχει αφαιρεθεί (κάρτα Micro SD).
Μπαταρία:
Η μονάδα χρησιμοποιεί μπαταρία πολυμερών υλικών υψηλής χωρητικότητας.
Η αντοχή της ισχύος της μπαταρίας εξαρτάται από την ένταση αναπαραγωγής, τον
τύπο των αρχείων αναπαραγωγής, και από τη λειτουργία των μπαταριών. Ο χρήστης
μπορεί να ρυθμίσει τον χρόνο απενεργοποίησης της συσκευής ή να χρησιμοποιήσει τη
ρύθμιση οθόνης ώστε να εξοικονομείται ενέργεια από τις μπαταρίες.
Φόρτιση:
Μπορείτε να φορτίσετε τη συσκευή μέσω θύρας USB ή μέσω του Φορτιστή ρεύματος
DC:
Συνδέστε τον Φορτιστή ρεύματος DC σε πρίζα ρεύματος AC 220V (ένταση εξόδου
2000 mA και τάση εξόδου 5V~5,2V), και έπειτα συνδέστε το βύσμα του φορτιστή στην
υποδοχή DC της συσκευής.
Page 65

65
Προειδοποιήσεις για τη φόρτιση:
Μια νέα μπαταρία μπορεί να είναι άδεια και να μην έχει φορτιστεί πριν λάβετε τη
συσκευή
.
Αν η συσκευή δεν έχει χρησιμοποιηθεί για μεγάλο χρονικό διάστημα, συστήνεται να τη
φορτίζετε πλήρως κάθε 2 ή 3 μήνες κατά τη διάρκεια της αποθήκευσης.
Ο αντάπτορας ρεύματος αποτελεί ένα βασικό εξάρτημα της συσκευής, και παίζει ένα
κρίσιμο ρόλο για τη φυσιολογική λειτουργία της και προστατεύει την ασφάλειά σας κατά
τη διάρκεια της χρήσης της. Οι μακροχρόνιες έρευνες πελατών και οι υπηρεσίες μετά την
πώληση δείχνουν ότι η δυσλειτουργία της φορητής συσκευής σε πολλές περιπτώσεις
οφείλεται στη χρήση ακατάλληλων εξαρτημάτων, και συγκεκριμένα του αντάπτορα.
Η χρήση ακατάλληλου αντάπτορα θα μειώσει σημαντικά τη διάρκεια ζωής της
φορητής συσκευής, ενώ τυχόν αστάθεια στην τάση θα επηρεάσει σοβαρά τη φυσιολογική
της λειτουργία και θα προκαλέσει μόνιμη βλάβη στην απόδοση και στην αξιοπιστία της
συσκευής. Η χρήση ακατάλληλου αντάπτορα θα μειώσει επίσης την ποιότητα ήχου της
συσκευής και θα επιφέρει την απενεργοποίησή της ενώ χρησιμοποιείται. Επιπροσθέτως, η
χρήση ακατάλληλου αντάπτορα μπορεί να προκαλέσει ανάφλεξη και έκρηξη, θέτοντας σε
κίνδυνο την ασφάλεια των καταναλωτών.
Επιστροφή στο κεντρικό περιβάλλον λειτουργίας
Σε οποιοδήποτε σημείο, αγγίξτε το εικονίδιο « » για να επιστρέψετε στο κεντρικό
περιβάλλον λειτουργίας.
Επιστροφή στο προηγούμενο σημείο ή μενού
Σε οποιοδήποτε σημείο, αγγίξτε το εικονίδιο « », ή πατήστε το πλήκτρο "" για
να μεταφερθείτε στο προηγούμενο σημείο ή στο μενού. Μπορείτε επίσης να κρατήσετε
πατημένο για λίγο το πλήκτρο " ".
Σημεία προσοχής
1 Μην χρησιμοποιείτε τη συσκευή σε εξαιρετικά κρύες ή ζεστές συνθήκες, ή σε
περιβάλλοντα με πολλή σκόνη, υγρασία ή ξηρασία.
2 Μην αφήσετε τη συσκευή να πέσει κάτω ενώ την χρησιμοποιείτε.
3 Να φορτίζετε την μπαταρία όταν:
Α. το εικονίδιο ισχύος της μπαταρίας δείχνει ένα άδειο εικονίδιο,
Page 66

66
Β. το σύστημα απενεργοποιείται αυτόματα και σβήνει αμέσως αφού ενεργοποιήσετε
ξανά τη συσκευή,
Γ. δεν υπάρχει κάποια απόκριση όταν πατάτε τα πλήκτρα.
4 Μην αποσυνδέετε την παροχή ρεύματος όταν μορφοποιείτε τη συσκευή ή κατά τη
διάρκεια αποστολής ή λήψης αρχείων. Διαφορετικά, μπορεί να προκύψει σφάλμα για το
πρόγραμμα.
5 Όταν η συσκευή χρησιμοποιείται ως φορητός δίσκος, ο χρήστης θα αποθηκεύει ή θα
εξάγει αρχεία σύμφωνα με την κατάλληλη μέθοδο διαχείρισης αρχείων. Οποιαδήποτε
εφαρμογή ακατάλληλης μεθόδου διαχείρισης μπορεί να οδηγήσει στην απώλεια αρχείων,
γεγονός για το οποίο δεν ευθύνεται η Εταιρία.
6 Μην αποσυναρμολογείτε τη συσκευή από μόνος σας. Σε περίπτωση απορίας,
επικοινωνήστε με τον αντιπρόσωπο.
7 Δεν πρόκειται να εκδοθεί ξεχωριστή ειδοποίηση σε περίπτωση αλλαγής στη
λειτουργία και στην απόδοση του παρόντος προϊόντος. Για να αποφευχθούν τα
προβλήματα που μπορεί να προκύψουν με τα καταστήματα service που εγκρίθηκαν από
Visual Fan Ltd (επειδή ηVisual Fan διατηρεί το δικαίωμα να σταματήσει την συνεργασία
με οποιοδήποτε κατάστημα service, το οποίο είχε προηγουμένως εγκριθεί και αναφέρονταν
στην κάρτα ΕΓΓΥΗΣΗ με την ημερομηνία κατά την οποία η παρτίδα του προϊόντος
πωλήθηκε στην αγορά), πριν επιστρέψεται ένα προϊόν στο κατάστημα service,
παρακαλούμε να ελέγξετε τον επικαιροποιημένο κατάλογο των εγκεκριμένων
καταστημάτων service στην ιστοσελίδα Allview στο τμήμα: " Support&Service – Approved
service ".
Κεντρικό περιβάλλον χρήσης
Το κεντρικό περιβάλλον χρήσης χωρίζεται σε 5 οθόνες προβολής. Σύρετε την οθόνη
προς τα αριστερά ή προς τα δεξιά ώστε να μεταβείτε στην επόμενη.
Page 67

67
Αλλαγή εικόνας φόντου
Πατήστε σε ένα κενό σημείο στην κεντρική οθόνη, ώστε να εμφανιστεί το μενού
εικόνας φόντου.
Προβολή όλων των λειτουργικών εικονιδίων
Πατήστε για λίγο το εικονίδιο ώστε να εμφανιστεί το εικονίδιο των
εγκατεστημένων λειτουργιών - αγγίξτε το αντίστοιχο λειτουργικό εικονίδιο ώστε να
προσπελάσετε το μενού λειτουργιών. Από το κεντρικό μενού, μπορείτε να εκτελέσετε τις
εγκατεστημένες εφαρμογές, να εγκαταστήσετε μια νέα εφαρμογή, να ξεκινήσετε τη
βαθμονόμηση της οθόνης αφής, να ξεκινήσετε την αναπαραγωγή μουσικής και βίντεο, να
περιηγηθείτε στο διαδίκτυο, να παίξετε παιχνίδια και να εκτελέσετε διάφορες άλλες
λειτουργίες.
Προσθήκη μικροεφαρμογής στο παράθυρο
Στο κεντρικό περιβάλλον χρήσης, αγγίξτε την οθόνη στη δεξιά πλευρά του εικονιδίου
ελέγχου " ", και έπειτα κάντε κλικ στο «Μικροεφαρμογές» (Widgets) (ώστε να επιλέξτε
Page 68

68
τη μικροεφαρμογή που επιθυμείτε να προσθέσετε στην επιφάνεια εργασίας.
Προβολή των προγραμμάτων παρασκηνίου που εκτελούνται
Από οποιοδήποτε σημείο, κάντε κλικ στο εικονίδιο " " που βρίσκεται στα αριστερά
της οθόνης, ώστε να εμφανιστεί η λίστα με τα προγράμματα παρασκηνίου που
εκτελούνται. Κάνοντας κλικ στο εικονίδιο του προγράμματος, μπορείτε να μεταβείτε στο
αντίστοιχο περιβάλλον του.
Πατώντας το δεξί εικονίδιο προγράμματος, μπορείτε να τερματίσετε αυτό το
πρόγραμμα.
Προβολή ενημερώσεων
Στο κεντρικό περιβάλλον, κάντε κλικ στην κάτω δεξιά γωνία της οθόνης, στο πεδίο
προβολής του ρολογιού, ώστε να εμφανίσετε ενημερώσεις για την τρέχουσα κατάσταση
της θύρας USB, της σύνδεσης στο δίκτυο, της ισχύος της μπαταρίας, όπως και άλλες
Page 69

69
πληροφορίες.
Διαγραφή εικονιδίων από την επιφάνεια εργασίας
Στο κεντρικό περιβάλλον, κρατήστε πατημένο το εικονίδιο του προγράμματος και
σύρετέ το προς τον κάδο ανακύκλωσης - η περιοχή του εικονιδίου θα γίνει πορτοκαλί.
Αφήστε το εκεί και θα διαγραφθεί.
Μετακίνηση εικονιδίου από την επιφάνεια εργασίας
Στο κεντρικό περιβάλλον, κρατήστε πατημένο το εικονίδιο της εφαρμογής και
μετακινήστε το όπου επιθυμείτε.
Εγκατεστημένο ΑΡΚ
1. Θα πρέπει να εγκαταστήσετε το λογισμικό του APK που περιέχεται στη συσκευή ή
στην κάρτα CD.
2. Κάντε κλικ στο εικονίδιο διαχείρισης αρχείων και επιλέξτε την εγκατάσταση της
εφαρμογής APK.
3. Επιλέξτε τη διαδρομή του ΑΡΚ και κάντε κλικ στο πρόγραμμα ΑΡΚ ώστε να
ξεκινήσει η εγκατάσταση.
Page 70

70
Αφαίρεση εφαρμογής ΑΡΚ
1. Κάντε κλικ στις «Ρυθμίσεις» στην επιφάνεια εργασίας, και έπειτα στις «Εφαρμογές»
- επιλέξτε και κάντε κλικ στο πρόγραμμα που επιθυμείτε να διαγράψετε.
2. Κάντε κλικ στο εικονίδιο «Διαγραφή προγράμματος» ώστε να ξεκινήσει η
διαγραφή του προγράμματος.
Page 71

71
Αναπαραγωγή βίντεο
Στο κεντρικό μενού, πατήστε την επιλογή “Super-HD player” ώστε να προσπελάσετε
τον φάκελο με τα αρχεία βίντεο.
Περιβάλλον λίστας αρχείων
Λειτουργία πλήκτρων
" ": Πατήστε το ώστε να επιστρέψετε στην κεντρική οθόνη
" ": Πατήστε το ώστε να επιστρέψετε στην προηγούμενη οθόνη
Αγγίξτε και σύρετε την οθόνη προς τα πάνω και προς τα κάτω ώστε να περιηγηθείτε
στον φάκελο με τα αρχεία βίντεο.
Περιβάλλον αναπαραγωγής βίντεο
Page 72

72
Λειτουργία πλήκτρων
'' / '': αναπαραγωγή ή παύση της τρέχουσας ταινίας,
'' / ": πατήστε το για την αναπαραγωγή της τελευταίας / επόμενης ταινίας,
κρατήστε το πατημένο για την γρήγορη μετάβαση προς τα πίσω / προς τα εμπρός,
“ / ”: πατήστε το για να αυξήσετε ή μειώσετε την ένταση,
" " πατήστε το για να επιστρέψτε στην προηγούμενη οθόνη
" M ": πατήστε το για να εμφανιστούν οι ρυθμίσεις ταινίας.
Συμβουλές:
1. Η παρούσα συσκευή ΜΡ4 υποστηρίζει αρχεία βίντεο ανάλυσης μέχρι και 2160.
2. Προβολή υποτίτλων
Η συσκευή υποστηρίζει αρχεία υποτίτλων τύπου *.SRT (ο χρήστης μπορεί να τους
κατεβάσει από τον ιστοτόπο) για τη συγχρονισμένη αναπαραγωγή υποτίτλων και βίντεο.
Όταν υπάρχει αρχείο υποτίτλων με την ίδια ονομασία στον φάκελο για την
αναπαραγωγή βίντεο, η συσκευή θα μπορεί να προβάλλει ταυτόχρονα τους υπότιτλους και
το αρχείο βίντεο.
3. Η συσκευή υποστηρίζει την αναπαραγωγή βίντεο πολλαπλών μορφών, βίντεο
υψηλής ανάλυσης, κ.ο.κ. Καθώς οι επιμέρους παράμετροι, οι μορφές κωδικοποίησης, η
ανάλυση και οι ρυθμοί ροής του κώδικα των αρχείων βίντεο που παρέχονται από το
διαδίκτυο διαφέρουν, η συσκευή δεν μπορεί να είναι συμβατή με όλα τα αρχεία βίντεο (και
ιδιαίτερα με τα αρχεία βίντεο υψηλής ανάλυσης ή υψηλών ρυθμών ροής κώδικα). Αν το
αρχείο βίντεο που έχετε κατεβάσει δεν εμπίπτει στο υποστηριζόμενο εύρος της συσκευής,
γεγονός που καθιστά αδύνατη την φυσιολογική αναπαραγωγή του από τη συσκευή,
συστήνεται η χρήση τρίτου λογισμικού μετατροπής αρχείων βίντεο και η μετατροπή της
μορφής του αρχείου μέσω υπολογιστή σε μορφή που υποστηρίζεται από τη συσκευή, πριν
μεταφέρετε το αρχείο στη συσκευή για αναπαραγωγή.
Πρόοδος αναπαραγωγής: σύρετε τη γραμμή για να αλλάξετε το σημείο
αναπαραγωγής.
Page 73

73
Αναπαραγωγή ήχου
Στο κεντρικό μενού, πατήστε την επιλογή “Μουσική” ώστε να προσπελάσετε τον
φάκελο με τα αρχεία μουσικής.
Περιβάλλον φακέλου μουσικής
Λειτουργία πλήκτρων
'' '': Επιστροφή στο κεντρικό περιβάλλον λειτουργίας
'' '': Επιστροφή στην προηγούμενη οθόνη
Αγγίξτε προς τα πάνω / προς τα κάτω την οθόνη ώστε να αρχίσει η κύλιση των
αρχείων
Καλλιτέχνης: σύμφωνα με τα στοιχεία καλλιτέχνη που περιέχουν τα αρχεία
μουσικής
Άλμπουμ: σύμφωνα με τα στοιχεία άλμπουμ που περιέχουν τα αρχεία
μουσικής
Κομμάτι: προβολή όλων των μουσικών κομματιών
Λίστα αναπαραγωγής: προβολή και αναπαραγωγή όλων των αρχείων
μουσικής από τη λίστα
Αναπαραγωγή: στο περιβάλλον αναπαραγωγής μουσικής που εκτελείται στο
παρασκήνιο
Page 74

74
Περιβάλλον αναπαραγωγής μουσικής
Λειτουργία πλήκτρων
'' '': Επιστροφή στο βασικό περιβάλλον λειτουργίας
'' '': Επιστροφή στην προηγούμενη οθόνη
'' / ": Πατήστε το για την αναπαραγωγή του τελευταίου / επόμενου
κομματιού, κρατήστε το πατημένο για την γρήγορη μετάβαση προς τα πίσω / προς τα
εμπρός,
'' '': Πατήστε το για την έναρξη / διακοπή της αναπαραγωγής
'' " : Πατήστε στο για την εμφάνιση της λίστας αναπαραγωγής
" ": Πατήστε το για την αναπαραγωγή κομματιών σε τυχαία σειρά
" " Πατήστε το για συνεχή αναπαραγωγή
Εμφάνιση στίχων
Όταν υπάρχει αρχείο στίχων με την ίδια ονομασία στον φάκελο για την αναπαραγωγή
μουσικής, η συσκευή θα εμφανίσει το περιβάλλον προβολής στίχων.
Η συσκευή υποστηρίζει τα αρχεία στίχων "*.Lrc" (ο χρήστης μπορεί να τα κατεβάσει
από την εξής διεύθυνση: "http://www.51lrc.com", ή να πραγματοποιήσει αναζήτηση για
"LRC Lyric" ώστε να βρει το αντίστοιχο αρχείο στίχων) για την συγχρονισμένη
αναπαραγωγή στίχων και μουσικής.
Page 75

75
Φωτογραφίες
Στο κεντρικό μενού, πατήστε την επιλογή “Super-HD player” ώστε να προσπελάσετε
τον φάκελο με τις φωτογραφίες.
Περιβάλλον προβολής φωτογραφιών
Λειτουργία πλήκτρων
'' '': Σύρετέ το ώστε να περιηγηθείτε σε όλες τις εικόνες
'' '' : Χρησιμοποιώντας αυτό το πλήκτρο, μπορείτε να πραγματοποιήσετε μαζική
διαχείριση των φωτογραφιών. Για παράδειγμα: διαγραφή, περιστροφή αριστερά,
περιστροφή δεξιά, ενώ μπορείτε επίσης να επιλέξετε τις φωτογραφίες ανάλογα με την
τοποθεσία, την ημερομηνία, τα πρόσωπα που εμφανίζονται και τα επιμέρους στοιχεία
(tags) που έχετε ορίσει για αυτές.
Page 76

76
'' '':Διαγραφή φωτογραφίας
'' '': Πατώντας το εικονίδιο μπορείτε να εμφανίσετε τα στοιχεία των
φωτογραφιών και να επιλέξετε διάφορες λειτουργίες, όπως: Παρουσίαση,
Επεξεργασία, Περιστροφή αριστερά, Περιστροφή δεξιά, Αποκοπή, Στοιχεία,
Καθορισμός φωτογραφίας
Page 77

77
Ενεργοποιήστε Sygic σας GPS Navigation
(προαιρετικός)
Πιο δημοφιλή app offline πλοήγησης GPS στον κόσμο από το
Sygic είναι προεγκατεστημένο σε αυτή τη συσκευή .
Απολαύστε την πλοήγηση σε 90 χώρες σε όλο τον κόσμο για
30 ημέρες δωρεάν.
1 . Κάντε κλικ στο εικονίδιο Sygic και την εφαρμογή
εκτόξευσης.
2 . Η εφαρμογή θα κατεβάσει τα απαραίτητα αρχεία .
πλήρη άδεια ζωή της πλοήγησης . Εάν επιλέξετε δίκη ,
μπορείτε να αγοράσετε την πλήρη άδεια ζωή αργότερα στο
μενού " My Sygic " .
7 . Επιλέξτε τη φωνητική πλοήγηση .
8 . Μπορείτε να συμμετάσχετε στην κοινότητα Sygic
καταχωρώντας το email σας .
9 . Απολαύστε όλα τα ταξίδια σας με την πλοήγηση
Sygic GPS !
Για περισσότερες πληροφορίες και υποστήριξη ,
παρακαλούμε επισκεφθείτε την ιστοσελίδα μας
http://help.sygic.com/ .
3 . Επιλέξτε το κουμπί "
World ΔΙΚΗ " .
4 . Επιλέξτε έναν ή
περισσότερους χάρτες και κάντε
κλικ στο "Συνέχεια " για να
κατεβάσετε .
5 . Παρακαλώ μην κλείσετε
την εφαρμογή και περιμένετε
μέχρι το τέλος της λήψης .
6 . Επιλέξτε " Συνέχεια δίκη
" για να χρησιμοποιήσετε Sygic
GPS πλοήγησης για 30 ημέρες
δωρεάν. Ή να αγοράσετε την
Page 78

78
Ρυθμίσεις
Στο κεντρικό μενού, πατήστε την επιλογή “Ρυθμίσεις” ώστε να προσπελάσετε τον
φάκελο με τις ρυθμίσεις συστήματος. Από τις ρυθμίσεις μπορείτε να αλλάξετε και τις
ρυθμίσεις φωτογραφιών.
Περιγραφή λειτουργιών:
1. WiFi
Wi-Fi: Ενεργοποίηση / απενεργοποίηση ασύρματης σύνδεσης
Ρύθμιση Wi-Fi: αγγίξτε το εικονίδιο " ", ώστε να μεταβείτε στις ρυθμίσεις για τη
σύνδεση WIFI
2. Χρήση δεδομένων
Προβολή χρήσης δεδομένων
3. Ρυθμίσεις ήχου
Ένταση: Ορίστε την ένταση των Ειδοποιήσεων, των πολυμέσων και του
ξυπνητηριού.
Προεπιλεγμένες ειδοποιήσεις: Πατήστε για να εμφανιστεί το μενού ήχων των
ειδοποιήσεων και επιλέξτε το στοιχείο που θα λάβει τον προεπιλεγμένο ήχο
ειδοποιήσεων.
Ήχοι αφής: Αφού επιλεχθεί, η οθόνη αφής θα παράγει ήχο σε κάθε άγγιγμα.
4. Ρυθμίσεις προβολής
Φωτεινότητα: Ρυθμίστε την φωτεινότητα της οθόνης.
Φόντο επιφάνειας εργασίας: μπορείτε να επιλέξτε το φόντο για την επιφάνεια
εργασίας από την εφαρμογή αναπαραγωγής Super-HD.
Αναμονή: Ρυθμίστε το χρόνο που απαιτείται για τη μετάβαση σε κατάσταση
Page 79

79
αναμονής.
5. Αποθήκευση
Ελέγξτε τη μνήμη ΡΜΡ και τη διαθέσιμη χωρητικότητα.
6. Μπαταρία
Εμφανίζονται στοιχεία για την κατάσταση και την χρήση της μπαταρίας.
7. Εφαρμογές
Προβολή και διαχείριση των εγκατεστημένων εφαρμογών.
8. Ασφάλεια
Κλείδωμα οθόνης: Ρύθμιση για το κλείδωμα οθόνης μέσω συρόμενης ράβδου,
σχηματισμού συγκεκριμένου σχήματος, καταχώρησης ΡΙΝ και κωδικού, και άλλων
μηχανισμών κλειδώματος.
9. Λογαριασμοί και συγχρονισμός
Στοιχεία και ρυθμίσεις συγχρονισμού για τους λογαριασμούς χρήστη.
10. Τοπικές υπηρεσίες
Περιέχει ρυθμίσεις για την ενεργοποίηση ή απενεργοποίηση των τοπικών επιλογών.
11. Γλώσσα και μέθοδος καταχώρησης.
Ρύθμιση γλώσσας και περιοχής, μεθόδου καταχώρησης, κ.α. Λειτουργία
αποθήκευσης.
12. Λήψη αντιγράφων ασφαλείας και επαναφορά
Λήψη αντιγράφων ασφαλείας, επαναφορά των ρυθμίσεων και των δεδομένων της
συσκευής.
13. Ημερομηνία και Ώρα
Ρύθμιση της ημερομηνίας, της ώρας, της ζώνης ώρας και της μορφής προβολής της
ώρας.
14. Προσβασιμότητα
Επιλογές για τη περιστροφή της οθόνης, τη μεγέθυνση του κειμένου, το συλλαβισμό
του κωδικού πρόσβασης, κ.α.
15. Επιλογές προγραμματιστών
Ρυθμίσεις και επιλογές για προγραμματιστές εφαρμογών Android.
16. Στοιχεία συσκευής
Προβολή της έκδοσης λογισμικού της συσκευής και άλλων στοιχείων
Page 80

80
OTG
Το OTG αποτελεί ακρωνύμιο του On-The-Go. Αποτελεί μια τεχνολογία που επιτρέπει
τη μετάδοση δεδομένων μεταξύ φορητών συσκευών χωρίς την ανάγκη ύπαρξης διακομιστή.
Συγκεκριμένα, δεν χρειάζεται η χρήση υπολογιστών για τη μεταφορά δεδομένων ή
εγγράφων από άλλες φορητές συσκευές στη συσκευή σας, όπως από δίσκους flash,
συσκευές mp3 και φορητούς σκληρούς δίσκους.
Βήματα σύνδεσης OTG:
1. Συνδέστε τον σκληρό δίσκο ή οποιαδήποτε άλλη συσκευή USB μέσω της υποδοχής
USB για να ενεργοποιήσετε τη λειτουργία OTG.
2. Για να εμφανιστεί η επιφάνεια εργασίας της εξωτερικής συσκευής USB, πατήστε το
εικονίδιο «διαχείριση αρχείων», και επιλέξτε το «αφαιρούμενος δίσκος». Έτσι, μπορείτε να
αποκτήσετε πρόσβαση στα αρχεία της συσκευής.
Παρατηρήσεις:
5. Λόγω της εκτεταμένης ποικιλίας των φορητών συσκευών, η συσκευή ενδεχομένως
να μην αναγνωρίζει κάποιες από αυτές.
6. Η συμβατότητα με περισσότερες συσκευές θα αυξηθεί μέσω αναβάθμισης του
firmware.
7. Ενώ χρησιμοποιείτε τη σύνδεση OTG, η συνδεδεμένη φορητή συσκευή
χρησιμοποιεί την παροχή ενέργειας της συσκευής σας. Εν συνεπεία, αν η συσκευή
διαθέτει λιγότερο από το 1/3 της ισχύος της μπαταρίας, ή αν η άλλη συσκευή καταναλώνει
πολλή ενέργεια, η σύνδεση OTG ενδεχομένως να μην προχωρήσει με επιτυχία.
Εναλλακτικά, μπορείτε να παράσχετε ενέργεια και στην άλλη συσκευή ξεχωριστά.
8. Επί του παρόντος, η λειτουργία OTG υποστηρίζει μεταφορά μόνο προς μια
κατεύθυνση. Δηλαδή, τα έγγραφα από άλλες συσκευές μπορούν να αναγνωστούν ή να
αντιγραφθούν στη συσκευή σας, αλλά τα αρχεία από τη συσκευή σας δεν μπορούν να
αντιγραφθούν στην άλλη συσκευή και δεν μπορείτε να διαγράψετε αρχεία στην άλλη
συσκευή.
Σύνδεση υπολογιστή
Μπορείτε να συνδέσετε τη συσκευή σε υπολογιστή μέσω καλωδίου USB ώστε να
Page 81

81
αντιγράψετε ή να διαγράψετε δεδομένα. Αυτή η διαδικασία εκτελείται ως εξής:
1. Αν η συσκευή είναι συνδεδεμένη μέσω καλωδίου USB στη θύρα USB του
υπολογιστή, θα εμφανίζεται η ειδοποίηση "Σύνδεση μέσω USB" επί της οθόνης.
2. Κάντε κλικ στην ειδοποίηση
«Σύνδεση μέσω USB» και επιλέξτε το
«Άνοιγμα συσκευών αποθήκευσης
USB”. Έπειτα, στον υπολογιστή θα
εμφανιστεί η συσκευή ως συσκευή με
αφαιρούμενο μέσο αποθήκευσης, όπου
μπορείτε να επεξεργαστείτε τα
δεδομένα.
Ρυθμίσεις δικτύου 3G
1. Η συσκευή μπορεί να χρησιμοποιήσει ασύρματη κάρτα 3G μέσω της υποδοχής
USB.
2. Στις «Ρυθμίσεις» της συσκευής, στον κατάλογο «Ασύρματη σύνδεση και δίκτυο»
περιέχονται οι επιλογές Wifi και 3G. Οι συνδέσεις Wifi και 3G δεν μπορούν να
χρησιμοποιούνται ταυτόχρονα.
Σημείωση
1. Λόγω των διαφορετικών συστημάτων επικοινωνίας 3G, η λειτουργία σύνδεσης 3G
της συσκευής ενδεχομένως να μην είναι συμβατή με όλο τον εξοπλισμό 3G.
2. Καθώς ο εξοπλισμός σύνδεσης 3G είναι εξωτερικός, θα καταναλώνει ενέργεια
μέσω της σύνδεσης USB. Σε αυτή την περίπτωση, βεβαιωθείτε ότι υπάρχει αρκετή ισχύς
στην μπαταρία.
Ρυθμίσεις δικτύου Ethernet
1. Στις “Ρυθμίσεις” της συσκευής, στον κατάλογο «Ασύρματη σύνδεση και δίκτυο»,
περιέχονται οι επιλογές Wifi.
2. Με την κάρτα Ethernet συνδεδεμένη μέσω του ειδικού καλωδίου OTG στην
υποδοχή USB, το σύστημα θα αναγνωρίζει αυτόματα και θα συνδέεται στο δίκτυο.
3. Στις «Ρυθμίσεις» της συσκευής, στον κατάλογο «Ρυθμίσεις Ethernet», επιλέξτε την
Page 82

82
επιλογή Ethernet.
4. Αν χρειάζεστε να ορίσετε τη διεύθυνση δικτύου Ethernet και την πύλη (IP και
gateway) μπορείτε να μεταβείτε στην επιλογή «Διαμόρφωση Ethernet».
Σημείωση
1. Λόγω των διαφόρων συστημάτων επικοινωνίας που χρησιμοποιούν οι κάρτες
Ethernet, ενδεχομένως η συσκευή να μην είναι συμβατή με κάθε εξοπλισμό.
2. Καθώς ο εξοπλισμός σύνδεσης Ethernet είναι εξωτερικός, θα καταναλώνει ενέργεια
μέσω της σύνδεσης USB. Σε αυτή την περίπτωση, βεβαιωθείτε ότι υπάρχει αρκετή ισχύς
στην μπαταρία.
Ημερολόγιο
Στο κεντρικό μενού, αγγίξτε το
εικονίδιο «Ημερολόγιο» ώστε να μεταβείτε
στο περιβάλλον του ημερολογίου.
Σε αυτό το μενού, αγγίξτε και σύρετε
την οθόνη προς τα αριστερά ή τα δεξιά ώστε
να εμφανιστεί ο προηγούμενος ή ο επόμενος
μήνας. Αν επιθυμείτε να καταχωρήσετε κάποιο νέο συμβάν, θα πρέπει πρώτα να
προσθέσετε τουλάχιστον ένα λογαριασμό Ημερολογίου στη συσκευή και να καταστήσετε
ορατό ένα ημερολόγιο.
Αριθμομηχανή
Στο κεντρικό μενού, αγγίξτε το
εικονίδιο «Αριθμομηχανή» ώστε να
μεταβείτε στο περιβάλλον της
αριθμομηχανής. Η αριθμομηχανή
μπορεί να χρησιμοποιηθεί ως μια τυπική
αριθμομηχανή. Μπορεί να σας
βοηθήσει στην εργασία και στη μελέτη
σας.
Page 83

83
Ρολόι
Στο κεντρικό μενού, αγγίξτε το εικονίδιο «Ρολόι» ώστε να ενεργοποιήσετε τη
λειτουργία. Μπορεί να σας βοηθήσει στην καθημερινότητά σας.
1. Αγγίξτε το «ρολόι» ώστε να εμφανιστεί το παρακάτω περιβάλλον
2." ": Αγγίξτε το για να ρυθμίσετε το ξυπνητήρι.
Θα ενεργοποιηθεί αυτόματα στην ώρα που έχετε ορίσει.
Μπορείτε να ρυθμίσετε την ώρα, τον ήχο, και τις επιλογές επανάληψης για κάθε
ξυπνητήρι.
Επαναφορά εργοστασιακών δεδομένων
Σε περίπτωση που εισχωρήσει ιός στη συσκευή ή υπάρχει δυσλειτουργία εξαιτίας
Page 84

84
λογισμικού τρίτου, μπορείτε από την επαναφορά του συστήματος να αφαιρέσετε το
παραπάνω λογισμικό και να επαναφέρετε τη συσκευή στην αρχική της κατάσταση. Στις
«Ρυθμίσεις» - «Προσωπικά στοιχεία» της συσκευής, επιλέξτε την «Επαναφορά
εργοστασιακών δεδομένων». Μετά την επιβεβαίωση, θα διαγραφθούν όλα τα δεδομένα.
Αναβάθμιση προγράμματος οδηγού της συσκευής
Το firmware αποτελεί ένα ενσωματωμένο πρόγραμμα με το οποίο μπορείτε να
εκτελέσετε διάφορες λειτουργίες για το υλικό. Αναβαθμίζοντας το firmware, μπορείτε να
βελτιώσετε την απόδοση και τις λειτουργίες της συσκευής. Η μη αναβάθμιση του
firmware δεν θα επηρεάσει τη φυσιολογική λειτουργία της συσκευής.
Η αναβάθμιση του firmware μπορεί να οδηγήσει σε δυσλειτουργία της συσκευής
εξαιτίας σφάλματος. Παρακαλούμε, διαβάστε προσεκτικά τις οδηγίες για την
αναβάθμιση πριν προβείτε σε αυτήν.
Σημείωση
1. Βεβαιωθείτε ότι η συσκευή που πρόκειται να αναβαθμίσετε έχει παραπάνω
από 60% ισχύ μπαταρίας. Διαφορετικά αποφύγετε την αναβάθμιση, καθώς δεν θα
μπορέσει να ενεργοποιηθεί.
2. Η διαδικασία της αναβάθμισης δεν επιτρέπει την επαναφορά ή την
απενεργοποίηση - σε περίπτωση διακοπής της αναβάθμισης η συσκευή δεν θα μπορεί
να ενεργοποιηθεί.
3. Η εταιρία μας παρέχει επίσημες ή δοκιμαστικές εκδόσεις των αναβαθμίσεων
του firmware. Η λειτουργία των προϊόντων και τυχόν αλλαγές στο μενού
πραγματοποιούνται χωρίς ειδοποίηση.
Page 85

85
4. Μετά την αναβάθμιση του firmware, όλα τα δεδομένα στη συσκευή θα
διαγραφθούν. Οπότε, πριν την αναβάθμιση, ο χρήστης θα πρέπει να έχει
αποθηκεύσει τα σημαντικά αρχεία του.
5. Το firmware της συσκευής δεν μπορεί να χρησιμοποιηθεί σε άλλους τύπους
προϊόντων - διαφορετικά θα προκύψουν αρνητικές επιπτώσεις και η εταιρία μας δεν
αναλαμβάνει ουδεμία ευθύνη.
Επίλυση κοινών προβλημάτων
1. Τί είναι το αρχείο ΑΡΚ; Ποια η σχέση του με το Android PMP;
A: Το ΑΡΚ αποτελεί σύντμηση του Android Package, ήτοι το Πακέτο Εγκατάστασης
Android. Μέσω των αρχείων ΑΡΚ, μπορείτε να εγκαταστήσετε το λειτουργικό σύστημα
Android σε συσκευές αναπαραγωγής ταινιών / ήχου.
2. Λήψη της εφαρμογής ΑΡΚ
A: Μπορείτε να λάβετε την εφαρμογή μέσω υπολογιστή, ενώ μπορείτε επίσης να την
αποκτήσετε και να την εγκαταστήσετε μέσω του Android Market.
3. Γιατί διακόπτεται η σύνδεση WiFi;
A: Αν έχει οριστεί «χρόνος αναμονής οθόνης», όταν λήξει ο προκαθορισμένος χρόνος,
η λειτουργία WiFi θα απενεργοποιηθεί ώστε να εξοικονομηθεί ενέργεια. Όταν
ενεργοποιηθεί η συσκευή εκ νέου, η σύνδεση WiFi θα χρειαστεί περίπου 5 δευτερόλεπτα
ώστε να αποκατασταθεί αυτόματα.
4. Γιατί κάποιο πρόγραμμα APK που κατέβασα δεν λειτουργεί σωστά;
A: Το λογισμικό APK ενδεχομένως να μην έχει ελεγχθεί όσο αφορά τη συμβατότητά
του με την πλατφόρμα, και μέρος του λογισμικού και του υλικού για το Android μπορεί να
έχει συγκεκριμένες απαιτήσεις και έτσι να μην είναι συμβατό με τη συσκευή. Αυτό δεν
σημαίνει ότι η συσκευή αντιμετωπίζει πρόβλημα.
5. Γιατί όταν συνδέεται ο φορτιστής δεν δείχνει ότι πραγματοποιείται φόρτιση;
A: Όταν η μπαταρία είναι εξαιρετικά εξαντλημένη, χρειάζεται να περάσει μισή ώρα
φόρτισης ή παραπάνω για να εμφανιστεί η κατάσταση φόρτισης.
6. Γιατί δεν λειτουργεί ο αισθητήρας βαρύτητας;
A: Η συσκευή αλλάζει τον προσανατολισμό της οθόνης ανάλογα με την περιστροφή
Page 86

86
της, αλλά ενδεχομένως κάποια εφαρμογή να μην υποστηρίζει αυτή τη λειτουργία.
Γενικά
ΔΙΚΤΥΟ
2G: 900/1800/1900 MHz;
3G: UMTS 900/2100 MHz HSPA+
Γλώσσες
Αγγλικά, Ρουμανικά, Γερμανικά,
Ισπανικά, κ.α.
Διαστάσεις
191x107,3x8,75mm
Βάρος
277,6g
Οθόνη
Τύπος
IPS-LCD
Πρόκειται για θέμα που αφορά το λογισμικό και όχι τη λειτουργία της συσκευής.
7. Δεν ενεργοποιείται η συσκευή
1. Ελέγξτε την μπαταρία.
2. Συνδέστε τον αντάπτορα ρεύματος αφού τον ελέγξετε.
3. Αν η συσκευή δεν ενεργοποιείται μετά από φόρτιση, επικοινωνήστε με το τμήμα
εξυπηρέτησης πελατών.
8. Δεν ακούγεται ήχος από τα ακουστικά
1. Βεβαιωθείτε ότι η ένταση δεν είναι στο 0.
2. Ελέγξτε τη σωστή σύνδεση μεταξύ των ακουστικών και της συσκευής.
9. Προβλήματα στη φόρτιση της συσκευής
1) Επιβεβαιώστε ότι οι προδιαγραφές του εξοπλισμού είναι συμβατές με τις
προδιαγραφές του φορτιστή.
2) Σε περίπτωση φόρτισης μέσω σύνδεσης USB, μην συνδέετε τη συσκευή στη
βασική θύρα USB του υπολογιστή.
10. Αποτυχία αναπαραγωγής αρχείου βίντεο
Η συσκευή μπορεί να είναι συμβατή με αρχεία βίντεο από το διαδίκτυο, αλλά καθώς
τα φορμά των αρχείων, η μέθοδος κωδικοποίησης, η ανάλυση, και ο ρυθμός ροής κώδικα
διαφέρουν, μπορεί μέρος του αρχείου βίντεο να μην αναπαράγεται ή να μην αναπαράγεται
σωστά. Συστήνεται η χρήση τρίτου λογισμικού μετατροπής αρχείων βίντεο και η
μετατροπή του φορμά του αρχείου μέσω υπολογιστή σε φορμά που υποστηρίζεται από τη
συσκευή, πριν μεταφέρετε το αρχείο στη συσκευή για αναπαραγωγή.
Προδιαγραφές
Page 87

87
Διάμετρος
7”
Οθόνη αφής
Capacitive, πολλαπλών σημείων αφής
Ανάλυση
1280x800 px
Φορμά
16:10
Χαρακτηριστικά
Λειτουργικό
σύστημα
Android 4.2 Jelly Bean
Επεξεργαστής
Cortex A7 - 1.3 GHz Quad Core
Επεξεργαστής
γραφικών
MALI400 MP
Μνήμη flash
8GB
RAM
1GB DDR3
Εξωτερική μνήμη
MicroSD, max 32GB
Χρώμα
Λευκό, μαύρο
Μικροεφαρμογές
(widget)
Ναι
Πολλαπλές
εργασίες
Ναι
Αισθητήρας
βαρύτητας
Ναι
Σχεδιασμός
Λεπτό
Συνδεσιμότητα
GPS
Ναι
3G
HSDPA+ 21 Mbps, HSUPA+ 5,76 Mbps
Bluetooth
4.0
WLAN
WiFi 802.11 b/g/n
Σύνδεση με
υπολογιστή
Ναι, μέσω USB 2.0
Πολυμέσα
Κάμερα
5MP AF / 0,3MP
Ήχος
Ενσωματωμένο ηχείο
Στερεοφωνική αναπαραγωγή με
ακουστικά
Ενσωματωμένο μικρόφωνο
Βίντεο
Απεικόνιση HD 1080p
Page 88

88
Απεικόνιση HD 1080p μέσω
διαδικτύου
Ηλεκτρονικός
αναγνώστης
βιβλίων (Ε-book)
Ναι
Φωτογραφίες
Ναι
Διαδίκτυο
Υπηρεσίες
κοινωνικής
δικτύωσης
Ναι
E-Mail
Ναι
Εφαρμογές
Ναι
Κλήση μέσω WiFi
Ναι.
Θύρες
Θύρα εξόδου
ήχου
Στρογγυλή υποδοχή 3,5 mm
Αναγνώστης
καρτών
MicroSD
USB
MicroUSB
Μπαταρία
Τύπος φορτιστή
DC 5V, 2000mA
Τύπος μπαταρίας
3,7V Λιθίου - πολυμερών
Χωρητικότητα
3000 mA
Περιεχόμενα
συσκευασίας
Ταμπλέτα, φορτιστής, καλώδιο μεταφοράς δεδομένων,
εγχειρίδιο χρήστη, κάρτα εγγύησης, ακουστικά
Page 89

89
ΔΗΛΩΣΗ ΣΥΜΜΟΡΦΩΣΗΣ
Εμείς, η εταιρία SC VISUAL FAN SRL, εισαγωγέας με έδρα στο Brasov, στη διεύθυνση 61
Brazilor, η οποία είναι καταχωρημένη στο Εμπορικό Επιμελητήριο του Brasov, με αριθμό
J08/818/2002, CUI 14724950, επιβεβαιώνουμε, εγγυόμαστε και δηλώνουμε υπεύθυνα, σύμφωνα
με το άρθρο 4 του HG υπ' αριθμ. 1.022/2002 αναφορικά με την κατάσταση των προϊόντων και των
υπηρεσιών που μπορούν να θέσουν σε κίνδυνο τη ζωή, την υγεία, την ασφάλεια της εργασίας και
την προστασία του περιβάλλοντος, ότι:
Το προϊόν με την ονομασία ALLVIEW VIVA H7S, υπολογιστής μορφής ταμπλέτας της
εταιρίας με την επωνυμία ALLVIEW, και τα εξαρτήματα που συνοδεύουν το προϊόν: φορτιστής
220V, ακουστικά, και μπαταρία, δεν θέτουν σε κίνδυνο τη ζωή, την υγεία, την ασφάλεια της
εργασίας και την περιβαλλοντική προστασία, και πληρούν τα παρακάτω:
- Οδηγία. 2011/65/ΕΕ όσον αφορά τον περιορισμό της χρήσης ορισμένων ουσιών στα είδη
ηλεκτρικού και ηλεκτρονικού εξοπλισμού.
-Η Ευρωπαϊκή Οδηγία 2001/95/ΕΚ και τις απαιτήσεις ασφαλείας του προτύπου EN 60065:2002 /
A12: 2011 και EN 60950-1:2006 / A12: 2011, EN62209-1 (2006), EN62311 (2008) πρότυπα, σε
σχέση με την εμπορία του συσκευές έχουν εκδοθεί τα επίπεδα ντεσιμπέλ.
Υπ’ αριθμ.1291
Τις διατάξεις του HG υπ’ αριθμ. 982/2007, ο οποίος έχει εναρμονιστεί με τις ουσιώδεις
διατάξεις που ορίζονται στην Ευρωπαϊκή Οδηγία 2004/108/ΕΚ σχετικά με την
ηλεκτρομαγνητική συμβατότητα.
Την Ευρωπαϊκή Οδηγία 73/23/ΕΟΚ αναφορικά με το ηλεκτρολογικό υλικό που πρόκειται να
χρησιμοποιηθεί εντός ορισμένων ορίων τάσεως, όπως αυτή τροποποιήθηκε από την Οδηγία
93/68/ΕΟΚ (HG 457/2003) και τα πρότυπα EN 55013:2001+A1:2003+A2:2006, EN
55020:2007, EN 610000-3-2:2006, EN 61000-3-3:1995+A1:2001+A2:2005.
Την Οδηγία 1999/5/ΕΚ σχετικά με το ραδιοεξοπλισμό και τον τηλεπικοινωνιακό τερματικό
εξοπλισμό και την αμοιβαία αναγνώριση της πιστότητας των εξοπλισμών αυτών (HG
88/303).
Το Προϊόν που περιγράφεται παραπάνω στην παρούσα Δήλωση και όλα τα εξαρτήματά
του πληρούν τα εξής πρότυπα:
Υγείας, EN 50360, EN 50361
Ασφάλειας, EN 6095-1
Ηλεκτρομαγνητικής συμβατότητας, EN 301489-1-7/17
Φάσματος συχνοτήτων, EN 301511, EN 300328
Έπειτα από τις δοκιμές και σύμφωνα με τα αποτελέσματα, διαπιστώθηκε ότι τα δείγματα
πληρούν τις παραπάνω προδιαγραφές. Η τεκμηρίωση διατίθεται από τη VISUAL FAN LTD, με
διεύθυνση Brasov, 61 Brazilor.
Επίσης διατίθεται στον παρακάτω ιστοτόπο: www.allviewmobile.com
CE 0678 Ο Διευθυντής
SAR: 1,776W/KG Cotuna Gheorghe
Page 90

90919293949596979899100
Page 91

Page 92

Page 93

Page 94

Page 95

Page 96

Page 97

Page 98

Page 99

Page 100

 Loading...