

Allegri 021041018FR001, 021041010FR001 User Manual
环形锁扣 线径环形锁扣 线径
6*
2*
6*
2*
MODEL 021041
ASSEMBLY AND DRESSING INSTRUCTIONS
Blending innovative design, cutting-edge technology and the grace and elegance of traditional crystal, ALLEGRI® proudly brings you a new approach
to lighting. ALLEGRI® fixtures are made from the finest raw materials and are brought to life through a combination of traditional manufacturing, such
as sand casting, hand-forging and technology driven techniques including laser cutting.
Enclosed are detailed instructions on how to properly install your fixture. Please read all instructions carefully. If you need further assistance, please
contact the dealer from which you purchased this product or call 866-820-2665 to speak with an ALLEGRI® customer service representative. We hope
you enjoy your fixture!
P1
WWW.ALLEGRICRYSTAL.COM
866.820.2665

CAUTION: FAILURE TO INSTALL THIS FIXTURE PROPERLY MAY RESULT IN SERIOUS PERSONAL INJURY AND
PROPERTY DAMAGE. All electrical components must be installed only by a Licensed Electrician.
This product must be installed in accordance with the National Electric Code (NEC), and appropriate local electrical code(s), by a
person familiar with the construction and operation of the product and the hazard involved.*
CAUTION: Do not exceed maximum wattage note on fixture. Uses only recommended bulbs with fixture.
For your safety and proper operation of fixture, read and understand all instructions completely before commencing installation.
This fixture is suited for dry locations. Never install fixture on damp ceiling; room should be dry and well ventilated.
Extreme care should be taken to avoid damage to the surface of lighting fixture and wires. Wearing gloves is recommended for installation.
Connect ribbed wire of lighting fixture to live wire, while smooth wire of lighting to neutral. Connect bare copper or silver color ground wire of
fixture to the double colored or green wire of outlet box.
Use UL LISTED wire nuts for the wiring connections in this fixture. Wrap wire nut connections with UL LISTED electrical tape.
Keep lighting away from acid, alkali and other corrosive chemical or gas; clean the fixture with a clean cloth only.
Fixture must be firmly secured when installing ceiling tube, chain pipe and other connecting parts.
Never cover the lighting fixture when power is connected.
Disconnect the power before installing, cleaning and/or replacing light bulb.
Extreme care should be taken when installing and cleaning of Glass and/or Crystal Components.
This product is rated 110-130V/60HZ bulb 40W Maximum.
Save these instructions for future reference.
T
he electricity must be turned off at the main fuse box or circuit breaker before installing this fixture. Turning the power off using the light switch ma y
not be sufficient to prevent electrical shock.
*ALLEGRI will not be liable for injury or damage caused by improper installation, lamping or use of this fixture.
WWW.ALLEGRICRYSTAL.COM
P2
866.820.2665
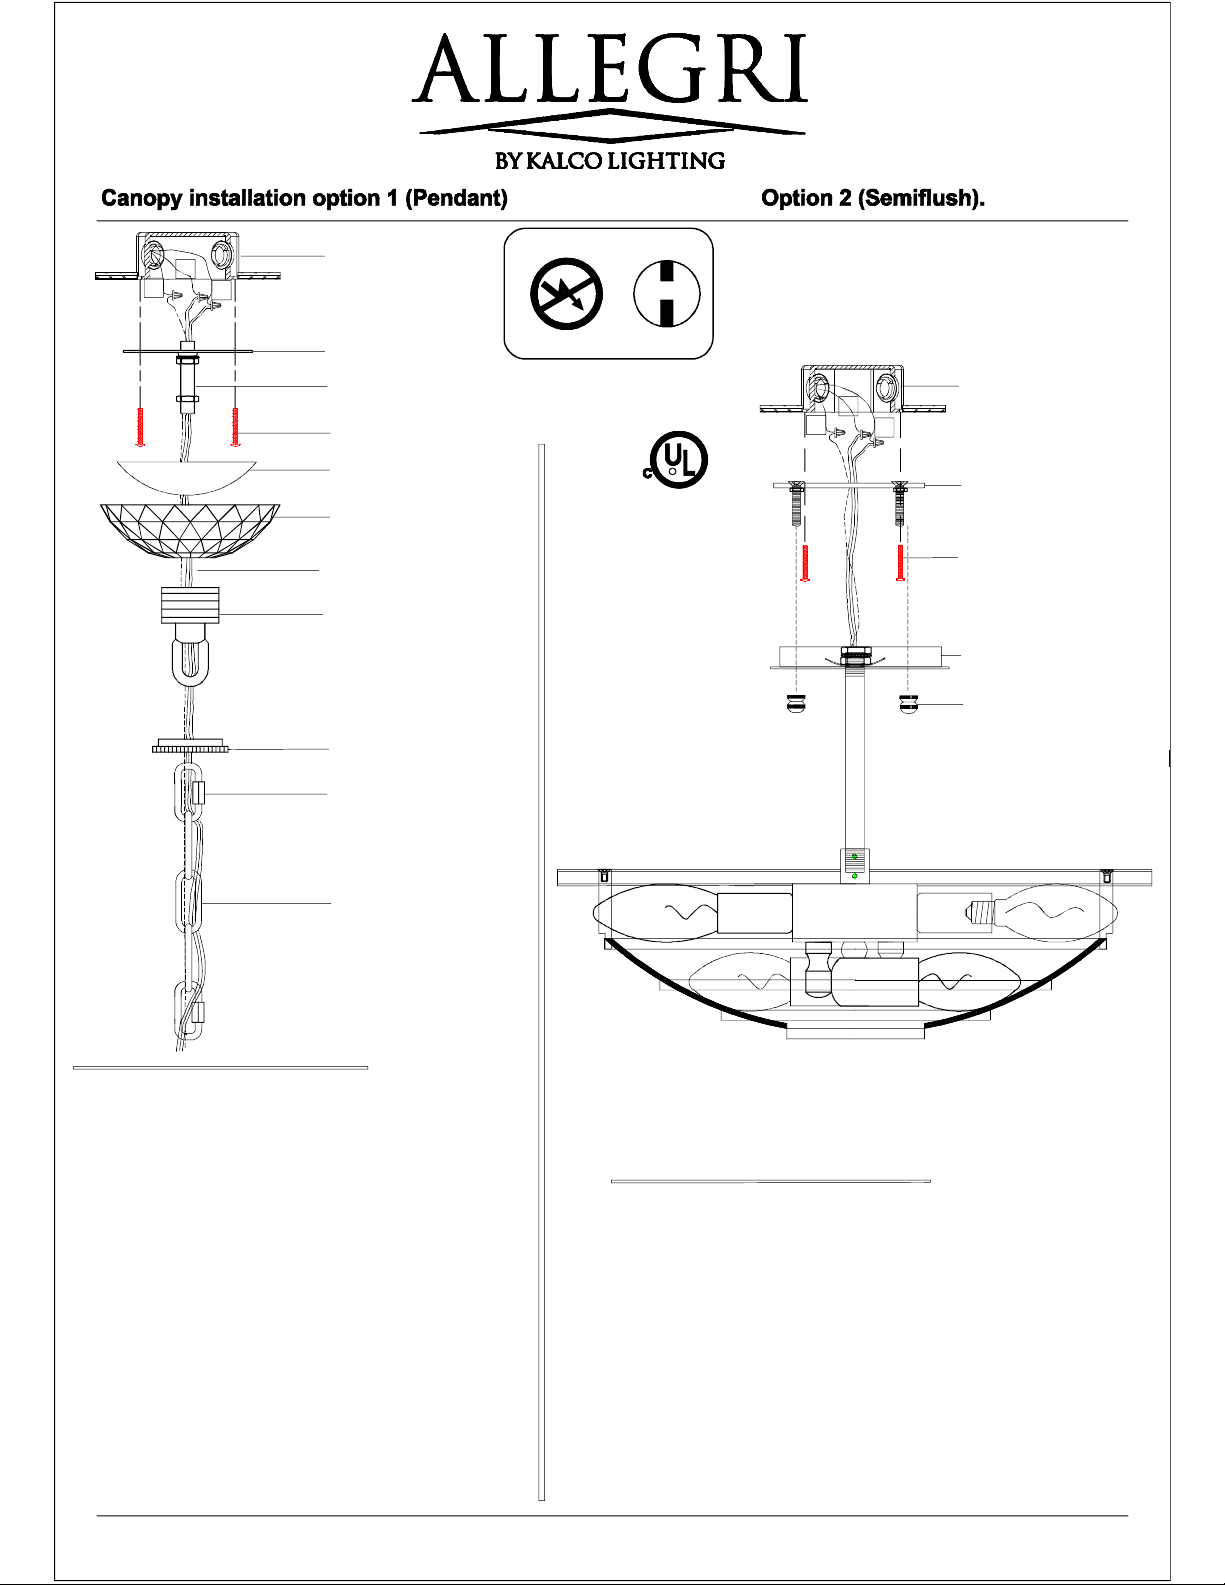
G
L
(not included)
1-Outlet box
WARNING
N
2-Cross Bar (Strap)
3-Threaded Nipple
(with hex nuts)
4-Outlet Box Screws
(not included)
5-Canopy Bowl
6-Crystal Bobeche
Fixture wires
7-Collar Loop
8-Collar Loop Ring
9-Easy Link
10-Chain
Electrical Danger
All electrical components must be
installed by a licensed electrician in
accordance with the National
Electric code and the appropriate
local electrical codes.
Turn Power Off
R
G
1-Outlet box
L
(not included)
N
2-Cross Bar with 2 Studs
(Universal Round)
4-Outlet Box Screws
(not included)
5-Flat Canopy
11-Decorative Nuts
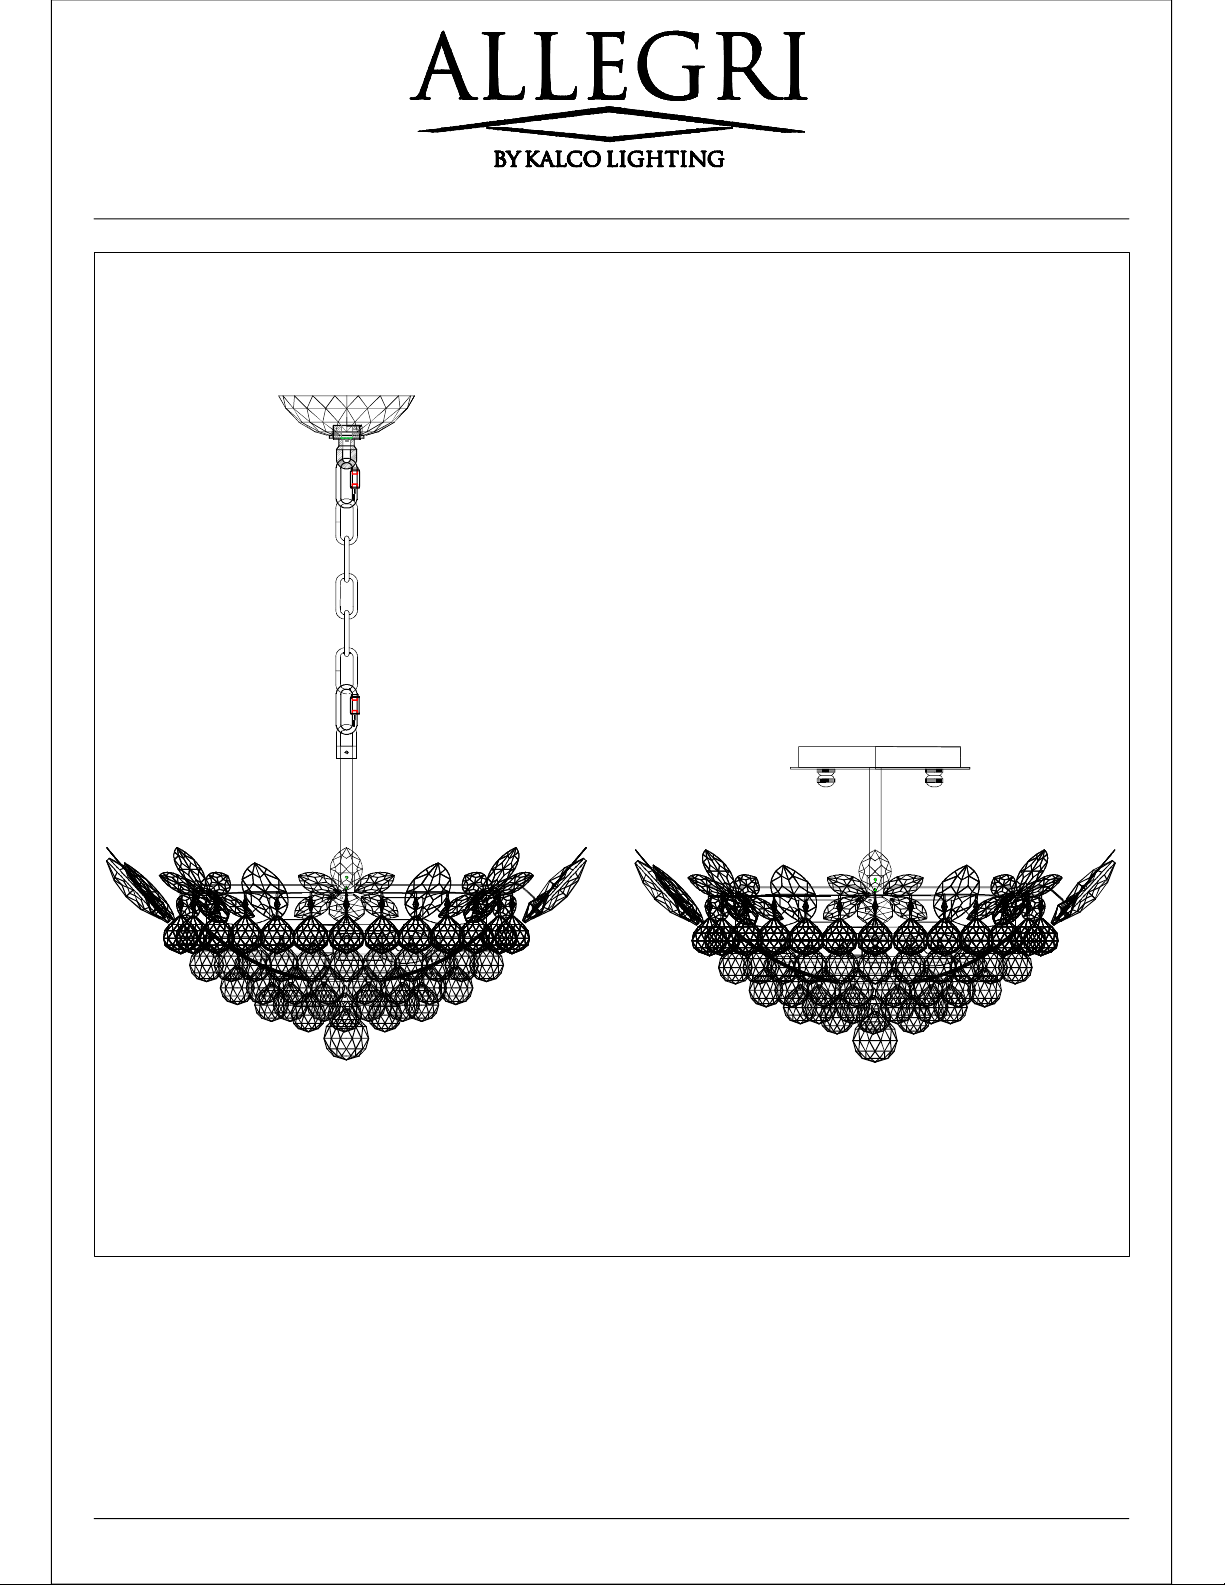
PENDANT CANOPY INSTALLATION:
Step 1. Carefully unpack parts and lay them down on a
clean soft cloth for identification:
Step 2. Install Cross bar 2 to outlet box 1 with the two
outlet box original screws 4
Step 3. Install Threaded Nipple 3 to Cross Bar 2 and
Collar loop 7 on the other side, thighteen all parts with
hex nuts to prevent from turning
Step 4. Install Canopy bowl 5 and crystal bobeche 6 to
Nipple 3 then secure all parts with Collar Loop Ring 8
Step 15. Determine chain length needed for installation,
if needed cut chain with a Bolt Cutter Tool. Hung chain
10 to Collar loop 7 with an easy link 9
Step 6. Assemble frame as shown in page 4 OPTION 1
(PENDANT)
SEMI-FLUSH CANOPY INSTALLATION:
Step 1. Carefully unpack parts and lay them down on a
clean soft cloth for identification:
Step 2. Install Cross bar 2 with the two Studs pointing
towards the floor to outlet box 1 with the two outlet box
original screws 4
Step 3. Assemble frame and canopy as shown in page 4
OPTION 2 (SEMIFLUSH)
P3
WWW.ALLEGRICRYSTAL.COM
866.820.2665
 Loading...