

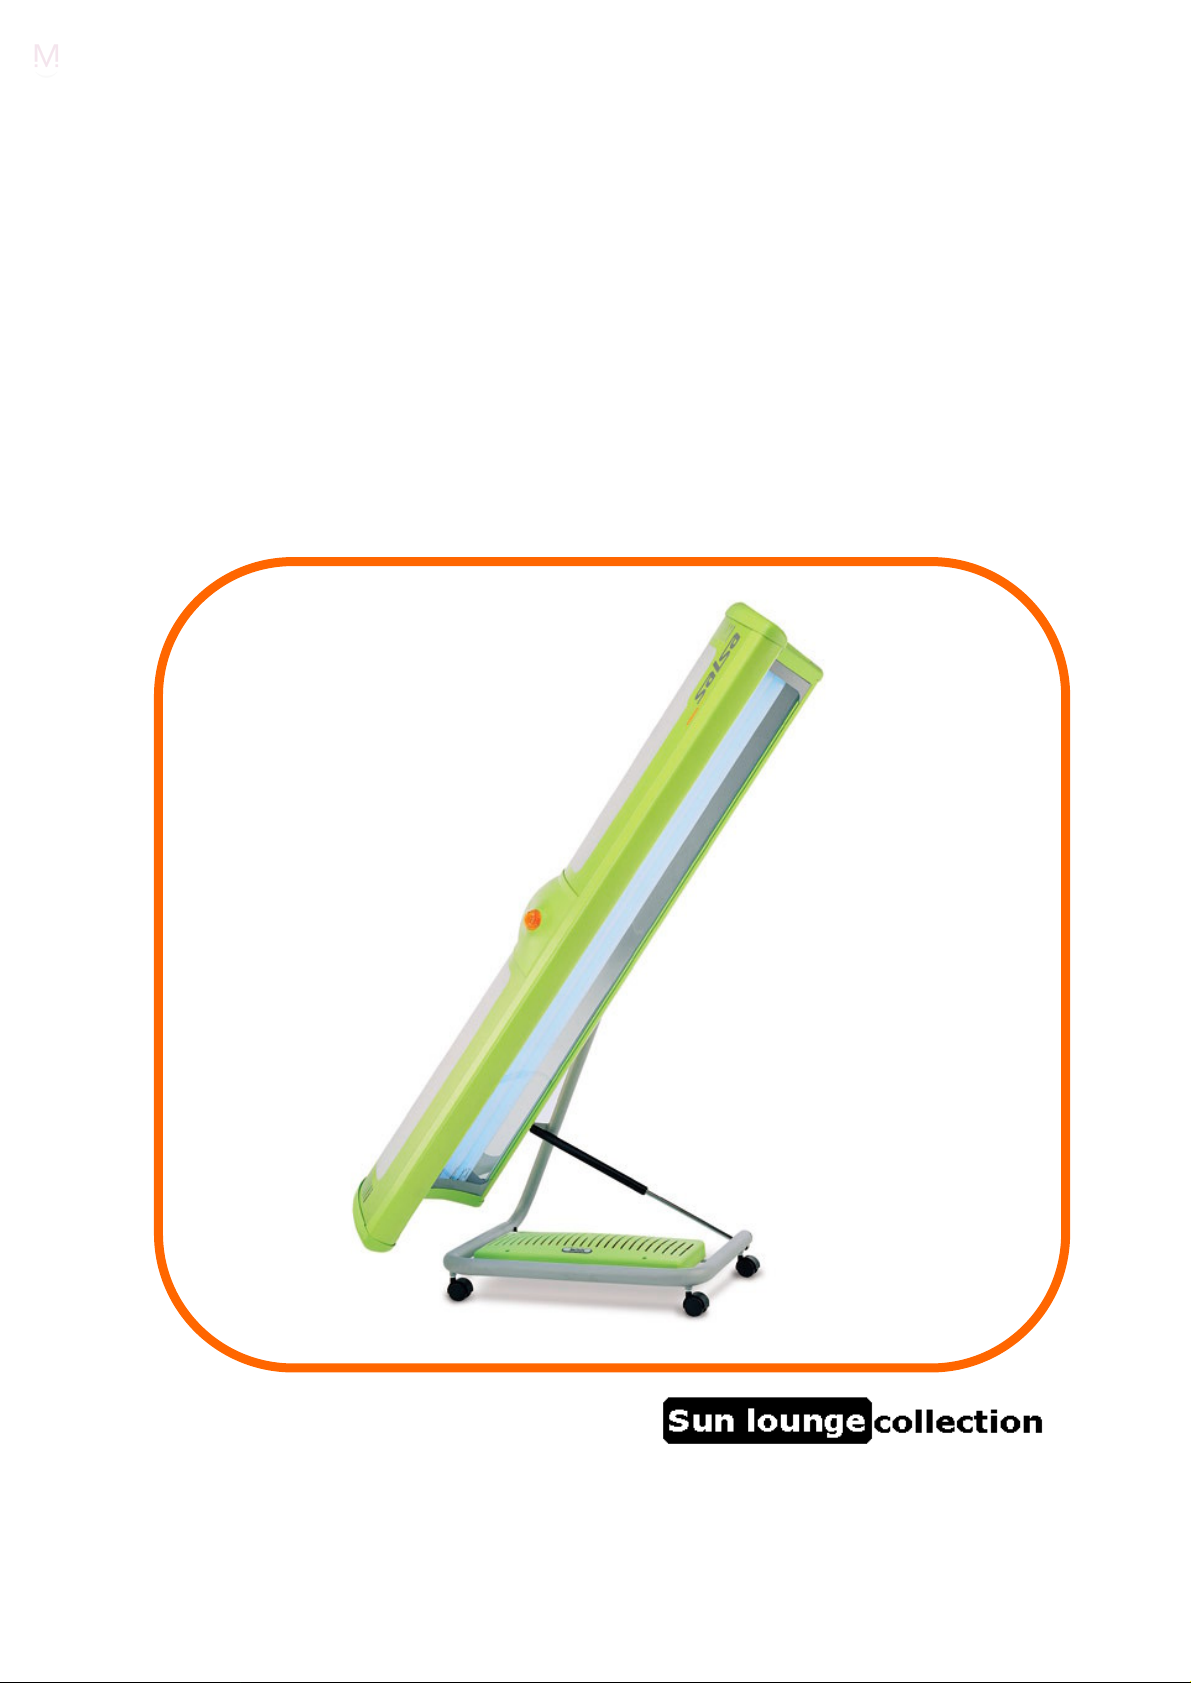
Alisun Salsa 12, Salsa 10 User Manual [it]
TECHNICAL MANUAL
Montage- en service-instructies
Assembly and Service manual
Montage- und Wartungsanleitung
Notice de montage et d'entretien
Instrukcja monta
Montaggio e manutenzione
u i obs ugi
Salsa 10
Salsa 12
document: TMBS030
art.: 382215
init: 9501
rev.: 2002/03
NEDERLANDS
MONTAGE
3.
Verwijder de beschermfolie van de
acrylplaat.
Controleer of de spanning ter plekke
overeenkomt met die op het
typeplaatje.
Steek daarna de
geaarde
Uw apparaat is nu klaar voor gebruik.
wandkontaktdoos.
stekker in een
GEBRUIK
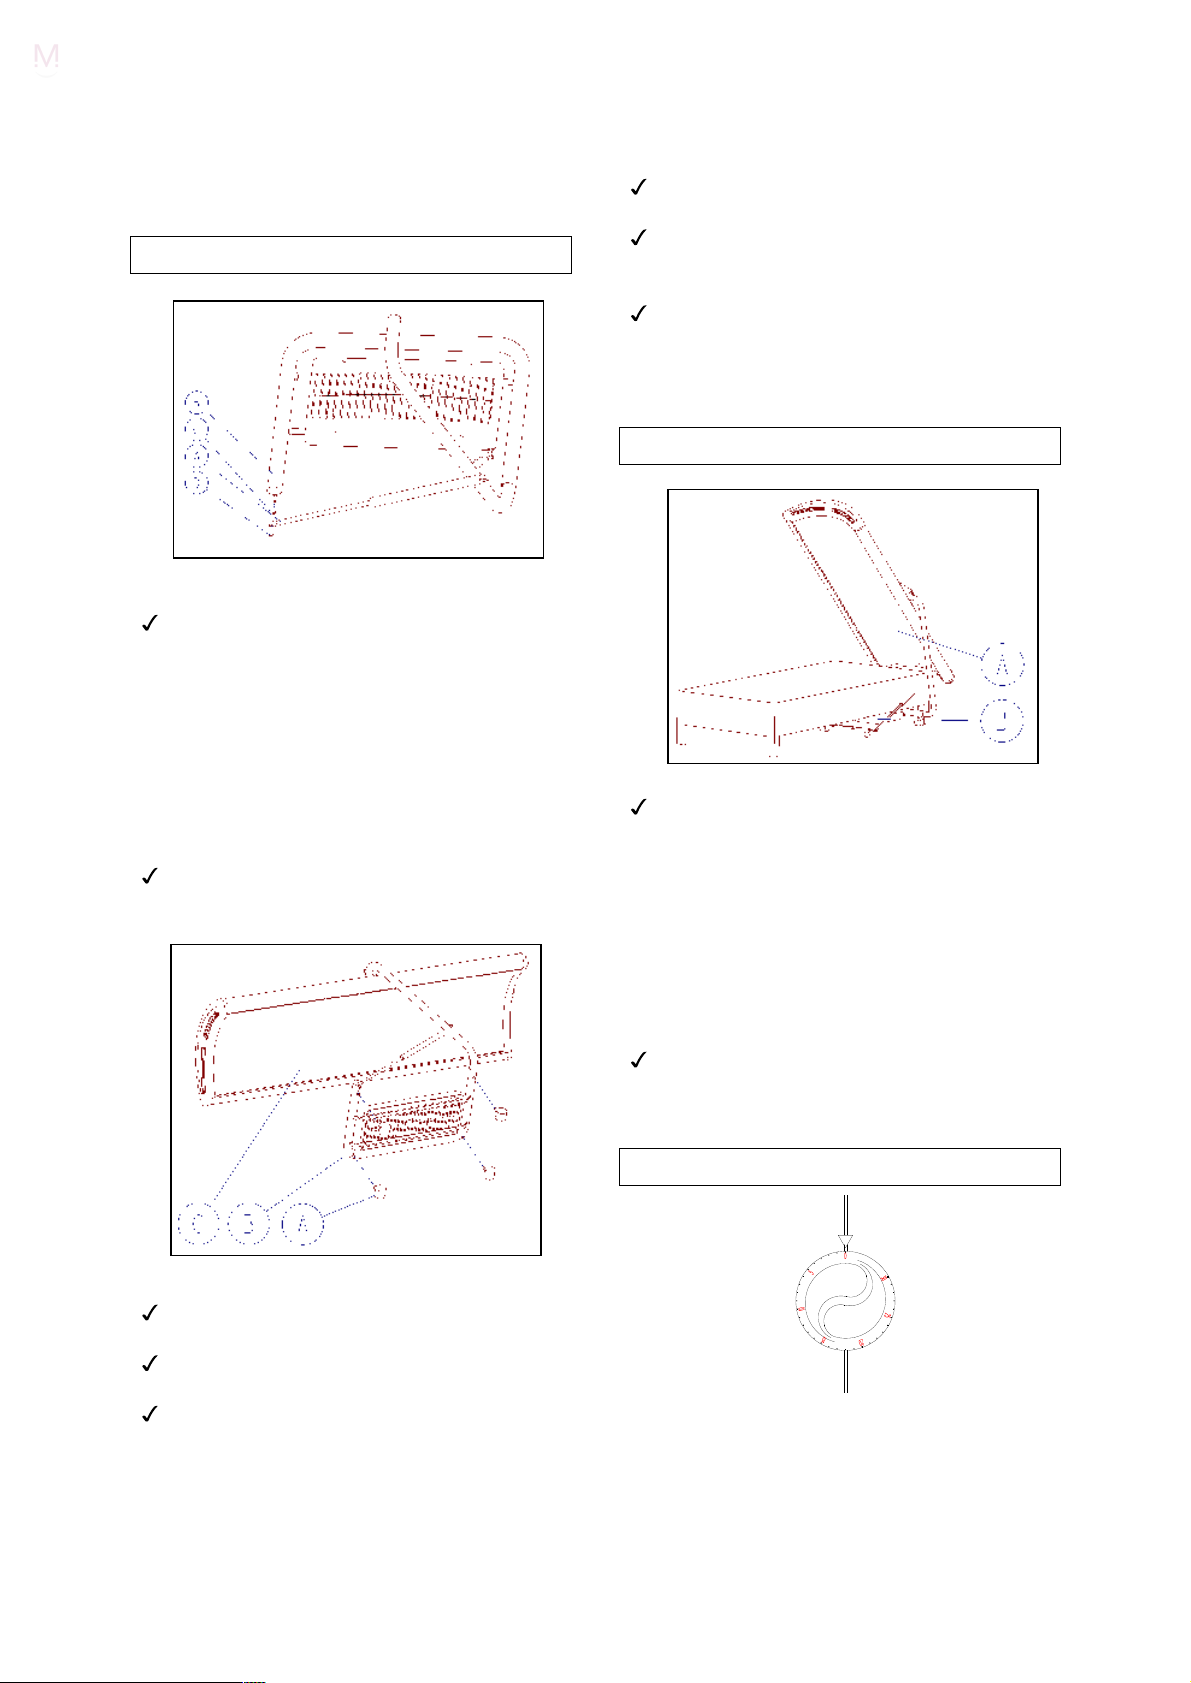
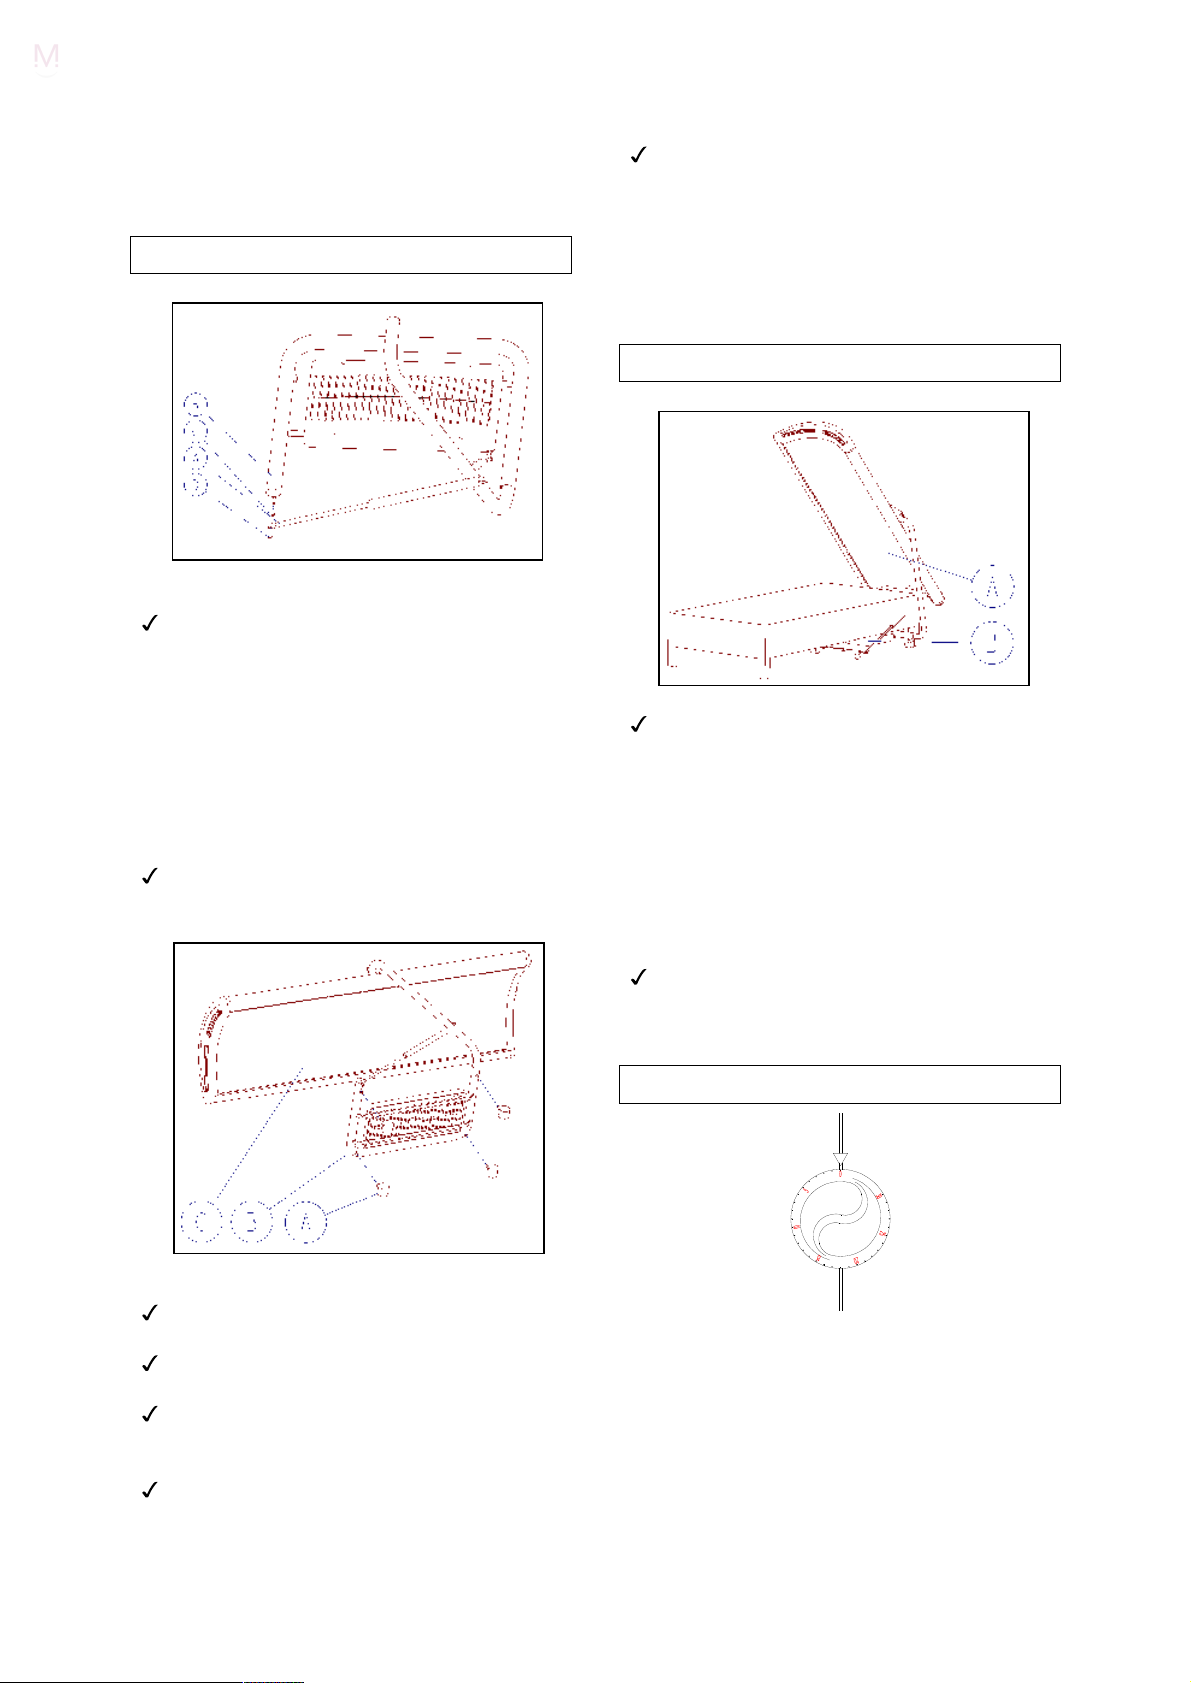
1.
Bevestig de gasdrukveer (A) aan het
statief (B) met behulp van de kunststof
ring (C) en de borgveer (D).
LET OP:
helemaal aangedrukt te worden. Een
eenmaal aangebrachte borgveer mag niet
verwijderd worden. De borgveer is slechts
éénmaal te gebruiken.
de borgveer dient goed en
Pak de hemel aan beide zijden in het
midden vast en til de hemel omhoog.
Rij
het apparaat (A) in verticale stand
naar het voeteneind van het bed, of
plaats het apparaat voor een stoel.
Zorg ervoor dat u het apparaat altijd op
een vlakke ondergrond plaatst.
LET OP:
mogen nooit door enig voorwerp worden
afgedekt.
Pak de hemel aan beide zijden vast en
trek de
de sleuven van de VSA-kar (B)
hemel naar u toe.
BEDIENING
2.
Kantel nu het apparaat zodanig dat
deze met de voorzijde op de grond ligt.
Bevestig
onderkant van het statief (B).
Zet de hemel (C) nu terug op het
statief.
de
zwenkwielen
(A) aan de
U kunt de timer op het gewenste aantal
minuten instellen door hem rechtsom te
draaien.
Na het verstrijken van de tijd schakelt de
timer automatisch uit. Wilt u uw apparaat
eerder uitschakelen dan draait u de timer
linksom naar nul.
ACRYLPLAAT
Het uitnemen van de acrylplaat dient alleen
verricht te worden als het apparaat zich op
kamertemperatuur bevindt.
1.
Wanneer u de acrylplaat wilt uitnemen,
dient u de volgende handelingen te
verrichten:
Haal de
wandcontactdoos.
Draai de 4 schroeven (A) van het
kopschot (B) los.
Schuif het kopschot uit de hemel.
Herhaal deze handeling bij het
kopschot aan de andere
Draai de hemel nu geheel rond zodat
de lampen aan de bovenzijde zitten.
stekker
uit de
zijde.
Trek nu de acrylplaat naar u toe zodat
deze loskomt uit het profiel aan de
andere zijde.
3.
Het monteren van de acrylplaat vereist de
volgende handelingen:
Schuif de acrylplaat aan één zijde in de
gleuf van het kunststof profiel.
Druk in het midden op de acrylplaat en
schuif aan de andere zijde de acrylplaat
in de gleuf van het kunststof profiel.
Draai vervolgens de hemel geheel rond
zodat de lampen weer aan de
onderzijde zitten.
Monteer nu beide kopschotten met de 4
schroeven.
ONDERDELEN
Gebruik alleen originele Alisun-onderdelen:
Onderdeel
Brilliant
GoldSun
Reflektor Salsa 10/12
Timer
Het vervangen van het netsnoer van dit
apparaat mag alleen door geautoriseerd
personeel gebeuren.
Sun plus XT 100W
DuoTan®
Professional 100W
Art.nr.
350377
350366
332220
355005
2.
Trek de acrylplaat (A) aan één zijde
voorzichtig los uit het kunststof profiel
(B).
ENGLISH
ASSEMBLY
Check if the voltage rating of your
facilities corresponds with the rating on
the type
the power cord into a grounded wall
socket.
Your unit is now ready for use.
label
.Then insert the plug of
USAGE
1.
Fasten the gas absorber (A) to the
stand (B) by means of the plastic
washer (C) and the locking spring (D).
NOTE:
pushed in properly, as far as it will go. Once
fitted, a locking spring should not be
removed. A locking spring can only be used
once.
The locking spring should be
Grasp the canopy on either side of the
centre
, then lift it upwards.
Wheel the equipment (A) (in a vertical
position), to the foot of the bed or place
it in front of a chair. See to it that the
equipment is always located on a flat
surface.
NOTE:
(incorporating ballast) must not become
covered by any foreign objects.
the slots of the wheeled base (B)
Grasp the canopy on either side and
pull it towards you.
OPERATION
2.
Now tilt the equipment such that its
front surface is on the floor.
Fasten the swivel casters (A) to the
bottom of the stand (B).
Now replace the canopy (C) on the
stand.
Remove the protective plastic from the
acrylic sheet.
You can set the timer to the required
number of minutes by turning it clockwise.
After the time has expired the timer will
switch off automatically. If you want to
switch off your unit sooner, the timer should
be turned anti-clockwise to the zero
position.
 Loading...