

Label Picture Description QTY
Assembly Instructions
Caution : You must read this before you proceed
BED
NOTE : This Bed is NOT a TOY.
Keep your child / children at bay during the assembly process.
The BED is HEAVY.
To prevent injury to yourself or damage to the product a minimum of two adults
arerequired whenever moving or lifting the product.
Part List
Page 1 OF 13

A Headboard 1
B Headboard Side Leg 2
C Headboard Center Leg 1
D Footboard 1
E Side Rail(Labelled 'E') 2
F Side Rail(Labelled 'F') 2
G
Side Cleat
4
H Center Side Cleat 2
I
Support Leg For Side
Rail
2
J Support Leg 2
Page 2 OF 13

K Center Suppopt Rail 2
L Slat 24
M U-shaped Support Leg 1
N
Cross Center Support
Rail
1
O Straight Connector 4
P Leg 2
Label Picture Description QTY
①
Bolt(M6 x 45mm)
25
②
Blot(M8 x 30mm)
17
③
Bolt(M6 x 25mm)
13
④
Bolt(M6 x 30mm)
9
⑤
Screw(M4 x 60mm)
5
⑥
Spring Washer(φ6.5mm)
9
⑦
Flat Washer(φ6.5mm)
21
Hardware
Page 3 OF 13

⑧
Allen Key(M6)
1
⑨
Allen Key(M8)
1
⑩
Screwdriver(Not Provide)
1
⑪
Center Slat Plug
14
⑫
Side Slat Plug
28
Assembly Preparation
Before
Beginning
Assembly:
x2x2x2
x4x2x2
x2
x2
x24
x2
x14
x28
x4
x25
x17
x13
x5
x9
x21
x9
Page 4 OF 13

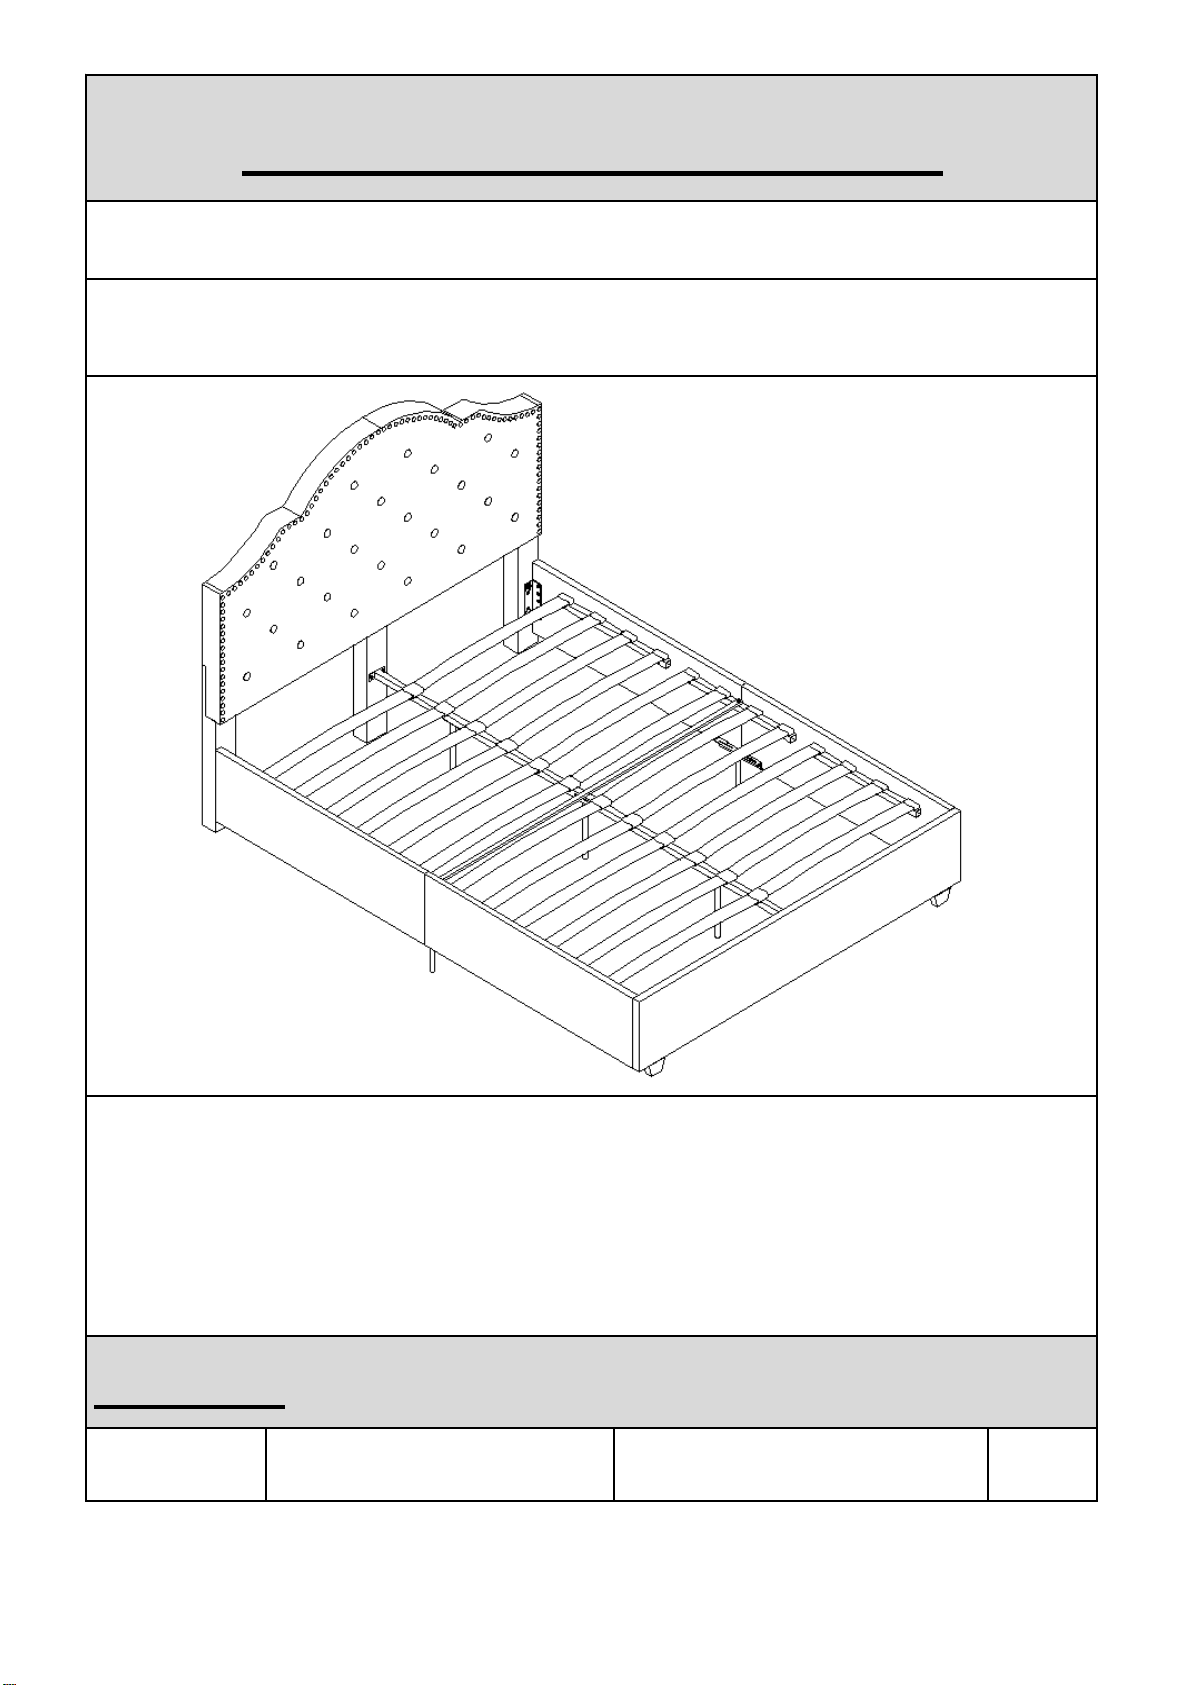
Unpack and place all parts for clear visibility.
Overview
This bed has multiple parts and may require up to 60 minutes to
assemble.
To give you an overview of the bed parts, the above picture is to help
you put the various parts into perspective.
Please read through the instructions below to familiarise yourself with
the parts and steps before assembly.
Step 1
Headboard(A)
Headboard
Side Leg(B)
Footboard(D)
Headboard
Center
Leg(C)
Side Rail(E)
Side Rail(F)
Side
Cleat(G)
Center Side Cleat(H)
Center Suppopt Rail(K)
Slat(L)
Center Suppopt Rail(N)
Leg(P)
Support Leg(M)
Straight Connector(O)
Support Leg For Side Rail(I)
x2
x2
x2
x4
x2
x2
x2
x2
x24
x2
x14
x28
x4
FRONT FACING
Side Rail(E)
Page 5 OF 13
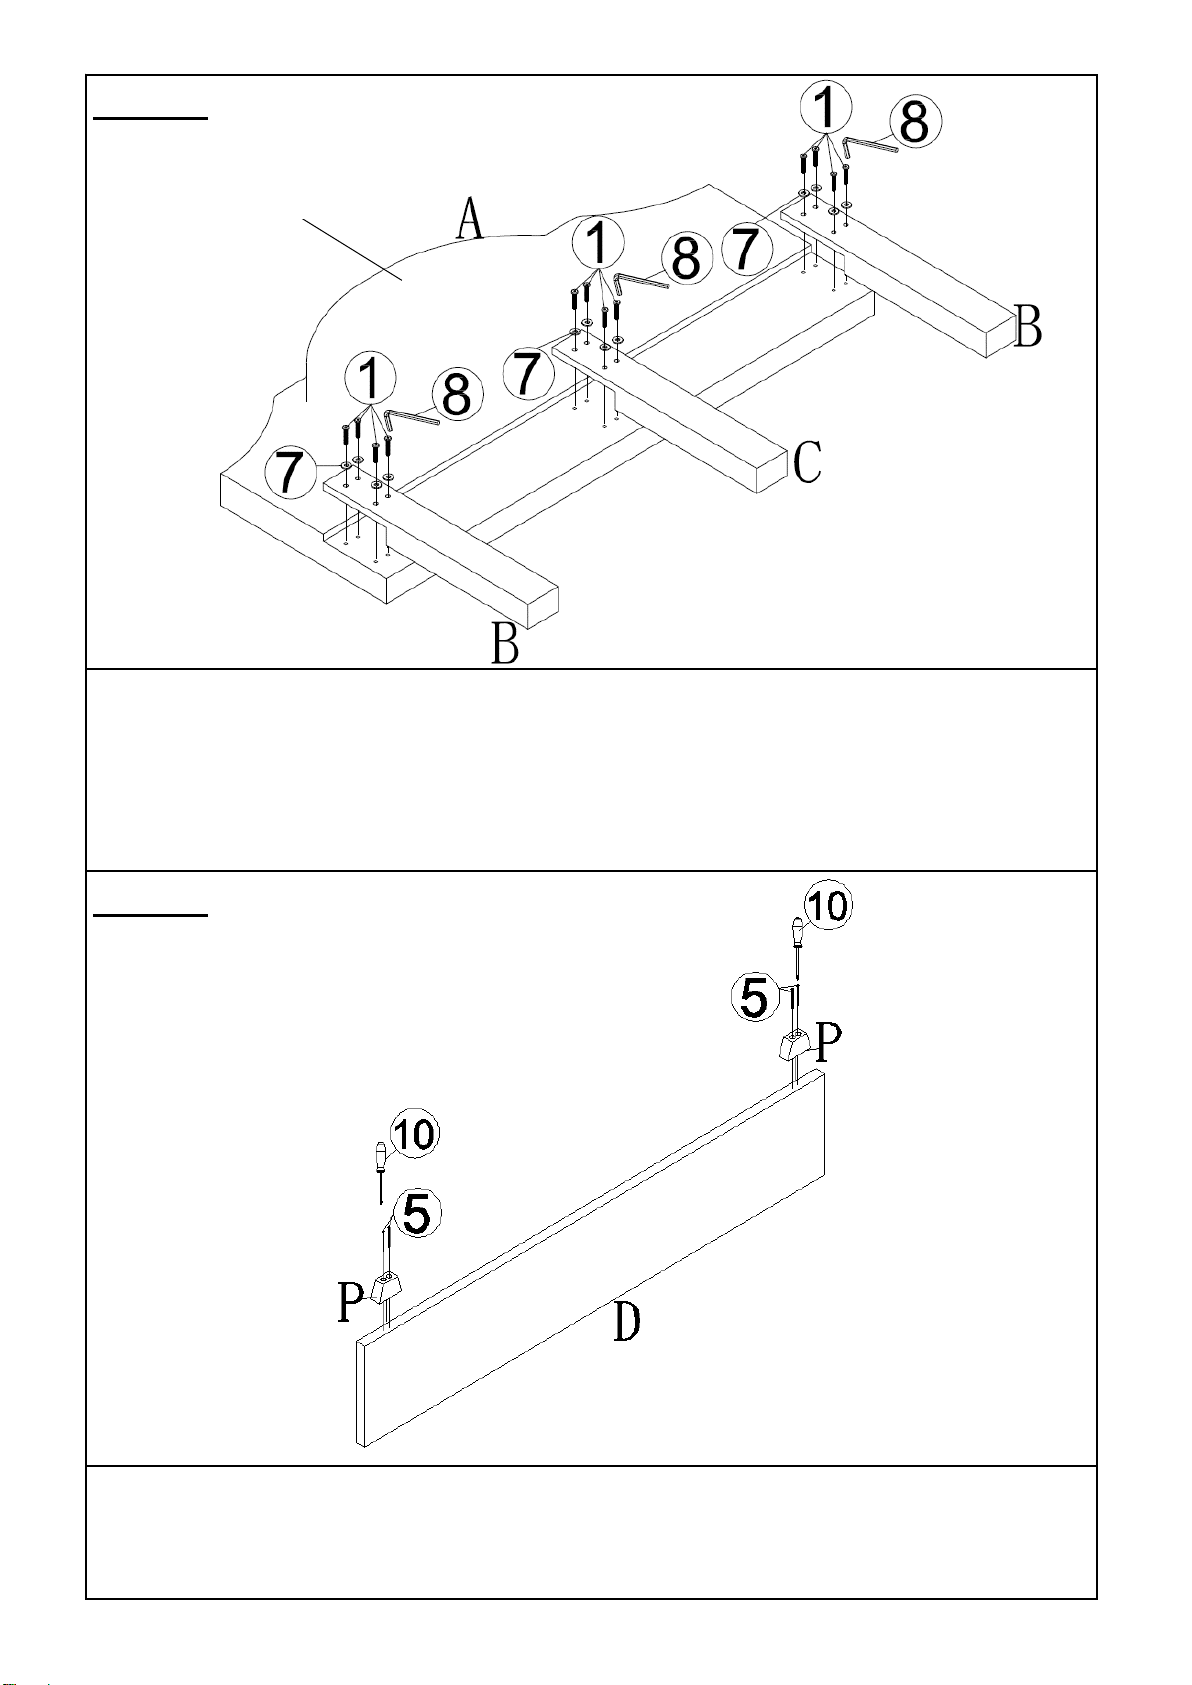
Place the Headboard(A) face down onto a clean, soft surface to avoid any
scratches or damages to the product.
Attach Headboard Side Leg(B) and Headboard Center Leg(C) to Headboard(A)
using Flat Washer(⑦) and Bolts(①) with Allen Key(⑧).
Note: Turn the assembled Headboard frame rightside up after assembling.
Step 3
Place the Footboard(D) upside down as pix shown.
Attach Leg(P) to Footboard(D) with Screws(⑤) using Screwdriver(⑩).
Note: Turn Footboard(D) rightside up after assembling.
Step 2
Back side
Page 6 OF 13
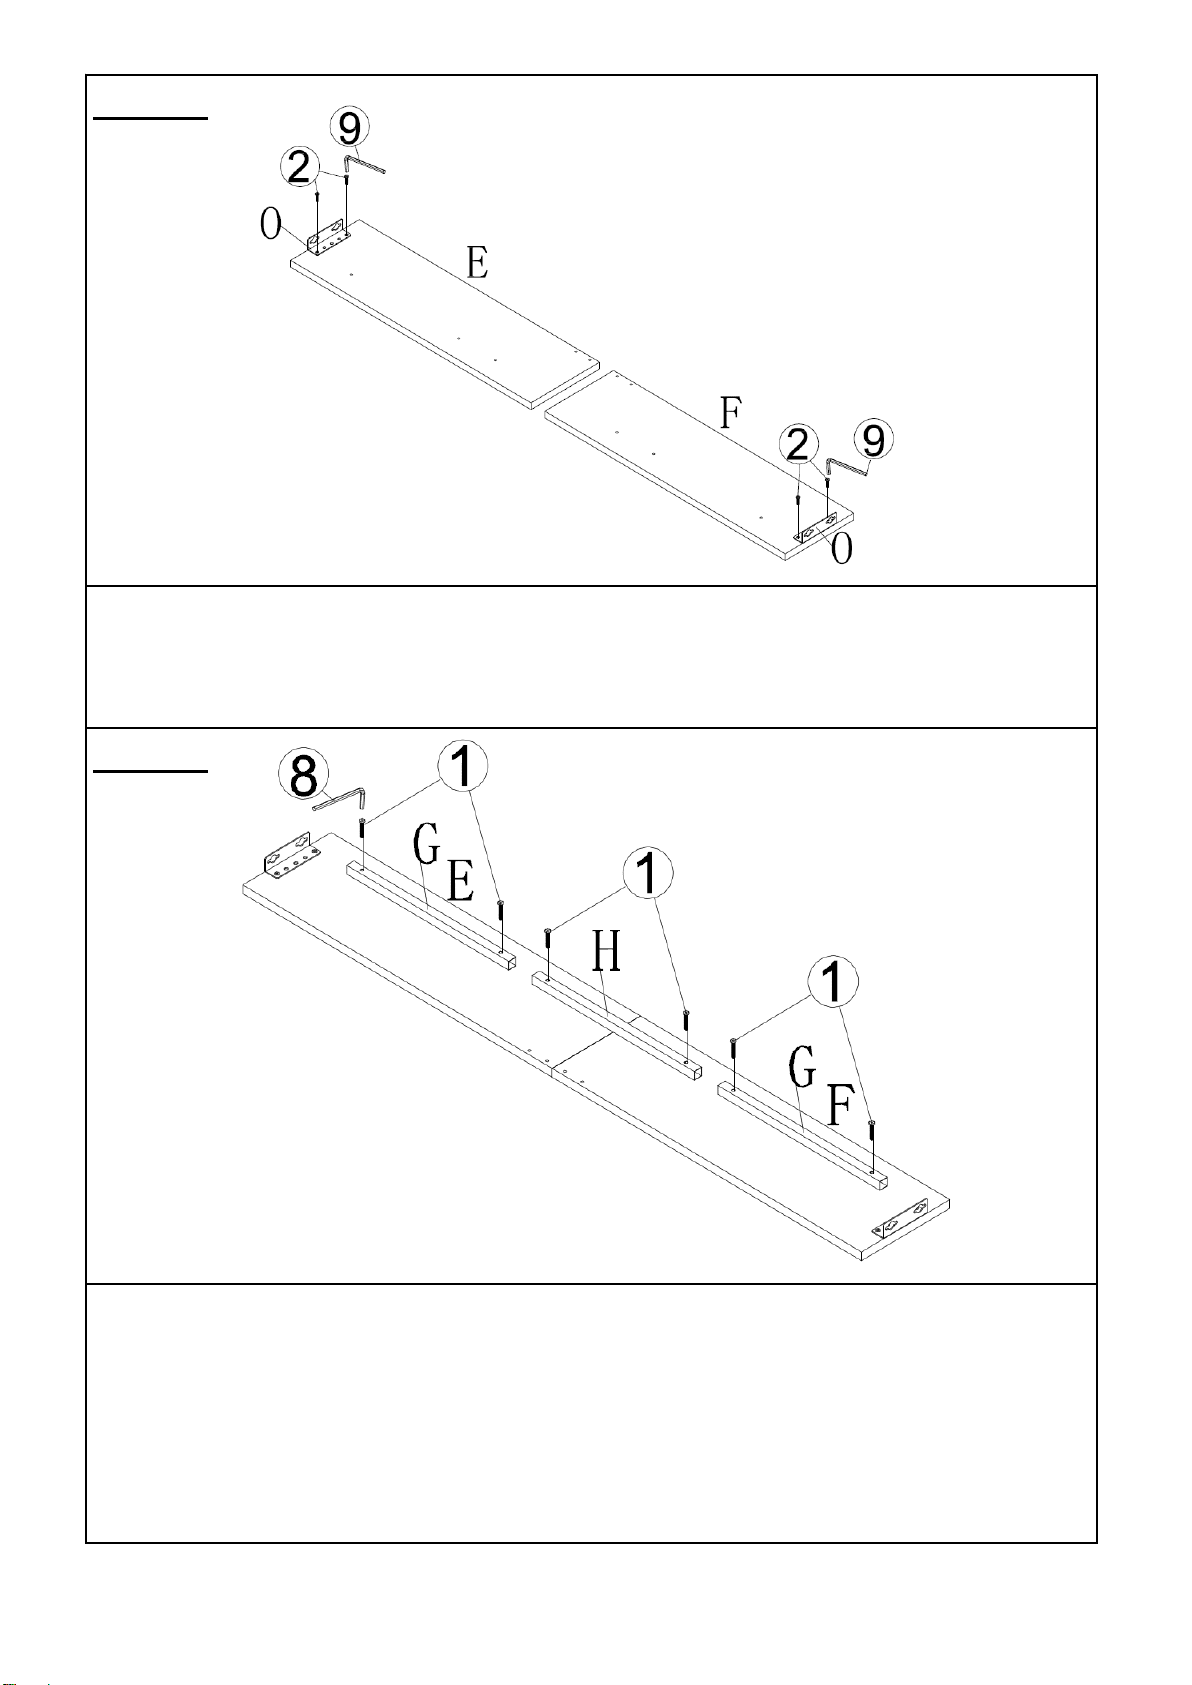
Attach the first and fifth mounting position of Straight Connector(O) to Side
Rail(E) and Side Rail(F) using Bolts(②) Allen Key(⑨).
Repeat same step to assemble remaining Side Rail(E&F).
Step 4
Step 5
Align the mounting position of Side Cleat(G) and Center Side Cleat(H) to Side
Rail(E&F).
Attach Side Cleat(G) and Center Side Cleat(H) to Side Rail(E&F) using Bolts(①)
with Allen Key(⑧).
Repeat same step to attach the other Side Rail(E&F).
Note: After assembling, the mounting positions should facing upside.
Page 7 OF 13

Attach Support Leg(J) to Center Suppopt Rail(K) using Bolts(③) with
Allen Key(⑧) as shown.
Step 6
Place assembled Side Rail Frame(E&F) face skywards onto a clean, soft
surface to avoid any scratches or damages to the product.
Attach Support Leg For Side Rail(I) to assembled Side Rail Frame(E&F) using
Bolts(④) with Allen Key(⑧).
Repeat same step to assemble the other Support Leg For Side Rail(I) to the
other assembled Side Rail Frame(E&F).
Note: Turn assembled Side Rail Frame(E&F) rightside up after assembling.
Step 7
Page 8 OF 13
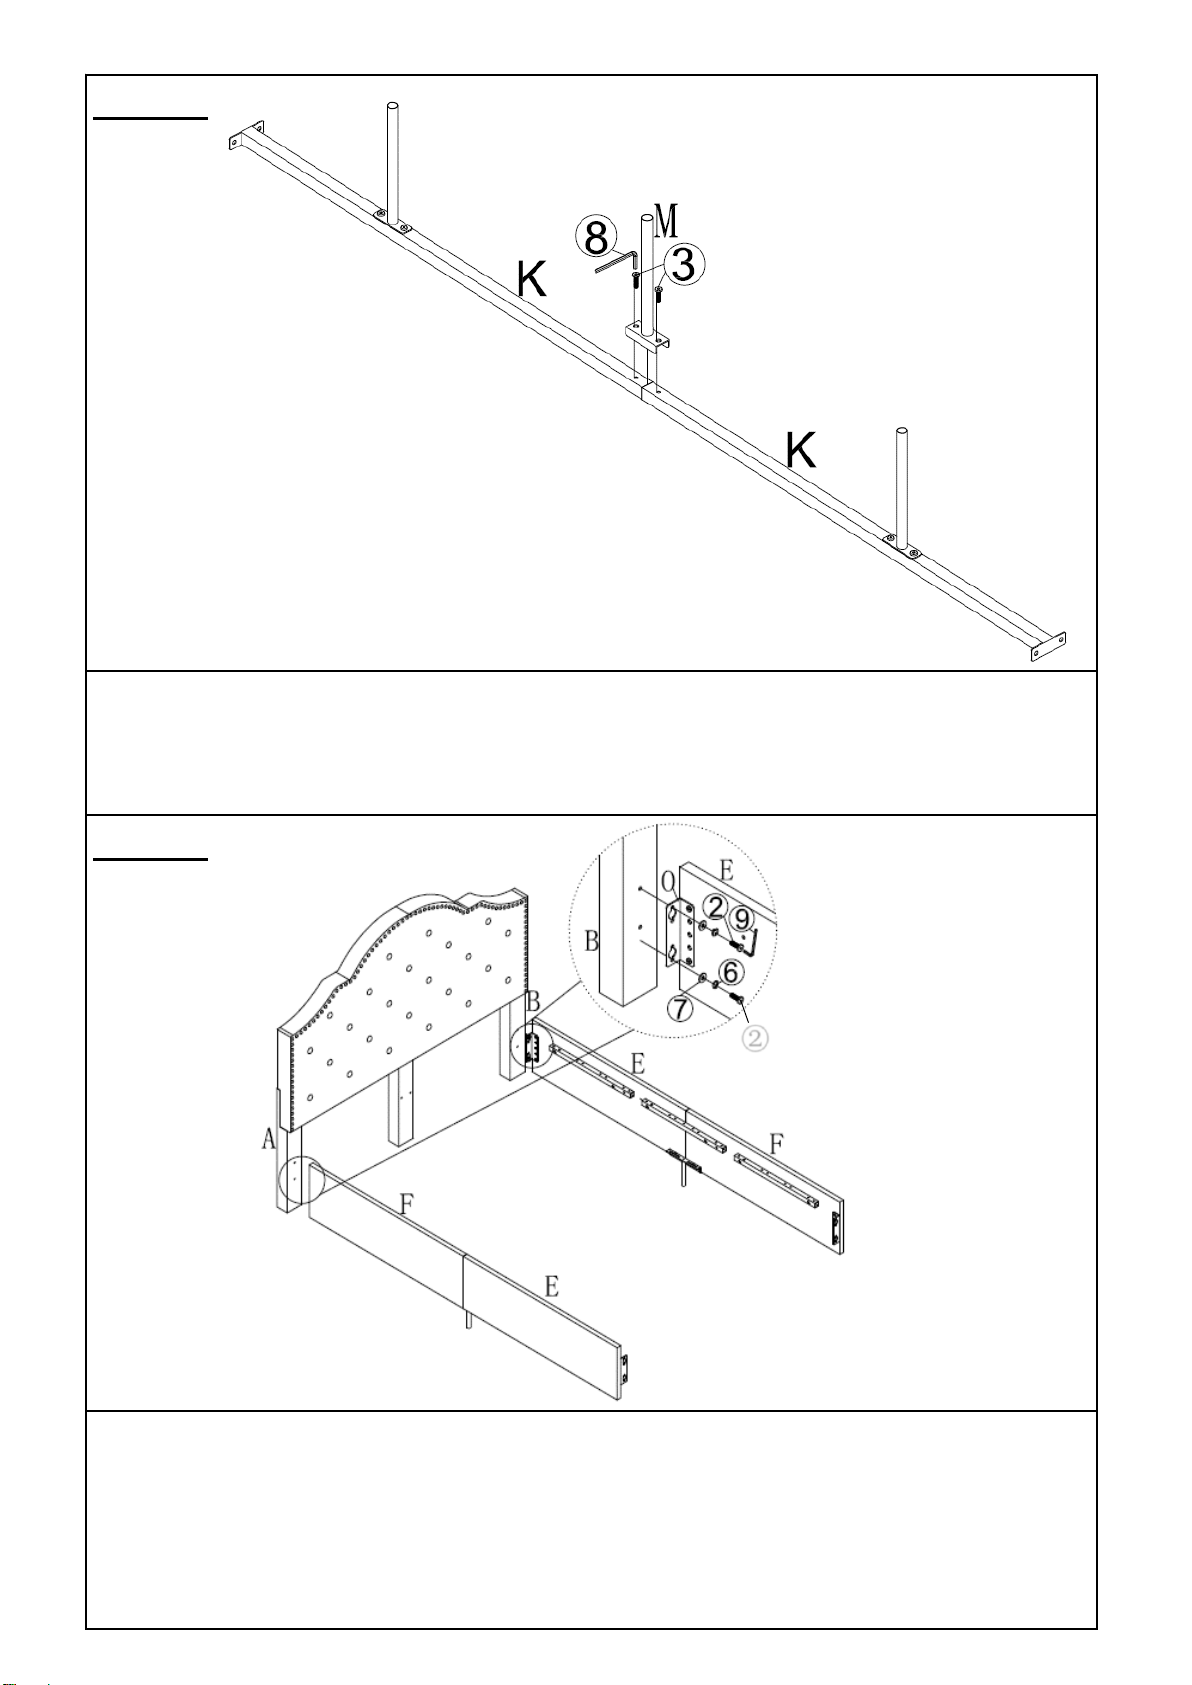
Align two Center Suppopt Rail(K) together with U-shaped Support Leg(M).
Attach U-shaped Support Leg(M) to Center Suppopt Rail(K) by tightening using
Bolts(③) with Allen Key(⑧) as shown.
With the help of adult partner, align the mounting position of Straight
Connector(O) on Side Rail(E) to Headboard Side Leg(B).
Attach Straight Connector(O) on Side Rail(E) to Headboard Side Leg(B) using
Flat Washers(⑦), Spring Washers(⑥) and Bolts(②) with Allen Key(⑨).
Repeat the same step to assemble Side Rail(F) to Headboard Side Leg(B).
Step 8
Step 9
②
Page 9 OF 13

Step 10
Align the mounting position of Straight Connector(O) on Side Rail(F) to
Footboard(D).
Attach Straight Connector(O) on Side Rail(F) to Footboard(D) using Flat
Washers(⑦), Spring Washers(⑥) and Bolts(②) with Allen Key(⑨).
Repeat the same step to assemble Straight Connector(O) on side Rail(E) to
Footboard(D).
Step 11
Page 10 OF 13

Step 12
Attach Cross Center Support Rail(N) to Center Side Cleat(H) using Bolts(③)
with Allen Key(⑧).
Step 13
Turn the assembled Center Suppopt Rail(K) rightside up.
Attach Center Suppopt Rail(K) to Headboard Center Leg(C) and Footboard(D)
using Bolts(③) with Allen Key(⑧).
Note: After assembling Center Suppopt Rail(K), the mounting positions of them
facing upside.
Page 11 OF 13

Step 15
Your Bed is ready for use.
Note: After assembly and before using the bed, inspect to make sure all
parts are properly connected and securely fastened.
Attach Center Slat Plug(⑪) and Side Slat Plug(⑫) to Slat(L) as pix shown.
Repeat same step to assemble remaining Slat(L).
Step 14
Now tighten all Bolts fully at all joints in a sequential manner.
Then, align assembled Slat(L) to the mounting position of Side Cleat(G), Center
Side Cleat(H) and Center Suppopt Rail(K) by pressing with hands.
Note: If necessary, tap assemble slat to ensure it is fully slotted into
position.
Page 12 OF 13

Page 13 OF 13
 Loading...