

Mini Digitalradio DR 72
Anleitung / Manual
Deutsch / English / Français
Español / Italiano

Inhalt
1. Sicherheitshinweise ....................................................................... 3
2. Technische Daten .......................................................................... 3
3. Bedienelemente............................................................................. 4
4. Radio laden ................................................................................... 5
5. Kopfhörer ....................................................................................... 5
6. Radio einschalten .......................................................................... 5
7. Betriebsmodus DAB+/UKW/Bluetooth wählen .............................. 6
8. DAB+ Sender suchen .................................................................... 6
9. Dienst-Informationen: DAB+ Modus .............................................. 6
10. Senderspeicher: DAB+ und UKW ............................................... 7
11. Sender suchen und auswählen: UKW-Modus ............................ 7
12. Dienst-Informationen: UKW-Modus ............................................. 7
13. Bluetooth-Verbindung .................................................................. 8
14. Anrufe verwalten .......................................................................... 9
15. Bluetooth-Musikwiedergabe ........................................................ 9
16. Bluetooth Pairings löschen .......................................................... 9
17. Menüsprache ............................................................................... 9
18. Konformitätserklärung ............................................................... 10
19. Gewährleistungs- und Recyclinginformationen ......................... 10
20. Serviceanschrift ........................................................................ 12
2 Deutsch
1. Sicherheitshinweise
1. Reinigen Sie das Gerät immer mit einem trockenen Tuch.
2. Verwenden Sie das Gerät nicht in unmittelbarer Nähe von heißen
Objekten oder Geräten.
3. Verwenden Sie nur das mitgelieferte Zubehör.
4. Setzen Sie das Radio nicht Wasser, Wasserdampf, Sand oder
sonstigen Umwelteinüssen aus.
5. Lassen Sie Ihr Radio nicht an Orten, an denen übermäßige Hitze
zu Schäden führen kann.
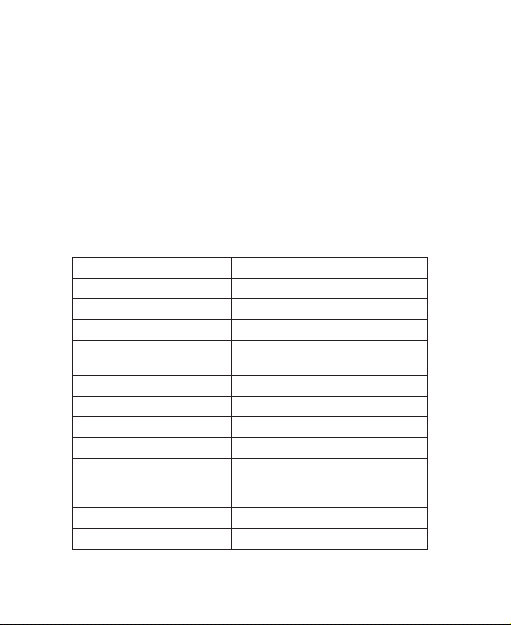
2. Technische Daten
Modell: DR 72
Unterstütztes Radioformat: DAB+ und UKW-Radio
DAB+ Frequenz: Band III (174,00 - 240,00 MHz)
UKW-Frequenzbereich: 87,5-108 MHz mit RDS
Bluetooth: Version 2.1+EDR, unterstützt A2DP,
Kopfhörer: 2 x 0,15 W RMS, 32 Ω, Ohrhörer
Akku: 400 mAh Lithium
Spannungsversorgung: Micro-USB-Port (5 V, 500 mA)
Ladezeit: ca. 2 Stunden
Batterielaufzeit: ca. 8 Stunden für DAB+, 20 Stunden
Abmessungen: 58 x 34 x 10 mm
Nettogewicht: ca. 35 g
AVRCP, HFP.
für Musikwiedergabe, 20 Stunden
für Sprachwiedergabe
3Deutsch
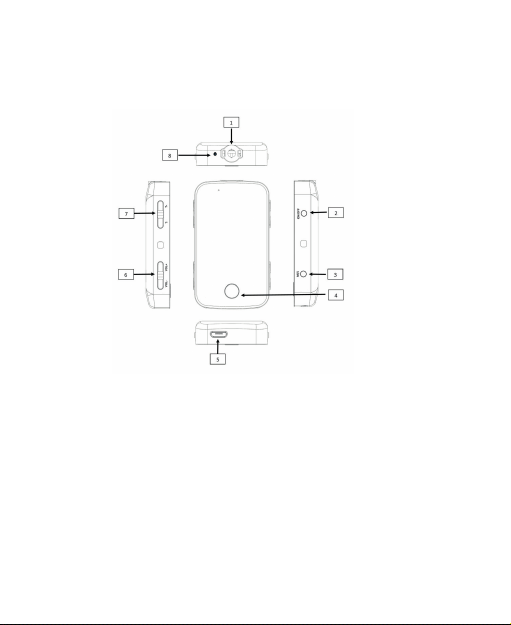
3. Bedienelemente
1. 3,5 mm Kopfhörerbuchse
2. Ein-/Ausschalter ON/OFF und Modus
3. M/S (Menü/Scan)
4. Senderspeicher
5. Micro-USB-Ladeanschluss
6. Lautstärke
7. Sendersuche/Tune
8. Mikrofon
4 Deutsch

4. Radio laden
Das DR 72 verfügt über einen integrierten 3,7V / 400mAh LithiumAkku. Das DR 72 wird mit einem Micro-USB-Ladekabel geliefert.
Vor der ersten Verwendung des Radios laden Sie den Akku bitte
vollständig auf.
1. Schließen Sie den Micro-USB-Stecker an das Radio und den
USB-Stecker an einen USB-Port Ihres Computers oder an ein
USB-Netzteil an.
2. Der Akku des Radios wird geladen. Ein Ladezyklus dauert ca.
2 Stunden.
3. Während des Ladezyklus bewegt sich die Ladeanzeige von rechts
nach links und stoppt, sobald der Akku vollständig geladen ist.
5. Kopfhörer
Das DR 72 ist mit hochwertigen, speziell konzipierten Ohrhörern
ausgestattet, die gleichzeitig als Antenne dienen. Die 3,5 mm
Klinkenbuchse bendet sich oben auf dem Radio und ist für Stereo-
Kopfhörer oder Ohrhörer geeignet.
Wichtig: Eine zu hohe Lautstärke über Ohr- oder Kopfhörer kann
Hörschäden verursachen.
6. Radio einschalten
1. Vergewissern Sie sich, dass der Akku vollständig geladen ist.
2. Halten Sie „ON/OFF“ zum Einschalten des Radios gedrückt.
3. Im Display wird das ALBRECHT-Logo und dann der zuletzt
verwendete Betriebsmodus (DAB/UKW/Bluetooth) angezeigt. Der
gewählte Modus wird auf der oberen Zeile des Displays angezeigt.
4. Stellen Sie die Lautstärke auf einen komfortablen Pegel ein
(Lautstärkepegel: 0-20).
5Deutsch

7. Betriebsmodus DAB+/UKW/Bluetooth wählen
1. Drücken Sie „ON/OFF“, um zwischen DAB+, UKW und Bluetooth
umzuschalten; „DAB“, „FM“ oder „Bluetooth“ wird auf der oberen
Zeile des Displays angezeigt.
2. Wenn Sie das Radio ausschalten, bleibt der Modus gespeichert.
8. DAB+ Sender suchen
1. Halten Sie „M/S“ gedrückt. Das Radio scannt und speichert alle
Kanäle automatisch (bis das nächste Mal gescannt wird).
2. Mit „T+“ oder „T-“ wechseln Sie die gespeicherten Sender.
9. Dienst-Informationen: DAB+ Modus
Anzeige der Dienst-Informationen – Technische Informationen zum
aktuellen Status des Senders und des übertragenen Titels.
Während Sie DAB+ hören, zeigt das Display folgende Informationen
an, sofern verfügbar
1. Sendername
2. Interpret und Titel (DLS)
3. Lautstärke
4. Signalstärke
5. Batteriestand
6 Deutsch

10. Senderspeicher: DAB+ und UKW
1. Zum Speichern des aktuell gehörten UKW/DAB+ Senders
halten Sie „SENDERSPEICHER“-Taste auf der Vorderseite
neben der Anzeige für 3 Sekunden gedrückt. Der nächste freie
Senderspeicher wird angezeigt. Wählen Sie die gewünschte
Speicherstelle mit „T+“ oder „T-“, dann drücken Sie erneut
„SENDERSPEICHER“ zur Bestätigung. „Preset Stored“ wird im
Display angezeigt (war der Senderspeicher zuvor belegt, so wird
er überschrieben).
2. Zum Aufrufen eines Senderspeichers drücken Sie
„SENDERSPEICHER“, dann wählen Sie die gewünschte
Speicherstelle (der Sendername wird angezeigt) mit „T+“ oder „T-“
und drücken Sie erneut „SENDERSPEICHER“ zur Bestätigung.
3. Ihnen stehen jeweils 20 Senderspeicher für UKW und DAB+ zur
Verfügung.
11. Sender suchen und auswählen: UKW-Modus
Drücken Sie „T+“ oder „T-“, um jeweils 0,1 MHz aufwärts oder abwärts
zu suchen. Halten Sie die jeweilige Taste zur automatischen Suche
nach dem nächsten verfügbaren Sender gedrückt.
12. Dienst-Informationen: UKW-Modus
Während Sie UKW-Radio hören, zeigt das Display folgende Informationen
an, sofern verfügbar
1. Frequenz
2. Lautstärke
3. Signalstärke
4. Batteriestandsanzeige
7Deutsch

13. Bluetooth-Verbindung
1. Drücken Sie mehrmals „ON/OFF“, bis sich das Radio BluetoothModus anzeigt.
2. Im Bluetooth-Modus halten Sie „M/S“ zur Aktivierung der
Kopplung gedrückt; „Pairing“ wird angezeigt und das BluetoothSymbol blinkt.
3. Schalten Sie auf Ihrem Smartphone die Bluetooth-Funktion ein
und suchen Sie nach Bluetooth-fähigen Geräten.
4. Wählen Sie in der Liste „DR 72“ und sobald die Verbindung
aufgebaut ist, werden „Connected“ und das Bluetooth-Symbol
oben rechts im Display angezeigt.
5. Soll im Kopplungsmodus die Suche nach einem neuen Smartphone
unterbrochen werden, so drücken Sie „SENDERSPEICHER“, um
zum zuletzt verbundenen Smartphone zurückzukehren.
Hinweis: Die Neuverbindung mit dem zuletzt verbundenen
Smartphone kann je nach Modell bis zu 1 Minute dauern. Während
der Neuverbindung blinkt das Bluetooth-Symbol und im Display wird
„Not Connected“ angezeigt.
6. Die bestehende Verbindung zu einem Smartphone kann getrennt
werden, indem Sie „M/S“ gedrückt halten, womit Sie das DR 72
in den Kopplungsmodus zwingen.
Hinweis: Sobald Ihr Smartphone mit dem DR 72 verbunden ist,
wird die Verbindung zwischen den beiden Geräten immer wieder
automatisch aufgebaut, wenn Sie das DR 72 einschalten. Das DR 72
verbindet sich automatisch mit dem zuletzt verbundenen Smartphone.
Soll das DR 72 mit einem anderen Smartphone verbunden werden,
das bereits zuvor, jedoch nicht als letztes, gekoppelt war, so müssen
Sie das DR 72 zunächst in den Bluetooth-Einstellungen des aktuellen
Smartphones trennen. Dazu halten Sie wieder „M/S“ zum Aufrufen des
Kopplungsmodus gedrückt.
8 Deutsch

14. Anrufe verwalten
1. Zum Annehmen eines eingehenden Anrufs drücken Sie die
„SENDERSPEICHER“ Taste.
2. Sprechen Sie in das Mikrofon, das sich neben der Kopfhörerbuchse
bendet.
3. Halten Sie „SENDERSPEICHER“ zum Ablehnen eines Anrufs
gedrückt.
4. Zum Beenden eines Anrufs drücken Sie die Taste erneut.
15. Bluetooth-Musikwiedergabe
1. Im Bluetooth-Modus wählen Sie bei verbundenem Smartphone
die Musik auf dem Telefon, um die Wiedergabe über die
Bluetooth-Funktion aufzurufen (weitere Informationen nden Sie
in der Bedienungsanleitung Ihres Smartphones).
2. Drücken Sie „T+“ oder „T-“, um den nächsten oder vorherigen
Titel auf dem Telefon zu wählen.
3. Drücken Sie „SENDERSPEICHER“ zur Wiedergabe oder
Unterbrechung (Pause) der Musikwiedergabe.
16. Bluetooth Pairings löschen
Drücken und halten Sie die Tasten „MENU“ und „T-“, während Sie im
Bluetooth Modus sind. Im Display erscheint die Nachricht „Pairing
löschen“, dies bedeutet, dass alle jemals vorgenommenen Pairings
gelöscht wurden.
17. Menüsprache
Drücken und halten Sie die Tasten „MENU“ und „VOL+“ gedrückt, um
das Sprachmenü zu öffnen. Wählen Sie die gewünschte Menüsprache
mit den Tasten „T+“ oder „T-“ und bestätigen Sie mit der „MENU“ Taste.
9Deutsch

18. Konformitätserklärung
Inverkehrbringer: Alan Electronics GmbH
Adresse: Daimlerstraße 1k, 63303 Dreieich
Produktname: DR 72
Produkttyp: DAB und UKW Radio mit Bluetooth Schnittstelle
Marke: Albrecht Audio
Das oben beschriebene Produkt entspricht unseren technischen
Konstruktionsunterlagen und Prüfberichten, erfüllt die wesentlichen
Anforderungen der R&TTE Richtlinie der Europäischen Union 1999/5/
EC, der EMV Richtlinie 2004/108/EC, der Niederspannungsrichtlinie
2006/95/EC. Gemäß Anhang III der R&TTE Richtlinie wurden die
folgenden harmonisierten Normen zur Beurteilung der Konformität des
Produkts herangezogen:
Standards
EN 301 489
EN 300 328
EN 60 065
19. Gewährleistungs- und Recyclinginformationen
Wir sind verpichtet, jedem Gerät Informationen über die Entsorgung,
über die gesetzlichen Gewährleistungsbestimmungen und die EG
Konformitätserklärungen mit Hinweisen über das Benutzen der Geräte
in den verschiedenen Ländern beizufügen. Sie nden daher diese
Informationen im folgenden Text.
Gesetzliche Gewährleistung von 2 Jahren nach Kaufdatum
Der Verkäufer dieses Geräts gewährt Ihnen eine gesetzliche
Gewährleistung von zwei Jahren nach Kaufdatum des Geräts. Diese
Gewährleistung umfasst alle Fehler, die durch defekte Bauteile oder
fehlerhafte Funktionen innerhalb der Gewährleistungsfrist auftreten
10 Deutsch

sollten, nicht jedoch Fehler, die auf normaler Abnutzung beruhen,
wie z.B. verbrauchte Akkus, Kratzer im Display, Gehäuse-defekte,
abgebrochene Antennen, sowie Defekte durch äußere Einwirkung,
wie Korrosion, Überspannung durch unsachgemäße externe
Spannungsversorgung oder Verwendung ungeeigneten Zubehörs.
Ebenso sind Fehler von der Gewährleistung ausgeschlossen, die auf
nicht bestimmungsgemäßen Umgang mit dem Gerät beruhen.
Bitte wenden Sie sich bei Gewährleistungsansprüchen zunächst
unmittelbar an den Händler, bei dem Sie das Gerät erworben haben,
oder auch gleich an unseren Servicepartner. Der Händler wird Ihr
Gerät entweder reparieren oder austauschen, oder er wird Ihnen eine
für das Gerät spezialisierte Serviceadresse nennen.
Falls Sie Ihr Gerät einschicken, vergessen Sie Ihre Kaufquittung als
Nachweis über das Kaufdatum nicht und beschreiben Sie bitte den
aufgetretenen Fehler möglichst genau.
Elektroschrottgesetz und Recycling
Europäische Gesetze verbieten das Entsorgen von defekten oder
nicht mehr brauchbaren Geräten über den Hausmüll.
Sollten Sie eines Tages Ihr Gerät entsorgen wollen, dann
geben Sie es bitte nur bei den überall eingerichteten
kommunalen Sammelstellen zum Recycling ab. Dieses
Sammelsystem wird von der Industrie nanziert und
sichert auch die umweltgerechte Entsorgung und das
Recycling wertvoller Rohstoffe.
11Deutsch

20. Serviceanschrift
Alan Service
c/o Transerv2000 Repair Service GmbH & Co. KG
Servicecenter Frankfurt
Robert-Bosch-Str. 35
64625 Bensheim
Die Servicehotline ist unter
06251-9856 0 55 (reguläre Festnetzpreise) bzw. per e-mail unter
service.alan@transerv2000.de erreichbar.
© 2015 Alan Electronics GmbH, Daimlerstraße 1k, 63303 Dreieich
12 Deutsch
Mini Digitalradio DR 72
Manual
English

1. Inhalt
1. Safety Instructions: ...................................................................... 16
2. Specications .............................................................................. 17
3. Controls ....................................................................................... 18
4. Charging the radio ....................................................................... 19
5. Headphones ................................................................................ 19
6. Starting your radio ....................................................................... 19
7. DAB+/FM/Bluetooth mode selection ........................................... 20
8. Scan for DAB+ stations ............................................................... 20
9. Service Information: DAB+ mode ................................................ 20
10. Presets: DAB+ and FM mode .................................................... 21
11. Search and select channels: FM Mode .................................. 21
12. Service Information: FM mode .................................................. 21
13. Bluetooth Connection: ............................................................... 22
14. Manage Phone Call: .................................................................. 23
15. Bluetooth Music Playback ......................................................... 23
16. Delete Bluetooth Pairings .......................................................... 23
17. Language Selection ................................................................... 23

2. Safety Instructions:
1. Clean it with a dry cloth.
2. Do not use near hot objects or appliances.
3. Use the accessories provided by the manufacturer.
4. Do not allow this unit to be exposed to water, steam, sand or
other environmental hazards.
5. Do not leave your radio where excessive heat could cause
damage such as expose to direct sunlight in a parked car where
the heat from the sun can easily build up to extreme levels and
damage the unit.
15English

3. Specications
Model: DR 72
Radio format support: DAB+ and FM radio
DAB+ frequency: Band III(174.00 –240.00MHz)
FM frequency: 87.5-108MHz with RDS
Bluetooth: Version 2.1+EDR,
Headphone: 2 x 0.15W RMS, 32Ω, in ear style
Battery power: Rechargeable 400mAh Lithium
Power source: Micro USB socket (5V, 500mA)
Charging time: about 2 hours
Usage time: about 8 hours for DAB+,
Dimension: 58 x 34 x 10mm
Net weight: Approx. 35g
16 English
support A2DP, AVRCP, HFP.
20 hours for music playback, 20
hours for voice

4. Controls
1. 3.5 mm Headphone Jack
2. Power ON/OFF and Mode
3. M/S (Menu/Scan)
4. Preset
5. Micro USB Charging Port
6. Volume Up and Down
7. Tune Up and Down
8. Microphone
17English

5. Charging the radio
The DR 72 features a built-in 3.7V, 400mAh rechargeable Lithium
battery. The DR 72 is supplied with one „USB to Micro USB“ cable for
power charging. Before the rst use of the radio, please fully charge
the battery.
1. Plug the Micro USB into the socket (on the bottom side of the
radio) and connect the other end to a power supply such as the
USB port of your computer or an USB power adaptor.
2. The radio will begin charging the battery. It will take approximately
2 hours to fully charge the battery.
3. The battery indicator will move from right to left during charging
and will stop when the radio is fully charged
6. Headphones
The DR 72 features a pair of high-quality specially designed in-ear
headphones which also acts as radio antenna. The 3.5mm jack
is located on the top of the radio, it is designed for use with stereo
headphones or earpieces.
Important: Excessive volume from earpieces or headphone may
cause damage to your ears.
7. Starting your radio
1. Make sure the battery is fully charged.
2. Press and hold the “ON/OFF” button to turn on the radio.
3. The display will show the ALBRECHT logo and then enter the last
operated mode (DAB/FM/Bluetooth). The selected mode will be
shown in the rst line of the display.
4. Adjust the volume to comfortable level (Volume Level: 0-20).
18 English

8. DAB+/FM/Bluetooth mode selection
1. Press the “ON/OFF” button shortly to switch between DAB+,
FM and Bluetooth mode, you will see the icon “DAB” or “FM” or
“Bluetooth” shown in the rst line of the display.
2. When you turn off the radio, the mode will be memorized.
9. Scan for DAB+ stations
1. Press and hold “M/S” button. The radio will scan and memorize
all the channels automatically until another scan is performed.
2. Switch through the found stations by pressing the “T+” or “T-“
button.
10. Service Information: DAB+ mode
The Service Information display - Technical information on the current
status of the station and song being broadcasted.
While listening to DAB+, the display will show the followings if
applicable
1. Channel Name
2. Artist and song name (DLS)
3. Volume Level
4. Signal Strength
5. Battery Level
19English

11. Presets: DAB+ and FM mode
1. When you would like to preset the FM/DAB+ station you are
currently listening to, press and hold the “PRESET” button for
3 seconds. The next available preset space will be shown.
Select your desired memory position by pressing the “T+” or “T-“
button and then press the “PRESET” button again to conrm. A
message of “Preset Stored” will be shown on the display (If the
preset space was occupied before, the original preset station will
be overwritten).
2. To play the preset stations, press shortly the “PRESET” button
and search the preset stations (the name of channel will be
displayed) by pressing the “T+” or “T-“ button, then press the
“PRESET” button again to conrm.
3. There are a maximum of 20 preset stations each for FM and
DAB+ mode available.
12. Search and select channels: FM Mode
1. Press “T+” or “T-“ button shortly to tune 0,1MHz up or down.
Press and hold the buttons to automatically search for the next
available station.
13. Service Information: FM mode
While listening to FM radio, the display will show the followings if
applicable
1. Frequency
2. Volume level
3. Signal Strength
4. Battery Level indicator
20 English

14. Bluetooth Connection:
1. Press the “ON/OFF” button repeatedly until you are in the
“Bluetooth” mode.
2. In “Bluetooth” mode, press and hold “M/S” button to activate the
pairing mode, the message “Pairing” will be shown with a ashing
Bluetooth icon.
3. On your phone, turn on Bluetooth and search for Bluetooth
devices.
4. Select “DR 72” in the list and once connection is established, the
Bluetooth screen will display “Connected” and a Bluetooth icon
will be shown at the right top corner of the display.
5. In “Paring” mode, if you want to stop searching for any new
phone, you can always press “PRESET” button to stop searching
and return to last connected phone.
Remark: during the process of re-connecting to last connected phone,
it may take several seconds to one minute for reconnect depending on
model of phone. In the reconnecting process, the Bluetooth icon will be
ashing and the LCD will show “Not Connected”.
6. You can disconnect an existing connected phone by pressing and
hold “M/S” button to force the DR 72 into pairing mode.
Remark: Once your phone is paired to the DR 72, the connection
between both devices will be automatically re-established each time
the DR 72 is powered on. DR 72 automatically connects itself to the
last used phone. If you want to connect DR 72 to another phone you
already paired but not the last one, you have to rst disconnect the DR
72 in the current phone‘s Bluetooth setting. Then press and hold the
“M/S” button to enter pairing mode again.
21English

15. Manage Phone Call:
1. When there is an incoming call, press the “PRESET” button to
answer the call.
2. Speak into the Microphone which is located next to the headphone
jack.
3. Press and hold “PRESET” button to decline a call.
4. To end a call, press the “PRESET” button.
16. Bluetooth Music Playback
1. In Bluetooth mode with phone connected, select the music from
your phone and playback via Bluetooth (Refer to your phone user
guide for more information),
2. Press the “T+” or “T-“ button to select the next or previous song
on the phone,
3. Press “PRESET” button to play or pause the music playback
17. Delete Bluetooth Pairings
In Bluetooth mode, press and hold “MENU” and “T –“ button, the message “Clear Paired” will be displayed which means all the Bluetooth
connections ever made will be deleted.
18. Language Selection
Press and hold “MENU” and “VOL+“ button to enter language menu,
then use “T+” or “T-“ button to select your prefered language and con-
rm by pressing the “MENU” button.
22 English

19. Declaration of Conformity
Manufacturer: Alan Electronics GmbH
Address: Daimlerstraße 1k, 63303 Dreieich
Product Name: DR 72
Product Type: DAB and FM receiver with Bluetooth interface
Brand: Albrecht Audio
The above mentioned product complies to the below mentioned
standards and fulllls the essential requirements of the EC directives
99/05/EC, 2004/108/EC and 2006/95/EC. This radio may only be used
in the EU and other states applying the R&TTE directive of the European community.
Standards
EN 301 489
EN 300 328
EN 60 065
20. Warranty and Recycling Information
We are legally obliged to include disposal and warranty information
as well as EU declaration of conformity with the use instructions in
different countries for every unit. Please nd this information on the
following pages.
2-Year Warranty From Date Of Purchase
The manufacturer/retailer guarantees this product for two years from
date of purchase. This warranty includes all malfunctions caused by
defective components or incorrect functions within the warranty period excluding wear and tear, such as exhausted batteries, scratches
on the display, defective casing, broken antenna and defects due to
external effects such as corrosion, over voltage through improper ex-
23English

ternal power supply or the use of unsuitable accessories. Defects due
to unintended use are also excluded from the warranty.
Please contact your local dealer for warranty claims. The dealer will
repair or exchange the product or forward it to an authorized service
center.
You can also contact our service partner directly. Please include your
proof of purchase with the product and describe the malfunction as
clearly as possible.
WEEE and Recycling
The European laws do not allow any more the disposal
of old or defective electric or electronic devices with the
household waste. Return your product to a municipal collection point for recycling to dispose of it. This system is
nanced by the industry and ensures environmentally responsible disposal and the recycling of valuable raw materials.
21. Service Address and Technical Hotline
(for units sold in Germany)
Alan Service
c/o Transerv2000 Repair Service GmbH & Co. KG
Servicecenter Frankfurt
Robert-Bosch-Str. 35
D - 64625 Bensheim
Contact our service hotline by phone
+49 (0) 6251 9856 0 55 (regular costs for German xed network) or
e-mail at service.alan@transerv2000.com
*Information of this user manual is subject to change without prior
notice.
© 2015 Alan Electronics GmbH
24 English

Mini Digitalradio DR 72
Manuel
Français

Sommaire
1. Instructions de sécurité :.............................................................. 28
2. Spécications .............................................................................. 29
3. Commandes ................................................................................ 30
4. Recharge de la radio ................................................................... 31
5. Écouteurs .................................................................................... 31
6. Utilisation de votre radio .............................................................. 31
7. Sélection du mode DAB+/FM/Bluetooth ...................................... 32
8. Recherche des stations DAB+ .................................................... 32
9. Informations sur les services : Mode DAB+ ................................ 32
10. Présélection de stations : Mode DAB+ et FM ............................ 33
11. Recherche et sélection de stations numériques : Mode FM ...... 33
12. Informations sur les services : Mode FM ................................... 33
13. Connexion Bluetooth : ............................................................... 34
14. Gestion des appels téléphoniques : .......................................... 35
15. Écoute de musique Bluetooth.................................................... 35
16. Information importante............................................................... 35
17. Déchets d’Equipements Electriques et Electroniques (DEEE) et
recyclage ......................................................................................... 36
26 Français

1. Instructions de sécurité :
1. Nettoyage avec un chiffon sec uniquement.
2. Ne pas utiliser près d’objets ou appareils chauds.
3. Utilisez seulement les accessoires fournis par le fabricant.
4. N'exposez pas votre appareil à l'eau, à la vapeur, au sable et à
tout autre risque dû à l'environnement.
5. Ne laissez pas votre radio où une chaleur excessive telle qu’une
exposition directe au soleil dans une voiture garée où la chaleur
peut facilement atteindre des niveaux extrêmes et endommager
l'appareil.
27Français

2. Spécications
Modèle : DR 72
Modes radio : Radio DAB+ et FM
Fréquences numériques : Bande III (174,00 -240,00MHz)
Fréquences FM : 87,5-108 MHz avec RDS
Bluetooth : Version 2.1+EDR, compatible
Écouteurs : 2 x 0,15 W RMS, 32Ω,
Puissance de la batterie : Au lithium rechargeable 400mAh
Alimentation électrique : Port micro USB (5V, 500mA)
Temps de charge : Environ 2 heures
Autonomie des piles : environ 8 heures pour DAB+,
Dimensions : 58 x 34 x 10mm
Poids net : environ 35g
28 Français
A2DP, AVRCP, HFP.
intraauriculaires
20 heures de musique, 20 heures
de conversation

3. Commandes
1. Sortie casque 3,5 mm
2. ON/OFF et mode
3. M/S (Menu/Recherche)
4. Présélection de station
5. Port de charge micro USB
6. Augmenter/diminuer le volume
7. Recherche avant/arrière
8. Microphone
29Français

4. Recharge de la radio
La DR 72 est dotée d'une batterie au lithium rechargeable de 3,7V,
400mAh. La DR 72 est livrée avec un câble de charge « USB vers
micro USB ». Chargez complètement la batterie avant la première
utilisation de la radio.
1. Branchez le connecteur micro USB dans le port (situé en bas de la
radio) et branchez l'autre extrémité dans une prise d’alimentation
telle qu’un port USB d’ordinateur ou d'adaptateur USB.
2. La charge de la batterie de la radio démarre. Une charge
complète de la batterie prend environ 2 heures.
3. L'indicateur de batterie se déplace de droite à gauche pendant la
charge et s’arrête une fois la batterie est complètement chargée
5. Écouteurs
La DR 72 est dotée d'écouteurs intraauriculaires de haute qualité
spécialement conçus qui agissent également comme antenne pour la
radio. La prise 3,5 mm est située en haut de la radio ; elle peut être
utilisée avec un casque ou des écouteurs stéréo.
Important : Un volume excessif dans les écouteurs ou le casque
risque d'endommager votre capacité auditive.
6. Utilisation de votre radio
1. Assurez-vous que la batterie est complètement chargée.
2. Maintenez appuyée la touche « ON/OFF » pour allumer la radio.
3. L'écran afche le logo ALBRECHT, puis passe au dernier mode
utilisé (DAB/FM/Bluetooth). Le mode sélectionné sera afché sur
la première ligne de l'écran.
4. Réglez le volume à un niveau confortable (niveau de volume :
0-20).
30 Français

7. Sélection du mode DAB+/FM/Bluetooth
1. Appuyez sur la touche « ON/OFF » pour basculer entre les modes
DAB+, FM et Bluetooth, l'icône « DAB », « FM » ou « Bluetooth »
sera afché sur la première ligne de l'écran.
2. Lorsque vous éteignez la radio, le mode sera mémorisé.
8. Recherche des stations DAB+
1. Maintenez appuyée la touche « M/S ». La radio recherche et
mémorise automatiquement toutes les chaînes jusqu'à ce qu'une
autre recherche soit lancée.
2. Vous pouvez parcourir les stations trouvées en utilisant les
touches « T+ » et « T- ».
9. Informations sur les services : Mode DAB+
L'écran Informations sur le service afche les données techniques sur
la station et la chanson en cours de diffusion.
Pendant que vous écoutez une station numérique, les informations
suivantes sont afchées sur l'écran (si approprié)
1. Nom de la station
2. Nom de l’artiste et du morceau (DLS)
3. Niveau de volume
4. Force du signal
5. Niveau de charge des piles
31Français

10. Présélection de stations : Mode DAB+ et FM
1. Maintenez appuyée la touche « PRÉRÉGLAGE » pendant
3 secondes pour mémoriser la station DAB+/FM en cours. La
position de mémoire disponible suivante sera afchée. Utilisez les
touches « T+ » et « T- » pour sélectionner une position mémoire,
puis appuyez de nouveau sur la touche « PRÉRÉGLAGE » pour
conrmer. Le message « Preset Stored » sera afché (toute
position mémoire déjà prise sera remplacée par la nouvelle
station).
2. Pour écouter une station mémorisée, appuyez sur la touche
« PRÉRÉGLAGE » et utilisez les touches « T+ » et « T- » pour
parcourir les stations (les noms des chaînes seront afchés),
puis appuyez de nouveau sur la touche « PRÉRÉGLAGE » pour
conrmer.
3. La radio permet de mémoriser 20 stations FM et DAB+.
11. Recherche et sélection de stations numériques :
Mode FM
1. Utilisez les touches « T+ » et « T- » pour régler augmenter/
diminuer la fréquence de 0,1MHz. Maintenez appuyée les
touches pour rechercher automatiquement la prochaine station
disponible.
12. Informations sur les services : Mode FM
Pendant que vous écoutez une station FM, les informations suivantes
sont afchées sur l'écran (si approprié)
1. Fréquence
2. Niveau de volume
3. Force du signal
4. Indicateur de niveau de charge des piles
32 Français

13. Connexion Bluetooth :
1. Appuyez plusieurs fois sur la touche « ON/OFF » jusqu'à atteindre
le mode « Bluetooth ».
2. En mode « Bluetooth », maintenez appuyée la touche « M/S »
pour activer le mode de couplage, le message « Pairing » sera
afché avec l’icône Bluetooth clignotant.
3. Sur votre téléphone, activez Bluetooth et recherchez les appareils
Bluetooth.
4. Sélectionnez « DR 72 » dans la liste et une fois la connexion
établie, l'écran Bluetooth afche « Connected » et l’icône
Bluetooth sera afché dans le coin supérieur droit de l'écran.
5. En mode « couplage », pour arrêter la recherche de tout nouveau
téléphone et revenir au dernier téléphone connecté vous pouvez
toujours appuyer sur la touche « PRÉRÉGLAGE ».
Remarque : La reconnexion au dernier téléphone connecté peut
prendre plusieurs secondes à une minute, selon le modèle de
téléphone. Pendant la reconnexion, l'icône Bluetooth clignote et
l'écran LCD et « Not Connected » sera afché.
6. Vous pouvez déconnecter un téléphone connecté en appuyant
sur « M/S » pour forcer la RD 72 à passer en mode couplage.
Remarque : Une fois que votre téléphone couplé à la DR 72, la
connexion entre les deux appareils sera rétablie automatiquement
chaque fois que le DR 72 est allumée. La DR 72 se connecte
automatiquement au dernier téléphone utilisé. Pour connecter la DR
72 à un autre téléphone déjà couplé, mais qui n’est pas le dernier
connecté, vous devez d'abord déconnecter la DR 72 dans les
paramètres Bluetooth du téléphone connecté. Appuyez ensuite sur la
touche « M/S » pour passer en mode couplage.
33Français

14. Gestion des appels téléphoniques :
1. Si un appel arrive, appuyez sur la touche « PRÉRÉGLAGE »
pour répondre.
2. Parlez dans le micro qui est situé à côté de la sortie casque.
3. Maintenez appuyée la touche « PRÉRÉGLAGE » pour refuser
l’appel.
4. Pour terminer un appel, appuyez sur la touche « PRÉRÉGLAGE ».
15. Écoute de musique Bluetooth
1. En mode Bluetooth avec un téléphone connecté, sélectionnez
la musique sur votre téléphone pour lancer son via Bluetooth
(Reportez-vous au guide d’utilisation de votre téléphone pour
plus d'informations),
2. Utilisez les touches « T+ » et « T- » pour sélectionner le morceau
suivant ou précédent sur le téléphone,
3. Appuyez sur la touche « PRÉRÉGLAGE » pour démarrer la
lecture, marquer une pause et reprendre la lecture.
16. Information importante
Nous sommes légalement tenus d’inclure les dispositions et les
informations de garantie et la déclaration de conformité de l’UE avec le
mode d’emploi de chaque unité, et ce dans la langue de chaque pays.
Veuillez trouvez ces informations dans les pages suivantes.
Deux ans de garantie à compter de la date d’achat
Le Fabricant/revendeur garantit ce produit pour deux ans à compter
de la date d’achat. Cette garantie couvre tout dysfonctionnement dû
à une défaillance des composants ou à des fonctions incorrectes
pendant la période de la garantie à l’exception des pièces d’usure,
34 Français
telles

que batteries, égratignures de l’écran, défectuosité du boîtier, rupture
de l’antenne et les défaillances dues à des raisons extérieures telles
que corrosion, surtension à cause d’une source d’alimentation externe
inappropriée ou l’utilisation d’accessoires inadéquats. La garantie ne
couvre pas les défaillances dues à un usage non prévu. Contactez
votre revendeur local pour réclamation sous garantie. Le revendeur
réparera/remplacera ou envoie le produit à un centre de service agréé.
Vous pouvez également contacter directement notre station de
réparation agrée. Incluez la preuve d’achat avec le produit et décrivez
l’anomalie de la façon la plus précise.
35Français

17. Déchets d’Equipements Electriques et Electroniques (DEEE) et
recyclage
La loi Européennes ne permet pas la mise au rebus des équipements
électriques et électroniques usagés avec les ordures ménagères.
Ramenez votre produit à un centre de collecte municipal pour être
recyclé. Ce système de collecte est nancé par les industriels pour
garantir l’élimination respectueuse de l’environnement et le recyclage
de matières premières précieuses.
Adresse du service d’assistance téléphonique (en Allemagne)
Alan Service
c/o Transerv2000 Repair Service GmbH & Co. KG
Servicecenter Frankfurt
Robert-Bosch-Str. 35
D - 64625 Bensheim
Contactez notre service d’assistance téléphonique par téléphone
au +49 (0) 6251 9856 0 55 ou par courriel au service.alan@
transerv2000.com
*Nous nous réservons le droit de modier toute information rapportée
dans ce document sans notication préalable.
36 Français

Mini Digitalradio DR 72
Manuale
Italiano

Sommario
1. Istruzioni di sicurezza: ................................................................. 39
2. Speciche tecniche...................................................................... 40
3. Comandi ...................................................................................... 41
4. Ricarica della radio ...................................................................... 42
5. Cufa ........................................................................................... 42
6. Accensione della radio................................................................. 42
7. Selezione della modalità DAB+/FM/Bluetooth ............................. 43
8. Scansione delle stazioni DAB+ ................................................... 43
9. Informazioni di servizio: Modalità DAB+ ...................................... 43
10. Preimpostazioni: modalità DAB+ e FM ...................................... 44
11. Ricerca e selezione dei canali: Modalità FM ............................. 44
12. Informazioni di servizio: Modalità FM ........................................ 44
13. Connessione Bluetooth: ............................................................ 45
14. Gestione delle chiamate telefoniche:......................................... 46
15. Riproduzione della musica via Bluetooth................................... 46
38 Italiano

1. Istruzioni di sicurezza:
1. Pulire con un panno asciutto.
2. Non utilizzare vicino a oggetti o apparecchiature incandescenti.
3. Utilizzare gli accessori forniti dal produttore.
4. Non esporre la presente unità ad acqua, vapore, sabbia o ad altri
pericoli ambientali.
5. Non lasciare la radio in luoghi dove potrebbe essere danneggiata
da un calore eccessivo, ad esempio in un'automobile parcheggiata
esposta alla luce diretta del sole.
39Italiano

2. Speciche tecniche
Modello: DR 72
Formato radio supportato: Radio DAB+ e FM
Frequenze DAB+: Banda III (174,00 –240,00 MHz)
Frequenza FM: 87,5-108MHz con RDS
Bluetooth: Versione 2.1+EDR, supporto A2DP,
Cufe auricolari: 2 x 0,15 W RMS, 32 Ω, intrauricolari
Sorgente di alimentazione a
batterie:
Sorgente di alimentazione
elettrica:
Tempo di ricarica: circa 2 ore
Tempo di utilizzo: Circa 8 ore per DAB+, 20 ore di
Dimensioni: 58 x 34 x 10 mm
Peso netto: circa. 35 g
40 Italiano
AVRCP, HFP.
Ricaricabili al litio da 400 mAh
Porta Micro USB (5 V 500 mA)
riproduzione musicale, 20 ore per
voce

3. Comandi
1. Ingresso per cuf e da 3,5 mm
2. Interruttore ON/OFF e Modalità
3. M/S (Menu/Scansione)
4. Preimpostazione
5. Porta di ricarica Micro USB
6. Regolazione del volume
7. Sintonia
8. Microfono
41Italiano

4. Ricarica della radio
L'unità DR 72 contiene una batteria ricaricabile al litio integrata da
3,7 V e 400 mAh. L'unità DR 72 di cavo “USB - Micro USB” per la
ricarica. Prima di utilizzare la radio per la prima volta, ricaricare
completamente la batteria.
1. Inserire l'estremità Micro USB del cavo di ricarica nell'apposita
porta (sul lato inferiore della radio) e collegare l'altra estremità ad
una sorgente di alimentazione, ad esempio una porta USB del
computer o un alimentatore USB.
2. La radio comincerà a caricare la batteria. Sono necessarie circa
2 ore per caricare completamente la batteria.
3. Durante il processo di carica, l'indicatore del livello della batteria
si sposterà da destra a sinistra e si fermerà quando la radio sarà
completamente carica.
5. Cufa
L'unità DR 72 è dotata di un paio di cufe intrauricolari di alta qualità
dallo speciale design che fungono anche da antenna della radio. La
presa da 3,5 mm situata sul lato superiore della radio è progettata per
l'uso con cufe e auricolari stereo.
Importante: Un volume eccessivo degli auricolari o delle cufe può
causare danni all’udito.
6. Accensione della radio
1. Accertarsi che la batteria sia completamente carica.
2. Tenere premuto il pulsante “ON/OFF” per accendere la radio.
3. Sul display apparirà il logo ALBRECHT e poi la radio accederà
all'ultima modalità utilizzata (DAB/FM/Bluetooth). La modalità
selezionata sarà visibile sulla prima riga del display.
4. Regolare il volume al livello desiderato (livello del volume: 0-20).
42 Italiano

7. Selezione della modalità DAB+/FM/Bluetooth
1. Premere brevemente il pulsante “ON/OFF” per scorrere tra le
modalità DAB+, FM e Bluetooth; l'icona corrispondente “DAB”,
“FM” o “Bluetooth” apparirà sulla prima riga del display.
2. Quando la radio viene spenta, la modalità resterà memorizzata.
8. Scansione delle stazioni DAB+
1. Tenere premuto il pulsante “M/S”. La radio eseguirà una scansione
e memorizzerà automaticamente tutte le stazioni no alla prossima
scansione.
2. Premere i pulsanti “T+” o “T-” per scorrere tra le stazioni.
9. Informazioni di servizio: Modalità DAB+
Il servizio informazioni mostra dati tecnici sullo stato attuale della
stazione e la canzone trasmessa.
Durante l’ascolto di DAB+, il display mostra quanto segue se applicabile
1. Nome del canale
2. Artista e titolo della canzone (DLS)
3. Livello volume
4. Potenza del segnale
5. Livello batteria
43Italiano

10. Preimpostazioni: modalità DAB+ e FM
1. Per memorizzare la stazione FM/DAB+ che si sta ascoltando,
tenere premuto il pulsante “PRESELEZIONE” per tre secondi. La
prima posizione di memoria libera sarà visualizzata. Selezionare
la posizione di memoria desiderata premendo il pulsante “T+” o
“T-” e poi premere di nuovo il pulsante “PRESELEZIONE” per
confermare. Il messaggio “Preset Stored” apparirà sul display (se
la posizione di memoria era già in uso, la precedente stazione
sarà sovrascritta).
2. Per ascoltare le stazioni memorizzate, premere brevemente il
pulsante “PRESELEZIONE” e cercare le stazioni (il nome del
canale sarà visualizzato) premendo i pulsanti “T+” o “T-”, inne
premere di nuovo il pulsante “PRESELEZIONE” per confermare.
3. Sono disponibili no a 20 posizioni di memoria per la banda FM
e 20 per la banda DAB+.
11. Ricerca e selezione dei canali: Modalità FM
1. Premere brevemente il pulsante “T+” o “T-” per sintonizzare la
radio verso l'alto o verso il basso della banda a passi da 0,1 MHz.
Tenere premuti i pulsanti per eseguire una ricerca automatica
della stazione successiva disponibile.
12. Informazioni di servizio: Modalità FM
Durante l’ascolto della radio FM, il display mostra quanto segue se
applicabile
1. Frequenza
2. Livello volume
3. Potenza del segnale
4. Indicatore livello batteria
44 Italiano

13. Connessione Bluetooth:
1. Premere ripetutamente il pulsante “ON/OFF” per accedere alla
modalità “Bluetooth”.
2. In modalità “Bluetooth”, tenere premuto il pulsante “M/S” per
attivare la modalità di abbinamento; la notica di “Pairing”
apparirà con l'icona Bluetooth lampeggiante.
3. Sullo smartphone, attivare il Bluetooth e avviare la ricerca dei
dispositivi Bluetooth.
4. Selezionare “DR 72” nell'elenco; una volta effettuata la
connessione, la schermata Bluetooth mostrerà “Connected” e
un'icona Bluetooth apparirà nell'angolo in alto a destra del display.
5. In modalità di “Abbinamento”, per interrompere la ricerca di un
nuovo telefono, è possibile premere il pulsante “PRESELEZIONE”
e tornare all'ultimo telefono connesso.
Nota: il collegamento all'ultimo telefono precedentemente connesso
potrebbe richiedere da alcuni secondi a un minuto, a seconda
del modello del telefono. Durante la fase di riconnessione, l'icona
Bluetooth lampeggerà e sul display LCD apparirà “Not Connected”.
6. Per interrompere la connessione con un telefono, tenere premuto
il pulsante “M/S” per accedere alla modalità di abbinamento
dell'unità DR 72.
Nota: Dopo che un telefono è stato abbinato all'unità DR 72, i due
dispositivi si connetteranno automaticamente ogni volta che l'unità DR
72 viene accesa. L'unità DR 72 si connetterà automaticamente con
l'ultimo telefono utilizzato. Per connettere l'unità DR 72 ad un altro
telefono che è già stato abbinato in precedenza, ma non è l'ultimo
nell'elenco dei dispositivi connessi, è necessario scollegare prima
l'unità DR 72 nelle impostazioni Bluetooth del telefono in connessione.
Poi, tenere premuto il pulsante “M/S” per accedere di nuovo alla
modalità di “Abbinamento”.
45Italiano

14. Gestione delle chiamate telefoniche:
1. Quando c'è una chiamata in arrivo, premere il pulsante
“PRESELEZIONE” per rispondere.
2. Parlare nel microfono situato accanto all'ingresso della cufa.
3. Tenere premuto il pulsante “PRESELEZIONE” per riutare una
chiamata.
4. Per terminare una chiamata, premere il pulsante “PRESELEZIONE”.
15. Riproduzione della musica via Bluetooth
1. In modalità Bluetooth e con il telefono connesso, selezionare
la musica memorizzata nello smartphone e riprodurla via
Bluetooth (consultare il manuale dello smartphone per maggiori
informazioni).
2. Premere il pulsante “T+” o “T-” per selezionare la traccia
successiva o quella precedente sullo smartphone.
3. Avviare e interrompere la riproduzione musicale, premendo il
tasto “PRESELEZIONE”.
*Le informazioni contenute in questo manuale sono soggette a modica
senza preavviso.
16. Garanzia e informazioni sul riciclaggio
Siamo legalmente obbligati a includere le informazioni relative allo
smaltimento e alla garanzia, nonché la dichiarazione di conformità
UE con le istruzioni d’uso in paesi diversi per ogni unità. Queste
informazioni sono riportate sulle pagine seguenti.
2 anni di garanzia dalla data di acquisto
Il costruttore/rivenditore garantisce questo prodotto per due anni dalla
data di acquisto. Questa garanzia include tutti i malfunzionamenti
46 Italiano

causati da componenti difettosi o funzioni non corrette entro il periodo
di garanzia escludendo l’usura, come battere scariche, graf sul
display, alloggiamento difettoso, antenna rotta e difetti dovuti a effetti
esterni quali corrosione, sovratensione attraverso alimentazione
esterna impropria o l’uso di accessori non idonei. Difetti dovuti all’uso
non intenso sono esclusi dalla garanzia.
Contattare il rivenditore locale per le richieste di interventi in garanzia.
Il distributore riparerà o sostituirà il prodotto o lo invierà a un centro
assistenza autorizzato.
È possibile anche contattare direttamente il servizio assistenza.
Includere la prova di acquisto con il prodotto e descrivere il
malfunzionamento in modo quanto più chiaro possibile.
WEEE e riciclaggio
Le leggi Europee non consentono lo smaltimento di dispositivi vecchi
o elettrici o elettronici difettosi con i riuti domestici. Portare il prodotto
a un punto di raccolta comunale per lo smaltimento. Questo sistema
è nanziato dall’industria e assicura uno smaltimento ecologico e il
riciclaggio di materie prime di valore.
Indirizzo assistenza e hotline tecnica (per unità vendute in
Germania)
Alan Service
c/o Transerv2000 Repair Service GmbH & Co. KG
Servicecenter Frankfurt
Robert-Bosch-Str. 35
64625 Bensheim
Contattare la hotline dell’assistenza telefonicamente al 06251-9856 0
55 (costi regolari da rete ssa tedesca) o via e-mail a service.alan@
transerv2000.de
47Italiano

48 Italiano

Mini Digitalradio DR 72
Manual
Español

Contenidos
1. Instrucciones de seguridad:......................................................... 51
2. Especicaciones .......................................................................... 52
3. Controles ..................................................................................... 53
4. Cargar la radio ............................................................................. 54
5. Auriculares ................................................................................... 54
6. Iniciar la radio .............................................................................. 54
7. Selección de modo DAB+/FM/Bluetooth ..................................... 55
8. Búsqueda de emisoras DAB+ ..................................................... 55
9. Información de servicio: Modo DAB+ .......................................... 55
10. Presintonías: Modo DAB+ y FM ................................................ 56
11. Búsqueda y selección de canales: Modo FM ............................ 56
12. Información de servicio: Modo FM ............................................ 56
13. Conexión Bluetooth: .................................................................. 57
14. Gestionar llamadas telefónicas: ................................................ 58
15. Reproducción de música Bluetooth ........................................... 58
16. Información sobre la garantía y el reciclado .............................. 59
50 Español

1. Instrucciones de seguridad:
1. Límpielo con un paño seco.
2. No lo use cerca de objetos o aparatos calientes.
3. Use los accesorios que proporciona el fabricante.
4. No deje que se exponga la unidad al agua, vapor, arena u otros
riesgos medioambientales.
5. No deje la radio en ningún lugar donde un calor excesivo
pueda causar daños como la exposición a la luz solar directa
en un aparcamiento donde el calor del sol se puede acumular
fácilmente hasta niveles extremos y provocar daños en la unidad.
51Español

2. Especicaciones
Modelo: DR 72
Formato de radio compatible: Radio DAB+ y FM
Frecuencia de DAB+: Banda III (174,00 –240,00MHz)
Frecuencia de FM: 87,5-108MHz con RDS
Bluetooth: Versión 2.1+EDR; es compatible
Auricular: 2 x 0,15W RMS, 32Ω, estilo
Alimentación de la batería: Recargable 400mAh de litio
Fuente de alimentación: Toma micro USB (5V, 500mA)
Tiempo de carga: aproximadamente 2 horas
Tiempo de uso: aproximadamente 8 horas para
Dimensiones: 58 x 34 x 10mm
Peso neto: Aproximadamente 35g
52 Español
con A2DP, AVRCP, HFP.
intrauricular
DAB+, 20 horas de reproducción de
música, 20 horas de voz

3. Controles
1. Toma de auriculares de 3,5 mm
2. Alimentación ON/OFF y Modo
3. M/S (Menú/Búsqueda)
4. Botón Preset
5. Puerto de carga Micro USB
6. Subir y bajar volumen
7. Sintonizar arriba y abajo
8. Micrófono
53Español

4. Cargar la radio
La DR 72 presenta una batería de litio recargable integrada de 3,7V,
400mAh. La DR 72 se suministra con un cable “USB a Micro USB”
para la carga de la alimentación. Antes de usar la radio por primera
vez, por favor, cargue completamente la batería.
1. Conecte el Micro USB en la toma (situada en la parte inferior de la
radio) y conecte el otro extremo a una fuente de alimentación como
el puerto USB del ordenador o un adaptador de alimentación USB.
2. La radio empezará a cargar la batería. Tardará aproximadamente
2 horas en cargar completamente la batería.
3. El indicador de la batería se moverá de derecha a izquierda
durante la carga y se detendrá cuando la radio esté completamente
cargada.
5. Auriculares
La DR 72 presenta un par de intrauriculares especialmente diseñados
de gran calidad que asimismo actúan como antena de radio. La toma
de 3.5mm está situada en la parte superior de la radio; está diseñada
para su uso con auriculares estéreo o audífonos.
Importante: Un volumen excesivo de los audífonos o auriculares
pueden provocar daños en sus oídos.
6. Iniciar la radio
1. Asegúrese de que la batería está completamente cargada.
2. Mantenga pulsado el botón “ON/OFF” para encender la radio.
3. La pantalla mostrará el logotipo de ALBRECHT y posteriormente
entrará en el último modo operado (DAB/FM/Bluetooth). El modo
seleccionado se mostrará en la primera línea de la pantalla.
4. Ajuste el volumen a un nivel confortable (Nivel de volumen: 0-20).
54 Español

7. Selección de modo DAB+/FM/Bluetooth
1. Pulse brevemente el botón “ON/OFF” para cambiar entre el modo
DAB+, FM y Bluetooth; verá el icono “DAB” o “FM” o “Bluetooth”
que se muestra en la primera línea de la pantalla.
2. Cuando apague la radio, se memorizará el modo.
8. Búsqueda de emisoras DAB+
1. Mantenga pulsado el botón “M/S”. La radio buscará y memorizará
los canales automáticamente hasta que se haya realizado otra
búsqueda.
2. Cambie entre las emisoras encontradas pulsando el botón “T+”
o “T-”.
9. Información de servicio: Modo DAB+
La pantalla de información de servicio – Información técnica sobre el
estado actual de la emisora y canción que se están emitiendo.
Mientras se escucha DAB+, la pantalla mostrará lo siguiente si es
aplicable
1. Nombre del canal
2. Artista y nombre de la canción (DLS)
3. Nivel de volumen
4. Fuerza de la señal
5. Nivel de batería
55Español

10. Presintonías: Modo DAB+ y FM
1. Cuando desee presintonizar la emisora FM/DAB+ que
está actualmente escuchando, mantenga pulsado el botón
“PRESINTONÍA” durante 3 segundos. Se mostrará el siguiente
espacio de presintonización disponible. Seleccione la posición
de la memoria que desee pulsando el botón “T+” o “T-” y
posteriormente, vuelva a pulsar el botón “PRESINTONÍA” para
conrmarlo. En la pantalla se mostrará el mensaje “Preset Stored”
(Si el espacio presintonizado ya se ha ocupado con anterioridad,
se sobrescribirá la emisora presintonizada originalmente).
2. Para reproducir las emisoras presintonizadas. Pulse
brevemente el botón “PRESINTONIZAR” y busque las emisoras
presintonizadas (se mostrará el nombre del canal) pulsando
el botón “T+” o “T-”; posteriormente, vuelva a pulsar el botón
“PRESINTONIZAR” para conrmarlo.
3. Existe un máximo de 20 emisoras presintonizadas en cada modo
FM y DAB+ disponible.
11. Búsqueda y selección de canales: Modo FM
1. Pulse brevemente el botón “T+” o “T-” para sintonizar 0,1MHz
hacia arriba o hacia abajo. Mantenga pulsados los botones para
buscar automáticamente la siguiente emisora disponible.
12. Información de servicio: Modo FM
Mientras escucha la radio FM, la pantalla mostrará lo siguiente si es
aplicable
1. Frecuencia
2. Nivel de volumen
3. Fuerza de la señal
4. Indicador del nivel de la batería
56 Español

13. Conexión Bluetooth:
1. Pulse el botón “ON/OFF” de forma reiterada hasta que se
encuentre en modo “Bluetooth”.
2. En modo “Bluetooth”, mantenga pulsado el botón “M/S” para
activar el modo de emparejamiento; se mostraré el mensaje
“Pairing” con un icono Bluetooth que parpadea.
3. En el teléfono, encienda el Bluetooth y busque dispositivos
Bluetooth.
4. Seleccione “DR 72” en la lista y una vez que se ha establecido
la conexión, la pantalla del Bluetooth mostrará “Connected” y un
icono de Bluetooth se mostrará en la esquina superior derecha
de la pantalla.
5. En modo “Emparejamiento”, si desea detener la búsqueda
de cualquier Nuevo teléfono, siempre puede buscar el botón
“PRESINTONIZAR” para detener la búsqueda y volver al último
teléfono conectado.
Comentario: Durante el proceso de reconexión al último teléfono
conectado, puede tardar de varios segundos a un minute en
reconectarse dependiendo del modelo de teléfono. En el proceso de
reconexión, parpadeará el icono Bluetooth y la pantalla LCD mostrará
“Not Connected”.
6. Puede desconectar un teléfono conectado existente manteniendo
pulsado el botón “M/S” para forzar al DR 72 al modo de
emparejamiento.
Comentario: Una vez que el teléfono está emparejado al DR 72,
la conexión entre ambos dispositivos se restablecerá de forma
automática cada vez que se encienda el DR 72. El DR 72 se conecta
automáticamente al último teléfono usado. Si desea conectar el DR
72 a otro teléfono ya emparejado pero no al último, tiene primero
que desconectar el DR 72 de la conguración Bluetooth del teléfono
actual. Posteriormente, mantenga pulsado el botón “M/S” para volver
a entrar en modo de emparejamiento.
57Español

14. Gestionar llamadas telefónicas:
1. Cuando haya una llamada entrante, pulse el botón
“PRESINTONIZAR” para responder la llamada.
2. Hable al micrófono que está situado cerca de la toma del altavoz.
3. Mantenga pulsado el botón “PRESINTONIZAR” para rechazar
una llamada.
4. Para nalizar una llamada, pulse el botón “PRESINTONIZAR”.
15. Reproducción de música Bluetooth
1. En modo Bluetooth con el teléfono conectado, seleccione la música
de su teléfono y reprodúzcala mediante Bluetooth (Remítase a la
guía de usuario del teléfono para obtener más información),
2. Pulse el botón “T+” o “T-” para seleccionar la canción siguiente o
anterior en el teléfono.
3. Pulse el botón “PRESINTONIZAR” para reproducir o hacer una
pausa en la reproducción de música.
*La información de este manual de usuario está sujeta a cambios sin
previo aviso.
58 Español

16. Información sobre la garantía y el reciclado
Estamos obligados por la ley a incluir en cada unidad la información
sobre la eliminación y la garantía del producto, así como la
declaración de conformidad de la UE con las instrucciones de uso
en los diferentes países. Por favor, encuentre esta información en las
páginas siguientes.
Garantía de 2 años desde la fecha de compra
El fabricante/vendedor garantiza este producto durante dos años
desde la fecha de compra. Esta garantía incluye todos los fallos
de funcionamiento causados por componentes defectuosos o
funcionamientos incorrectos dentro del periodo, excluyendo el
desgaste por uso, como las pilas gastadas, arañazos en la pantalla,
carcasa con defectos, antena rota y defectos debidos a efectos
externos como corrosión, sobretensión debido al uso de un adaptador
inadecuado o por conexión a una red eléctrica inadecuada, o el uso de
accesorios impropios. Los defectos debidos a un uso para el que no
está diseñado el aparato están excluidos de la garantía.
Por favor, contacte con su vendedor local para las reclamaciones de
garantía. El vendedor reparará o le cambiará el producto, o lo enviará
a reparar a un centro de servicio autorizado.
Usted también puede contactar directamente con nuestro centro
de servicio asociado. Por favor, incluya la prueba de compra con el
producto y describa el fallo de funcionamiento lo más claramente
posible.
59Español

WEEE y reciclaje
Las leyes europeas no permiten arrojar los aparatos
eléctricos o electrónicos a la basura doméstica. Entregue
el producto en un punto de recogida selectiva de basuras
para su correcto reciclaje. Este sistema está nanciado
por las industrias y asegura una eliminación ecológica y
el reciclaje de los materiales de valor.
Dirección del punto de Servicio y Teléfono (para unidades vendidas
en Alemania)
Alan Service
c/o Transerv2000 Repair Service GmbH & Co. KG
Robert-Bosch-Str. 35
D - 64625 Bensheim
Contacte con nuestro centro de reparaciones por teléfono +49 (0) 6251
9856 0 55 o por correo electrónico a service.alan@transerv2000.de .
Antes de devolver el producto, compruebe el capítulo de “Resolución
de problemas” para hacer una sencillas pruebas y vericaciones o
llame a nuestro teléfono 24h.
© 2015 - Alan Electronics GmbH
60 Español
 Loading...