

DL-WINDOWS
™
345 Bayview Avenue
Amityville, New York 11701
For Sales and Repairs 1-800-ALA-LOCK
For Technical Service 1-800-645-9440
Publicly traded on NASDAQ Symbol: NSSC
© ALARM LOCK 2007 WI1152A 8/07
V3.6.x QUICK START GUIDE
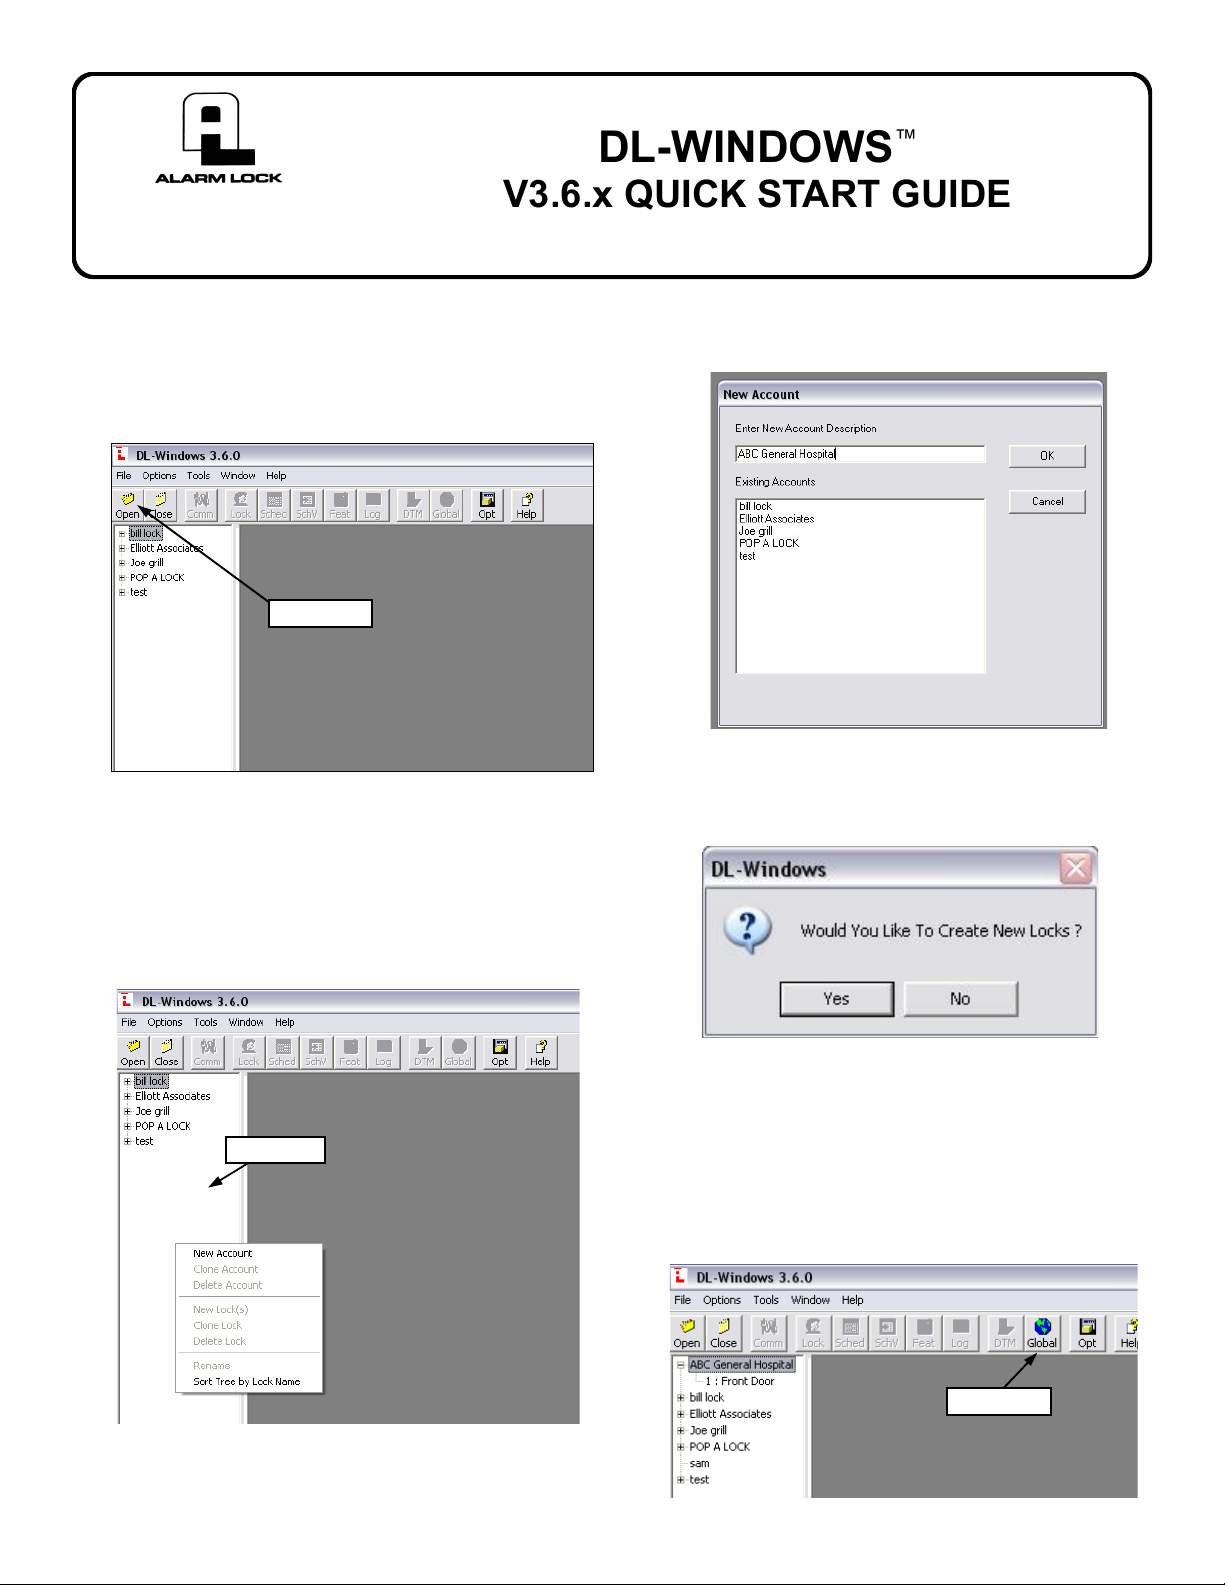
1. To open DL Windows, click the "DL Windows" icon on the desktop. Click the "Open"
button to open existing Accounts or to create
new Accounts.
Open button
2. To create a new Account, right-click in the
white area on the left side of the screen. From
the pop-up window, click "New Account".
"White area"
3. Type a New Account Description, and click
"OK".
4. Click "No" when asked to create new locks
(this will be done in a later step).
5. To open your newly created Account or an
existing Account, double-click the Account
name in the Account list (on the left side of the
screen). The Global button will illuminate.
Global button
continued
1
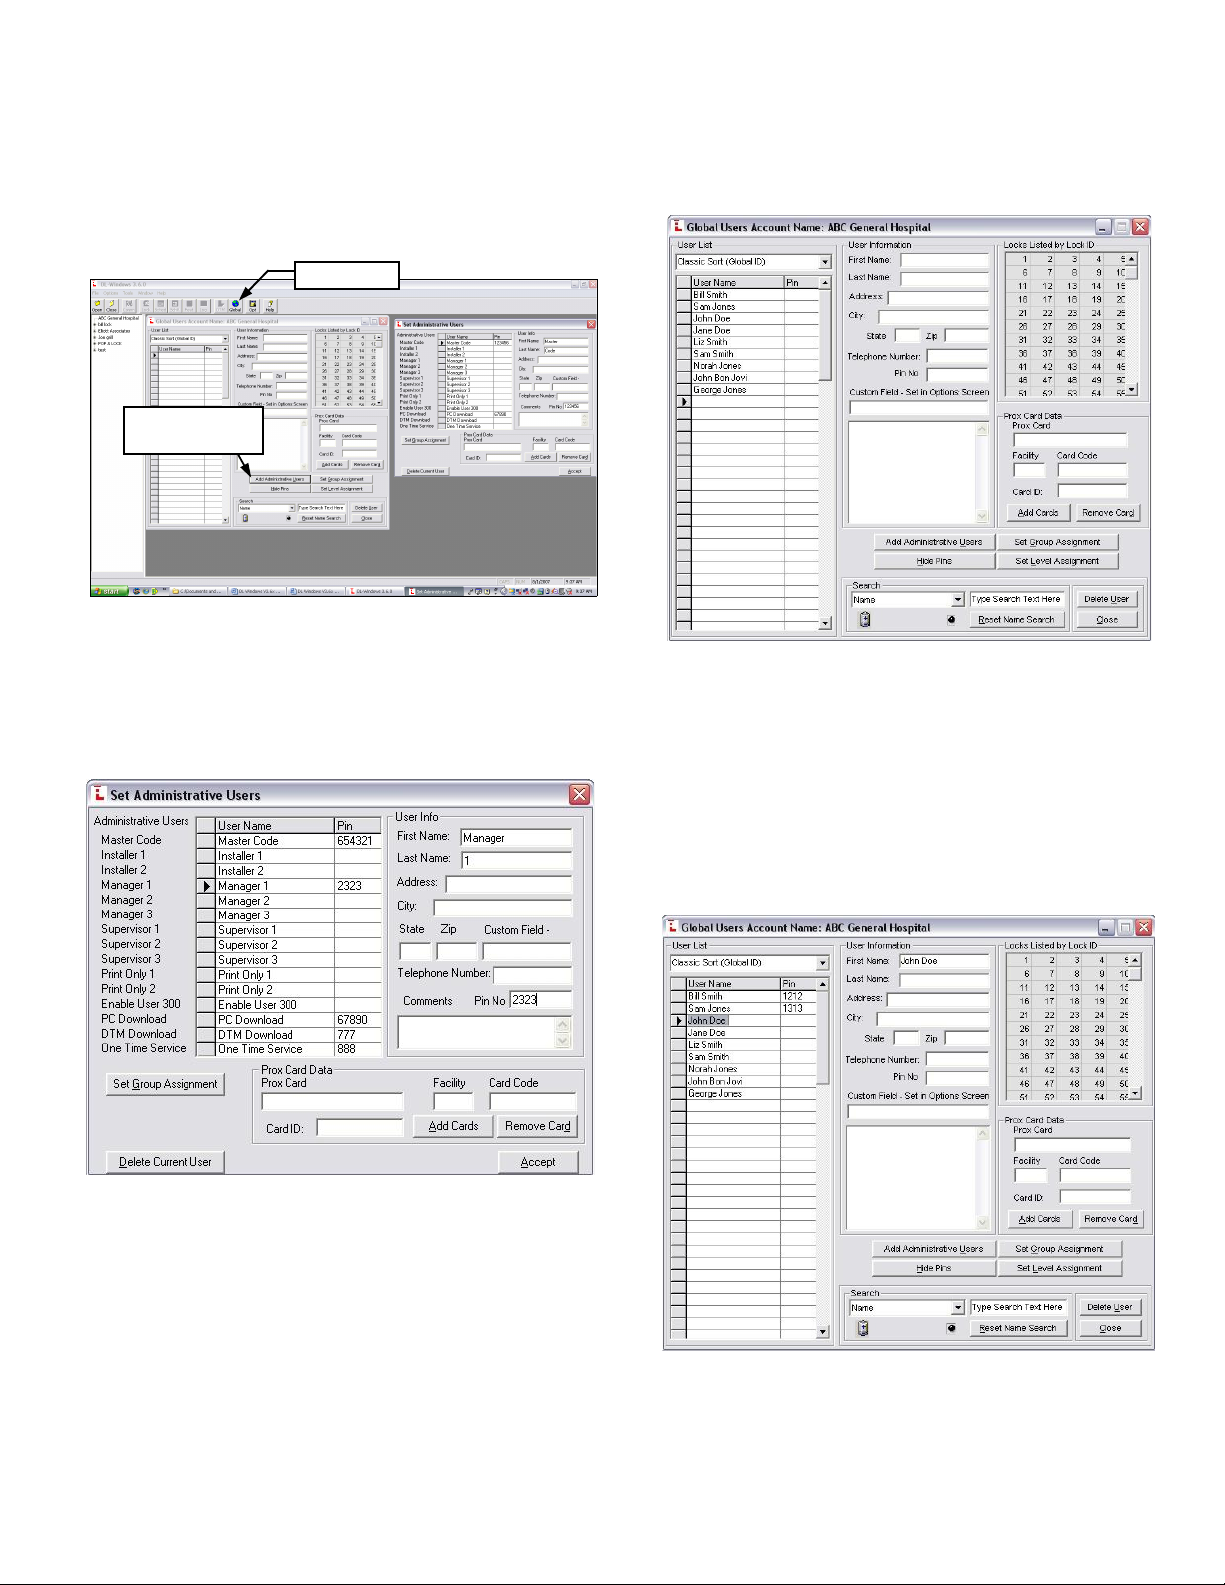
6. Double-click the "Global" button to open the
Global Users Screen. Double-click the "Add
Administrative Users" button to set the User
Codes for the Master, Managers, DTM, PC
Download, etc.
Global button
Add Administrative
Users
7. Determine your pin and/or Prox codes for
the Administrative users. When finished, click
the "Accept" button.
2
8. Add "Basic Users" to the Global Users
Screen (add all names first, then go back and
add pin codes and/or proximity cards).
9. Add Pin codes one at a time by either:
• highlighting individual names and typing
each code individually (see image below),
or
• right-click a name, then have the software
create a 6-digit random code from the
pop-up window.
continued

The software can "auto-generate" 6-digit
random codes for multiple users at one time:
• Click to highlight the first name;
• Press and hold the shift key;
• Click to highlight the last name;
• Right-click the highlighted area;
• From the pop-up window, click "Generate
Selected New Codes".
Click "Yes"
Pin Codes
"auto generated"
Add proximity cards to users. Select a
user, click the "Add Cards" button and
choose the correct Card Type, Card No. and
Facility Code. When using HID Prox cards
from Alarm Lock, choose "Nap 36" as the
Card Type, "19" for the Facility Code, and simply type the card number embossed on the
card itself. When finished, click the "Build
Card Data" button
Card Type
Add Cards
Facility
Code
Build
Card
Data
10. Create Locks. Highlight the Account in
which you want to create one or more locks.
Right-click and click "New Lock(s)" from the
pop-up window.
continued
3

Type a new lock description, choose your lock
type (using manufactures part numbers) and
the number of locks you want to create.
When finished, click "OK".
Please note that for each lock created, each
rectangle will turn white (no longer grayed-out)
in the "Locks Listed by Lock ID" chart. Up to
2000 locks may be created within each Account, and a maximum of 100 Accounts are
allowed within each DL Windows Software installation.
A new rectangle
turns white for
each new lock
created.
11. Add Users to Locks. Simply highlight the
users name from the list, then double-click
the desired lock(s). When the Lock ID rectangle turns green, the user is added to the
lock.
4
Turns green
when user added
You may also add multiple users to a specific
lock --or-- to ALL locks in your Account:
• Click to highlight the first name;
• Press and hold the shift key;
• Click to highlight the last name;
• Right-click the highlighted area;
• From the pop-up window, click "Add to
All or Add to A Lock".
Click "Yes"
Again, when the Lock ID rectangle turns
green, the user is added to the lock.
Turns green
when user added
continued

To add specific users to a specific lock, click to
highlight only those users to be added, and
click "Yes" in the Add Users pop-up...
...then select the specific lock in the Select
Door Number pop-up.
As shown in the image below, specific users
have been added to a specific lock. A green
Lock ID rectangle indicates the user is added
to the lock.
12. Send program to locks using your laptop:
• Double-click the lock you wish to program in
the Account;
• Click the "Send/Receive" button;
• Click "Send";
• Click "Start";
• Enter the PC Download code you previously
used in the Admin Screen.
While transmitting, look for the words
"Verifying Lock Type" and then rolling numbers at the bottom of the "Send to Lock"
screen. When finished, the message reads
"Transmission Complete".
continued
5

Using your DTM-III to program the lock:
• Double-click the DTM button to open the
"DTM 3 Support" screen.
• Under the "DTM Function" column, click the
row for the lock you wish to program.
• Select "Send Program to Lock"
• Under the "Selected" column, double-click
the row(s) for the lock(s) you wish to program. The check mark () appears for each
lock selected (the DTM-III can program up to
200 locks at one time).
• Click the "Program DTM for Selected
Locks" button to start the transmission. As
before, rolling numbers at the bottom of the
screen indicate the software and DTM-III are
transmitting the data.
6
 Loading...