

Page 1
MODEL RT-1
RECEIVER/TRANSMITTER
USER GUIDE
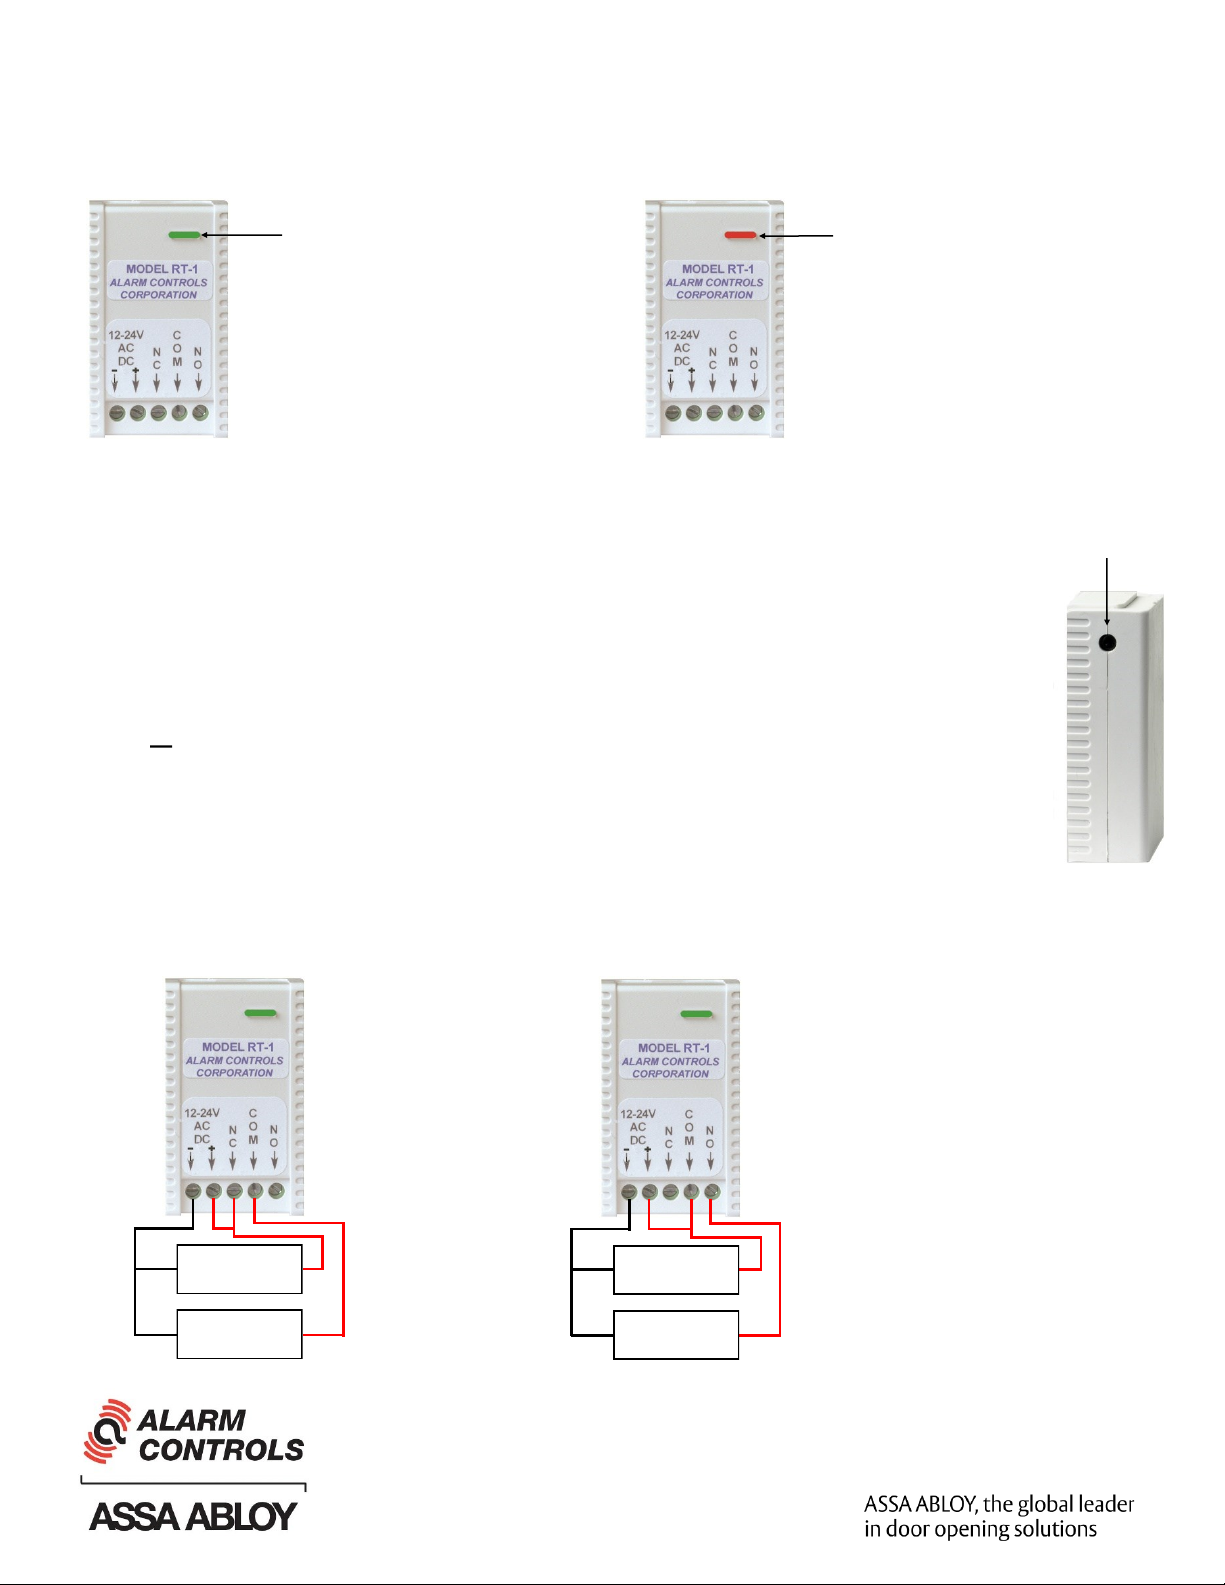
LED Indicator
Green = Power On
(Unit shown with cover removed)
The RT-1 Receiver is packaged with a set of paired Transmitters.
To pair additional Transmitters with the Receiver -
1. Press the Learning Button on the Receiver. The LED on the Receiver will turn from green to red.
2. Press the button on the Transmitter two times. The LED on the Receiver will flash four times indicating that
the Transmitter has been paired to the Receiver. If the LED on the Receiver flashes once and changes to
green, pairing has failed. The Transmitter button must be pressed within 8 seconds or the Receiver will exit
the learning mode.
To remove all learned Transmitters from the Receiver -
1. Press and hold the Learning Button on the Receiver. The LED on the Receiver will turn from green to red
and then back to green.
LED Indicator
Red = Relay Activated
(Unit shown with cover removed)
Learning
Button
2. Release the Learning Button and the LED will turn red.
3. Wait approximately 10 seconds and the LED will turn green again.
TYPICAL WIRING FOR
RELEASING A MAGNETIC LOCK
POWER
-
SUPPLY
-
MAGNETIC
LOCK
+
+
TYPICAL WIRING FOR
RELEASING AN ELECTRIC STRIKE
POWER
-
SUPPLY
-
ELECTRIC
STRIKE
+
+
Alarm Controls
Phoenix, AZ 85044
(800) 645-5538
www.alarmcontrols.com
Page 2

INSTRUCTIONS FOR CONVERTING MODEL RT-1
FROM MOMENTARY TO LATCHING OPERATION
Open Receiver case.
Pry open case where shown
Using a knife blade.
Locate the jumper which will allow Momentary or
Latching function.
Jumper perpendicular
to JP1.
-Momentary Action
Transmitter replacement battery type is CR2016. Each Transmitter requires 2 batteries.
Jumper parallel to JP1.
-Alternating Action
 Loading...