

Akura AV37751-HD User's Manual
Customer Help Line: 01422 263313
Opening Hours: Mon-Fri 8am-8pm, Sat 9am-4pm, Sun 11am-4pm
Or visit our website at www.ekey.co.uk
AV32751-HD
Contents
FIGURE 1
FOOT ASSEMBLY
Installation Of TheTFTTVToTheWall .......................................................................................................1
Remote Control Buttons ..............................................................................................................................2
LCDTV .......................................................................................................................................................2
Preparation.................................................................................................................................................3
Safety Precautions .....................................................................................................................................3
Before Switching On Your TV....................................................................................................................5
Switching The TV ON/OFF .........................................................................................................................5
Navigating theMenu System ......................................................................................................................6
MenuSystem ..............................................................................................................................................6
Other Features .........................................................................................................................................10
Teletext ..................................................................................................................................................... 11
ConnectPeripheralEquipment.................................................................................................................. 12
Tips .......................................................................................................................................................... 13
Appendix A: Aerial Connection .................................................................................................................14
AppendixB: Connect Peripheral Equipment ..............................................................................................14
User Help Guide .......................................................................................................................................15
PeripheralEquipmentConnections ........................................................................................................... 16
ImportantInstruction ................................................................................................................................. 17
Specifications ........................................................................................................................................... 18
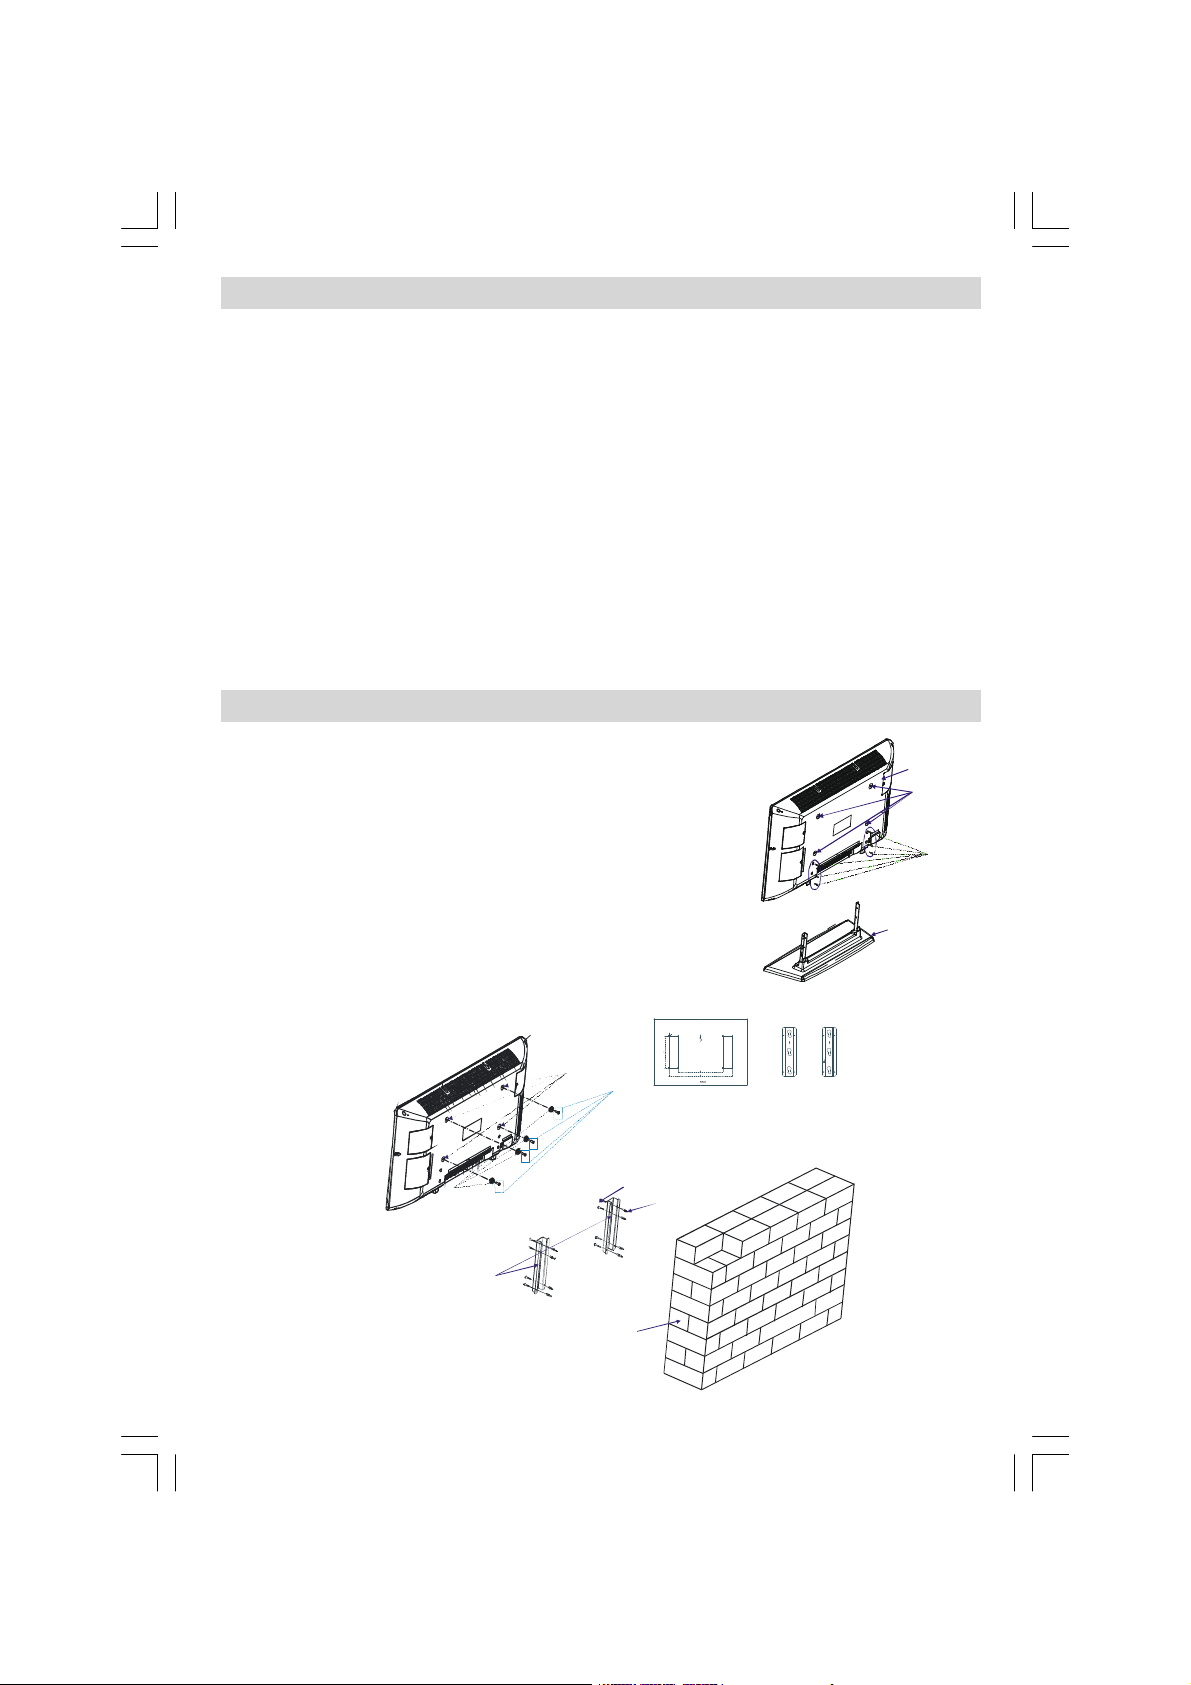
Installation Of The TFT TV To The Wall
1- To install the TFT TV on the wall, first of all, foot assembly should be
removed. (Figure 1). Unscrew the 6 screws (M4 x 16) that attach the foot
assemblytotheTFTpanelandremove the foot assemblyfromtheTFTpanel.
2- Place the 4 plastic pins to the circular screw holes at the rear of the TFT
and screw them to the TFT panel with 4 (4 x 10) screws.
3- Decide the place onthe wallwherethe TFT panelwouldbe placed.Fixthe
stencil wall mount (shown in Figure 2) on the wall.
Thestencilwallmount isusedforplacingthewallhangersonthewall,properly.
4- Level and mark with a pencil the 4 mounting points on each wall hanger.
Drill pilot holes for the plastic anchors and then fix the wall hangers with 8
screws (4 x 30).
5- Raise the TFT panel and hang it to the holeson the wall hangerfrom the 4
hanging screws at the rear of the TFT panel.
TFT PANEL
6 SCREWS
(4 X 16)
PLASTIC PINS
ENG-32720W-1063UK-32 INCH 17MB22-(WO PIP-WO PC)-50108619.P65 27.06.2007, 12:051
WALL HANGE R
SCREW HOLES FOR PLASTIC PINS
4 SCREWS
(4 x 10)
WALL
- 1 -
WALLHANGERS
(4 x 30)
- P/CH +
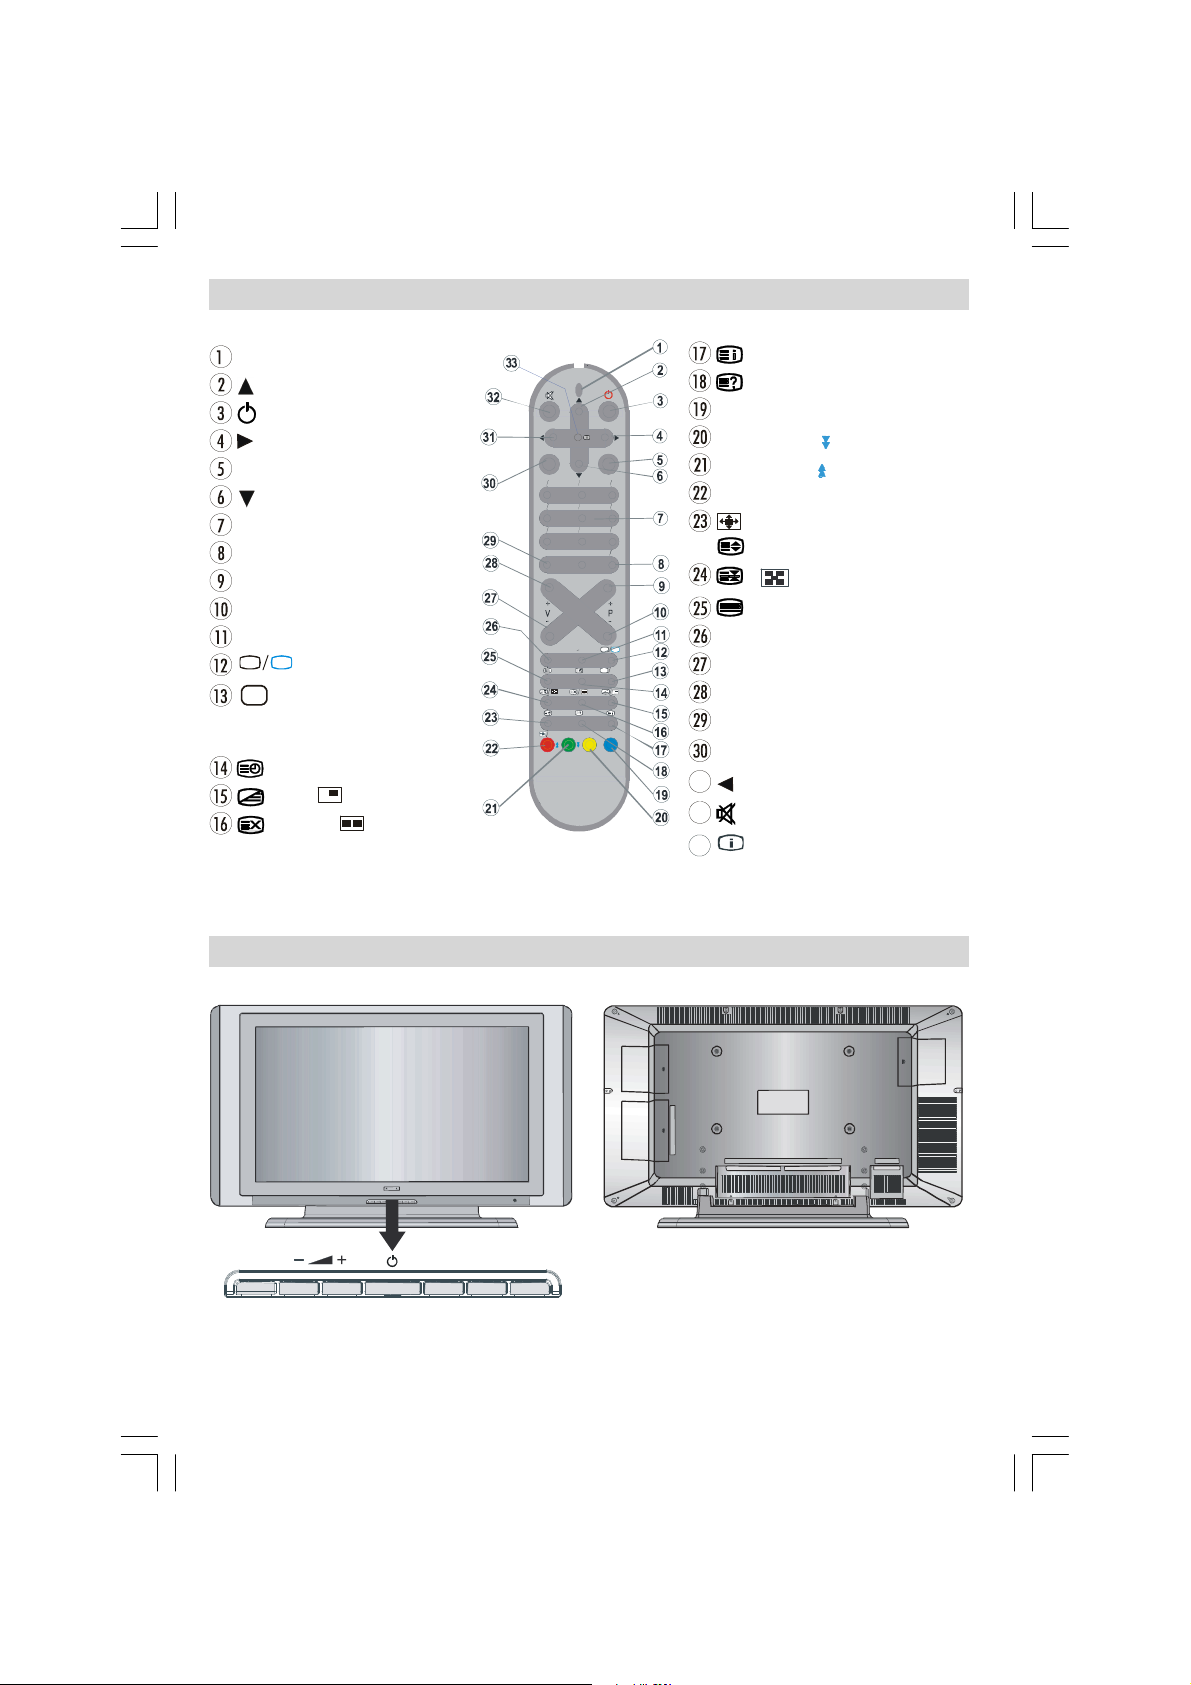
Remote Control Buttons
8
SignalIndicator
= Cursor Up
= Stand By
= Cursor Right
OK/SELECT = Okay (Store)
= Cursor Down
0 - 9 =DirectProgramme
-/-- / EXIT = No Function
P + =Programme Up
P - =Programme Down
I-II = Mono/Stereo -DualI-II
TV
= TV / Quit Menu
AV
= AVAV = External Source
(TV,EXT1,EXT2,EXT2S,
FAV,S-VIDEO,HDMI,YPBPR)
= Time
= Mix, = No function
= Update, = No function
M
1
4
JKL MNO
STU
7
P<P/SWAP
+
PP
= IndexPage
=Reveal
Bluebutton/Guide=Install
Yellow button / = Feature
DEF
Greenbutton / = Picture
Red button = Sound
YZ
VWX
-/--
/WIDE= Imagesize/
= Expand
/ = Hold / No Function
= Teletext
I II
-
PP = Personal preference
V - = Volume Down
V+ = Volume Up
P<P/SWAP =PreviousProgramme
M = Menu
= Cursor Left
= Mute
= Info
MENU
ENG-32720W-1063UK-32 INCH 17MB22-(WO PIP-WO PC)-50108619.P65 27.06.2007, 12:052
LCD TV
TV/AV
- 2 -
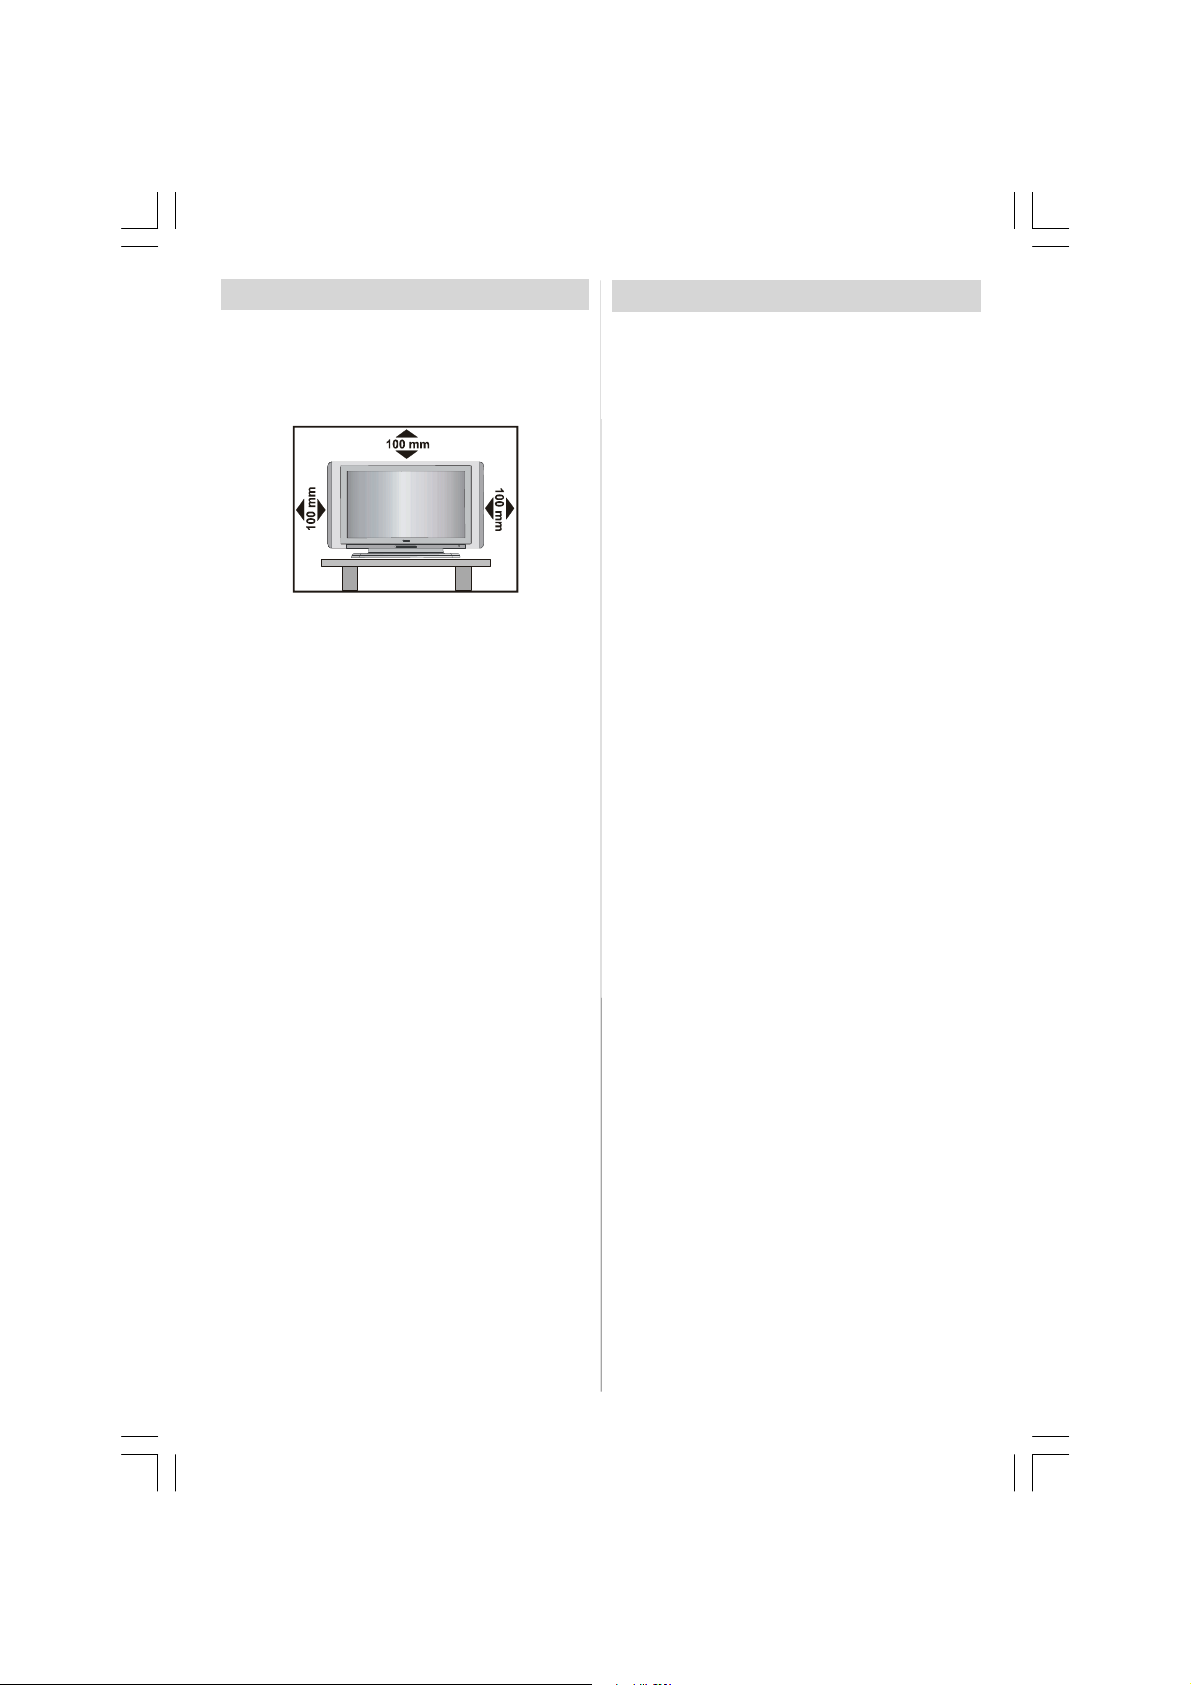
Preparation
Forventilation,leavea space of at least 10 cm freeall
around the set. To prevent any fault and unsafe situ-
ations, please do not place any objects on top of the
set.
Use this apparatusin moderate climates.
Features
• Remote controlledcolourLCD TV.
• 100 programmes from VHF, UHF bands or cable
channels can be preset.
• It can tune cable channels.
• Controlling the TV is very easy by its menu driven
system.
• It has 2 Scart sockets for external devices (such as
video, video games, audio set, etc.)
• Stereo sound system (German+Nicam).
• Full function Teletext (500 pages).
Fastext, TOP text.
• Headphone connection.
•A.P.S.(AutomaticProgrammingSystem).
•All programmes can be named.
• Forward or backward automatic tuning.
•Sleeptimer.
• Child Lock.
• Automatic sound mute when no transmission.
•NTSCPlayback.
• AV in and S-VHS in are available.
•It has an HDMIconnectorforDigitalVideoandAudio.
This connection is also designed to accept High
Definition signals.
•AVL(AutomaticVolume Limiting)
• When novalid signal is detected,after 5 minutes the
TV switches itself automatically to stand-by mode.
• PLL (Frequency Search)
Safety Precautions
Please read the following recommended safety precautions carefully for your safety
1. Power Source
The set shouldbe operated only from a 230-240V 50
Hz supply.
2. Power Cord
Do not place the set, a piece of furniture,etc. on the
power cord(mains lead) or pinch the cord.Handle the
power cord by the plug.Do not pull out the plug by
tugging the cord and never touch the power cord
when your hands are wet as this could cause a short
circuitor electricshock.Never make a knot in the cord
or tie it with other cord.The power cord should be
placed in such a way that they are not likely to be
stepped on.
A damaged power cord can cause fire or give you an
electric shock. When it is damaged and need to be
changed, it should be done by qualified personel.
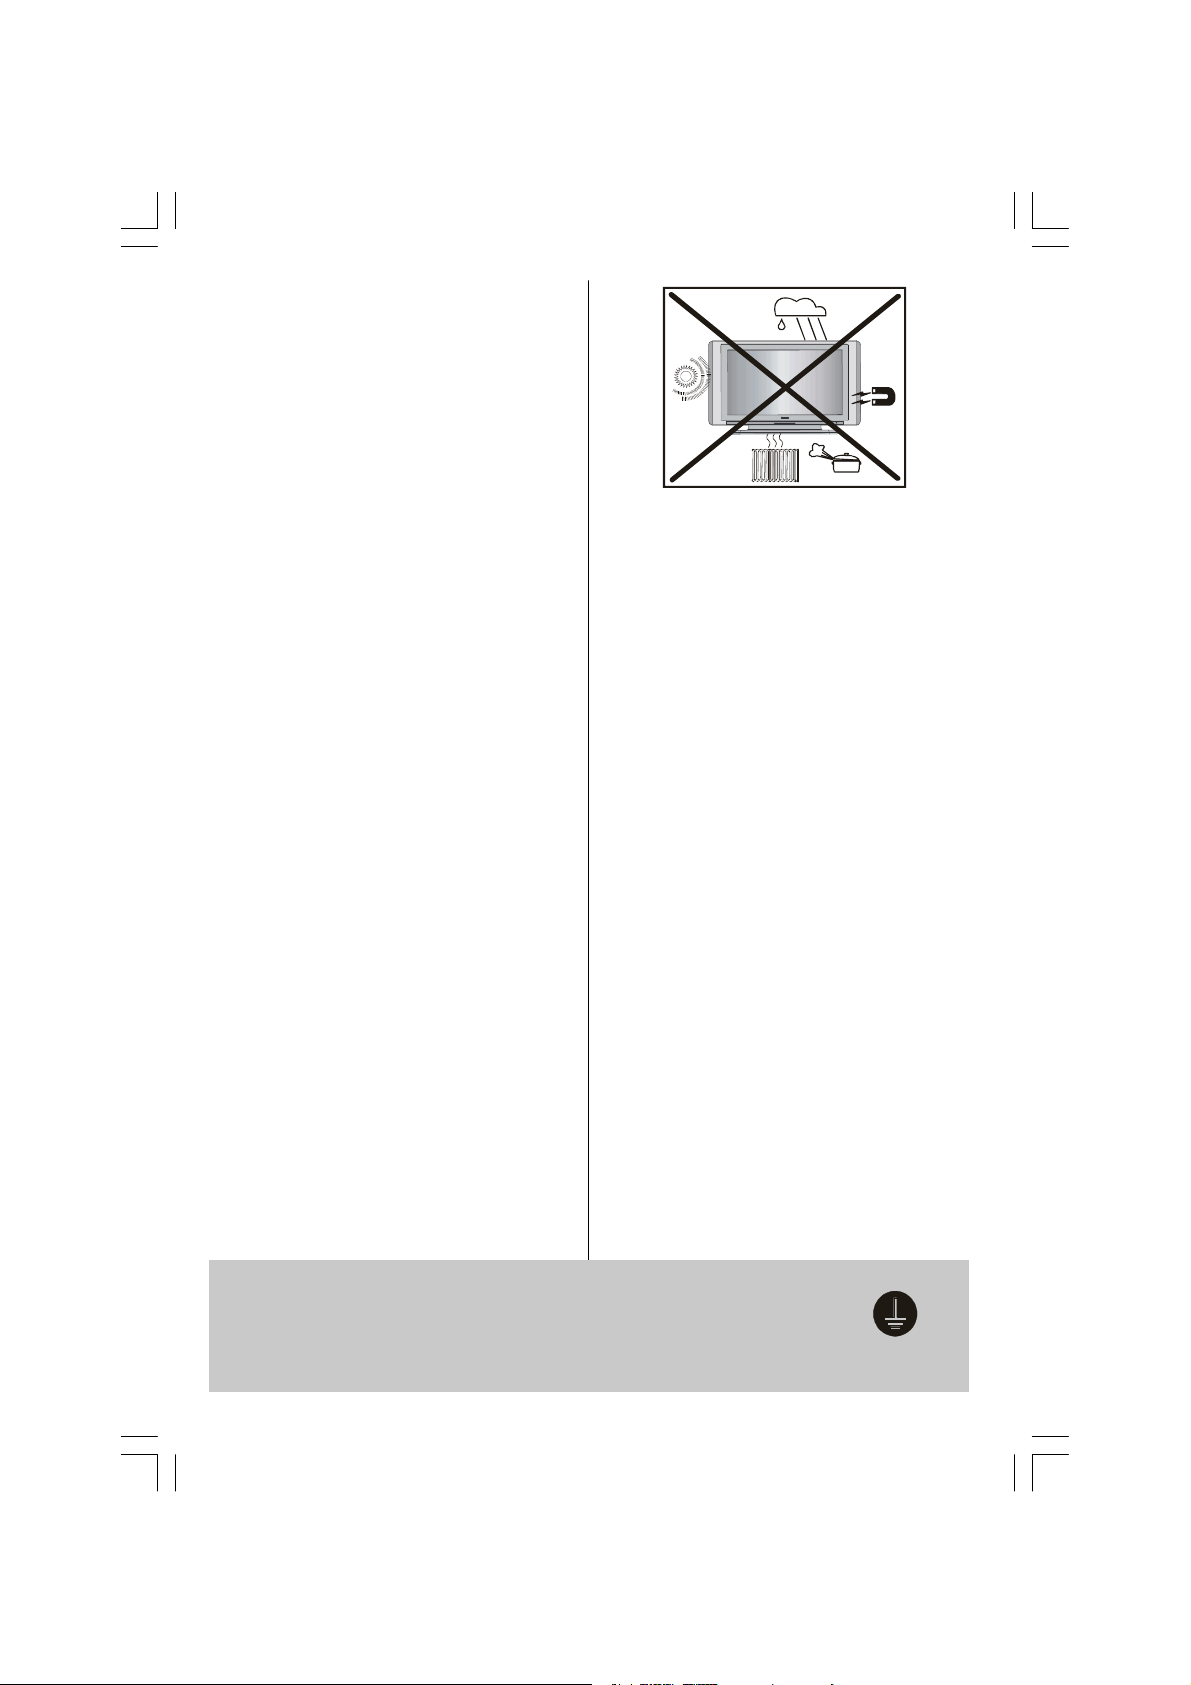
3. Moisture and Water
Donot use this equipmentin a humid and dampplace
(avoidthe bathroom,the sink in the kitchen, and near
the washing machine).Do not expose this equipment
to rain or water, as this may be dangerous and do not
place objects filled with liquids,such as flower vases
on top of the set. Avoid from dripping or splashing.
If anysolidobject or liquid fallsinto the cabinet, unplug
the set and have it checked by qualified personnel before operating it any further
4. Cleaning
Before cleaning, unplug the set from the wall outlet.
Do not use liquid or aerosol cleaners. Use soft and
dry cloth.
5. Ventilation
The slots and openings on the back cover are intended for ventilation and to ensure reliable opera-
tion.To prevent overheating, theseopeningsmustnot
be blocked or covered in anyway.
6. Heat and Flames
The set should not be placed near to naked flames
and sources of intense heat,such as an electric
heater. Ensure that no naked flame sources, such as
lighted candles, are placed on top of the set
7. Lightning
In the event of a Thunderstorm or when going on
holiday.Disconnect the mains supply and aerial (if
external).
ENG-32720W-1063UK-32 INCH 17MB22-(WO PIP-WO PC)-50108619.P65 27.06.2007, 12:053
- 3 -
8. Replacement Part
Whenreplacement parts are required,be surethe service technician has used replacement parts which are
specified by the manufacturer or have the same specifications as the original one.Unauthorised substitutions
may result in fire, electricalshock,or other hazards.
9. Servicing
Please refer all servicing to qualified personnel. Do
notremove the cover yourselfas thismay result in an
electric shock.
WARNING: When the device is not in use for a long
time, disconnect from power.
Instructions for waste disposal:
• Packaging and packaging aids are recyclable and
should principally be recycled. Packaging materi-
als, such as foil bag, must be kept away from children.
• Batteries.These should not be placed in the domestic waste.Do NOT break open or throw on a
fire. For disposal contact your local waste authority
• Cold cathode fluoresant lamp in LCD PANEL contains a small amount of mercury, please follow lo-
cal ordinates or regulations for disposal.
• The mains plug is used to disconnect the TV from
the mains and therefore it shall remain readily op-
erable.
Warning: To prevent injury, this device must be securely attached to the floor/wall in accordance with
the installationinstrutions.
“The LCD panel is very high technology product with
about a million thin film transistors, giving you fine
picture details. Occasionally, a few non-active pixels
may appear on the screen as a fixed point of blue,
greenor red. Pleasenote that this does not affect the
performance of your product.”
“DONOTLEAVEYOURTVINSTANDBYOROPERATINGWHENYOULEAVEYOURHOUSE”
This is a "Class One" apparatus. Always ensure the earth terminal is
connected.
If replacing the mains plug or lead ensure the Earth wire is connected.
If you are not sure please consult your local engineer.
- 4 -
ENG-32720W-1063UK-32 INCH 17MB22-(WO PIP-WO PC)-50108619.P65 27.06.2007, 12:054
Before Switching On Your TV
Power Connection
IMPORTANT: The TV set is designed to operate on
230-240V AC, 50 Hz.
•After unpacking, allow the TV set to reach the ambi-
ent room temperaturebefore you connect the set to
themains.
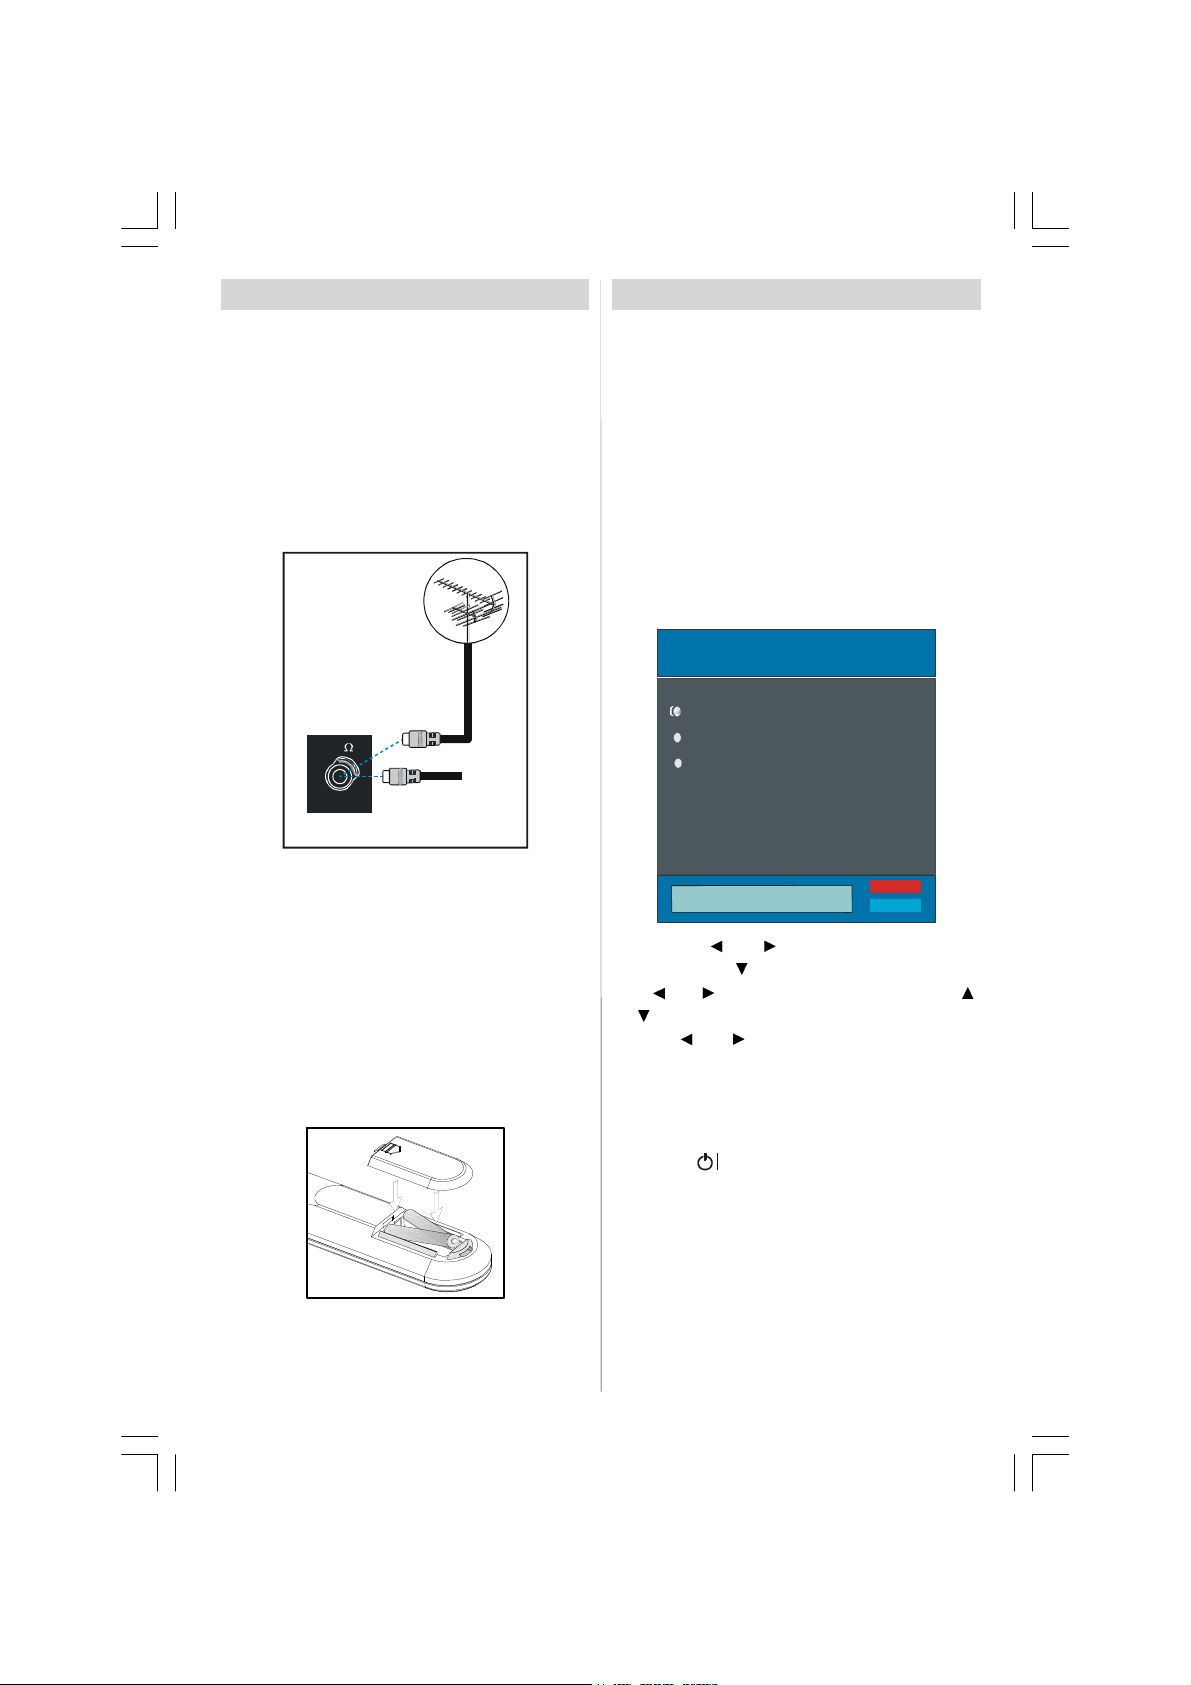
Connections To The Aerial Input Socket
•Connecttheaerialor cable Tvplugto theAerial input
socket located at the rear of the Tv.A VCR or other
box may also be connected.
VHF/UHF
REAR OF THE TV
Inserting Batteries In The Remote
Control Handset
WARNING:Remotecontrolisbatteryincluded.Aplas-
tic protector is used to disconnect the batteries in
orderto preventthe batterylife from reducing.Please
remove the plastic protector before the first use.
• Remove thebatterycover located on the backof the
handset by gently pulling backwards from the indicated part.
• Insert two AAA/R03 or equivalent type batteries
inside.Place the batteriesin the right directions and
replace the battery cover.
CABLE TV
Switching The TV ON/OFF
To switch the TV on:
Your TV will switch on in two steps:
1. Connect thepowersupply cord to theTv.Press the
Power ON/Off button located at the REAR of the TV.
The Tv will now be in STANDBY mode.
2. To switch the Tv from Standby mode either :
Press a digit button on the remote control so that a
programme number is selected,or Press the "-P/CH"
or "P/CH+" button on the TV or press the “-P” or
“P+” button on the remote control, so that last mode
switched off is selected.
By either method the TV will switch on. When the TV
is operated for the first time, the following screen
appears:
Auto Program
Country
Language
TXT Language
AUTO. PROGRAMMING SYSTEM
By pressing “ ” or “ ” button, adjust the Country
item and press “
” or “ ” button to set “Language”. Use “ ”
Use “
” buttons to select “TXT Language” and set it
or “
by using
continue:
For more information on this process, see “Install
Menu” section.
To switch the TV off:
• Press the “ (stand-by)”buttonon the remotecontrol or On/Off switchon the TV, so theTV will switch
to stand-by mode.
To power down the Tv completely, press the Power
On/Off button located at the REAR of the Tv. Or dis-
connect the mains plug from the supply.
” to highlight “Language” item.
” or “ ” buttons. Press “OK” button to
Note: Remove the battery from remote control handset when it is not to be used for a long period. Other-
wise it can be damaged due to any leakage of battery.
ENG-32720W-1063UK-32 INCH 17MB22-(WO PIP-WO PC)-50108619.P65 27.06.2007, 12:055
- 5 -
 Loading...