

Akura AKCDB607 User Manual

Please read this user manual carefully before using the receiver.
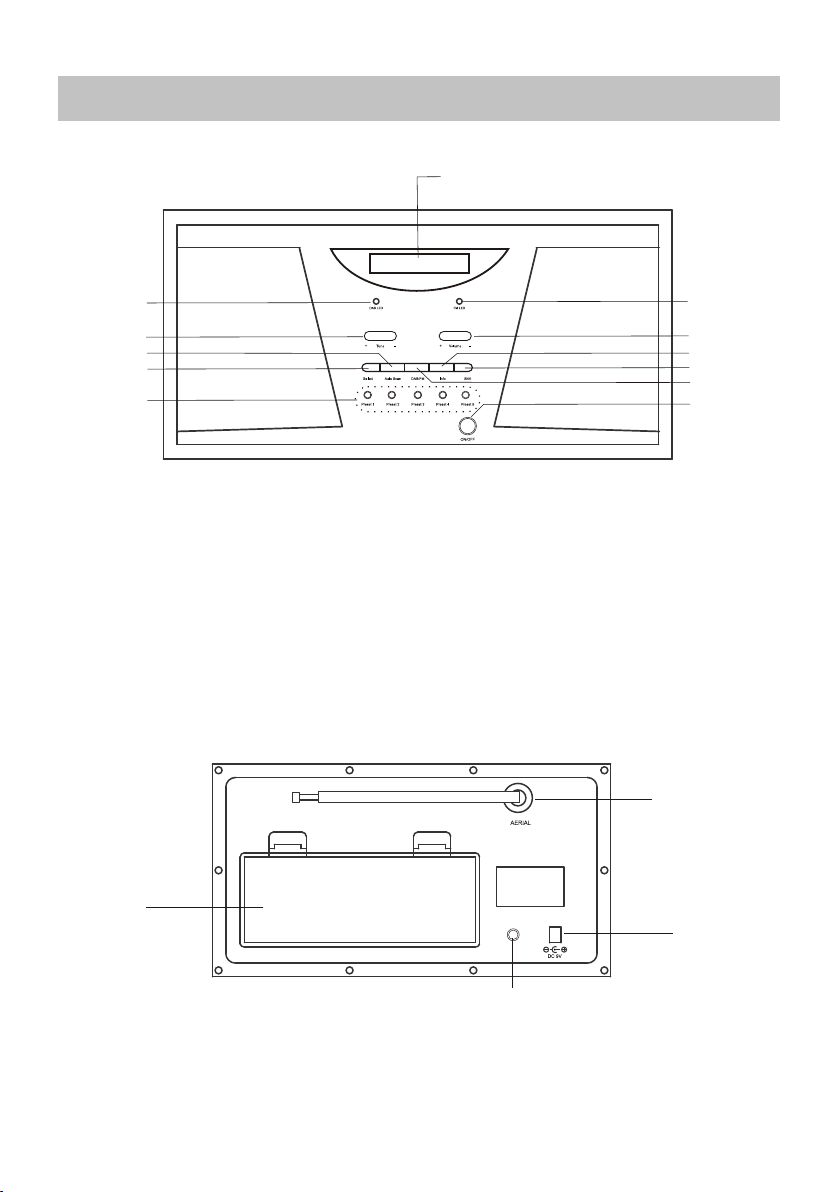
LOCATION OF CONTROLS
Front
Back
2
3
4
5
6
1. LCD DISPLAY
2. DAB LED
3. TUNE CONTROL KEY
4. AUTO SCAN KEY
5. SELECTION KEY
6. PRESETS KEYS
(1-5 / 6-10)
1
Dab Radio
7.
FM LED
8.
VOLUME CONTROL KEY
9. INFO KEY
10. SHIFT KEY
11. DAB/FM SWITCH
12. POWER SWITCH
7
8
9
10
11
12
1
4
2
3
1. AERIAL INPUT 2. DC POWER SOCKET
3. 3.5mm EARPHONE SOCKET 4. BATTERY DOOR
-1-

1. Switching your radio on for the first time
1.1 Power Supply
1.1a Main Adaptor (supplied with the package)
Connect the mains adaptor to the DC power socket of the radio to the wall socket.
1.1b Battery (not supplied)
Open the battery door and insert 6 "C " size alkaline batteries.
Remark: Insert batteries correctly. Pay attention to the +/- Pole.
1.2 Extend the telescopic aerial as far as it can go.
1.3 Press the Power switch to turn on the radio. The radio will automatically enter into auto tune mode.
Autotune
Autotune
Quick scan
Quick scan
During scan mode, the LCD will display a slide bar that indicates the progress of scan
and the amount of radio stations that have been found so far.
00
Searching...
Once the scan has finished, the radio will select the first alphanumerically found station.
Remark: The name of the found group of DAB radio stations will be displayed on the
bottom half of the display.
PRESENT STATION
RADIO MODE (DAB OR FM)
DAB Only
<DLS>
SCROLLING TEXT INFORMATION (DLS)
If you can't hear any sound, then press the volume control " + " button until you reach a desired level. If you
consider the volume is too large, then press volume control " - " button to decrease the volume level to reach
a desired level.
-2-
11B
DAB
11D
 Loading...