

Aiwa CX-N4000 U User Manual [en, es, fr]

OPERATING INSTRUCTIONS
MANUAL DE INSTRUCCIONES
MODE D’EMPLOI
NSX^OO
NSX-3900
COMPACT DISC STEREO SYSTEM
SISTEMA ESTEREOFONICO DE DISCO COMPACTO
COMPACT DISC STEREO CASSETTE RECEIVER
RADIOCASSETTE ESTEREO CON DISCO COMPACTO
CX-N4000 u,c
CX-N3900 u
SPEAKER SYSTEM
SISTEMA DE ALTAVOCES
SX-FN4500
n COMPACT
(ílüSE
DIGITAL AUDIO

CAUTION
RISK OF ELECTRIC SHOCK
DO NOT OPEN
“CAUTIONiTO REDUCE THE RISK OF
ELECTRIC SHOCK,
DO NOT REMOVE COVER (OR BACK).
NO USER-SERVICEABLE PARTS INSIDE.
REFER SERVICING TO QUALIFIED
SERVICE PERSONNEL.”
Explanation of Graphical Symbols;
The lightning flash with arrowhead symbol, within
an equilateral triangle, is intended to alert the user
to the presence of uninsulated “dangerous volt
age” within the product’s enclosure that may be of
sufficient magnitude to constitute a risk of electric
shock to persons.
The exclamation point within an equilateral tri
angle is intended to alert the user to the presence
of important operating and maintenance (servic
ing) instructions in the literature accompanying
the appliance.
NOTE (U model only)
This equipment has been tested and found to comply with the limits for
a Class B digital device, pursuant to Part 15 of the FCC Rules. These
limits are designed to provide reasonable protection against harmful
interference in a residential installation.
This equipment generates, uses, and can radiate radio frequency
energy and, if not installed and used in accordance with the instruc
tions, may cause harmful interference to radio communications. How
ever, there is no guarantee that interference will not occur in a
particular installation. If this equipment does cause harmful interfer
ence to radio or television reception, which can be determined by
turning the equipment off and on, the user is encouraged to try to
correct the interference by one or more of the following measures:
- Reorient or relocate the receiving antenna.
- Increase the separation between the equipment and receiver.
- Connect the equipment into an outlet on circuit different from
that to which the receiver is connected.
- Consult the dealer or an experienced radio/TV technician for
help.
CAUTION
Modifications or adjustments to this product, which are not expressly
approved by the manufacturer, may void the user’s right or authority to
operate this product.
WARNING:
TO REDUCE THE RISK OF FIRE OR ELECTRIC
SHOCK, DO NOT EXPOSE THIS APPLIANCE TO
RAIN OR MOISTURE.

COPYRIGHT
Please check the laws on copyright relating to recordings from
discs, radio or external tape for the country in which the machine
is being used.
DERECHO DE AUTOR
Sírvase observar las leyes de derecho de autor relacionadas a las
grabaciones de los discos, radio o cinta externa para el país donde
se utiliza el aparato.
DROITS D’AUTEUR
Prière de vérifier les lois sur la propriété artistique relatives à
l’enregistrement de disques, de la radio ou de cassettes dans le
pays d’utilisation de l’appareil.
• Dolby noise reduction manufactured under license from Dolby
Laboratories Licensing Corporation.
“DOLBY” and the double-D symbol □□ are trademarks of Dolby
Laboratories Licensing Corporation.
• Reducción de ruido Dolby fabricado bajo licencia de Dolby
Laboratories Licensing Corporation.
DOLBY y el símbolo de la D doble □□ son marcas de Dolby
Laboratories Licensing Corporation.
• Réduction de bruit Dolby fabriquée sous licence de Dolby
Laboratories Licensing Corporation.
DOLBY et le symbole double-D □□ sont des marques de Dolby
Laboratories Licensing Corporation.
UUÊS SYSTEM (NSX-3900 only)
The word “BBE” and the “BBE symbol” are trademarks of BBE
Sound, Inc.
Under license from BBE sound, Inc.
UUIs SYSTEM (sólo NSX-3900)
El término “BBE” y el símbolo “BBE” son marcas comerciales de
BBE Sound, Inc.
Bajo licencia de BBE sound, Inc.
mUsYSTEM (NSX-3900 seulement)
L’expression “BBE” et le symbole “BBE” sont des marques déposées
de BBE Sound, Inc.
Sous licence de BBE Sound, Inc.
FOREWORD
Welcome to the Aiwa NSX-4000/NSX-3900
Congratulations on your purchase of an Aiwa Stereo System.
To optimize the performance of this system, please take the time
to read through these Operating Instructions and become familiar
with the operating procedures.
About the layout of this manual
This manual contains instructions in three languages (g) @ © and
illustrations @-r H .When following the steps for each operation,
refer to the illustration indicated by the capital letters (□ ). Bold
face numbers refer to steps in the operation. Smaller numbers and
lowercase letters in circles (®) are used to explain step procedures
and identify parts and controls.
® Illustrations
d) English
@ Spanish
@ French
Model number suffix
The model number is marked on the rear panel of the unit. It has a
suffix that denotes the model type.
Example: MODEL NO. CX-N4000 U
[—suffix (U)
Units with different suffixes are different as follows.
Model No., suffix
Equipped with BBE
If suffixes are mentioned in the instructions, read the section
following the suffix for your unit.
CX-N4000 U/N4000 C
No
CX-N3900 U
Yes
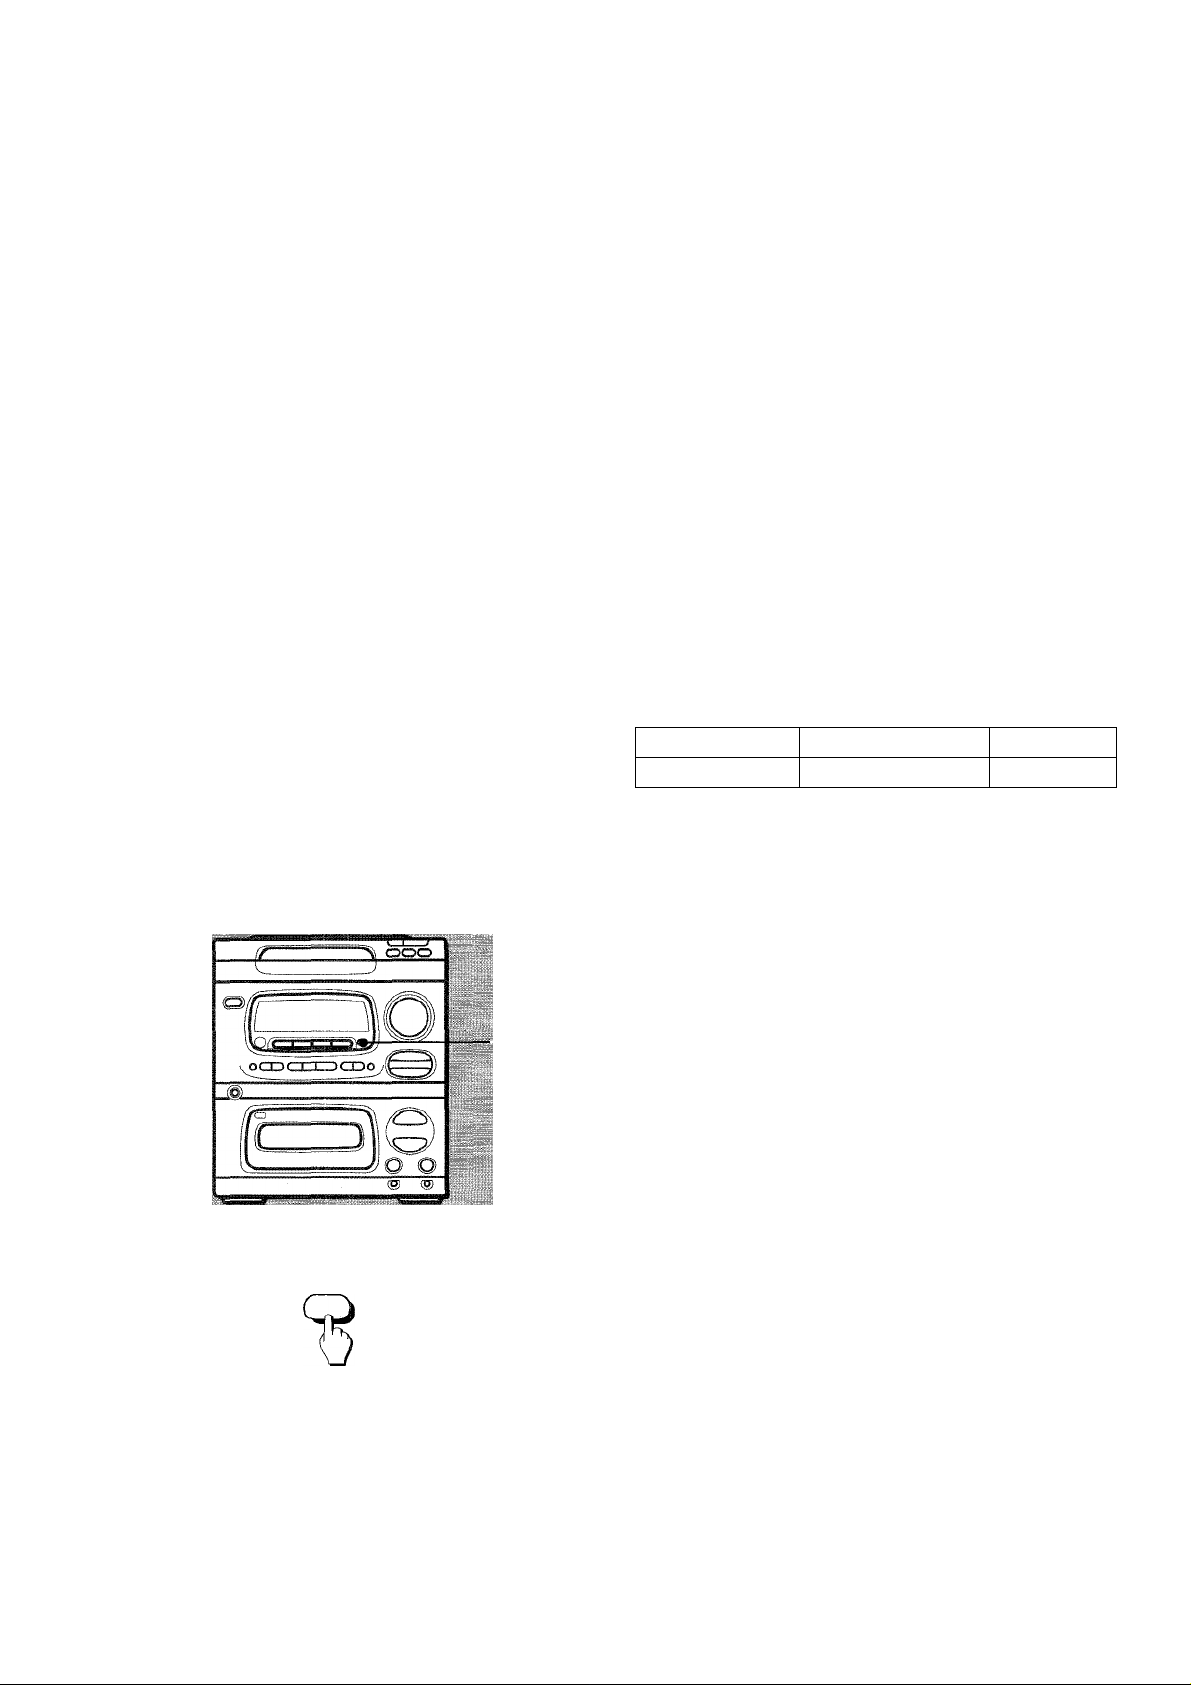
DEMO (Demonstration) mode
When you first connect the AC cord, the display window demon
strates the unit’s preset functions.
To cancel DEMO mode -* [0
■DEMO
□
DEMO
Press the DEMO button.
4

PREFACIO
PREFACE
Bienvenido a Aiwa NSX-4000/NSX-3900
Muchas gracias porsu acertada compra del Sistema Estereofónico
de Aiwa.
Para obtener el óptimo funcionamiento de su sistema, sírvase leer
detenidamente este manual instrucciones y familiarícese con los
procedimientos de operación.
Formato de este manual
Este manual contiene instrucciones en tres idiomas (D (3) © e
ilustraciones @Q .Cuando siga los pasos para cada operación,
refiérase a la ilustración encabezada por la letra mayúscula (Q ).
Los números en negrita se refieren a los pasos de operación. Los
números pequeñosy las letras minúsculas en círculo (®) se usan
para explicar los procedimientos por paso y para identificar las
piezas y los controles.
® Ilustraciones
(D Inglés
® Español
® Francese
Sufijo del número del modelo
El número del modelo está marcado en el panel trasero del
aparato. Y tiene un sufijo que indica el tipo del modelo.
Ejemplo: MODEL NO. CX-N4000 U
”L Sufijo (U)
Los modelos con distintos sufijos difieren como sigue:
No. del modelo, sufijo
Equipado con BBE
Si los sufijos están indicados en las instrucciones, sírvase leer la
sección correspondiente al sufijo de su aparato.
CX-N4000 U/N4000 C
No
CX-N3900 U
Sí
Aiwa vous souhaite la bienvenue.
Félicitations pour votre achat d’une chaîne stéréo Aiwa.
La lecture de ce mode d’emploi vous permettra de maîtriser
l’utilisation et d’optimiser les performances de cette chaîne.
Disposition de ce manuel
Ce manuel comporte des instructions en trois langues (2) (3) © et
des illustrations ® -♦ □. Quand on suit les étapes pour chaque
opération, se reporter aux illustrations indiquées par les lettres
majuscules (□ ). Les numéros en gras renvoient aux étapes de
l’opération. Les numéros plus petits et les lettres minuscules dans
des cercles (@ ) sont employés pour expliquer les procédures
d’étape et pour identifier les pièces et les commandes.
® Illustration
@ Anglais
@ Espagnol
@ Français
Suffixe du numéro de modèie
Le numéro de modèle se trouve au dos de l’appareil. Il possède un
suffixe qui indique le type de modèle.
Exemple; MODEL NO. CX-N4000 U
I
------
suffixe (U)
Les appareils qui n’ont pas les mêmes suffixes présentent les
différences suivantes.
№ de modèle, suffixe
Muni du système BBE
Si des suffixes sont mentionnés dans les instructions. Hire la partie
suivant le suffixe de votre appareil.
CX-N4000 U/N4000 C
Non
CX-N3900 U
Oui
Modo DEMO (Demostración)
Al conectar por primera vez el cordón CA, la ventanilla visualizadora
muestra las funciones memorizadas del aparato.
Para cancelar el modo DEMO -* Q]
Presione el botón DEMO.
Mode DEMO (Démonstration)
Quand on branche le cordon d’alimentation, la fenêtre d’affichage
montre les fonctions mémorisées de l’appareil.
Pour annuler le mode DEMO -r [0
Appuyer sur la touche DEMO.

TABLE OF CONTENTS
FOREWORD
FEATURES
PRECAUTIONS.....................................................................10
CONNECTIONS
CONNECTING THE SUPPLIED SPEAKERS
CONNECTING THE AC CORD
ANTENNA CONNECTIONS.............................................14
REMOTE CONTROL
OTHER CONNECTIONS..................................................16
...........................................................................
...........................................................................
..........................................................
.................
.......................................
.......................................................
8
12
12
12
16
PREPARATIONS........................................................18
BEFORE OPERATION
DEMO (DEMONSTRATION) MODE................................20
DIRECT PLAY FUNCTIONS............................................20
SETTING THE CLOCK
....................................................
....................................................
18
22
SOUND........................................................................24
ADJUSTING THE SOUND...............................................24
CD PLAYING...............................................................28
BASIC OPERATIONS......................................................28
RANDOM PLAY...............................................................34
REPEAT PLAY
PROGRAMMED PLAY
................................................................
....................................................
34
36
4
TAPE PLAYBACK
BASIC OPERATIONS......................................................38
......................................................
38
RADIO RECEPTION...................................................42
MANUAL TUNING
PRESETTING STATIONS
TUNING IN TO A PRESET STATION..............................46
OTHER SOURCES
LISTENING TO OTHER SOURCES
...........................................................
...............................................
.....................................................
................................
42
48
RECORDING...............................................................50
RECORDING FROM THE RADIO OR CONNECTED
EQUIPMENT
RECORDING FROM A CD
Al EDIT RECORDING
PROGRAMMED EDIT RECORDING...............................58
....................................................................
..............................................
......................................................
TIMER..........................................................................62
SETTING THE TIMER......................................................62
SETTING THE SLEEP TIMER.........................................66
KARAOKE
MICROPHONE MIXING
USEFUL FUNCTIONS FOR KARAOKE
..................................................................
...................................................
.........................
68
44
48
50
52
54
68
68
CARE AND MAINTENANCE
SPECIFICATIONS.................................................................74
TROUBLESHOOTING GUIDE
PARTS AND CONTROLS.....................................................80
................................................
..............................................
72
77

INDICE
TABLE DES MATIERES
PREFACIO..............................................................................5
CARACTERISTICAS
PRECAUCIONES.................................................................11
..............................................................
CONEXIONES.............................................................13
CONEXION DE LOS ALTAVOCES SUMINISTRADOS.... 13
CONEXION DEL CORDON CA.......................................13
CONEXION DE LAS ANTENAS......................................15
CONTROL REMOTO.......................................................17
OTRAS CONEXIONES
PREPARATIVOS
ANTES DE LA OPERACION...........................................19
MODO DEMO (DEMOSTRACION)
FUNCIONES DE REPRODUCCION DIRECTA
AJUSTE DEL RELOJ
....................................................
........................................................
.................................
..............
......................................................
17
19
21
21
23
SONIDO.......................................................................25
AJUSTE DEL SONIDO....................................................25
REPRODUCCION DE DISCOS COMPACTOS
OPERACIONES BASICAS..............................................29
REPRODUCCION ALEATORIA......................................35
REPRODUCCION REPETIDA.........................................35
REPRODUCCION PROGRAMADA
................................
..........
37
REPRODUCCION DE LA CINTA...............................39
OPERACIONES BASICAS..............................................39
RECEPCION DE LA RADIO.......................................43
SINTONIZACION MANUAL.............................................43
MEMORIZACION DE EMISORAS...................................45
SINTONIZACION DE UNA EMISORA MEMORIZADA
OTRAS FUENTES
ESCUCHA DE OTRAS FUENTES SONORAS
......................................................
...............
....
49
49
GRABACION..............................................................51
GRABACION DE LA RADIO O DEL EQUIPO
CONECTADO..................................................................51
GRABACION DE UN DISCO COMPACTO.....................53
GRABACION CON EDICION Al......................................55
GRABACION CON EDICION PROGRAMADA
..............
59
29
47
9
PREFACE
CARACTERISTIQUES............................................................9
PRECAUTIONS................................................................ 11
...............................................................................
5
CONNEXIONS........................................................... 13
CONNEXIONS DES ENCEINTES FOURNIES
CONNEXION DU CORDON SECTEUR
CONNEXIONS DES ANTENNES
TELECOMMANDE...........................................................17
AUTRES CONNEXIONS..................................................17
....................................
......
....................
................
13
13
15
PREPARATIONS........................................................19
AVANT L’UTILISATION
MODE DEMO (DEMONSTRATION)
FONCTIONS DE LECTURE DIRECTE
REGLAGE DE L’HORLOGE
................................................
...............................
...........................
...........................................
19
21
21
23
SON ............................................................................25
REGLAGE DU SON.........................................................25
LECTURE DE DISQUES COMPACTS
OPERATIONS DE BASE.................................................29
LECTURE ALEATOIRE...................................................35
LECTURE REPETEE.......................................................35
LECTURE PROGRAMMEE.............................................37
LECTURE DE CASSETTES .....................................
OPERATIONS DE BASE.................................................39
RECEPTION RADIO
ACCORD MANUEL
MEMORISATION DE STATIONS
ACCORD SUR UNE STATION MEMORISEE
................................................
............
.............................................
......................
....................................
.................
29
39
43
43
45
47
AUTRES SOURCES............................................ .....49
ECOUTE D’AUTRES SOURCES
ENREGISTREMENT
ENREGISTREMENT A PARTIR DE LA RADIO OU
DE L'APPAREIL CONNECTE.........................................51
ENREGISTREMENT A PARTIR D’UN DISQUE
COMPACT...................................................................... 53
ENREGISTREMENT AVEC MONTAGE ET CALCUL
DU TEMPS..................................................................... 54
ENREGISTREMENT AVEC MONTAGE PROGRAMME ...59
................................................ 51
..................................
49
TEMPORIZADOR
AJUSTE DEL TEMPORIZADOR
AJUSTE DEL CRONODESCONECTADOR
KARAOKE
MEZCLA DE MICROFONO
FUNCIONES UTILES PARA KARAOKE
CUIDADO Y MANTENIMIENTO
ESPECIFICACIONES...........................................................75
GUIA PARA LA SOLUCION DE PROBLEMAS
PIEZAS Y CONTROLES.......................................................80
.......................................................
.....................................
...................
..................................................................
.............................................
........................
...........................................
..................
63
63
67
69
69
69
73
78
MINUTERIE.................................................................63
REGLAGE DE LA MINUTERIE.....
REGLAGE DE LA MINUTERIE D’ARRET
KARAOKE
MIXAGE AVEC MICROPHONE
FONCTIONS UTILES POUR KARAOKE........................69
SOINS ET ENTRETIEN
SPECIFICATIONS.................................................................76
EN CAS DE PROBLEME
NOMENCLATURE.............................................................. 80
................................................................
........................................................
.....................................................
..................................
......................
.....................................
63
67
69
69
73
79
7

FEATURES
Three CD changer system
Three compact discs can be placed in the disc compartment at the
same time and played continuously. You can select any track on
any of the discs, either directly or in programmed play. You can
change two of the discs while the third is playing.
DSP (Digital Signal Processor) system
DSP circuits can recreate the effect of sounds reflected from walls
or ceilings, to obtain the sound presence of real environments
without the need to connect surround speakers.
There are three DSP modes, with matching equalization curves.
Front surround system
The front speakers provide an effective surround sound environ
ment.
In addition, by selecting a DSP mode, you can obtain the sound
presence of a disco, live music performance or concert hall.
VOCAL FADER and MULTIPLEX functions for Karaoke
Using the following functions, you can enjoy Karaoke with your
favorite music software.
VOCAL FADER function
This function makes the vocal part on ordinary discs or tapes
softer, so you can enjoy Karaoke without special Karaoke
software.
You can also use the AUTO VOCAL FADER function to reduce
the vocal part only while you sing with the connected micro
phone.
MULTIPLEX function
This function mutes the vocal part on multi audio discs or tapes,
so that the accompaniment is heard from both speakers.
You can also use the AUTO MULTIPLEX function to reduce the
vocal part only while you sing with the connected microphone.
Direct play function
If a disc or tape is inserted, you can turn the unit on and begin
playback by pressing one of the direct play buttons. This is a
convenient way to begin playback quickly.
Other features
Amplifier section
• BBE for clear and vivid high-frequency sound. (NSX-3900 only)
Aiwa is the world's first manufacturer to employ the BBE sound
system in consumer audio equipment.
This feature also helps your voice to be clearer when singing with
the Karaoke functions.
• T-BASS for realistic reproduction of low frequency sound with
compact speakers.
• Three preset equalization curves.
• Daily event /sleep timer
Tuner section
• Synthesizer tuner
CD player section
• Repeated playback of tracks or discs
• Playback of tracks in random order
• Playback of tracks in programmed order
• Two different CD edit functions
8

CARACTERISTICAS
CARACTERISTIQUES
Sistema de cambiadiscos de tres discos compactos
Pueden colocarse al mismo tiempo tres discos compactos sobre el
compartimiento de discos y reproducirse continuamente. Usted
puede seleccionar cualquier canción de cualquier disco,
directamente o en la reproducción programada. Además, puede
cambiar los dos primeros discos durante la reproducción del tercer
disco.
Sistema DSP (Digital Signal Processor “Procesador de Señales Digitales”)
Los circuitos DSP pueden volver a crear el efecto sonoro repercutido
de las paredes o techo para obtener un ambiente de sonido real sin
la necesidad conectar los altavoces perimétricos.
Hay tres modos de DSP con adaptación de curvas de ecualización.
Sistema de altavos perimètrico delantero
Los altavoces delanteros ofrecen un ambiente lleno de sonido
difuso. Además, mediante selección de un modo DSP, puede
obtenerse un efecto sonoro como el de una discoteca, una
representación musical viva o una sala de concierto.
Funciones de VOCAL FADER y MULTIPLEX para Karaoke
Con las siguientes funciones, usted podrá disfrutar del Karaoke
con su favorita fuente sonora.
Función de VOCAL FADER
Esta función atenúa la parte vocal de los discos o cintas
ordinarios, por lo que usted podrá disfrutar del Karaoke sin un
software de Karaoke especial.
Usted puede usartambién la función de AUTO VOCAL FADER
para reducir la parte vocal solamente cuando esté cantando
con el micrófono conectado.
Función de MULTIPLEX
Esta función silencia la parte vocal de los discos o cintas de
audio múltiple, y sólo el acompañamiento musical se oye de
ambos altavoces.
Usted puede usar también la función de AUTO MULTIPLEX
para reducir la parte vocal sólo cuando esté cantando con el
micrófono conectado.
Función de reproducción directa
Insertando un disco o una cinta, usted podrá encender el aparato
e iniciar la reproducción presionando uno de los botones de
reproducción directa. Esta función es conveniente para iniciar
rápidamente la reproducción.
Otras características
Sección del amplificador
• BBE para un sonido más nítido y vivido a niveles sonoros de alta
frecuencia, (sólo NSX-3900)
Aiwa es el primer fabricante en el mundo que ha incorporado el
sistema de sonido BBE en los equipos de audio de clase no
profesional.
Esta característica permite que su voz se oiga más claramente
cuando cante con las funciones de Karaoke.
• T-BASS para la reproducción realista a niveles de bajafrecuencia
con los altavoces compactos.
• Tres curvas de ecualización prefijadas.
• Temporizador de programa diario/cronodesconectador
Sección del sintonizador
• Sintonizador sintetizador
Sección del reproductor de discos compactos
• Reproducción repetida de las canciones o discos
• Reproducción de las canciones en el orden aleatorio
• Reproducción de las canciones en el orden programado
• Dos diferentes funciones de edición de discos compactos
Système changeur à trois disques compacts
Trois disques compacts peuvent être mis en même temps dans le
compartiment à disques et peuvent être lus en continu. On peut
sélectionner n’importe quelle plage de n’importe quel disque,
directement ou en lecture programmée. On peut changer deux des
disques pendant que le troisième est en lecture.
Système DSP (processeur numérique de signaux)
Les circuits DSP peuvent recréer l’effet des sons réfléchis par les
murs ou le plafond, pour obtenir une ambiance sonore réelle sans
le besoin de connecter des enceintes surround.
Il y a trois modes DSP, avec des courbes d’égalisation
correspondantes.
Système surround avant
Les enceintes avant donnent un efficace effet sonore d’ambiance.
De plus, en sélectionnant un mode DSP, on peut obtenir la
présence sonore d’une discothèque, d’une représentation musicale
en direct ou d’une salle de concert.
Fonctions VOCAL FADER et MULTiPLEX pour Karaoke
A l’aide des fonctions suivantes, vous pouvez obtenir un effet
Karaoke avec vos disques et cassettes préférés.
Fonction VOCAL FADER
Cette fonction atténue la partie vocale des disques ou cassettes
ordinaires, vous permettant ainsi d’obtenir un effet Karaoke
sans disques ou cassettes spéciaux.
Vous pouvez également utiliser la fonction AUTO VOCAL
FADER pour atténuer la partie vocale seulement pendant que
vous chantez avec le microphone connecté.
Fonction MULTIPLEX
Cette fonction supprime la partie vocale des disques ou cas
settes multi audio, si bien que l’accompagnement est audible
par les deux enceintes.
Vous pouvez également utiliser la fonction AUTO MULTIPLEX
pour atténuer la partie vocale seulement pendant que vous
chantez avec le microphone connecté.
Fonction lecture directe
Si un disque ou une cassette est en place, on peut mettre l’appareil
sous tension et commencer la lecture en appuyant sur une des
touches de lecture directe. Cette fonction est pratique pour com
mencer la lecture rapidement.
Autres caractéristiques
Partie amplificateur
• Système BBE pour des sons de haute fréquence clairs et vifs.
(NSX-3900 seulement)
Aiwa est le premier fabricant du monde à utiliser le son BBE dans
une chaîne audio grand public.
Ce système permet également d’obtenir une voix plus claire
quand on chante avec les fonctions Karaoke.
• Système T-BASS pour une reproduction réaliste des sons de
basse fréquence avec des enceintes compactes.
• Trois courbes d’égalisation mémorisées
• Minuterie interne quotidienne/d’arrêt
Partie tuner
• Tuner à synthétiseur
Partie lecteur de disques compacts
• Lecture répétée de plages ou de disques
• Lecture de plages dans un ordre aléatoire
• Lecture de plages dans un ordre programmé
• Deux fonctions de montage de disques compacts différentes
9

PRECAUTIONS
Follow the advice below for safe and correct operation.
On AC voltage
Before use, check that the rated voltage of your system matches
your local voltage.
On placement
• Do not use the system in places which are extremely hot, cold,
dusty or humid.
• Place the system on a flat, even surface.
• Be careful not to obstruct the ventilation holes on the exterior of
the unit, as increased internal temperature may affect the electric
parts. In particular, do not place the system in an airtight rack.
On safety
• When connecting and disconnecting the AC cord, grasp the plug
and not the cord itself. Pulling the cord may damage it and thus
be hazardous.
• When you are not going to use the system for a long period of time,
disconnect the AC cord. If the cord is plugged in, a small amount
of current keeps on flowing to the system even if the power switch
is not ON.
• If the AC cord is broken or damaged, or if the wires are exposed,
contact your dealer or an Aiwa service station and have it
replaced or repaired immediately.
On condensation
When the room is heated, you sometimes see water drops on your
windows; this is called condensation.
This can occur inside the CD player when:
• it is moved from a cold spot to a warm spot,
• it is used in a room where the heating system has just been turned
on.
• it is used in a place with a lot of moisture.
• it is used where it has direct contact with cool air, such as near an
air-conditioner.
When it has condensation inside, the unit may not function normally.
Let it stand fort to 2 hours before turning the poweron; or, gradually
heat the room and dry the unit before use.
Should any trouble occur, disconnect the AC cord and contact
a qualified sen/ice representative.
10

PRECAUCIONES
PRECAUTIONS
Para obtener una operación segura y correcta, siga ios consejos
descritos a continuación.
Voltaje de CA
Antes dei uso, compruebe si ei voitaje nominai de su sistema
coincide con ei voitaje de su iocalidad.
Colocación
• No utiiiceei sistema en iugares extremadamente calurosos, fríos,
polvorientos o húmedos.
• Coloque el sistema sobre una superficie plana.
• Tenga cuidado de no obstruir los orificios de ventilación del
exterior del aparato, ya que el aumento de la temperatura interna
podría afectar las piezas eléctricas. En particular, no coloque el
aparato en un armario hermético.
Seguridad
• Para conectar y desconectar el cordón de alimentación CA, tome
el enchufe y no el propio cordón. Si tirase del cordón, podría
dañarlo, lo que resultaría peligroso.
• Cuando no vaya a emplear el sistema durante mucho tiempo,
desconecte el cordón de alimentación. Cuando el cordón de
alimentación esté conectado, circulará una pequeña cantidad de
corriente, aunque el interruptor de alimentación esté
desconectado.
• Si el cordón de alimentación CA está roto o avenado, o si sus hilos
están al descubierto, póngase inmediatamente en contacto con
un centro de reparaciones Aiwa para solicitar reparación o
reemplazo.
Condensación
Al calentar una sala, a veces pueden verse gotitas de agua en las
ventanas; esto se denomina condensación.
Este fenómeno puede ocurrir también en el interior del reproductor
de discos compactos cuando:
• se traslade de un lugar frío a otro cálido.
• se emplee en una sala donde acaba de ponerse en funcionamiento
el sistema de calefacción.
• se emplee en un lugar con mucha humedad.
• se emplee en un lugar directamente en contacto con aire frío,
como cerca de un acondicionador de aire.
Cuando se haya producido condensación en el interior, es posible
que el aparato no funcione normalmente. Déjelo en reposo 1 a 2
horas antes de conectar la alimentación, o caliente gradualmente
la sala para que se seque el aparato antes de su utilización.
Si se presenta algún problema, desconecte el cordón de
alimentación de CA y solicite los servicios del personal
cualificado.
Prière de respecter les consignes suivantes pour une utilisation
sûre et correcte.
Tension du secteur
Avant l’utilisation, vérifier que la tension nominale de la chaîne
correspond à celle du secteur.
Emplacement
• Ne pas utiliser la chaîne dans des endroits extrêmement chauds,
froids, poussiéreux ou humides.
• Installer la chaîne sur une surface plate et lisse.
• Faire attention à ne pas obstruer les orifices de ventilation situés
sur l’extérieur de l’appareil; une élévation de la température
interne risque d’affecter les composants électriques. En particulier,
ne pas placer la chaîne dans un meuble complètement fermé.
Sécurité
• Pour brancher ou débrancher le cordon secteur, le tenir par sa
fiche et non pas par le cordon proprement dit. Toute traction sur
le cordon risque de l’endommager et de créer ainsi un danger.
• Si la chaîne ne doit pas être utilisée pendant longtemps, débrancher
le cordon secteur. Si on laisse ce cordon branché, un courant de
faible intensité continue de circuler dans la chaîne même si
l’interrupteur d’alimentation est sur la position de repos.
• Si le cordon secteur est coupé ou endommagé, ou si les fils sont
exposés, contacter immédiatement le revendeur ou un centre de
service Aiwa pour le faire remplacer ou réparer.
Condensation
Lorsqu’une pièce est chauffée, on voit parfois des gouttes d’eau sur
les vitres; c’est ce qu’on appelle la condensation.
De la condensation peut se former à l’intérieur du lecteur de
disques compacts quand:
• il est déplacé d’un endroit froid à un endroit chaud.
• Il est utilisé dans une pièce où le le chauffage vient juste d’être mis
en marche.
• il est utilisé dans un endroit très humide.
• il est utilisé dans un endroit exposé à un courant d’air froid,
comme près d’un climatiseur.
S’il y a de la condensation à l’intérieur de l’appareil, il risque de ne
pas fonctionner normalement. Le cas échéant, le laisser hors
tension pendant une à deux heures; ou chauffer la pièce
progressivement pour faire sécher l’appareil avant l’utilisation.
En cas de problème, débrancher le cordon secteur et contacter
un technicien qualifié
11

CONNECTIONS
IMPORTANT
Connect equipment, antennas, and other optional equipment be
fore connecting the AC cord.
CONNECTING THE SUPPLIED SPEAKERS
You can obtain a front surround effect.
Connect the speakers to the SPEAKER terminals and the SUR
ROUND SPEAKERS jacks of the main unit.
1 Connect to the SPEAKERS terminals.
Connect the right speaker © to the R terminal, and the left
speaker (D to the L terminal with the cords attached to the
speakers.
Open the levers of the SPEAKER terminals on the main unit and
insert the conductors of the cords with white stripes to ffi and the
conductors of the black cords to ©.
Then, shut the levers to lock.
2 Connect to the SURROUND SPEAKERS jacks.
Use the supplied yellow-black cords.
Connecting to the speakers
Push the levers of each terminal, and insert the conductors of
the yellow cords to ffi and the conductors of the black cords to
0. Then, release the levers to lock.
Connecting to the main unit
Connect the speakers to the SURROUND SPEAKERS jacks
with the plugs of the connecting cords.
Right speaker ® should be connected to the R jack, and left
speaker @ to the L jack.
NOTE
’ The speaker systems are magnetically shielded. However, if
the speakers should affect the color on yourTV screen, turn off
the TV and turn it on again 15-30 minutes later. If the TV screen
still has poor color, move the speakers away from the TV.
' Do not leave magnets or objects generating magnetism near
the speakers.
12
CONNECTING THE AC CORD
Connect the AC cord to an AC outiet.
A demonstration of the unit’s preset functions begins in the display
window (DEMO mode). This demonstration can be canceled.
Refer to “DEMO (DEMONSTRATION) MODE” on page 20.
Also, the II SET button flashes to inform you that the current time
needs to be set. Refer to “SETTING THE CLOCK” on page 22.
If setting up with optional equipment, connect the optional equip
ment before connecting the AC cord.
To be continued.

CONEXIONES
CONNEXIONS
IMPORTANTE
Conecte el aparato, las antenas y otros equipos opcionales antes
de conectar el cordón de alimentación CA.
CONEXION DE LOS ALTAVOCES
SUMINISTRADOS
Usted puede obtener un efecto difuso delantero.
Conecte los altavoces a los terminales SPEAKER y a las tomas
SURROUND SPEAKERS del aparato principal.
1 Conecte a los terminales SPEAKERS.
Conecte el altavoz derecho ® al terminal R, y el altavoz
izquierdo (2) al terminal L con los cordones conectados a los
altavoces.
Abra las palanquitas de los terminales SPEAKER del aparato
principal e inserte los conductores de los cordones con rayas
blancas a ffi y los conductores de los cordones negros a 0.
Luego, cierre las palanquitas para dejarlos trabados.
2 Conecte a las tomas SURROUND SPEAKERS.
Use los cordones amarillo-negro suministrados.
IMPORTANT
Connecter la chaîne, les antennes et tout autre appareil optionnel
avant de connecter le cordon secteur.
CONNEXION DES ENCEINTES FOURNIES
On peut obtenir un effet surround avant.
Connecter les enceintes aux bornes SPEAKERS et aux prises
SURROUND SPEAKERS de l’unité principale.
1 Connecter aux bornes SPEAKERS
Connecter l’enceinte droite @ aux bornes R et l’enceinte
gauche (D aux bornes L avec les cordons connectés aux
enceintes.
Ouvrir les leviers des bornes SPEAKERS de l’unité principale
et insérer les conducteurs des cordons avec des traits blancs
dans ffi et les conducteurs des cordons noirs dans ©.
Ensuite, fermer les leviers pour verrouiller.
2 Connecter aux prises SURROUND SPEAKERS
utiliser les cordons jaunes et noirs fournis. ■
Conexión a los altavoces
Empuje las palanquitas de cada terminal e inserte los
conductores de los cordones amarillos a ffi y los conductores de
los cordones negros a ©. Luego, suelte las palanquitas para
dejarlos trabados.
Conexión al aparato principal
Conecte los altavoces a las tomas SURROUND SPEAKERS
con las clavijas de los cordones de conexión.
El altavoz derecho ® debe estar conectado a la toma R, y el
altavoz izquierdo (g) a la toma L.
NOTA
Los sistemas de altavoces está magnéticamente protegidos.
Sin embargo, si los altavoces afectan el color de la pantalla de
su televisor, apague el televisor y vuélvalo a encender 15-30
minutos después. Si no mejora el color de la pantalla del
televisor, aleje los altavoces del televisor.
' No deje imanes u objetos que generan magnetismo cerca de
los altavoces.
CONEXION DEL CORDON CA
Connexion aux enceintes
Appuyer sur les leviers de chaque borne et insérer les
conducteurs des cordons jaunes dans ffi et les conducteurs des
cordons noirs dans 6. Ensuite, relâcher les leviers pour
verrouiller.
Connexion à l’unité principale
Connecter les enceintes aux prises SURROUND SPEAKERS
avec les fiches des cordons de raccordement.
L’enceinte droite ® doit être connectée à la prise R, et l’enceinte
gauche @ à la prise L.
REMARQU
• Les enceintes sont dotées d’un blindage magnétique.
Toutefois, SI elles affectent les couleurs de l’écran d’un
téléviseur, mettre ce dernier hors tension puis de nouveau
sous tension au bout de 15 à 30 minutes. Si les couleurs sont
toujours affectées, éloigner les enceintes du téléviseur.
• Ne pas laisser d’aimant ou autre objet produisant un champ
magnétique près des enceintes.
CONNEXION DU CORDON SECTEUR
Conecte el cordón CA a una toma de corriente CA.
Inicia una demostración de las funciones memorizadas del aparato
en la ventanilla visualizadora (Modo DEMO). Esta demostración
puede cancelarse. Refiérase al “MODO DEMO (DEMO
STRACION)’’ en la página 21.
Además de esto, parpadea el botón II SET para informarle que
debe ajustarse la hora. Refiérase a “AJUSTE DEL RELOJ” página
23.
En caso del uso con un equipo opcional, conecte el equipo antes
de la conexión del cordón CA.
Continúa.
Brancher le cordon secteur à une prise de courant.
Une démonstration des fonctions mémorisées de l’appareil com
mence sur lafenêtre d’affichage (mode DEMO). Cette démonstration
peut être annulée. Se reporter à la partie “MODE DEMO”, page 21.
De plus, le touche II SET clignote pour vous signaler que l’heure
courante doit être réglée. Se reporter à la partie “REGLAGE DE
L’HORLOGE”, page 23.
Dans le cas d’une installation avec un appareil optionnel, connecter
cet appareil avant de connecter le cordon secteur.
A suivre
13
IE
CONNECTIONS
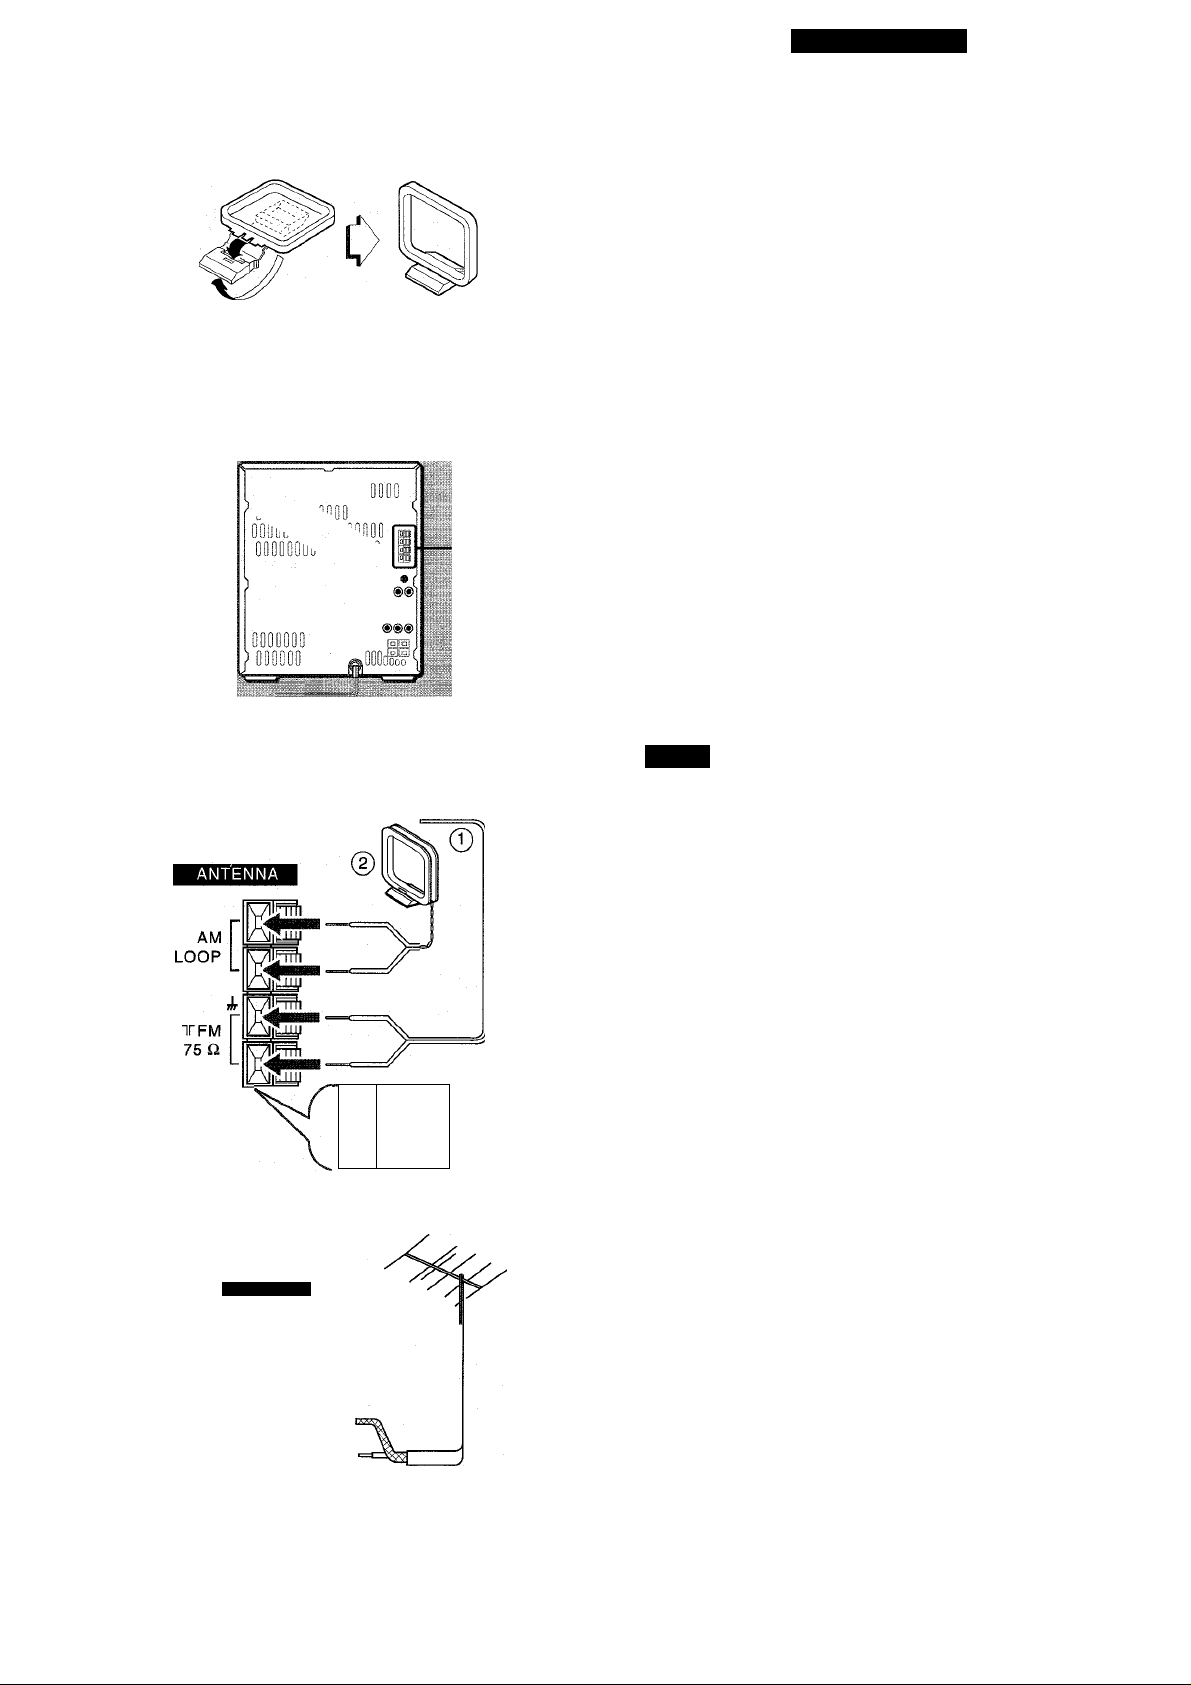
ANTENNA CONNECTIONS
CONNECTING THE SUPPLIED ANTENNAS
Connections differ according to the suffix of the model number on
the rear of your unit.
Preparation
• Untie the suppiied FM feeder antenna.
• Stand the supplied AM ioop antenna on a surface by fixing the
ciaw to the slot. -> □
Connection -► ID
Push the lever of each terminal, and insert the conductor. Then,
release the lever to lock.
FM: Connect the conductor of the FM feeder antenna © to the FM
75Q terminals.
AM: Connect the conductor of the AM loop antenna @ to the AM
LOOP terminals.
Positioning FM feeder antenna
Extend this antenna horizontally in a T-shape and fix its ends to the
wail with cellophane tape.
ID
Positioning AM loop antenna
To fix it to the wall, use screw.
Find the best position for reception, and fix this antenna vertically.
NOTE
■ Do not bring the ends of the FM feeder antenna near metal objects
or curtain rails.
’ Do not unwind the AM loop antenna wire.
' Do not bring the AM loop antenna near a turntable system, CD
player, TV monitor, or the stereo system itself, or close to the AC
cord or speaker cords, since noise will be picked up.
CONNECTING AN OUTDOOR ANTENNA
For better FM reception, use of an outdoor antenna is recom
mended.
Connect the outdoor antenna to the FM 75Q terminals. -» Q
S'©J
14
ANTENNA
TFM
75 n

CONEXIONES
connexions
CONEXION DE LAS ANTENAS
CONEXION DE LAS ANTENAS SUMINISTRADAS
Las conexiones difieren según ei sufijo dei número dei modeio
indicado a ia espaida dei aparato.
Preparación
• Desate ia antena de iínea FM suministrada.
• Ponga de pie ia antena de cuadro AM suministrada sobre una
superficie, fijando ia garra a ia ranura. -► El
Conexión -* [0
Empuje ia paianquita de cada terminai e inserte ei conductor.
Luego, sueite ia paianquita para dejado trabado.
FM: Conecte ei conductor de ia antena de línea FM suministrada
@ a ios terminaies FM 75 íl.
AM: Conecte ei conductor de ia antena de cuadro AM @ a ios
terminaies AM LOOP.
Coiocación de ia antena de iínea FM
Extienda esta antena horizontalmente en una forma de T y fije sus
extremos a la pared con una cinta adhesiva.
Colocación de la antena de cuadro AM
Para fijada a la pared, use tornillo.
Encuentre la mejor posición de recepción, fije esta antena
verticalmente.
CONNEXION DES ANTENNES
CONNEXION DES ANTENNES FOURNIES
Les connexions diffèrent selon le suffixe du numéro de modèle
indiqué au dos de l’appareii.
Préparation
• Détacher l’antenne FM intérieure fournie.
• Dresser l’antenne cadre AM fournie sur une surface en ajustant
la griffe dans la rainure. -* El
Connexion -> QJ
Appuyer sur le levier de chaque borne et insérer le conducteur.
Ensuite, relâcher le levier pour verrouiller.
FM: Connecter les conducteurs de l’antenne FM intérieure © aux
bornes FM 75 ü.
AM: Connecter les conducteurs de l’antenne cadre AM @ aux
bornes AM LOOP.
Positionnement de i’antenne FM intérieure
Déployer cette antenne horizontalement selon la forme d’un T et
fixer ses extrémités à un mur avec de la bande adhésive.
Positionnement de i’antenne cadre AM
Pour la fixer à un mur, utiliser une vis.
Trouver la position donnant la meilleure réception, puis fixer cette
antenne verticalement.
NOTA
' No acerque ios extremos de la antena de línea FM a ningún
objeto metálico o riel de codinas.
' No desenrolle el hilo de la antena de cuadro AM.
' No acerque la antena de cuadro AM a un sistema de tocadiscos,
reproductor de discos compactos, monitor de TV o al sistema
estereofónico mismo, ni la acerque al cordón CA o a los cordones
de altavoz, ya que puede causar ruido.
CONEXION DE UNA ANTENA EXTERIOR
Para la óptima recepción de FM, se recomienda utilizar una antena
externa.
Conecte la antena exterior a los terminales FM 75£í. ^0
' Ne pas mettre les extrémités de l’antenne FM intérieure près
d’objets métalliques ou de tringles à rideaux.
' Ne pas dérouler le fil de l’antenne cadre AM.
' Ne pas mettre l’antenne cadre AM près d’un tourne-disque, d’un
lecteur de disques compacts, d’un téléviseur ou de la chaîne
stéréo ni près du cordon secteur ou des cordons d’enceinte; elle
pourrait capter des parasites.
CONNEXION D’UNE ANTENNE EXTERIEURE
Pour obtenir une meilleure réception FM, il est recommandé de
connecter une antenne extérieure.
Connecter l’antenne extérieure aux bornes FM 75 £2.-> 0
15

CONNECTIONS
REMOTE CONTROL
Inserting batteries
Detach the battery cover on the rear of the remote control and insert
two R6 (size AA) batteries. -+ Q
When to replace the batteries
The maximum operational distance of the remote control should be
approximately 5 meters (16 feet). When this distance decreases,
replace the batteries with new ones.
NOTE
SENSOR
^BsSi
He
I INF OUT
V.
• Do not mix different types of batteries, or old batteries with new
ones.
• If you are not going to use the unit for a long period of time, remove
the batteries to prevent possible electrolyte leakage.
Hints for correct operation
The remote control may not operate correctly when:
• the line of sight between the remote control and the unit’s remote
sensor is exposed to intense light, such as direct sunlight.
• other remote controls are used nearby (television etc.).
OTHER CONNECTIONS
CONNECTING OPTIONAL EQUIPMENT-* D
You can listen to and record sounds from optional equipment
connected to this unit.
Use a cable with an RCA phono plug (not supplied) to connect
analog equipment (turntables, LD players without digital output
connectors, VCRs, etc.) for audio playback.
Connections
Connect the red plug to the R jack, and the white plug to the L jack
of the VIDEO/AUX jacks.
16
V.
______
...^
y
When connecting a turntable
Use an Aiwa turntable equipped with an equalizer amplifier.
CONNECTING A SUPER WOOFER
Connecting a super woofer increases the realism of low-frequency
sounds.
Connect a super woofer with a built-in amplifier (Aiwa TS-W5 etc.)
to the SUPER WOOFER terminal. -» Q
Refer to the super woofer operating manual for details.

CONEXIONES
CONNEXIONS
CONTROL REMOTO
Inserción de las pilas
Abra la tapa del compartimiento de pilas situada en la trasera del
control remoto e inserte dos pilas R6 (tamaño AA). El
Reemplazo de las pilas
La distancia máxima de operación entre el control remoto y el
aparato debe ser de 5 metros. Cuando disminuya esta distancia,
reemplace las pilas con las nuevas.
NOTA
• No mezcle diferentes tipos de pila, ni pilas viejas con las nuevas.
• Cuando no vaya a utilizar el aparato por largo tiempo, quite las
pilas para evitar posible fuga elecfrolítica.
Consejos útiles para la correcta operación
El control remoto puede operar incorrectamente cuando:
• la línea de visión entre el control remoto y el sensor del control
remoto del aparato está expuesta a la luz intensa, tal como la luz
directa del sol.
• otros controles remotos están usándose en la cercanía (televisor,
etc.).
TELECOMMANDE
Mise en place des piles
Enlever le couvercle des piles du dos de la télécommande et mettre
deux piles R6 (taille AA) en place. -+ El
Quand remplacer des piles
La distance maximale de fonctionnement de la télécommande doit
être d’environ cinq mètres. Lorsque cette distance diminue,
remplacer les piles par des neuves.
REMARQUE
• Ne pas mélanger différents types de piles, ni des vieilles piles
avec des neuves.
• Si la télécommande ne doit pas être utilisée pendant longtemps,
enlever les piles pour éviter tout risque de fuite d’électrolyte.
Conseils pour un fonctionnement correct
La télécommande risque de ne pas fonctionner correctement
quand:
• l’espace entre la télécommande et le capteur de l’appareil est
exposé à une lumière intense, comme le soleil.
• d’autres télécommandes (téléviseur, etc.) sont utiliséesà proximité.
OTRAS CONEXIONES
CONEXION DE EQUIPOS OPCK3NALES -> B
Usted puede escuchar y grabar el sonido del equipo opcional
conectado a este aparato.
Use un cable con clavija Phono RCA (no suministrado) para
conectar un equipo análogo (tocadiscos, reproductor de discos
compactos sin conectores de salida digital, videograbadora, etc.)
para la reproducción de audio.
Conexiones
Conecte la clavija roja a la toma R y la clavija blanca a la toma L de
las tomas VIDEO/AUX.
Conexión de un tocadiscos
Utilice un tocadiscos Aiwa equipado con amplificador ecualizador.
CONEXION DE UN ALTAVOZ DE SUPER
GRAVE
La conexión de un altavoz de super grave aumenta el realismo de
los sonidos a baja frecuencia.
Conecte un altavoz de super grave con amplificador integrado
(Aiwa TS-W5 etc.) al terminal SUPER WOOFER. -► Q
Refiérase al manual de insfrucciones del altavoz de super grave
para mayor detalle.
AUTRES CONNEXIONS
CONNEXION D’UN APPAREIL OPTIONNEL
m
On peut écouter et enregistrer le son venant d’un équipement
optionnel connecté à cet appareil.
Utiliser un câble à fiches phono RCA (pas fourni) pour connecter
un appareil analogique (tourne-disque, lecteur de disque laser
sans connecteurs de sortie numérique, magnétoscope, etc.) pour
lecture audio.
Connexion
Connecter la fiche rouge à la prise R et la fiche blanche à la prise
Ldes prises VIDEO/AUX.
Pour connecter un tourne-disaue
Utiliser un tourne-disque Aiwa muni d’un amplificateur à égaliseur.
CONNEXION D’UN CAISSON DE GRAVES
La connexion d’un caisson de graves augmente le réalisme des
sons de basse fréquence.
Connecter un caisson de graves à amplificateur intégré (Aiwa TS-
W5, etc.) à la borne SUPER WOOFER. B
Pour plus de détails, se reporter au mode d’emploi du caisson de
graves.
17

POWER
■CD
PREPARATIONS
BEFORE OPERATION
To turn on the unit -* □
Press the POWER button.
You can also turn the unit on by pressing one of the direct play
buttons. (See page 20.)
The disc compartment may open and cióse for resetting the unit.
After use
Press the POWER button to turn off the power. The display
changes to clock or DEMO mode.
After turning on the unit
The flash window above the disc compartment lights up.
For 4 seconds, the most recentiy used function button fiashes in
green.
No operation may be carried out during this 4-second period.
o-
ÓSTANDBY/OI^'.
SET
The fiash window ID
)
The flash window lights up during power on and flashes when the
disc compartment is opened or closed, and when the trays are
rotated.
To turn it off, operate as follows:
1 Turn on the power and press the CD button. (The CD button
lights in red.)
2 Press the ■ button while pressing the CD button.
To turn it back on, repeat the procedure.
• Do not carry out this operation during recording.
Illumination guide -» Q
Whenever one of the function buttons is pressed, the buttons for
that operation light up or flash.
Example:
When connecting the AC cord, the II SET button flashes to guide
you in setting the current time.
Headphones
Connect headphones to the PHONES jack with a stereo standard
plug (06.3 mm/’A inch).
No sound is heard from the speakers whiie headphones are
plugged in.
After a power interruption
The current time needs to be reset. (See page 22.)
• If power is interrupted for more than about 24 hours, you wiii also
have to reset preset stations and timer playback or recording
settings.
18

PREPARATIVOS
PREPARATIONS
ANTES DE LA OPERACION AVANT L’UTILISATION
Para encender el aparato -+ □
Presione el botón POWER.
Usted puede encender también el aparato, presionando uno de los
botones de reproducción directa. (Véase la página 21.)
El compartimiento del disco quizá se abra y se cierre para reponer
la unidad.
Después del uso
Presione el botón POWER para desconectar la alimentación. La
visualización cambia al modo de reloj o DEMO.
Después de encender el aparato
Se enciende la ventanilla parpadeante sobre el compartimiento de
discos. El botón de función más recientemente usado parpadea en verde
durante 4 segundos.
No puede efectuarse ninguna operación durante este período.
Ventanilla parpadente I3
La ventanilla parpadeante se enciende durante la conexión de la
alimentación y parpadea al abrir o cerrar el compartimiento de
discos, y cuando están girando las bandejas.
Para apagar el aparato, opere como sigue:
1 Conecte la alimentación y presione el botón CD. (El botón CD
se enciende en rojo.)
2 Presione el botón ■ mientras mantiene oprimido el botón CD.
Para volver a encender el aparato, repita el mismo procedimiento.
• No realice esta operación durante la grabación.
Guía de iluminación -* Q
Siempre que presione uno de ios botones de función, se encenderá
o parpadeará el botón correspondiente a tal operación.
Ejemplo:
Al conectar el cordón CA, parpadea el botón II SET para guiarle
en el ajuste del reloj.
Uso de los auriculares
Conecte los auriculares a la toma PHONES con una clavija de
estéreo estándard (06,3 mm).
Con esta conexión, no se oirá el sonido proveniente de los
altavoces.
Pour mettre l’appareil sous tension -* □
Appuyer sur la touche POWER.
On peut aussi mettre l’appareil sous tension en appuyant sur une
des touches de lecture directe. (Voir page 21.)
Le compartiment à disque peut s’ouvrir et se fermer du fait de la
réinitialisation de l’appareil.
Après l’utilisation
Appuyer sur la touche POWER pour couper
L’affichage passe à l’horloge ou au mode DEMO.
’alimentation.
Après la mise sous tension de l’appareil
La fenêtre clignotante située au-dessus du compartiment à disques
s’allume.
Pendant quatre secondes, la touche de fonction utilisée en dernier
clignote en vert.
Aucune opération ne peut être effectuée pendant cette période de
quatre secondes.
Fenêtre clignotante -► □
La fenêtre clignotante s’allume lors de la mise sous tension et
clignote quand le compartiment à disques est ouvert ou fermé, et
quand les plateaux tournent.
Pour l’éteindre, procéder comme suit:
1 MettresoustensionetappuyersurlatoucheCD. (LatoucheCD
s’allume en rouge.)
2 Appuyer sur la touche ■ tout en appuyant sur la touche CD.
Pour la rallumer, procéder de la même manière.
• Ne pas effectuer cette opération pendant l’enregistrement.
Guide par éciairage -* Q
Chaque fois qu’on appuie sur une des touches de fonction, les
touches correspondant à cette opération s’allument ou clignotent.
Exemple:
Quand on branche le cordon secteur, la touche II SET clignote
pour guider dans le réglage de l’heure courante.
Utilisation d’un casque
Brancher un casque muni d’une fiche stéréo standard (6,3 mm 0)
à la prise PHONES.
Aucun sont ne sort par les enceintes quand un casque est branché.
Después de una interrupción eléctrica
Se requiere ajuste del relo. (Véase la página 23.)
»Si el tiempo de interrupción es más de 24 horas, deben
memorizarse nuevamente las emisoras y ajustar las fijaciones
de reproducción o grabación del temporizador.
Après une Interruption d’alimentation
L'heure courante doit ne nouveau être réglée. (Voir page 23.)
• Si l’interruption dure plus d’environ 24 heures, il faudra également
effectuer la mémorisation de stations et les réglages de lecture ou
d’enregistrement commandé par la minuterie.
19

PREPARATIONS
BEFORE OPERATION
CASSETTE TAPES
Usable tapes
For playback, use normal (type I), CrOz (type II), and metal (type
IV) tapes.
The proper bias and equalization to suit the type of tape are
selected automatically.
For recording, use a normal (type I) tape.
Tape slack
Take up any slack in the tape with a pencil or similar tool before use.
Slack tape may break or jam in the mechanism. Q
120-minute or longer tapes
These are extremely thin and easily deformed or damaged. They
are not recommended.
To prevent accidental erasure
Break off the plastic tabs on the cassette tape after recording, with
a screwdriver or other pointed tool. -> [0
® Side A
® Tab for side A
To record on the tape again, cover the tab openings with cello
phane tape.
DEMO
■DEMO
DEMO (DEMONSTRATION) MODE
When you first connect the AC cord, the display window demon
strates the unit’s preset functions.
When the power is turned on, the DEMO display is hidden by the
operation display. When the power is turned off, it is restored.
To cancel DEMO mode B
Press the DEMO button.
To reenter DEMO mode
Press the DEMO button again.
After a power interruption
The unit enters DEMO mode.
DIRECT PLAY FUNCTIONS
You can turn the unit on and start playback immediately by pressing
one of the direct play buttons. Press the TUNER/BAND button to
listen to the tuner, the TAPE button to listen to a tape, or the CD
button or DISC DIRECT PLAY buttons to listen to discs loaded in
the disc compartment.
20
NOTE
If the power is on, pressing the CD button or the TAPE button
selects a source to be played. Press the button to start play.

PREPARATIVOS
PREPARATIONS
ANTES DE LA OPERACION
CASSETTES DE CINTAS
Cintas utilízables
Para la reproducción, utilice las cintas normales (tipo I), Cr02 (tipo
II) y cinta metálica (tipo IV).
Se seleccionan automáticamente la polarización y la ecualización
adecuadas al tipo de la cinta.
Para la grabación, utilice una cinta normal (tipo I).
Cinta fioja
Tense cualquier cinta floja con un lápiz u otro objeto similar. La
cinta floja puede romperse o agarrotarse en el mecanismo de la
cinta. -► H
Cintas de 120 minutos o mayor
Estas cintas son muy delgadas y tienden a deformarse o dañarse,
por lo que se recomienda no utilizarlas.
Para evitar borraduras accidentaies
Rompa las lengüetas de plástico del cassette después de la
grabación, con un destornillador u otra herramienta puntiaguda.
-0
© Cara A
(2) Lengüeta para la cara A
Para grabar sobre una cinta grabada, cubra las aberturas de
lengüeta con una cinta adhesiva.
AVANT L’UTILISA TION
CASSETTES
Cassettes utilisables
Pour la lecture, utiliser des cassettes normales (type I), CrOa (type
II) ou au métal (type IV).
La polarisation et l’égalisation adaptées au type de cassette sont
sélectionnées automatiquement.
Pour l’enregistrement, utiliser une cassette normale (type l).
Tension du ruban
Avant d’utiliser une cassette, utiliser un crayon ou un objet similaire
pour tendre le ruban magnétique. Un ruban magnétique détendu
peut se rompre ou s’emmêler dans le mécanisme. -* 0
Cassettes de 120 minutes ou plus
Le ruban magnétique de ces cassettes est extrêmement fin et se
déforme et s’endommage facilement. Ces cassettes ne sont pas
recommandées.
Pour éviter un effacement accidentel
Utiliser un tournevis ou tout autre objet effilé pour casser les ergots
en plastique après l’enregistrement. -+ 0
® Face A
©) Ergot pour la face A
Pour enregistrer de nouveau sur une cassette, recouvrir les cavités
des ergots avec du ruban adhésif.
MODO DEMO (DEMOSTRACION) MODE DEMO (DEMONSTRATION)
Al conectar porprimera vez el cordón CA, la ventanilla visualizadora
muestra las funciones memorizadas del aparato.
Cuando la alimentación está conectada, la indicación DEMO
queda oculta por la visualización de operación. Se visualiza al
desconectarse la alimentación.
Para cancelar el modo DEMO -» 0
Presione el botón DEMO.
Para restablecer el modo DEMO
Presione nuevamente el botón DEMO.
Después de una interrupción eléctrica
El aparato entra en el modo DEMO.
Ouand on branche le cordon secteur, la fenêtre d’affichage montre
les fonctions mémorisées de l’appareil.
Lors de la mise sous tension, l’affichage de démonstration est
caché par l’affichage d’opération. Quand l’alimentation est coupée,
il est rétabli.
Pour annuier ie mode DEMO 0
Appuyer sur la touche DEMO.
Pour repasser au mode DEMO
Appuyer de nouveau sur la touche DEMO.
Après une interruption d’aiimentation
L’appareil passe au mode DEMO.
FUNCIONES DE REPRODUCCION DIRECTA
Usted puede encender el aparato e iniciar inmediatamente la
reproducción, presionando uno de los botones de reproducción
directa. Presione el botón TUNER/BAND para escuchar la radio,
el botón TAPE para escuchar una cinta, o el botón CD o los
botones DISC DIRECT PLAY para escuchar los discos cargados
en el compartimiento de discos.
FONCTIONS DE LECTURE DIRECTE
On peut mettre l’appareil sous tension et démarrer la lecture
immédiatement en appuyant sur une des touches de lecture
directe. Appuyer sur la toucheTUNER/EîAND pour écouter le tuner,
sur la touche TAPE pour écouter une cassette ou sur la touche CD
ou les touches DISC DIRECT PLAY pour écouter les disques en
place dans le compartiment à disques.
Con la alimentación conectada, presione el botón CD o el botón
TAPE para seleccionar la fuente deseada. Presione el botón
para iniciar la reproducción.
REMARQUE
Si l’appareil est sous tension, le fait d’appuyer sur la touche CD ou
la touche TAPE sélectionne une source à lire. Appuyer sur la
touche pour démarrer la lecture.
21

PREPARATIONS
SETTING THE CLOCK
When you first connect the AC cord, the II SET button flashes to
inform you that the current time needs to be set. Set the time as
foiiows, whiie the power is stiii off.
1
Sb'l
II
J
«◄DOWN UP^W
J
SFT
eg
j
«◄DOWN UP^M
= — 2,4
•!(
H It f_
I l_!^
---
1 Press the II SET button.
The hour fiashes.
2 Press the ◄◄ DOWN or
designate the hour.
3 Press the II SET button to set the hour.
The hour stops flashing and the minute starts fiashing.
4 Press the DOWN or UP button to desig
nate the minute.
5 Press the II SET button to set the minute and
compiete setting.
The minute stops fiashing in the dispiay and the ciock starts
running from 00 seconds.
To set the time more accurateiy, press the II SET button when
another ciock or a time signal indicates that the current time is
00 seconds.
Each coion fiash in the dispiay indicates one second.
To correct the current time -♦ ES
Press the CLOCK button on the remote controi. The ciock is
dispiayed and the II SET button on the main unit flashes for 4
seconds.
Within this period, press the II SET button and continue by
foilowing steps 2 to 5.
To display the current time while the power is on
Press the CLOCK button on the remote control. The current time
is dispiayed for 4 seconds.
However, the time cannot be dispiayed, during recording.
UP button to
c
SET
II
I,
J
J
_< _ *
I
) J
Ills'
■(JLUtJK
To switch to the 24-hour standard
The clock is factory-set to the 12-hour standard. To switch to the
24-hour standard, press the CLOCK button on the remote control
and then press the ■ button within 4 seconds. Repeat the same
procedure to restore the 12-hour standard.
After a power interruption
If you switch the display to clock, the clock flashes to remind you
that the current time needs to be reset.
22

PREPARATIVOS
PREPARATIONS
AJUSTE DEL RELOJ
Al conectar el cordón CA, parpadea el botón 11 SET para informarle
que la Indicación horaria debe ajustarse. Ajuste la indicación
horaria mientras que la alimentación esté desconectada.
1 Presione el botón II SET.
Parpadea la hora.
2 Presione el botón ◄◄ DOWN o ►► UP para
ajustar la hora.
3 Presione el botón II SET para fijar la hora.
La Indicación de “hora” deja de parpadeary empieza a parpadear
la indicación de “minutos”
4 Presione el botón DOWN o ►► UP para
ajustar los minutos.
5 Presione el botón II SET para fijar los minutos y
terminar el ajuste del reloj.
La Indicación de “minutos” deja de parpadear en el visualizador
y el reloj se pone en funcionamiento de 00 segundos.
Para obtener la indicación más exacta del reloj, presione el
botón II SET en el preciso momento que se dé la señal horaria
oficial.
Cada destello del punto en el visualizador indica un segundo.
Para corregir la indicación horaria -* □
Presione el botón CLOCK del control remoto. Se visualiza el reloj
y el botón II SET del aparato principal parpadea durante 4
segundos.
Dentro de este período, presione el botón II SET y siga los pasos
2 al 5.
Para visualizar la hora con la alimentación conectada
Presione el botón CLOCK del control remoto. La presente hora se
visualiza durante 4 segundos.
Sin embargo, esto no puede obtenerse durante la grabación.
Para cambiar a la indicación del sistema de 24 horas
El reloj está ajustado en fábrica al sistema de 12 horas. Para
cambiar al sistema de Indicación de 24 horas, presione el botón
CLOCK del control remoto y luego oprima el botón ■ dentro de 4
segundos. Repitael mismo procedimiento para restablecer el reloj
a la indicación del sistema de 12 horas.
Después de una interrupción eléctrica
Si intenta visualizar el reloj, el reloj parpadea para indicarle que
debe ajustarse la hora.
REGLAGE DE L’HORLOGE
Quand on branche le cordon secteur, la touche II SET clignote
pour signaler que l’heure courante doit être réglée. L’alimentation
étant coupée, régler l’heure comme décrit cl-dessous.
1 Appuyer sur la touche II SET.
Les heures clignotent.
2 Appuyer sur la touche DOWN ou UP pour
spécifier les heures.
3 Appuyer sur la touche II S>ET pour régler les
heures.
Les heures arrêtent de clignoter et les minutes se mettent à
clignoter.
4 Appuyer sur la touche ◄◄ DOWN ou ►► UP pour
spécifier les minutes.
5 Appuyer sur la touche II SET pour régler les
minutes et terminer le réglage.
Les minutes arrêtent de clignoter sur l’affichage et l’horloge
démarre à 00 seconde.
Pour régler l’heure avec plus de précision, appuyer sur la
touche II SET quand une autre horloge ou un signal horaire
indique que l’heure courante est à 00 seconde.
Chaque clignotement des points sur l’affichage indique une
seconde
Pour corriger l’heure courante -► □
Appuyer sur la touche CLOCK de la télécommande. L’horloge est
affichée et la touche II SET de l’unité principale clignote pendant
quatre secondes.
Pendant cette période, appuyer sur la touche II SET et continuer
en suivant les étapes 2 à 5.
Pour afficher l’heure courante quand la chaîne est sous
tension
Appuyer sur la touche CLOCK de la télécommande. L’heure
courante est affichée pendant quatre secondes.
Toutefois, l’heure ne peut pas être affichée pendant l’enregistrement.
Pour passer au format de 24 heures
L’horloge est réglée à la fabrique sur le format de 12 heures. Pour
passer au format de 24 heures, appuyer sur la touche CLOCK de
la télécommande puis appuyer sur la touche ■ dans les quatre
secondes qui suivent. Pour revenir au format de 12 heures,
procéder de la même manière.
Après une interruption d’alimentation^
Si on passe à l’affichage de l’horloge, elle clignote poursignalerque
l’heure courante doit être réglée de nouveau.
23

ADJUSTING THE SOUND
VOLUME □
To adjust the volume with the VOLUME control on the main unit
To increase the volume, turn the VOLUME control clockwise.
To decrease the volume, turn the VOLUME control
counterclockwise.
To adjust the volume with the VOLUME buttons on the
remote control
To increase the volume, press the /\ button.
To decrease the volume, press the V button.
BBE system (NSX-3900 only) — For clear and vivid
high-definition sound -» Q]
The BBE system enhances the clarity of high-frequency sounds. It
also helps your voice to be clearer when singing with the Karaoke
functions.
Press the BBE button. Each time it is pressed, the level changes.
Select one of the four levels, or the off position, to suit your
preference.
Recording with BBE
Sound can be recorded with BBE. When listening to a tape
recorded with BBE, it is recommended that BBE be set to off.
SUPER T-BASS — For louder deep bass -* B
T-BASS function enhances the realism of low-frequency sounds.
Press the T-BASS button to turn on the giiiill indicator.
To turn it off, press the T-BASS button again.
T-BASS T-BASS
llllllll ^
irtll
POP
b.
CLASSIssj^ I
POP
GEQ (GRAPHIC EQUALIZER) ^ [>]
For greater listening pleasure, you can select one of three different
equalization curves.
ROCK: Powerful sound emphasizing treble and bass.
POP: More presence of vocals and midrange.
CLASSIC: Sound enriched with heavy bass and fine treble.
a. To select an equalization mode
Press one of the GEQ buttons. You can check the selected mode
in the display.
b. To cancel the selected mode
Press the selected button again.
EQ oFF is displayed.
c. To select with the remote control
Press the GEQ button repeatedly until the desired equalization
curve is displayed.
ROCK-
POP- ■ CLASSIC -
EQ OFF
24
GEQ

SONIDO
AJUSTE DEL SONIDO
VOLUMEN -» □
Para ajustar el volumen con el control VOLUME del aparato
principal
Para aumentar el volumen, gire el control VOLUME a la derecha.
Para disminuir el volumen, gire el control VOLUME a la izquierda.
Para ajustar el volumen con los botones VOLUME del
control remoto
Para aumentar el volumen, presione el botón /\.
Para disminuir el volumen, presione el botón V.
Sistema BBE (sólo NSX-3900) — Para obtener un
sonido altamente nítido y vivido Q]
El sistema BBE hace más nítido el sonido de alta frecuencia. Ayuda
también a hacer más nítido su voz cuando cante con las funciones
de Karaoke.
Presione el botón BBE. Cada vez que presione este botón, cambia
el nivel. Seleccione uno de los cuatro niveles, o la posición OFF,
según su gusto.
Grabación con BBE
El sonido puede grabarse con BBE. Cuando escuche una cinta
grabada con BBE, es preferible desactivar la función BBE.
SUPER T-BASS — Para hacer más intenso los tonos
graves profundos -► B
La función T-BASS hace más real el sonido de baja frecuencia.
Presione el botón T-BASS para encender el indicador miilll.
Para apagarlo, presione nuevamente el botón T-BASS.
GEQ (ECUALIZADOR GRAFICO) ^ ^
Para mayor deleite musical, seleccione una de las tres siguientes
curvas de ecualización.
ROCK: Sonido potente que acentúa los tonos graves y agudos.
POP; Con mayor relieve en los vocales y en la gama media.
CLASSIC: Sonido enriquecido con tonos graves intensos y tonos
agudos finos.
a. Para seleccionar un modo de ecualización
Presione repetidamente uno de los botones GEQ. Usted podrá
verificar el modo seleccionado en el visualizador.
REGLAGE DU SON
VOLUME □
Pour régler le volume avec la commande VOLUME de
l’unité principale
Pour monter le volume, tourner la commande VOLUME vers la
droite.
Pour baisser le volume, tourner la commande VOLUME vers la
gauche.
Pour régler le volume avec les touches VOLUME de la
télécommande
Pour monter le volume, appuyer sur la touche T\.
Pour baisser le volume, appuyer sur la touche V'.
Système BBE (NSX-3900 seulement) — Pour
un son clair et de haute définition |§]
Le système BBE améliore la clarté des sons de haute fréquence.
Il permet également d’obtenir une voix plus claire quand on chante
avec les fonctions Karaoke.
Appuyer sur la touche BBE. A chaque pression sur cette touche, le
niveau change. Sélectionner un des quatre niveaux ou la position
de repos, comme on préfère.
Enregistrement avec BBE
Le son peut être enregistré avec BBE. Pour écouter une cassette
enregistrée avec BBE, il est conseillé de mettre le système BBE
hors service.
SUPER T-BASS — Pour des basses plus graves et
profondes -► B
Le système T-BASS améliore le réalisme des sons de basse
fréquence.
Appuyer sur la touche T-BASS pour allumer l’indicateur .miill.
Pour éteindre cet indicateur, appuyer de nouveau sur la touche T-
BASS.
GEQ (EGALISEUR GRAPHIQUE) ^ Q
Pour un plus grand plaisir d’écoute, on peut sélectionner une des
trois courbes d’égalisation différentes.
ROCK: Son puissant accentuant les aigus et les graves.
POP: Présence accrue des parties vocales et de la gamme
moyenne.
CLASSIC: Son enrichi par des graves puissants et des aigus fins.
b. Para cancelar el modo seleccionado
Presione otra vez el botón seleccionado.
Se visualiza EQ oFF.
c. Para la selección con el control remoto
Presione repetidamente el botón GEQ hasta que se visualice la
curva de ecualización deseada.
ROCK- POP-
■ CLASSIC ■
EQ oFF -
a. Pour sélectionner un mode d’égalisation
Appuyer sur une des touches GEQ. On peut vérifier le mode
sélectionné sur l’affichage.
b. Pour annuler le mode sélectionné
Appuyer de nouveau sur la touche sélectionnée.
EQ oFF est affiché.
c. Pour sélectionner avec la télécommande
Appuyer sur la touche GEQ à plusieurs reprises jusqu’à ce que la
courbe d’égalisation souhaitée soit affichée.
ROCK-
POP-
CLASSIC •
EQ oFF
C
25

ADJUSTING THE SOUND
DSP (DIGITAL SIGNAL PROCESSOR) 0
The sound of a concert hall Is produced by sounds reflected from
the walls and celling, reinforcing the sounds coming directly from
the orchestra.
You can use this unit’s DSP circuits to recreate reflected sounds
digitally, to obtain the sound presence of a disco, live music
performance or concert hall.
In addition, the supplied speaker system has a surround speaker
which faces upward and outside, for a surround sound effect.
By selecting a DSP mode, you can obtain more effective surround
sound.
Sound characteristics of DSP modes
There are three DSP modes. Equalization curves are selected
automatically to match the DSP sound.
a.
b.
c.
Adisco
Adisco
о
О
о I о
UVE I HALL^
о
О ^
LIVE
HALL^
DSP
I/1-
f
____
L U
Ь " о h h
Sound characteristics
DISCO
Surround
LIVE
Surround
HALL
Surround
• The graphic equalization curve can also be selected or turned off,
as you prefer.
A powerful sound like that of a disco.
The graphic equalizer is automatically set to ROCK.
A vibrant sound like that of a live music performance.
The graphic equalizer is automatically set to POP.
A sound presence like that of a concert hall.
Suitable for playback of orchestral music.
The graphic equalizer is automatically set to CLASSIC.
a. To seiect a DSP mode
Press one of the DSP buttons.
You can check the selected mode in the display.
b. To cancel the selected DSP mode
Press the selected DSP button once more.
S-oFF is displayed.
c. To select with the remote control
Press the DSP button repeatedly until the desired mode is dis
played.
DISCO—► LIVE —►HALL—►S-oFF-
Г
When the music source is monaural
A simulated stereo effect can be obtained by selecting the LIVE
mode.
26
NOTE
If you press the MIC ECHO button to echo the sound, the selected
DSP mode is automatically canceled.
When you select a DSP mode. MIC ECHO is set to OFF automati
cally.
SOUND ADJUSTMENT DURING RECORD
ING
The output volume and tone (T-BASS, GEO and DSP) of the
speakers or headphones may be freely varied without affecting the
level of the recording.
 Loading...