

Airthings Ethernet Hub
User Manual
Congratulations on taking this important step toward living a healthier life.
By keeping track of your radon and indoor air quality levels, you can make healthier decisions
in the spaces where you spend most of your time. Reducing your exposure to radon will
reduce your risk of lung cancer.
The Airthings Hub brings your Airthings devices online, providing on-demand access to your
indoor air quality data at any time, from anywhere. Connect to the Airthings Wave App to get
started.
Remote access to Your Airthings system
Version 1
22 April 2020
Breathe better, live better,
The Airthings Team
Get in touch
For technical support or if you have any questions or comments
that we did not answer here, you can reach us the following ways:
• The Support menu in the Airthings Wave mobile app
• Chat bubble on the airthings.com website
• Send an email to support@airthings.com

What’s in the box
Airthings Hub
Power supply and plugs
Ethernet cable
Rubber bumper pads
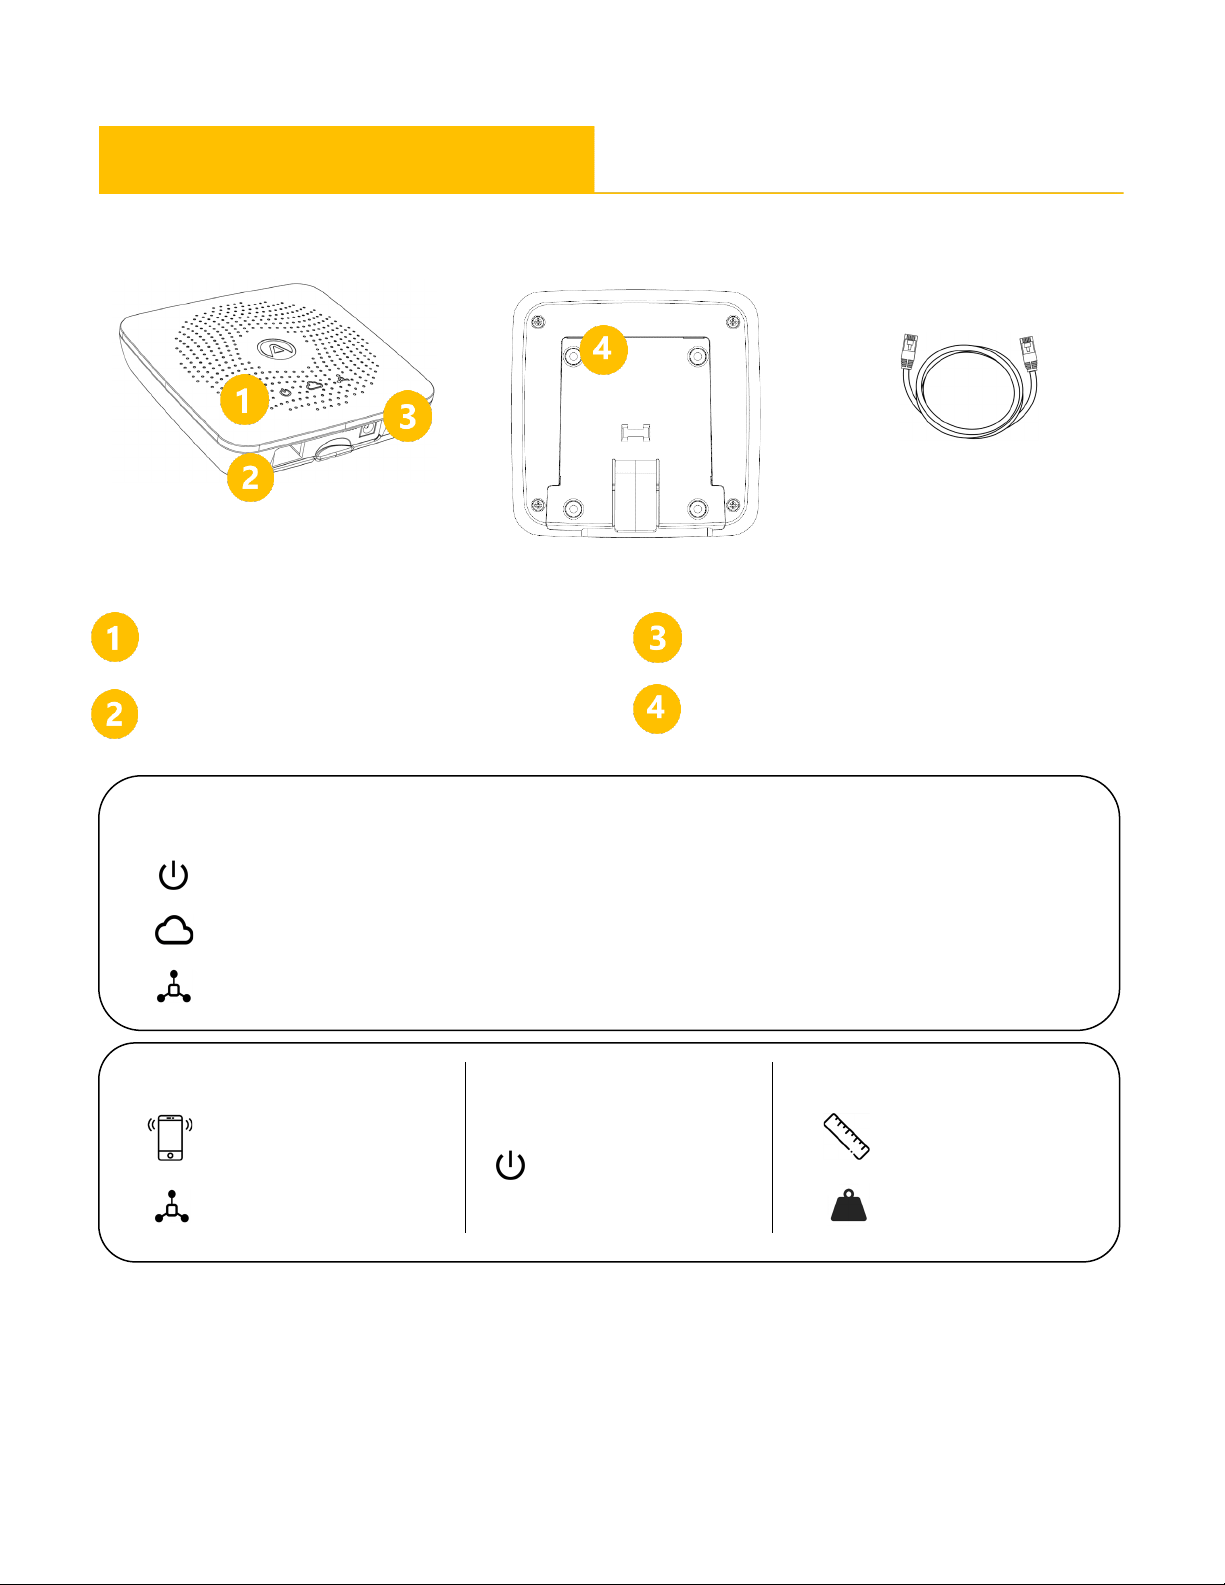
Hub Specifications
Light Indicators
One or more Wave devices are connected and actively sending data
Communication
Power Supply
Dimensions & Weight
Bluetooth low energy
Input:
5VDC / 2A
Airthings Smartlink
868 / 915 Mhz
Connectivity
Ethernet
Light indicators
Ethernet port
Power supply is connected and Hub is running
Communication with Airthings cloud is successful
(for adding Hub only)
100-240VAC / 50-60Hz
Output:
Power input
Wall mounting bracket
125mm (4.9”)
249g (8.8oz)

Hub Setup
STEP 1 Airthings Wave App
Download or update the Airthings Wave App from the Apple App Store or Google Play
Store. If you already have Airthings Wave App and Airthings Wave devices, please sync
sensor data before proceeding.
STEP 2 Assembly
Assemble the power supply adapter using your regional power plug.
STEP 3 Placement
Place the Hub near a free Ethernet port. It should be placed at least 30cm / 1ft away from
WiFi routers and other WiFi enabled devices. The range of the Hub should be long enough
to cover even a large family home.
The Hub should be placed in normal indoor environmental conditions and can be either
placed wall mounted or lying down on a flat surface.
STEP 4 Connections
Connect the Ethernet cable and power supply. You should see the Hub power indicator light
up.
After 10 seconds, the Hub cloud indicator should light up to indicate successful
communication between the Hub and the Airthings cloud.
STEP 5 Add Hub to your Airthings account
Add your Hub to your account using the sign in the App.
This step requires Bluetooth to be enabled on your phone to find the Hub. Android also
requires location to be enabled.
The phone should be less than 1m / 3ft away from the Hub when the Airthings Wave app
searches for the Hub.
Note:
When adding the Hub, it is very important that the correct region is selected (Europe / North
America) for proper functionality. This ensures that the correct wireless frequency is used by
the Hub for your region.
 Loading...