

Page 1
Super G Wireless USB 2.0 Adapter
Model # AWLL4030
User’s Manual
Ver. 1A
Page 2

Table of Contents
1. Introduction.................................................................................................3
1.1 Features................................................................................................. 3
1.2 Specifications .........................................................................................3
1.3 Package Contents...................................................................................4
2 Installation ................................................................................................... 5
2.1 Installation for Windows 98SE/ME ...........................................................5
2.2 Installation for Windows 2000/XP ............................................................ 7
3. Configure USB Adapter ............................................................................. 12
4. Configure Client Utility............................................................................... 15
4.1 Current Status ...................................................................................... 15
4.2 Profile Management.............................................................................. 16
4.3 Modifying Profiles ................................................................................. 17
4.3.1 General tab ..................................................................................... 17
4.3.2 Security........................................................................................... 18
4.3.3 Advanced........................................................................................ 22
4.4 Diagnostics........................................................................................... 23
5. Verify Driver Installation............................................................................. 24
Technical Support ......................................................................................... 26
2
Page 3

1. Introduction
Thank you for purchasing the Super G Wireless USB 2.0 Adapter. This USB
Adapter is designed to comply with IEEE 802.11g Wireless LAN standard and is
easy to carry with its minimal size. It is suitable for any laptop or desktop
computer.
This Adapter supports 64/128/152-bit WEP data encryption that pr otects your
wireless network from eavesdropping. It also supports WPA (Wi-Fi Protected
Access) feature that combines IEEE 802.1x and TKIP (Temporal Key Integrity
Protocol) technologies. Client users are required t o authorize before accessing
the APs or AP Routers, and the data transmitted in the network is
encrypted/decrypted by a dynamically changing secret key.
The Adapter supports the Super G mode feature which enhances the data rate
to 108Mbps when it is connected to a Super G compatible device.
1.1 Features
•
Complies with IEEE 802.11b and IEEE 802.11g 2.4GHz standards.
• Up to 54Mbps high data transfer rate (108Mbps in Super G mode).
• Supports 64/128/152-bit WEP, WPA, and IEEE 802.1x high-level security.
• Complies with IEEE 802.11d country roaming standard.
• Supports the most popular operating system: Windows 98SE/ME/2000/XP.
• Supports USB 2.0/1.1/1.0 interface.
• Portable and mini-size design.
• Suitable for any notebook or desktop PC.
1.2 Specifications
•
Standard: IEEE 802.11g/b
• Bus Type: USB 2.0 Type A
• Frequency Band: 2.4000~2.4835GHz (Industrial Scientific Medical Band)
• Modulation: OFDM with BPSK, QPSK, 16QAM, 64QAM (11g)
BPSK, QPSK, CCK (11b)
• Data Rate: 54/48/36/24/18/12/11/9/6/5.5/2/1Mbps auto fallback (108Mbps:
Super G enabled)
• Security: 64/128/152-bit WEP Data Encryption, WPA , IEEE 802.1x
• Antenna: Internal Antenna
• Drivers: Windows 98SE/ME/2000/XP
3
Page 4

• LED: Link/Activity
• Transmit Power: 16dBm (Typical)
• Dimension: 9(H) x 27(W) x 87(D)
• Temperature: 32~131°F (0 ~55°C)
• Humidity: 0-95% (Non-Condensing)
• Certification: FCC, CE
1.3 Package Contents
Before you begin the installation, please check the items of your package. Th e
package should include the following items:
• One Super G Wireless USB Adapter
• One USB 2.0 Extension Cable (100 cm)
• One Quick Installation Guide
• One Installation CD (Driver/Utility/Manual)
4
Page 5

2 Installation
2.1 Installation for Windows 98SE/ME
The following steps are for Windows 98SE/ME
Note: Do not insert the USB Adatper into the computer until you’ve reached the
appointed step.
Step 1 Insert the Installation CD into the CD drive and wait for the autorun screen to
appear.
Note: If the autorun screen doesn’t appear automatically go to Start, Run, and
type D:\autorun.exe (where D is the letter of your CD drive) and click OK.
Step 2 Click Install Driver (Window s 98SE/ME).
Step 3 Click Next at the welcome screen.
Step 4 Click Next to accept the License Agreement.
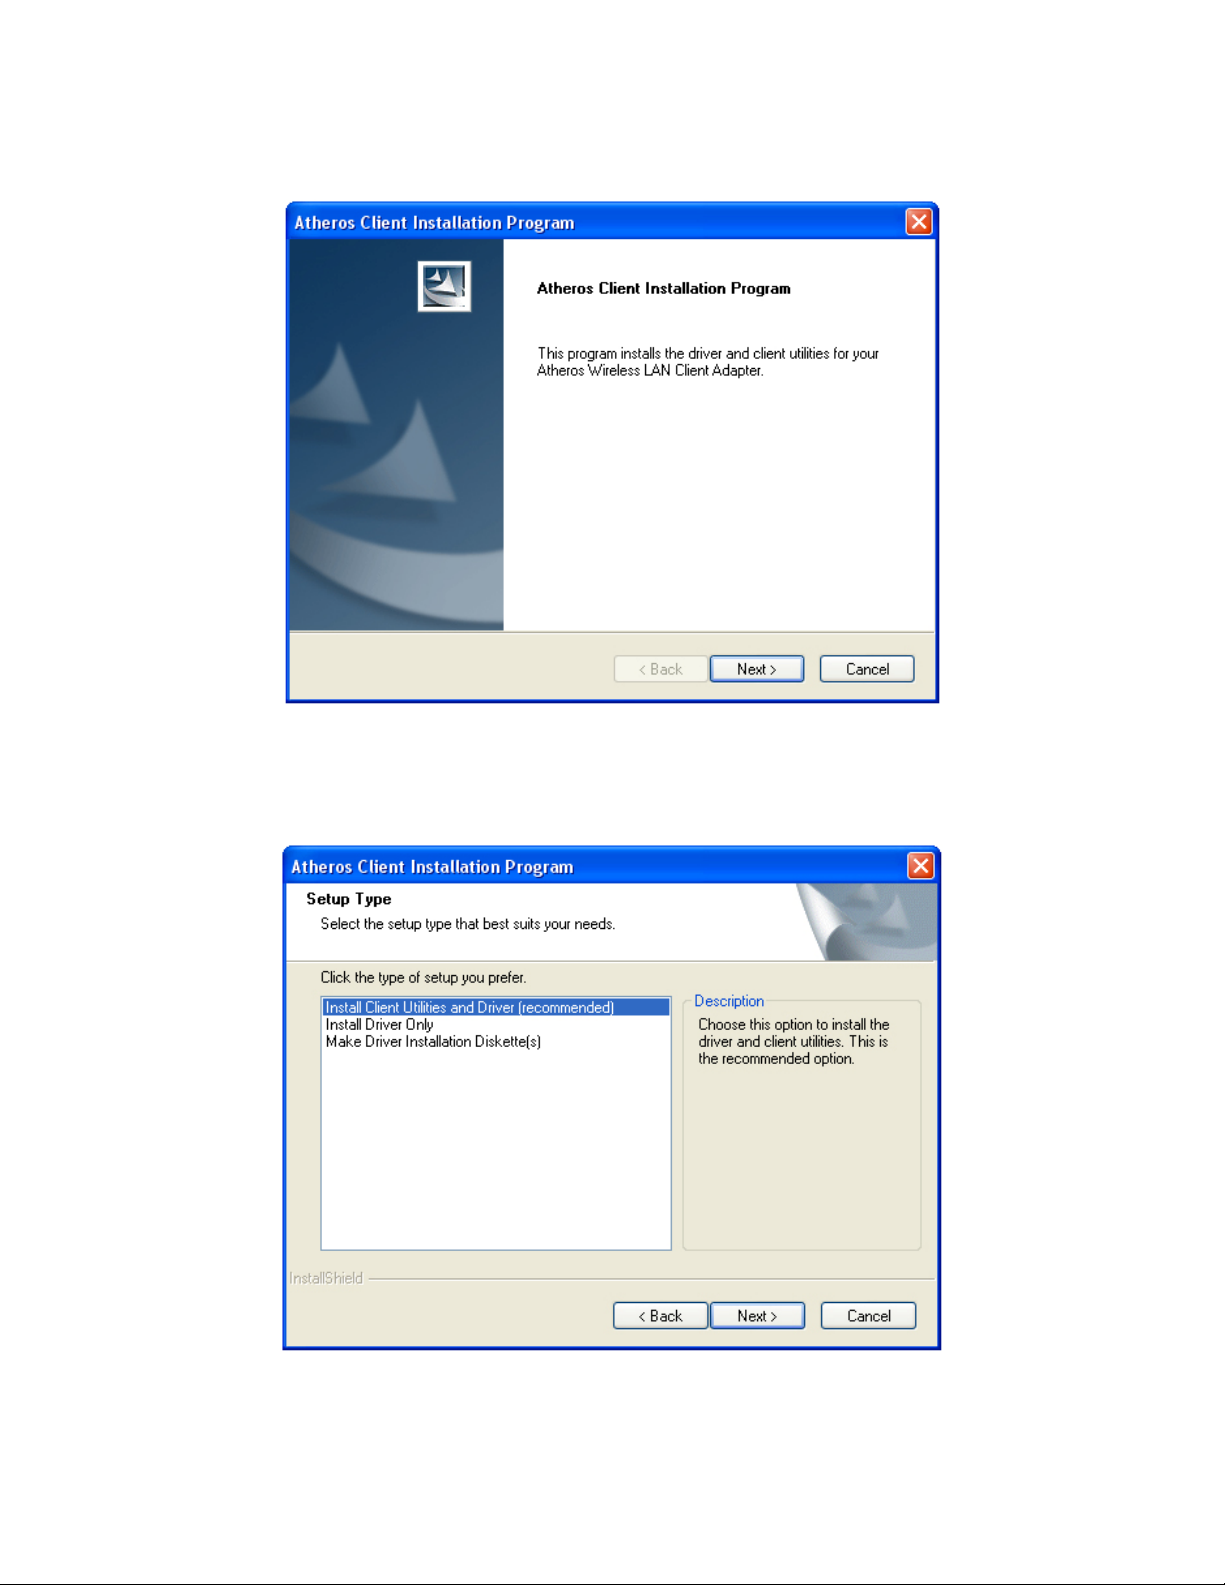
Step 5 Verify Install Client Utilities and Driver is selected and click Next.
5
Page 6

Step 6 Click Yes to acknowledge the need for a reboot after the installation.
Step 7 Click Next to accept the default Destination Folder.
Step 8 Click OK t o acknowledge the prompt.
Step 9 Click OK to reboot y our computer.
Step 10 After your computer is restarted, insert the USB Adapter into the
computer.
Step 11 Click Next at the Add New Hardware Wizard.
Step 12 Verify Search for the best driver for your device is selected and click
Next.
Step 13 Click Next to install the driver.
Step 14 Click Finish to exit the wizard.
Step 15 Restart the computer to complete the driver installation.
6
Page 7

2.2 Installation for Windows 2000/XP
The following steps are for Windows 2000/XP.
For Windows 2000/XP, you must update your USB driver to USB 2.0
For Windows XP you must install Service Pack 2 prior to installing the USB
Adapter.
Note: Whenever the Found New Hardware Wizard appears, click Cancel to quit the
wizard and continue with the installation.
Step 1 Insert the Wireless USB Adapter to the computer’s USB port.
Step 2 Insert the Installation CD into the CD drive and wait for the autorun screen to
appear.
Note: If the autorun screen doesn’t appear automatically go to Start, Run, and
type D:\autorun.exe (where D is the letter of your CD drive) and click OK.
Step 3 Click Install Driver (Window s 2000/XP).
7
Page 8
Step 4 Click Next at the welcome screen.
Step 5 Click Next to accept the License Agreement.
Step 6 Verify Install Client Utilities and Driver is selected and click Next.
8
Page 9

Step 7 Click Yes to acknowledge the need for a reboot after the installation.
Step 8 Click Next to accept the default Destination Folder.
Step 9 Click Next t o accept the default Program Folder.
9
Page 10

Step 10 Read the notes carefully and click Next.
Step 11 Verify Atheros Client Utlity and Supplicant is selected and click Next.
Step 12 Click OK to acknowledge the prompt.
Step 13 Click Continue Anywa y at the Windows Logo prompt for the
Bootloader Download. (Click Yes for Windows 2000).
10
Page 11

Step 14 Click Continue Anywa y at the Windows Logo prompt for the Wireless
Network Adapter (Click Yes for Windows 2000).
Step 15 Click OK to reboot your computer.
11
Page 12

3. Configure USB Adapter
The following steps are for Windows 98SE/ME/2000/XP.
If you already have signal strength and valid IP address, you do not need to
perform the following steps.
Step 1 Start the Atheros Client Utility by double-clicking on it from your desktop.
Step 2 If there is no Signal Strength and/or the IP Address is all 0’s, select the
Profile Managment tab.
12
Page 13

Step 3 Select the Default profile and click Modify.
Step 4 Enter the SSID (Network Name) that your wireless router/access point is
using in the SSID field and click OK.
13
Page 14

Step 5 Return to the Current Status tab and verify that you have signal strength
and valid IP address.
If your wireless router/access point has encryption enabled, you’ll
need to apply the same encryption settings to the Adapter as well.
For information on how to configure encryption, please refer to
Section 4.3.2 of this manual for more detail.
14
Page 15

4. Configure Client Utility
The Client Utility is a user-friendly utility designed to configure the wireless
settings of the USB Adapter as well as to display its network status.
4.1 Current Status
When you open the Client Utility, the system will scan all the channels to find all
the access points/stations within the accessible range of your Adapter and
automatically connect to the wireless device with the highest signal strength.
From this tab, you can see all the infomration about the wireless connection.
15
Page 16

4.2 Profile Management
The Profile Managment tab allows you to add and edit profiles for your USB
Adapter. Profiles are used to save various settings so you can eas ily choose
between them without having to manually set the settings each time.
Parameter Description
New To add a new profile, click New on the Profile
Management tab.
Modify
Remove To remove a profile, select the desired profile from the
Import
Export
To modify an existing profile, select the desired profile from
the list and click Modify. For more information, see 4.3.
list and click Remove.
You can import an existing profile if you have previously
saved it as a file in your hard drive.
You can export a profile and save it as a file in your
hard drive.
16
Page 17

Order Profiles
Including a profile in the auto selection list allows the
Adapter to automatically select that profile from the list
and use it to connect to the network.
4.3 Modifying Profiles
4.3.1 General tab
The General tab allows you to set up to three SSIDs for each profile. Enter the
SSID of your wireless network in the applicable fields.
17
Page 18

4.3.2 Security
By default, wireless security is turned off. To enable encryption, se lect the
appropriate security option from the list. You must use the same encryption
settings as your wireless router/access point.
It is recommended to use WPA Passphrase if your wireless router/access point
is capable of using WPA security.
To access the Security tab, first select a profile from the Profile Management tab
and click Modify, then click on the Security tab.
18
Page 19

To enable WPA encryption, select WPA Passphrase from the list and click
Configure.
Enter a Passphrase between 8 and 64 character s long and click OK. The
Passphrase must be the same as your wireless router/access point is using.
The Adapter will rescan the network and connect to the wireless router/access
point using the provided Passphrase.
19
Page 20

To enable WEP encryption, select Pre-Shared Key (Static WEP) from the list
and click Configure.
Enter the appropriate WEP key values in the applicable fields. The key values,
key size, and key entry must be exactly the same as your wireless router/access
point is using. Click OK when done.
20
Page 21

Key Button Description
Key Entry Determines the entry method for an encryption key:
hexadecimal (0-9, A-F), or ASCII text (all keyboard
characters except spaces).
Encryption
Keys
Selects the default encryption keys to be used. The
Key number must match that of the wireless
router/access point.
WEP Keys (1-
4)
Click on the radio button to set the key as the default
encryption key.
WEP Key Size
Defines the size for each encryption key. The
options include:
64-bit (enter 10 digits for hexadecimal, 5 ASCII
characters)
128-bit (enter 26 digits for hexadecimal, 13 digits for
ASCII)
152-bit (enter 32 digits hexadecimal, 16 digits for
ASCII)
The Adapter will rescan the network and connect to the wireless router/access
point using the provided WEP key.
21
Page 22

4.3.3 Advanced
The Advanced tab allows you to fine-tune the Adapter’s wireless settings.
Transmit Power Level: Use the drop-down menu to select the desired transmit
power level for the Adapter.
Wireless Mode: By default, all modes are enabled. To disable a mode, uncheck
the corresponding check box.
Power Save Mode: Select the desired power save mode.
Network Type: Choose between Infrastructure or Ad-Hoc.
Note: You will not be able to access the Internet if you set the Adapter to Ad-
Hoc mode. To allow other wireless clients to access the Internet thr ough the
Adapter in Ad-Hoc mode, you will need to configure your comput er as a router
and a DHCP server. The vendor will not provide any technical support in regards
to the USB adapter functioning as an access point.
802.11b Preamble: Choose between Short & Long or Long Only.
22
Page 23

4.4 Diagnostics
The Diagnostics tab provides a list of the Adapters statistics.
Parameter Description
Adapter Information The Adapter Information contains general information
about the network interface card (the wireless network
adapter) and the network driver interface specificat ion
(NDIS) driver.
Advanced Statistics Displays even more advanced statistics about the
Adapter.
23
Page 24

5. Verify Driver Installation
To verify if the driver has been installed successfully, please perf orm the
following steps.
Step 1 Right-click on My Computer from your desktop and select Properties.
Step 2 Select the Hardware tab and click on Device Manager.
24
Page 25

Step 3 Expand Network adapters from the list and verify that Atheros USB 2. 0
Wireless Network Adapter is listed and no yellow question mark is beside it.
Congratulations! You have successfully installed the Super G
Wireless Network Adapter.
25
Page 26

Technical Support
E-mail: support@airlink101.com
Toll Free: 1-888-746-3238
Web Site: www.airlink101.com
*Theoretical maximum wireless signal ra te based on IEEE sta ndard 802.11g specificati ons. Actual data throughpu t
will vary. Network conditions and environmental factors, including volume of network traffic, building materials and
construction, mix of wireless products used, radio frequenc y interference (e.g., cordless telephones and microwaves)
as well as network overhead lower actual data throughput rate.
Copyright © 2005 AirLink101. All rights reserv ed. AirLink101, the styliz ed AirLink101 logo, speci fic product
designations, and all other words a nd logos that are iden tified as trademarks and/ or service marks are, unless
noted otherwise, the trademarks an d service marks of AirLi nk101. All other product or service names are t he
property of their respective holders. AirLink1 01 products are protected under num erous U.S. and foreign patents
and pending applications, mask work rights, and copyrigh ts.
26
 Loading...