

Page 1
150N Draft 802.11n Wireless Router
Model # AR670W
Quick Installation Guide
Ver. 1A
Page 2
Section 1
Section 1
This Quick Installation Guide only provides the basic instructions. For more
detailed information, please refer to the User’s Manual on the supplied CD.
Connecting the Router
Note: Prior to connecting the router, be sure to power of f your computer, DSL/Cable modem,
and the router . Y ou should setup the router with a wired connection first before attempting to
setup any wireless connections.
Step 1 Connect one end of the network cable to the WAN port of the router and connect the
other end of the cable to the DSL/Cable modem.
Step 2 With another network cable, connect one end of the cable to your computer’s network
card and connect the other end to one of the LAN (Ethernet) ports on the router .
Step 3 Power on the DSL/Cable modem and wait for the lights on the modem to settle
down.
Step 4 Power on the router by connecting one end of the supplied power adapter to the
power jack of the router and connecting the other end to an electrical outlet.
Step 5 Power on your computer.
Step 6 Make sure the WAN, Wireless, and the LAN ports that the computer is connected to
are lit. If not, try the above steps again.
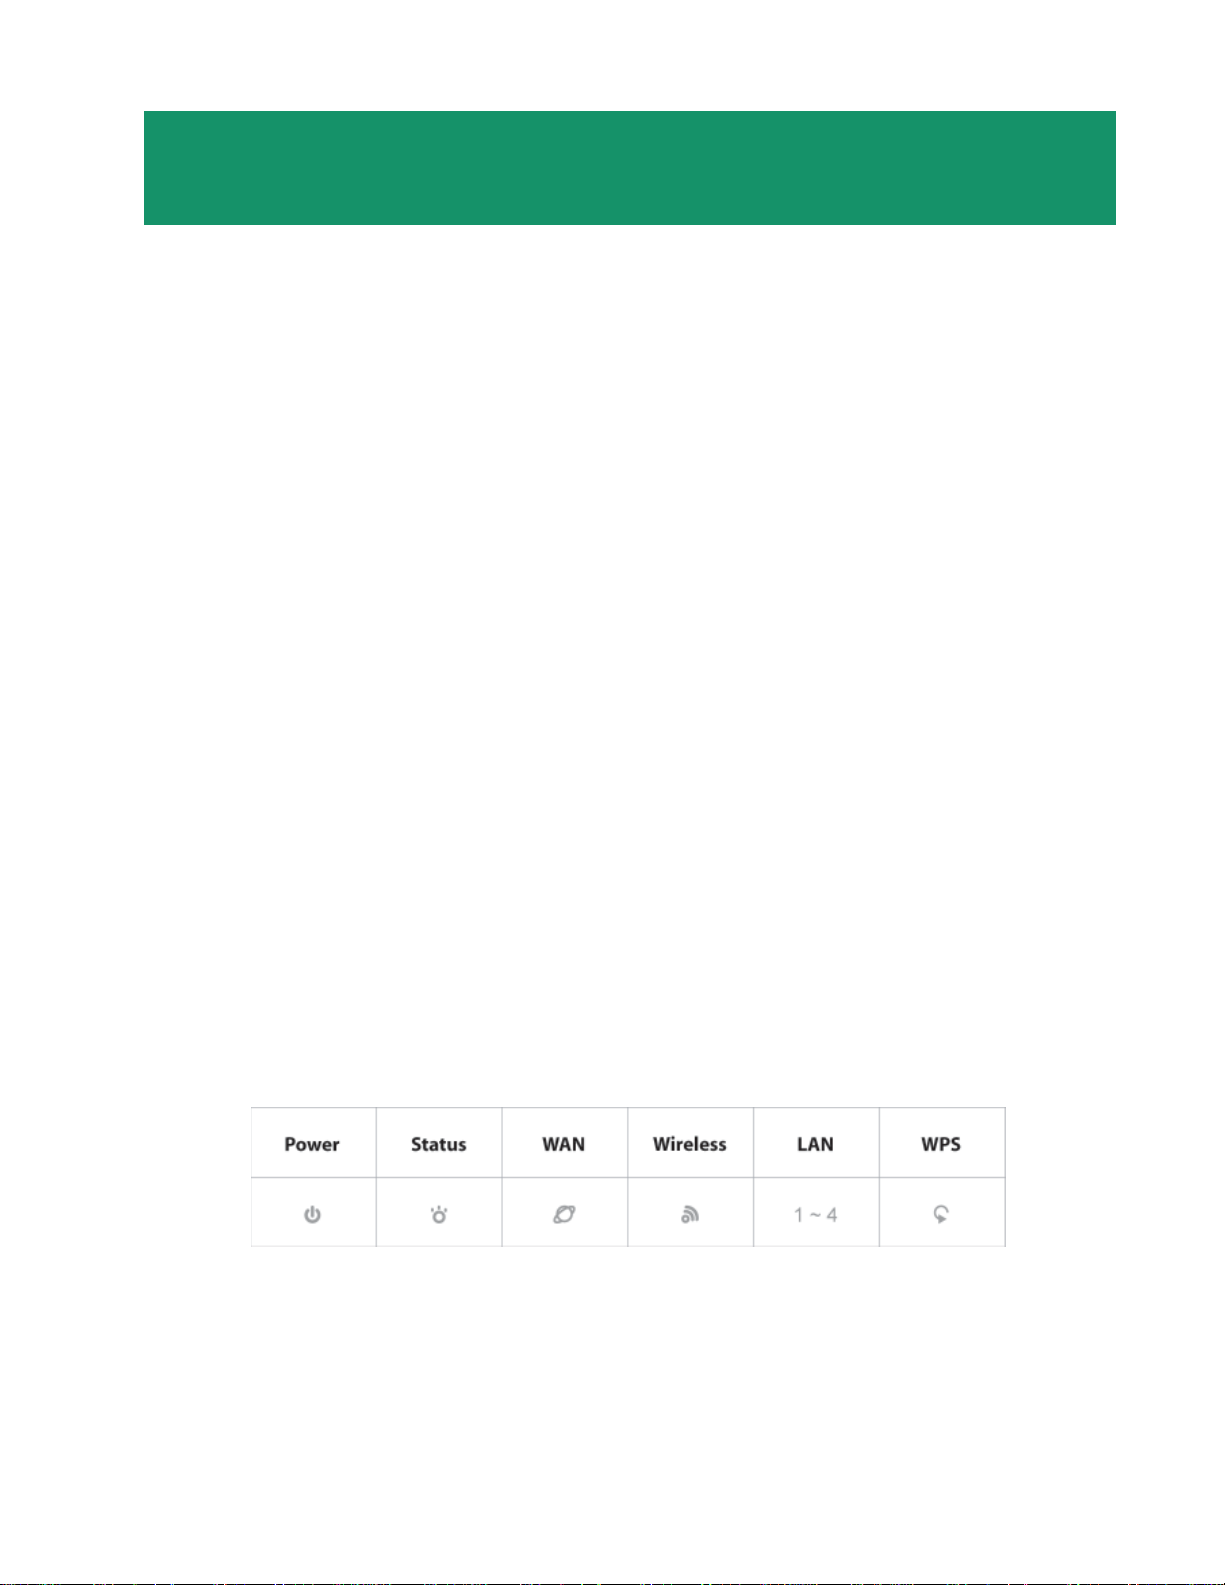
AR670W Icon Illustrations:
Power
On: Power on
Status
Blinking: Function properly .
WAN
On: Link established / Blinking: Data transmission
Wireless
On: Wireless is ready / Blinking: Data transmission
LAN
On: Link established / Blinking: Data transmission
WPS (WiFi Protected Setup)
Blinking Green: WPS setting in progression
Static Green: WPS successfully set up
Blinking Red: Error found
Page 3

Section 2
V erifying Connection to the Router
Step 1 Go to Start, Run, type command (for Windows 95/98/ME) or cmd (for Windows
2000/XP) and click OK. You will see the command prompt as below.
Step 2 Type ping 192.168.1.1 and press Enter. You should get four reply responses back.
Step 3 If you get Request timed out, or Destination host unreachable, double-check the
network cable connection between the computer and the router and try Step 2 again. If you
still encounter problem, go to the next step; otherwise proceed to Section 3, Configuring the
Router.
Step 4 For Windows 2000/XP, type ipconfig/release and press Enter. (Windows 98se/ME
skip to Step 6)
Page 4

Step 5 T ype ipconfig/renew and press Enter. Y ou should get an IP address of 192.168.1.x
(where x is a number between 2 - 254). Proceed to Section 3, Configuring the Router . If
you don’t get an IP address, reset the router by holding in the reset button on the back of the
router for 10 seconds while it is ON and try ipconfig/renew again.
Step 6 For Windows 95/98/ME go to Start, Run, type winipcfg and click OK. (Not
necessary for Windows 2000/XP Users)
Step 7 Select your network card from the drop-down menu and click Release.
Page 5
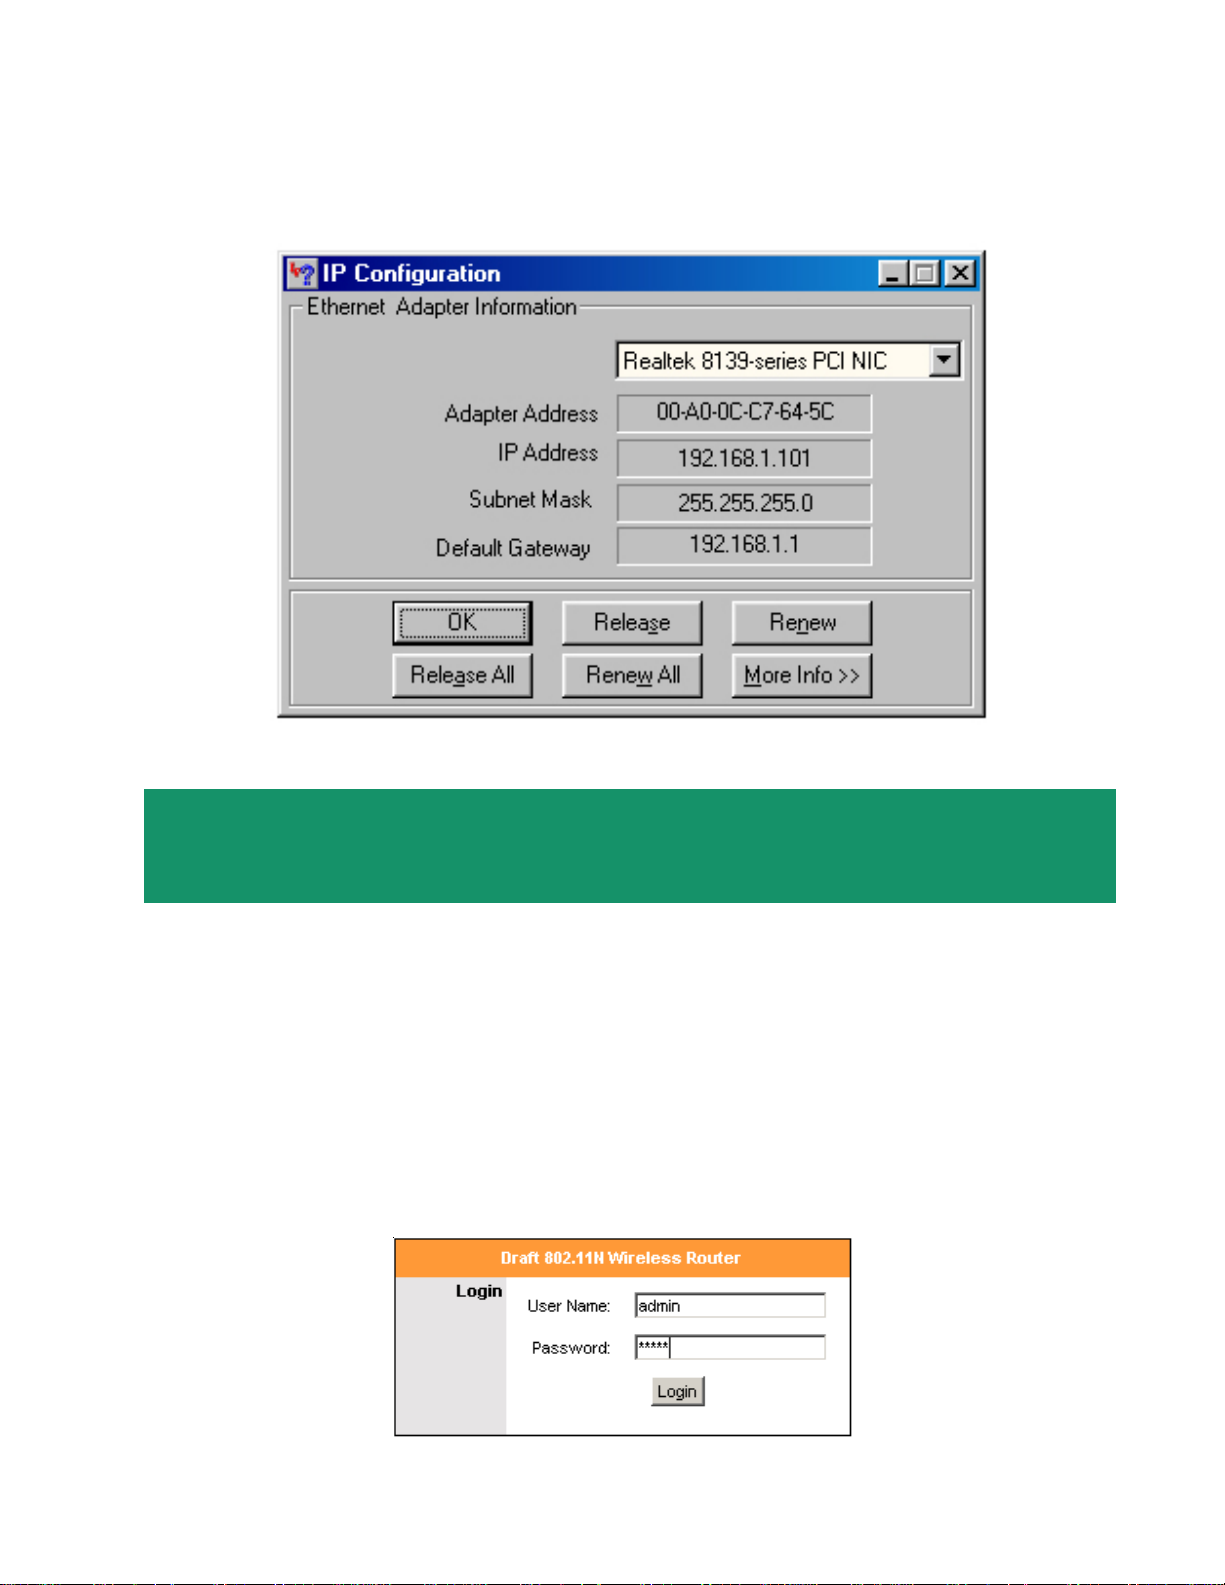
Step 8 After your IP address is released, click Renew. You should get an IP address of
192.168.1.x (where x is a number between 2 - 254). If you don’t get an IP address, reset
the router by holding in the reset button on the back of the router for 10 seconds while it is ON
and try Renew again.
Section 3
Configuring the Router
Step 1 Open a web browser (Internet Explorer) and type 192.168.1.1 in the URL Address field
and press Enter.
Step 2 Enter admin for both username and password fields and click OK.
Page 6

Step 3 Select the proper region, North America or South America, and click Apply.
Warning: Incorrectly selecting the current region of operation may result in illegal operation
and may cause harmful interference to other systems. Y ou can refer to the user manual on the
provided CD for more details.
Cable Modem
For most cable modem users, you should be able to connect to the Internet without any
configuration. If your ISP has provided you with a host name, enter it in the optional Host
Name field.
Click on the Clone MAC Address button. Click Apply and OK to save the settings.
Go to the Status tab, Internet connection section to verify that you are getting valid IP
address information. If you have trouble connecting to the Internet, please go through the
Troubleshooting section at the end of this inst allation guide.
Page 7

DSL
For DSL users, follow the steps below to configure the router .
Step 1 Select PPPoE from the drop-down menu.
Step 2 Enter your username and password provided by your ISP.
Note: Depending on the ISP , you may need to include the domain name with your username.
Example: username@sbcglobal.net
Page 8

Step 3 Click Apply and OK to save the setting.
Go to the Status tab, Internet connection section to verify that you are getting valid IP
address information. If you have trouble connecting to the Internet, please go through the
Troubleshooting section at the end of this inst allation guide.
Section 4
Connecting the Router Wirelessly
Below are the default wireless settings of the router. Y ou must configure your wireless network
card to the same settings in order to establish a wireless connection to the router . Please refer
to your wireless network card’s manual on how to configure these settings.
SSID: default
Operating Mode: Infrastructure
Authentication: Open System
Channel #: 6
WEP: disabled
If you want to change the router’s wireless settings, log in to the router and select the
Wireless tab. Be sure to click Apply and OK to save the settings.
For information on changing the router’s log in password and enabling wireless encryption,
please refer to the User’s Manual on the provided CD.
Page 9

Section 5 (Optional)
Wi-Fi Protected Setup
Wi-Fi Protected Setup™ (WPS) is a new and easy way to configure the encryption for your
wireless network clients. In order to use it with your router , firstly , you must configure the
wireless encryption on the router. Y ou can find instructions for configuring it in the User Manual
located on the CD that came with your router. Secondly , you will need to have wireless
adapters that support this feature. If your wireless adapters do not support WPS, you will need
to set up the wireless security manually and you can skip this section.
In the instructions below, we are going to use the utility , Wireless Monitor that comes with the
Airlink101 300N or 150N Wireless Adapters (A WLC6070, A WLC6080, A WLH6070,
AWLH6080, A WLL6070, and A WLL6080) as the example.
Step 1 Go to the computer with the Airlink101 150N wireless adapter and open the Wireless
Monitor. Under AP List, click on the wireless network you want to connect to and click on the
WPS Connect button.
Note: If you do not see the WPS Connect button, you can go to www.airlink101.com to
download the latest utility and driver .
Page 10

Step 2 Choose your configuration method, either Push Button or Pin Code, and click Next.
Step 3a Write down the PIN if you choose Pin Code method and click Next.
Step 3b If you choose Push Button method, click on the Wi-Fi Protected Setup button.
Page 11

Step 4 Go to your routers configuration screen and click on Wireless. Then click Wireless
security. Make sure that the Wi-Fi Protected Setup Enable box is checked. Then click the
Add Wireless Device Wizard button.
If you are using Pin Code method, enter the Pin Code in the Pin Number box and click
connect. If you are using Push Button method, click on Virtual Push Button or the physical
push button on the router.
Page 12

After a few moments both the router configuration screen and the adapter configuration screen
should show a message telling you that you are connected.
Step 5 Click Finish on the adapter screen.
Step 6 Click Continue on the router configuration screen.
Page 13

Section 6
T roubleshooting
If you have trouble connecting to the Internet, try the following steps.
Step 1 Power off the Cable/DSL modem, router, and computer and wait for 5 minutes.
Step 2 Turn on the Cable/DSL modem and wait for the lights on the modem to settle down.
Step 3 Turn on the router and wait for the lights on the router to settle down.
Step 4 Turn on the computer.
Step 5 Reconfigure the router as described in Section 3.
Step 6 Log in to the router and select the Status tab.
Step 7 Verify that the IP Address, Default Gateway, and at least one of the DNS fields
have valid numbers assigned to them (instead of all 0’s).
If each field has a valid number assigned, the router is connected to the Internet.
Page 14

Section 7
Technical Support
E-mail: support@airlink101.com
Toll Free: 1-888-746-3238
Web Site: www.airlink101.com
*Theoretical maximum wireless signal rate derived from IEEE 802.11g standard and IEEE 802.11n draft specification version 2.0. Actual
data throughput will vary. Network conditions and environmental factors, including volume of network traffic, building materials and
construction, mix of wireless products used, radio frequency interference (e.g., cordless telephones and microwaves) as well as
network overhead lower actual data throughput rate. Specifications are subject to change without notice. All products and trademarks
are the property of their respective owners. Copyright ©2008 AirLink101®
®
 Loading...