

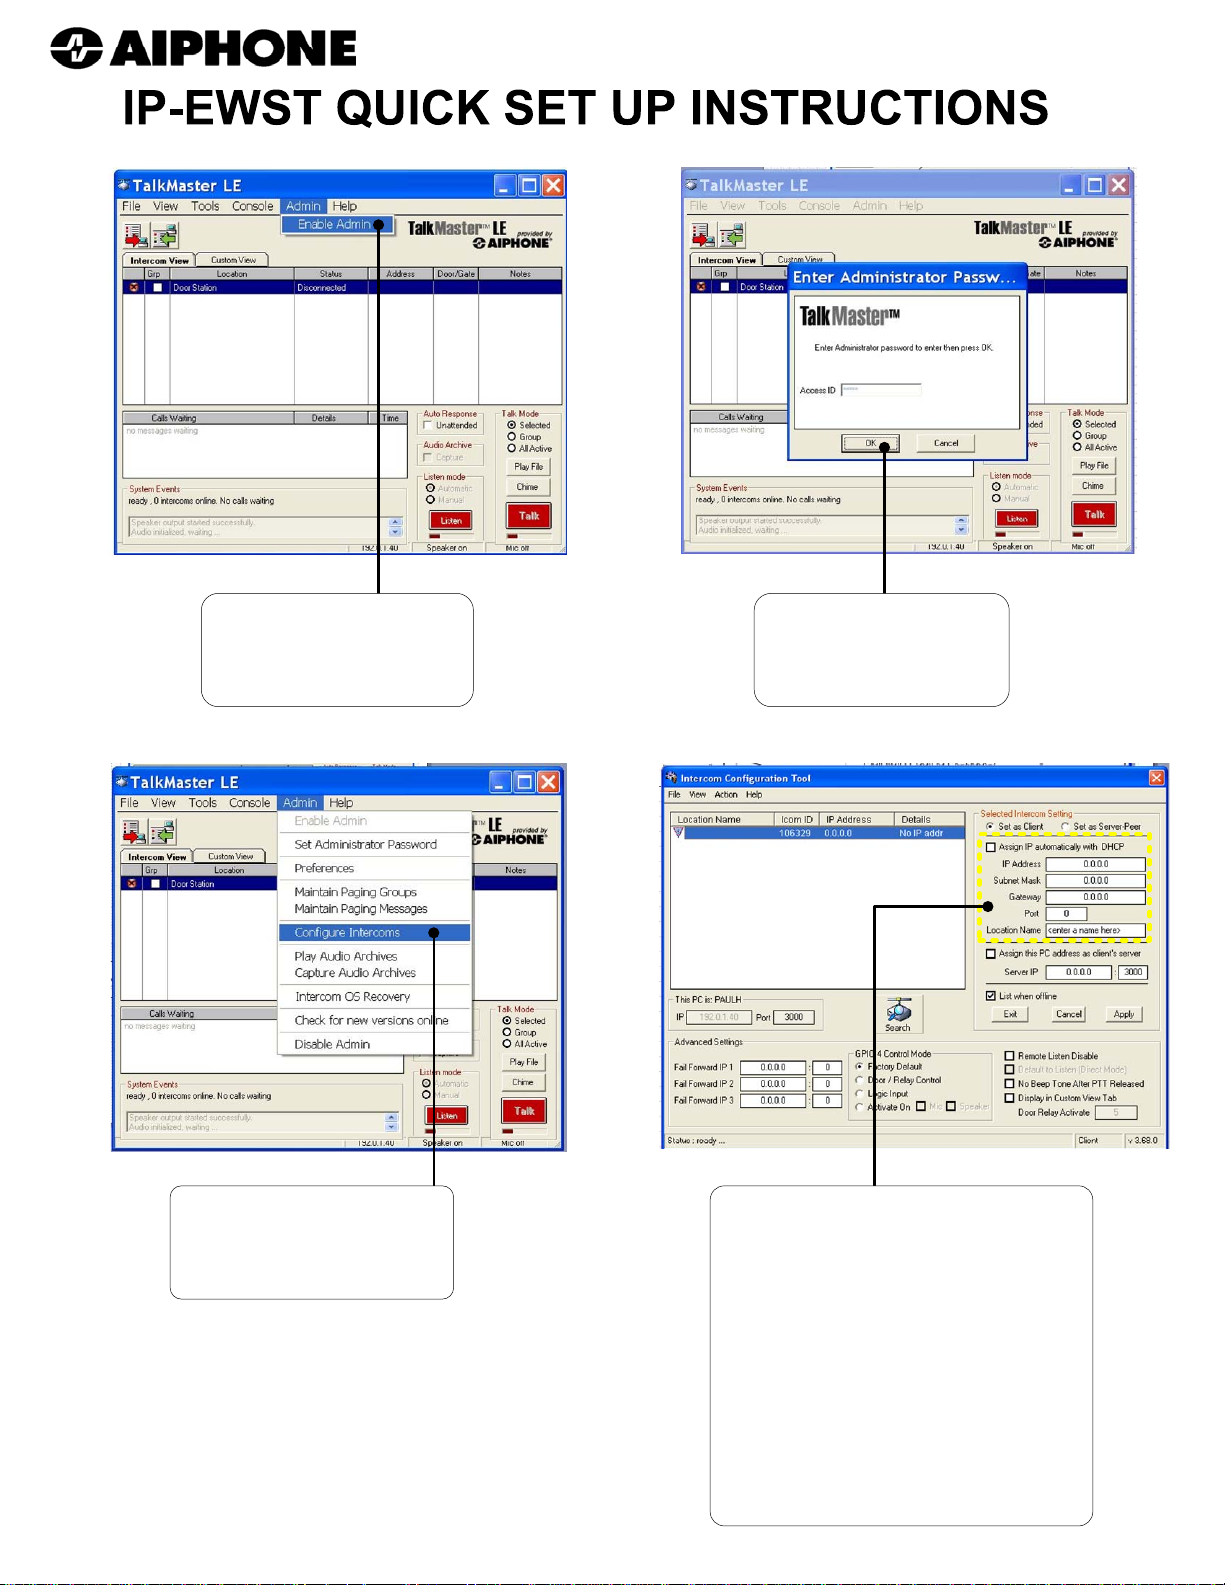
STEP 1:
Click on “Admin” menu, then
click on “Enable Admin”
STEP 2:
Enter “Access ID” code
Default is “admin”
(Note: case sensitive)
STEP 3:
Click on “Admin” menu again,
then click on “Configure
Intercoms”.
STEP 4:
Intercom Configuration Tool will search
for IP-EWST automatically.
Determine if the network is static or
dynamic, by asking clients IT dept. If
dynamic click on “Assign IP automatically
with DHCP” button. If static enter the
appropriate information into the “IP
Address”, “Subnet Mask”, “Gateway”,
and “Port”. Information can be obtained
from clients IT department. Enter
location name in field to identify substation location.
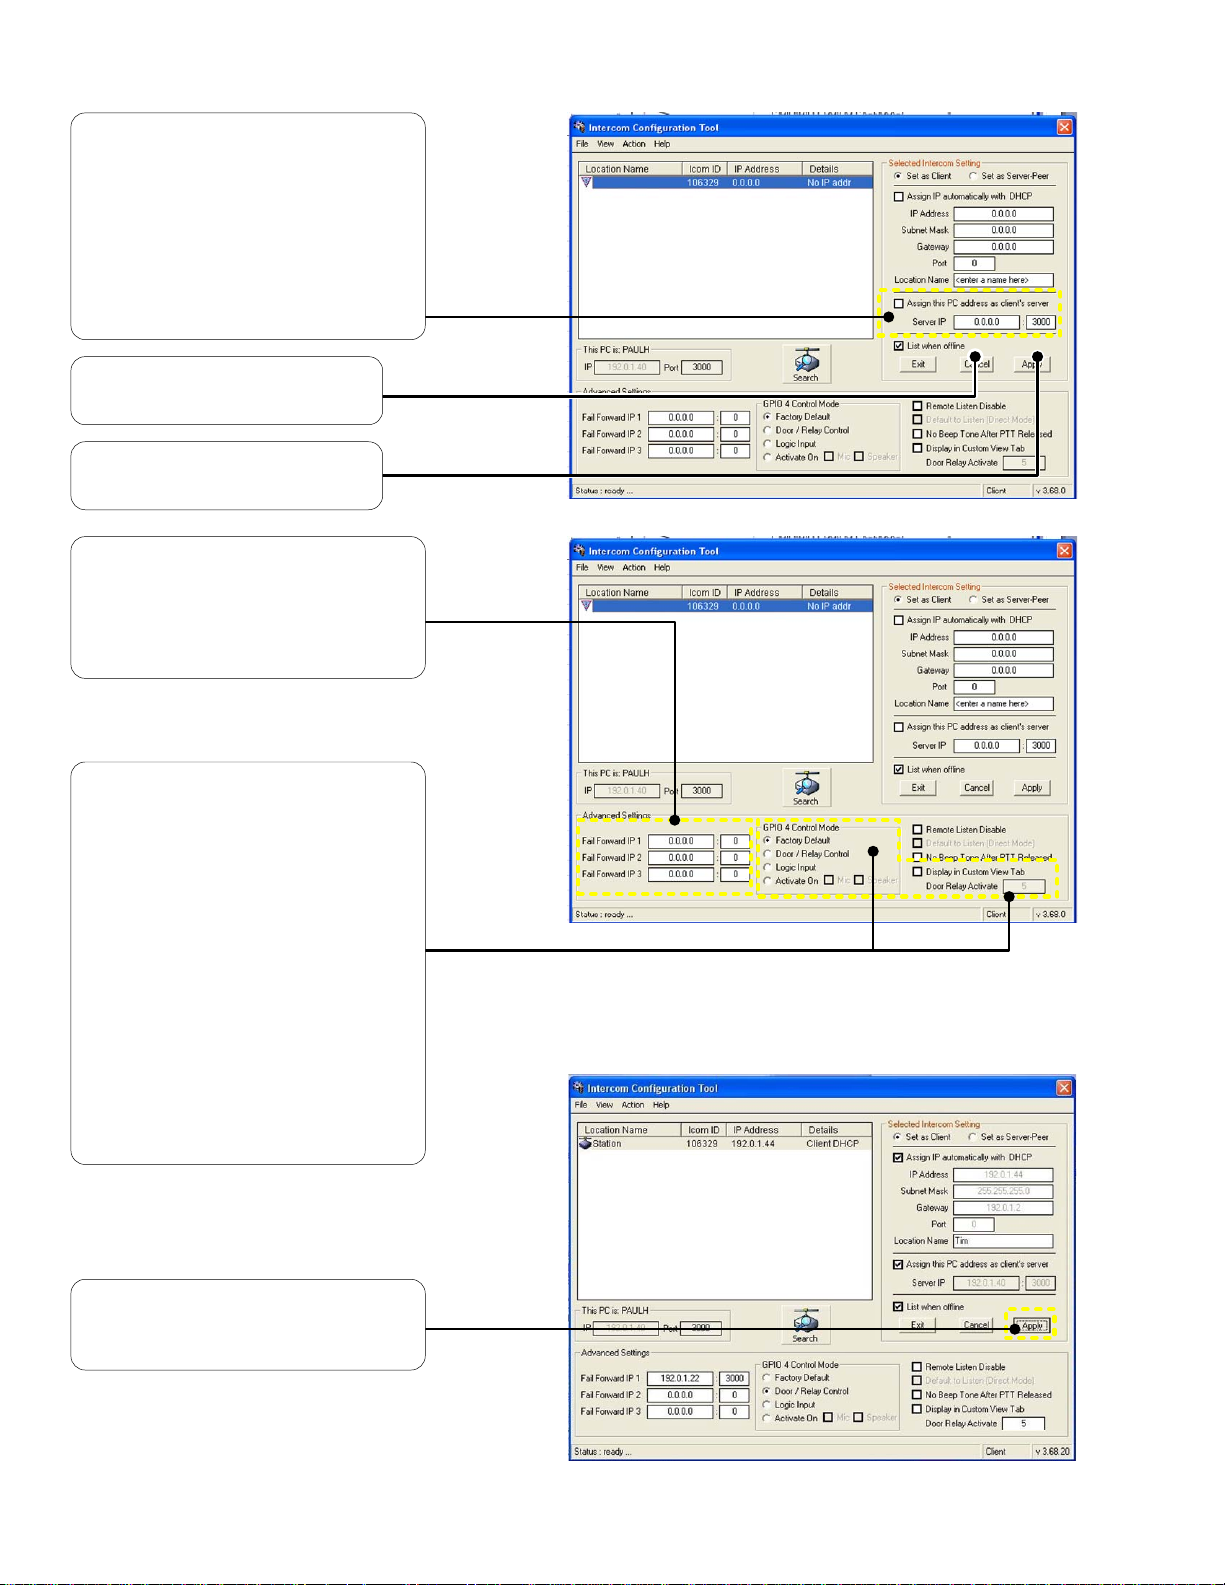
STEP 5:
Assign the Master PC address. If
programming from the PC that is
going to be the assigned PC, click on
the “Assign this PC address as clients
server” button. If assigning a different
PC enter Server IP address.
Obtained by clients IT department.
Server IP: Obtained by clients IT
Dept. (Master PC’s address)
Port address: Obtained by clients
IT Dept. Default is “3000".
STEP 6:
Assign the Fail Forward IP address’.
If not using this feature skip to Step 7.
Enter IP address of fail forward PC’s
in “Fail Forward IP1,2,3” location.
STEP 7:
Assign relay feature. If not using this
feature skip to Step 8. If “Advanced
Settings” is not visible click on “View”
menu, then click on “Advanced”.
Activate feature by clicking on “Door /
Relay Control” button. Next enter the
amount of time that the relay needs to
stay latched in seconds in the “Door
Relay Activate” field. Max. time is
255 seconds. Relay can also be
activated when either the Speaker,
Microphone, or both are activated by
clicking on the “Activate On” button,
and then choosing either “Mic” or
“Speaker”.
STEP 8:
To apply the new changes click on
“Apply” button.

STEP 9:
Click “OK” on the “Completed intercom
configuration!” pop up screen.
STEP 10:
Click “Exit” button. This will return you to
the main screen.
Main Screen:
Intercoms configured will show in display
window, those that have an active
connection will display a green icon in
the left column. If enabled, an audible
verification will be heard at the intercom.
If the station was configured for door
release a green open button will be
indicated.
Main Screen:
Select station by clicking on it. (note:
station selected is highlighted blue) Click
“Talk” button to transmit, click “Listen”
button to monitor. If using door release
feature clicking on “Open” button will
release door, and turn button yellow for
the predetermined time. To disconnect
either press “Esc” key, or click “Listen”
button while in listen mode. (note: station
not selected is highlighted yellow)
 Loading...