

Page 1
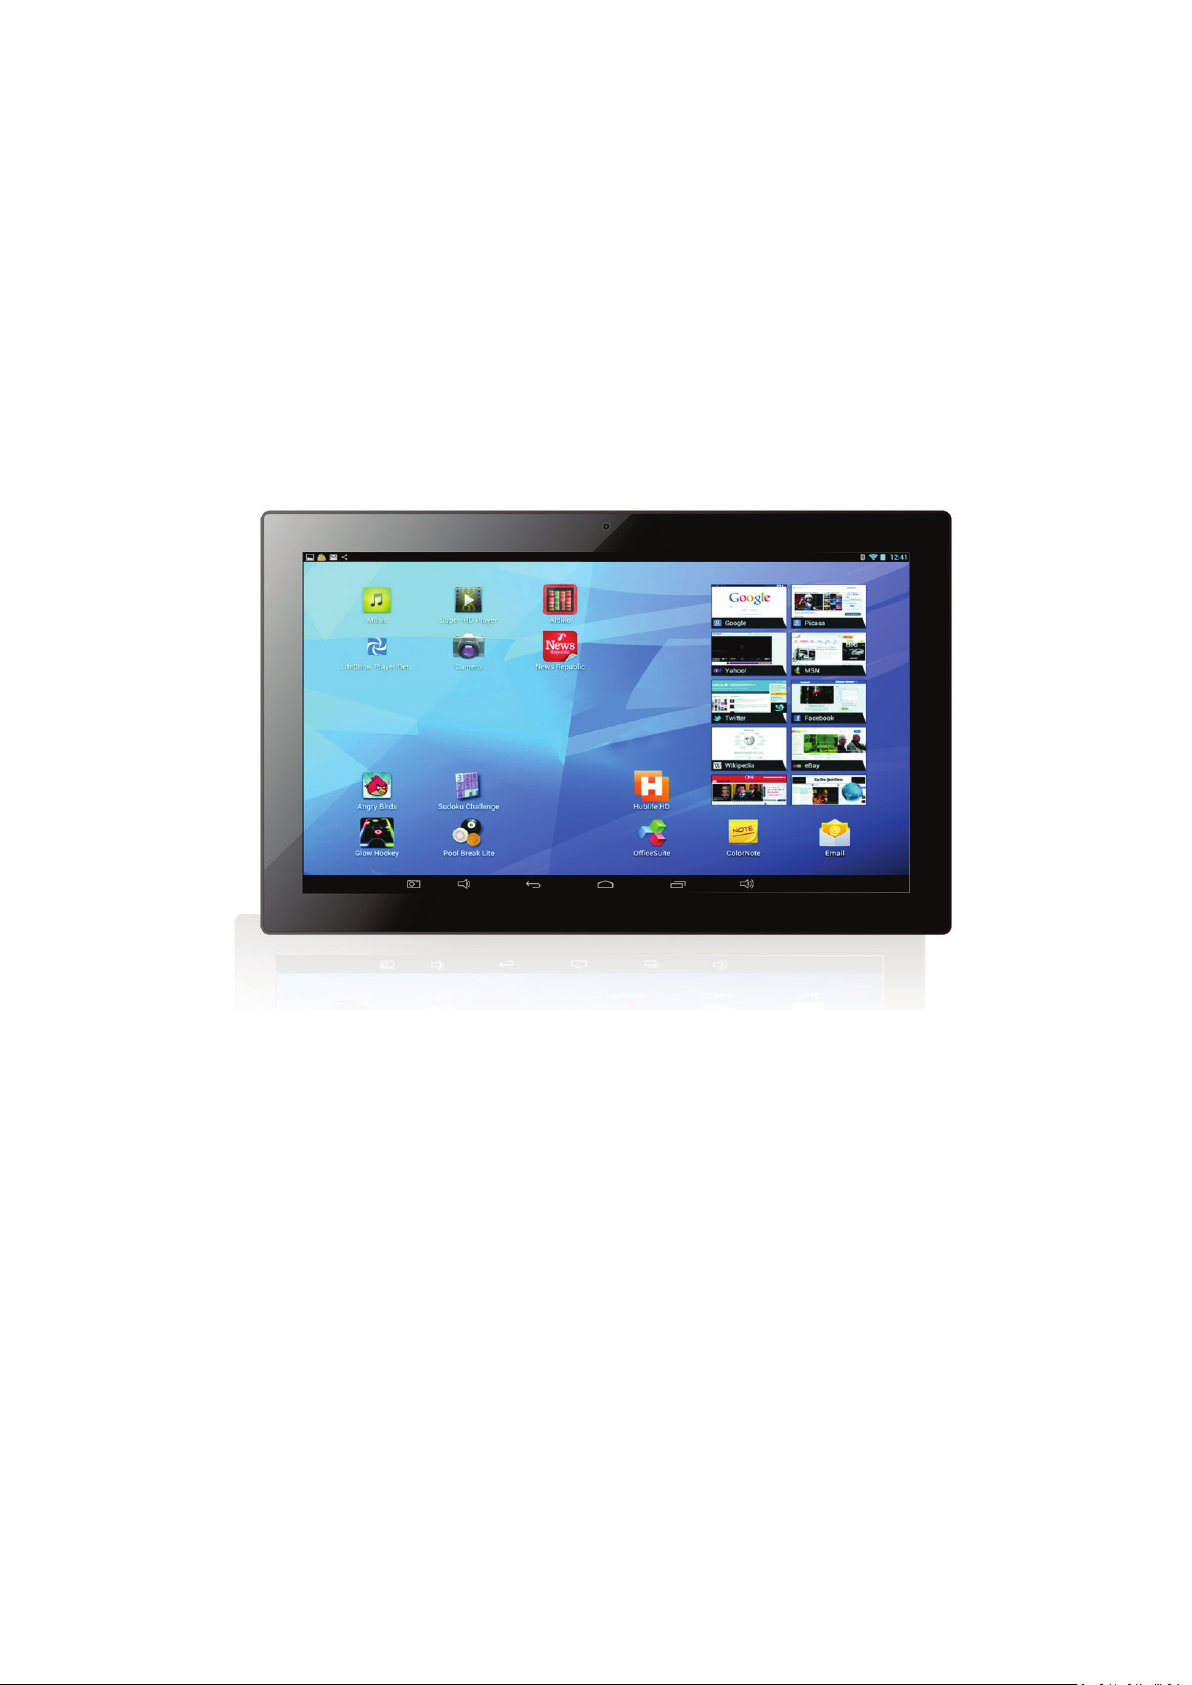
AIO PAD
User Manual
Version: 1.0
1
Page 2

Table of Contents
Important Notes ........................................................................................ 3
Product Features ....................................................................................... 3
Diagrams ................................................................................................... 4
Getting Started .......................................................................................... 5
Power On/Off ............................................................................................ 5
Access to the Applications Menu .............................................................. 6
Wireless Internet ...................................................................................... 7
Install APK ................................................................................................. 8
Uninstall APK ............................................................................................. 9
Data Transmission ..................................................................................... 9
Factory Reset .......................................................................................... 10
Disposal ................................................................................................... 11
2
Page 3

Important Notes
1) Keep the device away from places with extreme heat (40°C and above), extreme
cold (-5°C and below) or moisture.
2) Do not hit the device or place heavy objects on it.
3) Use only the accessories specified by the manufacturer.
4) Keep the device away from benzene, diluents and other chemicals.
5) Keep the device away from water.
6) The device should only be serviced by professional service personnel, do not try to
service it yourself.
7) Unplug the device from the mains if it will not be used for a long time or during
thunderstorms.
8) In order to avoid damaging the touch panel, never place heavy or sharp objects on
it.
9) Arrange all cables and cords in such a way that people and pets are not likely to
accidentally trip over or pull on them. Do not allow children to play with cables and
cords.
Product Features
Quad-core ARM cortex-A9 high performance processor
1GB DRAM
CPU frequency up to 1.6GHz
High resolution display
2.0MP camera on the front
Supports Bluetooth
Wi-Fi wireless internet, 802.11 b/g/n
Google browser supports Google Chrome, Google search engine, etc.
Supports gravity sensor, auto-rotate screen
Supports 3G USB dongle (external)
10-point touch screen
Supports USB peripheral devices (mouse, keyboard, Ethernet, etc.)
Full format video playback - RMVB, MPEG1, MPEG2, MPEG4, VC1, MKV, H.264, etc.
Image viewer supports JPEG, BMP, GIF and PNG formats
Internet chat tool supports QQ, MSN, Skype, etc.
Online video , YouTube, Facebook
3
Page 4
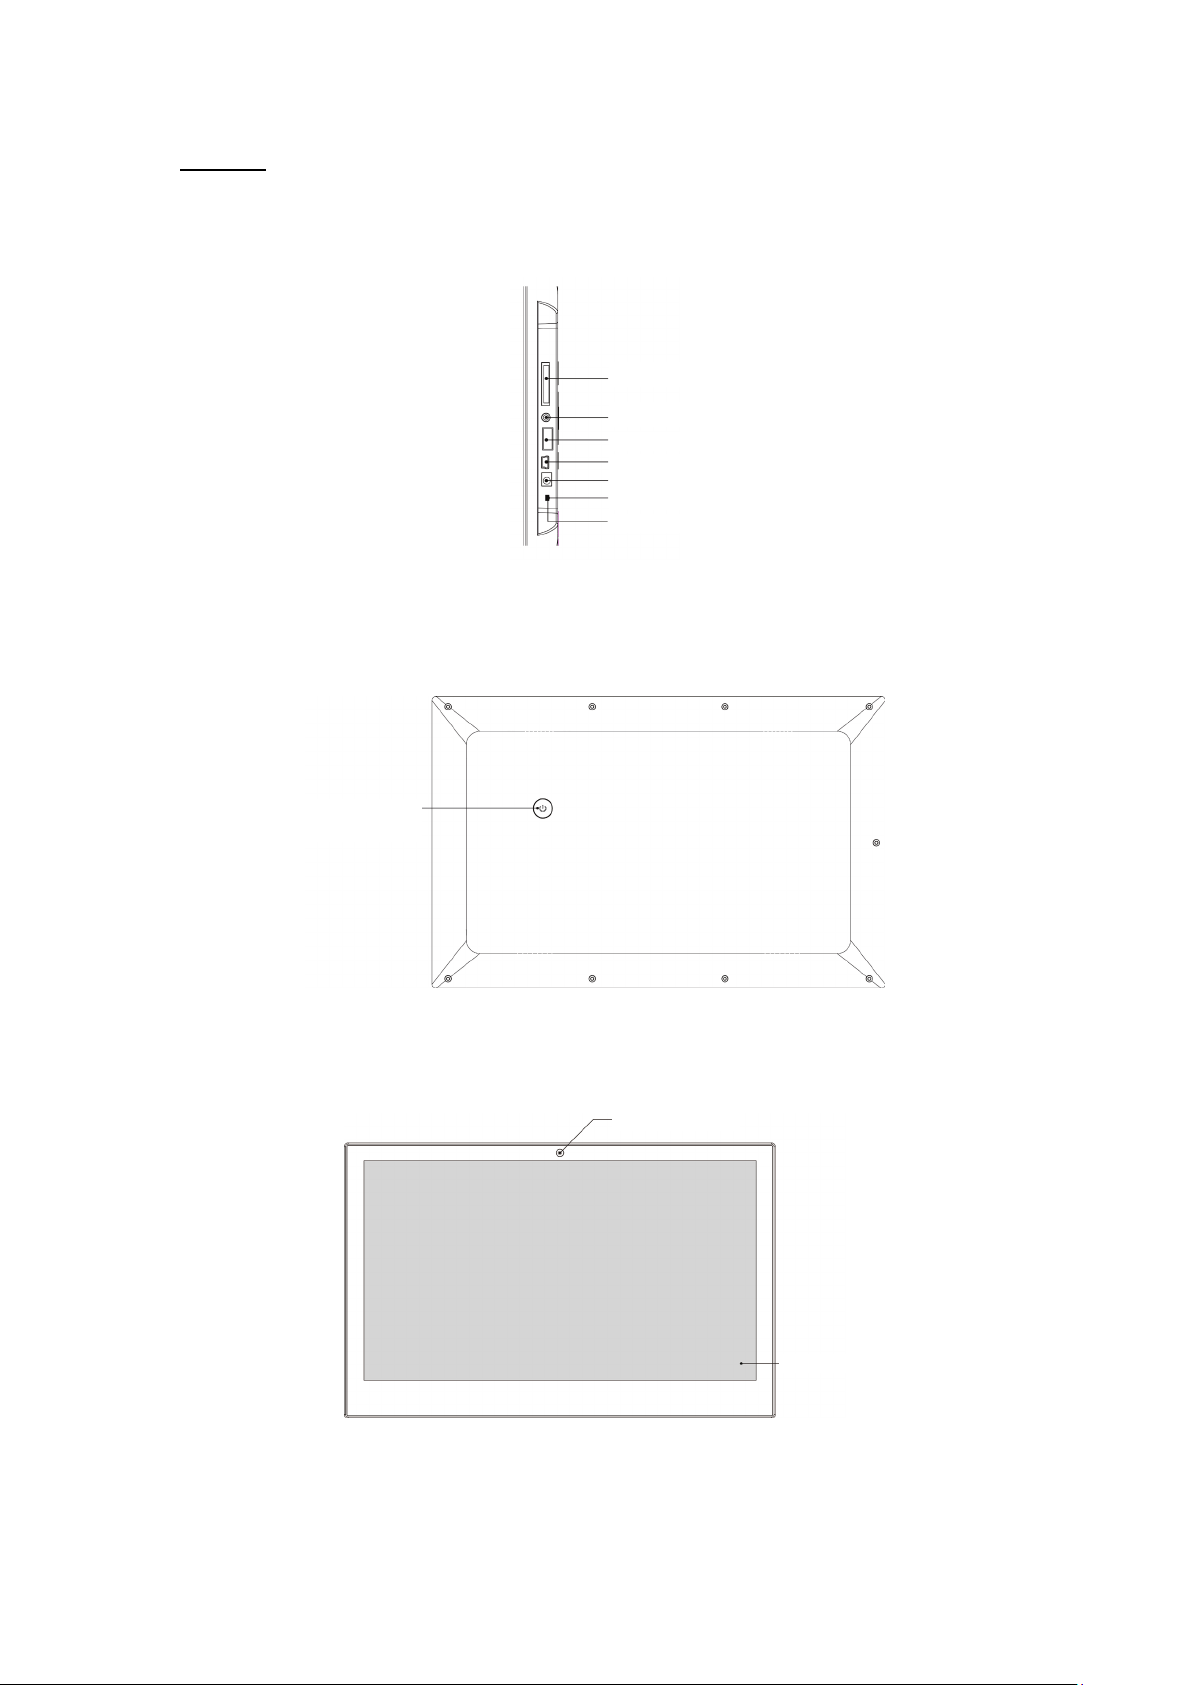
Diagrams
SD Card slot
USB 2.0 port
Mini USB port
DC In
Reset
Micphone jack
Power
Press and hold to power ON/OFF
Camera
Touch screen
Side view
Rear view
Headphone jack
Front view
Short press for sleep
4
Page 5
Getting Started
1) Insert the connector plug of the mains cable into the DC In socket, and then plug
the other end into a suitable power outlet.
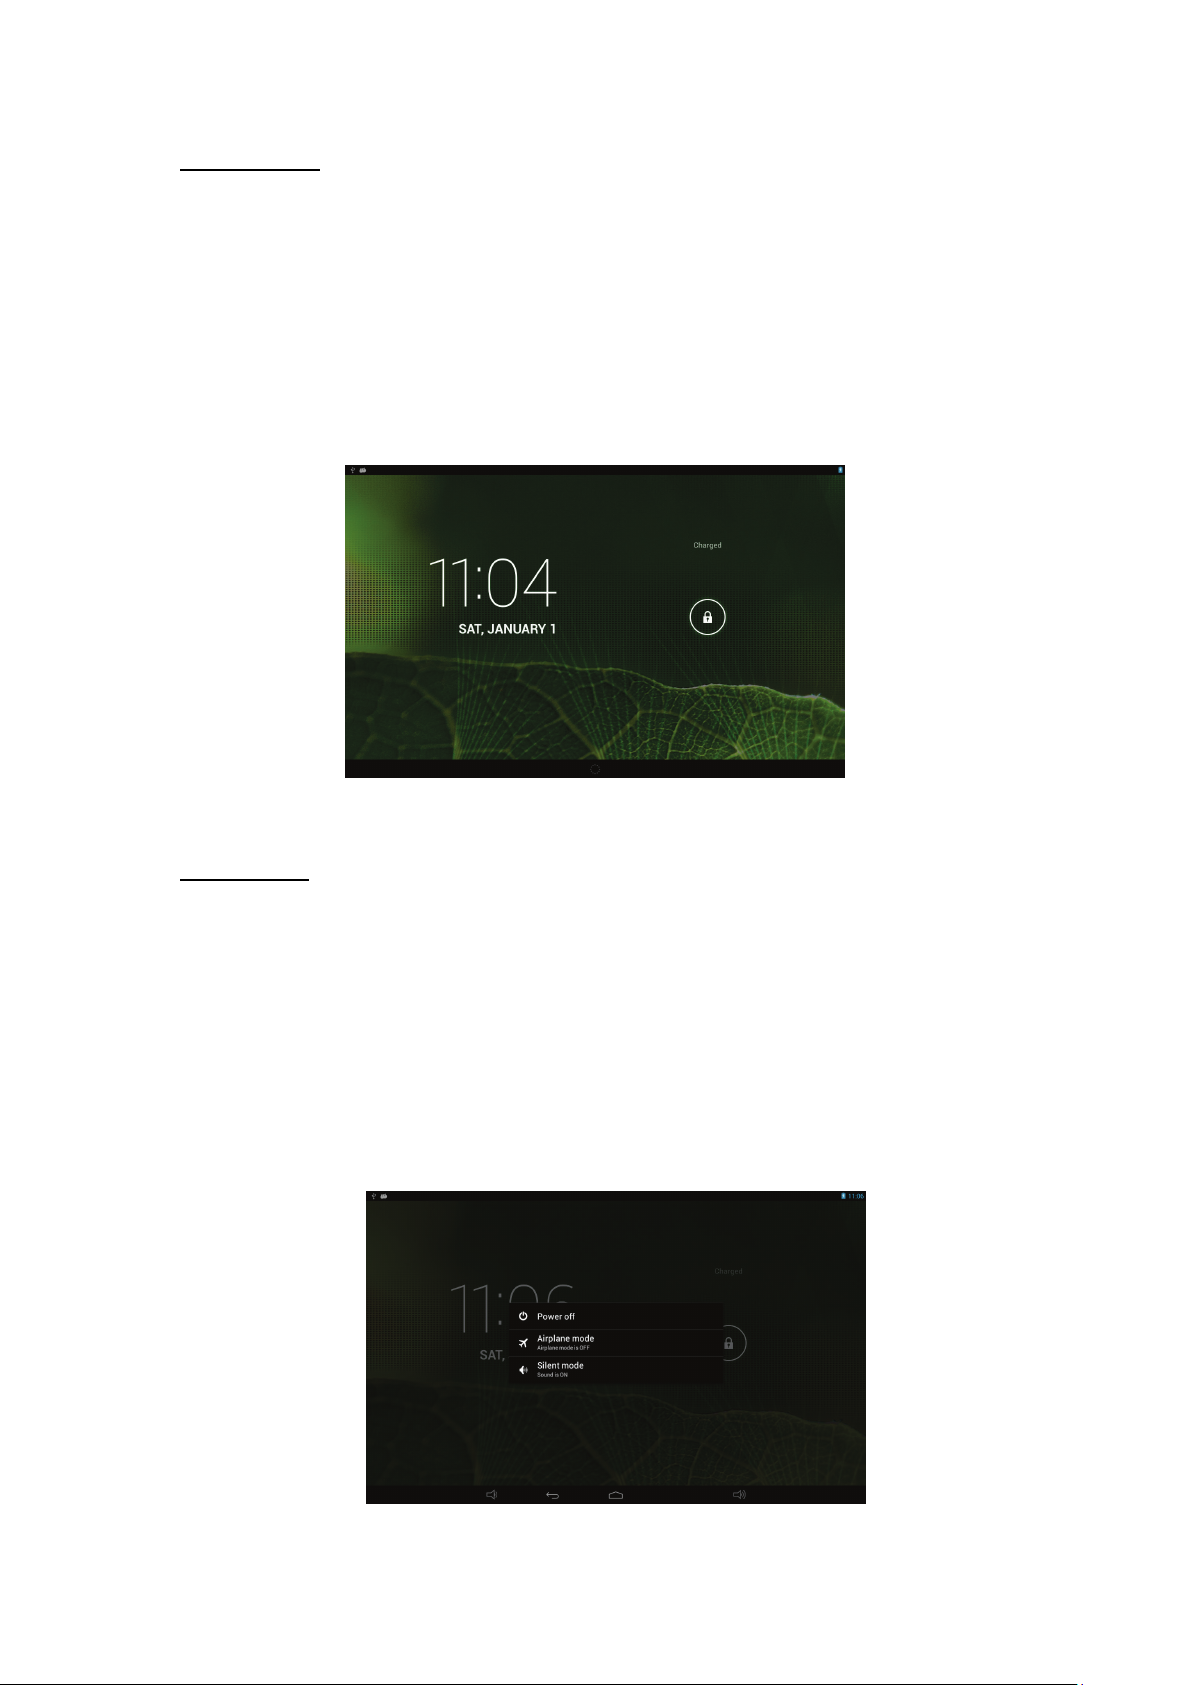
2) Turn on the device by holding the power button for 3 seconds.
3) The screen will show the startup logo.
4) Wait for about 30 seconds, then the main interface will be shown on the screen.
Power On/Off
1) Power on: When the device is powered off, turn it on by holding the power button
for 3 seconds.
2) Power off: When the device is powered on, hold the power button for 3 seconds
and tap “Power off” to turn it off.
3) Short press the power button to put the device into sleep mode or to turn it on
again if it is on standby.
5
Page 6
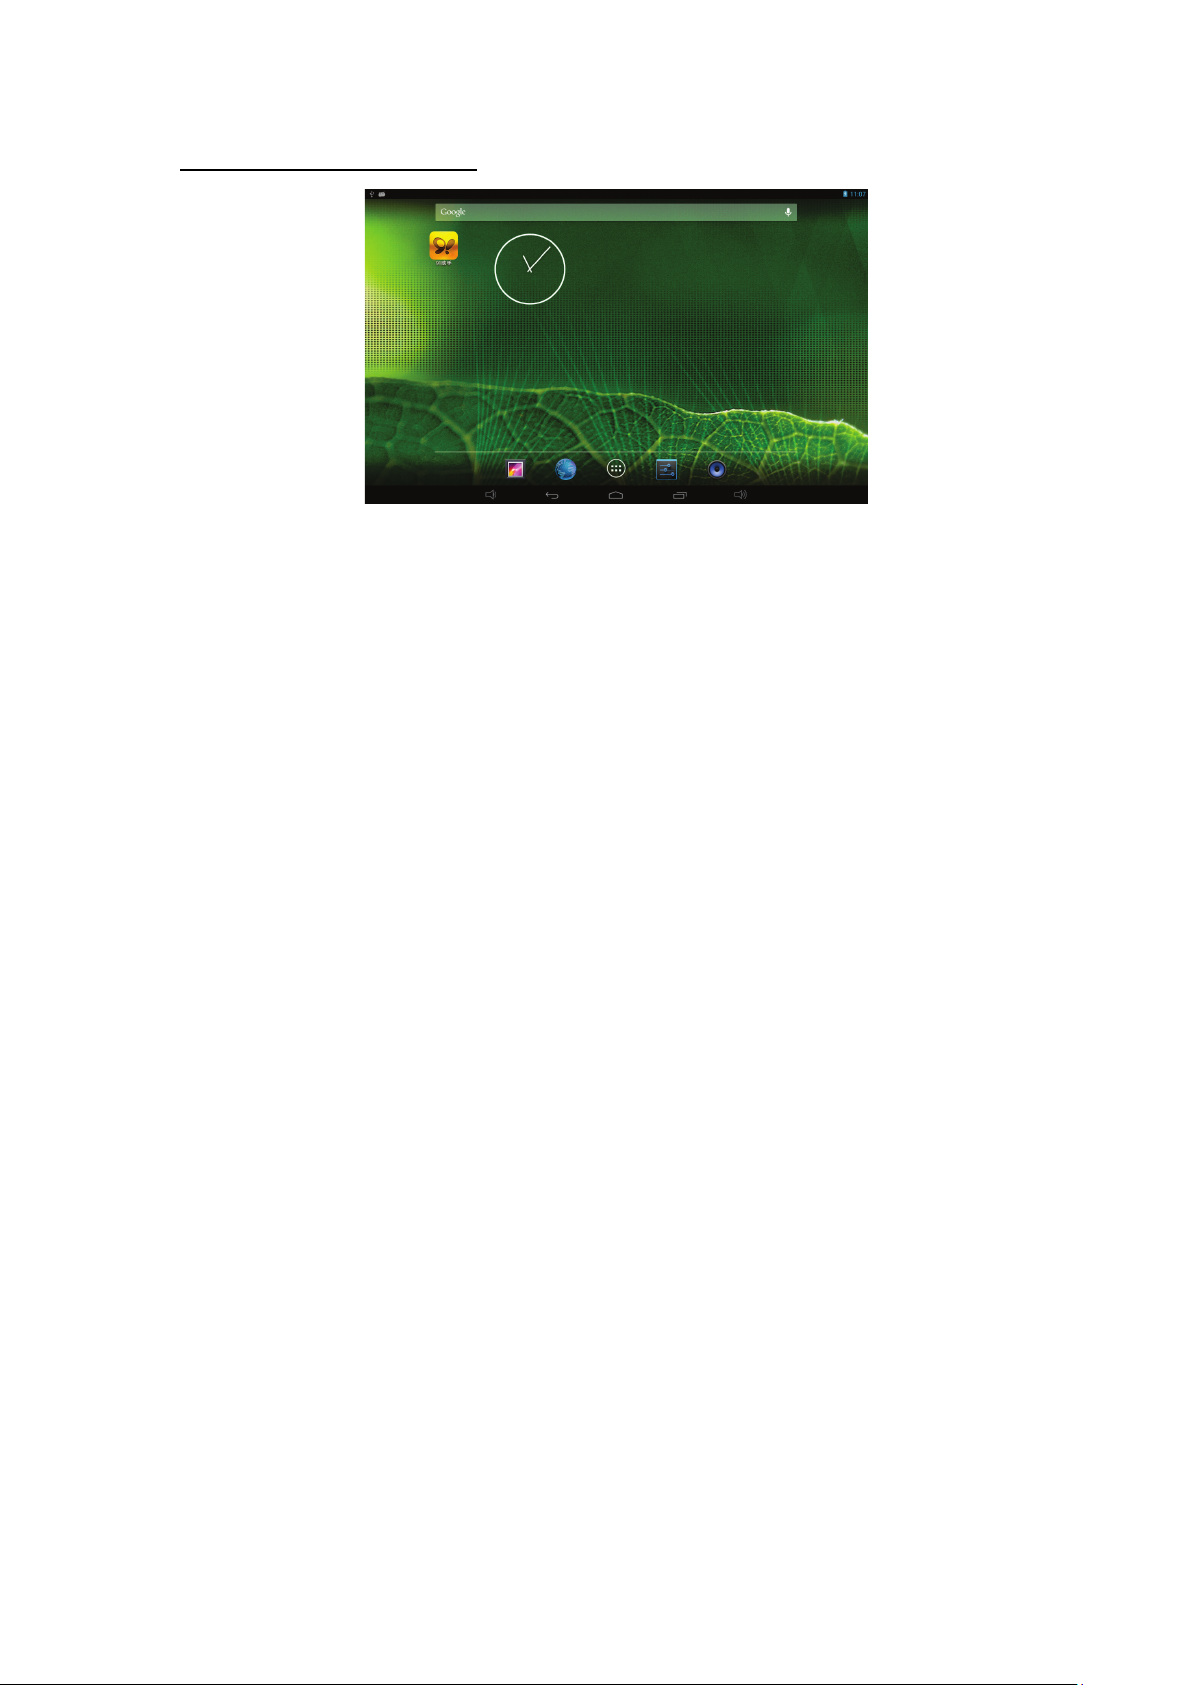
Access to the Applications Menu
6
Page 7
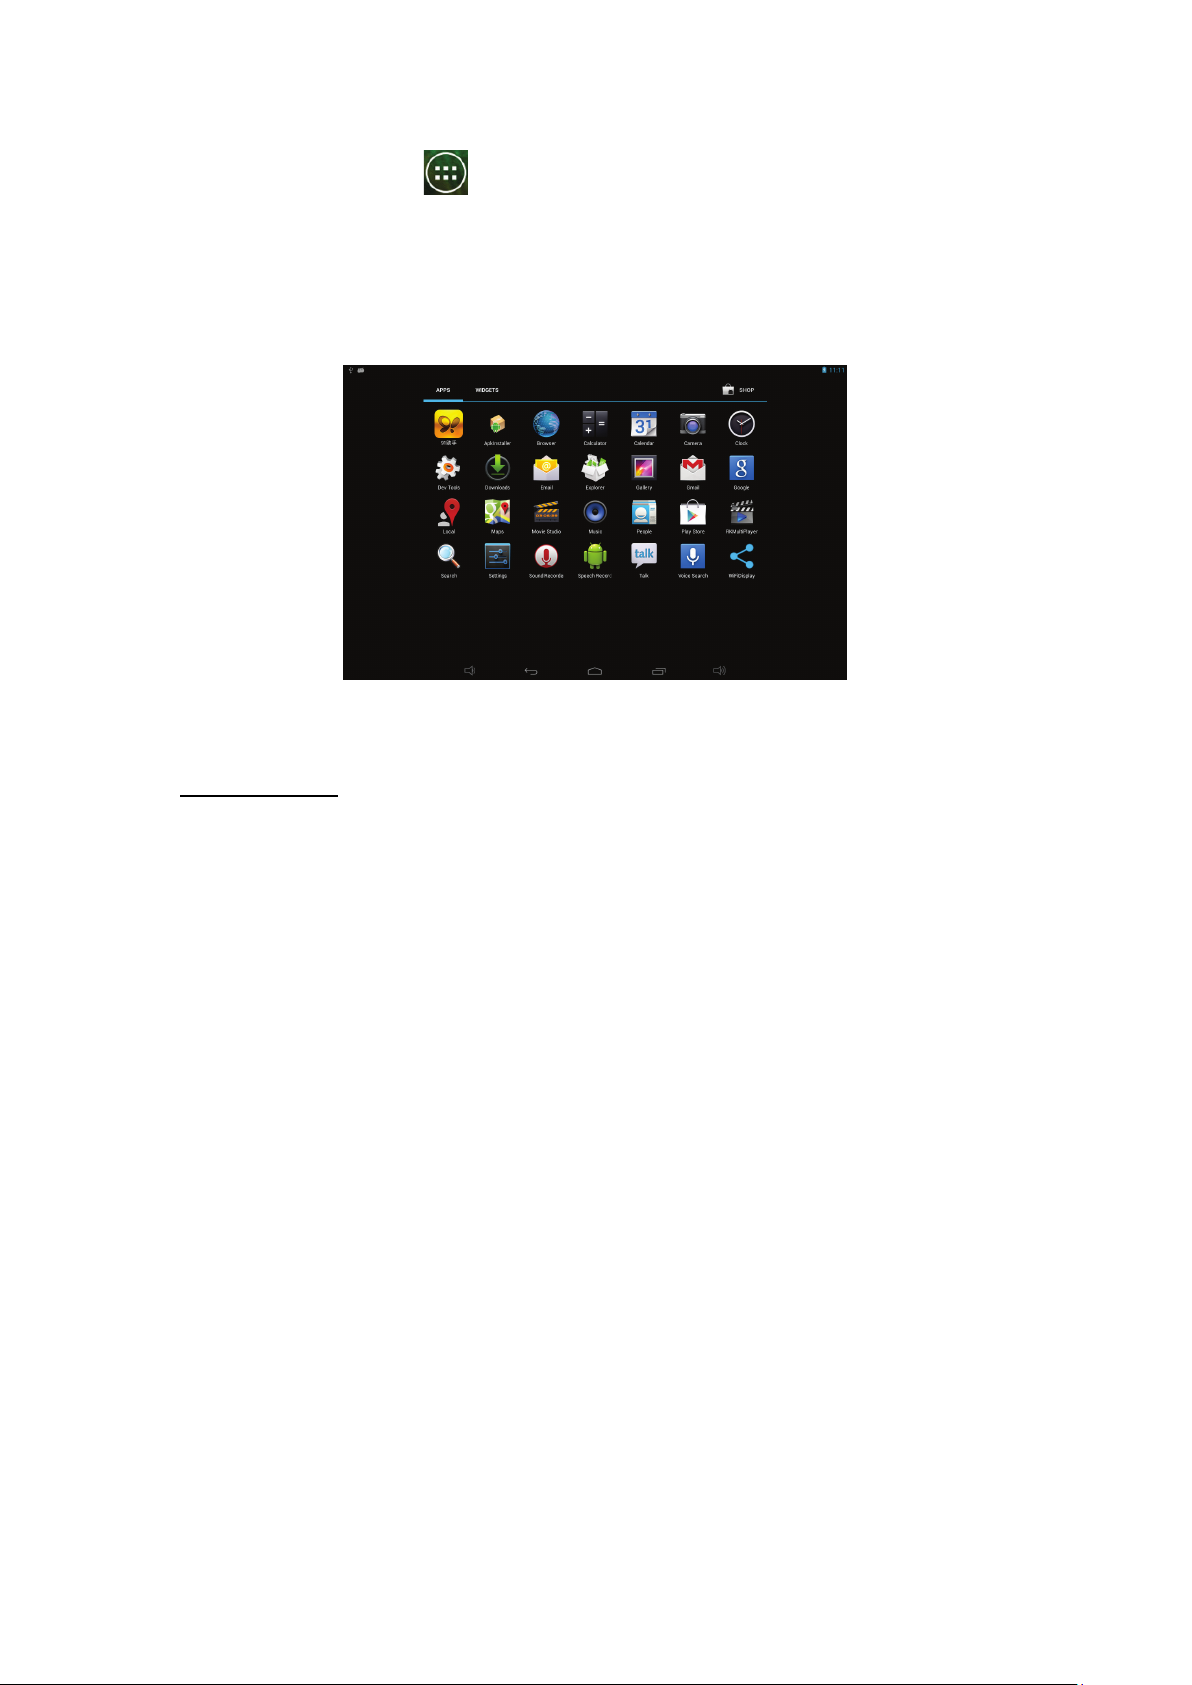
In the main menu, tap the icon to go to the applications menu screen.
1) Quickly slide the screen to the left or to the right to switch to the next menu screens.
2) Tap the icon of the desired application to begin using it.
3) Tap the “RETURN” icon to return to the previous page, or tap the “HOME” icon to return
to the main menu.
Wireless Internet
1) Go to the applications menu screen, tap the Settings icon and turn on the Wi-Fi to
connect to an available network.
2) Tap the Browser icon, this will then bring you to the Google homepage.
3) Enter the URL of the website you want to visit in the address bar at the top of the
screen, or search for interesting news and videos using the Google search engine.
7
Page 8
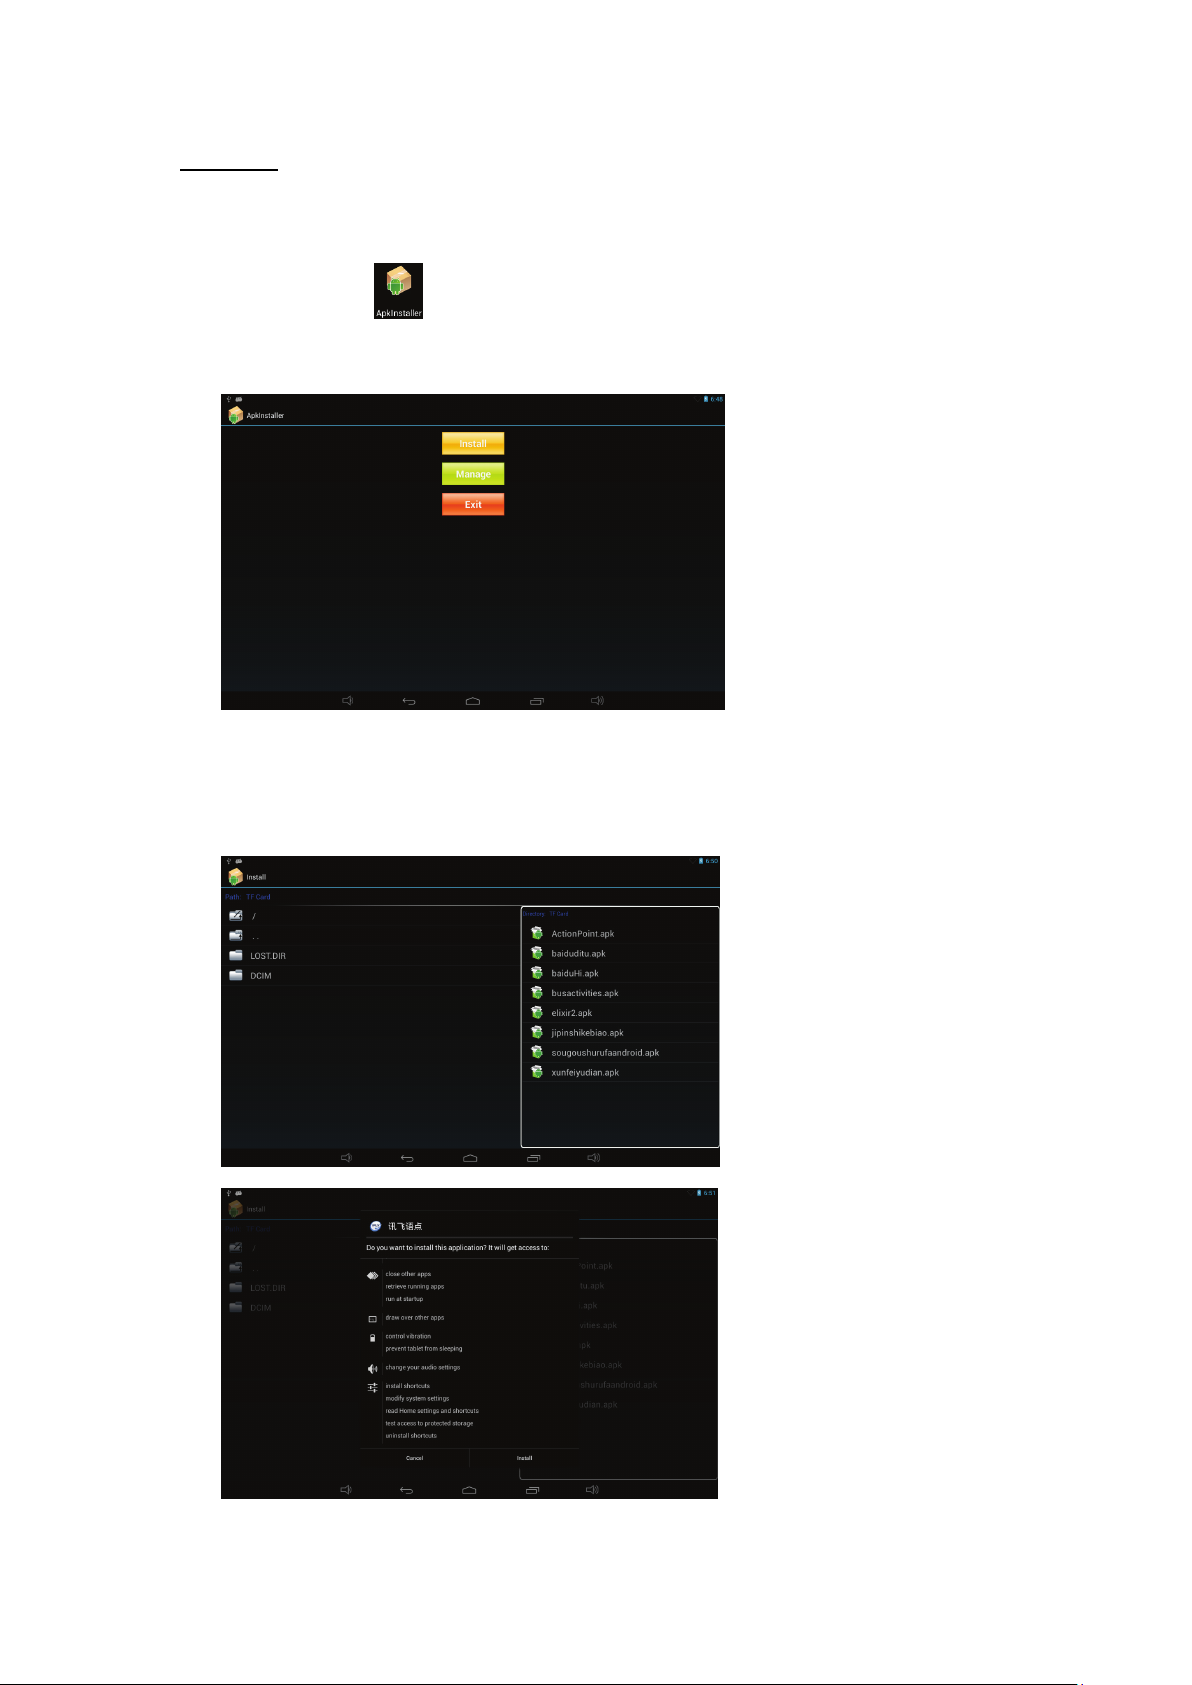
Install APK
1) Copy the APK file format to your device or SD card.
2) Tap the icon
in the applications menu, this will then bring you to the ”APK
Installer”. Select ”Install” as shown in the following picture:
3) Tap the APK that you want to install, as shown in the following pictures:
8
Page 9
After installing the APK, you can tap the APK icon in the applications menu to use the
application.
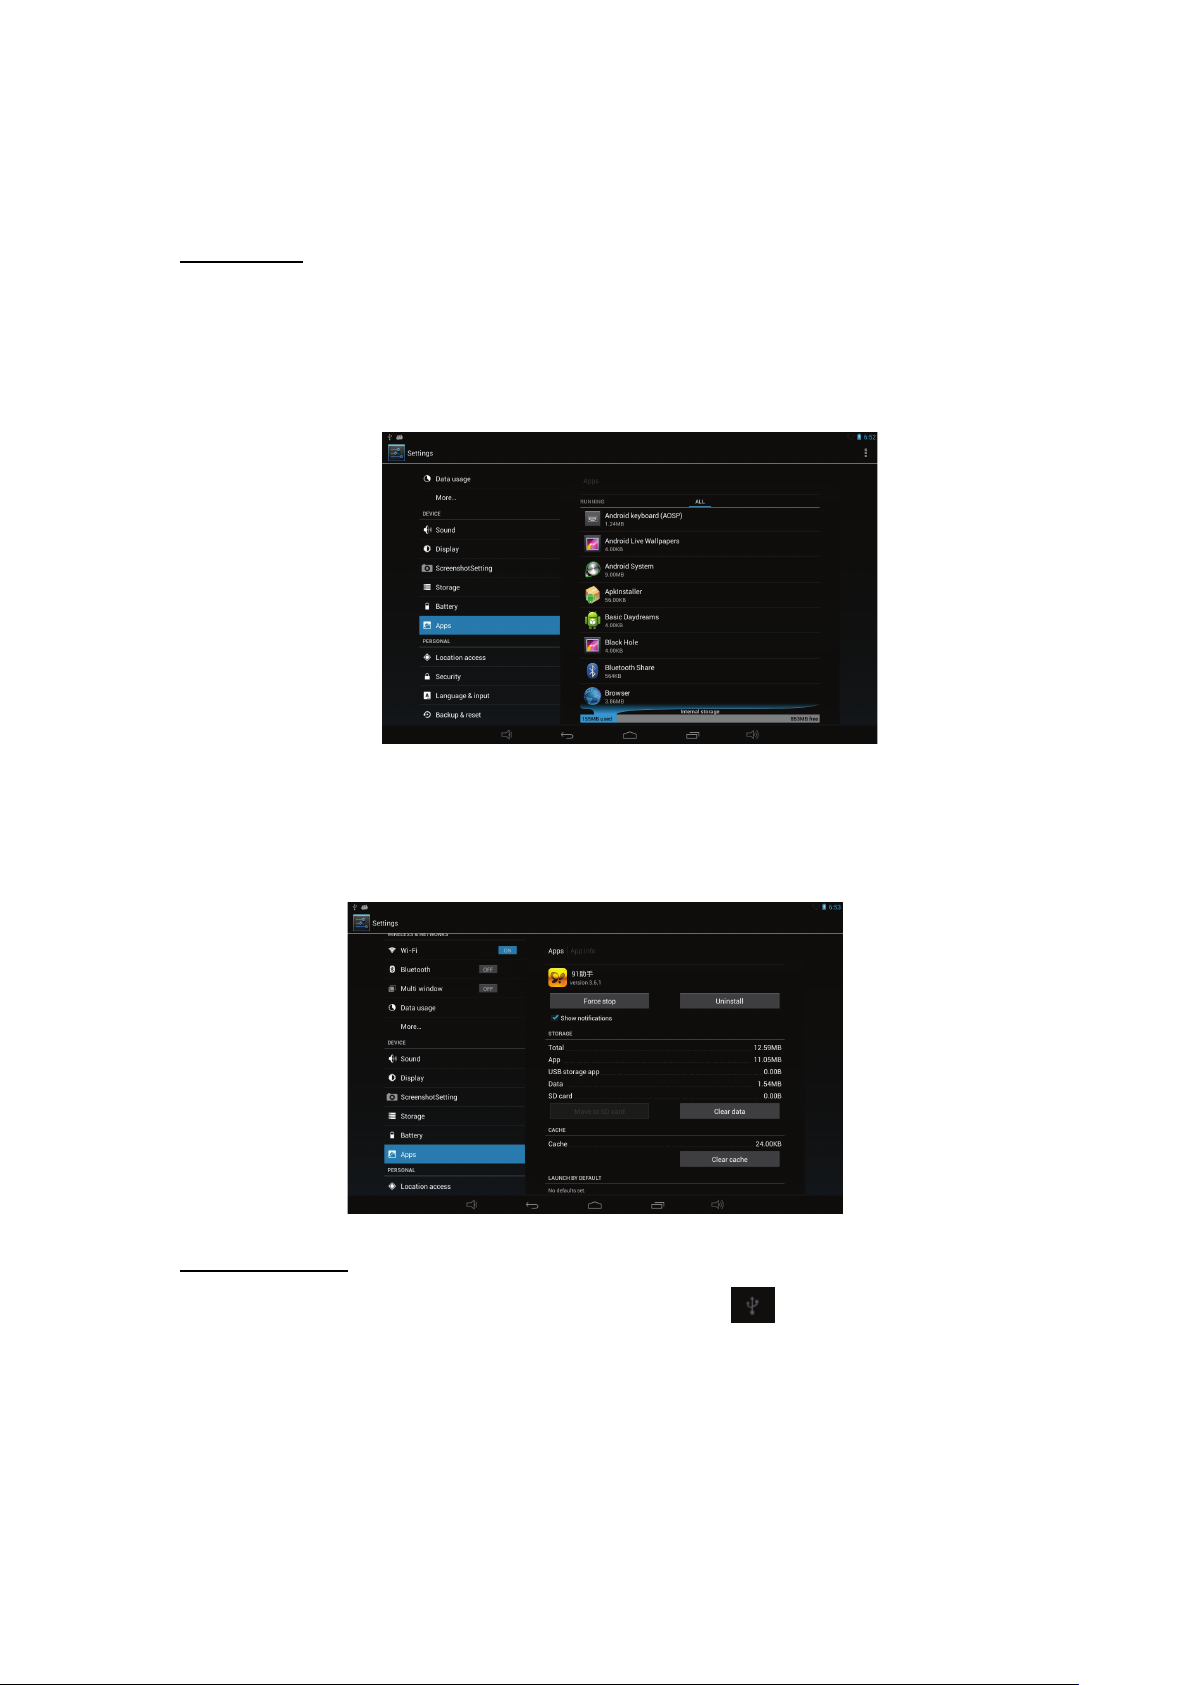
Uninstall APK
1) Tap the Settings icon in the applications menu, then go to ”Settings” ”Apps”
”DOWNLOADED”.
Select the application that you want to uninstall, as shown in the following picture:
2) Tap the Uninstall button to uninstall this application, as shown in the following
picture:
Data Transmission
Connect the device to a PC using a USB cable. The USB icon will appear on the upper
left side of the status bar, indicating that a USB connection has been established, as shown in
the following picture:
9
Page 10
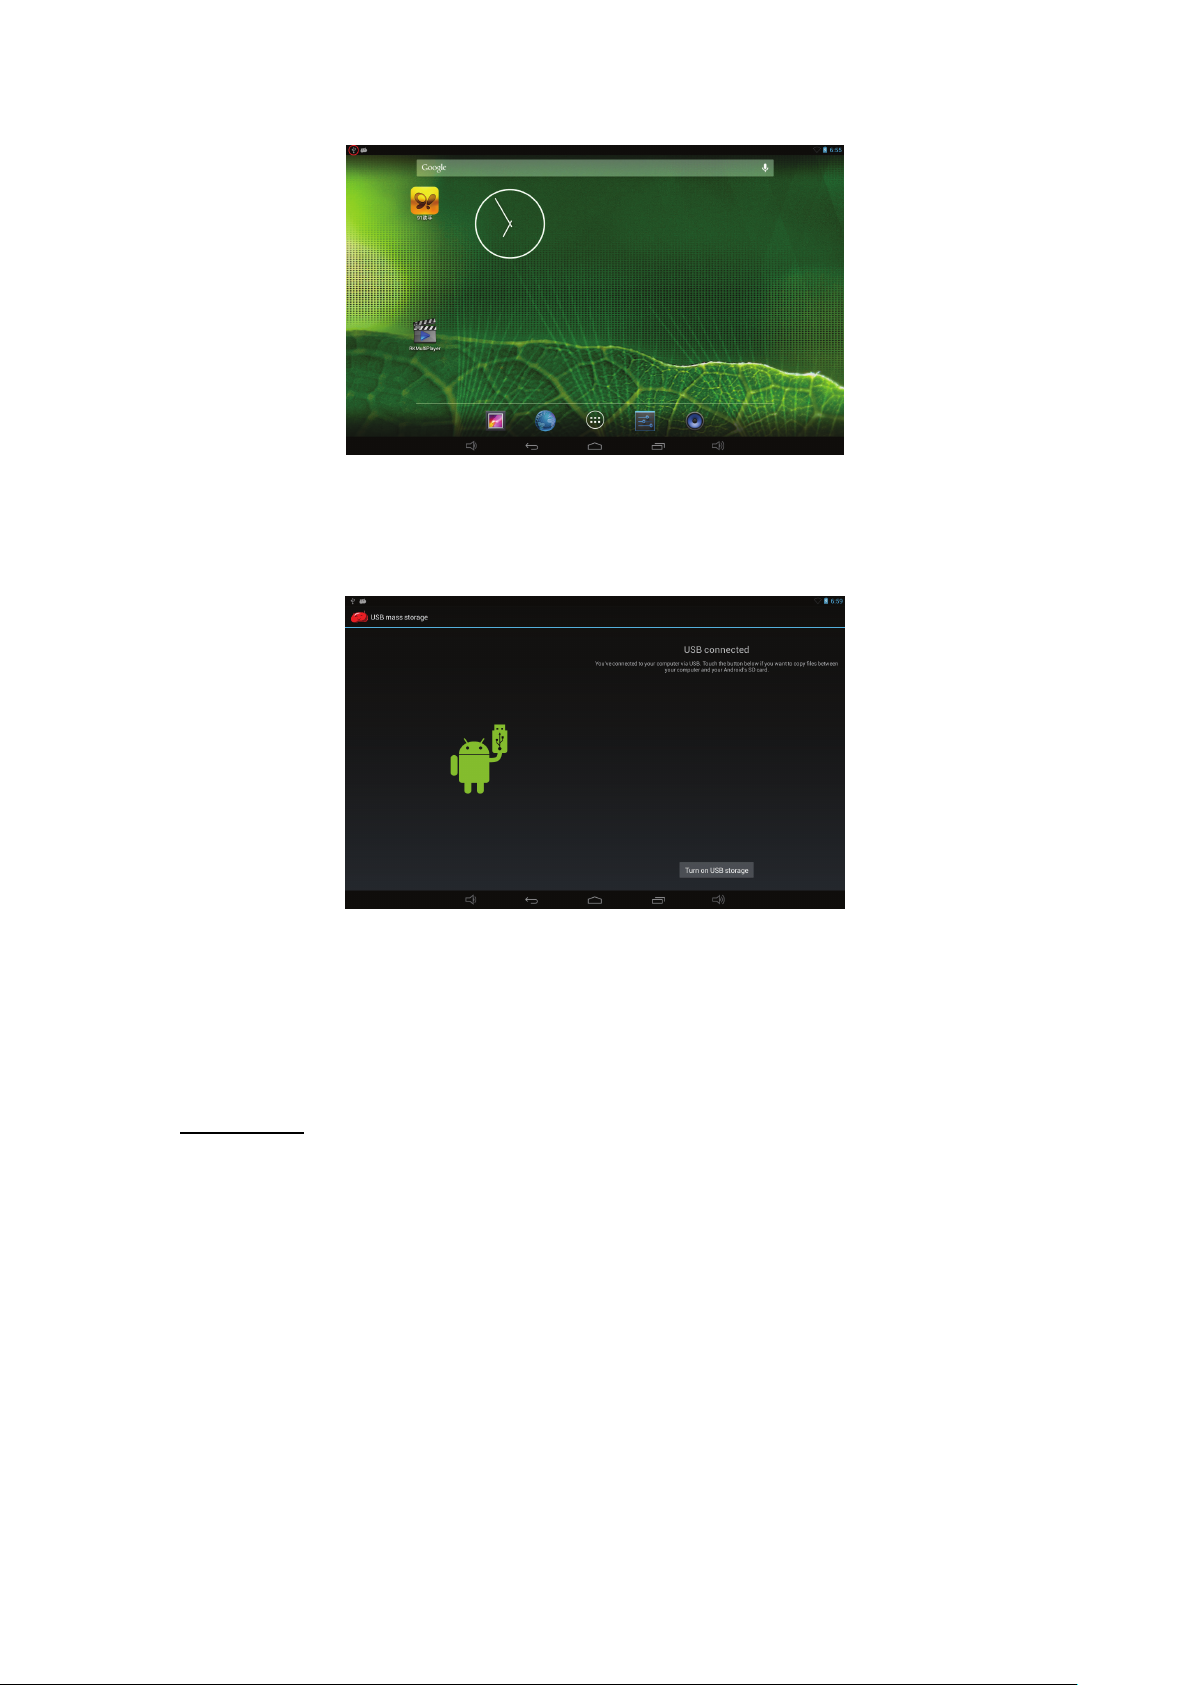
When the main menu appears, tap “USB connected”.
Tap “Turn on USB storage” in the window prompt.
At this time, you can find the device storage card and SD card (if this card has been plugged
in) in the My Computer list.
After data transmission has been completed, tap “Turn off USB storage” to disable data
transmission.
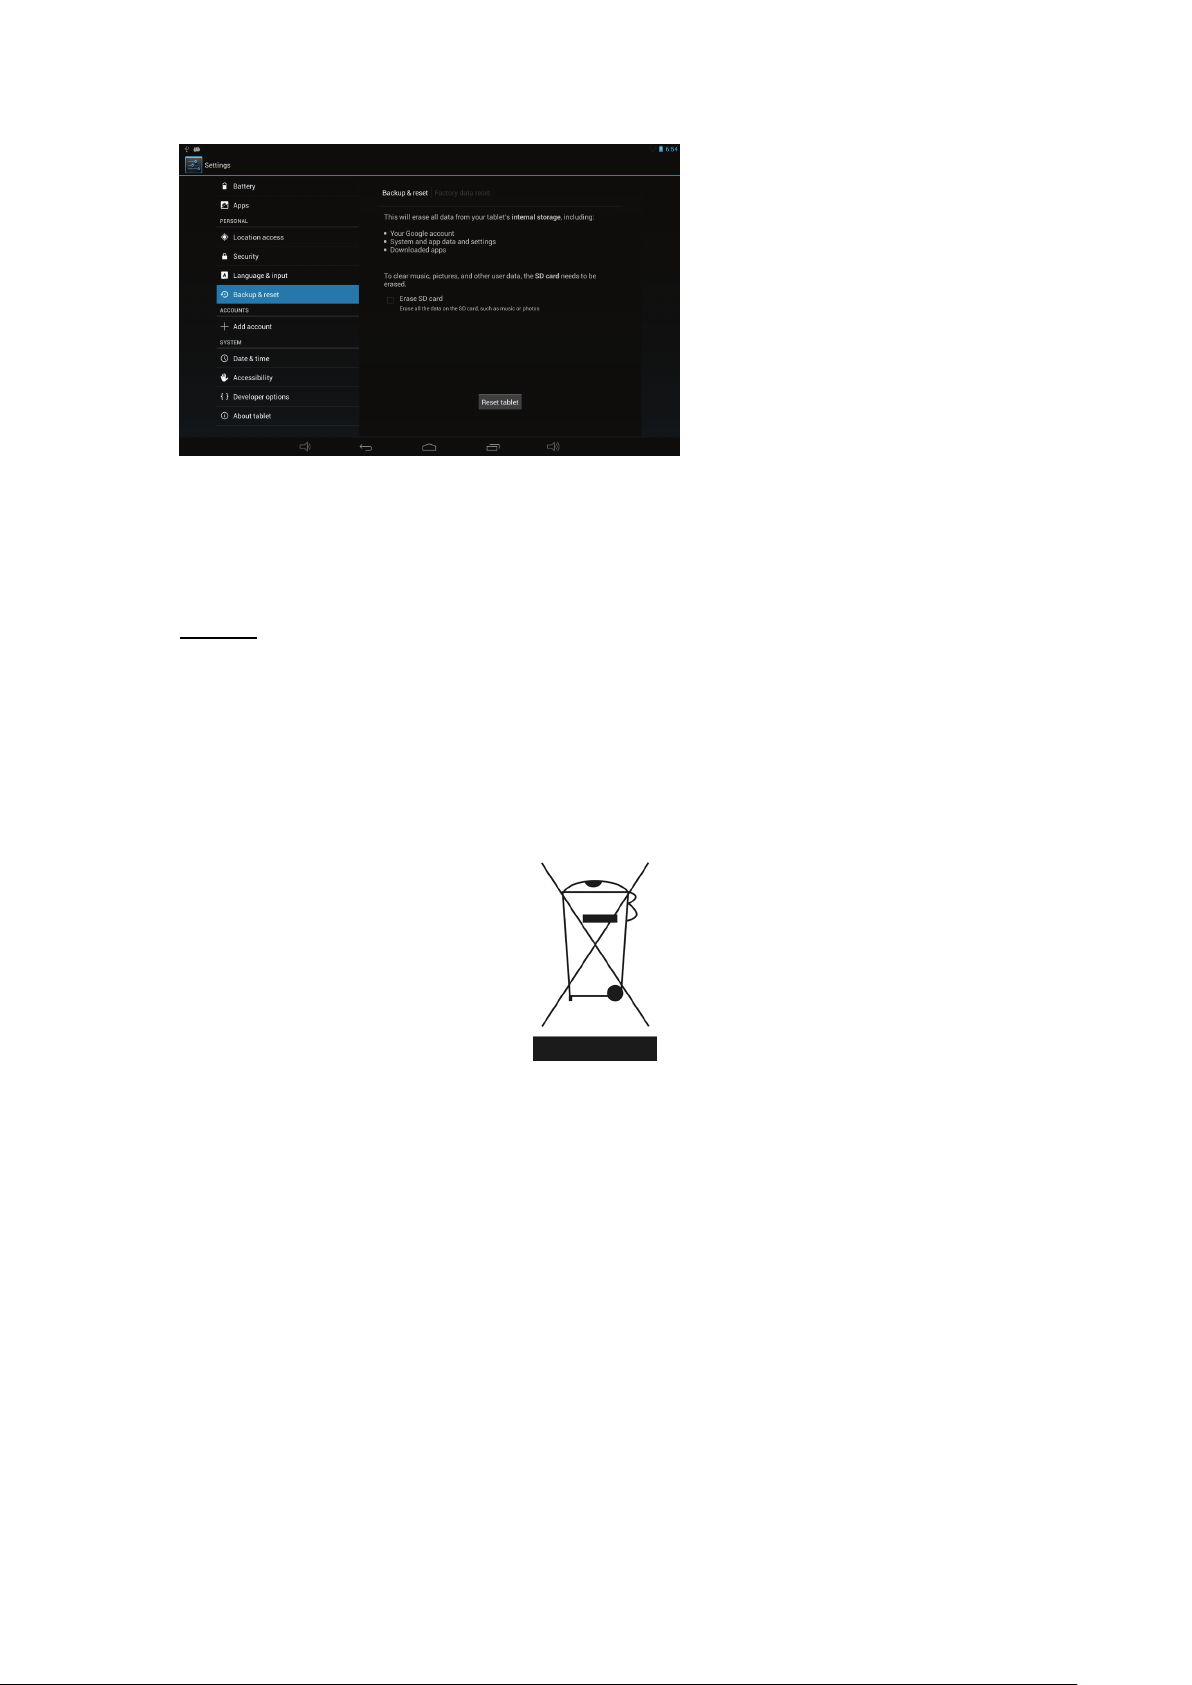
Factory Reset
If your device has been infected with a virus, or has malfunctioned as a result of installing
third-party applications, you can erase all data from your device via the reset tablet function.
Operation: Tap ”Settings” ”Backup & reset” ”Factory data reset”, then tap ”Reset
tablet” and ”Erase everything”, as shown in the following picture:
10
Page 11
Disposal
This symbol on the product or in the instructions means that, at the end of its useful life,
your electrical or electronic equipment should be disposed of separately from your
household waste. There are separate collection systems for recycling in your country.
For more information, please contact the local authorities or the retailer where you
purchased the product from.
11
 Loading...