

Agio International Round Captured Glass Table User Manual
IMPORTANT!! PLEASE READ ENTIRE INSTRUCTION SHEET BEFORE ASSEMBLY!!
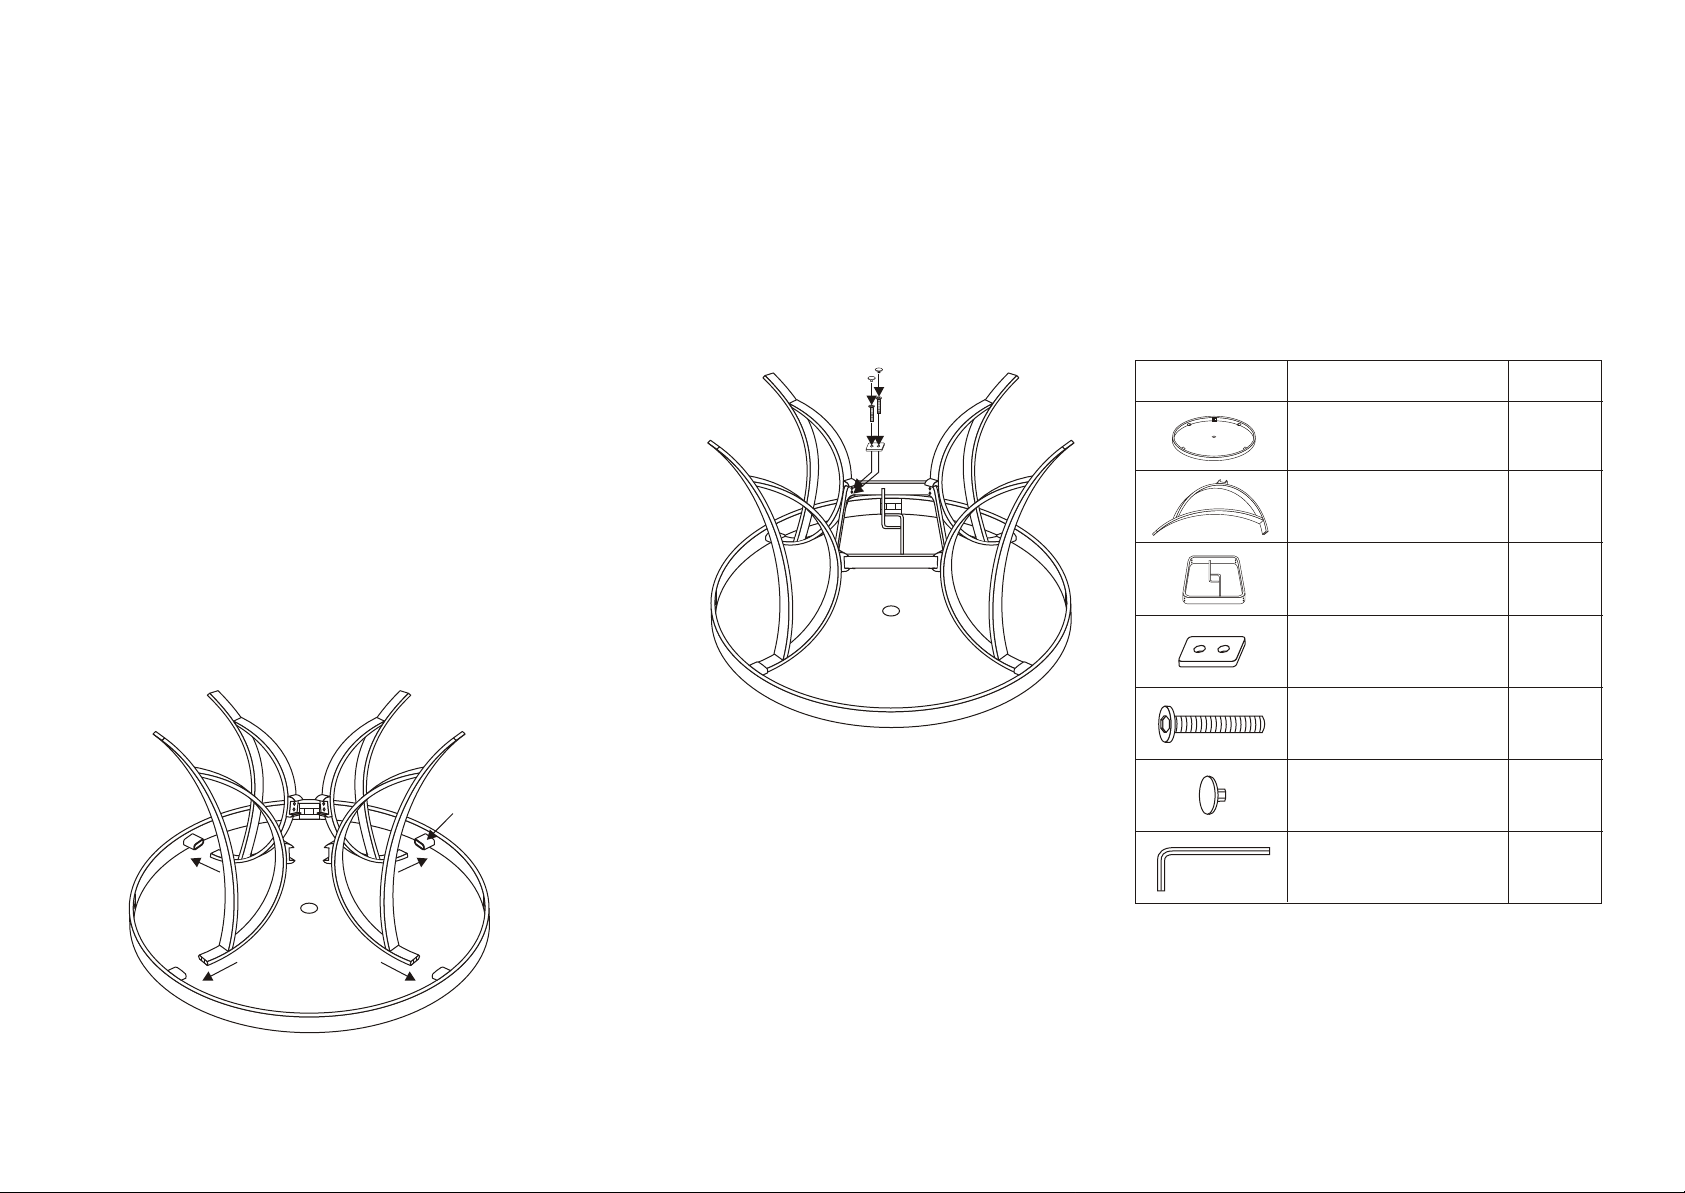
Step 1:Identify all parts packed in the carton against the
parts list. Remove all protective materials. If you
are missing any parts or are unsure as how to proceed
with the assembly, please call our Customer Service
Center immediately (800) 416-3511. Do not attempt
to assemble table if any parts are missing or damaged.
Step 2: With the help of another person, place tabletop upside
down on a flat, non-abrasive surface to avoid scratching
the glass or rim. Note the plastic fittings on the inside of
the table rim. These fittings slide. Adjust, if necessary,
by sliding the fittings into proper position as shown in
diagram below. If applicable, adjust flat plastic
supports so they are spaced evenly throughout
the inside of the rim. This will ensure best possible
support of the glass in the table. Make sure clear
bumpers are in place in the small holes on the table legs.
Guide each of the table legs into the plastic fittings in the
table rim.
Step 3:Attach one leg to the leg connector bracket using two
bolts. Add a metal plate to the bolts and guide through
the inside of the connector bracket into the fixed nuts
inside of the table leg. Hand tighten three or four
revolutions only. Important note: Hand tighten
only as some adjustments may be necessary to
ensure legs are properly aligned. Repeat procedure
on other three legs, adjusting as necessary to ensure
the legs are properly aligned.
Step 5:With the help of another person, carefully turn the
table in the upright position. Your table is now ready
for use. If you have any questions, please call our
Customer Service Center at (800) 416-3511.
PARTS LIST DESCRIPTION
TABLE RIM
WITH GLASS
LEG
CONNECTOR RING
TABLE LEG
METAL PLATE
BOLT
QTY./PCS
1
4
1
4
8
PLASTIC FITTING
Step 4:At this time tighten all bolts using the Hex Bolt
Driver provided. Important note: each bolt should
be tightened a few revolutions at a time. We
recommend working in a cross corner “X” fashion,
alternating between bolts. This will tighten the
frame evenly by placing equal pressure on all bolt
joints. Do not over tighten. Cover all bolts with
PVC bolt covers provided.
Page 2
PVC BOLT COVER
HEX BOLT DRIVER
MODEL # 50-48-09
8
1
 Loading...