

Page 1
1, 5
2a
3
2b
4
6
VWorks Protocol Authors
Quick Guide
Workflow overview To create protocols in the VWorks software:
Step For this task...
1 Add devices.
2 Create a protocol.
3 Add tasks.
4 Compile the protocol and simulate the protocol run.
5 Run the protocol.
6 Optional. Create a form for operators to use to run the protocol.
Step 1.
Add devices
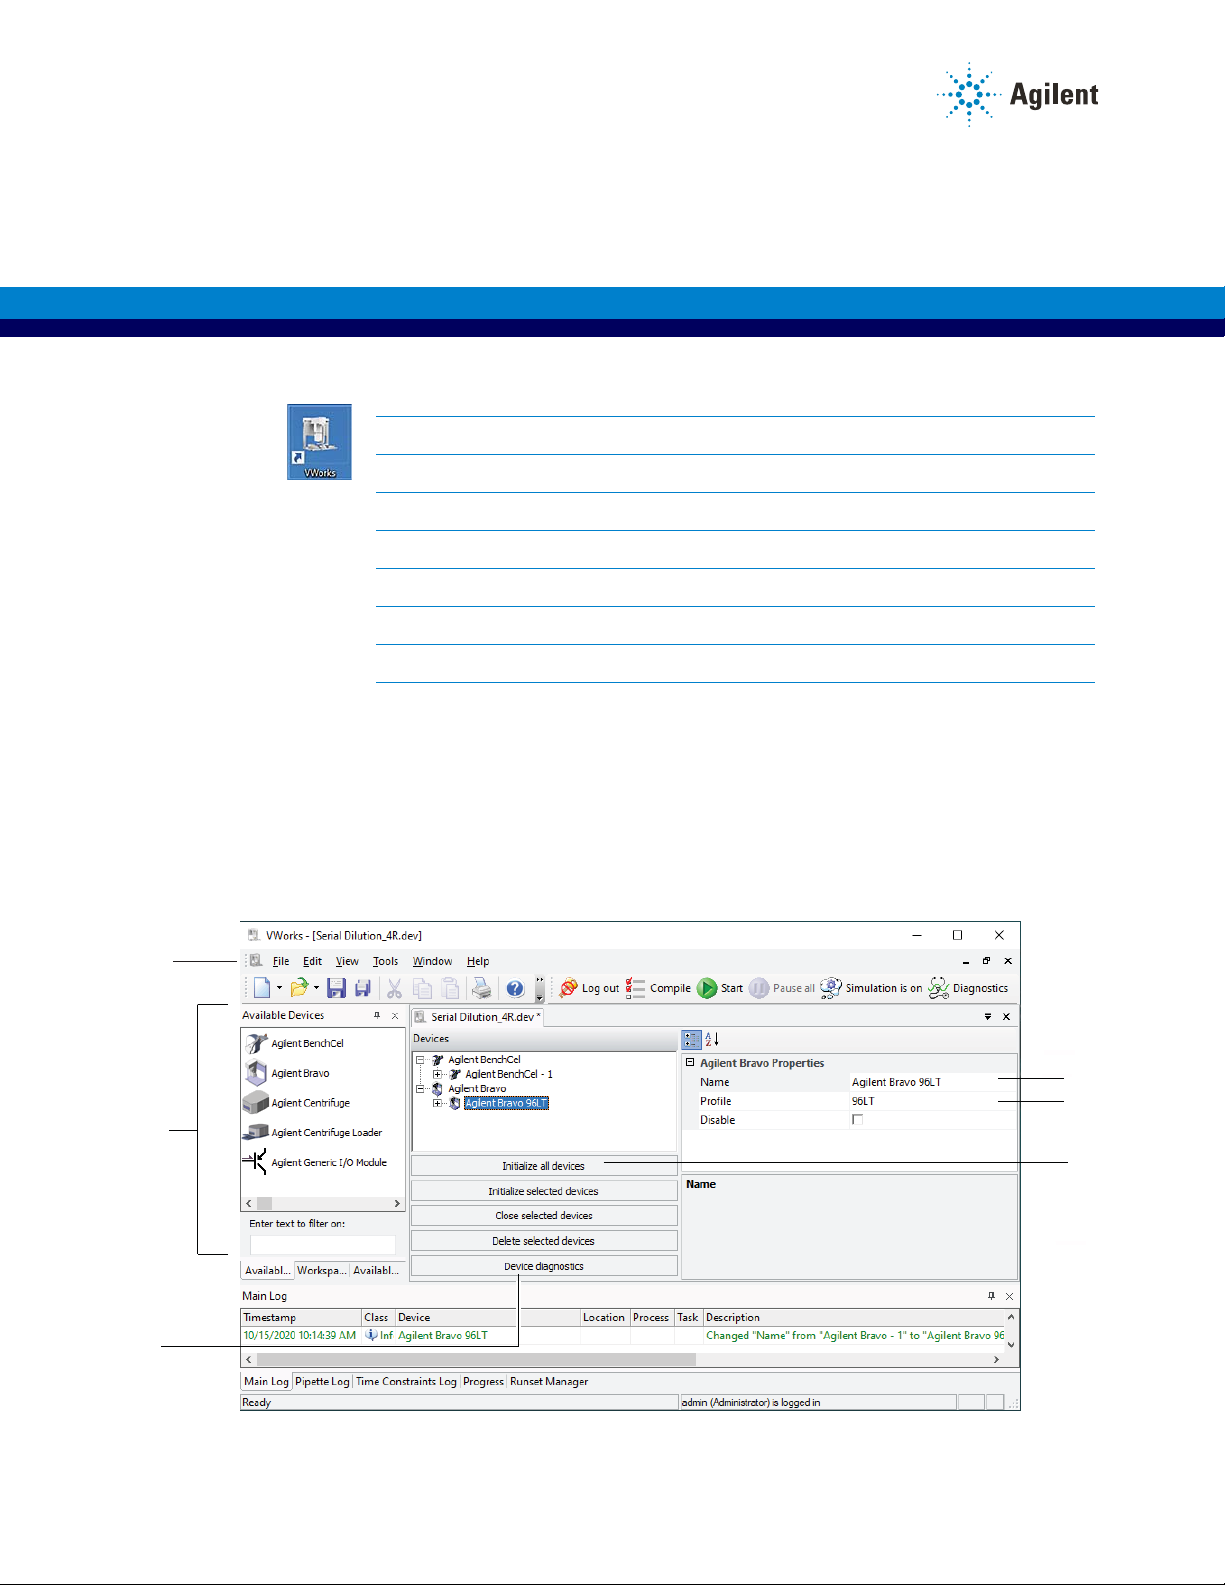
To add devices:
1 In the VWorks window, select File > New > Device. A device file tab appears.
2 Add a device to the device file tab:
a Double-click the device icon in the Available Devices area. (If you are in the
Workspace tab, click the Available Devices tab to display the devices.)
b Type a name for the device and set the device properties.
1
Page 2

Step 2. Create a protocol
3 To create a profile for the device, click the device name in the device file tab and
then click Device diagnostics. When the device diagnostics window opens:
a Name the profile, select the connection type (Ethernet or serial), and locate
and connect to the device in the Discovered Bionet Devices dialog box
(Ethernet connections only).
b Set the teachpoints.
For devices such as the BenchCel Microplate Handler, you also need to
reference the teachpoint file.
4 Select the profile in the device properties area.
5 Click File > Save, and then repeat steps 1 to 4 to add other devices.
VWorks Plus. If the Audit Comments dialog box appears, enter a reason for the
change, and then click OK.
6 In the Devices area, click Initialize all devices.
Step 2.
Create a protocol
Refer to the following figure for this step.
To create a protocol:
1 Select File > New > Protocol.
2 Click Protocol Options in the protocol area to verify the device file location, provide
a description of the protocol, add notes about the protocol, and set other options.
If you are using a VWorks form to run the protocol, specify the form to use and
whether to automatically load the form file.
3 VWorks 14.0 and later. If the protocol will use any files created in other software,
click File > Import Misc Files and import the file into storage for use in the VWorks
software.
4 Click Main Protocol.
5 Click Configure Labware to set the starting locations of labware in a device.
Note: Configured labware will return to its starting location by the end of the
protocol run.
Repeat this step for each device in the system.
6 Set up a process.
a Click the process - n icon.
b Set the process plate parameters in the Task Pa ram eters area.
Note: A process is a sequence of tasks that are performed on a particular
labware or a group of labware. The process labware will move into the system
to be processed, and move out of the system when processing is finished.
7 Repeat step 6 to add additional processes.
2 VWorks Protocol Authors Quick Guide
Page 3
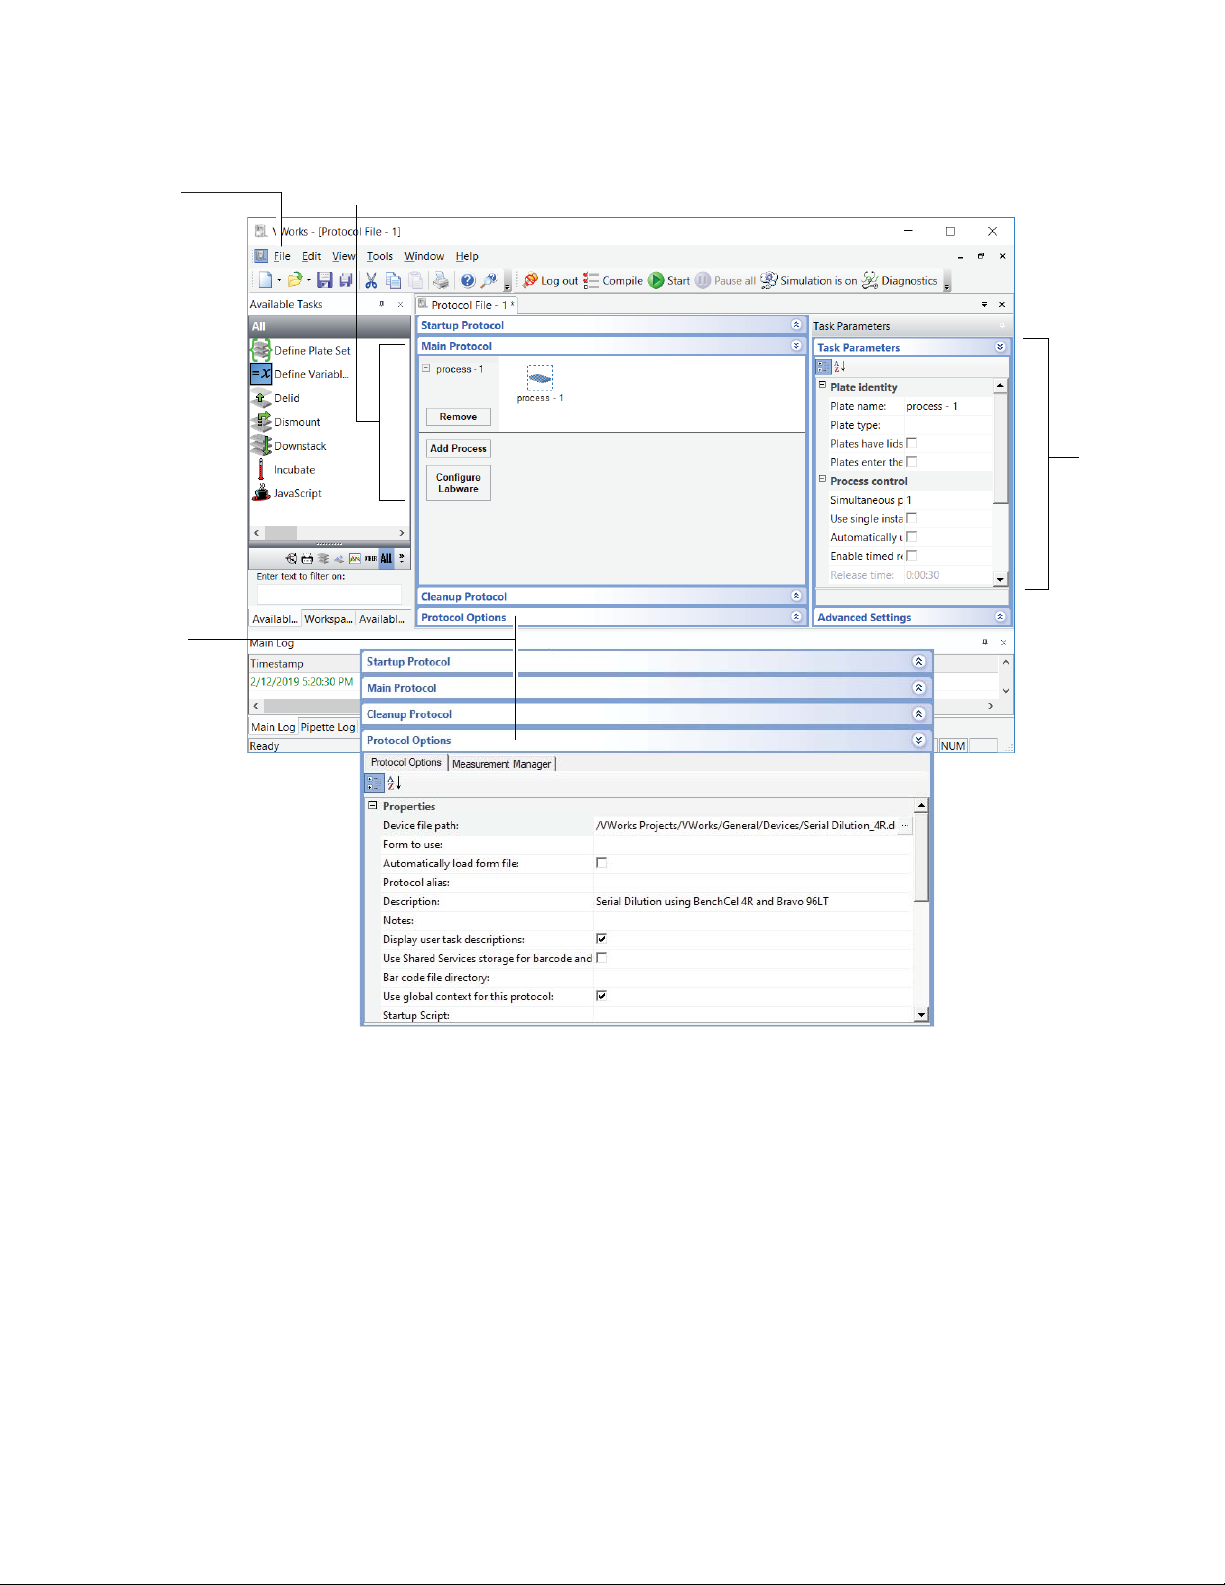
Figure Creating a protocol
1
3, 4, 5a
5b
2
Step 2. Create a protocol
VWorks Protocol Authors Quick Guide
3
Page 4

Step 3. Add tasks
1
3
4
2
Step 3. Add tasks To add tasks to the protocol:
1 Drag tasks from the Available Tasks area to the protocol area.
2 Set the parameters in the Task Par ame ters area.
3 Optional. Click Startup Protocol or Cleanup Protocol in the protocol area to add
processes that start before or finish after the main protocol starts and finishes.
4 Select File > Save.
VWorks Plus. If the Audit Comments dialog box appears, enter a reason for the
change, and then click OK.
4 VWorks Protocol Authors Quick Guide
Page 5

Step 4. Compile the protocol and simulate a run
1b,
2b
1a 2a
Step 4. Compile
the protocol and
simulate a run
To compile the protocol and simulate a run:
1 To compile the protocol to check for protocol-writing or logical errors:
a Click Compile.
b View and fix the errors and warnings listed in the Main Log tab.
c Repeat steps a and b until the protocol compiles error free.
d Save changes made to the protocol.
VWorks Plus. If the Audit Comments dialog box appears, enter a reason for the
change, and then click OK.
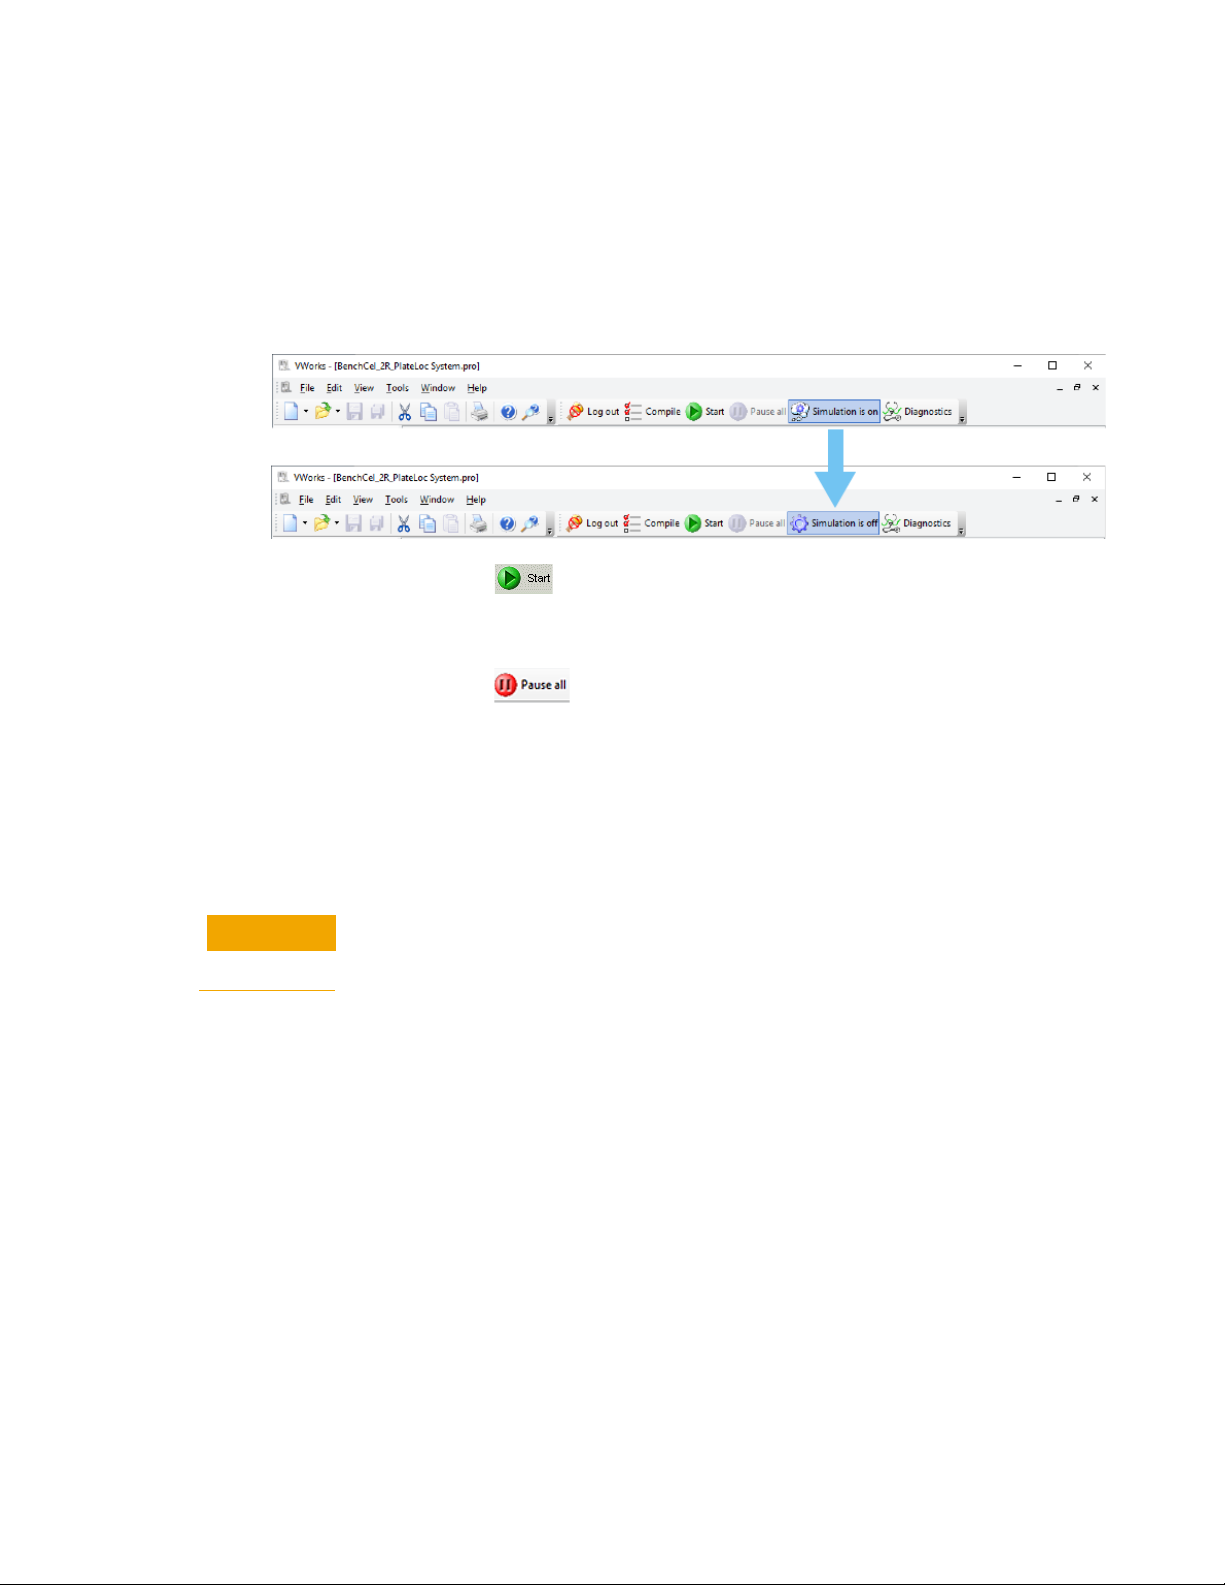
2 To simulate the protocol run to check for potential deadlocks:
a Click Simulation is off to turn on the simulation mode (the button changes to
Simulation is on), and then click Start.
b View and fix any deadlock errors that are listed in the Main Log tab.
c Repeat steps a and b until all deadlock errors are fixed.
d Save changes made to the protocol.
VWorks Plus. If the Audit Comments dialog box appears, enter a reason for the
change, and then click OK.
VWorks Protocol Authors Quick Guide
5
Page 6
Step 5. Run the protocol
CAUTION
Step 5.
Run the protocol
VWorks Plus. To run a protocol successfully, any dependent records must have a
development state equal to or greater than the protocol. For example, if you attempt to
run a released protocol with labware entries that are still in validation, an error
message appears and you must abort the protocol.
To run a live protocol run:
1 Click Simulation is on to turn off the simulation mode (the button changes to
Simulation is off).
2 Click Start ( ) on the toolbar. Or, If you have a runset open, view the
scheduled start times in the Runset Manager tab.
To pause the protocol run:
Click Pause all (). In the Scheduler Paused dialog box, you can select the
command to resume, finish processing existing labware already in the system, or
abort the run. You can also open the device diagnostics to make adjustments before
resuming the run.
To stop a run in an emergency:
Use the hardware emergency-stop button.
See the device user guide for more details.
You may not be able to resume a protocol run after you press the hardware
emergency stop button. To recover the system after an emergency stop, see the
device user guide.
6 VWorks Protocol Authors Quick Guide
Page 7

Creating a protocol form
Creating a
protocol form
A form provides a simplified interface, which can be helpful for users who have limited
or infrequent experience with the VWorks software.
To open the Form Designer and create a new form:
1 In the VWorks window, click File > New > Form to open the Form Designer.
2 In the Form Designer, drag the desired controls to the form canvas and set the
properties for the form controls.
3 VWorks 14.0 or later. Click File > Import Misc Files to import any image or icon files
that you want to use in your form. Such files must be in Shared Services storage to
be available for use in a VWorks form.
4 Set the form properties, and then click OK to save the form.
5 VWorks Plus. If the Audit Comments dialog box appears, enter a reason for the
change, and then click OK.
6 Open the protocol that the form will run, and in the Protocol Options area, specify
the form to use and other options for the form.
7 Save any changes.
VWorks Plus. If the Audit Comments dialog box appears, enter a reason for the
change, and then click OK.
VWorks Protocol Authors Quick Guide
7
Page 8

Where to find help
12
Where to find
help
To open the knowledge base:
• From within VWorks software, click Help > Knowledge Base or press F1.
• From the Windows desktop, select Start > All apps > Agilent Technologies >
VWorks Knowledge Base.
To open context-sensitive help in the VWorks window:
1 In the VWorks window, click the button on the toolbar. The pointer changes to
.
2 Click an icon or area of interest in the VWorks window. The relevant help topic or
guide opens.
Contacting
Agilent
D0004379, Revision A
November 2020
Web: https://www.agilent.com
Contact page: https://www.agilent.com/en/contact-us/page
Documentation feedback: documentation.automation@agilent.com
Copyright© Agilent Technologies, Inc. 2020
All rights reserved
 Loading...