

Page 1

GeneSpring GX 9
Quick Start Guide
The information in this guide is for use with GeneSpring GX 9
...............................................................................................What is GeneSpring GX 9? 1
....................................................................................Where do I get GeneSpring GX 9? 1
.............................................................................Is there a demo experiment I can run? 1
........................................................................................How can I get more Pathways? 9
What is GeneSpring GX 9?
GeneSpring GX is a powerful visualization and analysis solution
designed for use with genomic expression data. It allows you to
display and analyze large data sets on your personal computer.
GeneSpring GX can analyze data from many sources, including
academic, biotechnology, and pharmaceutical organizations.
Where do I get GeneSpring GX 9?
You can download a free evaluation copy of GeneSpring GX that will
be fully active for 15 days. Go to http://genespring.com and follow
the link for “Download FREE Trial”.
If you would like to buy a copy of GeneSpring GX, request a quote
from the website, call +1-800-227-9770 (Option 6) or contact your
Agilent sales representative or distributor.
....................................................................How do I get started with GeneSpring GX 9? 1
..................................................................Where do I get GSEA compatible Gene Sets? 10
.......................................................................Where is my data from GeneSpring GX 7? 10
How do I get started with GeneSpring GX 9?
After installation of GeneSpring GX, you can get started immediately
since it comes pre-loaded with a demonstration experiment to show
you the functionality of GeneSpring GX. There is a project called
“Demo Project” and contains an experiment and results from a study
of HeLa cells that were treated with an unknown compound in a
cancer treatment pilot study. We encourage you to explore this
demonstration project to get to know GeneSpring GX.
Is there a demo experiment I can run?
You can re-create the experiment from the demonstration project,
since the original data you need is provided with the installation. The
data files you need are located in the samples directory of the main
installation folder, usually found in
C:\Program Files\Agilent\GeneSpringGX
Follow the steps below to create a new experiment with the provided
data:
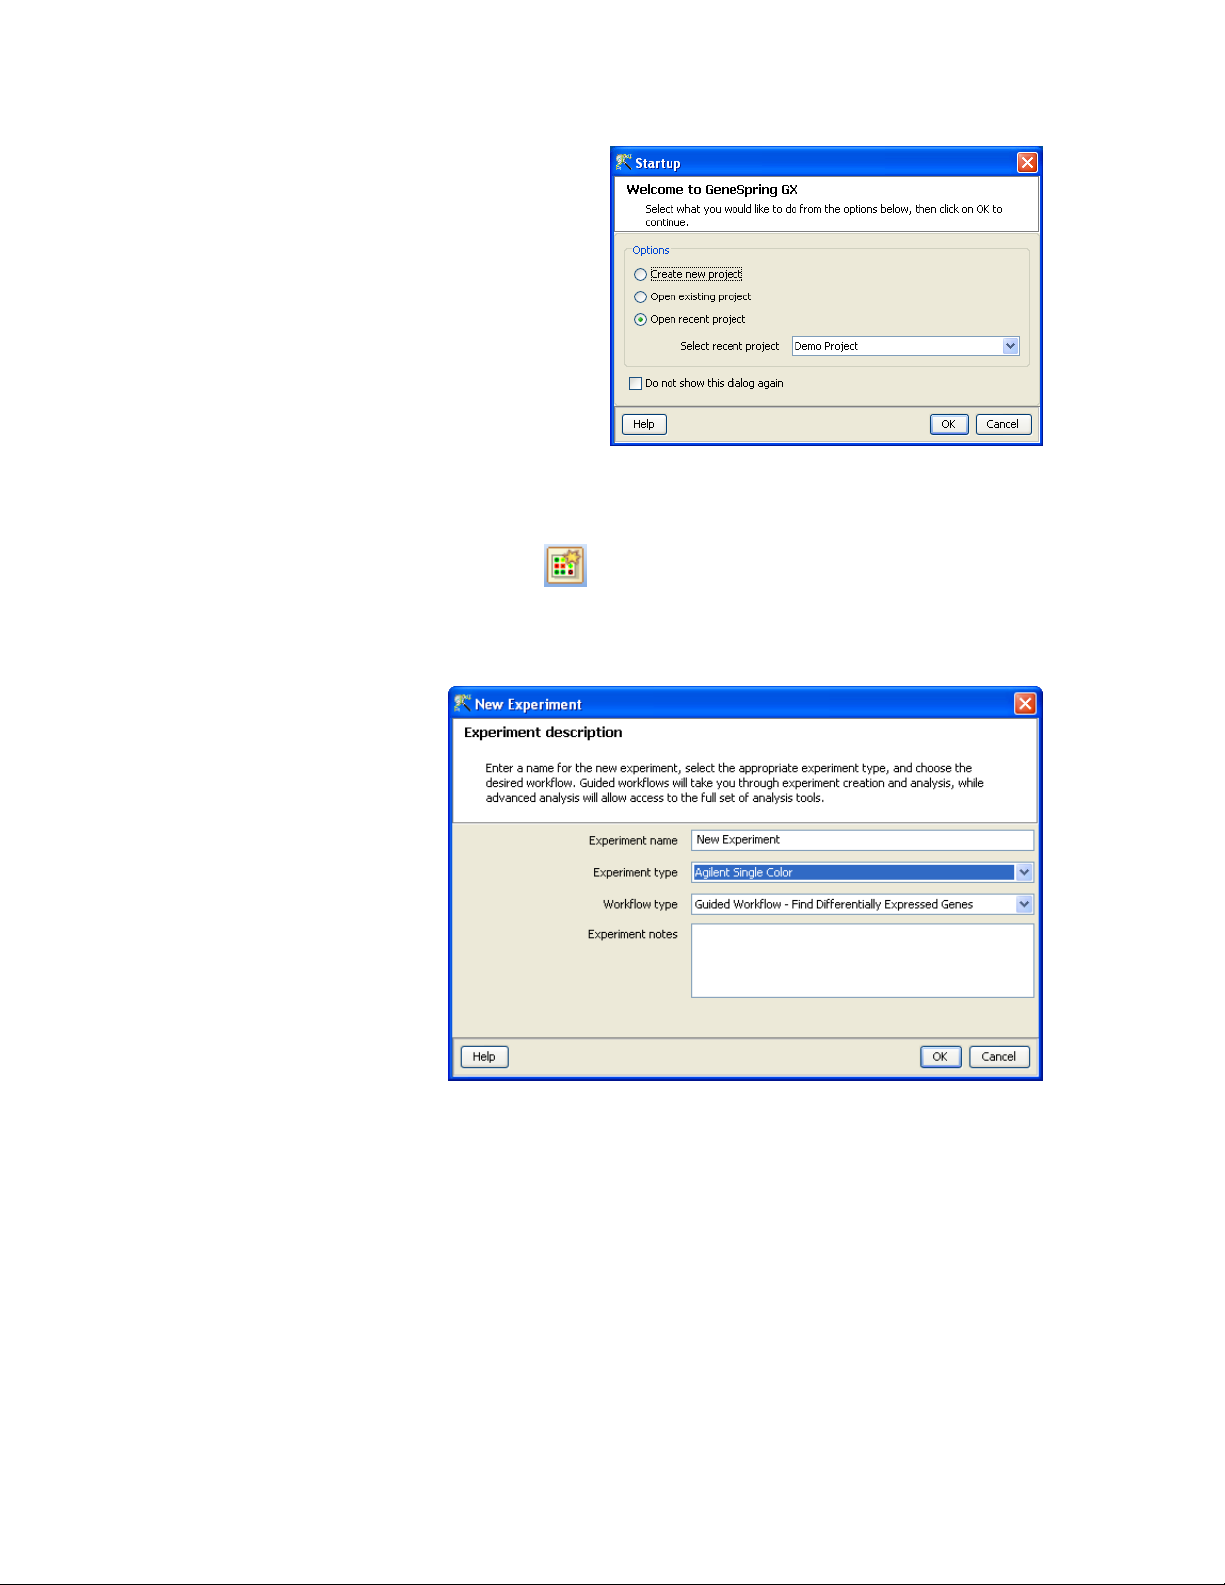
1) Start GeneSpring GX
2) Select the “Demo Project” from the Startup dialog box (or create
a new project)
GeneSpring GX 9 Quick Start Guide 1
Page 2
3) This will open the project open the experiment that was stored in
this project
4) To create a new project, press the New Experiment icon on the
Toolbar ( ) or select “Project -> New Experiment” from the
menu bar.
5) This will start the new Experiment wizard that will guide you
through the creation of the experiment
6) For the name, use something such as “HeLa cells treatment” to
give it a sensible name
7) Since the data we provided is a Agilent Single Color experiment,
choose “Agilent Single Color” as the Experiment Type.
8) There are two modes of GeneSpring GX, “Guided Workflow” or
“Advanced Analysis”. The Guided Workflow option will provide a
you with full guidance and is a good starting point. Select
“Guided Workflow” for the Workflow Type and press OK.
9) The next window will allow you to import new data files into the
system or use data that had been previously loaded (samples).
For this demonstration experiment we will use new data files.
GeneSpring GX 9 Quick Start Guide 2
Page 3
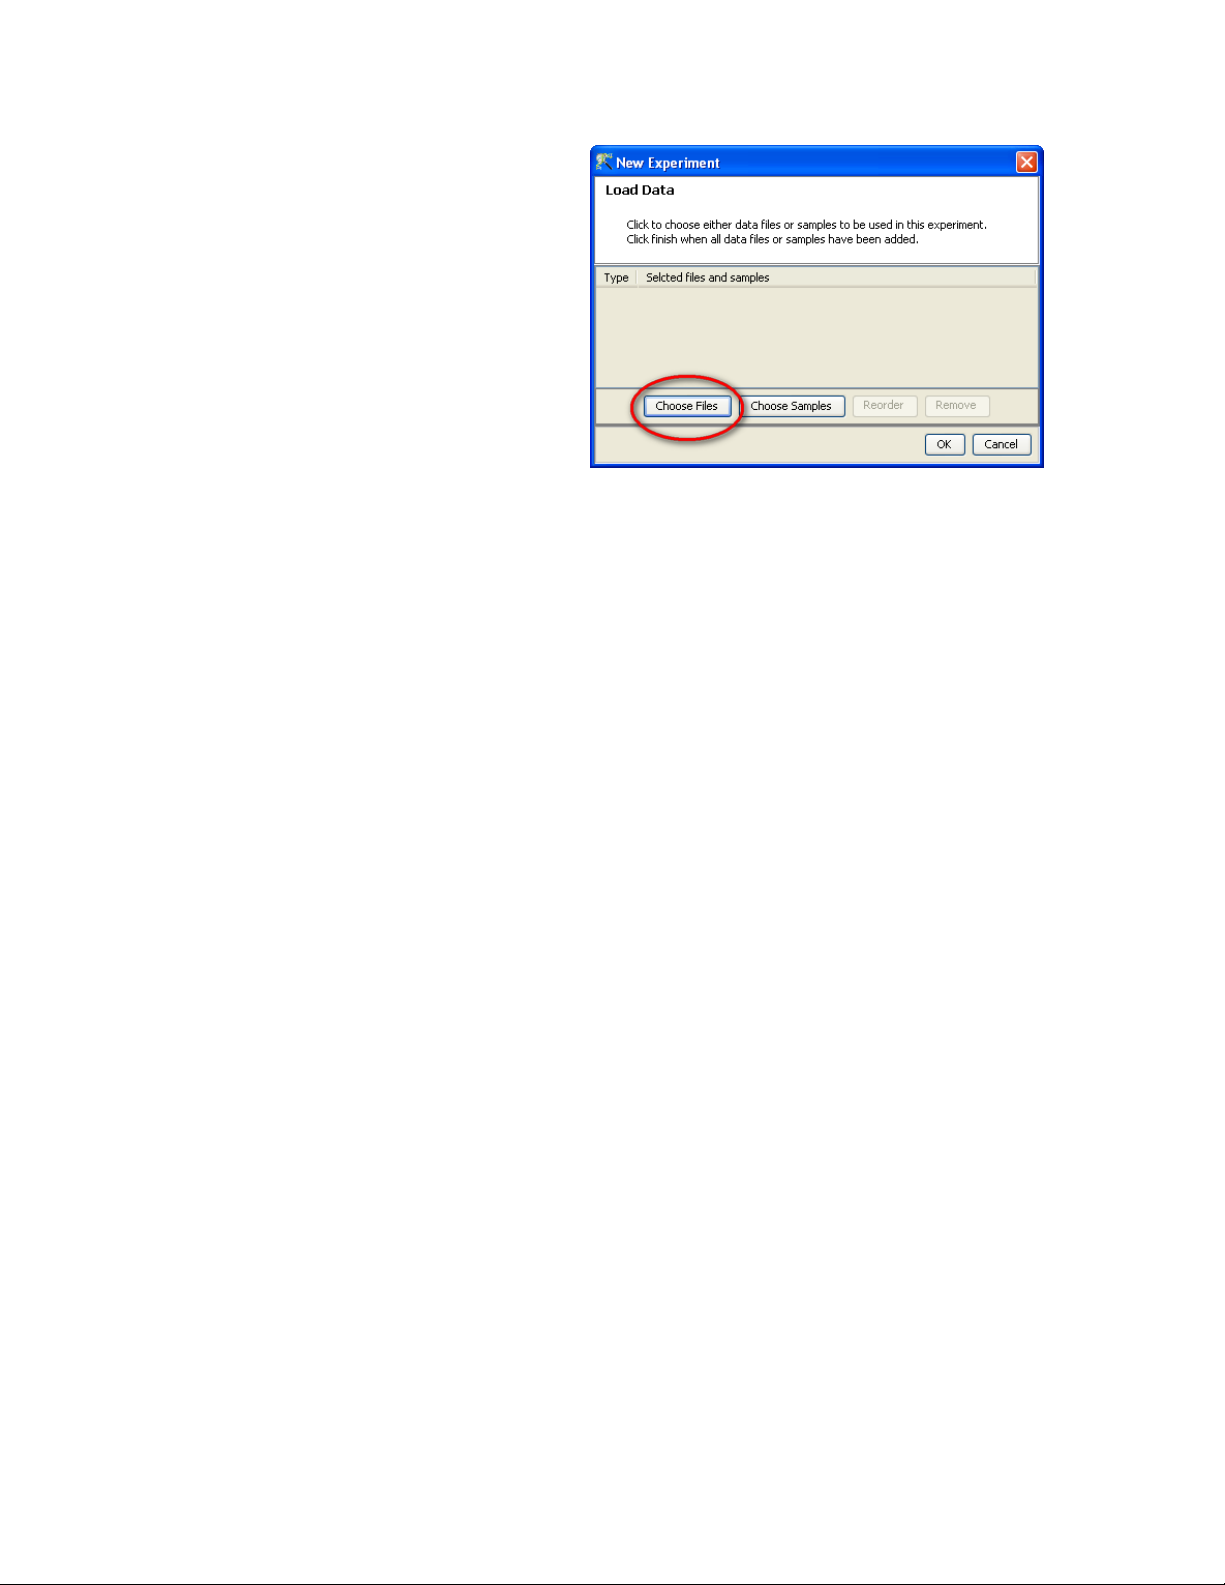
10) Select Choose Files to bring up the Choose file dialog. The choose
file dialog will most likely already point to the samples directory in
the main GeneSpring GX installation directory, but if not, point it
to the directory called “Agilent One-color Demo”, which is in
C:\Program Files\Agilent\GeneSpringGX\samples\Agilent Onecolor Demo
By default.
11) Select all .txt files to be loaded and press OK:
•
"US22502705_251209747382_Untreated.txt"
•
"US22502705_251209747387_Untreated.txt"
•
"US22502705_251209747392_Treated.txt"
•
"US22502705_251209747393_Treated.txt"
•
"US22502705_251209747394_Untreated.txt"
•
"US22502705_251209747404_Treated.txt"
12) The application will load the files, extract the expression data and
perform some standard normalizations and transformations. For
the Guided Workflow: Find Significant Differentially Expressed
Genes” the defaults are set as follows:
•
Threshold all values to 5
•
Perform a Median Shift normalization to the 75 percentile
•
Perform a Baseline transformation using the median of all
samples
13) These are sensible normalization for many experiments and will
provide a good starting point. In the advanced analysis workflows
you can change these normalization and transformation settings
to more appropriate settings for your experiment.
14) After the samples have been loaded and processed, the Guided
Workflow wizard will appear and show a summary of the data
with a box plot of the data distribution of the 6 samples and an
outline of the steps that will be performed on the left side.
GeneSpring GX 9 Quick Start Guide 3
Page 4
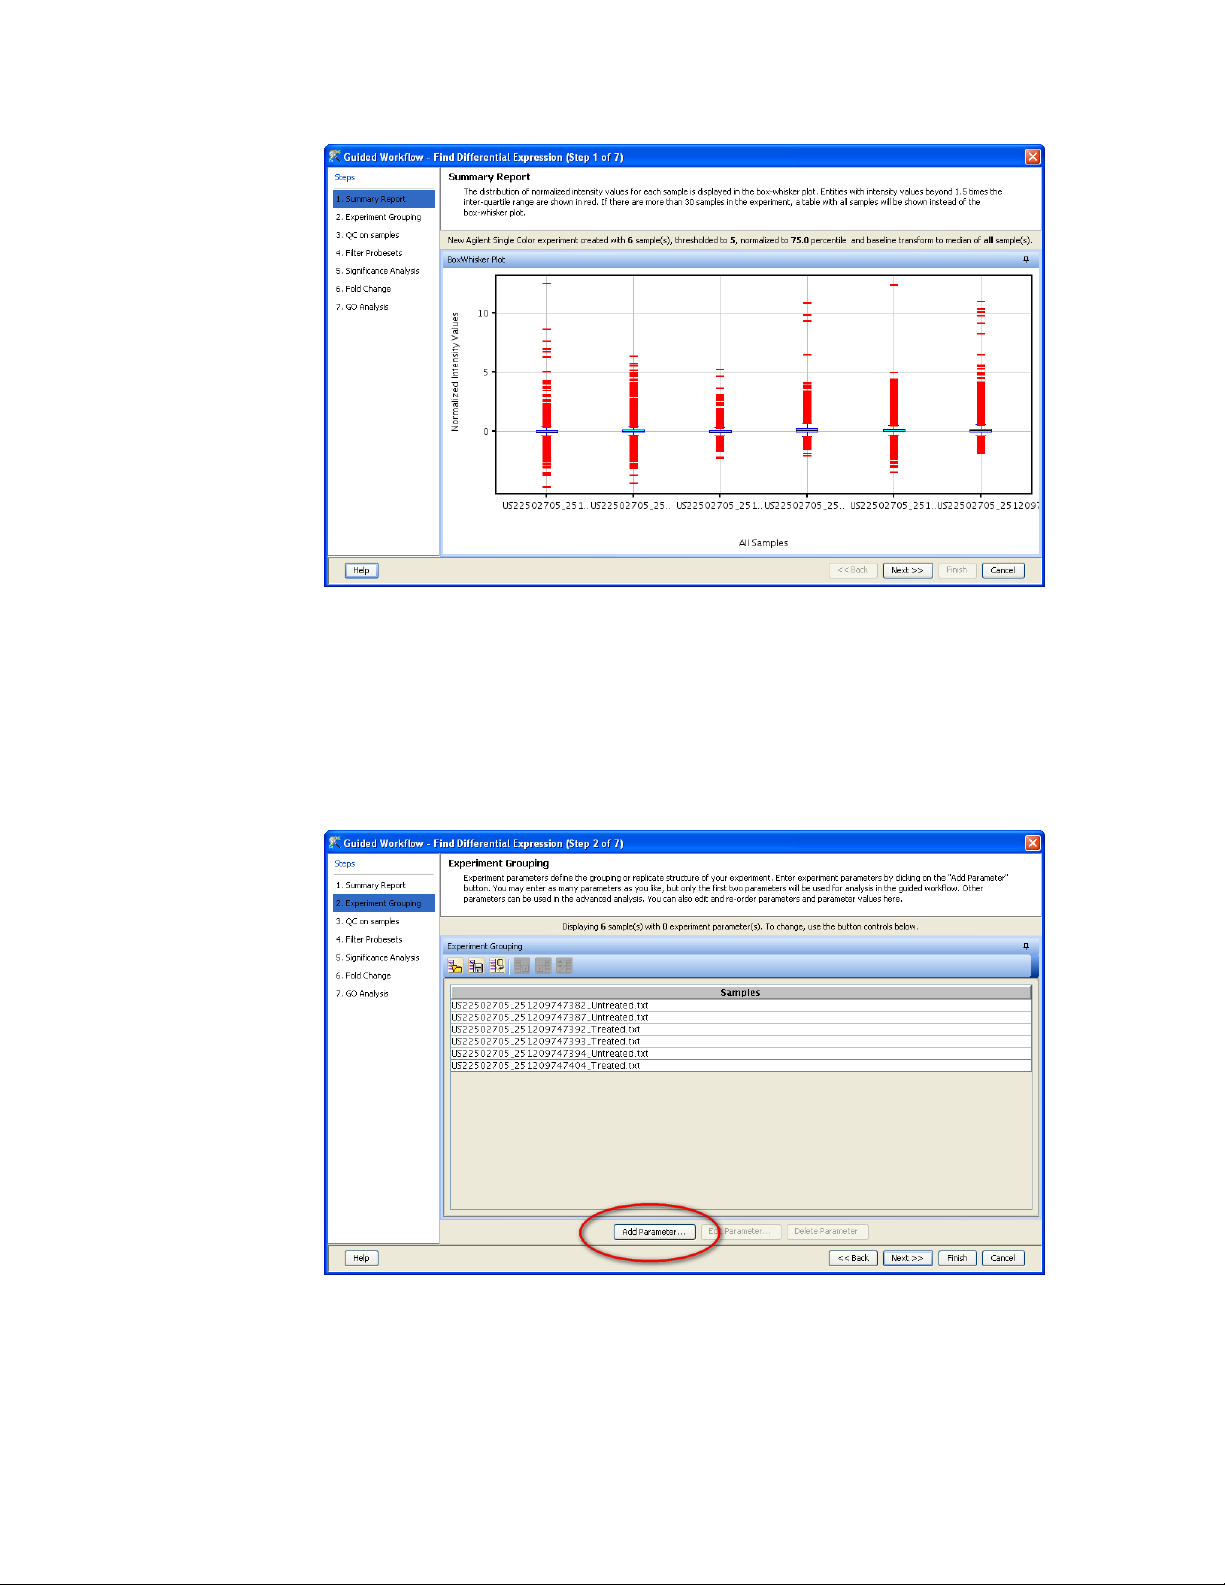
15) The guided workflows are controlled by pressing the <Next>
button to go to the next step. By pressing the <Back> button you
can go back and make some modifications. Press the <Next>
button to continue
16) The next window is where we let the program know which
samples are the treated samples and which as the untreated
samples. This is done by adding an “Experimental Parameter” and
pressing the <Add Parameter> button.
17) The filenames are pretty descriptive so it is easy to figure out
which samples are treated and which are untreated. In the Add
Parameter window, make “Treatment” the parameter name and
type the values “Untreated” and “Treated” in the Parameter
Values columns. (Hint: Select the three samples that need the
GeneSpring GX 9 Quick Start Guide 4
Page 5

value “Untreated” and press the <Assign Value> to speed up the
assignment of multiple values at once)
18) Press OK and press Next to move to the next Guided Workflow
step; “QC on Samples”. This window will show some Quality
Metrics from the Feature Extraction Files and shows a PCA plot to
determine if the replicates are grouped together. See the manual
for more on this, but for the purpose of this demonstration we
will step through the windows without any interference, since
most of the defaults are good and appropriate.
GeneSpring GX 9 Quick Start Guide 5
Page 6

19) Press <Next> for the next five screens and read the text at the
top to understand what you are looking at. You may want to
make some screenshots or save the images you see as JPEGs for
your lab notebook. The defaults in all cases are fine and at the
last window press the <Finish> button to end the guided
workflow.
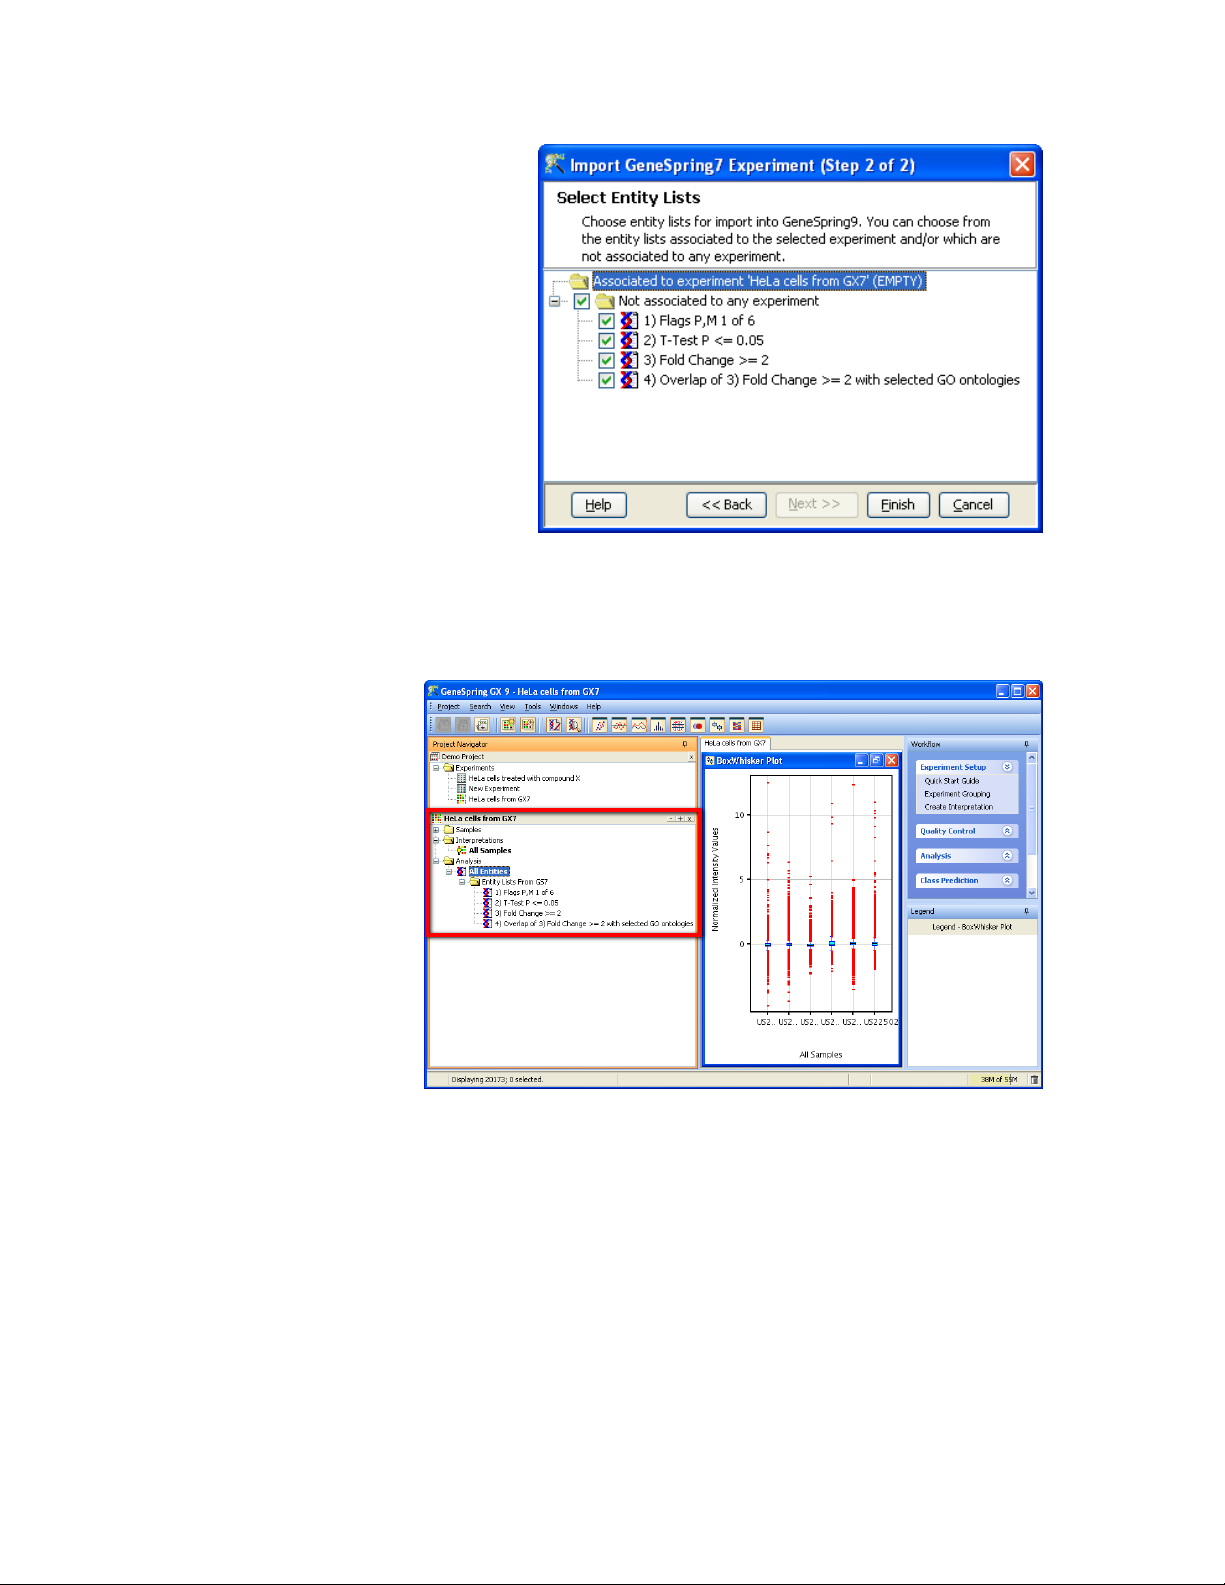
20) After the guided workflows are finished, the main GeneSpring GX
window shows all the results of the guided workflow.
GeneSpring GX 9 Quick Start Guide 6
Page 7

21) The result of the analysis is presented in a hierarchical manner,
making it easy to see the steps that were done in the guided
workflow and which steps were done.
At this point you have created a new experiment and done some
preliminary analysis using the guided workflows. One extra step we
invite you to explore is to use the Pathway Analysis functionality in
GeneSpring GX 9. We will explore if there is a pathway for which that
entity list is significantly enriched.
22) Select the Entity List “copper ion binding” by single clicking the
list and select the “Find Similar Pathways” function in the
Workflow panel on the right, under the “Results Interpretation”
section
GeneSpring GX 9 Quick Start Guide 7
Page 8

23) The resulting window will show that that there is one pathway,
called “MT-HeavyMetal-Pathway” for which the entity list has 7 of
its 16 entities being part of that pathway, showing that there is
some definite connection between a large portion of the genes in
the list and the P value of 4.1E-18 shows that this finding can be
considered to be rather significant
24) Press <Finish> to save the pathway as a result in the analysis
hierarchy. It will be saved as result under the selected entity list.
Double clicking the pathway link will open the network diagram.
GeneSpring GX 9 Quick Start Guide 8
Page 9

At this point we invite you to explore all the functionality of the
product. We recommend that you consult the manual (Help menu)
and other help is provided on the http://genespring.com website in
the form of online tutorials.
How can I get more Pathways?
GeneSpring GX 9 comes pre-loaded with a small set of 20 pathways,
courtesy of the Computational Biology Center at Memorial Sloan-
Kettering Cancer Center, the Gary Bader's lab at the University of
Toronto for the 'Cancer Cell Map', the PandeyLab at Johns Hopkins
University and the Institute of Bioinformatics (Bangalore, India). The
pathway diagrams were loaded through the BioPAX exchange format,
an open platform for the distribution of network and pathway
information.
The website http://biopax.org has more information about the BioPAX
format and has links to a number of other pathway databases that
are provided in the BioPAX format, such as KEGG, BioCyc, NCI Cancer
Cell Map and many other pathway databases. Other lists of
repositories of BioPAX compatible pathways are provided at the
Pathguide site (http://www.pathguide.org/).
NOTE: Import of KEGG pathways in the BioPax format
requires non-academic users to obtain a license through the
licensor, Pathway Solution, Inc. (pws@kegg.org). Other
pathway/networks may require similar license agreements
and Agilent Technologies, Inc. cannot be held responsible for
unlicensed use of network or pathway data.
GeneSpring GX 9 Quick Start Guide 9
Page 10

Where do I get GSEA compatible Gene Sets?
GSEA (Gene Set Enrichment Analysis), developed by Subramanian,
Tamayo, et al. (2005, PNAS 102, 15545-15550) and Mootha,
Lindgren, et al. (2003, Nat Genet 34, 267-273) from the BROAD
institute, described a fixed set of Gene Sets and these can be used in
GeneSpring GX 9 in the GSEA tool. Agilent technologies does not
have the re-distribution rights to these gene sets and the user of
GeneSpring GX 9 is asked to download the gene sets directly from the
BROAD Institute website: http://www.broad.mit.edu/gsea/msigdb/
downloads.jsp
Download the file “MSigDB.xml” (At the time of the writing of this
manual, the latest version was 2.1 and the file was
“msigdb_v2.1.xml”). Unzip the file and use the XML file for import
into GeneSpring GX 9 using the “Import BROAD GSEA Gene Sets” in
the “Utilities” section.
Where is my data from GeneSpring GX 7?
Due to the completely new data organization in GeneSpring GX 9
when compared to previous versions, data that was saved in
GeneSpring GX 7 is not automatically available in version 9, but
migration tools are provided. There are two options for data
migration, depending on need for the old data:
1) Re-create an experiment in GX 9 from the raw files in GX 7
2) Open the normalized data from GX 7 as a new experiment in GX
9
The first option will result in a new experiment in 9, with all the
parameter settings etc. maintained, but the normalized values may
not be exactly the same. This option is only available for experiments
that were created with Agilent FE files and Affymetrix CEL and CHP
files.
The second option is available for all experiments from GeneSpring
GX 7 and will result in an exact copy of the normalized values, but
the samples from which the experiment was created are not available
for the creation of a new experiment.
In addition to the experiments, gene lists can also be migrated, but
migration of trees and classifications is currently not supported, but
these derived objects can easily be re-created in version 9.
Recreating a experiment
For option 1 (re-creation of an experiment), follow the instructions
below.
1) Choose menu item “Project -> Import GS7 experiment”. Select
the GeneSpring GX 7 data directory.
GeneSpring GX 9 Quick Start Guide 10
Page 11

2) The default location for the GeneSpring GX data directory is
usually:
C:\Program Files\Agilent\GeneSpring GX\data
But may be different in your case
3) After the selection of the data directory, GeneSpring will find all
the genomes and experiments that were created in GeneSpring
GX 7 and you can select the one experiment you would like to recreate in GX 9
4) Select the appropriate Experiment Type for the Experiment you
want to migrate to ensure GeneSpring GX looks for the correct
sample attachments and press <Next>
5) The next window will show all the Gene Lists that are present in
the genome. GeneSpring GX 9 will attempt to find the gene lists
that are were created for the selected experiment, but in many
cases this information is not recorded and you can manually
choose which gene lists to associate with the experiment, from
the folder “Not associated to any experiment”. Press <Finish> to
continue.
GeneSpring GX 9 Quick Start Guide 11
Page 12
GeneSpring will now extract the original data files from the samples
and start the New Experiment wizard with these samples. All the
parameters will be retained, so you can immediately create the
interpretations and perform the analysis.
Loading Normalized data as a new experiment
For option 2 (Open normalized data from 7) the follow steps should
be followed
1) Run the migration tool once
•
Menu item “Tools -> Export GS7 Experiments”
GeneSpring GX 9 Quick Start Guide 12
Page 13

•
Select the GeneSpring GX 7 data directory and press
<Start>.
•
This tool only need to be run once and will prepare GX 7 for
migration. NOTE: This may take some time if there is a lot of
data.
2) Create a custom technology in GeneSpring GX 9
•
Menu item “Tools -> Create Custom technology -> Import
GS7 genome”
•
Select the GeneSpring GX data directory and the genome you
would like to migrate
•
This tool only needs to be run once for each Genome in
GeneSpring GX 7
•
This tool will create a library for GX 9 that contains all the
annotations for the genes
3) Import a GeneSpring GX 7 experiment
•
Menu item “Project -> Import GS7 experiment”
•
Choose the option “Export Normalized Experiment Signals”
See the manual for more information about the migration of
GeneSpring GX 7 data.
GeneSpring GX 9 Quick Start Guide 13
 Loading...