

Page 1
Flexible Metal Ferrules Swaging
1
2
3
4
5
6
Guide for UltiMetal Plus and
Gold-Plated Ferrules
Parts supplied 1
Tools required 2
Preparing the column ends 3
Swaging quality inspection 5
How to run a leak test 6
Parts supplied
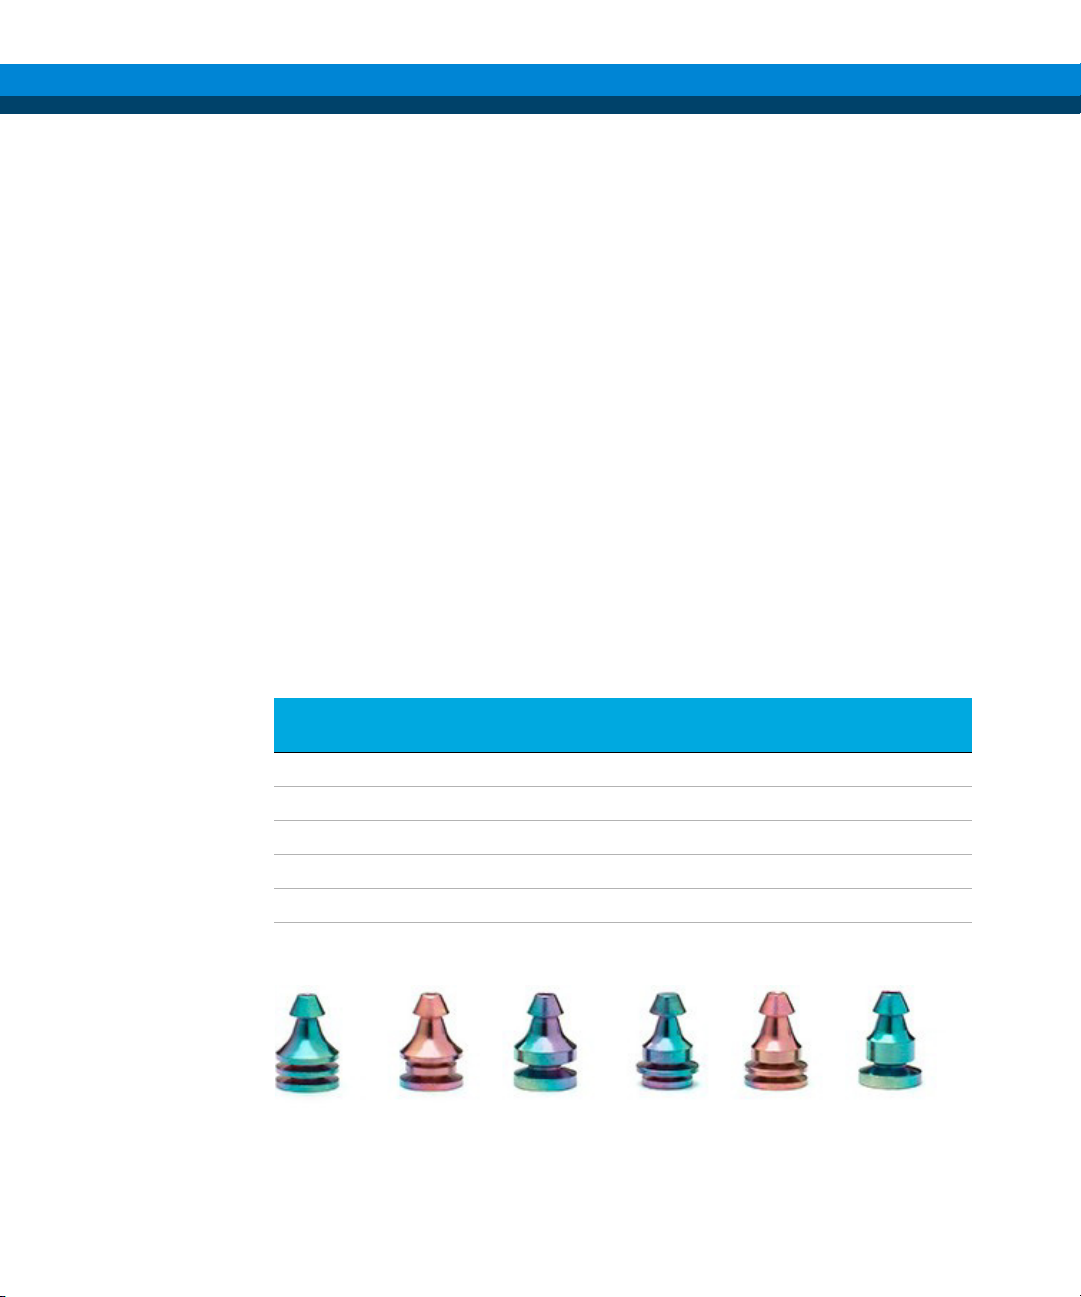
The available UltiMetal Plus and Gold-plated Flexible Metal ferrule packages are
listed in Table 1, Figure 1, and Figure 2.
Table 1 Available UltiMetal Plus and Gold-plated Flexible Metal ferrule packages.
ItemCompatible Column id
1 0.1 to 0.25 mm G3188-27501 G2855-28501
2 0.32 mm G3188-27502 G2855-28502
3 0.45 to 0.53 mm G3188-27503 G2855-28503
4 Plug G3188-27504 N/A
5 0.25 to 0.32 mm UltiMetal G3188-27505 G2855-28505
6 0.53 mm UltiMetal G3188-27506 G2855-28506
Figure 1. UltiMetal Plus Flexible Metal ferrules.
Flexible Metal Ferrules Swaging Guide 1
UM+ FMF
part number
Gold-Plated FMF
part number
Page 2
Flexible Metal Ferrules Swaging Guide for UltiMetal Plus and Gold-Plated Ferrules
NOTE
Tools required
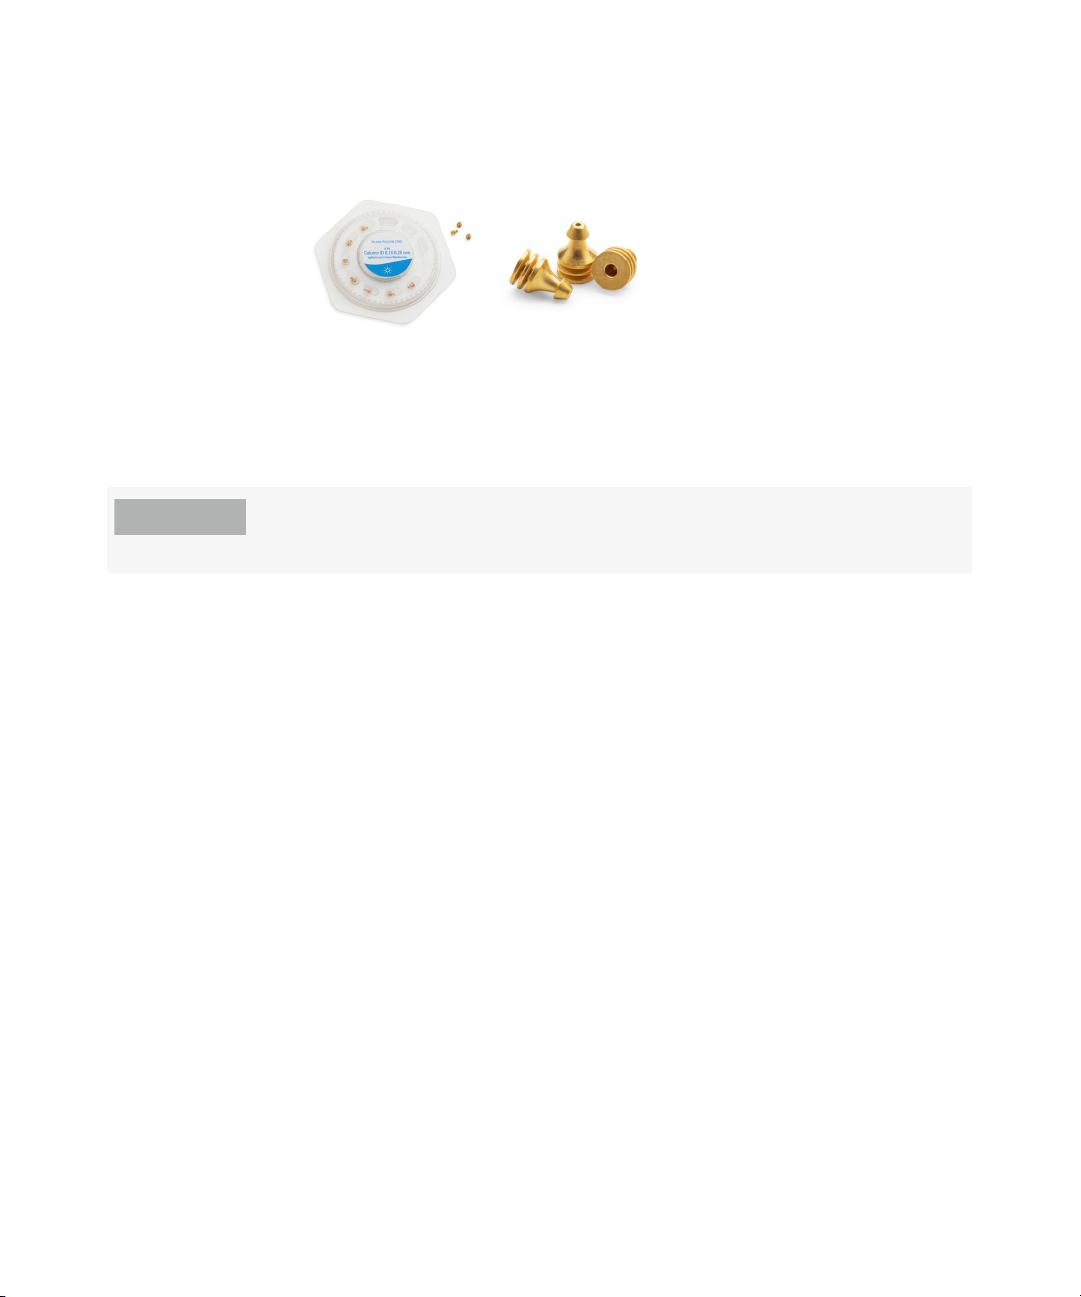
Figure 2. Gold-Plated Flexible Metal ferrules.
Each Flexible Metal ferrule part number is uniquely designed to prevent inventory
mixups, and to quickly help find the needed ferrule. Color variations between
UltiMetal Plus ferrules are a normal result of the UltiMetal coating.
Gold ferrules are only suited for CFT usage and should not be used in the inlet
or detector. UltiMetal Plus ferrules are recommended for inlet and detector
fittings, and are not appropriate for CFT usage.
Tools required
• Two 1/4-inch open-end wrenches
• Column cutting tool
• Swaging wrench for capillary columns, p/n G3440-80227
• Swaging wrench for metal columns, p/n G3400-80247
2 Flexible Metal Ferrules Swaging Guide
Page 3
Flexible Metal Ferrules Swaging Guide for UltiMetal Plus and Gold-Plated Ferrules
NOTE
Preparing the column ends
Preparing the column ends
If transitioning from UltiMetal Plus to Gold-Plated ferrules for CFT
connections, blow out the CFT fitting to avoid any grit and scratches caused
by the UM+ coating. This will help avoid leaks.
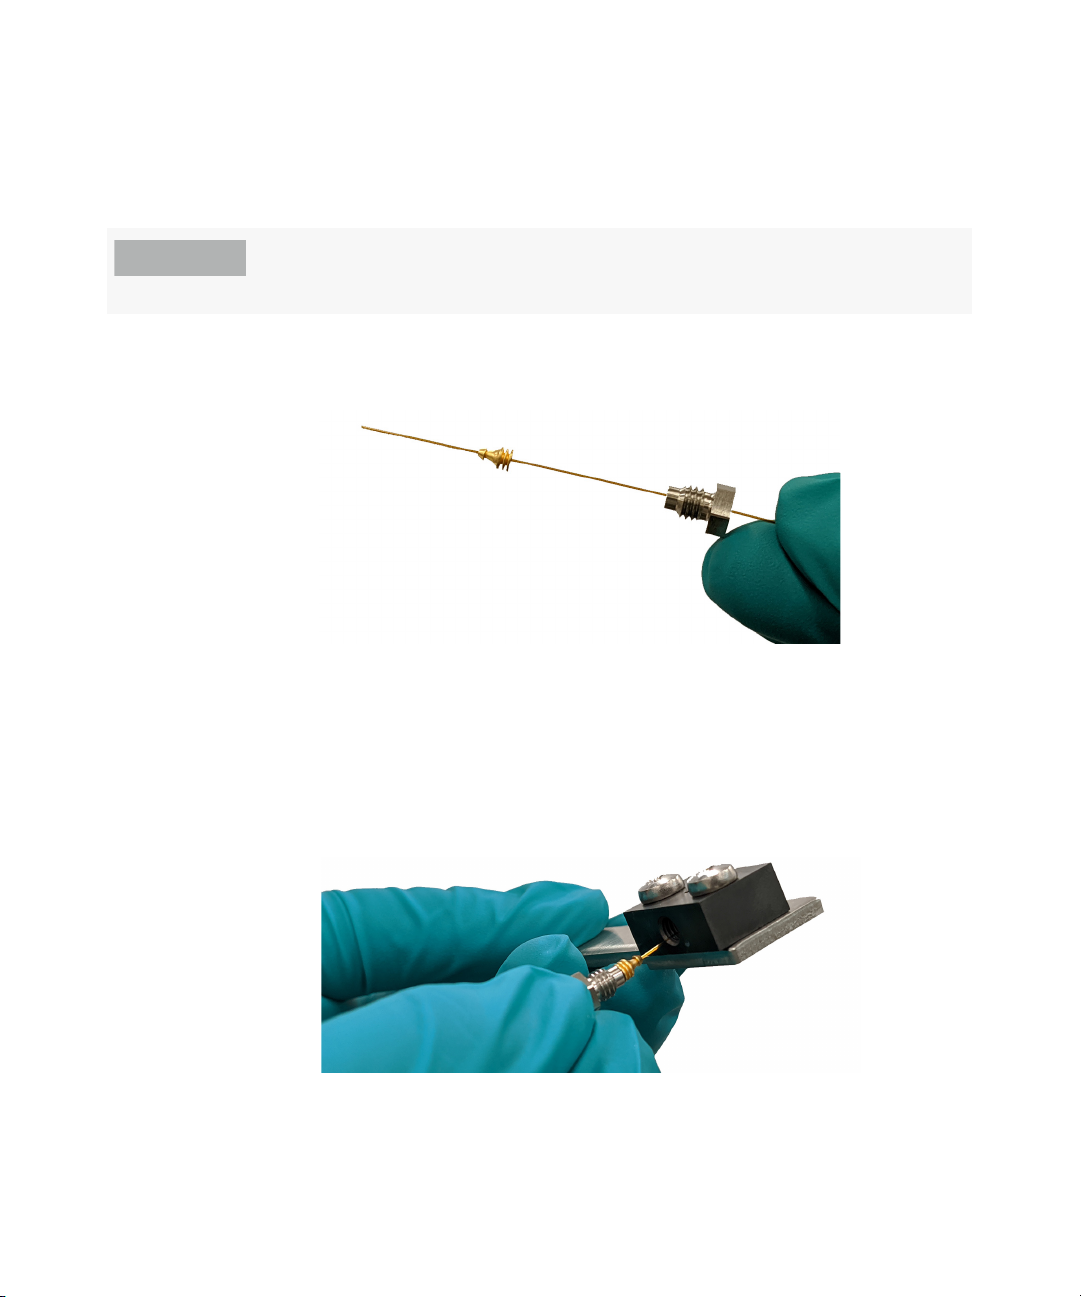
1 Pass the column end through the internal nut and the ferrule (Figure 3), then
trim the column with a ceramic column cutter and verify that the cut is
straight across and even.
Figure 3. Thread the column through the internal nut and ferrule.
2 Using the column cutter trim the column and inspect the end to ensure a
smooth cut with no jagged edges. The swage tool has been designed to
ensure an accurate depth of 0.1 to 0.5mm.
3 Thread the internal nut into the swaging wrench and finger tightening. The
swaging tool has been designed to automatically set the column length to
desired measurement. (See Figure 4.)
Figure 4. Thread the internal nut into the swaging wrench.
Flexible Metal Ferrules Swaging Guide 3
Page 4

Flexible Metal Ferrules Swaging Guide for UltiMetal Plus and Gold-Plated Ferrules
Preparing the column ends
4 Begin to swage the ferrule to the column using a 1/4-inch open-ended
wrench.
The design of the Flexible Metal ferrules reduces the probability of column
breakage and minimizes the damage to the thread of the corresponding
fittings.
Unlike other ferrule designs, a reliable leak-free seal is best made by
tightening the internal nut to a recommended number of degrees, not by
applying more force. Applying excessive force will not provide a better seal
and will lead to damaged parts. Also, compressing the Flexible Metal ferrule
less minimizes damage to fittings.
To swage the ferrule to the column:
a Find the ferrule type in Table 2 on page 4 and note the range of degrees
to tighten the internal nut.
b Tighten the internal nut clockwise to the lower end of the ferrule's range.
c Check if the ferrule is gripping the column. If yes, stop. If not, continue to
tighten the internal nut in small 5- to 15-degree increments. Check after
each increment to see if the ferrule is gripping the column. Stop as soon
as gripping occurs (see Figure 5 on page 4).
Table 2 Degrees to tighten the internal nut for proper swaging
UM+ FMF part number Gold-Plated FMF part number Degrees to tighten internal nut
G3188-27501 G2855-28501 50 to 100
G3188-27502 G2855-28502 30 to 70
G3188-27503 G2855-28503 20 to 50
G3188-27504 N/A 60
G3188-27505 G2855-28505 40 to 90
G3188-27506 G2855-28506 20 to 50
Figure 5. Tightening the internal nut
4 Flexible Metal Ferrules Swaging Guide
Page 5
Flexible Metal Ferrules Swaging Guide for UltiMetal Plus and Gold-Plated Ferrules
Incorrect Correct
Swaging quality inspection
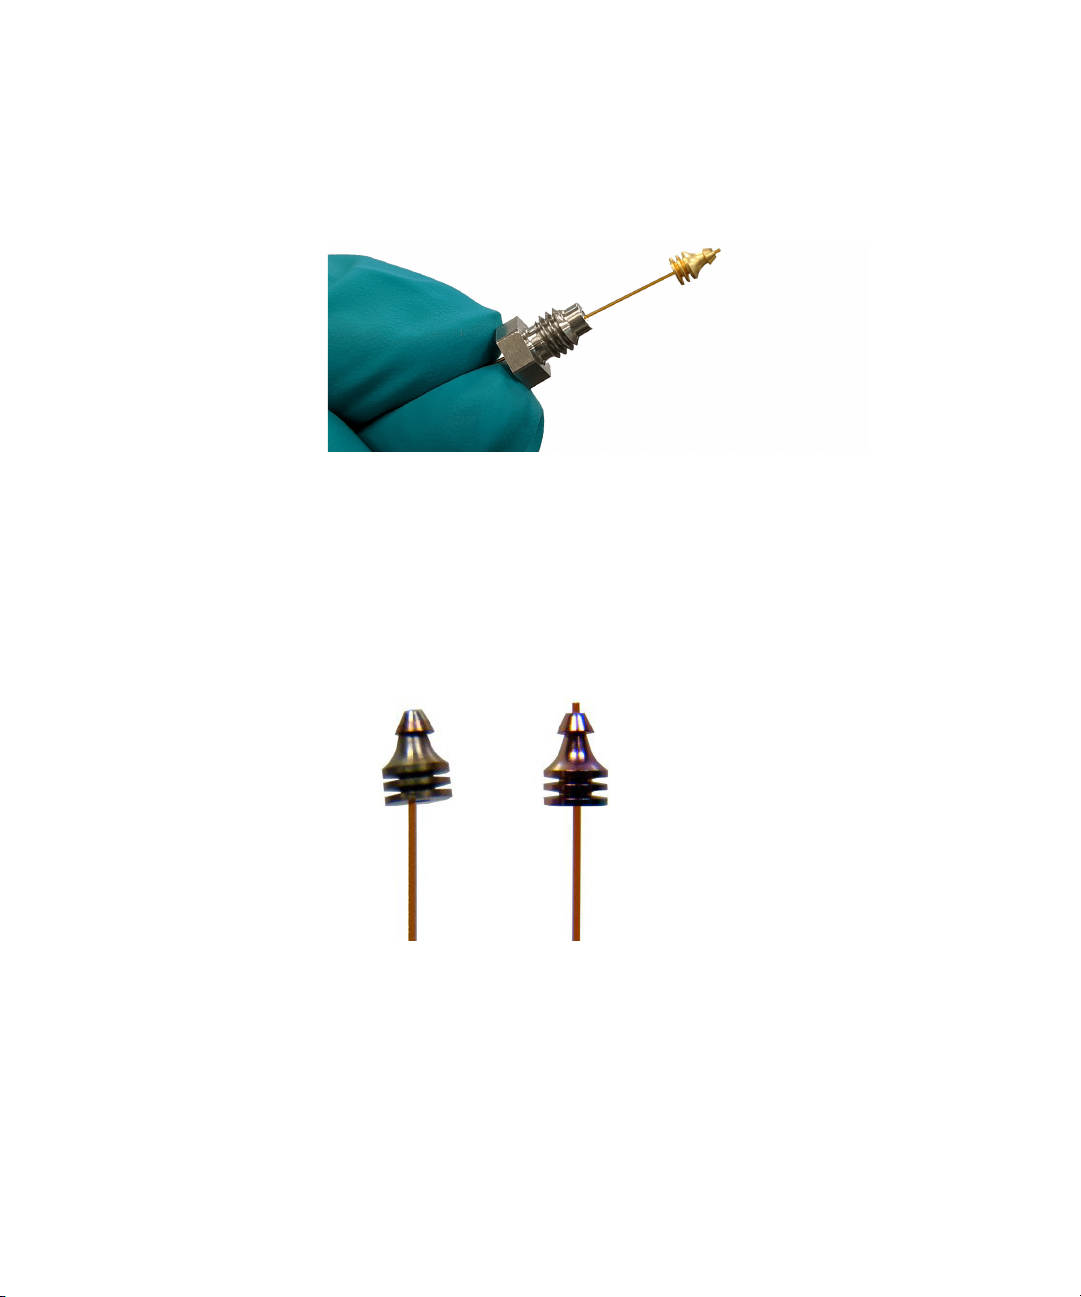
5 Using the 1/4- inch open- ended wrench, turn the internal nut an additional 10
to 15 degrees clockwise to assure the ferrule is properly swaged onto the
column (see Figure 6).
Figure 6. Ferrule swaged to column and internal nut.
6 Using the 1/4- inch open-ended wrench, remove the internal nut from the
swaging wrench and column.
Swaging quality inspection
Figure 7 shows both an incorrect and correct swaging symmetry.
Figure 7. Incorrect and correct swaging symmetry.
If the column and ferrule appear like the incorrect example in Figure 7, it is
Flexible Metal Ferrules Swaging Guide 5
possible that the swaging wrench is defective or worn out. Try swaging with a
new wrench or new nut.
Page 6

Flexible Metal Ferrules Swaging Guide for UltiMetal Plus and Gold-Plated Ferrules
How to run a leak test
How to run a leak test
Allow the carrier gas to flow for 10 to 30 minutes to flush out the column.
A gas leak detector (G3388B) can be used to check CFT fittings for leaks, when
using any GC detectors, whether MS and non-MS detectors.
Leak checking on MS system:
1 After allowing carrier gas to flow for approximately 10 to 30 minutes, pump
down the MSD for approximately one hour. If the MS system has been open
to atmosphere for more than one day, allow MSD to pump down for two
hours or longer.
2 Access the manual tune function in the acquisition software and select the
Profile tab.
3 An electronics duster (typically a polyhalogenated compound WITHOUT the
bitter additive) can be a useful way to test for leaks. Enter the m/z values for
the compound, such as 69 and 83 m/z for 1,1,1,2-tetrafluoroethane, into the
Profile tab.
4 Spray a short burst of the dusting compound at the vent valve and watch for
changes in the profile abundances. Repeat for the side door of the MS and
the transfer line connection in the GC oven.
• If the abundances increase significantly just after spraying that location,
tighten the vent valve or transfer line nut by small increments until no
significant changes in ion abundances are observed.
• If a leak is identified at the analyzer (side) door of the MS, the MS must
be vented and the O-ring checked on the door.
5 When the MS is leak-free, check the CFT connections.
Checking the CFT connections:
1 Using a small piece of paper around the CFT fitting can help to focus the
spray onto that specific fitting.
2 Spray a short burst of duster. Depending on the system design (column or
restrictor lengths and carrier gas flow rate), it may take 30 to 60 seconds for
the duster compound to reach the MSD. For example, with a 15 m × 15 m
column setup with a purged Ultimate union at the midpoint (column 1 flow
rate of 1.2 mL/min and column 2 flow rate of 1.4 mL/min), it takes
approximately 40 seconds for the duster compound to reach the MSD.
6 Flexible Metal Ferrules Swaging Guide
Page 7

Flexible Metal Ferrules Swaging Guide for UltiMetal Plus and Gold-Plated Ferrules
NOTE
How to run a leak test
3 If a large increase in the m/z abundances is observed (at least a double in
signal and obvious peak appears across all m/z ratios), tighten the CFT nut
by a small wrench turn (approximately 10 degrees).
4 Repeat the short spray bursts and wrench turns, until the m/z abundances do
not show large changes.
5 Repeat for the leak checking process (steps 1 through 4) for each CFT fitting.
A small CO2 canister could be used instead of the electronics duster; however,
there will be a natural background of CO
and the user will need to understand
2
the background abundance of 44 m/z and then watch for increases in the
abundance with leak checking.
Table 3 Additional tools for installation
Tool de scr ip tio n Part number
GC column installation preswaging tool, for
Flexible Metal ferrules
CFT Metal Column preswaging tool for GC G3440-80247
Ferrule preswaging tool G2855-60200
G3440-80227
Ceramic scribe column cutter, 4/pk 5181-8836
Wrench, open-ended, 1/4 inch and 5/16 inch 8710-0510
Internal nut, CFT capillary fitting G2855-20530
Flexible Metal Ferrules Swaging Guide 7
Page 8

www.agilent.com
DE.2820324074
Agilent Technologies, Inc. 2020
First edition, October 2020
*G3188-90001*
G3188-90001
 Loading...