

Afinia DLF-220L Instruction Manual

Afinia Label DLF-220L
All-in-One Digital Label Finisher
Instruction Manual
USER MANUAL
this product is certified:
DLF-220L
Digital Label Finishing System
IMPORTANT: Please keep the original packaging in
case of return. If we receive the system in non-original
packaging, the warranty will be voided.
CAUTION: Do not install Graphtec cutter software, and
do not touch buttons on Graphtec Plotter unless otherwise instructed during installation.”

I N D E X
System requirements
How to install outer discs
How to install the plotter
How to install the cutting plotter
How to install the core holder
How to load and operate with the lamination module
How to set the lamination sensor
How to adjust the clutch
When to adjust the clutch
How to load the laminated media into the plotter
How to run the cut test
How to install the matrix remover & slitter
How to load the matrix remover core holder
How to load the rewinder core holder and set the slitter module
......................................................................................p. 3
................................................................................p. 3
..................................................................................p. 3
.......................................................................p. 4
..........................................................................p. 5
.....................................p. 6
....................................................................p. 7
..................................................................................p. 8
................................................................................p. 8
............................................p. 8
....................................................................................p. 9
.....................................................p. 10
.................................................p. 11
..................p. 11
How to add or remove blade holder
Metal guide alignment
i-MARK
User interface
Error messages
Black-mark detection
Cutting le specications
Black-mark position into the cutting le and printed artwork
Black-mark position in the media
How to replace the knife
How to update i-mark software
How to restore plotter settings
How and when to reduce the plotter feeding speed
How to replace the slitter blade
................................................................................................p. 14
.............................................................................................p. 16
...................................................................................p. 13
.....................................................................................p. 16
..............................................................................p. 16
................................................................................p. 18
..............................................................p. 13
..................................................................p. 18
.....................................................................p. 19
......................................................................p. 20
.....................................p. 20
.....................................................................p. 20
.........................p. 17
Media path
Ultrasonic sensor calibration
Lamination / matrix remover&slitter modules speed rotation
....................................................................................................p. 21
.........................................................................p. 21
........................p. 22
2
SYSTEM REQUIREMENTS
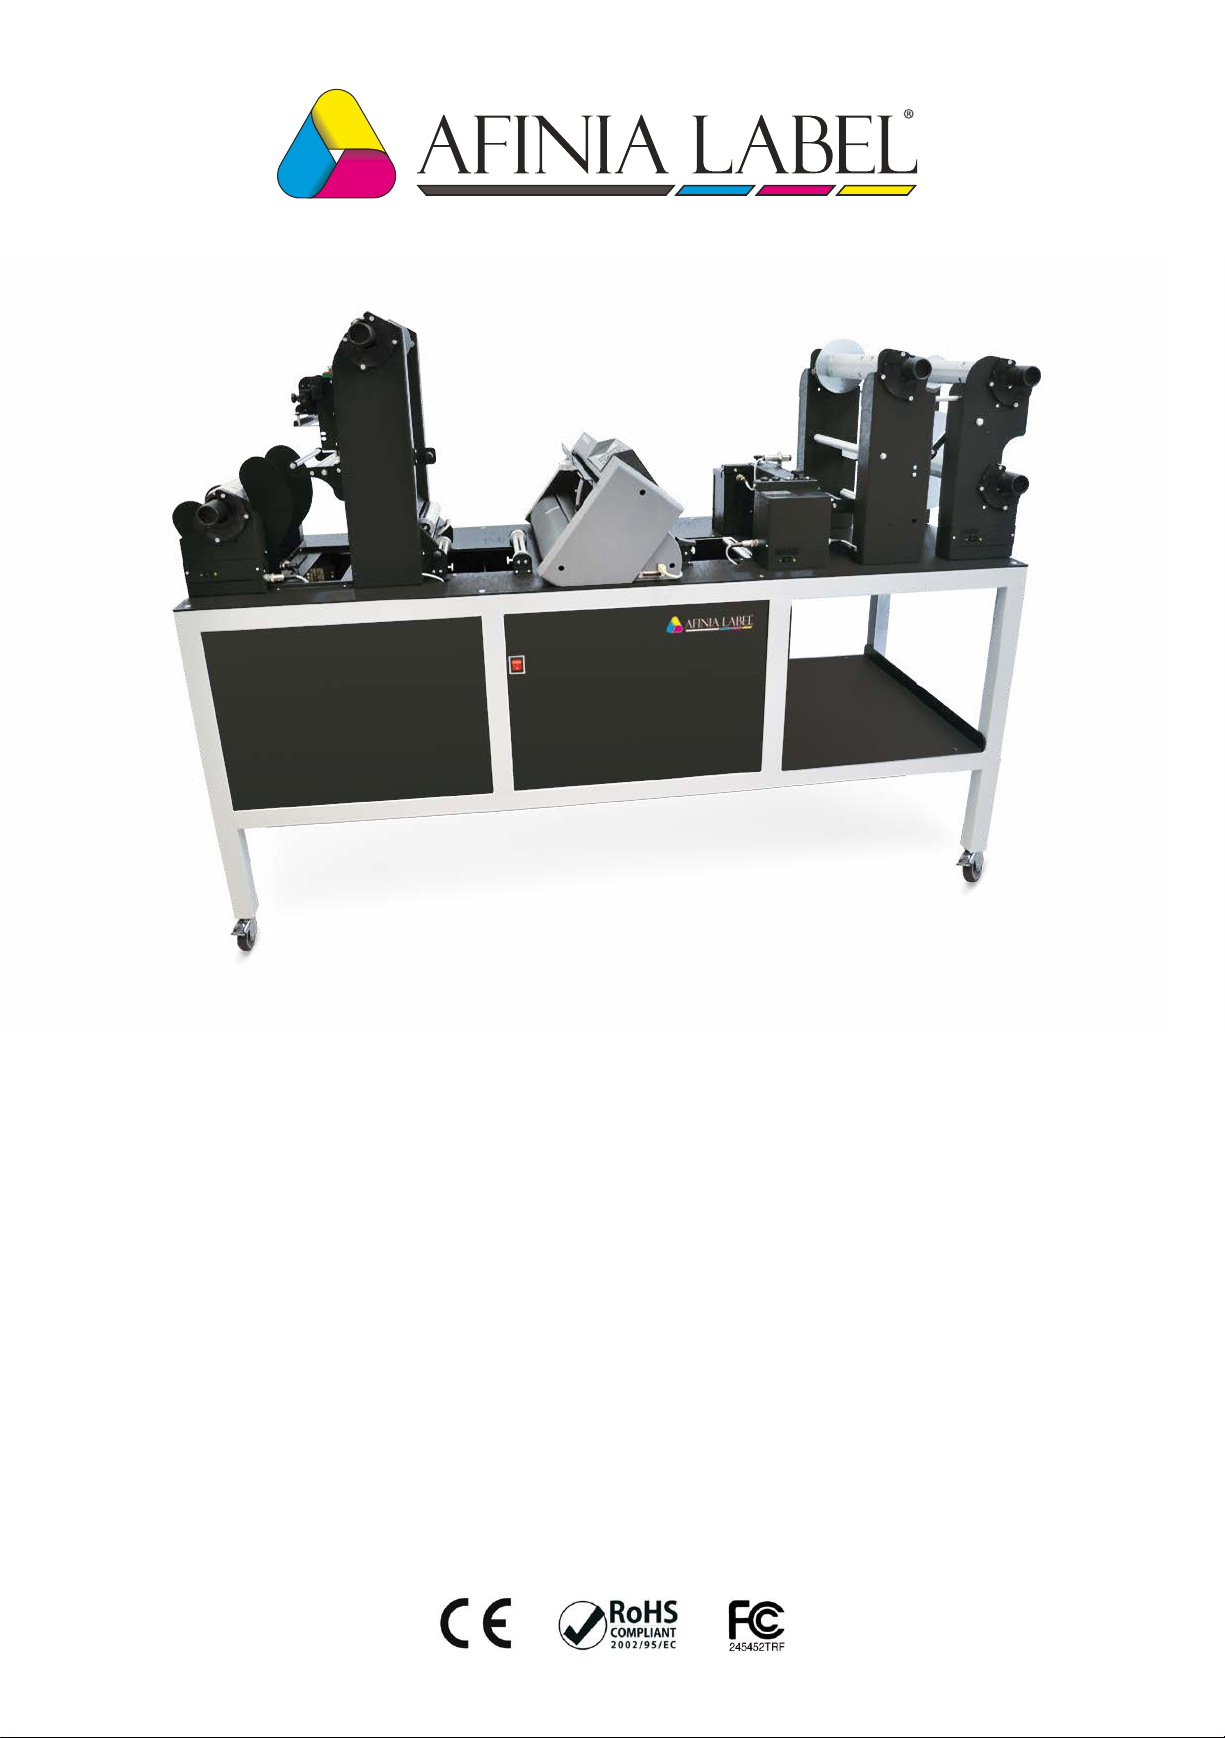
Error
SEnSor
ManagEMEnt
donglE
uSb
caMEra
uSb
plottEr
uSb
uSb
to pc
i-Mark software is compatible with
Windows XP and newer versions;
CPU memory 4GB;
Cutting les: Adobe Illustrator (AI) and
Corel Draw (EPS).
Diagram connectors behind the on-off
panel.
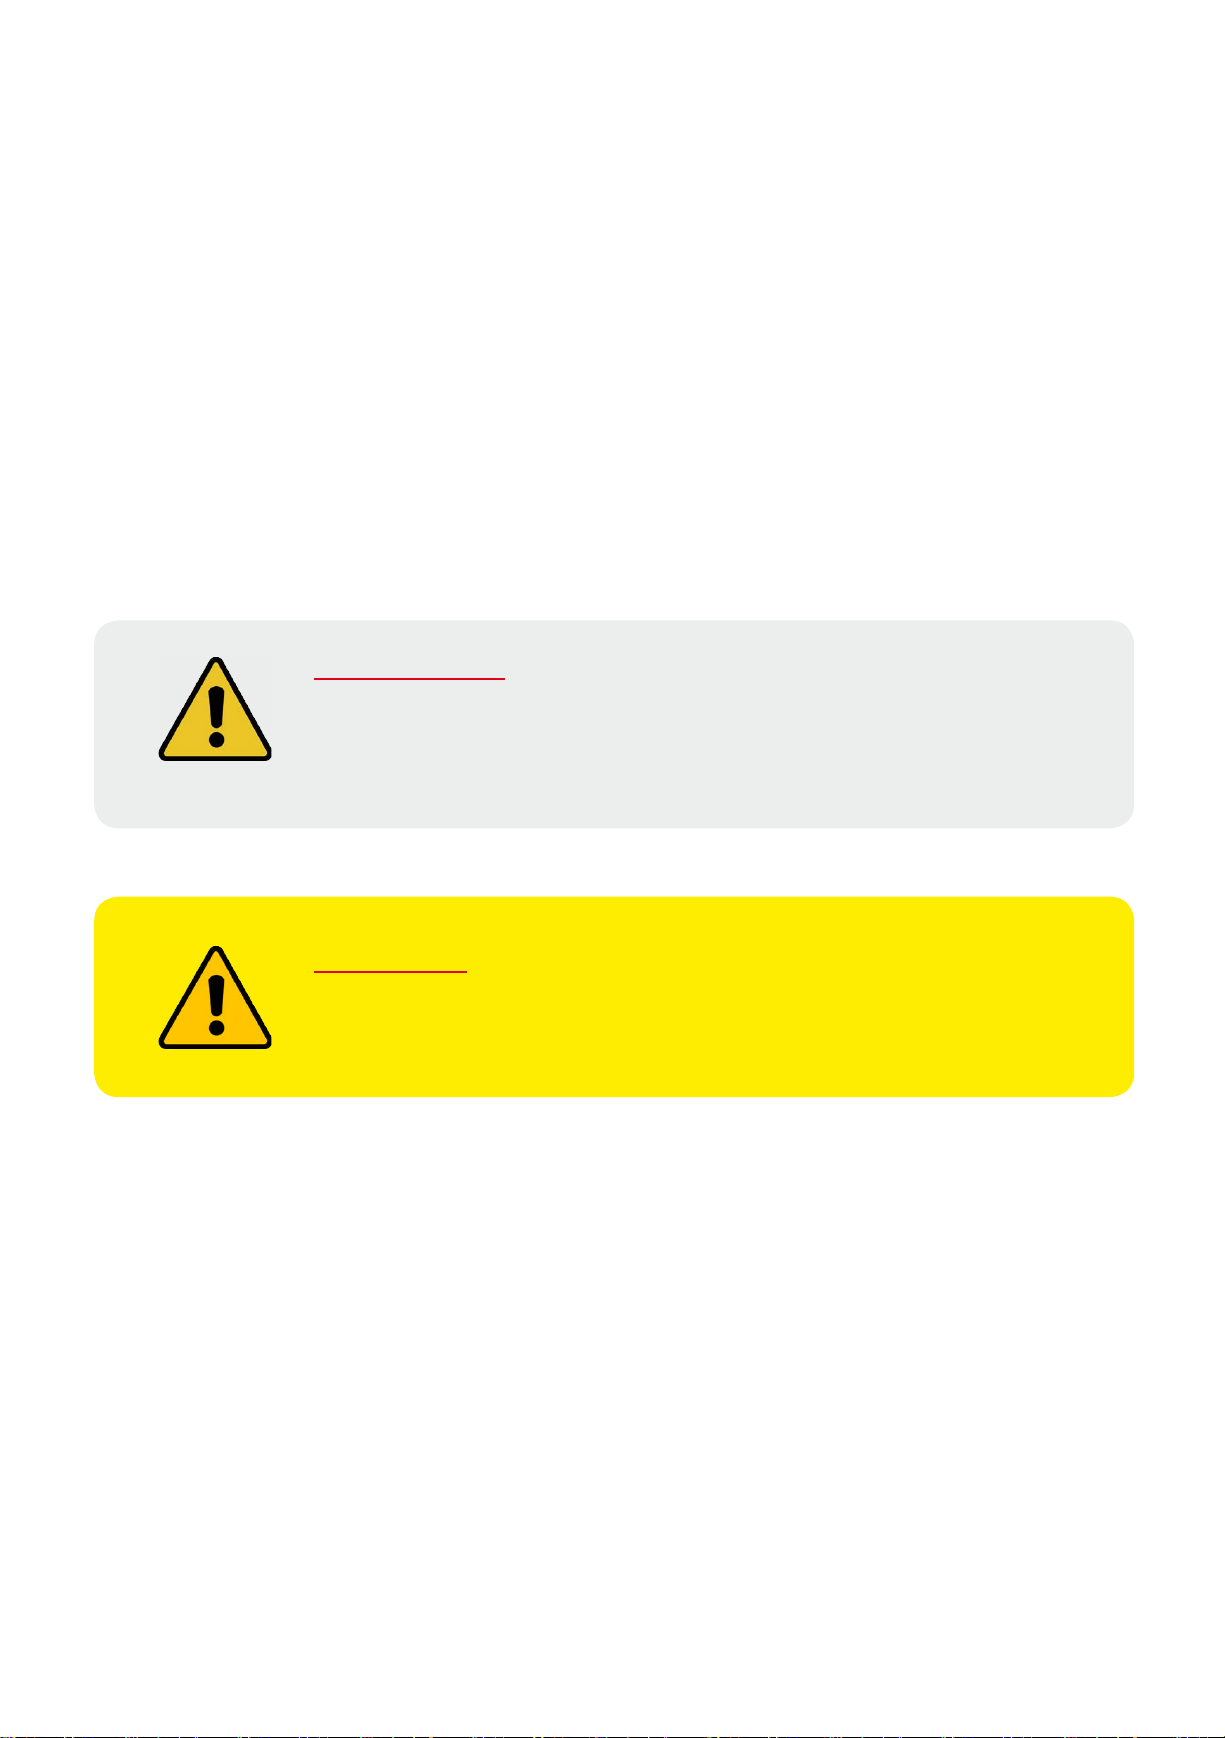
HOW TO INSTALL OUTER DISC
For printed rolls, install the outer discs on the
core holder with a screwdriver.
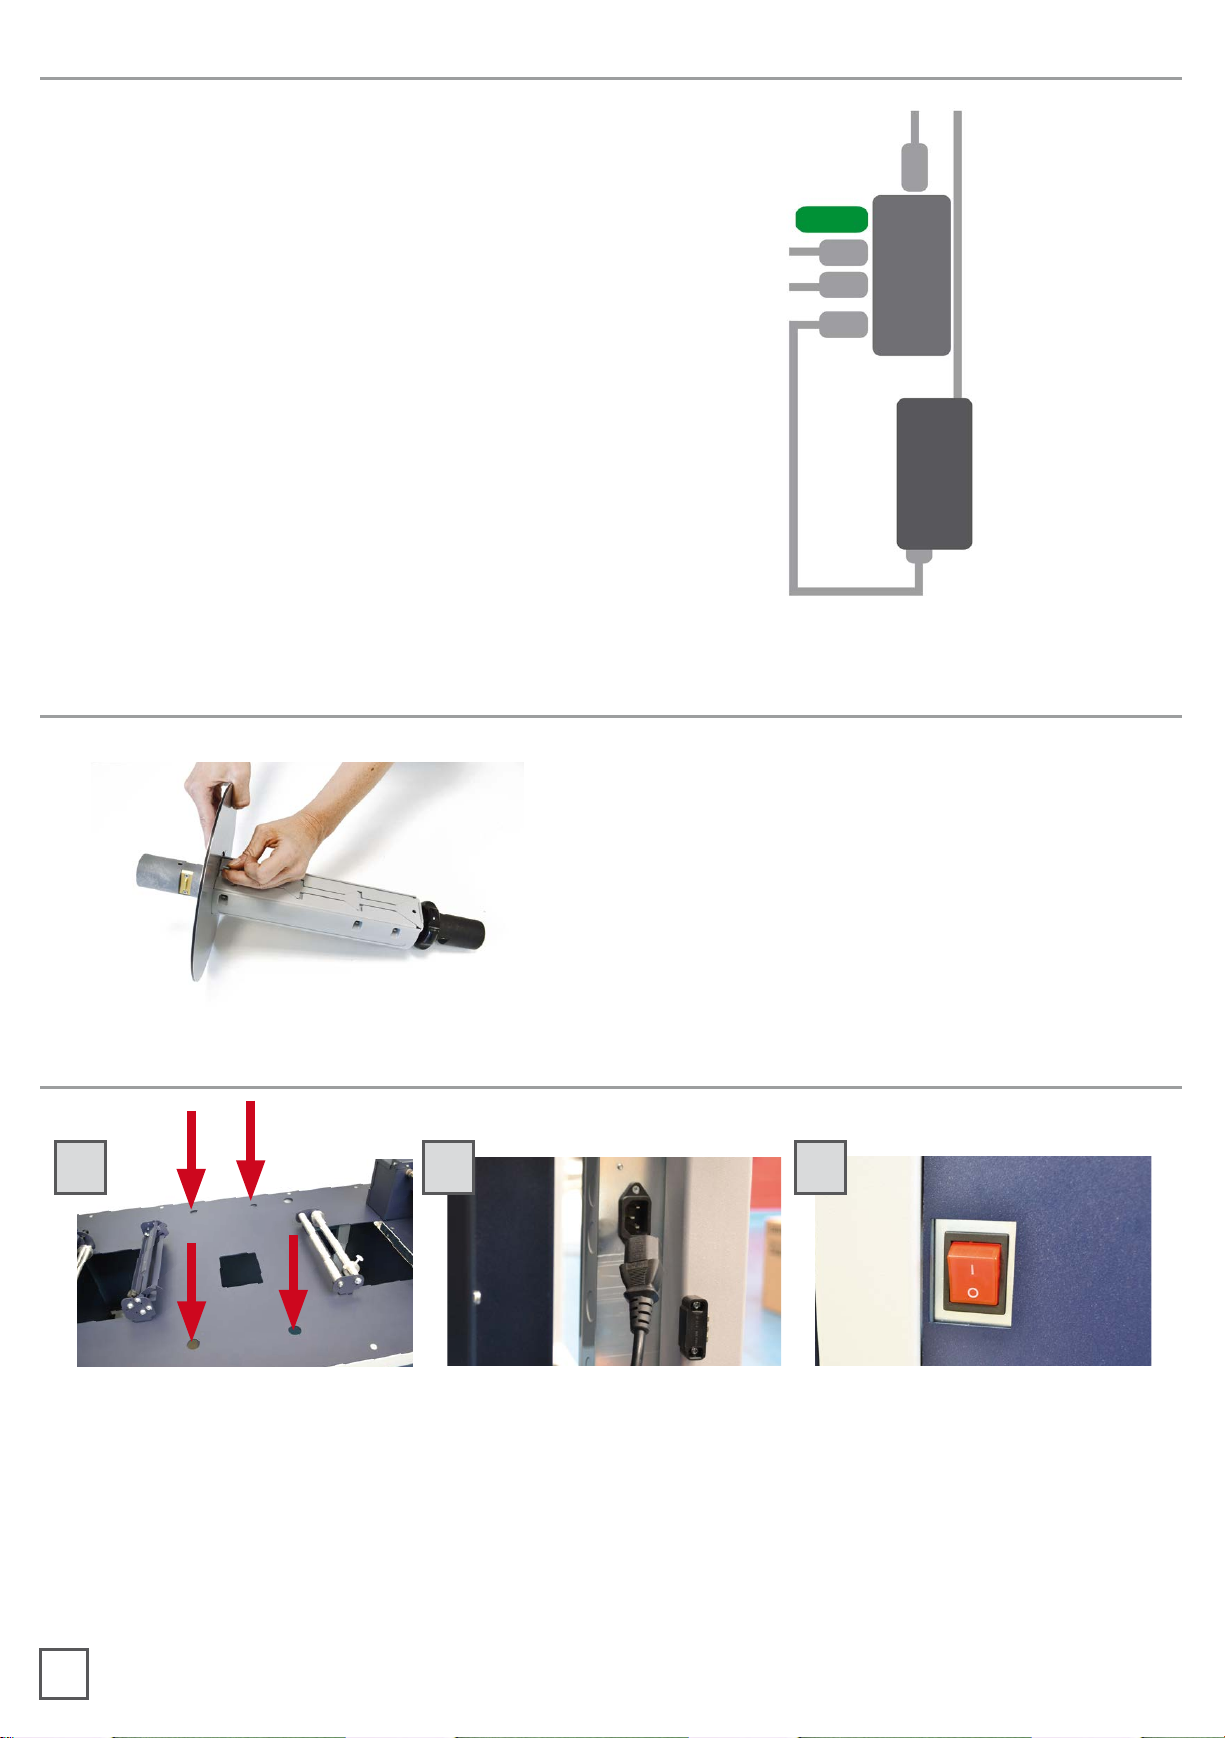
HOW TO INSTALL THE PLOTTER
A B C
A. Remove the plotter from the packaging and place it on the plate, making sure to push
the rubber feet into the holes.
B. Plug the power cord into the power strip.
C. Switch on.
3
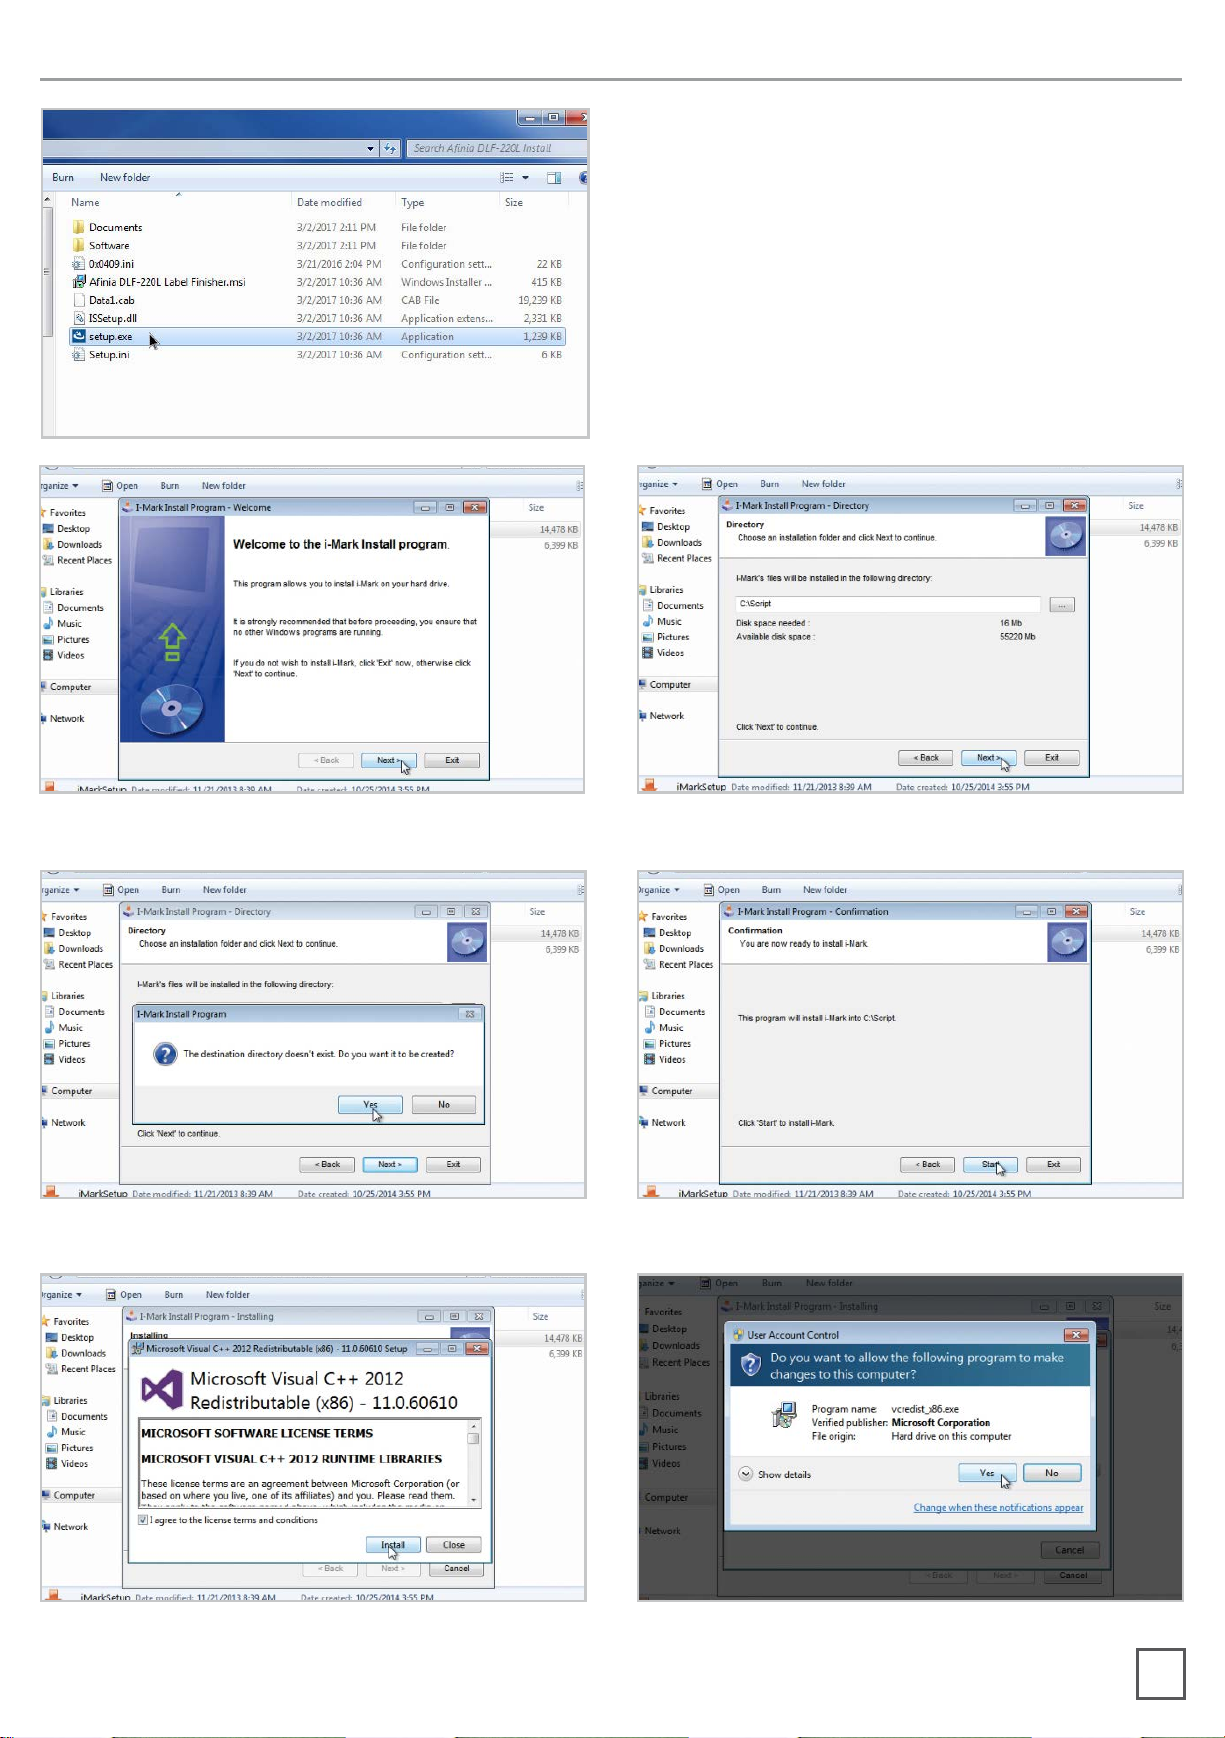
HOW TO INSTALL THE CUTTING PLOTTER
1. Download the DLF-220L Full Installer
from http://anialabel.com/support/
software-drivers/ and unzip the les.
2. Open the location of the extracted les
and run setup.exe. Follow the installation
instructions.
3. When the window for the i-Mark
installer appears, follow these next steps.
4. Click NEXT 5. Click NEXT
6. Click YES
7. Click START
8. Check “I agree to license terms and
conditions” and click INSTALL
9. Click YES
4

10. In process 11. Click CLOSE
12. Uncheck ‘launch i-Mark’
Plug in the USB camera and the USB dongle. They will auto-install.
i-Mark will generate a folder in the Windows start menu.
13. Click EXIT
If the USB dongle is not installed correctly
or is un-plugged, the below error will be
shown.
HOW TO INSTALL THE CORE HOLDER
5
The grey handle must match with the
grey holder, and the black handle with
the black holder.
IMPORTANT: screws must face
downward.
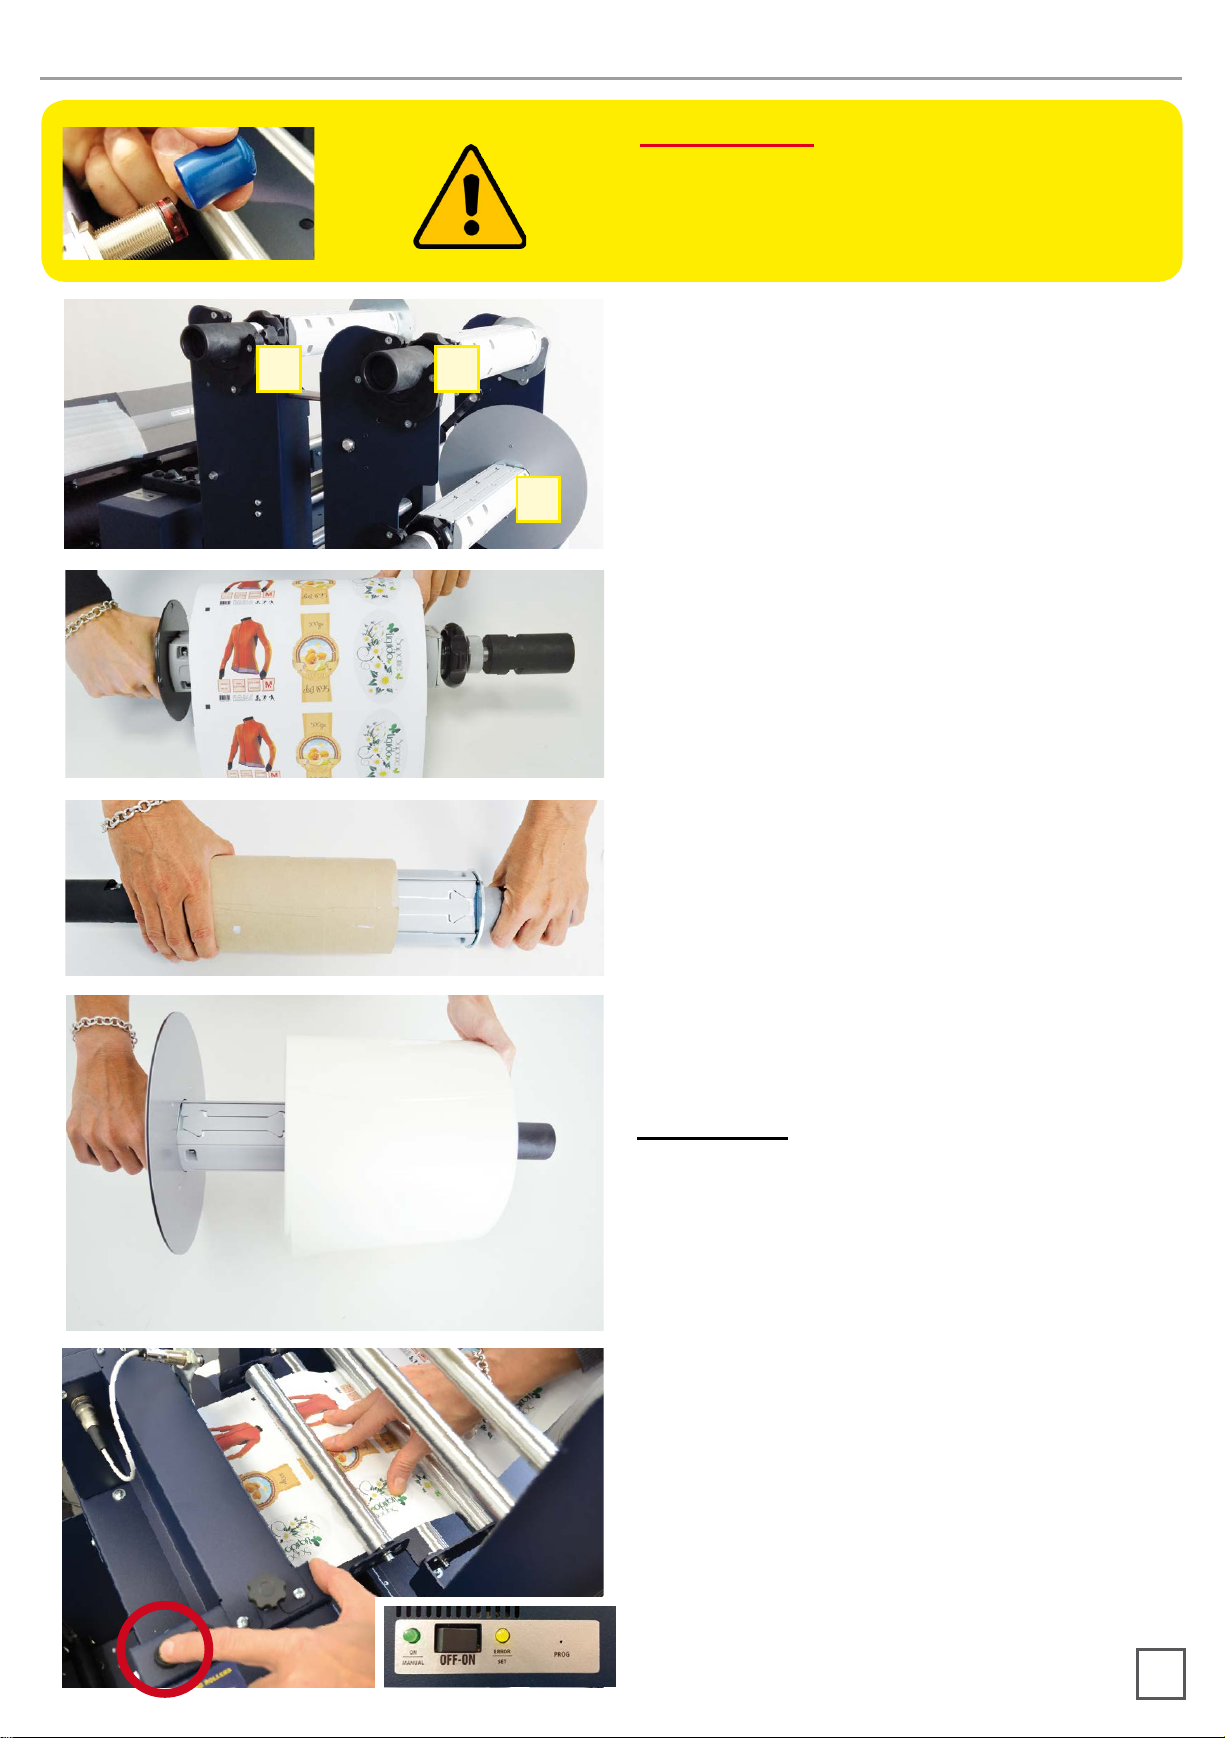
HOW TO LOAD & OPERATE THE LAMINATION MODULE
IMPORTANT:
If you don’t use the lamination roll
please cover the sensor with the blue
cap.
Core Holder No. 1: intended for laminate
use
1
2
Core Holder No. 2: intended for laminate
liner use
3
Core Holder No. 3: intended for printed
roll use
Load the printed roll and move it against
the roll guide. Tighten the core holder.
Load an empty cardboard core onto
the shaft intended for laminate liner
rewinding. Tighten the core holder.
Load the lamination roll and move it
along the supply shaft until it matches
with the web.
IMPORTANT: the lamination roll always
needs to be narrower than the web width.
Example: if the web width is 7”, then the lamination roll
needs to be less than 7” (let’s say ¼ inch on each end).
At this point you can tighten the core
holder.
When the LEDs on the control panel are
off, the device requires manual feeding.
Move the media through the rollers
and press the FORWARD button. The
media will be loaded through the rollers,
whereas if you push the BACKWARD
button, the rollers will roll the media
backwards.
6
 Loading...